415 Gallon Plywood Tank Build

acrylic51

Active Member
After a break away from the hobby persuing my motocross racing, another major back surgery, addition of a new grand daughter, the bug has bitten me again, and decided to do something alittle different and a test or challenge of my skills......This build will be rather long due to time, expense and other commitments, but will try to keep it moving along.
The major goal of this tank is to have it in a major gathering point in the house and that would be in my familyroom where everyone always is, which will make it easier to maintain and notice little changes going on instead of outside my main area as my other tank consumes my 2 car garage as some might remember.
I started following a couple of threads over at -- and on Fingerlakesreef, and Bronco300 and I had talked alittle behind the scenes on the build, so alof of credit is due to Bronco300, AcroSteve(--), Dsandford(--), Kent(Fingerlakesreef). The tank will be built with plywood and epoxy resin. The tank dimensions are going to be 70"Lx48"Wx28.50"H. These are inside dimensions. The tank will be built using the pour method, but for added peace of mind, I will be incorporating 37oz biaxial fiberglass which will add to the structrual strength of the build as well. As another safety measures since a very important feature of this build will be to have no cross bracing on the 48" wide tank. Not sure if it will totally work out that way, but will see!!!!! To add in not having to add any cross bracing to the tank, the tank will be eurobrace 6" the entire way around the perimeter of the tank and there will b a steel frame 2" angle iron built around the intial plywood box, that will be embedded in epoxy that will be modified with West High Strength additive. One reason for all the reinforcement is that I'm plannng on haveing an external wavebox housing 3-4 Tunze 6101s or 6205's. Another important reason is the tank will feature an external overflow box on the back of the tank that will be 48"Lx12"Wx12"H. Getting alittle ahead of myself I will be using West Epoxy, and there are other epoxies such as MAS, US Composites, etc........The steel framing will be totally hidden from sight by covering the steel with a skin of finished wood.
Again the new tank will be housed in my familyroom, and since I have a full bath off the familyroom and walk in closet as well, I figured why not put that wasted space of the full bath and walk-in closet to use......Sorry guys!!!!! I have 3 full baths upstairs in the house, so no not giving up to much
So the build will be alittle slow, because I have to do alittle deconstruction work on the bathroom and walk in closet and alittle framing and drywall work, and I will have to come up with a duct system to the outside of the house to vent the humidity from the fish room as well. Another challenge of this build is my main water lines are running over top of were the tank will sit, and I have plans to reroute those lines and water filter in the build process, which should make my wife and daughters extremely happy shutting off the water during this process. There are still alot of parts that haven't come together and this is where I'm going to get you guys involved and need opinions and advice in areas......
1. For exhausting and controlling humidity in the fishroom would you opt for an exhaust fan type setup or considering controlling humidity by air conditioning the room?
2. Anyone have any good ideas or designs on how to build a structurally sound multi-function quarantine tank stand, and work table area within the fishroom? I'm considering welding a steel frame and making the traditional rectangular shape like a typical stand, but wanting to angle the front legs back towards the wall and use the wall actually as support for the stand/table? Would this work?
So again guys....give me some feedback and will get the build rolling!!!!!!!!!
 

acrylic51

Active Member
I should have mentioned earlier that the tank will be lit with a custom LED setup I'm planning on building myself, and should cut down on heat and humidity in the room as well. I'm also going to be building my own calcium reactor during the build process as well, along with all the other important stuff that goes along with building a setup......
Another important issue with this tank is to be as energy efficient as possible.....I see more and more threads around about energy consumption, and 1 particularly here on this site, and the LED's might seem alittle cost restrictive up front, but I'm pretty sure they will pay for themselves shortly if you factor in alot of the issues, be it MH bulb changes throughout the course of the year, electrical consumption of the MH's and ballasts vs the LED's, heat output from the MH's, which in turn affect how you tackle the cooling aspect of the tank and fishroom, and overall lighting of the tank, where I feel MH's are alittle restrictive, whereas LED's can be tailored to light what you need or want not just lighting the whole tank.....
 

acrylic51

Active Member
The toilet and sink will stay in place, but the tub/shower and closet will be removed and a wall will be added to separate the bathroom from the fishroom itself. Basically shortening the bathroom and claiming the space for the fishroom. Going to be using a pocket door setup to save on space needed by a traditional door.
 

acrylic51

Active Member
Okay guys trying to do alittle more planning before deconstruction starts. Trying to get some input on a good size quarantine tank so I can figure out counter space. I'm planning on quaranting a few of the harder tangs that require good swimming space. I was thinking of something in the line of 48"lx18"wx12"-16"h. Any thoughts or suggestions?
 

acrylic51

Active Member
Did alittle more surveying and this is the area where the new tank will be housed.....Sorry not the greatest pics....... Is there also away to use your pics from your photobucked account in a post as well?


cranberry

Active Member
Yup, you just copy their tag and post it. I hate the thumbnails, so I'm with ya there.
*sits and waits for the photobucket attachments*
 

acrylic51

Active Member
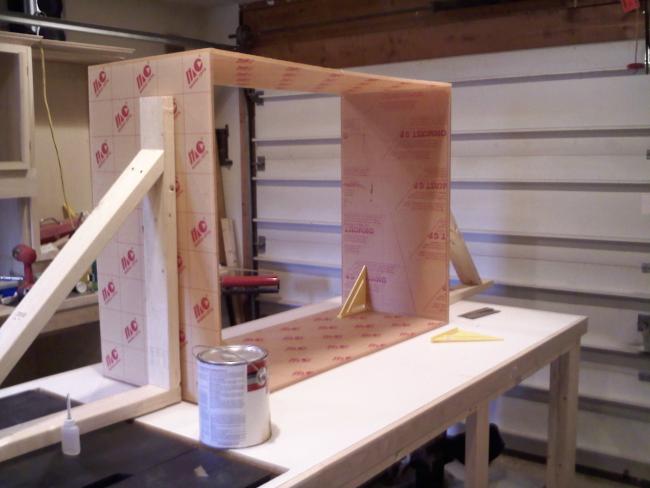
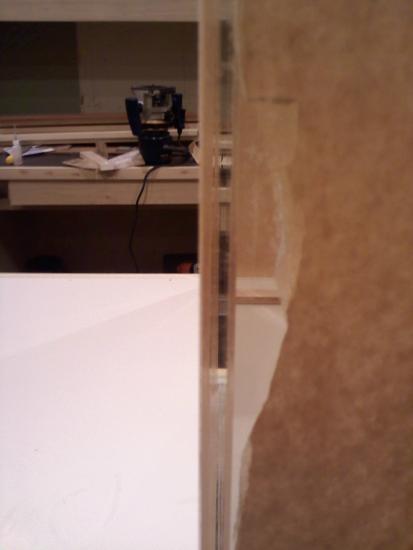
I have started on some of the areas of the new build.....I enjoy doing as much of the work as possible....Did get a chance to start on the building of the sump. Here is a brief pic of the sump build and maybe it might help others contemplating building their own sumps down the road......More pics to follow. The first pic shows how I like to setup and keep things square during the build....2nd pic shows the glued joint.


acrylic51

Active Member
Got started on some of the demo work needing to be done.....During the demo and construction phase I will have to move my whole house water filter and I will be installing vapor barrier to isolate humidity from the rest of the house. Also during this phase I will be running the needed electrical lines and such.


I removed the top section of the ceiling and my plans are to install a pocket door to reduce the loss of floor space in the fishroom itself.
 

acrylic51

Active Member
As you can see in the pics I already started running the extra electrical lines and started installing the recessed lighting in the room as well. As most of you might know from my last build in my garage I'm a nut when it comes to recess lights.....I just love to cut holes in drywall.....My wife on the other hand just


1 of 4 recessed lights being installed

Outlet boxes going in and you can see I've already started installing the insulation as well.


Close up of electrical outlets. There are actually 4 separate circuits 20amp circuits and 1 30amp 220v line coming into the fishroom so I can split the load evenly and not worry about a breaker tripping taking everything down.

Lines running from the switch box.
Hopefully I can get the vapor barrier going up here shortly.....Working 3rd shift takes it's toll on me after awhile. Still looking for some feedback as far as venting the room to the outside and if anyone has any ideas as far as table layout/work area inside the fishroom?????? Need some ideas guys!!!!!!!!
 

acrylic51

Active Member
Alittle more of an update....While at HomeDepot picking up more materials and vapor barrier, I was already thinking of the build for the stand.....I was contemplating doing a steel stand, because of strength and wanted the stand open as much as possible for easy access to things under the tank, but then I started figuring cost and time. I have a good source for steel, and have a welder, but happen to come upon a good deal at HD on 2x10's !!!!! I know you guys are thinking way overkill, but for .50 for 5' pieces I couldn't pass them up. Hopefully I'll be able to work on the stand build as soon as I can get all the framing and vapor barrier and drywall in place.
 

acrylic51

Active Member
Just a quick update....It's going alittle slower than expected, but hopefully things will get rolling here shortly. I worked on the sump alittle at the end of the week and decided to leak test the sump so far before I go any further with adding baffles and fuge.

I let the sump sit almost full about 2" from the top for 24hrs and no leaks. I figured there wouldn't be any, but I've had it happen in the past even with well prepped and clean edges you don't get a good weld, so better safe than sorry. Easier to fix without the baffles in place. Here is a quick pic of the first baffle being dry fitted.....Baffle won't extend the entire width of the sump. Just using it as a mock up making sure work surface is pretty level and finding and marking where I need to shim at before the baffle gluing happens.


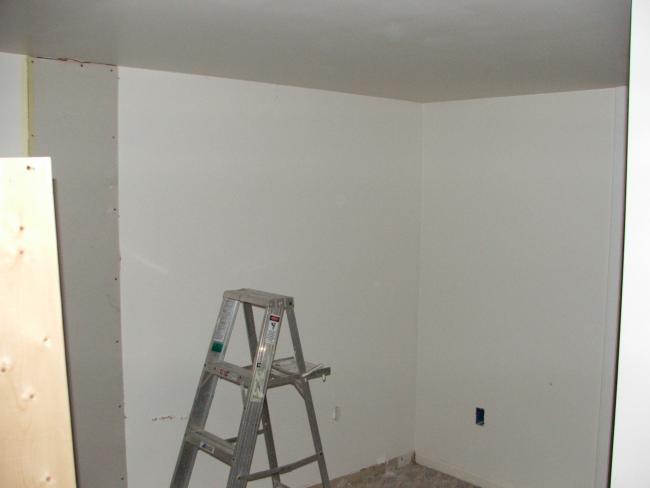
Also here's a quick shot or 2 of the viewing wall opened up giving an idea of where the tank will be located.


You'll notice in the 1st pic the yellow drywall. I had to cut alittle deeper into the wall than originally planned and during the "unplanned" portion that always happens I decided against using the standard greenboard. Alot of people use the greenboard since it's used in bathrooms and such, but after doing alittle checking and homework, I decided to use the DenseArmor drywall. You'll also notice that I installed it with the rough side out
. All that means is that I'll have to do alittle more mud work and a total skim coat on that area to make it nice and smooth. The DenseArmor I feel is better suited for this situation or build, since it is designed to have contact with water, whereas regular green board isn't as moisture resistant as they state. The DenseArmor cuts and feels like regular drywall, but it's alot heavier than your standard drywall or greenboard.
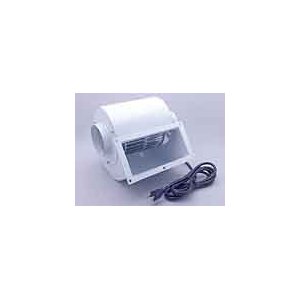
Hopefully tomorrow I'll get alittle more ambitious and start tackling the task of installing the vapor barrier. I did get the duct work installed today to vent the room. I installed a 4" dryer duct on the outside of the house and piped it into the fishroom. Still waiting to hear some ideas from you guys as far as how you'd go about venting the fishroom for humidity? I've been looking at a exhaust fan used for greenhouses, I'll have to find a pic of it and post it to give you guys a real good idea what I'm looking at, or my other option was to go with a portable AC unit and vent it through that vent. Humidity is an issue with this size tank and has to be addressed. Humidity plays havoc on my last setup in the garage, and it has AC and a cheapo bathroom exhaust fan. Any good ideas????
 

aquaknight

Active Member
Dang sorry I've missed the thread till now. Awesome work so far.
Where you'd get the acrylic from? Local store? No ideas on the vent, even a 400gal tank would probably keep the humidity in the house less then bubbling swamp outside, around these parts.... Not necessarily a cheapo bathroom fan, but a higher end model should have decent cfm?
 

acrylic51

Active Member
Thanks!!!!! I get the acrylic locally. Fortunate for me 2 of my wifes friends that grew up down the street from her, own 1 of the local acrylic/fab shops here in town. It's also nice to be able to sneak into their shop and get tips and help on craziness I think of, and they send alittle work my way as well. It's really nice having at my fingertips all the professional tools they have as well. The sump is water tested and started the initial layout of the baffles and such. The skimmer area will be roughly 17"x20" to handle any size skimmer I can throw at it, and if needed can always build a platform for the skimmer to si on to take care of skimmer water depth. The return section of the sump will be roughly 17"x22 1/2". I know it's rather large, but leaves me the option to put my dual chamber calcium reactor in there if the need arises. The sump also will incorporate a fuge.....haven't determine all the details there as of yet, have several options to consider, but the size will roughly be 15"x30".
Talking more on the fish room now....the space is roughly 11'x11', so not a super huge area, but still with the size of the tank and sump, I want to be ahead of the curve if possible on having something in place to handle the humidity issues. In the past when I first had my house built I did have a 150 gallon tank in the family room and had no issues, but this build is a lot bigger. I have thought of several options and some get ruled out due to cost or inability to do it. One big consideration was an air handler, and the cost is rather expensive, but keeps popping up. I have seen on some big tank builds where people have cut into their existing AC lines and plumbed into both the lines. In my mind I feel that eventually that will lead to premature failure of the heat system. The family room area never gets any warmer than 70 degrees even during the hot, sticky days of summer. I always keep the AC vents closed because it's so cool......Here is a poor pic of the air/exhaust fan I'm considering
 

acrylic51

Active Member
Here are some specs and stuff for the fan I have in mind:
Product Description
Designed for continuous use, these sturdy shaded blower fans offer economical air delivery for exhausting, cooling, or ventilating. Use them in conjuction with a temperaure-stat for exact control. Use them with a humidistat and control ambient moisture. Features a built in finger guard and 4 inch duct tube adapter on intake, and comes wired with a grounded plug.
Product Features
* Exchanges air in a 2200 cu. Ft. room in 5 minutes.
* Motor HP: 1/40 th
* CFM: 465
 

acrylic51

Active Member
Just a quick update.....Got a little done...started putting up the vapor barrier inside the fish room and got the whole house water filter moved from over where the tank will be located.

Pic of where the water filter was located.....

Vapor barrier going up in the fish room

Pic of whole house water filter moved, and some framing and drywall installed in the wall.

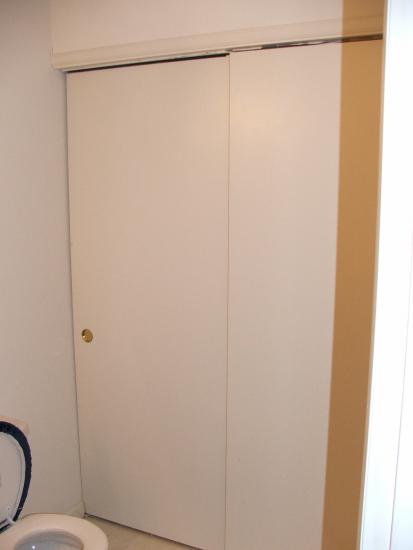
Next pic is of the pocket door already installed in the entrance of the fish room off of the bathroom. I chose to go with a pocket door due to the size and space constraints inside the fish room. I figured it would free up a little room inside if the door didn't open up into the room. Later as the fish room progresses you will understand that a regular door would be a battle with the positioning of the stand and tank.
The pocket door kit was purchased at Lowes and comes with the aluminum track and roller and door attaching hardware. The door is a standard hollow core door, but if you hit Lowes in my area early in the morning like I at 6am you'd be surprised the stuff that has damage, but is salvageable depending on your needs.....I picked the door up for $2.00, so a real steal. The damage was it was cracked at the top which is hidden in the wall, but before the door was installed, with a little glue and clamping was able to fix it.
 

acrylic51

Active Member
Also started on the stand build as well....It will give me a good workbench and junk table during the build process. The top of the stand will be covered with 3/4" plywood and then the outside will be skinned as well, but no definite plans as of yet. The inside will be primed and painted, and after the paint has dried I will caulk all the seams and joints. The bottom will be lined with FRP waterproof board and glued down. The 2x6 bottom will have the sides covered with FRP as well, and then once all that is setup and dried all the seams of the FRP board will be sealed creating a waterproof container to contain any spillage from the tank. I have always done that on all the stand work I do and it's invaluable IMHO. It easily wipes up as well.
 

stdreb27

Active Member
not going to use RFI Plugs?
Personally I'd just go find a used 55 gallon or so tank to use as a QT. As far as a humidity control goes, I'd just use a vent. Realistically, where I've from 80% humidity is the norm. Another option would be a window unit. Cooling the air basically wrings out any humidity... BC cooler air can't hold as much water....
 
Top