55g stand and canopy build for client

snakeblitz33

Well-Known Member
One of my clients 47g hex aquariums started leaking after I serviced it. They decided to replace the whole thing, but there isn't a company out there that makes standard 47g hex aquariums anymore. So, we decided to replace it with a standard 55g, which isn't much bigger than what they had. And, it won't cost that much to set it up and about the same to maintain it. Anyways,... here is today's progress... about 1.5 hours into the build. Let me know what you think.
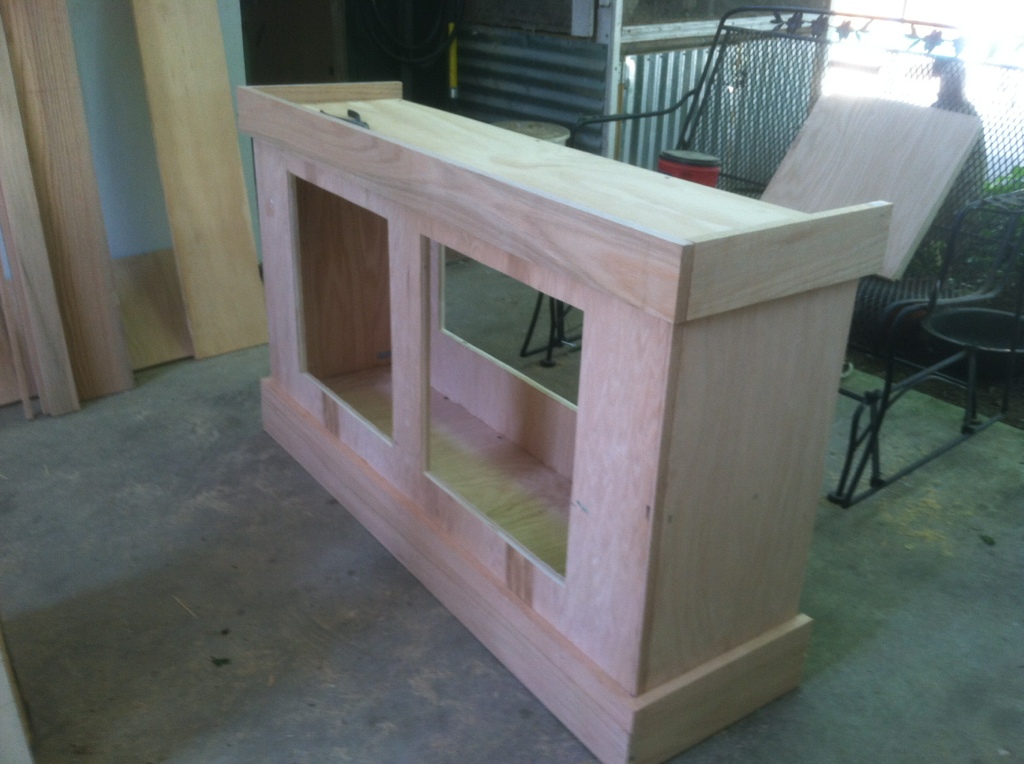
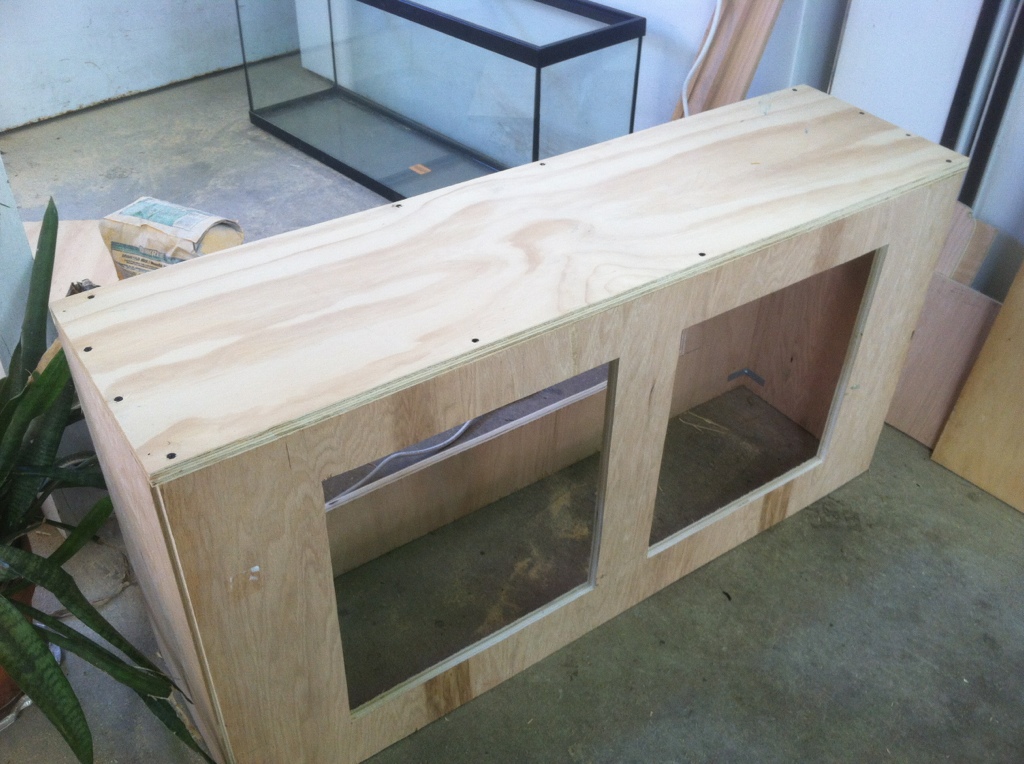
It's on a Red Oak Plywood stand - the front, back, sides, and top have been cut and fit in place and the whole thing has been made level. They are still deciding what color stain to put on it. I hope it is something dark.
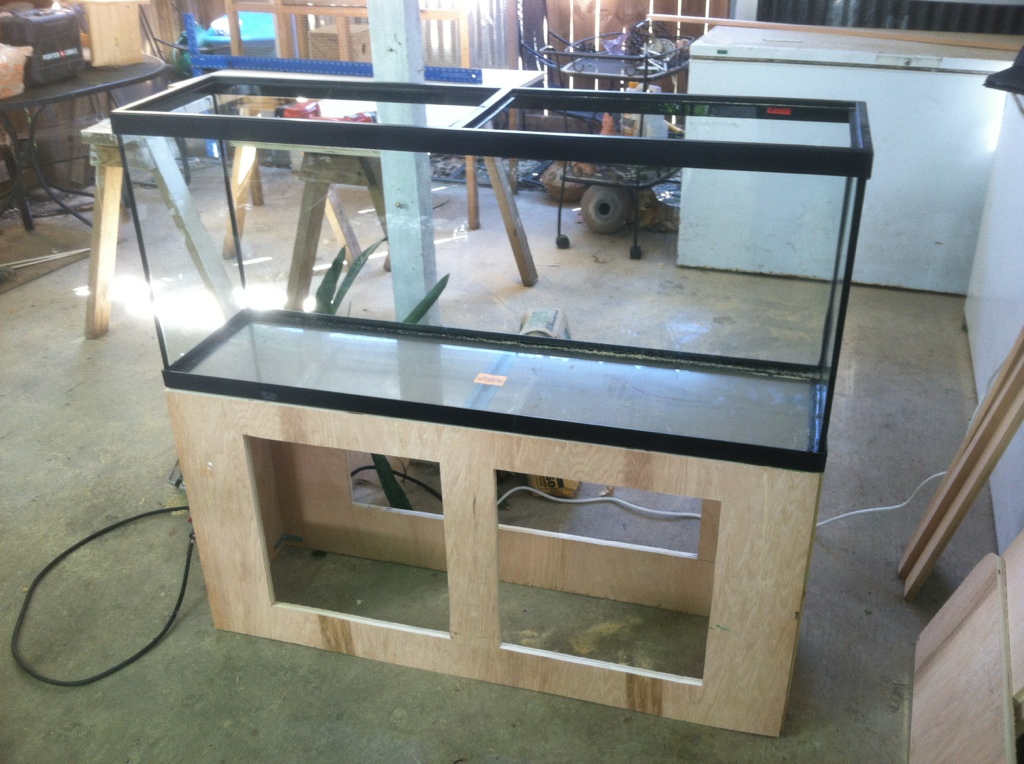
Anyways, the thing is rock solid. My mother and I sat on it and leaned back and forth. I don't think there will ever be an issue with the sturdiness of the stand.
The canopy will be built at some point this week. I'm going to put the finish trim work on the stand tomorrow and possibly get started on the doors as well if I have time.
 

snakeblitz33

Well-Known Member
I know that the bottom doesn't necessarily need any plywood, but I do know that it would add even more strength and stability to the stand. The bottom would not be red oak plywood, however. What do you guys think?
 

snakeblitz33

Well-Known Member
So, today my client called and said that she wants a 30" tall stand afterall. She said that she didn't realize that I would build it any shorter than the old stand for the 47 hex which is about 30" tall.
SOOOO... it looks like I am going to have to add a plywood bottom to the stand and then build a 2x4 base frame around it AND then add additional red oak trim that wasn't in the budget originally. I wish people would let me know these things.
They want English Chestnut as the stain. If I Can't find that, they like the Red Mahogany. So,.. I'll be able to throw a stain on it somehow. lol.
I'm going to try to work on it some this morning before I have to get to work this afternoon.
 

snakeblitz33

Well-Known Member
So, I built the base and added a bottom and a top to it. It went from 24" tall to 29" tall. I think it's tall enough, really. It's best that it stays relatively short because of the children in the bank... as well as for maintenance. I can still reach in the tank and it be right at my arm pit level. So, all's good.
 

snakeblitz33

Well-Known Member
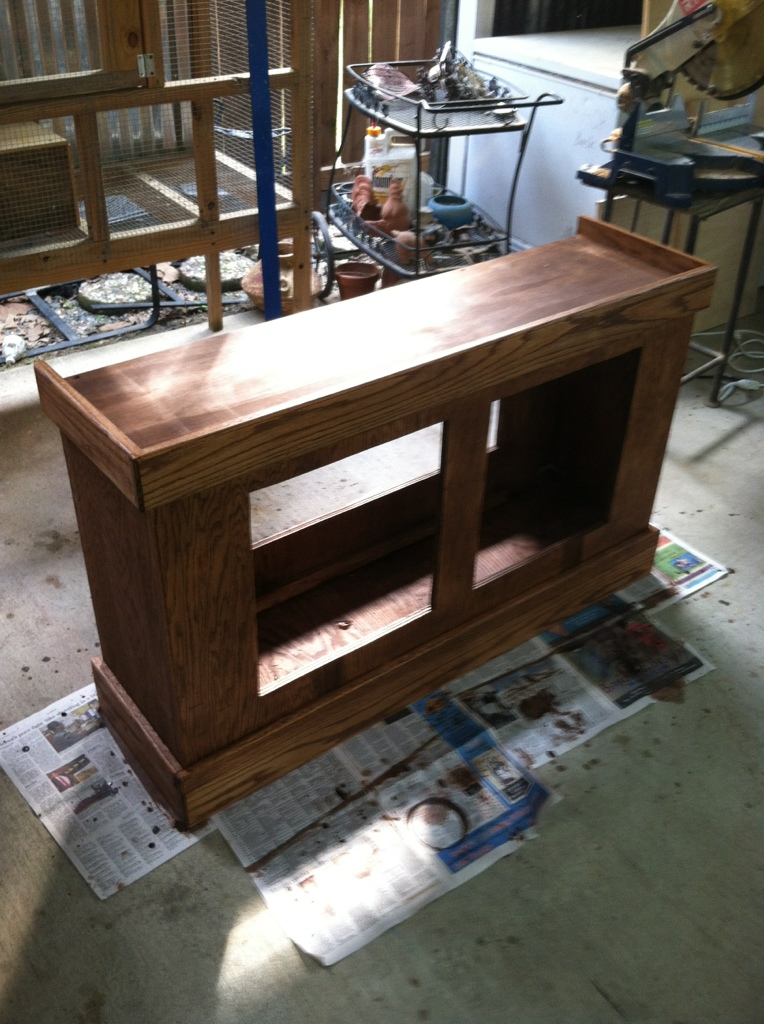
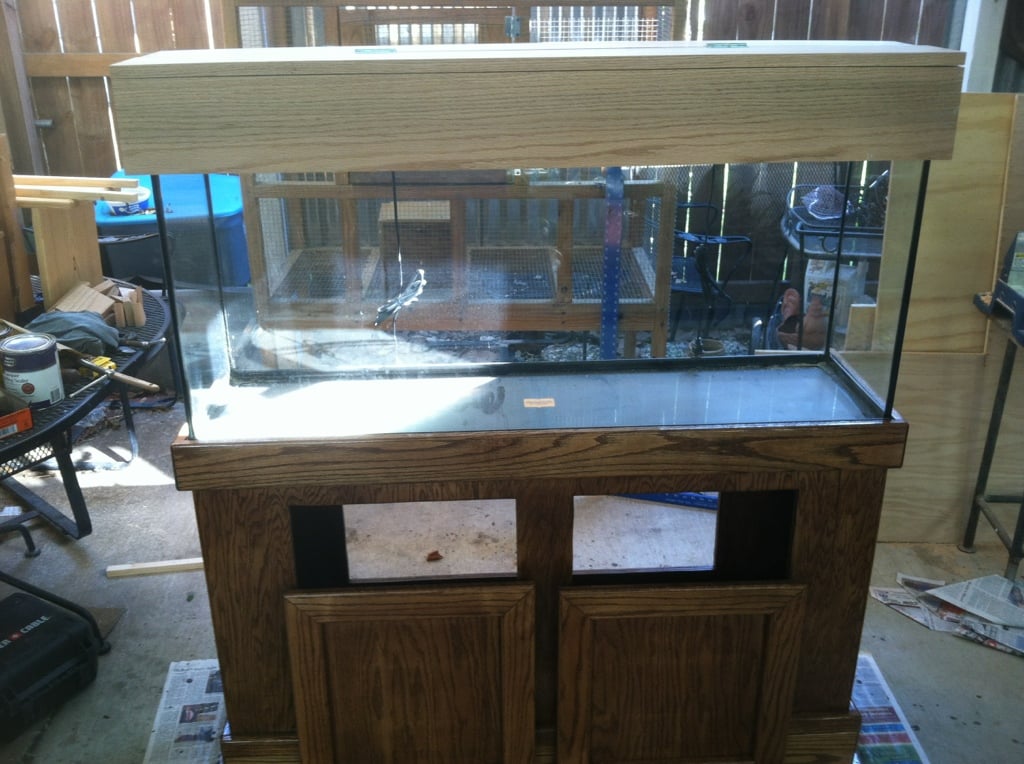
Next, I sanded everything down where it ought to be and then stained it with Minwax English Chestnut. Looks pretty good. The iPhone pictures don't do it justice.
 

snakeblitz33

Well-Known Member
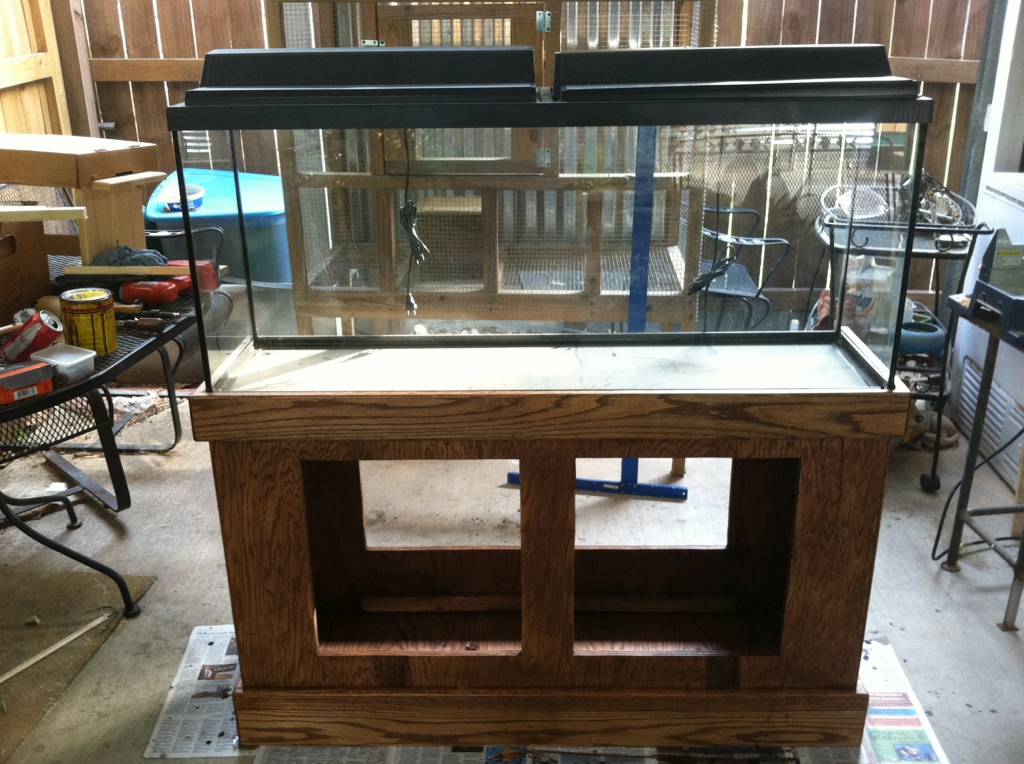
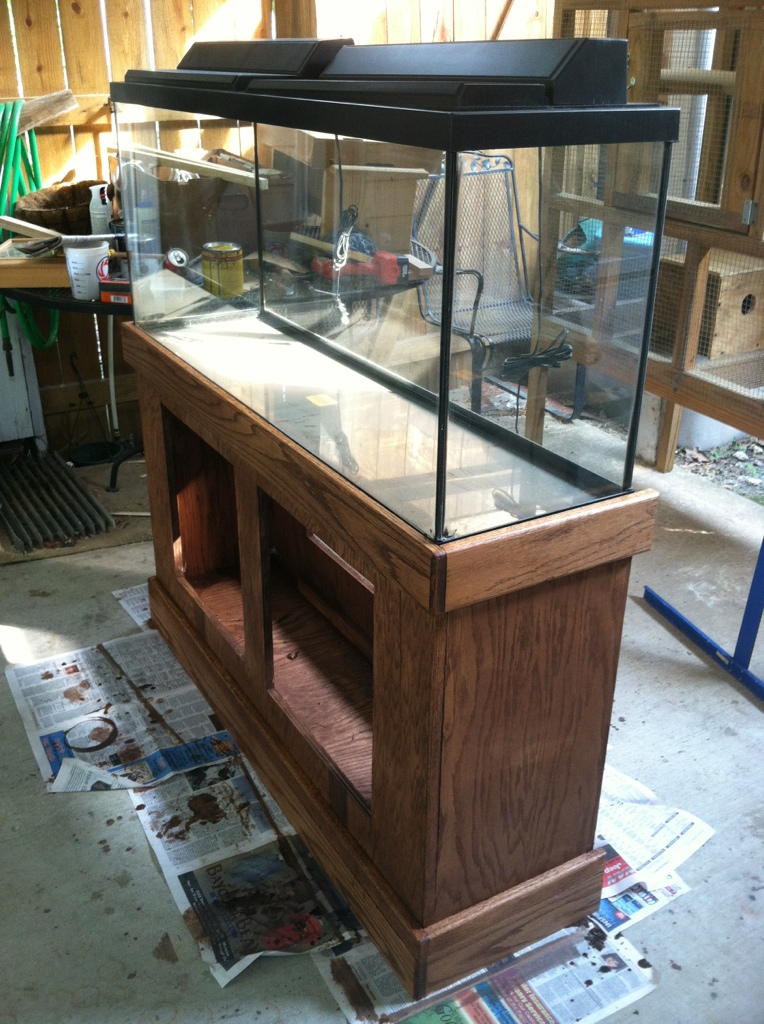
Here's a couple of pics with the aquarium on it.


The trim is solid red oak. I didn't want to make it look cheap by using plywood trim - and that cost me a little extra to do it like that - but this aquarium will probably sit in the bank for the next 25 years like the old one did. I wanted it to look good.
 

snakeblitz33

Well-Known Member
This morning I am going to make the doors and stain them. If I have a chance I'll also put some sand and sealer on the stand if the stain is dry enough and possibly gloss it today. Though, the main thing is getting the doors done.
 

snakeblitz33

Well-Known Member
Thanks. Doors are done. They came out really nice. The hinges that i bought are the wrong kind. Im gonna have to take them back and trade them out.
The doors are done and stained. I am using a couple folded up blue shop towels for a stain brush. Seems to work better then a brush which just slops it everywhere.
The stand and ******** have been sand and sealed today. The doors will get a coat and the stand will be completely done by tomorrow i hope. Then it is on to designing the canopy. I want to get it all completely done and installed the same day.
 

foodshape

Member
Pics may not do it justice as you say, but it looks great in the pics nonetheless. I really like the stain colour. If you don't mind my asking, how did you get into this business? Do you have a carpentry background? I know I can make passable stands, but nowhere near quickly or cost-efficiently enough to make any money at it...
 

snakeblitz33

Well-Known Member
Quote:
Originally Posted by foodshape http:///t/395496/55g-stand-and-canopy-build-for-client#post_3521684
Pics may not do it justice as you say, but it looks great in the pics nonetheless. I really like the stain colour. If you don't mind my asking, how did you get into this business? Do you have a carpentry background? I know I can make passable stands, but nowhere near quickly or cost-efficiently enough to make any money at it...
Yeah, I think my next stand, whatever it may be, might just have to be stained with English Chestnut. I really like the color that it turned out. I might have to take a pic of it with the big camera to show ya'll the real detail of it.
I don't mind at all... one day I woke up and said..."Jeez, I really like the aquarium hobby, and I like carpentry.... lets see if I can make a little extra money at it." I don't have a carpentry background... as a job,... I have built a few decks and storage buildings. I've helped on several construction projects. I've built many aquarium stands over the years. I can do them much, much more fancy, but my client didn't give me the money to spend on nice pre-fab red oak trim etc. and in fact, a little of my own money had to go into this. BUT, I get to service the account for a couple hundred dollars every two months, so it works out in the long run.
This red oak stand and it's corresponding canopy cost me roughly $250 in materials - covering everything from wood, stain, S&S and lacquer gloss finish and the screws. It would have only cost me $190-200 if they would have told me they wanted a 30" tall stand to begin with, but that doesn't bother me. Nothing that adding a base couldn't fix.
I can make quick stands, but most of the people that contact me and have me build stands for them want something custom - which takes more time. The only thing that takes me a long time is doors. If I had the right router bits, it would be a cinch. But, I don't have the $200 to spend on the right router bit, which leaves me with using a table saw and bits that I already have.
There are ways to cut corners in woodworking - and you also have to know a thing or two about wood. Plywood is much, much stronger than we give credit. heck, the spruce goose was made of plywood and glued together!
Keep in mind, I'm in my late 20's and I am a full time college student, part time taxidermist and full time family man. It's hard to find the extra time for projects like these... but at least it is something I enjoy.
 

snakeblitz33

Well-Known Member
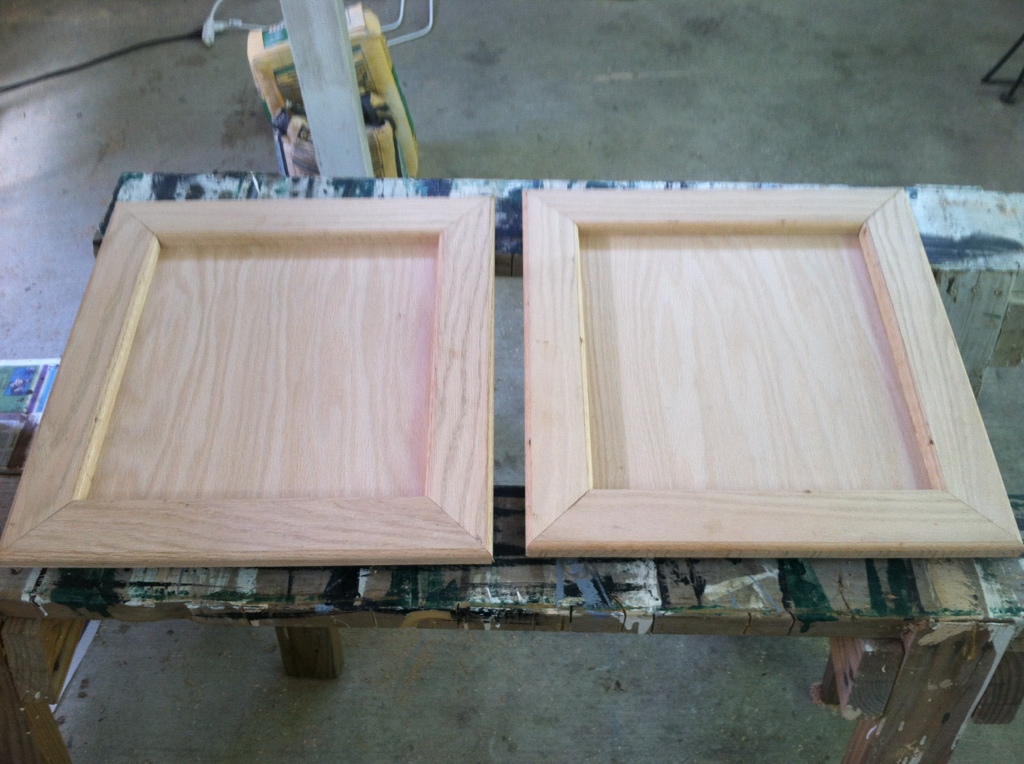
So, I finished the doors, but I didn't get a picture of them after the stain. whoops. Maybe tomorrow after the doors go on I'll get a good pic of them. Here yah go:

I used solid red oak as the trim and routed the inside and outside edges and then picture framed it in. I used the 3/4" plywood cutouts for the door on the stand and re-used them as the backing to the doors. I opted for the much thicker backing because it is inside a bank and you never know what kind of people are going to be knocking around on the doors. I didn't want a thinner cabinet door to split. The same router bit - a 3/8" roundover, was used on the doors to match the rest of the trim. I chose a simple router bit so that it would match the same style as the stand that they currently have, that way there will be less... change.... so to speak.
The slight gaps in the pictureframed trim are not noticeable after the stain was applied.
Next I have to build the canopy - and for that, I need another piece of 3" red oak. :( another $9 out of my pocket. X*(
 

flower

Well-Known Member
OMG...Cute attack!!
Wow...seems like just a month ago you had just brought her home...time flies.
 

foodshape

Member
Aww! she IS a cutie! The doors look great btw. (And no, I did not have to google spruce goose; have known what it was since, oh, the 70's or so I guess <eek>).
 

snakeblitz33

Well-Known Member
Lol, thanks guys and gals.
Yeah, the doors turned out pretty good. I would have liked to have slotted them, but I think I made the right choice to use the 3/4" plywood. Best of all - they are square and they fit! They don't pull out at all - they lay completely flat!! I like the fact that it has a 3/4" backing because I can install a little door storage later on.
 

acrylic51

Active Member
Sorry about the slow response Seth.....Looks really good......The little one is cute.......Good thing she looks like momma.....but I think has dads humor........
 

snakeblitz33

Well-Known Member
Thanks Shawn,
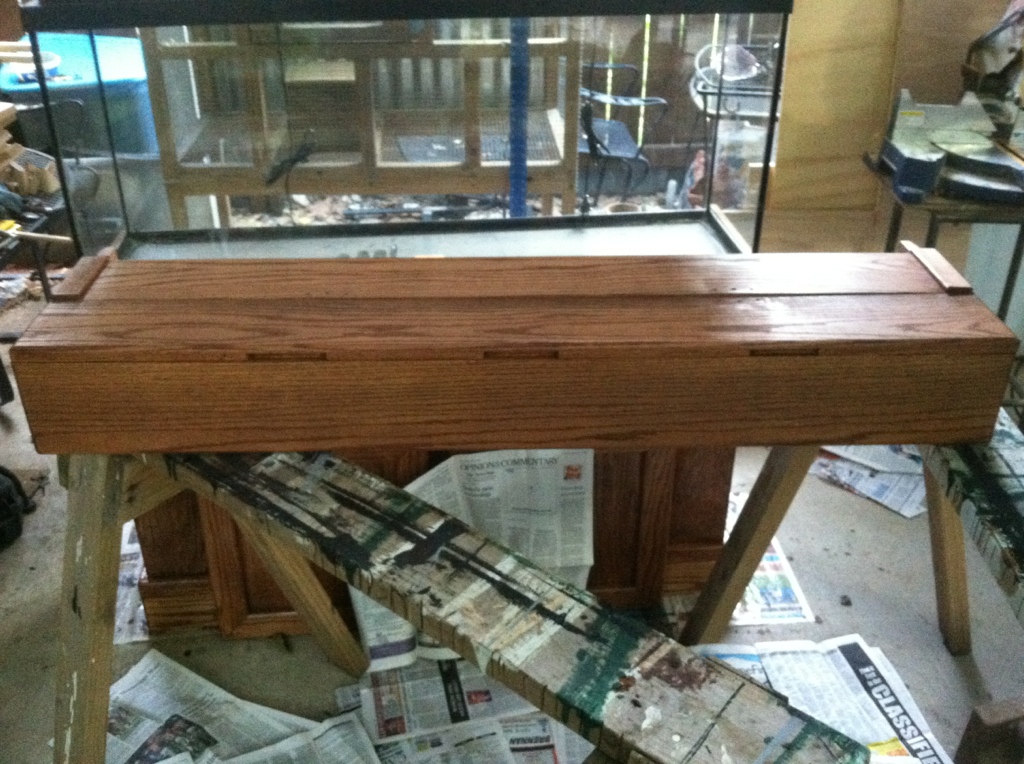
So... I built the canopy today. I made sure it fit on top of the tank...

Then I routed all of the edges and made sure everything fit straight. I also stained it.

The two little pieces of wood you see on either end hides some recessed screws for that top board. It's also convenient because when the canopy is opened, it doesn't bang the entire top on the other top piece of wood - just those two "sound dampners."
You will also notice three notches in the top piece of wood... that's a handle - where you stick your thumb or finger to open the top up. All in all, I really like the design and was considering using it on other aquariums. I used a really simple design for the stand and canopy on purpose - the bank said that they wanted roughly the same style - so I kept it simple instead of showing off my routing skills. lol
Anyways, I hope everyone likes it. It's going to get a good coat of sand and seal tomorrow morning and then I'll use some steel wool to smooth it down, and then a coat of lacquer gloss. I'll also have to mount all of the hinges and cabinet door handles. But, essentially, it's done. I'm happy that I will be able to deliver Friday. :D
 
Top