Greetings
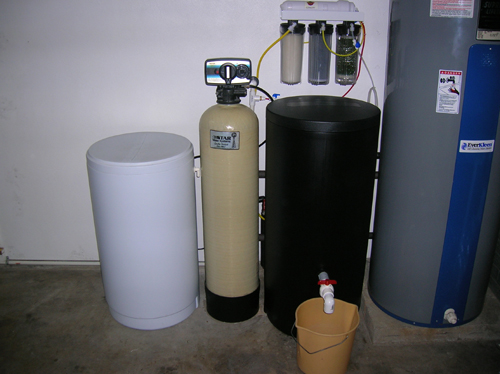
I invested in water softener brine tanks for this purpose (one to hold RO/DI water and one to hold saltwater). They are quite a bit more expensive than Rubbermaid containers, but I was interested in a more permanent and better-looking solution that I could then use as the basis for a remote automatic top-off and water change system (tanks are in the garage / system design is in the works). The tanks I bought are approximately 18 1/2" in diameter and 40" high and are made from black plastic, so they block light and help eliminate the problems that more "transparent" containers would cause for longer term water storage.
Another plus is that they come with float valves and overflow fittings and are plumbed for 1/4" polyethylene tubing. This makes it a relatively simple process to connect the tank to your RO and/or top-off systems. I cut a hole towards the bottom of one of the tanks and installed a DIY spigot (for bucket filling) that I made using PVC plumbing and electrical parts. My first attempt developed a leak after a few uses, primarily due to the poor seal between the thin rubber gaskets I chose and the curved tank wall. I have since found some thick rubber washers with an inside diameter that fits the spigot parts perfectly (the standard rubber washer for a bathroom sink tailpiece). That, along with silicone, fixed the problem.
Here are some pictures of the tank and the DIY spigot effort in case anyone is interested. I'm sure there are more elaborate tank systems in use, but this approach seems to work well for me. I hope this helps - I'm not too smart about corals yet, but I can find my way around plumbing, electrical and mechanical issues
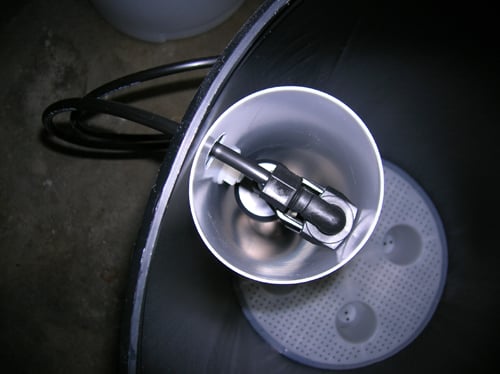
Photo #1 - View of the float valve and 1/4" input line
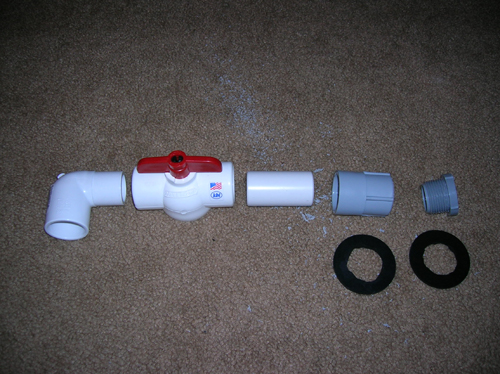
Photo #2 - Parts used to make DIY spigot (shows old rubber washers...)
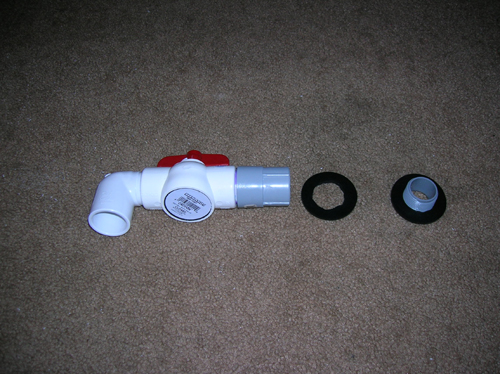
Photo #3 - Assembled DIY spigot ready for installation on tank
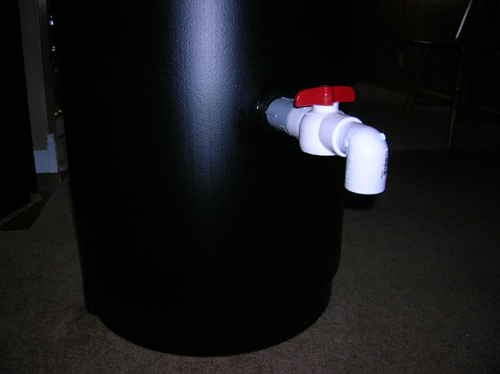
Photo #4 - Spigot installed (high enough for bucket to sit underneath)
Photo #5 - Tank connected to RO system (Note: this was before the addition of the second tank - no auto top-off or water change efforts have been started yet...)