DIY Spray Bar for Nanos

jemshores

Member
Got an idea over the weekend for one, and am sure its not new! But, went to H Depot, bought the parts and assembled in about 10 minutes (plus drilling holes and placement)! Just wanted to share and am soooo pleased with the outcome. As you can see, the flow on the surface is great (3 holes) and 6 down below for the rest of the tank. Still run my K1 but not 24/7. I had already upgraded to a Rio1400 after purchasing the tank so I didn't really have an issue with flow anyway. But it was circular in nature and my fish didn't spend time in all parts of the tank; now they are everywhere. The middle piece which is threaded on both ends came form the irrigation dept, as did the caps. And the elbow, just from the plumbing supplies. You can make them in any length, add holes as you please and I luv it! As do my corals!

The pic is of my 12.
 

jemshores

Member
Originally Posted by jemshores
http:///forum/post/3200787
Got an idea over the weekend for one, and am sure its not new! But, went to H Depot, bought the parts and assembled in about 10 minutes (plus drilling holes and placement)! Just wanted to share and am soooo pleased with the outcome. As you can see, the flow on the surface is great (3 holes) and 6 down below for the rest of the tank. Still run my K1 but not 24/7. I had already upgraded to a Rio1400 after purchasing the tank so I didn't really have an issue with flow anyway. But it was circular in nature and my fish didn't spend time in all parts of the tank; now they are everywhere. The middle piece which is threaded on both ends came form the irrigation dept, as did the caps. And the elbow, just from the plumbing supplies. You can make them in any length, add holes as you please and I luv it! As do my corals!

The pic is of my 12.
Just wanted to add that I use a Rio600 in the 12 and a Rio 1400 in the 24; not sure if stock pump would work as well-so upgrading might have to happen to achieve the proper flow.
 

jemshores

Member
Didn't have to change the return at all. Where it comes out, I purchased a fitting that goes to the elbow, hence, long piece of piping, then end cap. When at H Depot, you can put it all together there, no adhesives necessary. I think the return in 1/2' so I use a 5/8" adapter/fitting. Most of it in the irrigation dept., screw-ons are better, didn't want to have to use adhesives/blue gunk! Hey, I'm a female, if I can do it, anyone can! Just get a basket and put the pieces in there and by trial and error, they work. Total cost? about $4.00 each. If you want I will take it off the return and take more pics..
 
Originally Posted by jemshores
http:///forum/post/3200941
Didn't have to change the return at all. Where it comes out, I purchased a fitting that goes to the elbow, hence, long piece of piping, then end cap. When at H Depot, you can put it all together there, no adhesives necessary. I think the return in 1/2' so I use a 5/8" adapter/fitting. Most of it in the irrigation dept., screw-ons are better, didn't want to have to use adhesives/blue gunk! Hey, I'm a female, if I can do it, anyone can! Just get a basket and put the pieces in there and by trial and error, they work. Total cost? about $4.00 each. If you want I will take it off the return and take more pics..

Haha I'm actually very interested in trying this. I'll have you know I know some very handy do it yourself females (I studied engineering and know quite a few female engineers)! In any case, if I were to try this I'm actually wondering if the nozzle on my return will come off where I can attach a spray bar. I have a 24 gallon nano cube and since you have a 12g I assume it is also a nano cube? Any pics are welcome. My understanding is you removed the nozzle on the return and used an elbow to attach it correct?
 

jemshores

Member
Originally Posted by Contraband629
http:///forum/post/3200962
Haha I'm actually very interested in trying this. I'll have you know I know some very handy do it yourself females (I studied engineering and know quite a few female engineers)! In any case, if I were to try this I'm actually wondering if the nozzle on my return will come off where I can attach a spray bar. I have a 24 gallon nano cube and since you have a 12g I assume it is also a nano cube? Any pics are welcome. My understanding is you removed the nozzle on the return and used an elbow to attach it correct?
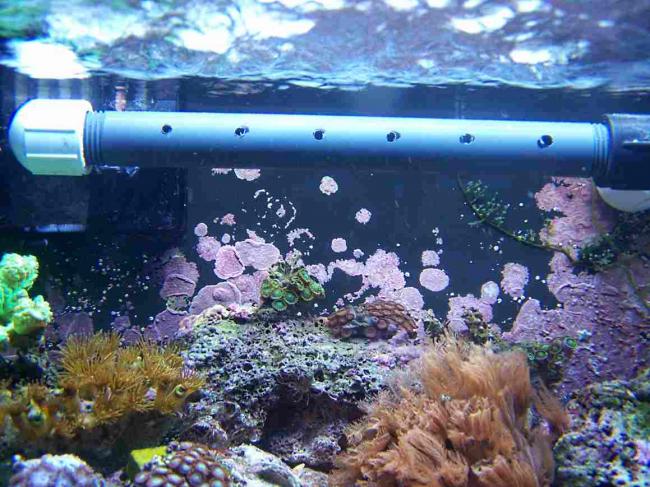
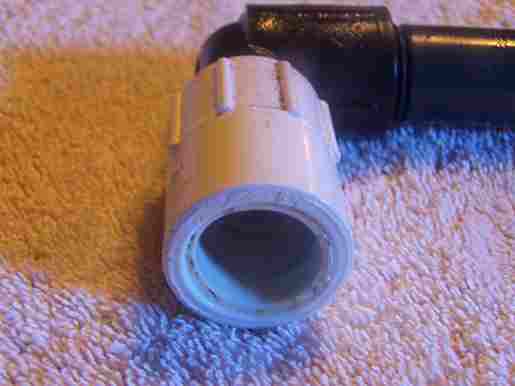
Here are some pics..not the best. The return on the wall ( I have a JBJ 24 and 12-both the same return-5/8"). I got a piece (flange 7/8") and attached one end to the wall, the other end is threaded, that attaches to an elbow. The elbow is threaded on both ends (sorta like male and female?) so you insert into wall and the other end will let you screw in the grey pipe-which is threaded on both ends. Then the cap, which is threaded too. Some parts in plumbing and some in irrigation...honestly don't remeber exactly which came from where, except for the grey pipe,,,irrigation! Soaked in boiling water after completed and done! One thing I did run into though is the wall attach piece, where it goes into the elbow...I did have to take a dremel and drill it out a tiny bit (white piece) so I could get a good turn on the threaded piece(black elbow). There is no threads in the piece coming from the wall. Leave it to a woman to explain this!!! It would be easier for me to make one than explain this is laymens terms LOL If you have any other ??? let me know and will take more lousy pics! (just remeber 5/8 and 7/8 !!!! Also, the grey pipe comes in different lengths, what I bought is 8", and the placement of the holes is totally up to your tank. I put 3 on top for water movement 6/7 below, some facing forward, down and even back to the wall. Used 1/8" and 3/8" drill bits-cordless did a fab job!
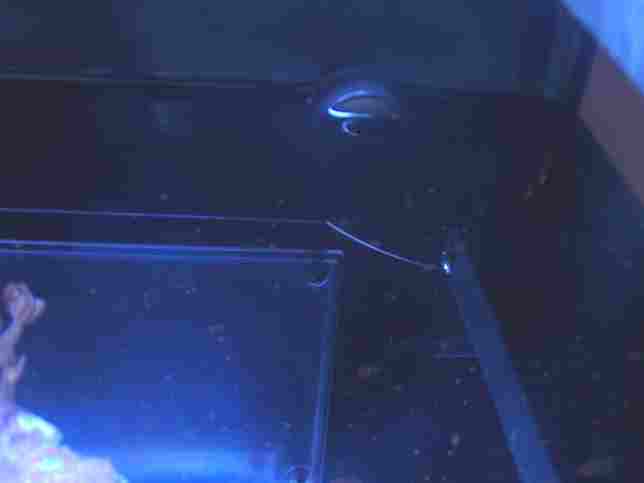
The last pic is the return chamber, to show that no additional tweeking is needed back there. Just that white fitting on the inside of the tank-7/8" !


jemshores

Member
Oh I forget....if you order now....before midnight, you can 2 for the price of 1; plus a free piece of hair algae for $00.00
 
Top