blackjacktang
Active Member
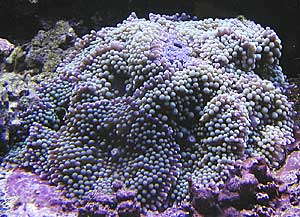
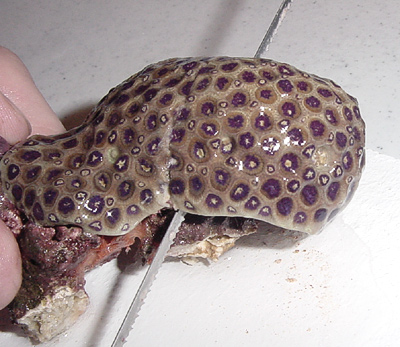
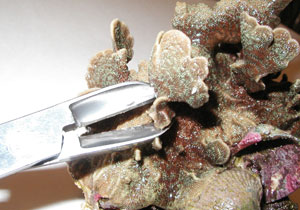
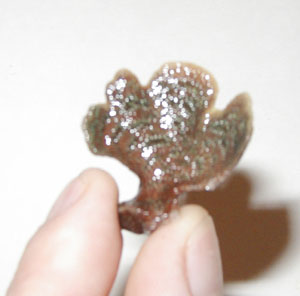
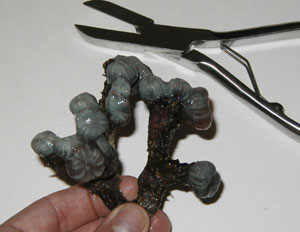
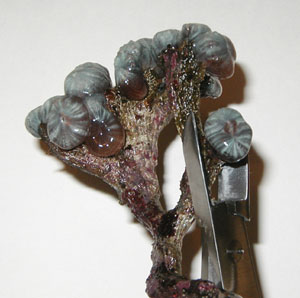
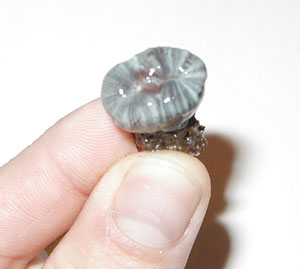
Mushroom Coral
Unlike what many people might think, the propagation of soft coral and polyps is a relatively easy thing and can still be performed by anyone with limited time and resources. Below I have documented the process I have followed to propagate mushrooms in my main tank. Note, this write up is the process I follow, I will not be held responsible if you try this and damage or somehow spoil your tank or livestock. It is meant to be used as a guide in your endeavors to propagate and cultivate your own mushrooms.
Before I start, let me tell you about my main set up and my prop tank. I live on the 6th floor of an apartment building. As much as I would love to have a 100+ gallon tank, I drew the line at a 72G Bowfront. I was running a 40G with a 30G Refugium/Sump before that. The tank I have used as a prop tank until now is the cheapest set up possible, in other words, a 10G tank, with some sand at the bottom, a NO Fluorescent tube, and a small Whisper filter. Nothing more, nothing less. Sure, this is not the best of setups to do this, but I, like most people, did not have much money to spare and what little extra money I did have was going into my show tank. I have since moved up mostly due to size limitations with the 10G tank. My boss at work tore down a turtle tank he had and kindly donated a 20G long tank, which I have converted to my prop tank. I have set it up with 2 Lights Of America power compacts for lighting and a small Rio powerhead for circulation. Skimming on the 20G is provided by a RedSea Prizm I used to have on my 72G which I replaced with a AquaC EV 150.
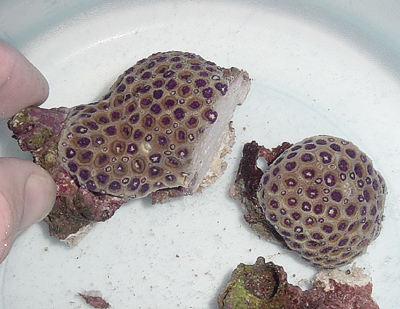
Now that you have an idea of the setup you will need to maintain the frags, let's make the frags! Prepare for the day that you are going to frag.
This includes the following:
Have base rock or reef plugs to mount your frags on
Have 2 small tanks or containers big enough to work in. ( I use a 10G tank and a small Rubbermaid container)
Sharp scissors (Toxin free, oil free, rust free)
Paper towels (Bounty)
Super Glue Gel (Keep it in the freezer to thicken it)
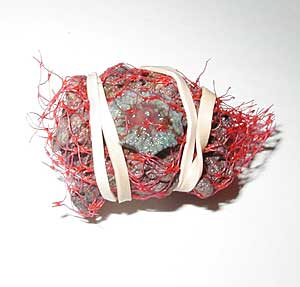
String/Rope/Nylon filament to tie frags to rocks
Tweezers
Water – I usually use about 5G of water, so what I do is use the occasion to do a small water change in my show tank, and use the water I have taken out to do my cutting and chopping in.
Tank to put the frags in. (This could be your show tank but it’s not recommended as frags emit a lot of mucous and other toxins in the water that could affect your other livestock)
Once you have all your equipment ready and are psychologically prepared to cut your livestock up, get ready to get your hands wet and slimy")
Unlike what many people might think, the propagation of soft coral and polyps is a relatively easy thing and can still be performed by anyone with limited time and resources. Below I have documented the process I have followed to propagate mushrooms in my main tank. Note, this write up is the process I follow, I will not be held responsible if you try this and damage or somehow spoil your tank or livestock. It is meant to be used as a guide in your endeavors to propagate and cultivate your own mushrooms.
Before I start, let me tell you about my main set up and my prop tank. I live on the 6th floor of an apartment building. As much as I would love to have a 100+ gallon tank, I drew the line at a 72G Bowfront. I was running a 40G with a 30G Refugium/Sump before that. The tank I have used as a prop tank until now is the cheapest set up possible, in other words, a 10G tank, with some sand at the bottom, a NO Fluorescent tube, and a small Whisper filter. Nothing more, nothing less. Sure, this is not the best of setups to do this, but I, like most people, did not have much money to spare and what little extra money I did have was going into my show tank. I have since moved up mostly due to size limitations with the 10G tank. My boss at work tore down a turtle tank he had and kindly donated a 20G long tank, which I have converted to my prop tank. I have set it up with 2 Lights Of America power compacts for lighting and a small Rio powerhead for circulation. Skimming on the 20G is provided by a RedSea Prizm I used to have on my 72G which I replaced with a AquaC EV 150.
Now that you have an idea of the setup you will need to maintain the frags, let's make the frags! Prepare for the day that you are going to frag.
This includes the following:
Have base rock or reef plugs to mount your frags on
Have 2 small tanks or containers big enough to work in. ( I use a 10G tank and a small Rubbermaid container)
Sharp scissors (Toxin free, oil free, rust free)
Paper towels (Bounty)
Super Glue Gel (Keep it in the freezer to thicken it)
String/Rope/Nylon filament to tie frags to rocks
Tweezers
Water – I usually use about 5G of water, so what I do is use the occasion to do a small water change in my show tank, and use the water I have taken out to do my cutting and chopping in.
Tank to put the frags in. (This could be your show tank but it’s not recommended as frags emit a lot of mucous and other toxins in the water that could affect your other livestock)
Once you have all your equipment ready and are psychologically prepared to cut your livestock up, get ready to get your hands wet and slimy