How to setup connection between 2 tanks

I want to set up a second so that all filtering can take place in that one and just the fish and live rock in the main tank. How can i do this? What do i need?
 

ameno

Active Member
is the 125 reef ready? meaning built in overflows, and or drilled for overflows? If not you will have to have a HOB overflow box to drain to your sump, then use a pump to return from the sump, all built out of PVC.
 

scotts

Active Member
A few questions for you first, have you set the tanks up yet?
Is the 125 a drilled tank
Is the 55 a drilled tank
What equimpent do you have
How good are you at working with things like PVC
Answer these and I can help you out. I have a 55 as a sump under my 125. Plus have to love the fact that you are a Steeler fan.....you are a Steeler fan aren't you?
 
Neither tank is drilled. I have no equipment other than water pumps. I just want nothing in the main tank but live aquaria and maybe some water pumps for movement. Yes i love the steelers and the rest of the steeler nation, a little more than most.
 

ameno

Active Member
you have a couple choices, if the tank is not up and running yet you can have it drilled for overflows, are the easy way but IMO not the best is to buy a hangon overflow box. Will your skimmer go in the sump also? I would plan on putting a skimmer compartment in the sump for a much better setup. if you do what is the gph for the skimmer pump. this will help determine the flow your going to need, and sizes for overflow and pumps
 
I have a skimmer that is good for up to 150 gallons and have no idea about how much it is good up to. I am putting the skimmer in the sump. Basically i want one pipe going from main tank to sump and then a second pump going from sump to main tank. can i do that?
 

ameno

Active Member
yep, if you drill, I'd use a 1.5" bulkhead, if not then a HOB overflow box for 1200 GPH. and probably a mag 12 pump for the return, but we will have to see how high you pumping to be sure about that. The set-up I like best for the fuge is to put the fuge on one side and the skimmer on the other and the return in the middle, I feel you have better control over your flow to each compartment that way. you would run 1.5" pipe to the sump then tee off to each compartment with a valve after the tee on each line. and then for your return go up to 1.25 or 1.5" pipe put in a union after the pump and then a ball valve, and be sure to drill a 1/8" or so hole in the return just below the water level in the DT to break the back siphon when the pump powers down.
If you can try and get some flex pvc, it will make the plumping easier.
 
Clearly this is my first time doing something like this and already it seems far too complicated especially after hearing all that from you. Is there any way you can be more in depth about some things because I am not sure what tees are and so much more. How about a step by step guide if possible as that would seem far easier? Thank you for your time and patience.
Kevin
 

ameno

Active Member
Ok lets start with your sump, do you have it already to go with baffles(dividers in it for the compartments?
 
Ha ha. No. When I say this is my first I am serious. I have been a hobbyist for years with success, but everything always cluttered my tank. So baffles and all of this sound familiar as I have read about them, but never used them. So please elaborate on this first step (by the way, youre the first helpful person so far).
thank you Kevin
 

scotts

Active Member
Well I finally have time to type some stuff up for you, and hopefully the board will let me get it in.
You have the same set up I do, I have a 125 with my old 55 under it as a sump. I have another thread that shows how I moved it in, but I can't search for it right now. Anyway here is how I have my tank set up.
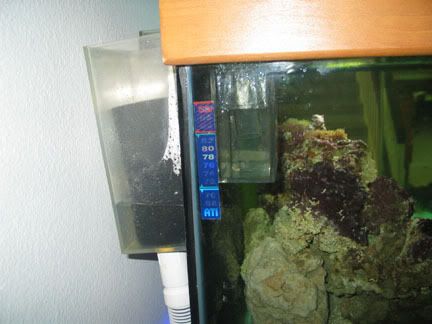
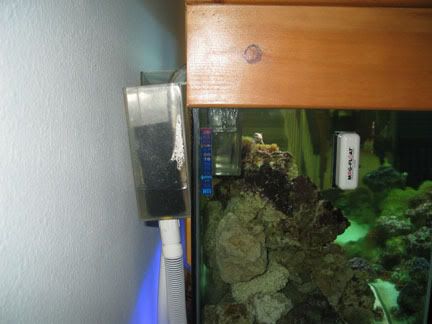
Here is the overflow. What this does is the water enters into the collection box inside the tank, the U-tube siphons the water over the side of the tank to the collection box on the outside of the tank. The water then travels by hose down into your sump.


The obvious question is what happens if the power goes out. The overflow box is designed so that if the power goes out the ends of the U-tube stay under water so it never loses it siphon. When the power comes back on and the water flows again the siphon is still intact and it goes back to flowing normally.
 

scotts

Active Member
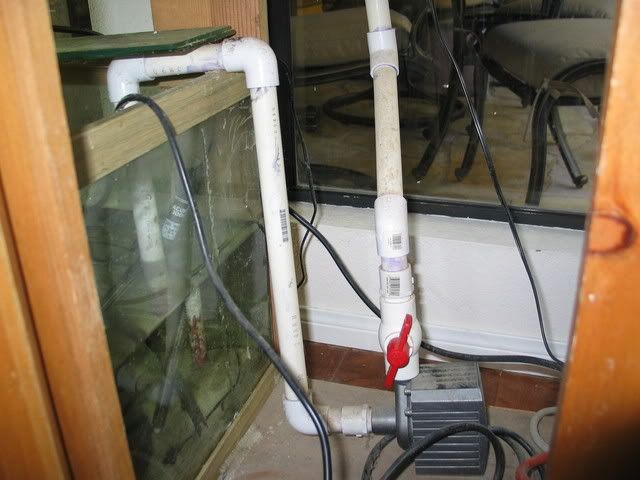
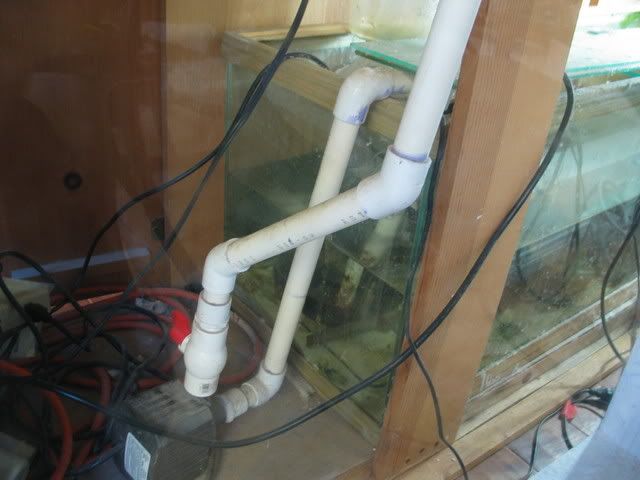
Now how do you get the water from the sump into your Display Tank(DT)? Well obviously you need a pump, and since you are using and old tank like I am, you can plumb it by going up and over the side, like in the picture shown. I always recommend that you put in a valve on the outlet of the pump so that you can adjust the flow. You will not shorten the life of your pump by doing this.

Here is the pipe going from the pump up to the tank. You can see that I used two 45s instead of two 90 degree elbows.

What I have at the top of the tank is an elbow and then a threaded connector. That way I can adjust the direction of flow in the tank.
One thing about setting up a tank like this is if I have any problems and need to pull the pump, all I have to do is literally pull the pump.
 

scotts

Active Member
One thing you have to keep in mind is if the power goes out. Depending on what you have going on into the top of the tank, when the power goes out the water will siphon back from your DT into sump through the plumbing from the pump. One way to stop this is to drill a small hole, like 1/8" in this plumbing right below the water level in your DT. This way if the power goes out and the water siphons down to this hole, the air will go into the pumbing and break the siphon and stop the water from flowing.
You also need to think about what you want to put in the sump. Like your heater, skimmer.....
I hope this helps so far, if you or Josh have ANY questions at all please ask.
 

ameno

Active Member
good info, You may also want to do some research on how sumps are put together, don't know if Scotts showed a picture of his are not, (my work computer won't lit me see the pics) but once you figure out the size, how many and placement of your baffles then you can go to a glass place and have them cut them, then silicone in place. It might be a good idea to stop off at your local hardware store such as lowes or HD and check out the plumbing section to get familiar with tee's and ell's and the different type fitting you'll need in the Pvc section.
 

teresaq

Active Member
can I add one thing, if you are using a 55 gal as your sump, make sure you have enough clearance to work in the sump. I made this mistake, and cannot get a skimmer in. I should have used a shorter tank for my sump/fuge.
 

fishycpa

Member
Originally Posted by TeresaQ
http:///forum/post/2451140
can I add one thing, if you are using a 55 gal as your sump, make sure you have enough clearance to work in the sump. I made this mistake, and cannot get a skimmer in. I should have used a shorter tank for my sump/fuge.

I did the same thing...55g sump for my 125, and although I put a skimmer in there before any water, i can barely get to the collection cup to empty it and there will be no way to take the skimmer out to clean it...
 

ameno

Active Member
good point most normal stands do not have enough room, thats why I built a custom stand with a side cabnet for mine, just to get the skimmer out.
 

scotts

Active Member
I must be one of the lucky ones because I have the room to take my skimmer out of the sump. It is an ASM G2. Good idea about going to the hardware store and looking at the PVC stuff. I know here in CA. you can buy this super cheap, super thin wall PVC pipe. You do NOT want to use that.
A copule of other things. Buy yourself a PVC cutter. Much easier and cleaner than using a hacksaw to cut the pipe. Also get youself a couple of sticks of pipe, some fittings (elbows and connectors) and the primer and glue. Get yourself a "contractors bag" of fittings. It is usually a pack of 10 and the price per fitting is at least half the price of buying then individually. You may have to cut the pipe to fit your car on the way home. Then practice and practice how to cut and glue. The stuff is cheap and reusable so go for it and have fun.
You will also need some teflon tape when you are ready for the final install. This is for your threaded connections.
 
Top