snakeblitz33
Well-Known Member
Snake's Methods for Building an Algae Scrubber
Algae scrubbers are nothing new to the hobby. Some of the first built were for commercial aquarium use back in the 1970s. Algae scrubbers use water, light, and a rough screen in order to grow algae to remove nitrate, phosphates and heavy metals from the aquarium. Algae scrubbers also have the ability to keep your pH stable, water cooled, and your tanks oxygen levels super saturated. There are many benefits to running a scrubber, which is discussed in Snake's Methods for Algae Scrubber Baics.
First, determine if you need an algae scrubber. Are you interested in reducing or eliminating nitrate and phosphate from your system? Do you have constant problems with hair algae, cyanobacteria, and poor water quality? Well, an algae scrubber may be of use to you.
A simple in-sump scrubber can usually be built for less than $20 if you already have a few parts laying around. If you don't have a pump, lights, or some extra PVC laying around, then an in-sump scrubber will cost between $50 and $75. However, keep in mind that a properly built scrubber will move as much, if not more then a very high end protein skimmer, and it has extra benefits that a protein skimmer doesn't.
There are a few things you need to know about an algae scrubber before you start building your own. For every 1” of horizontal length, you'll need on average 35gph of water. So, for a 12” screen, you will need a minimum 420gph of real flow. For every one square inch of screen, lit both sides, can filter 1 gallon of water volume. Therefore, a 12x12” screen lit on both sides can handle the bioload for a 144g aquarium. If lit on one side, double the screen size. There is a way to build it horizontally, which will be discussed later.
An Algae Scrubber is as expensive as you want to make it. Some people build them in acrylic boxes and use fancy T5 lighting or LEDs, but that is not necessary to get good algal growth. All you need for a simple in-sump scrubber is listed below: It will take approximately one afternoon to build it.
6' of 3/4” PVC pipe. It can be schedule 20, but 40 is best. All parts are 3/4”
2x end caps
2x T offs
4x 90d Elbows
1x union
1x slipxFTP adaptor
1x hose barb adaptor
2 foot vinyl tubing for pump
Pump with ball valve
2x hose clamps
1x roughed up plastic canvas screen
zip ties
2x light sockets with reflectors (Home Depot / Lowes)
24 hour timer
2x 23w “warm light” CFL bulbs
1x tube silicone (aquarium safe)
Tools needed:
Table saw or dremel tool
PVC Cleaner and Cement
Hole saw bit
Hack Saw
Steps to building your first in-sump algae scrubber:
[*]
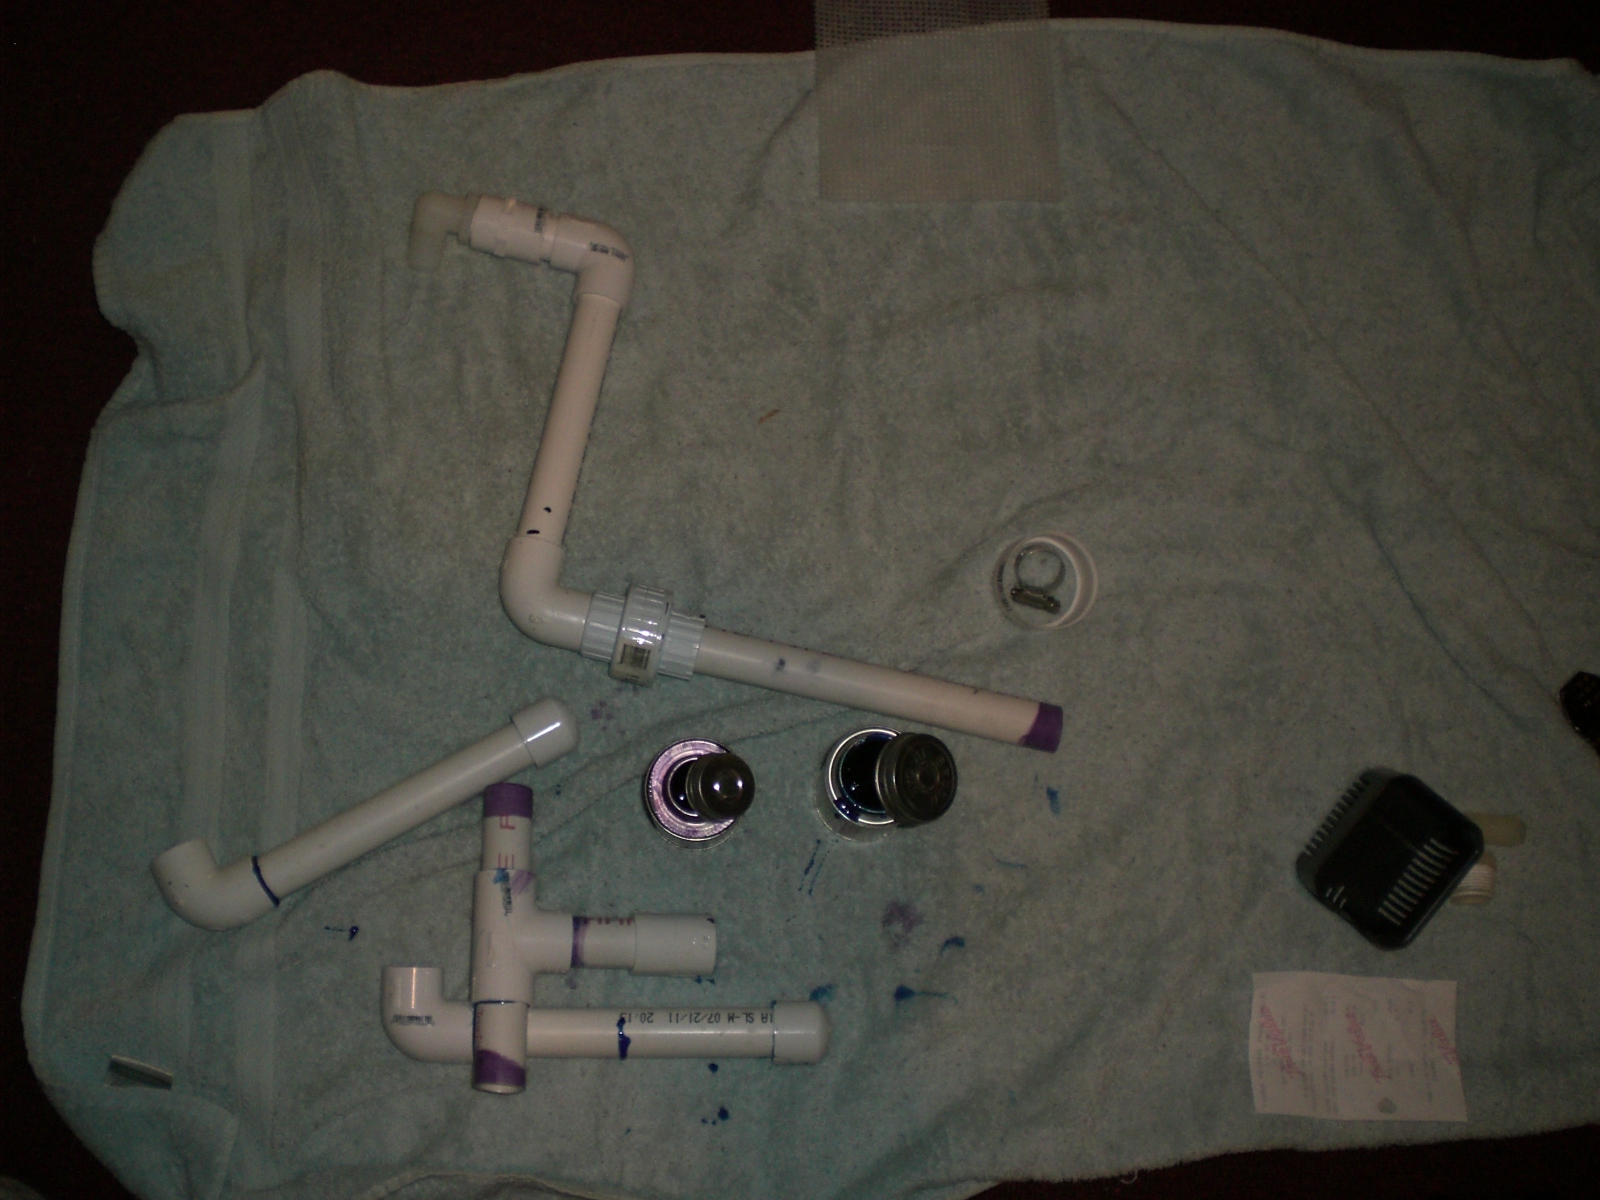
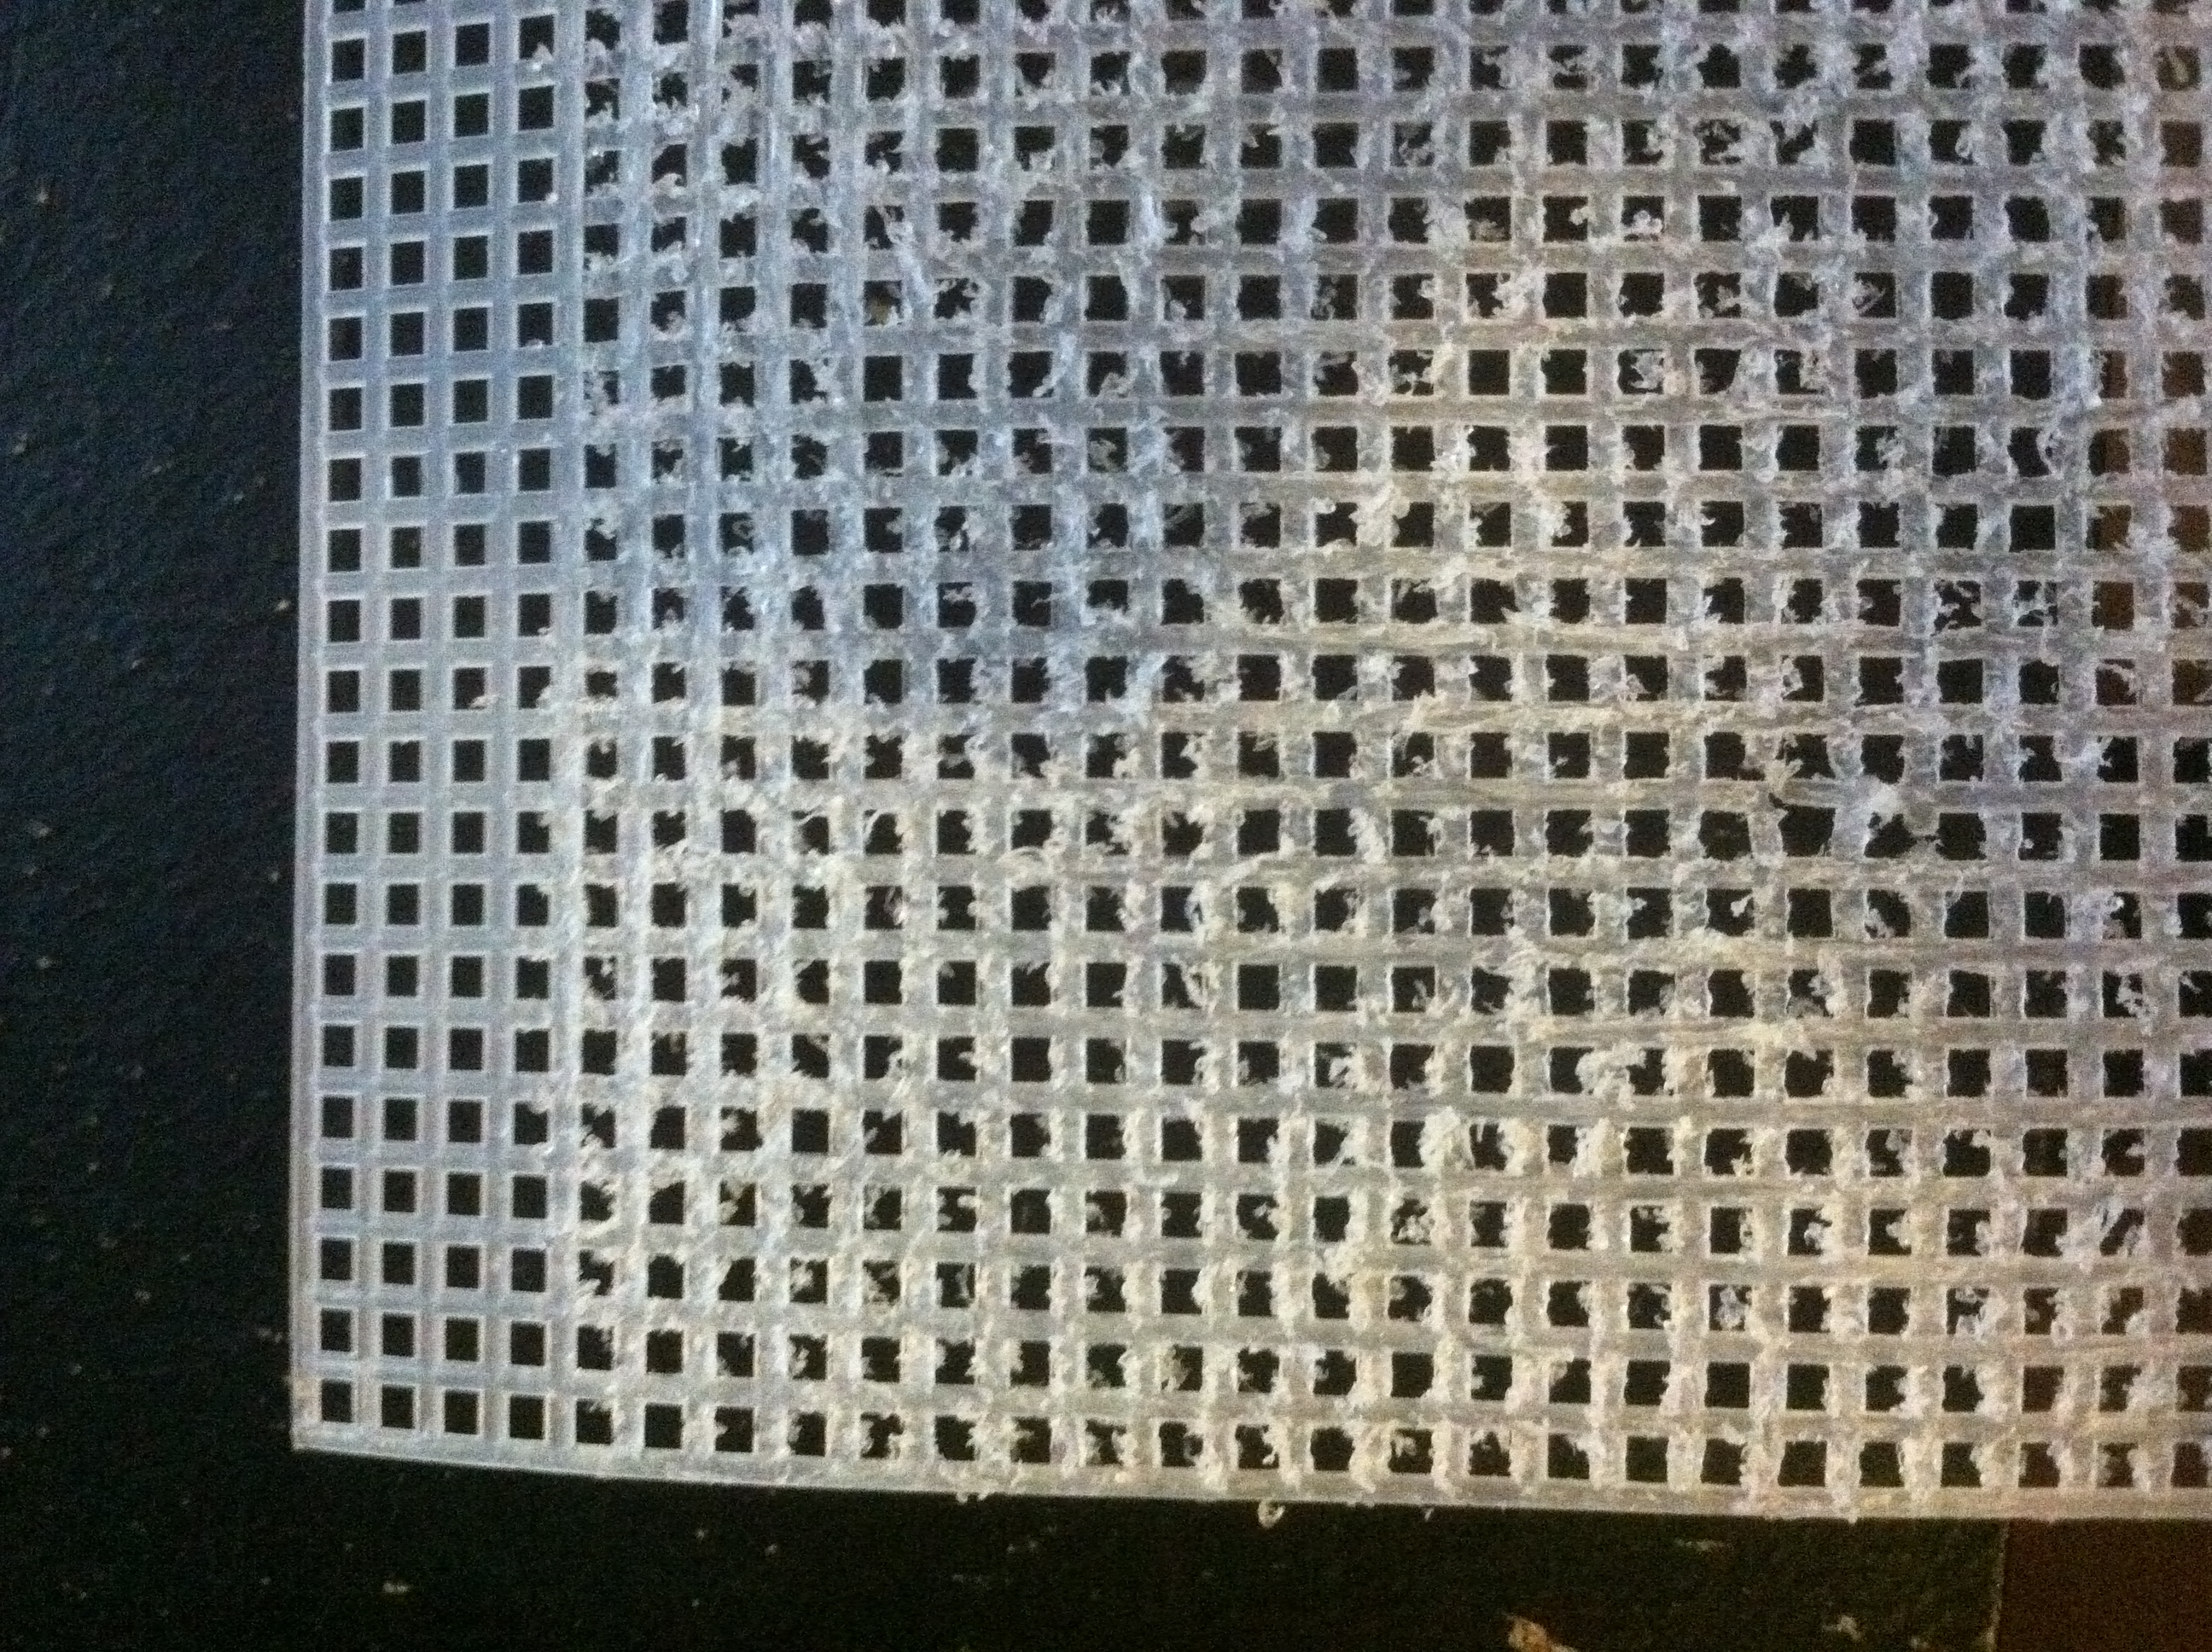
Gather all of your parts and pieces. The plastic canvas screen can be obtained from your local Wal-Mart or Fabric Store. It's used for creating yarn pictures. A pack generally costs $2.50. You'll need only one to two screens, depending on the size of your scrubber.
[*]
Rough up your plastic canvas screen on both sides using a hole saw bit. I personally drag it side to side first, then up and down, then in circles. This gives me the most rough surface, with the least amount of work. For a 12x12” screen to be roughed up on both sides, it takes approximately one hour. The screen should be cactus like.
[*]
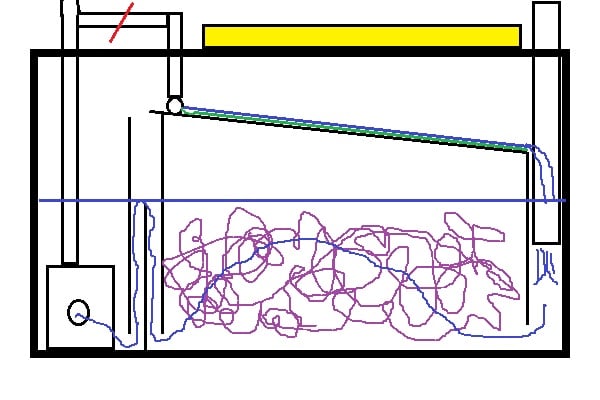
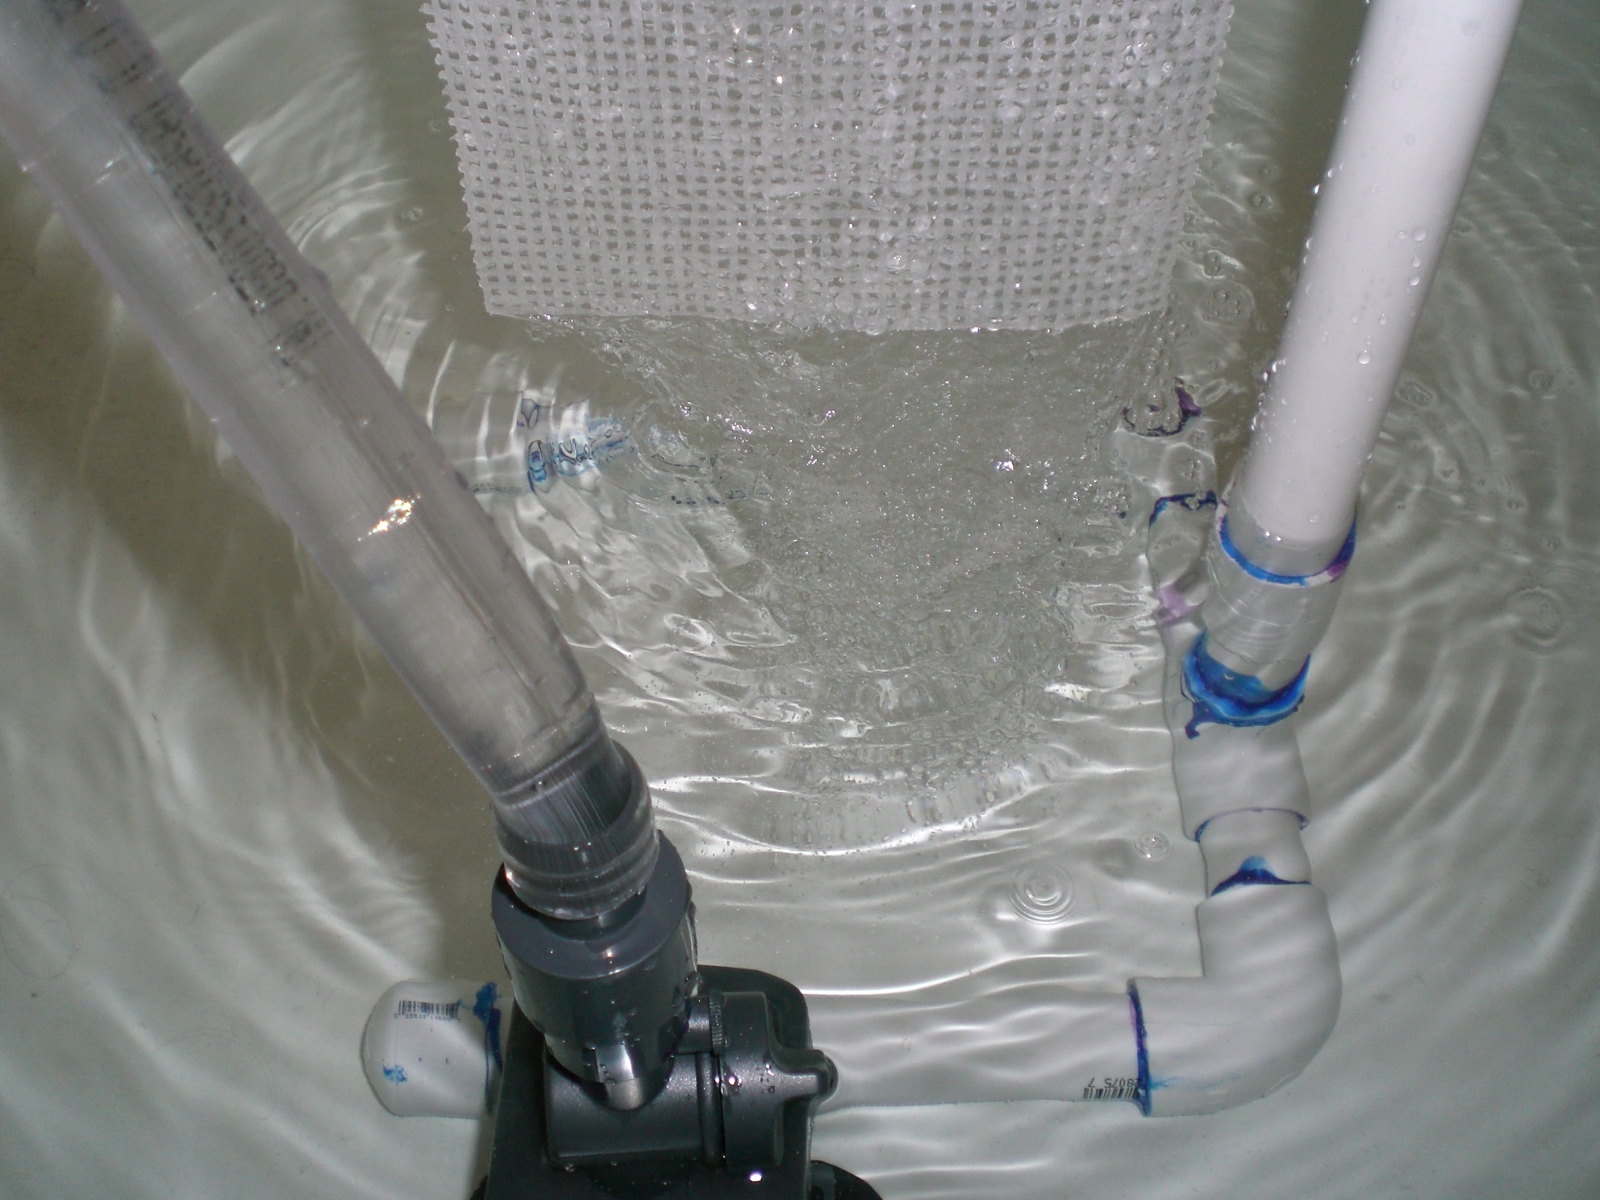
Take measurements from your sump. The inside width and length of the chamber you are putting the scrubber in, and the height of the water in that chamber. Decide how big your screen will be, and add that additional height to the design. Your screen should dip into the water 1/2”. The water from the screen should not splash into the sump, but gently flow off.
[*]
Cut a piece of PVC that is a few inches longer than the horizontal length of your screen, with a hack saw and then cut a 1/8” slot in it with a table saw. Be very careful of this step. Be aware that you are using a very dangerous piece of equipment, and you should take every precaution possible to be safe with it. I am not going to discuss how to cut the slot.
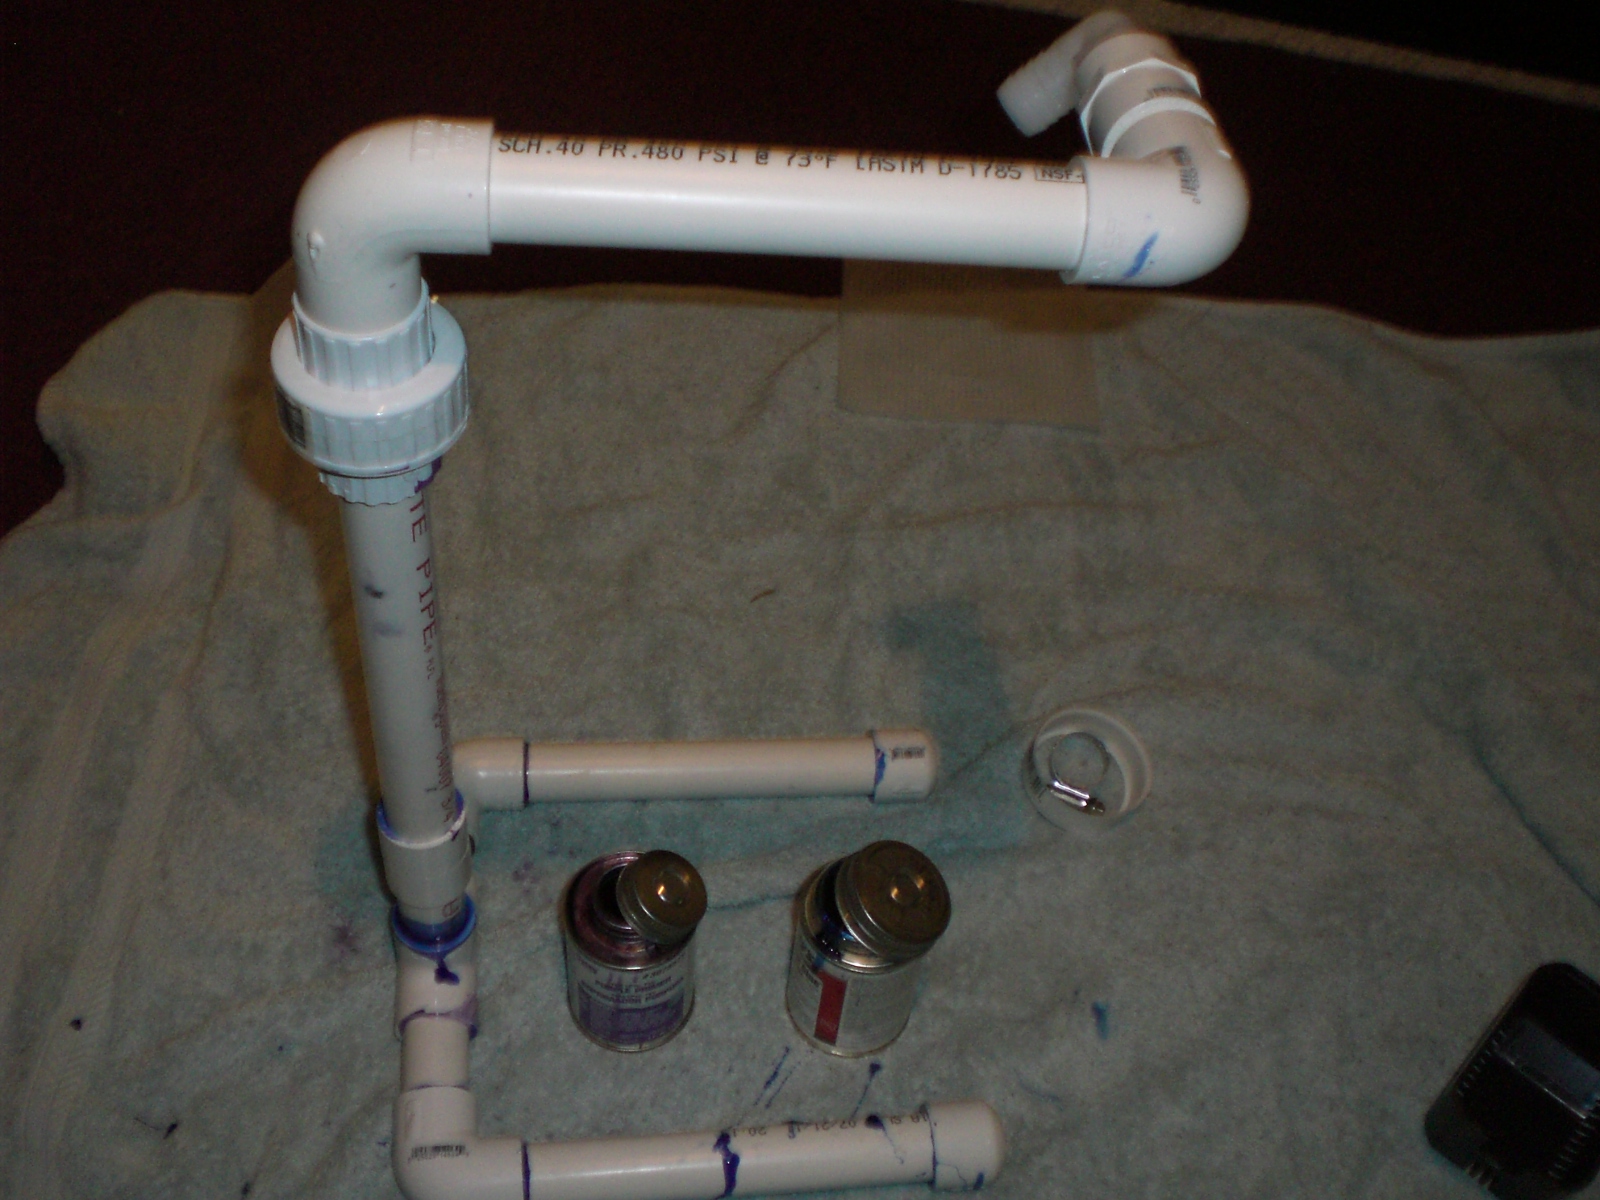
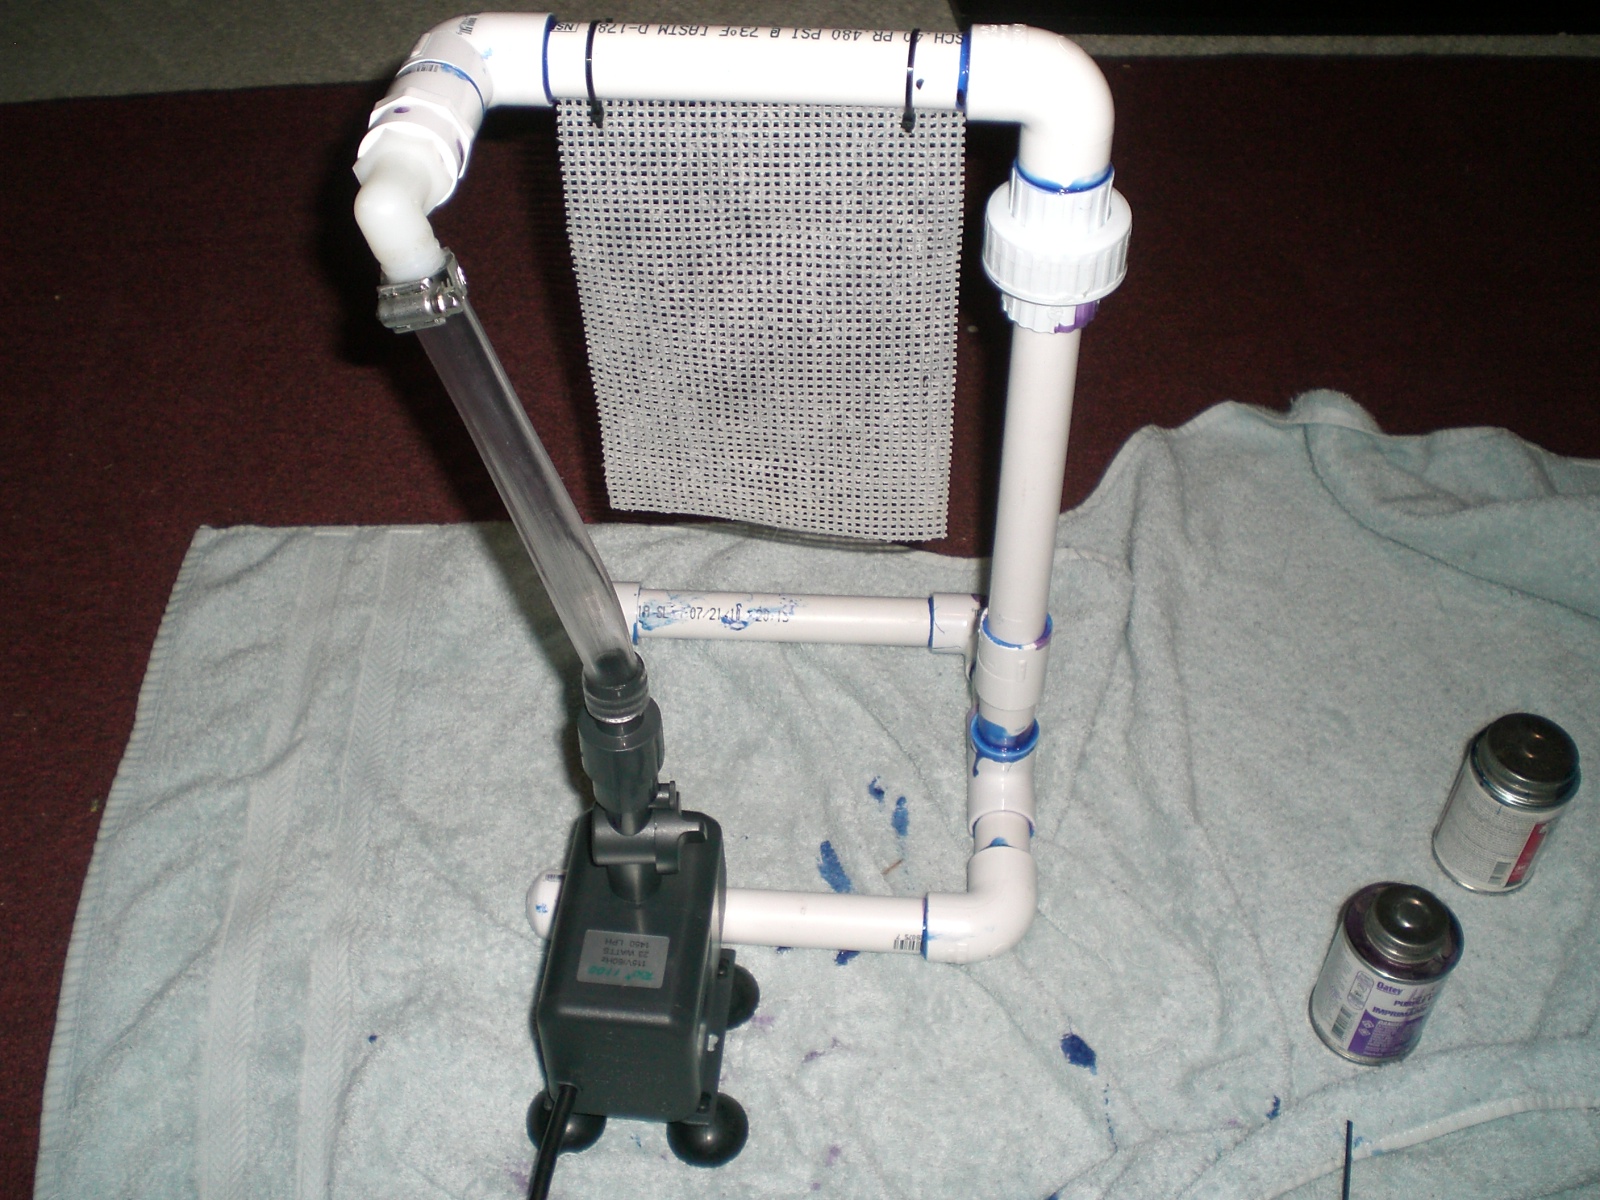
Push in a 90d elbow on one side of the slot. Push your plastic canvas screen into the slot and zip tie it through the holes.
Put your other elbow up to the slotted PVC and mark it where your elbow will push in, but not crowd the screen. Cut the slotted PVC to fit, and push in the elbow joint to make sure you have the correct fit.
Proceed with the rest of the design. Use a 3/4” union to remove the top of the algae scrubber.
: 0in; font-weight: normal;">
Once you dry fit all of the PVC, clean the joints and cement everything into place.
[*]
Attach your vinyl hose to the adapter and use a hose clamp to keep it on. Attach your pump with the ball valve next.
[*]
Take your new scrubber into the bathroom and place it in the tub. Run some water, enough to cover the pump to test it.
[*]
Make sure that the water coming off of the bottom of the screen is uniform, and like a sheet of water. This ensures that your screen is getting enough water on both sides.
[*]
Empty the bathwater out of the scrubber, to make sure that chlorine doesn't get into your aquarium.
Install it in your sump.
Install your CFL lights no further than 4” away from the screen. Your CFL lights should be siliconed into the sockets, and the back of the sockets should be siliconed in to prevent any saltwater from getting into the socket. This step is essential for the safety of you, your tank, and your family. Electricity and water don't mix.
Put your lights on a timer, and turn them on for 16 hours a day, off 8 hours a day, generally on an opposite lighting schedule than your display tank. Make sure your timer is plugged into a GFCI outlet.
In sump algae scrubbers are built a bit differently than scrubbers that are built in Plastic Totes. The same general rule of thumb applies, however. You have to have flow down a screen, the screen has to be very well lit, the bulbs must be siliconed into the sockets. Reflectors should be used with all algae scrubber light bulbs. The amount of screen you should use is the same. The only thing different is that it doesn't have to support itself, the tote can hold up the slotted PVC.
Algae scrubbers have their place in saltwater (and freshwater) aquaria. It's definitely something to consider adding to any system, either as a replacement to a skimmer, or in conjunction with a skimmer.
There are different thing you have to look out for, when dealing with an algae scrubber. Maintenance on an algae scrubber, and all of the basics of an algae scrubber can be found on Snake's Methods for Algae Scrubber Basics.
Pics will be added to this thread as necessary!

