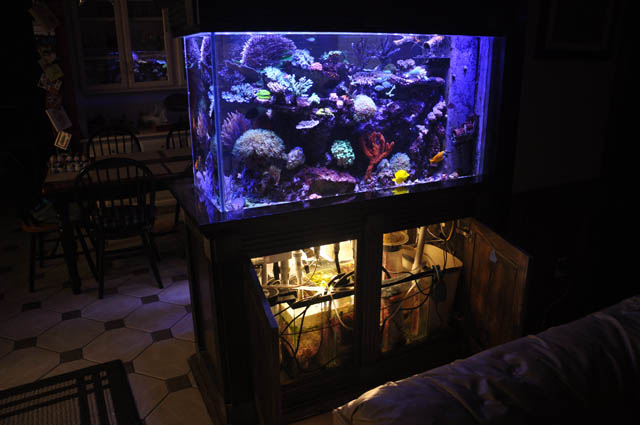
Snake's Official 110g Build Thread

snakeblitz33

Well-Known Member
Ah, isn't this exciting? A new reef tank being born? I talked to my wife about setting up the old 110g tank as soon as she starts teaching... YES... TEACHING! She just got a job! WOOT WOOT. Anyways - now that we will be making more money, I get to have a bigger tank.
She doesn't start teaching till August and I have no idea when I can get some financial backing for it - but I know for a fact that I am going to get it set up and running as soon as possible.
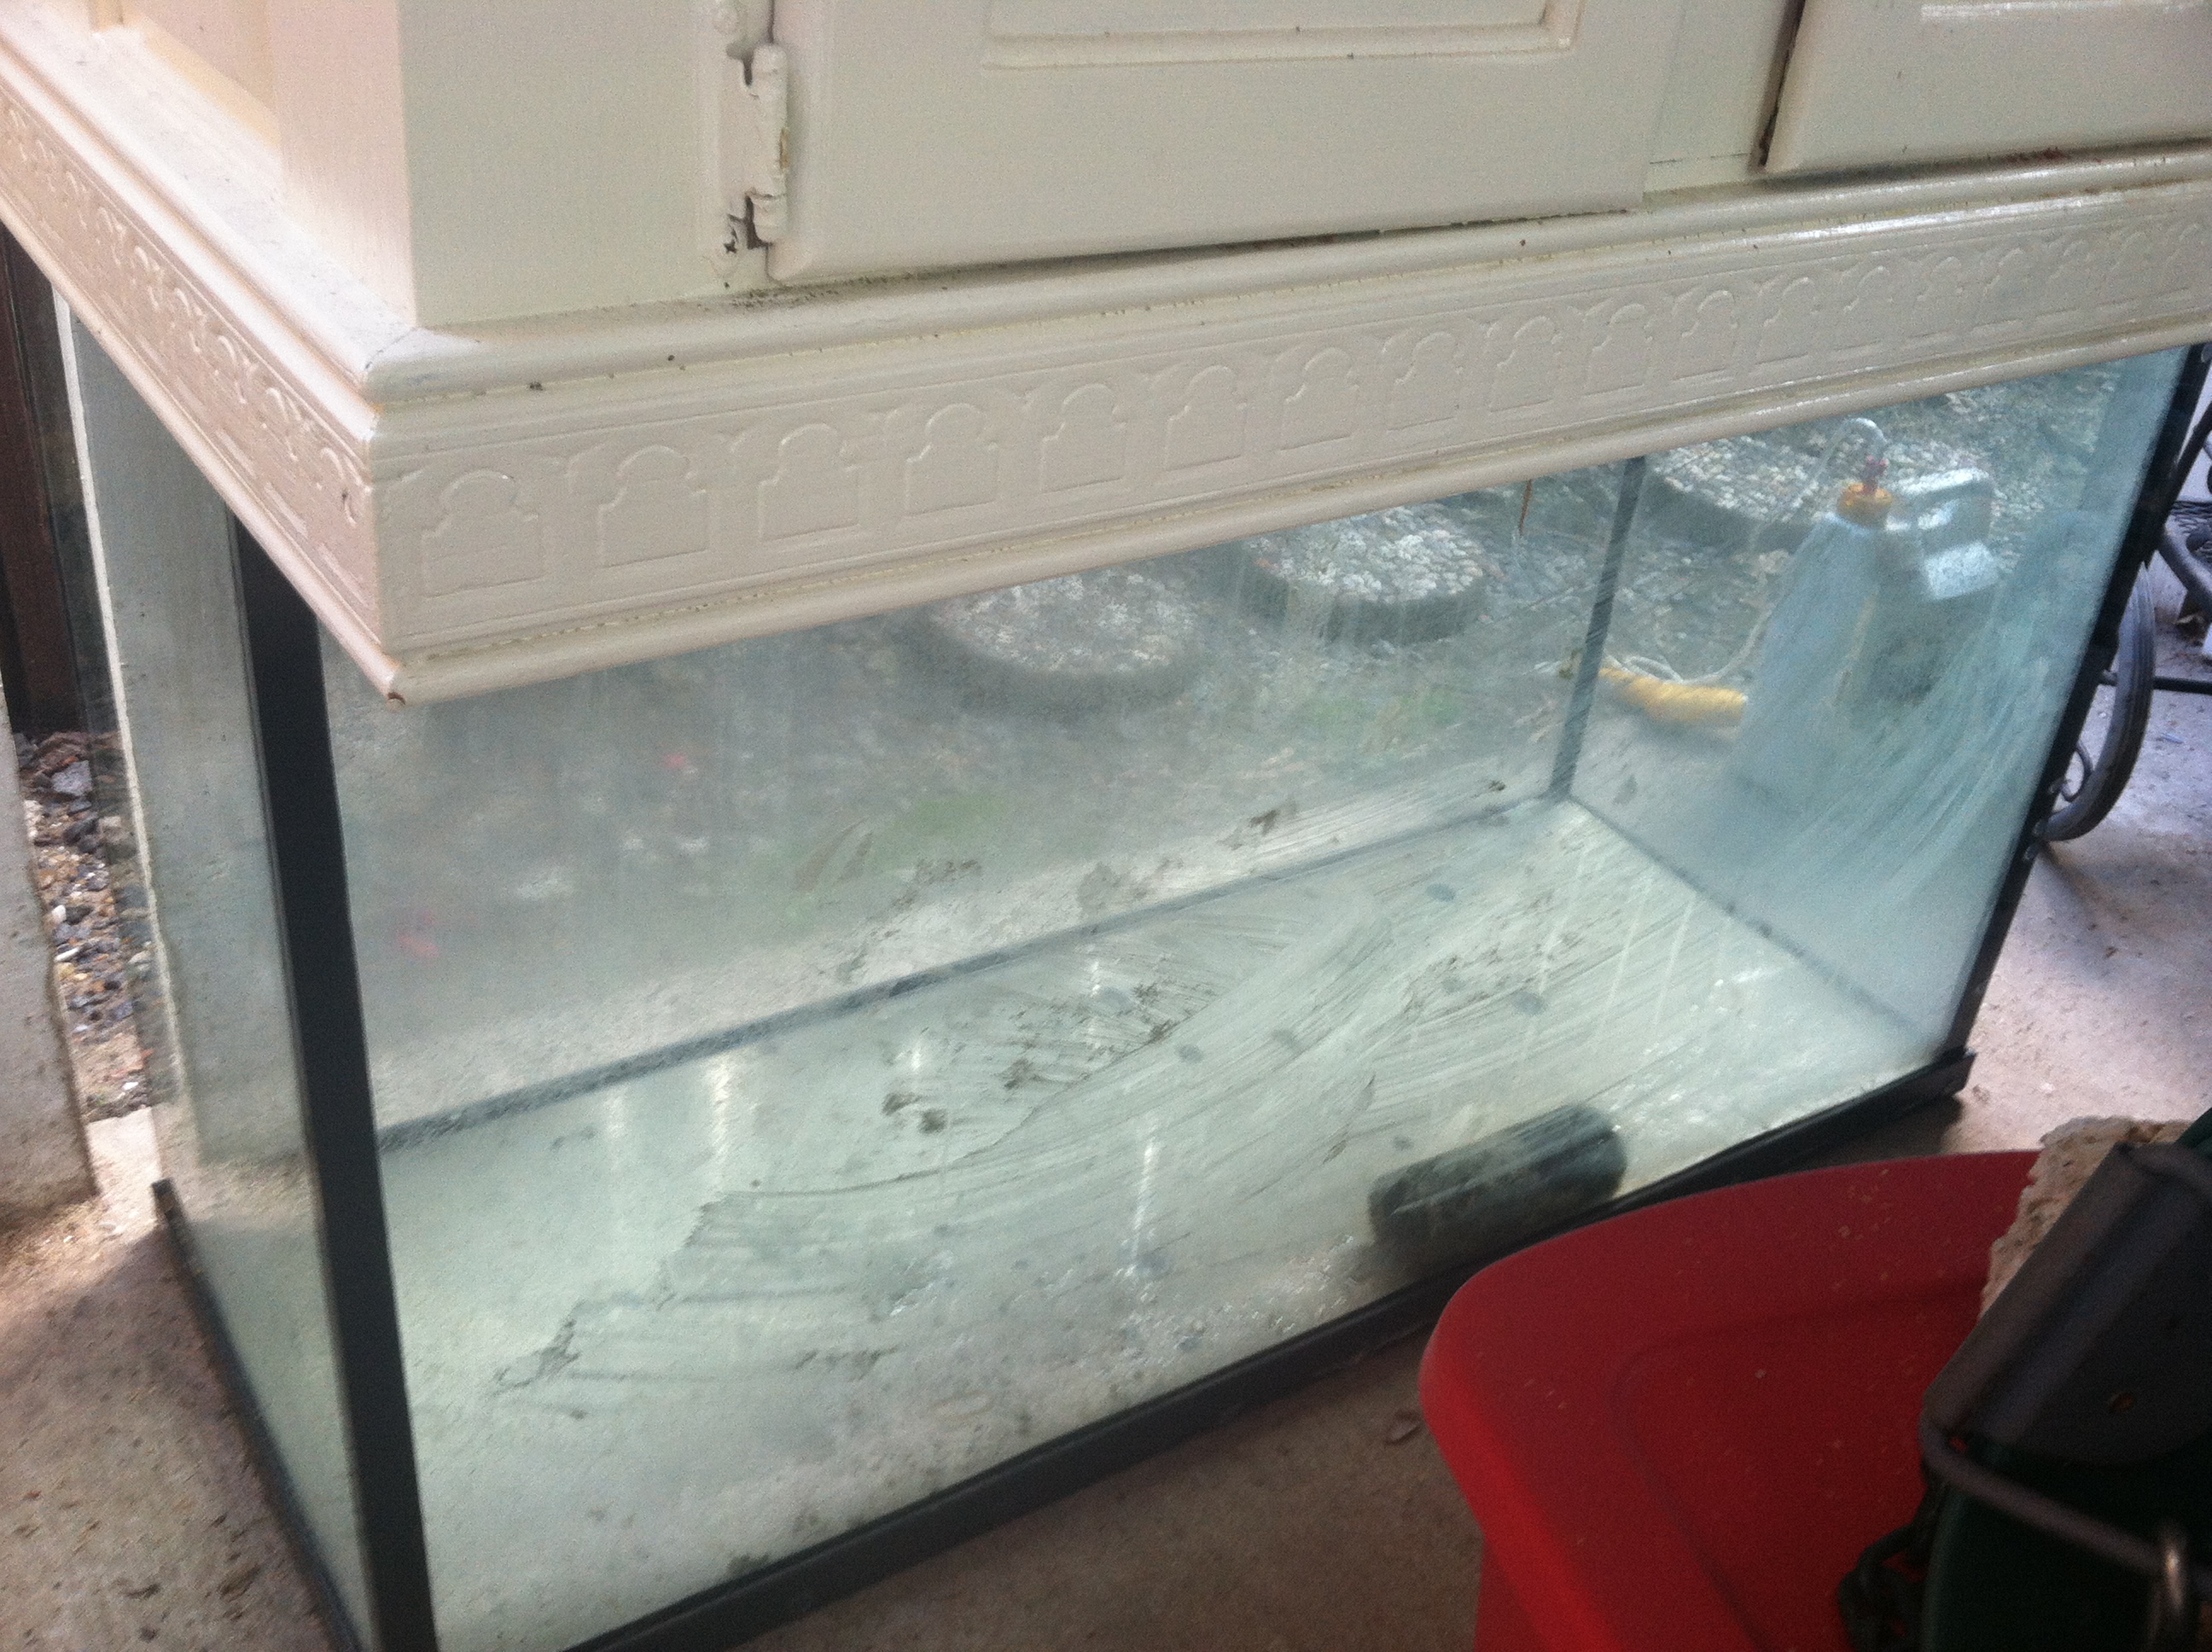
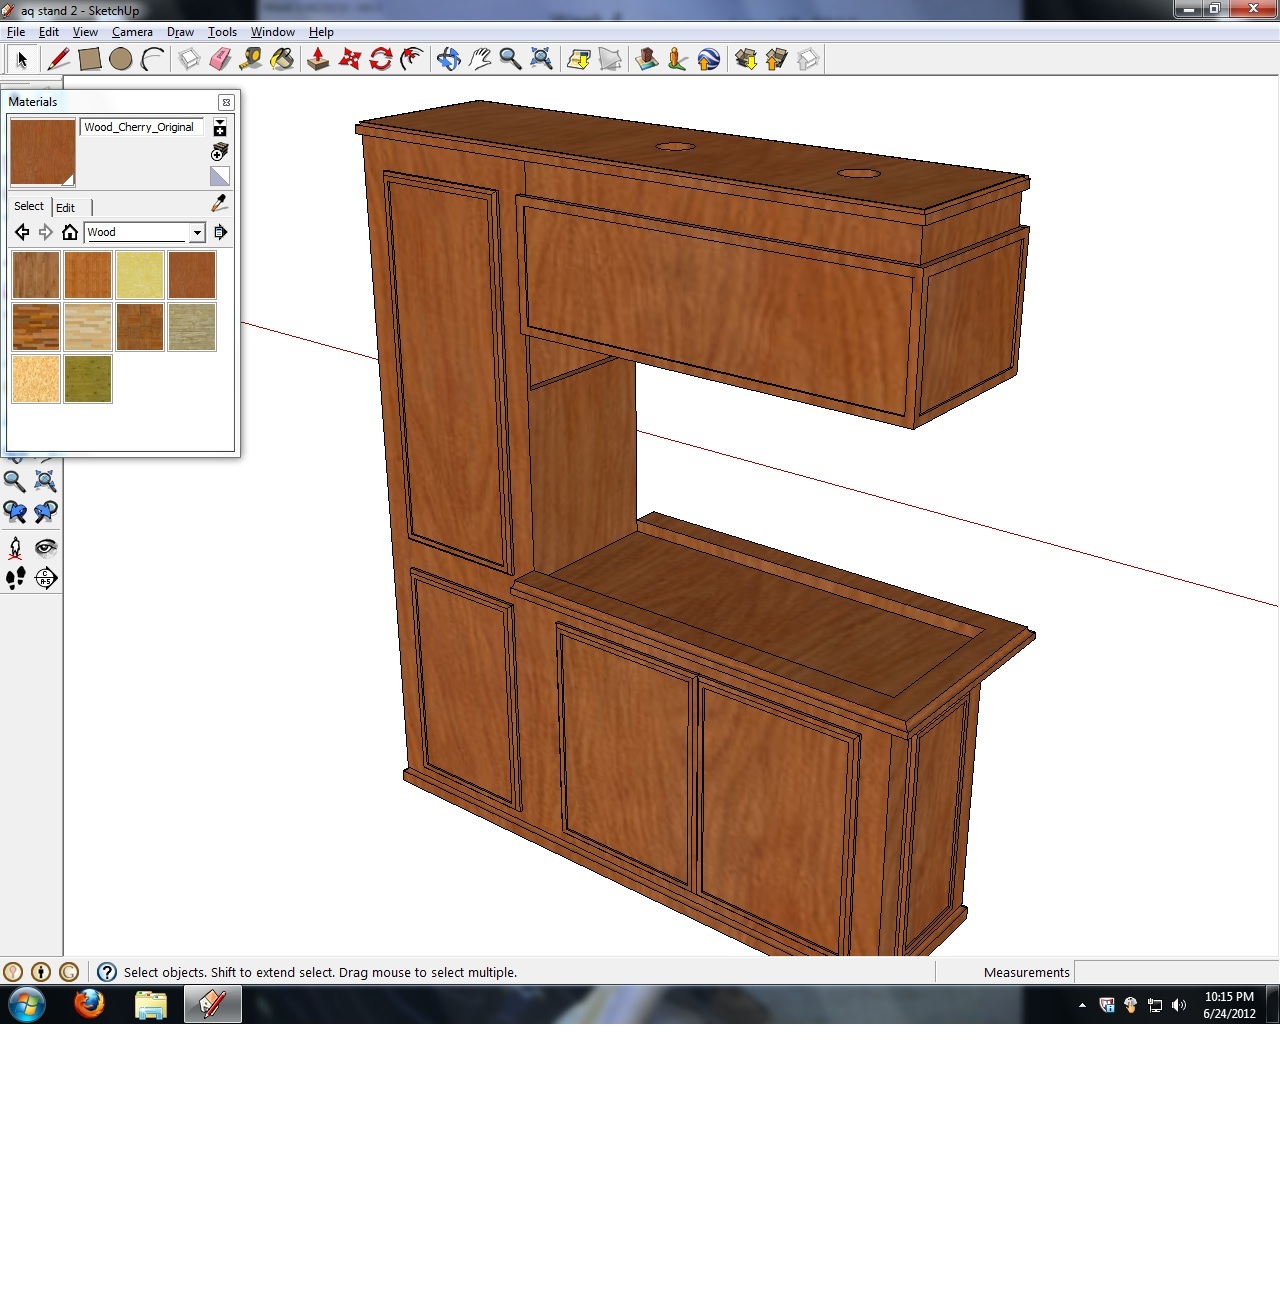
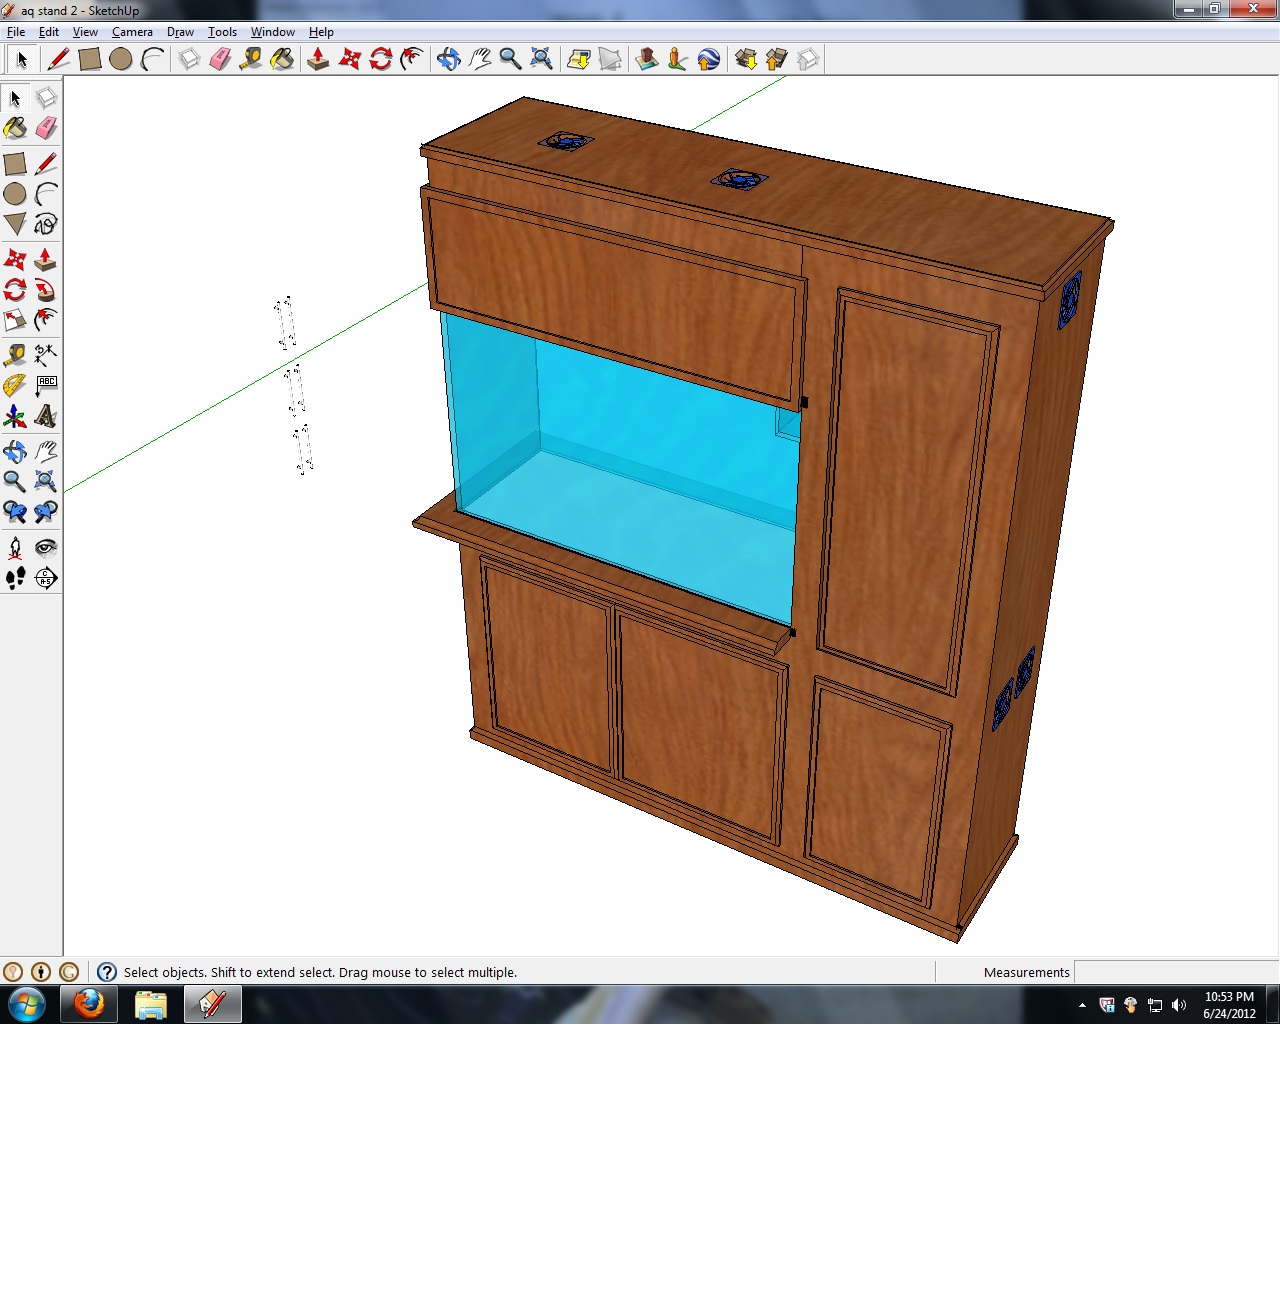
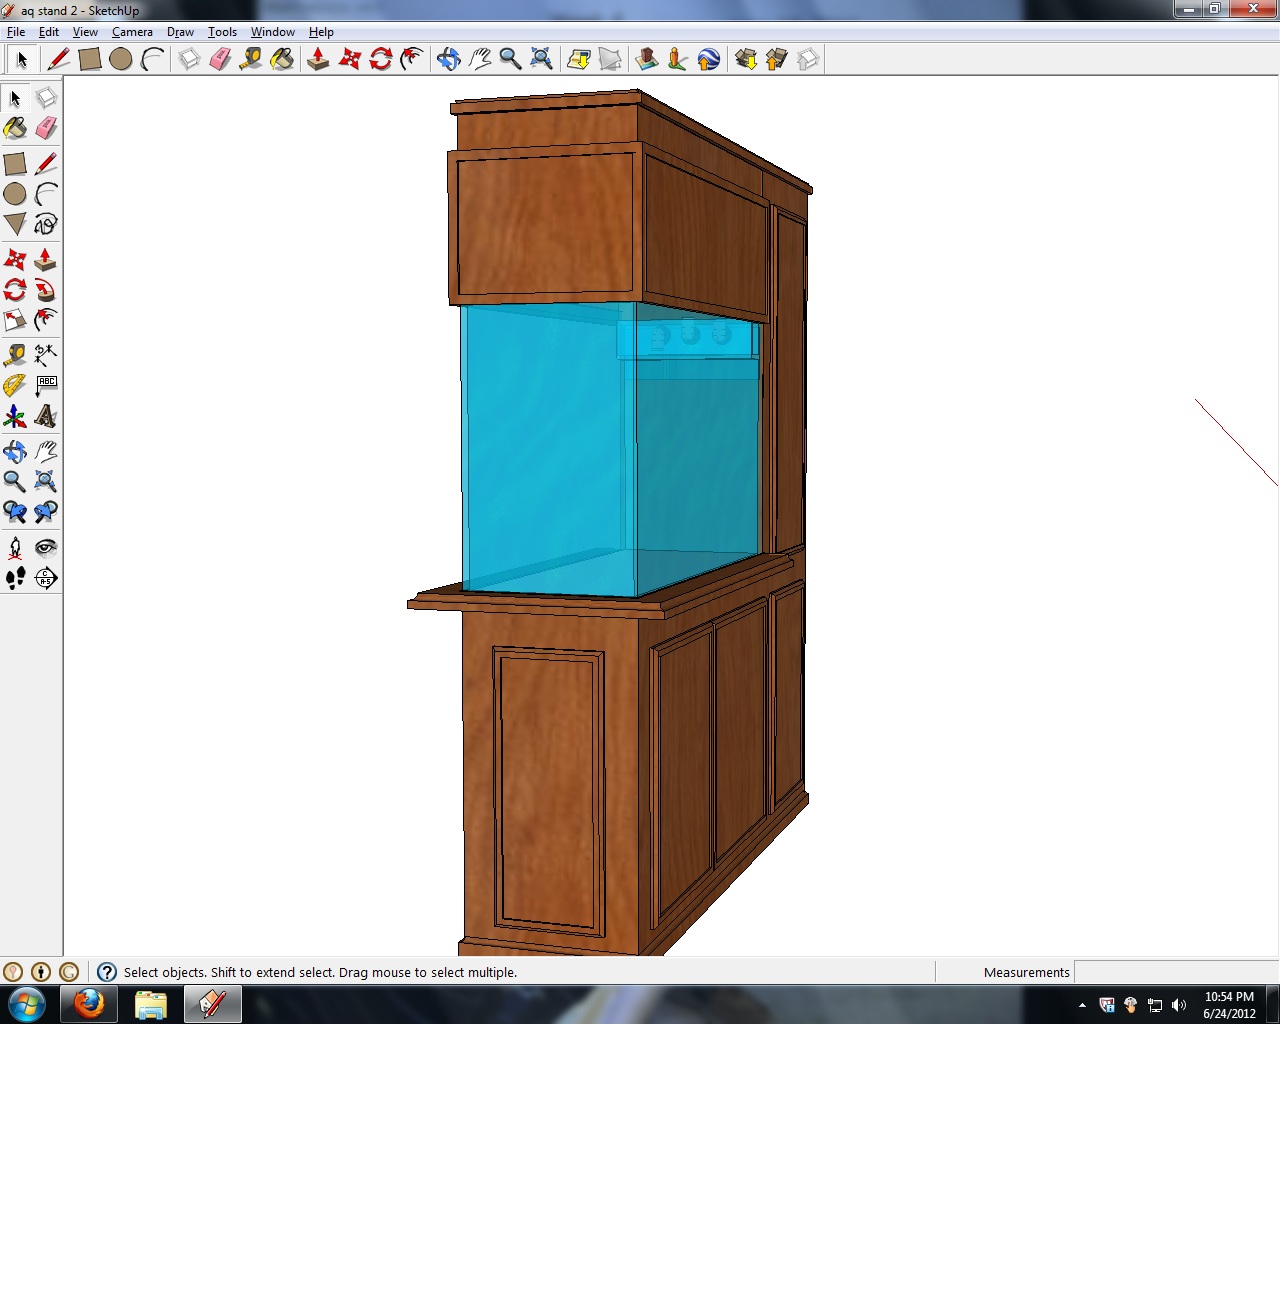
Therefore, here are a few pics of the tank and something I made in Google Sketchup. Please, realize that I have only had the program and toyed around with it for the last two days and no more.
Breakdown:
110g show tank
Custom 20g sump
Bean-Animal overflow
10g refugium with 4" deep sand bed, live rock rubble and chaetomorpha algae
Octopus cone skimmer (not decided which one yet)
Instant Ocean salt
Used Calcium Reactor
Water container for extra water volume and used for water changes.
Mag 9 return pump
UAS (Underwater/Upflow Algae Scrubber on the side of the refugium
2x200w heaters - titanium
Profilux 2 controller
Either a DIY LED fixture or just wait to buy a couple of those chinese led fixtures. :p
Auto Top Off unit - also has float valve on the RO Reservoir to continuously top it off. No more worrying about putting water in the tank. :D
2 Vortech MP40s
2" sandbed with course sand (Keeps it from blowing around with those vortechs)
Stand:
Peninsula style stand
Door open light
5 fans on Temp controller
Floating wooden top
Sealed bottom
36" tall
Side cabinet is 7'6" tall.
Electrical panel on switches to easily turn off components that are not connected to the Profilux 2 controller.
Polyurethaned ******** and exterior.
Stocklist:
Suggestions?
I'm thinking about this:
Mimic tang
Yellow tang
bicolor blennie
yellow and black chromis (schooling)
Oscellaris pair
mandarin dragonet
Wrasse of some sort
Yup - that's pretty much it. Or - if I can save a little money I might be able to buy some of the cool fish on Divers Den. :D
Corals:
Lots of SPS at the top of the tank
LPS like hammers, frogspawn and acans in the middle
Zoas, green star polyps, tube anemone, colt/kenya/nepthea, orange sun coral at bottom level.
Yeah, kind of a mixed tank. I know how some people say don't mix SPS with other types of corals, but I have done this successfully with a lot of carbon. lol
Inverts:
Peppermint shrimp 2-3
Cleaner shrimp pair
cucumber
conch
cleaner clams
nassarious snails
zebra snails
nerite snails
turbo snails
 

snakeblitz33

Well-Known Member

As it sits now on the back patio.
The canopy will not be used on the new tank. Trim is way too girly and the access to the tank is severely limited. It's also very heavy.
 

snakeblitz33

Well-Known Member

Quick rendering of just the stand. So far, I like the design. The cabinet to the side of the tank will house my electrical work and my water change system. The canopy is fully accessable - in-fact, I bet I could just about climb into and out of the tank if I need to. .. this comes in very handy with maintenance. The tank itself is recessed down onto the floating wooden top where the trim won't show on either the top or bottom.
The two holes in the top of the canopy are for fans. The fans will blow directly down onto my halides OR those cheap Chinese LED units.
 

snakeblitz33

Well-Known Member

If you notice, I already put in the beananimal overflow in the background, but I am going to tweak it some. On both ends, I'm going to come in with it a little bit so that I can fit a couple of return pipes. OR, I could spend the extra money and buy a couple of sea swirls. I don't know if they are worth the money. Anyone?
Keep in mind, I've only been playing with google Sketchup for two days - so go lightly on me.
Thoughts or comments on the stand?
 

snakeblitz33

Well-Known Member
Yeah, like I said in the beginning - it's going to be a long road and a slow build. Probably not as long as 2Quills though. lol I figure I might have to build the stand in place, or build it in two pieces - the canopy and top cabinet for one and then the lower cabinet. That way I don't have to cut the stand to get it out of the next apartment we move into before we get a house.
 

novahobbies

Well-Known Member
Looks like a great start!
I need to learn sketchup. I do all my plans in CorelDraw...hardly what it was meant for, but it works for figuring out angles and measurements.
 

snakeblitz33

Well-Known Member
Thanks nova. Any suggestions ? Anything i might need to move?
If you use the free version of sketchup, you still have access to all the models. Here's what i did:
I downloaded it. I clicked on the "help" button and it takes you to their youtube channel. I watched all four videos twice and paid attention to it. I paused it and tried it out myself. Then the next day i took time to make the stand that i just posted pics of. Took me about two hours to do that, 4 hours total from learning to doing. Main thing is after you wath the videos and trying their techniques its just a matter of playing around with the program.
I am not an expert at it by any means but i am proud of myself for doing what i did.
Gardening season is almost over here in louisiana. When temps constantly go above 100f the plants start to wilt regardless of how much theyve been watered. Im going to spend some time breaking down my 4x16 garden in front of my apartment and start cleaning up the family garden(36x70) for cold crops. Ill have a lull in between to do some work on the tank and make four holes on the side.
 

sweatervest13

Active Member
Alright the 110g is back on!! Sweet!!
Looking good so far. Nice job on the sketches. Can't wait to see this baby filled up and some nice coral in there.
 

snakeblitz33

Well-Known Member
Quote:
Originally Posted by sweatervest13 http:///t/392103/snakes-official-110g-build-thread#post_3480046
Alright the 110g is back on!! Sweet!!
Looking good so far. Nice job on the sketches. Can't wait to see this baby filled up and some nice coral in there.
YEAH! I'm really excited too - it's finally coming true!
Thank you very much. Thank for saying nice job... It was my first real sketch and I've only played with the program for about 4 hours. lol. I can't wait to get it up and going either If I could, I would start building my stand TODAY! But, unfortunately, money is really tight right now.
 

snakeblitz33

Well-Known Member
The "Easy" water change system
So, I hate doing water changes - dragging out the hoses and carrying 5g of saltwater to the toilet or to a designated spot in the backyard. I'm all about being easy - because when it comes to maintenance I have to make sure that every minute I spend on my tank counts. This is how I thought of the "Easy" water change system.
It starts with a modified food grade tall plastic container. I picked one out online that is roughly 30g. It is modified with a bulkhead in the bottom and has a standpipe coming up to about the 25g mark. On the tank, I will calculate by the dimensions how much water is 25g from the top and I also will measure out 55g from the top for a 50% water change. With me so far?
The 110g tank will have a hole drilled at the 55g mark and fitted for a 3/4" bulkhead. This is the "water change port." There is an external pump on the water container. This external pump will pump water anywhere I need it to go and will also be used for mixing new saltwater inside the container. The container will have an automatic top off unit on it. The auto top off unit will sit in a small water container that has a float valve on it. To drain the water container, I remove the standpipe then, I simply turn the automatic top off unit "off" to prevent salinity from droping, and then I turn a ball valve at the bottom of the container on to drain into the sump while the return pump is on, filling the tank back up.
To get water out of the display tank, I use the water change port on the side of the tank. The port is connected to a water hose that drains the water to the toilet or sink or outside in a designated spot by gravity. Once I get to the 25g mark on the tank, I turn the ball valve on the water change port on the side of the tank off, drain the water from the container into the sump and turn my return pump back on, which pushes saltwater back into the display tank. Once the water change container is empty, I turn the ball valve off, replace the stand pipe and turn the auto top off unit back on. My RO unit will make enough water over the course of the day to fill the container back up. Then salt is mixed with the freshwater in the container to the right salinity with the external pump. I then test the water for the correct calcium, alkalinity and magnesium levels and adjust as needed. Then, I turn the ball valve back on and use some of the return pump power to push water to the container and the display tank.
What this means is:
1. No more carrying 5g buckets of water to and from the house, toilet, etc.
2. You can mix your saltwater up and test your water before you add it to the system (which you should do anyway)
3. You don't have to manually fill the container ever - the auto top off unit does that for you.
4. You can hook a gravel siphon to the water change port on the tank and clean your substrate and suck detritus off your rocks
5. OR you can stir up all the detritus in the tank with a powerhead to get it suspend in the water column and then turn the water change port on to drain it out of the tank.
6. You can SLOWLY add new saltwater to the system - and if you notice any small changes in the livestock, you can cut the water container off in case you get a bad salt mix, you can limit the amount of damage to your tank.
7. If you want to do water changes that is half your water volume, you simply get a bigger water container.
 

snakeblitz33

Well-Known Member
So, what really inspired my new build and got my mind going? This:

I would give the name of the guy that did this tank, but for some reason RC isn't loading on my computer. Once it does work, I will edit this with the guys name and month it was TOTM.
I just absolutely love the peninsula style tanks for some reason. I've never had one before, so it will be a new challenge.
 

snakeblitz33

Well-Known Member
By the way - I'm thinking about sump sizes and what will work for my tank. The stand will be six foot long total... I am thinking about buying a 55g and putting the end of it where the bean animal overflow goes straight down into the first mechanical filtration chamber. What do you guys think?
 

sweatervest13

Active Member
Quote:
Originally Posted by SnakeBlitz33 http:///t/392103/snakes-official-110g-build-thread#post_3480131
By the way - I'm thinking about sump sizes and what will work for my tank. The stand will be six foot long total... I am thinking about buying a 55g and putting the end of it where the bean animal overflow goes straight down into the first mechanical filtration chamber. What do you guys think?
Will a 55g fit under the stand?? I would think it would be tight but it should fit if you have a removable center brace. Right?? I love a big sump!!
I did not catch if the stand will have doors on each side of the tank?? I think you are going to make a lot of people jealous if you do, that would make getting to the back side of the sump super easy.
 

snakeblitz33

Well-Known Member
Yes. The way i am building the stand i will have room for a 55g sump. Since the 110g tank is 18.5" wide and the bottom stand is 6'x18.5"+
All of the equipment will be placed on both ends of the sump, relatively 1' on each side. This includes a calcium reactor, phosphate reactor, carbon reactor. I am considering using a real kalkwasser stirrer on the tank to balance out the pH being lowered from the calcium reactor.
Yes. Open up from all angles.
 

snakeblitz33

Well-Known Member
Then again, i could build the stand 24" wide and make room for a ten gallon tank that is baffled and contains calcium, alkalinity and magnesium and use my profilux 2 controller for automatic dosing using the balling method. On one end have a 10g tank for the dosing and on the other have a water reservoir for an auto top off unit.
Soo many possibilities at this point. Ill have plenty of time to think about it. Thoughts? Comments? Suggestions?
 

sweatervest13

Active Member
I like the 24" wide.
The more room the better. Once you have it built you will want more room under the tank no matter what. I have seen some pretty crowded sump areas that were begging for some extra room. Heck, I got all the room in the world and I still think mine is a bit crowded.
 

mr. limpid

Active Member
Looks good Seth, aways like a tank you can see from many sides. Is the plan to run the returns up and over to the opposite side and the power head on the covered side?
 

snakeblitz33

Well-Known Member
The sump will have mechanical filtration on one side, the return in the middle and a nice sized fuge area on the other end. Im going to use a small powerheAd to pump water to the fuge. The return plumbing will be ran up the cabinet side and will be split three ways. First split is the water change container which will add an extra 25g to the system. The second and third split will put two returns into the tank.
 

snakeblitz33

Well-Known Member
So, i need help with a decision:
Kalkwasser stirrer and calcium reactor with pH probe controlled by the profilux 2
Or
Balling method with the tripple automatic dosers controlled with the profilux 2 (with the probes)
Decisions, decisions.
A ca reactor adds not only ca and alk, but can also add mg and trace elements but does somewhat decrease pH because of the co2. Kalkwasser reactor adds ca and alk to the tank and also increases pH.
Balling method only doses three main parts and no trace. I could add some kents essentials to make up the trace in between water changes.
 
Top