wahoowa
Member
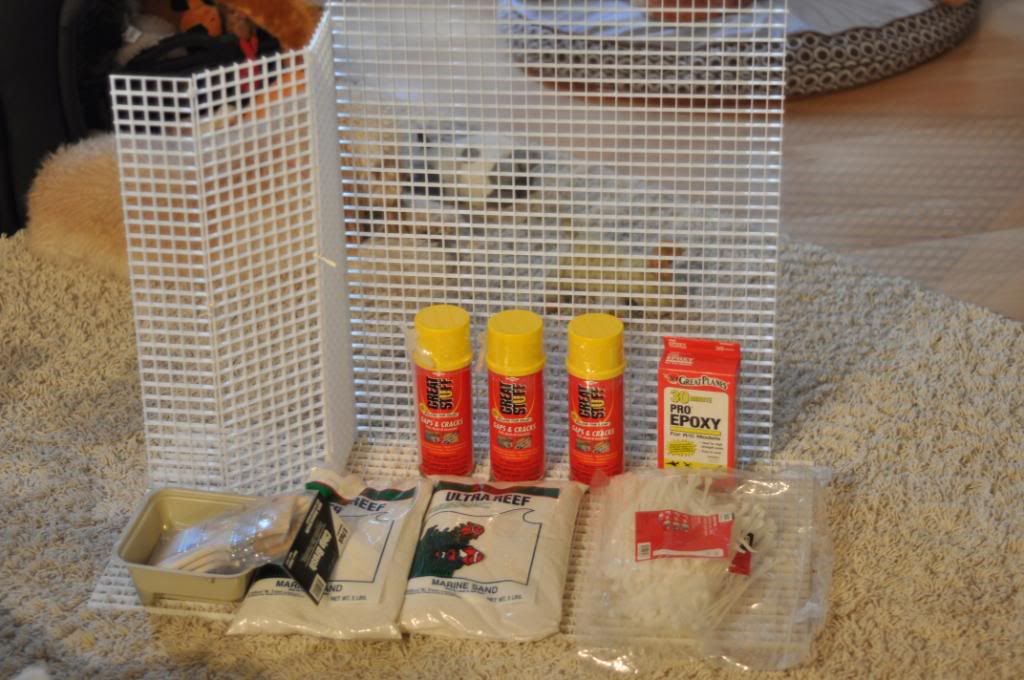
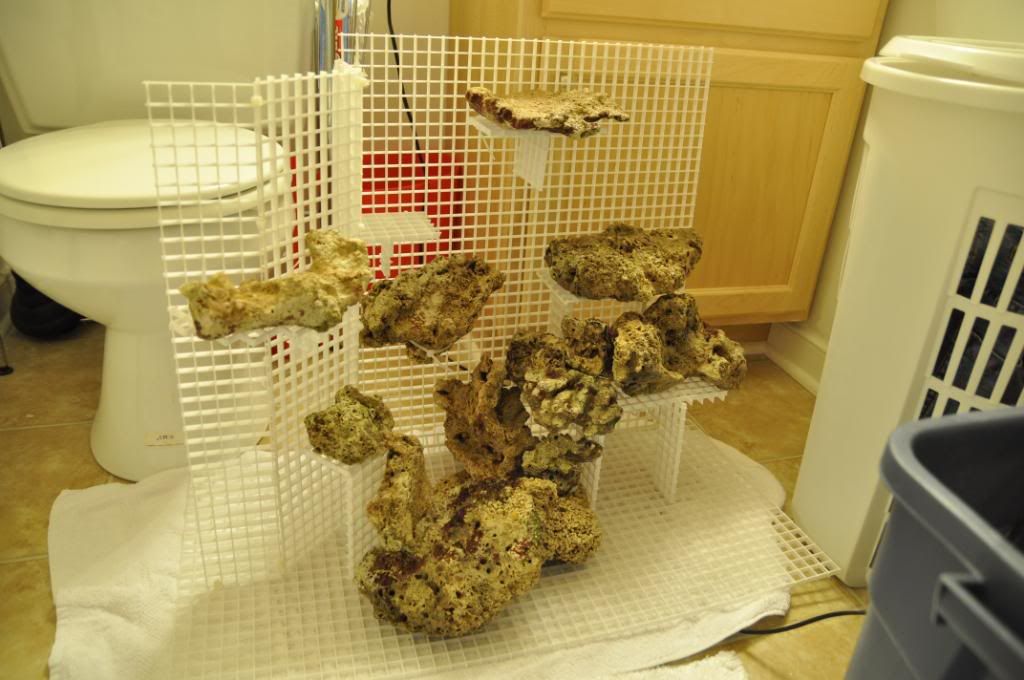
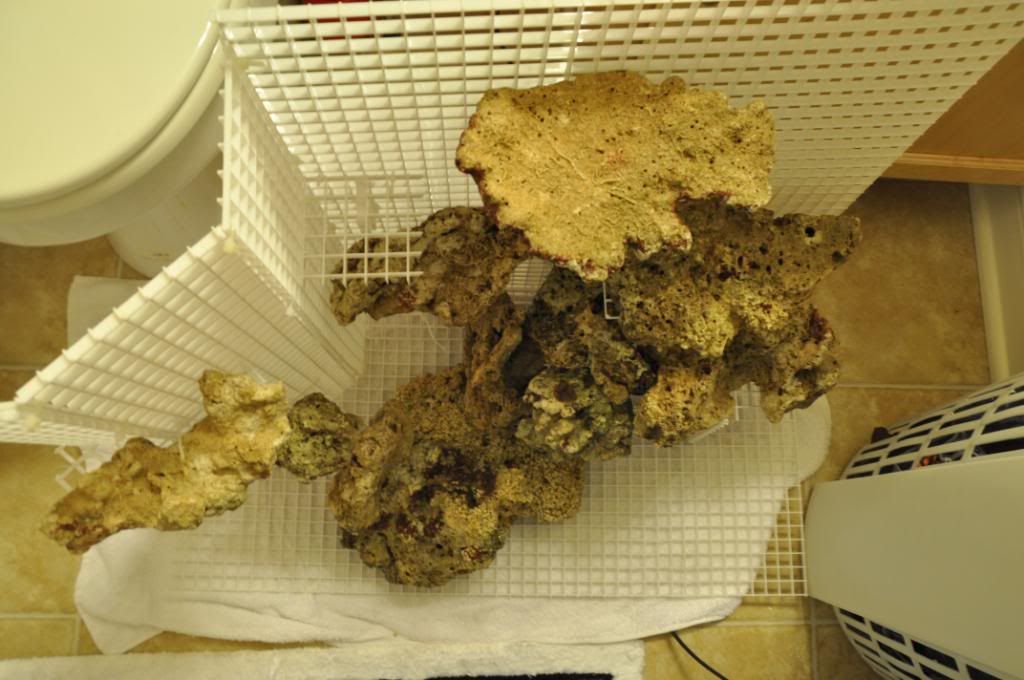
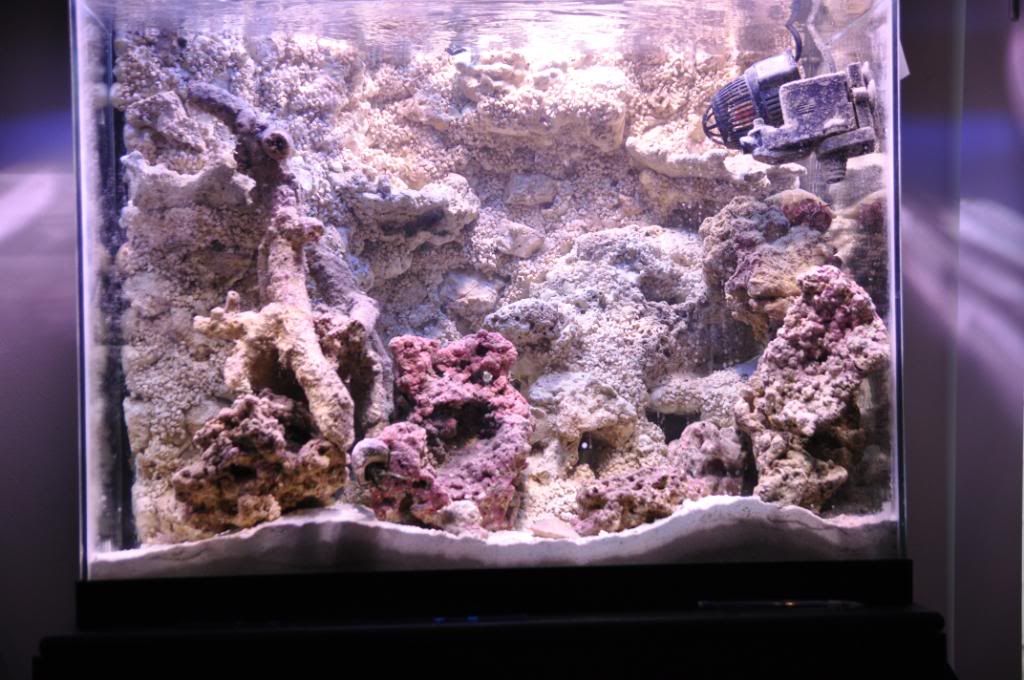
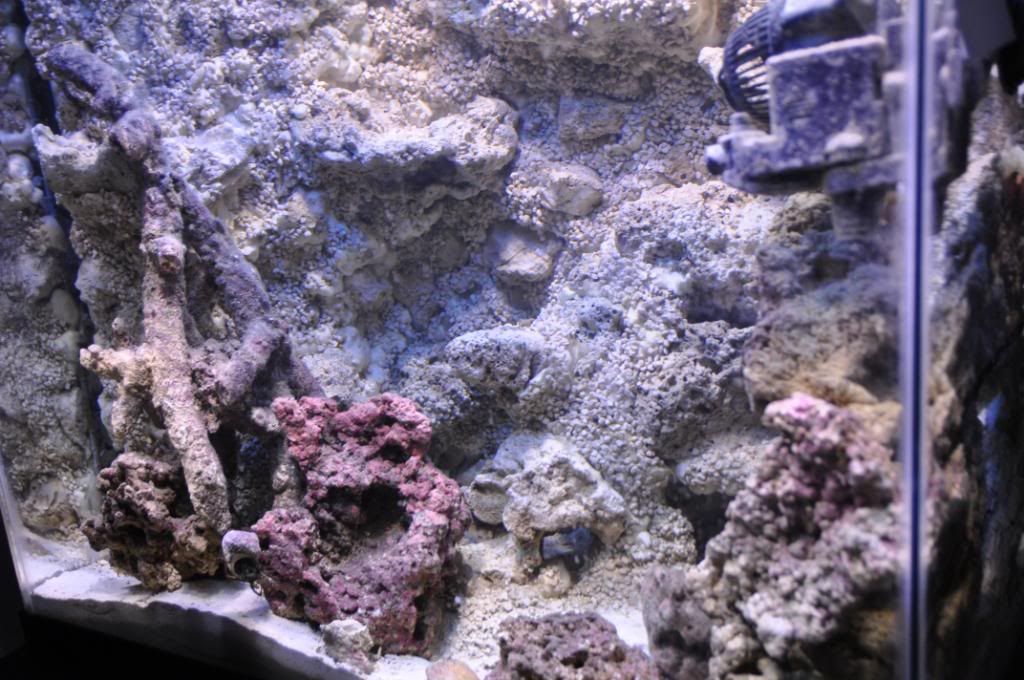
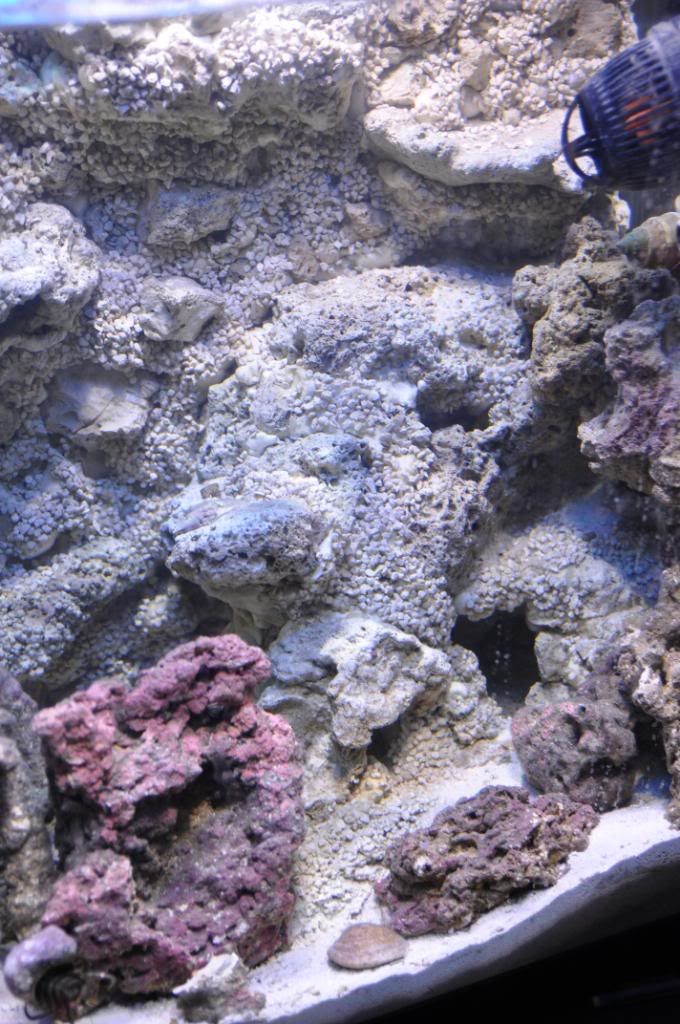
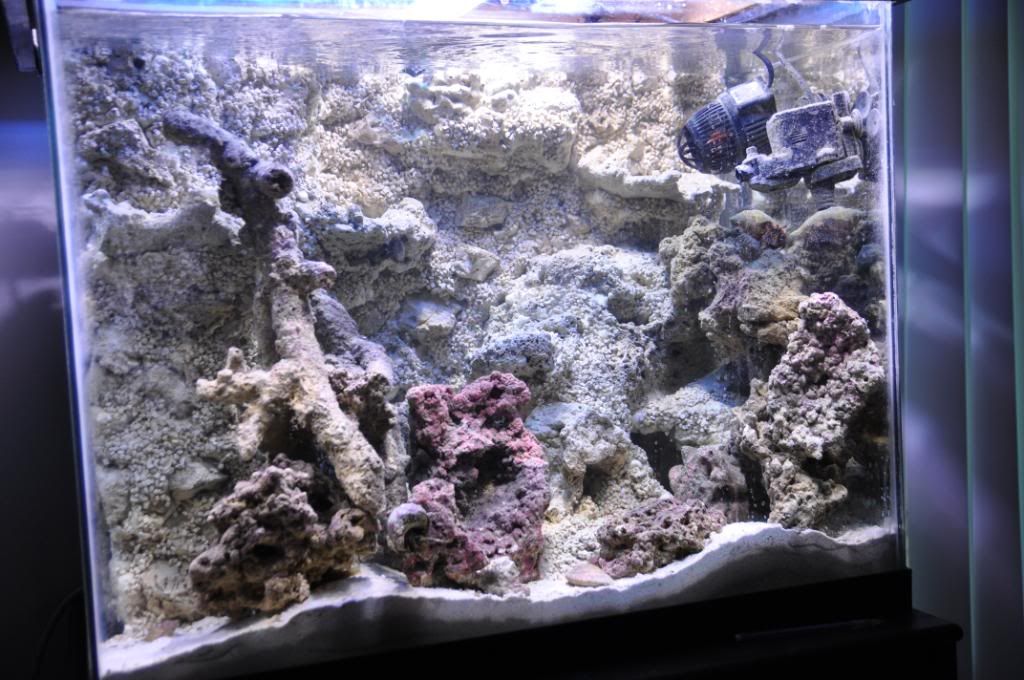
As some of you know, I picked up a reef ready 56 gallon and have have decided to take on the foam rock wall for the background. After the tank stabilizes from the transfer of livestock from my 75, I'm going to be adding corals and hopefully make it a slammin' reef tank. Here are my materials, plans, and cost for peope who might be attempting this in the future. This whole thing needs to be done by the 19th of April, so it should be a pretty fun build.
Setup and Materials:
56 gallon reef ready
Sump and Return
(1) Metal Halide and (2) 22" T5s
Custom Stand and Canopy - ($200 used for entire tank setup)
70lbs. live "lace" rock for back wall - ($50)
$150 lbs Figi - ($80)
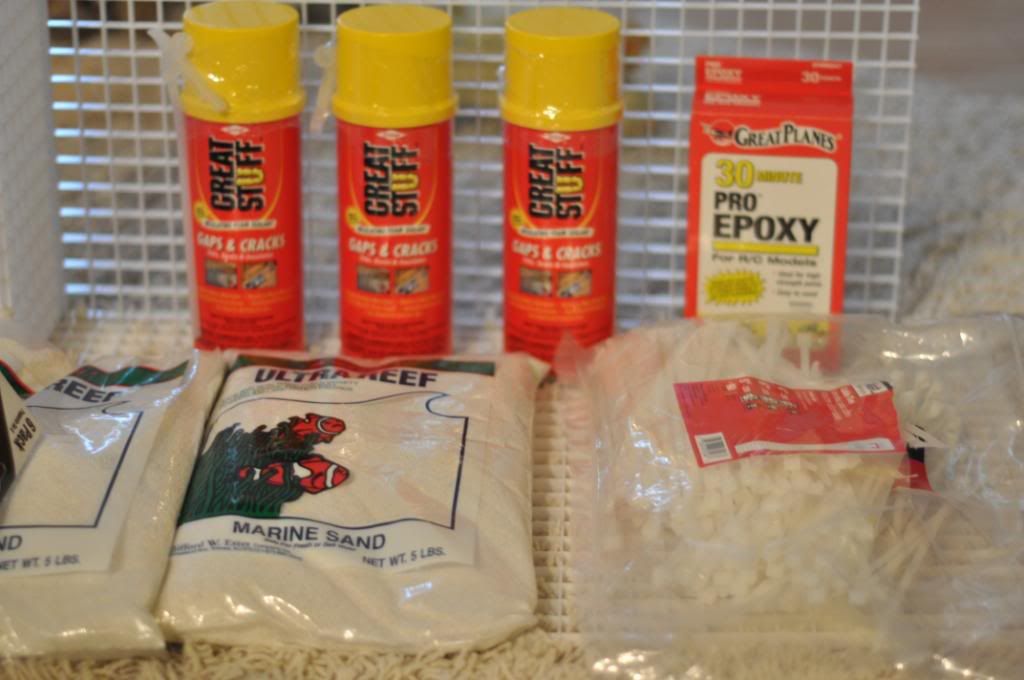
2 Sheets Eggcrate ($22)
9oz. 2-part Epoxy Resin ($9)
2 Cans Foam ($20)
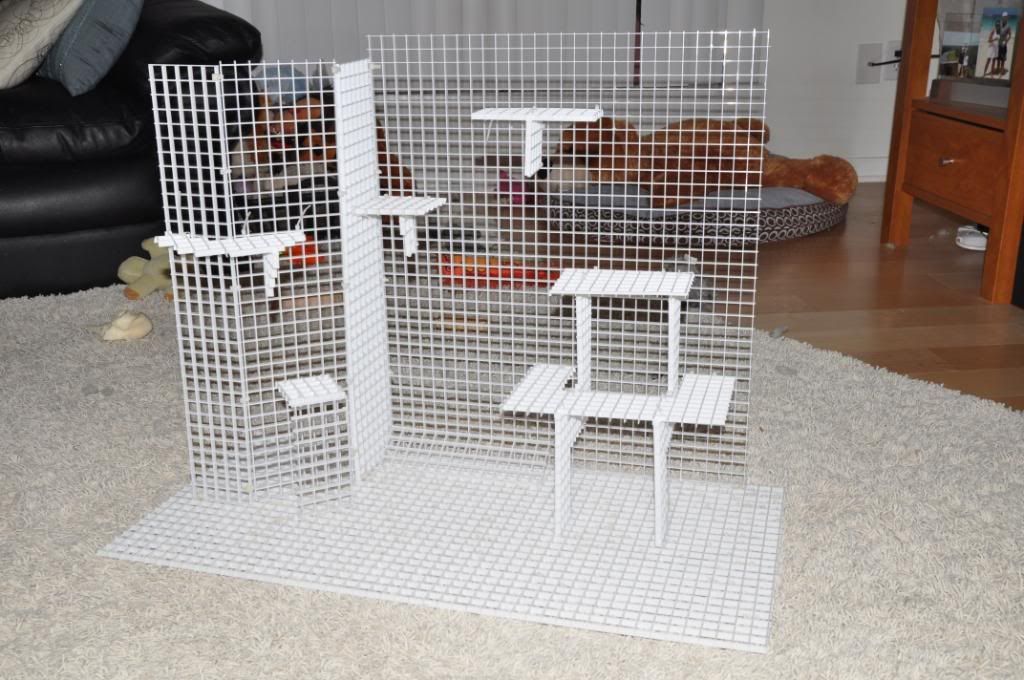
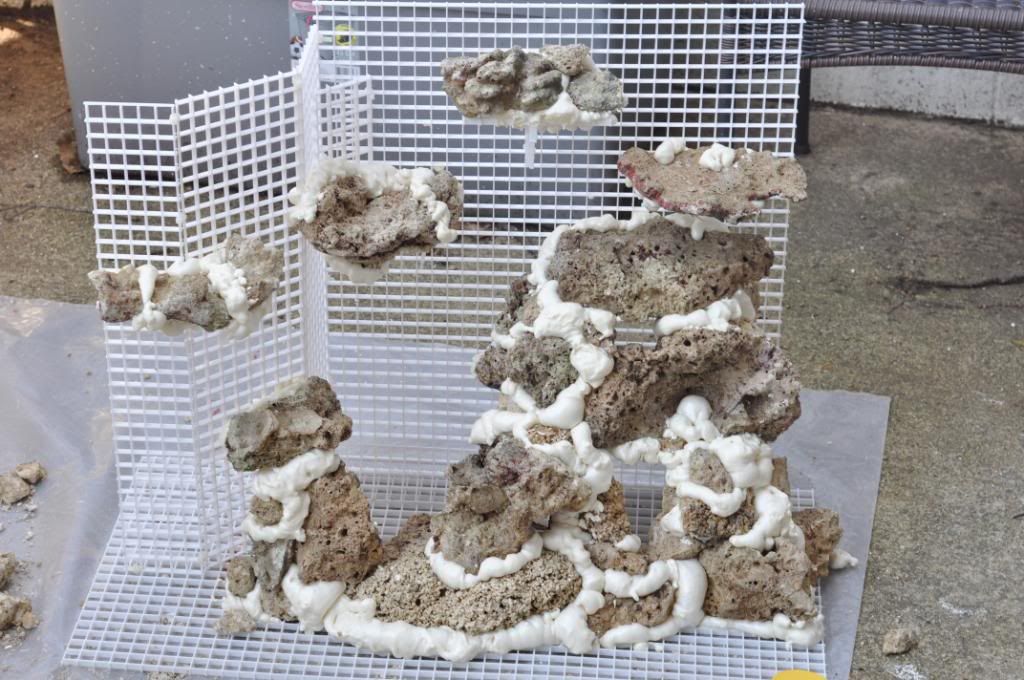
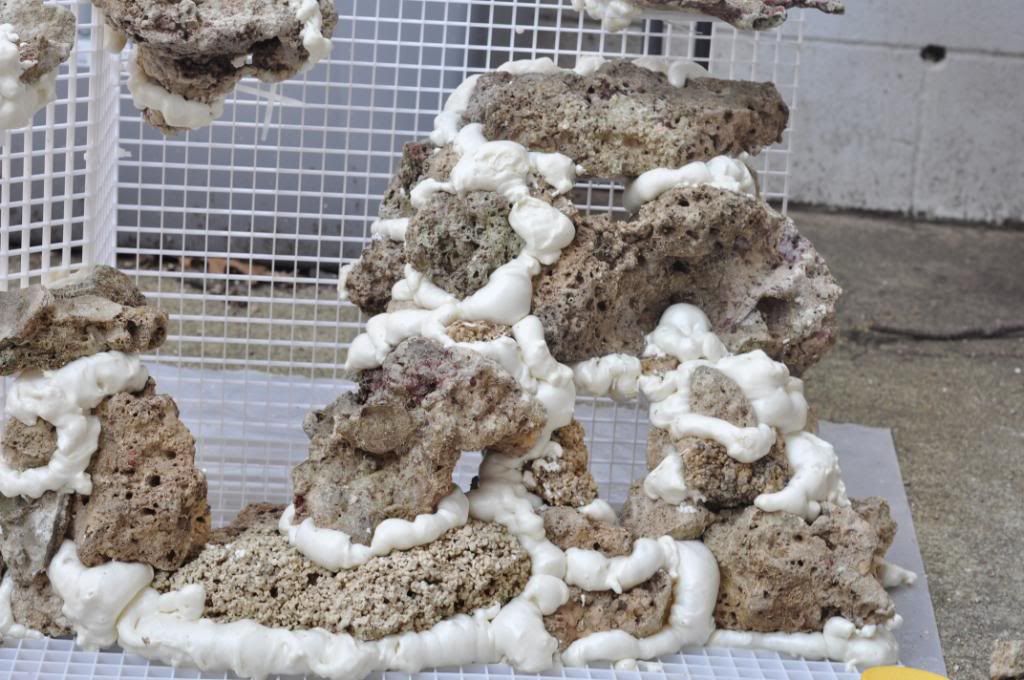
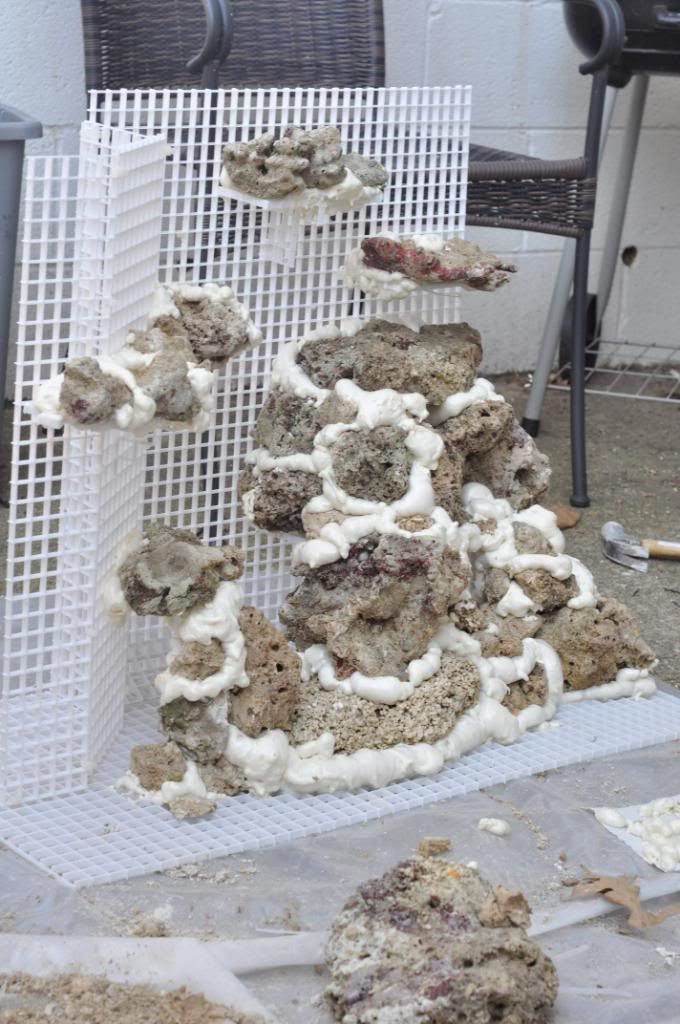
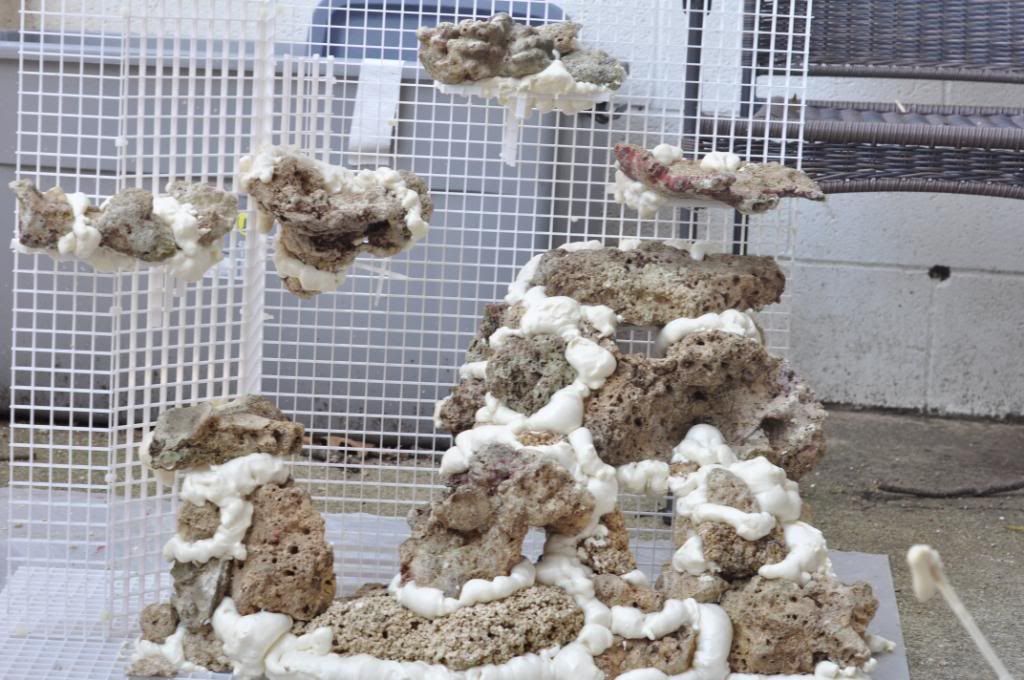
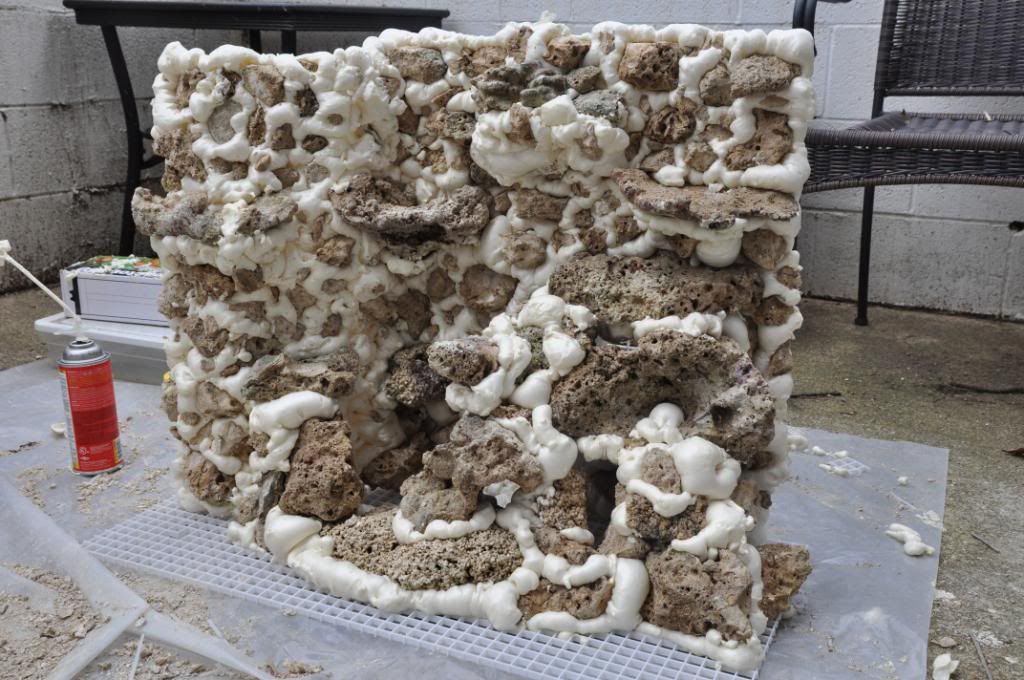
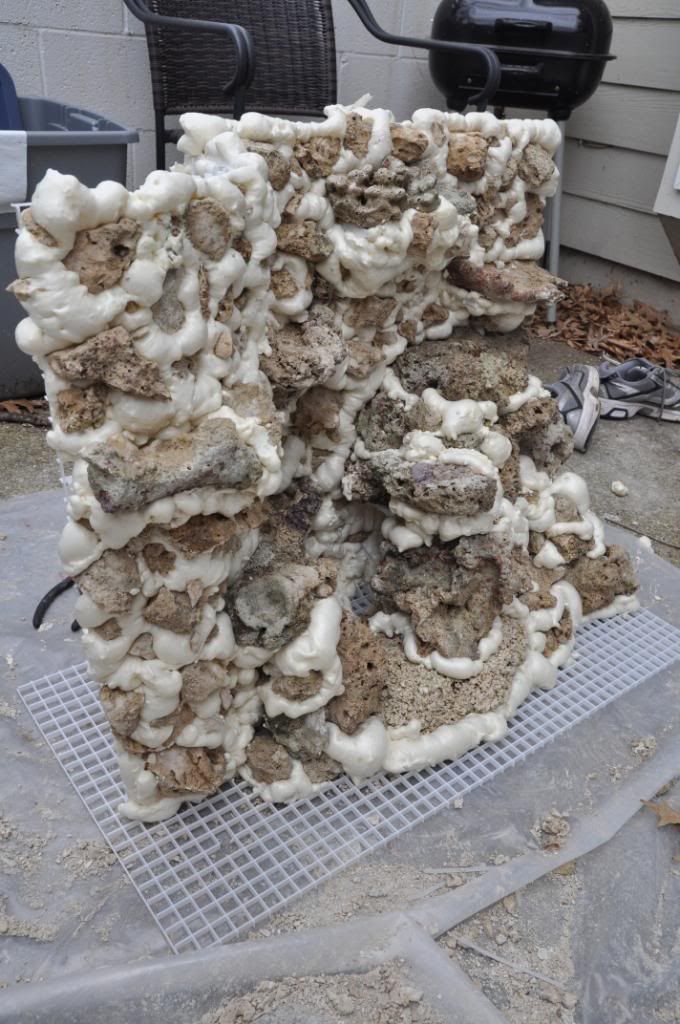
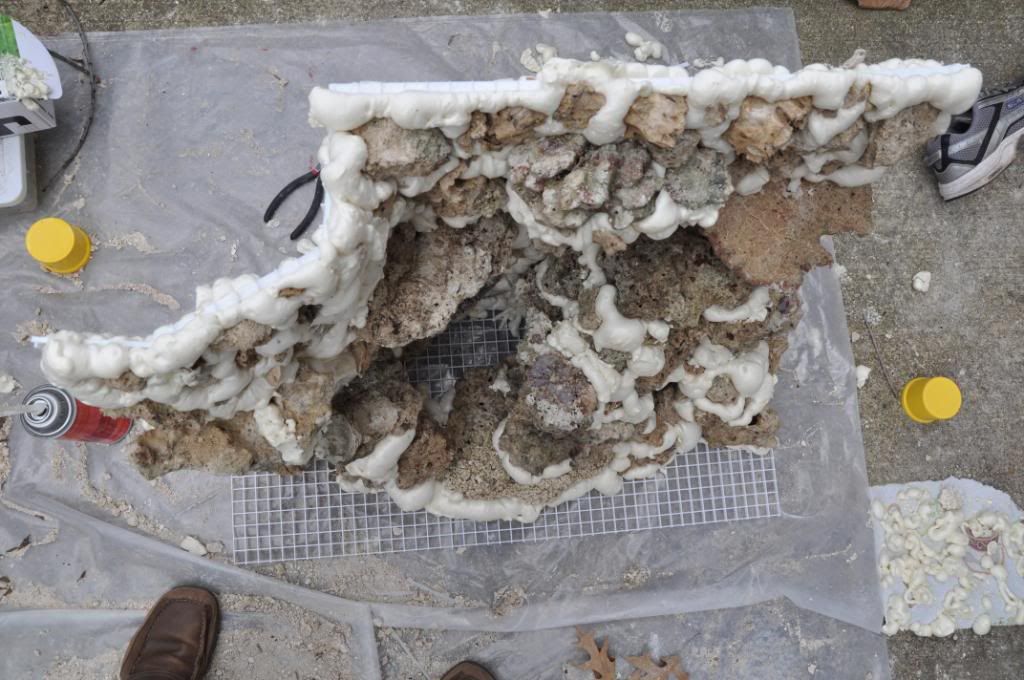
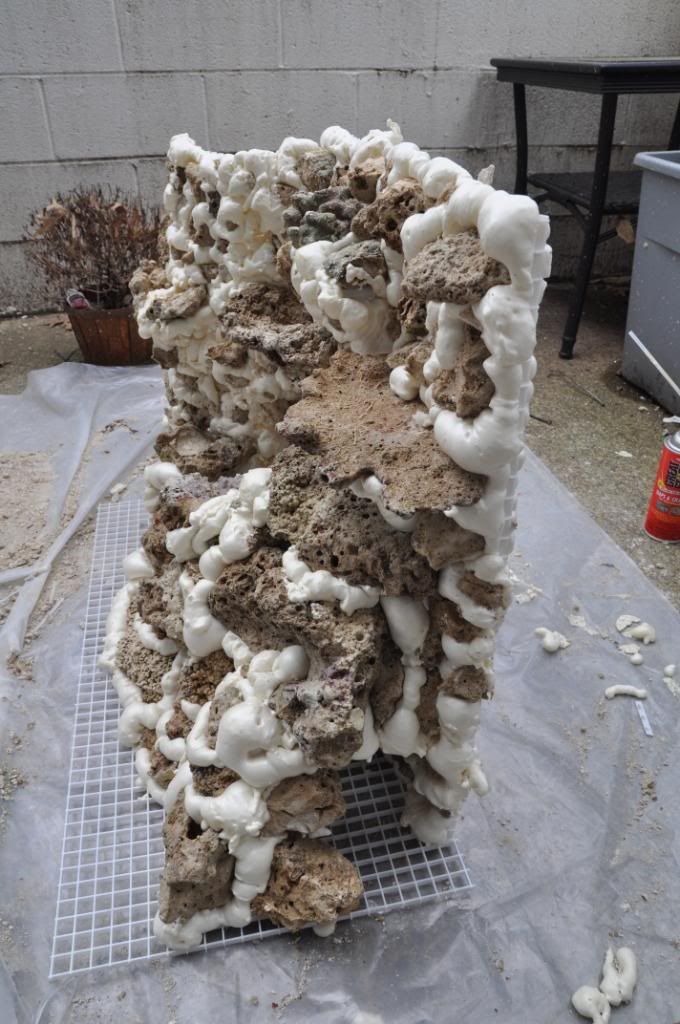
As of now, I am in the process of repainting the stand and canopy. Today I cut out the center brace of the tank because the heat had made it crack and so it would be easier to put the rock wall in the back. I'm going to rig up a piece of acrylic over it so that once the background is in, I'll put the acrylic where the center brace was and it will be good as new. I have cut out the skeleton for the frame and will be zip-tieing everything together. I'll then ziptie the rock on the the eggcrate and lightly foam it in the place - my goal is the less foam the better. Whatever foam is visible, I will epoxy it and dump sand over it to give it a natural look. I'm hoping that this turns out well - if anybody has any suggestions, questions, comments (or complaints), feel free to post. Pictures should start coming in tomorrow or Tuesday. Wish me luck!
Setup and Materials:
56 gallon reef ready
Sump and Return
(1) Metal Halide and (2) 22" T5s
Custom Stand and Canopy - ($200 used for entire tank setup)
70lbs. live "lace" rock for back wall - ($50)
$150 lbs Figi - ($80)
2 Sheets Eggcrate ($22)
9oz. 2-part Epoxy Resin ($9)
2 Cans Foam ($20)
As of now, I am in the process of repainting the stand and canopy. Today I cut out the center brace of the tank because the heat had made it crack and so it would be easier to put the rock wall in the back. I'm going to rig up a piece of acrylic over it so that once the background is in, I'll put the acrylic where the center brace was and it will be good as new. I have cut out the skeleton for the frame and will be zip-tieing everything together. I'll then ziptie the rock on the the eggcrate and lightly foam it in the place - my goal is the less foam the better. Whatever foam is visible, I will epoxy it and dump sand over it to give it a natural look. I'm hoping that this turns out well - if anybody has any suggestions, questions, comments (or complaints), feel free to post. Pictures should start coming in tomorrow or Tuesday. Wish me luck!