Complete Tank Build for 75 g, sump, refugium, & side cabinet

D

dennis210

Guest
Still fighting trying to show pics!

Well after trying each selected pics 5 to 6 x you can settle for have the steps of the sump build. The last two are of the finished project.


str8salt

Member
Well got everything tore down today. I pulled the rock, Scrubbed off any of the green bubble algae and have those rocks saoking in fresh water overnight. I don't want that pest coming back. I tried to frag what I could. I managed to save some of the mushrooms and some zoos. I took the sump apart, removed the lights, pumps etc. When I wnt to remove the shell substrate I found that it had indeed fused together in one big sheet. I had to dig a ling out in the middle the remove it in two sheets. Its the weirdest thing I have ever seen. It looks like I pored sheel bade concrete into the bottom of my tank. I am just glad it came out. I can't wait for tomarrow!
LONG LIVE THE CREEPS!!!!!
 

str8salt

Member
Thanks, Dennis had spent alot of time designing and building this. He has done an incredible job. I was just his sidekick. I guess I'm real lucky to have such good freinds. My other buddy Matt is housing my fish and clams during the switch. There is no better bud than a CREEP. LONG LIVE THE CREEPS.
 
D

dennis210

Guest
Okay - the entire project has been moved to Tim's house. Stand, hood, side cabinet, sump, refugium, and all plumbing were finished at the shop. Sunday we will be hooking everything up and aquascaping. The fun pictures are about to start coming now! Will post as we get things set up.
 

gatorwpb

Active Member
Originally Posted by Dennis210
http:///forum/post/2897224
Okay - the entire project has been moved to Tim's house. Stand, hood, side cabinet, sump, refugium, and all plumbing were finished at the shop. Sunday we will be hooking everything up and aquascaping. The fun pictures are about to start coming now! Will post as we get things set up.
Amazing build thread!
Subscribed for future reference!
 

str8salt

Member
Its looks even better in my house. Thanks Dennis and Matt.They came over tonight in a snowstorm,about 10 degrees, matt sick, to deliver it. Thanks guys.Its like christmas times 20. And to think that I have a few more christmas days left. Sure makes it hard to sleep, or work, or anything else for that matter. lol. My wife loved it when she came home.
 

kingzfan

Member
Ok...I have to say that stand looks great.. One question, how come you used 2x4 for the frame instead of 4x4? does it make a difference?
Was it just your preference?
 
D

dennis210

Guest
4 x 4 's are a little harder to work with. Trying to dimensionalize especially.
2 x 4 's were easier to rip down on the table saw on both sides to make them all 3" and square. After that the drum sander was used just to remove the saw kirf on those new edges and take the thickness down to 1 3/8". The joints made of lumber this way can take enormous stress in all directions and not let a twist occur (which is what collapses most stand accidents).
Okay today was an easy day as everyone had to work - so tonight the sump, refugium, and display tank were merely plumbed together. We put in multiple outlet boxes and then started to repair one damaged section of trim (moved it in last night in a snowstorm and had an oops! Little glue, little putty, little paint and it will be like new! Here are the pics - I hope!
 
D

dennis210

Guest
trying again - this is getting so old!
Okay tried from the file I store pics in no go then direct from the removable disc SD card and still no go - any ideas?
 
D

dennis210

Guest
okay this morning it's gonna let me upload - go figure. I am told my IP is less busy and I am not sharing so much banwidth (whatever the heck that means)
A few shots of underneath with sump and fuge - and a few shots in place.


nwdyr

Active Member
WOW........ummm......WOW
I feel like building something now! the only problem with that is I am more like Tim Taylor so I know I will end up in the hospital and my stand will be sideways
GREAT JOB!! and GREAT pic's!
 
D

dennis210

Guest
Day 15 of the round the clock build. It's just the way I feel - very tired today. Final day of the build and when we went to get water it was -9'F out and that was just way too cold. Pics are: temp!
adding sand, coarser grade on bottom, mixing first 50 gallons of water, sand for me to mix and rinse/flush clean.
Gonna try again later!
 

str8salt

Member
Tanks in and running. Thanks Dennis and Matt!!! It looks great and works oh so sweet. The water is starting to clear up. It won't be long and soon I should be able to see the aquascaping. I got a fresh shot of chaeto and pods from another CREEP. Thanks NATCLAN. Won't be long now......
LONG LIVE THE CREEPS!!!!!!!!!
 
D

dennis210

Guest

Yes it really says -9'F

adding sand bed

coarser sand on bottom with diffuser grid

mixing forst 50 gallons of water

sand ready for mixing and rinsing out silt

live rock cleaned and ready to go into tank

yes the plugs are wet but we are done with them
Matt the LFS owner here to help

discussing building strategies

addding base rock

second layer / level of rock
 
D

dennis210

Guest
fill'er up!


underneath the tank

refugium

sump

plenty of electrical outlets

tee connection of return with ball valve control to refugium

right side metal halide

in tank DIY return (45' angle to both front and back walls)
 
D

dennis210

Guest

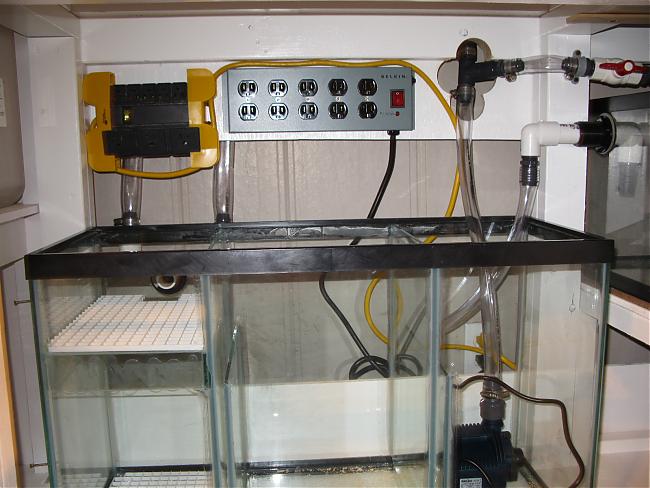
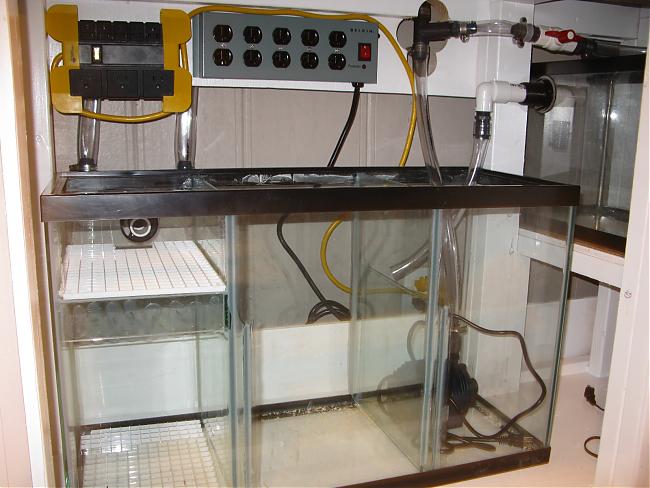
overflow box - esopp's dual (note to seld - in future plan for the utubes as well as box this will prevent use of jigsaw freehand onsite!)

left side metal halide

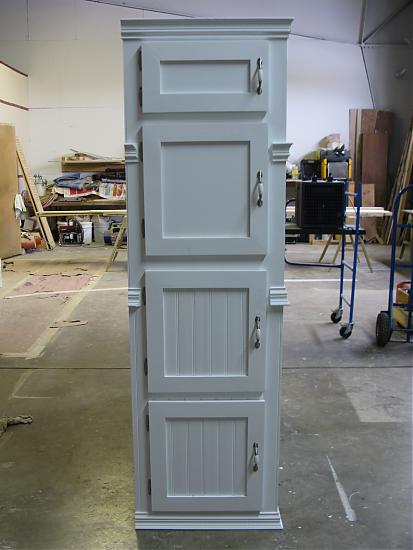
side cabinet top shelf - ballast

side cabinet second shelf down - drip / dosing container (also future home of dosing pump) Tim what was the hammer for!!!!!!

side cabinet third shelf down - drip / dosing container #2

Side cabinet bottom shelf - future home to cannister filter for carbon filtration

side cabinet - profile view

Tim checking out the system

Yes Tim were done for now!

No Tim we haven't stocked any fish in there yet!
 
Top