FoamBack Project 101

maxalmon

Active Member
On the last pic I posted, see all the little bubbles of foam that are inbetween all the pieces of LR, as soon as those harden, I'll use a razor and cut them down so that it doens't look fake, then I can use some more LR rubble and glue/foam it over those area's......Now I want to tear into my 215.....
 

grubsnaek

Active Member
you think this would have any affect on your equipment. soley meaning water movement, cause say you were to put two koralia #3's in there. with all that rock not clumped in the middle of the tank, those koralia #3's would work even better now. so would that make equipment changes...
 

kellig

Member
Looks awesome.....will kindof be like a lava flow!!!
I wouldnt change a thing! Except your avatar! Keep posting pics of it!!!
Cant wait to see it with 'stuff' in the tank!!! Its very natural looking!
Hey Fl Ricordia--where did the Congo go?? I like the birdies!
 

grubsnaek

Active Member
you can also use the egg crate to creat ledges for frags and it would look natural.....
wow, this in an awsome thread, my mind is very creative rite now.
 

maxalmon

Active Member
Originally Posted by grubsnaek
http:///forum/post/2771347
you think this would have any affect on your equipment. soley meaning water movement, cause say you were to put two koralia #3's in there. with all that rock not clumped in the middle of the tank, those koralia #3's would work even better now. so would that make equipment changes...
Ah Crap!!!!! I had a Koalia #3 that I was going to hide in the top left hand rockwork, even had it laying on the counter so that I could build the form around it, got the box made for the maxijet and just kinda forgot about the K3.....Huff Snort,...Well guess I'll be doing some repair work tomorrow after I rip out a section to hide the K3. I'm going to using a Coralife Aqualight pro 250w Mh and 2x45 actinic fixture, also have a 1/10hp chiller, calcium reactor and controller..Plans are to turn it into a K-A$$ mini sps tank.....
 

keebler

Member
Pesonally I would get rid of the bubbles (they remind me of bubble algae more than sponges). It looks amazing though, I've only seen a few people do this and I am wondering why more people don't do it. I am inspired. However, I do have one question. Doesn't that foam float? You should put it in big bin of water to make sure that it doesn't float. Or are you going to adhere it to the tank? I can't get over how fast you made that...and how professional it looks. I would've assumed you'd been doing this for years. Man, that sure does beat a black background.
 

grubsnaek

Active Member
wont that restrict the water being takin in by the koralia? by making a cover for it, it will restrict the water it can pull in, i would think????
 

maxalmon

Active Member
Originally Posted by Keebler
http:///forum/post/2771399
Pesonally I would get rid of the bubbles (they remind me of bubble algae more than sponges). It looks amazing though, I've only seen a few people do this and I am wondering why more people don't do it. I am inspired. However, I do have one question. Doesn't that foam float? You should put it in big bin of water to make sure that it doesn't float. Or are you going to adhere it to the tank? I can't get over how fast you made that...and how professional it looks. I would've assumed you'd been doing this for years. Man, that sure does beat a black background.
All the foam is adhered to glass, both the bottom and back so no chance of it floating....With my 215, I'm going to make the panels that are removable and floatation will be an issue. From what I've been told, a can of this foam will float a 50lb rock....This was an issue I should have mentioned in the start of this thread, but the foam will stick to anything, thats why I sued it on the bottom of the tank and then attached all my gridwork for the other structures to the gridwork onthe bottom, made it very ridgid and nothing is moving
 

maxalmon

Active Member
Originally Posted by grubsnaek
http:///forum/post/2771400
wont that restrict the water being takin in by the koralia? by making a cover for it, it will restrict the water it can pull in, i would think????
It's not going to be a tight fitting box, much like the one I built for the maxijet, it'll have more of a rock work feature infront of it so that I't can't be seen, but shouldn't resrict the waterflow at all.
 

grubsnaek

Active Member
i honestly think im going to do this for my 29 set up. you can make any structure you want, even make shapes out of pvc and foam over them with rubble all over it.
see what you started!!!!!
 

grubsnaek

Active Member
stop are you a rebel or a prettyboy....hahaha gotcha....na for real you gotta have confidence....i feel the same way, but im tryin it
 

maxalmon

Active Member
There is almost noway to mess this up, kinda fun....try it on a small project. Heck you don't even have to use a real aquarium, you could do a test using a carboard box.....
My little brain is spinning with ideas, I've got 2 nano's that are in need of an ExtremeFoam Makeover

Did some shopping around and as usual True Value hardware
has the best price for this kinda stuff. http://www.idealtruevalue.com/servlet/the-48255/Detail
 

maxalmon

Active Member
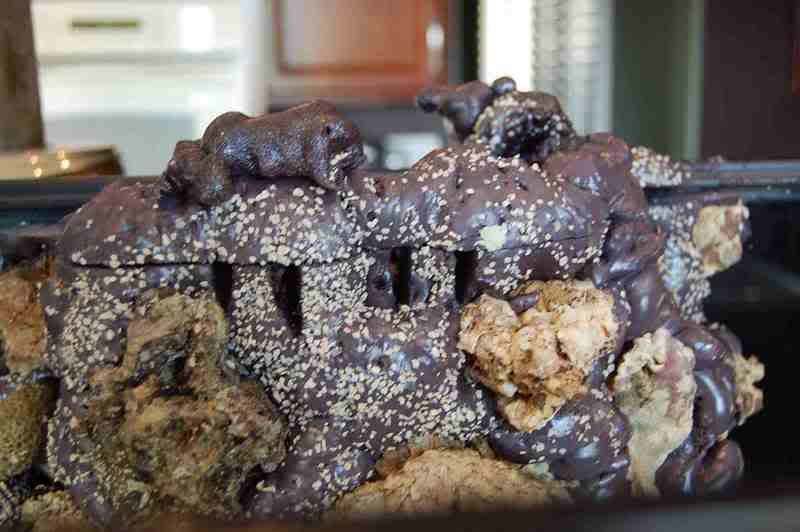
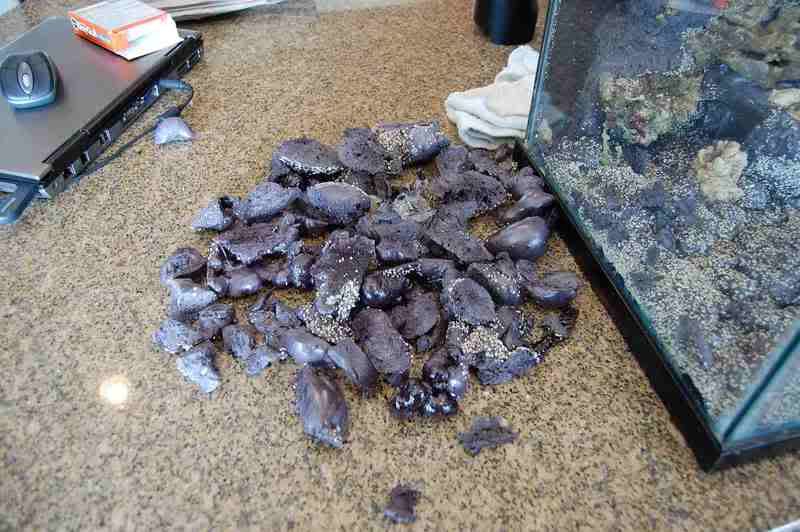
Time to start trimming excess foam and do the detail work.
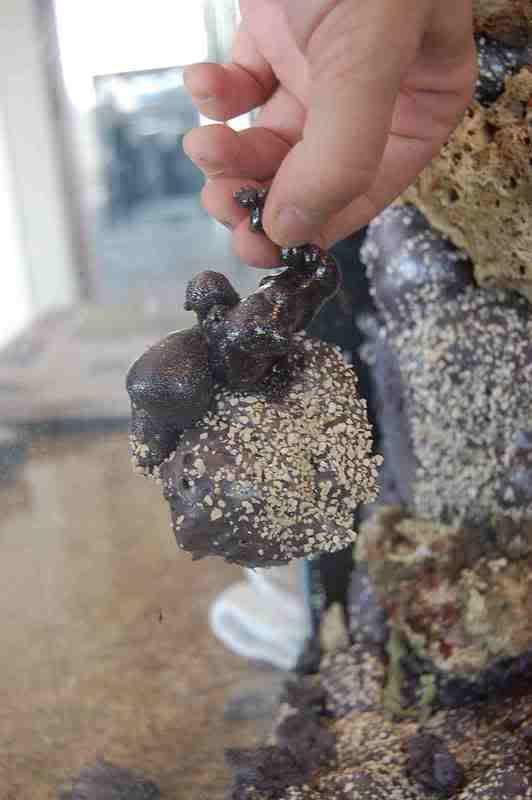
1st was the overflow, The foam tends to keep expanding overnight, to trimthe foam use a serrated knife or saw blade, very easy to cut. One of the things I've found is that to keep it looking natural, cut away as much as spossible with a knife and then use your fingers to pinch out small areas, this makes the surface much more rough and textured.
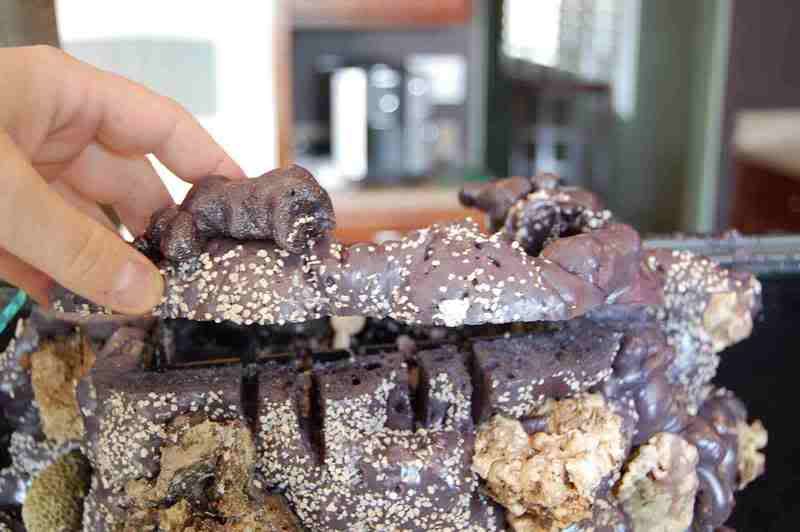
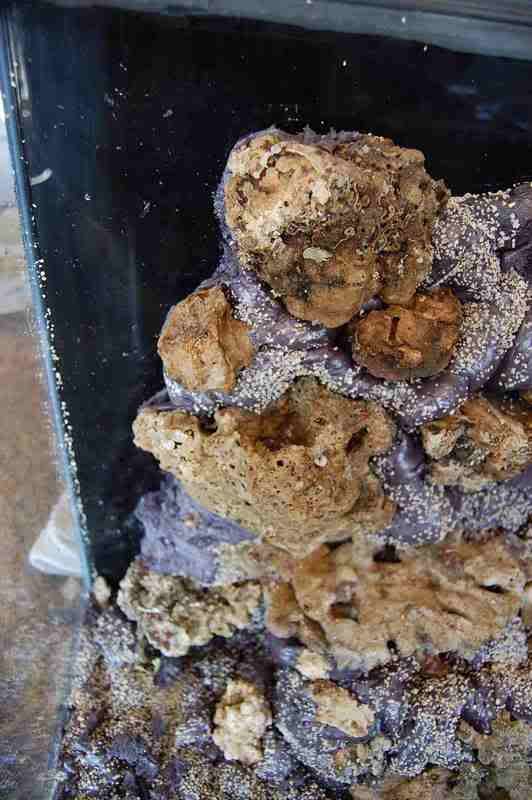
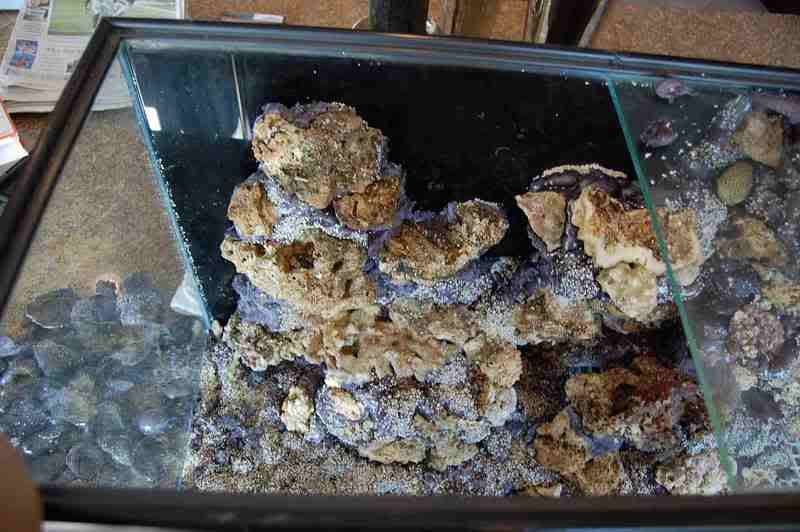
Here is the top of the overflow box, one mistake I made was placing some of the LR over the slots for the overflow, I'm not going to worry too much about it as I can probably use a saw and cut slots thru the LR as most LR is very porous and soft. I had already removed the top portion and cut the overflow slots before these pictures were taken

Here is the top part after cutting away with serrated knife

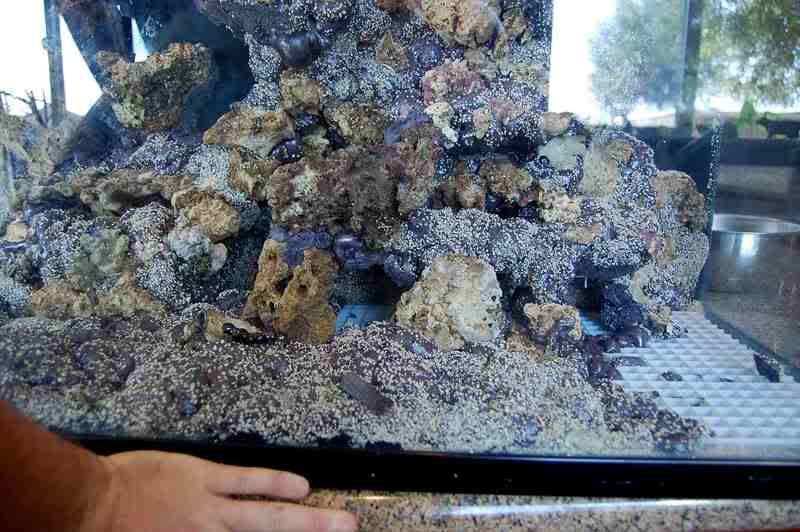
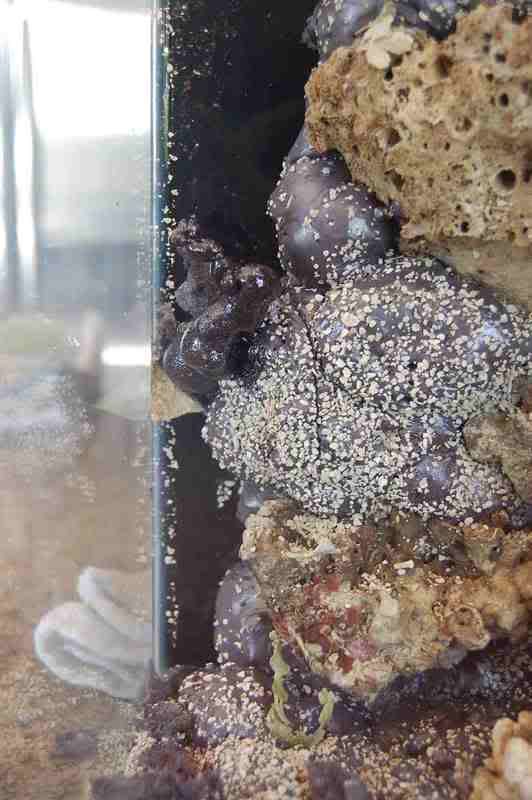
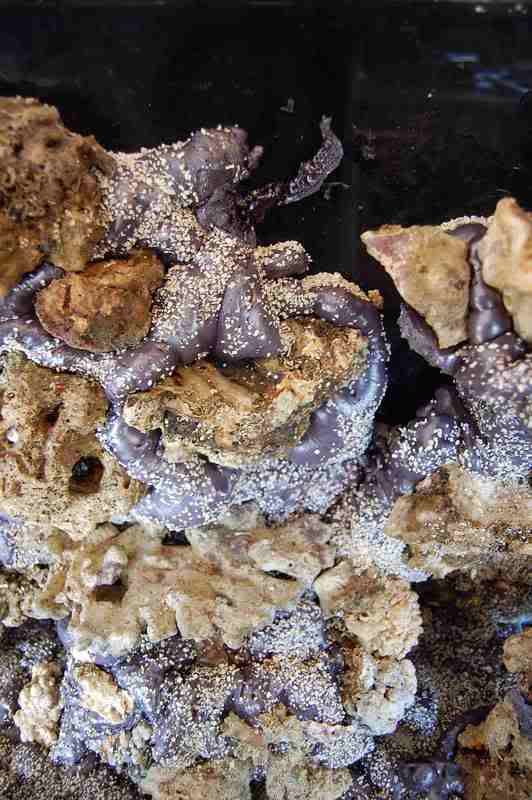
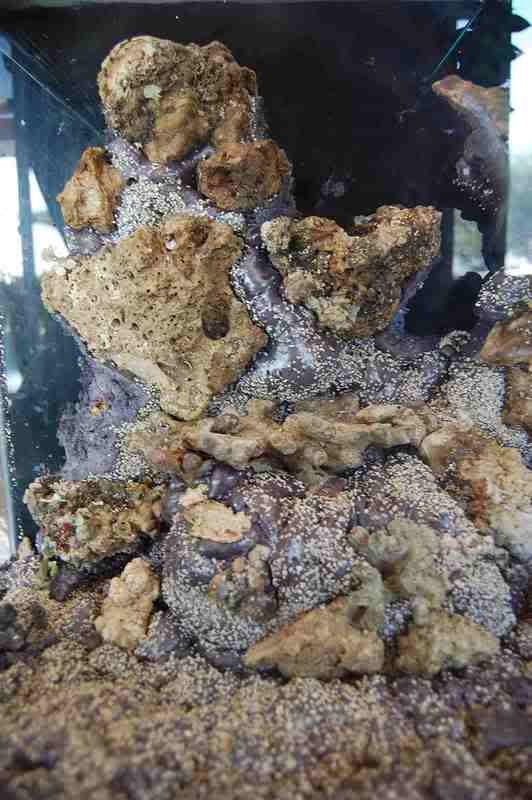
This is really amazing, you honestly can't see the overflow box from the front of the tank and unless you were looking for one, you wouldn't think there was anything there. Using the gridwork I built the area up underneath the overflow box so that it was totally open and had several caves

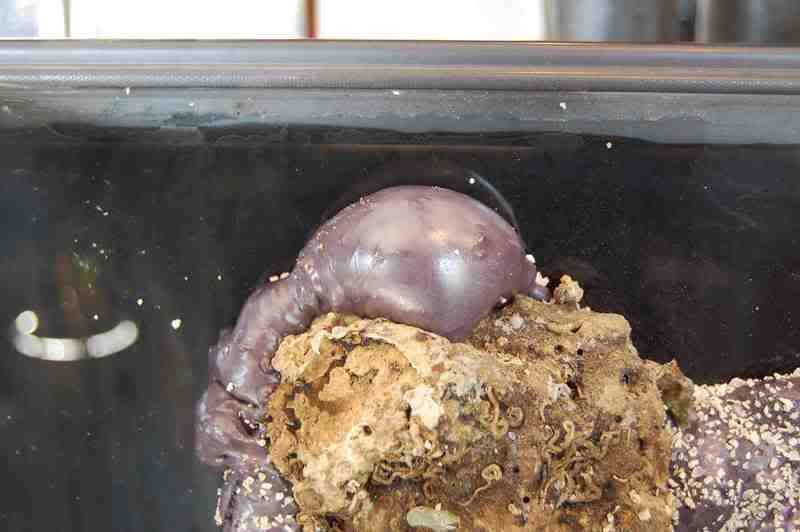
Here is the area underneath the overflow, you can see all the caves, still have a lot of detail work to do and some more foam to apply.
 

maxalmon

Active Member
Pretty sure I'm going to turn it into a dedicated SPS tank, I've got chillers, calcium reactors, controllers, MH & Actinics lights sitting out in the garage in the "pile of equipment" LOL.... I'm going to post a few more pics, run over to HomeDepot to pick up another can of foam and then back to hacking and sculpting as I really want this wrapped up today.
 

maxalmon

Active Member
Here is what happened overnight, this little bubble grew and grew. Took all of 5 seconds to remove it.

This sections is directly underneath the above pic and you can see this area expanded as well

Here is the section that I cut away using a regular knife

Forgot to take a "Full" before shot of this area, but here it is after I trimmed the bubble and cleaned up the side.
 

maxalmon

Active Member
Here is another area that has a very cool piece of LR thats flat and shaped like a bowl, it's about 6"x5" to give you some perspective. The foam had expanded so much that it reduced the surface area of this piece of LR to almost nothing.

Here it is after a massive trimming, you can see that now I have a really nice ledge to place some SPS frags.

Here is all the foam pieces that I removed from just the above, figure that by the time I'm done it should be about 4-5x this amount that I'll remove.

Another shot of the same area
 
Top