my official frag tank build thread
- Thread starter reefkprz
- Start date
reefkprz
Active Member
well I am at a stand still for the moment. I am waiting for the 55g tank to drain, so I can slide it out of the way and put the now cleaned out 65g in its place and set it up for my fiancees gold fish and steal the tank the goldfish are/were in to put my corals and fish in for temporary housing, on the upper level untill my rubber deck seal gets here. I am then going to seal the lower level and place the other 55g there and transfer everything down into it then seal the top level. I still have other parts of the build to do in the mean time, like wiring up the stand and placing the outlets and powerstrips. for now everything is going to run off powercords. talk about make ya nervous.
reefkprz
Active Member
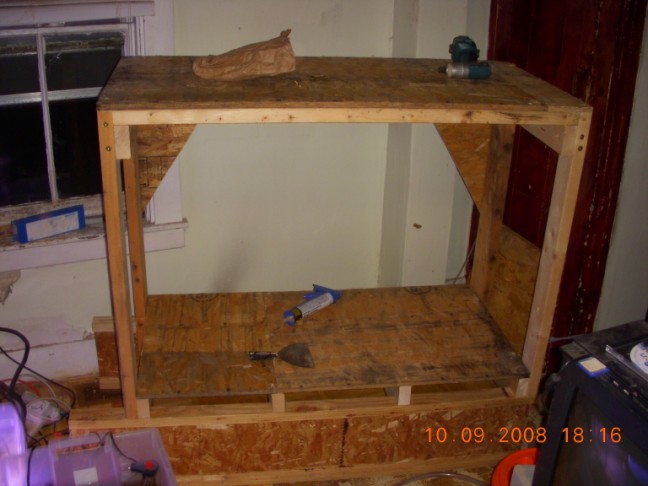
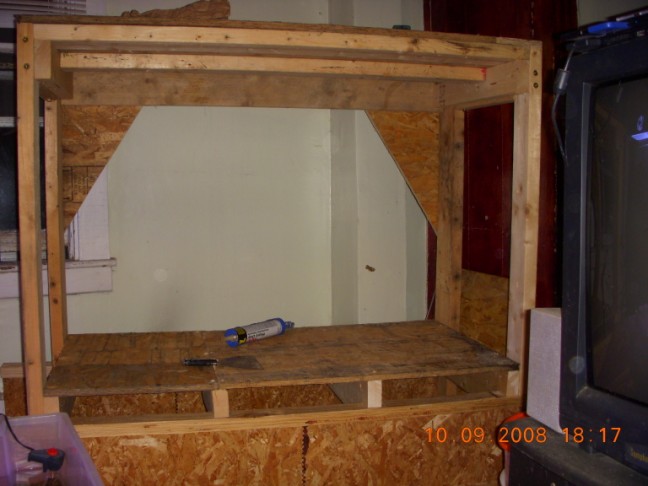
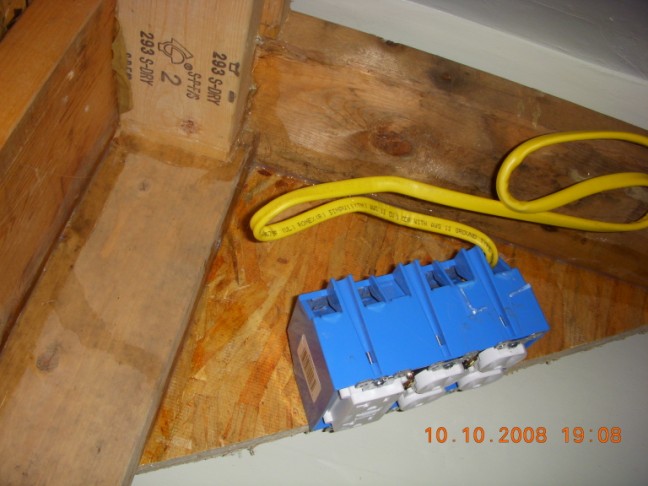
the angle pieces in the back arent just angle bracing they are going to be boxed in and that is where the oulets are going to be with the faces downward above them is a 5 inch wide plane of wood for attaching my powerstrips so they will be sheltered under the top deck.
I wish this 55g would hurry up and drain.
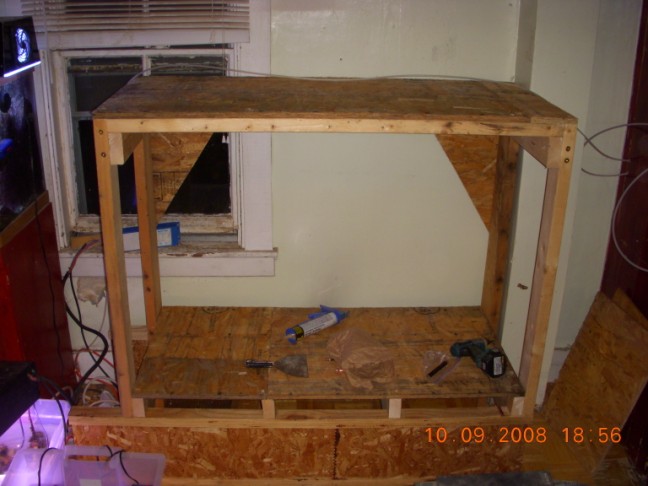
the last picture is the stand in the actual spot where it shall rest for eternity (or at least untill I move)


I wish this 55g would hurry up and drain.
the last picture is the stand in the actual spot where it shall rest for eternity (or at least untill I move)
reefkprz
Active Member
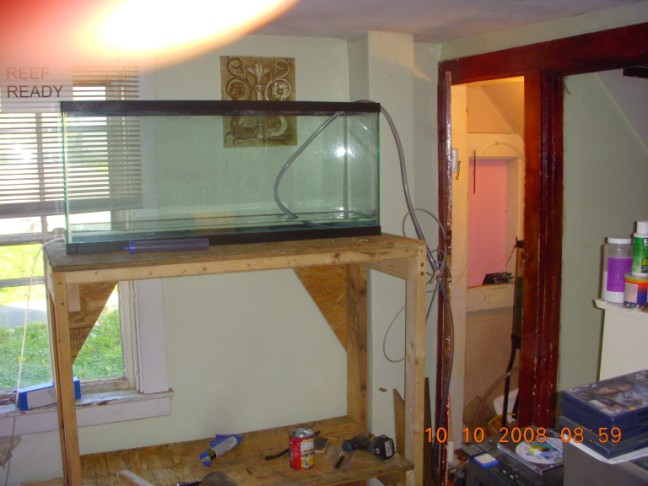
well my fiancees 65g gold fish tank is now up and running. yay. now to clean out the old 55g. unfortunatly since I have neighbors and live in the city I cannot continue using powertools as it is getting too late for that so construction will begin anew tommorrow.
for tonight I am just going to clean out the 55g, throw it on the stand, and map out my wiring on the stand. as well as plan for my pulley systems for my lights.
right when i want to keep on bulling ahead I have to pretty much lock up the brakes just because of neighbors. well everything should be fine in the totes for the night they al have heat and circulation.
well, more to come tommorrow.
reefkprz
Active Member
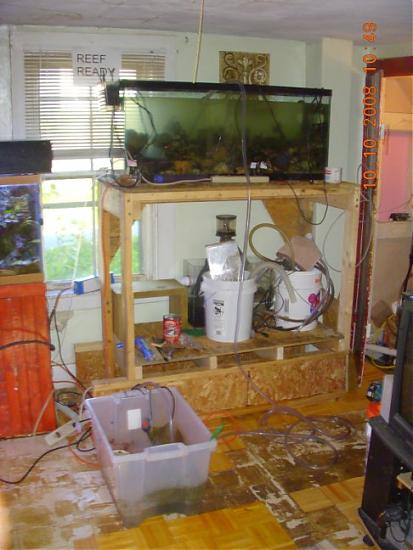
beginning the fill. yes I know the stand is still UGLY! well beyond ugly. patience my friends, this is to get my creatures out of the totes and back into a more managable amount of water. in theory I could leave them in the totes. BUT. space constraints in my living room disallow this notion. As well as the fact that my fiancee would be quite miffed if I left everything in totes strewn about the living room for a week whilst I worked on this stand.

reefkprz
Active Member
well, I'm home and I have started wiring up the outlets for the integral power in the stand. so far one GFCI and two outlets wired together. cant find my other GFCI which is ticking me off. I need to run the main feed for both sections of outlets.
and of course the battery is dead on my 18v drill so I need to wait for that to charge. meanwhil;e I am going to mount the box and cut the plywood needed for the stand boxes. need to dig out my silicone too for sealing these.
and of course the battery is dead on my 18v drill so I need to wait for that to charge. meanwhil;e I am going to mount the box and cut the plywood needed for the stand boxes. need to dig out my silicone too for sealing these.
reefkprz
Active Member
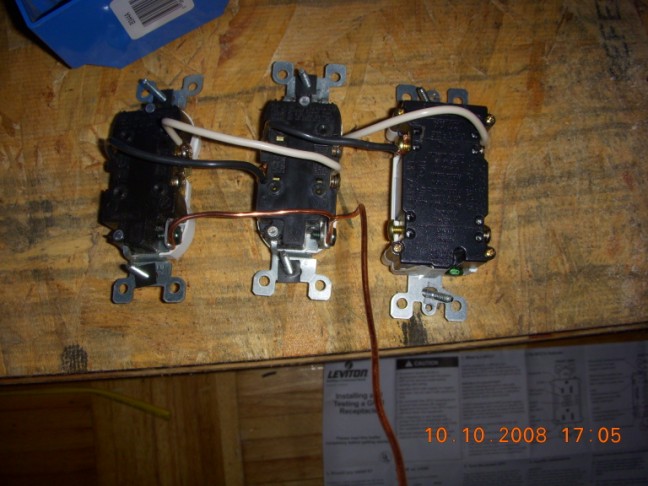
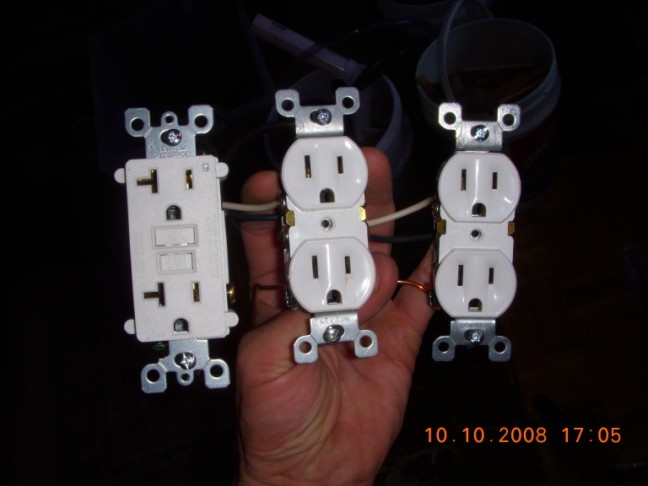
here are some pics of the GFI set up.
you can see the silicone used on the seams of the wood to seal out all moisture but I am still going to have a drip loop in the wire just in case. by having the outlets inverted it should create drip loops on any thing plugged into the oulets just by the way they are pointing.
unfortunatly due to the lateness of the evening no more powertools so i cant build the box in. oh well there is plenty of other stuff to do. like relax.
chris17
Member
How is all your livestock doin? I bet they like the tank much more than the small bins lol It seems like its hit or miss, sometimes everybody chimes in and sometimes you feel like your talking to a 9 month old lol
 I have been checkin the thread here and there but have'nt had much time to post anything. You have gotten alot done very fast IMO. I wish any project of mine went close to this, even with planning lol

wattsupdoc
Active Member
I'm here taggin along.
 Lookin good reef.

reefkprz
Active Member
Originally Posted by chris17
http:///forum/post/2789307
How is all your livestock doin?
all the live stock is ok, except my pink urchin the tote with him in it had a heater malfunction and the temperature spiked to 93 degrees. he has lost all his spines. I dont hold up much hope for his survival.

http:///forum/post/2789307
How is all your livestock doin?
all the live stock is ok, except my pink urchin the tote with him in it had a heater malfunction and the temperature spiked to 93 degrees. he has lost all his spines. I dont hold up much hope for his survival.
fishfreak1242
Active Member
Originally Posted by reefkprZ
http:///forum/post/2789843
all the live stock is ok, except my pink urchin the tote with him in it had a heater malfunction and the temperature spiked to 93 degrees. he has lost all his spines. I dont hold up much hope for his survival.
I must've been one hot urchin! (sorry for the bad pun) Anyway...tank looks great and is coming along well.
rebelprettyboy
Active Member
Originally Posted by nwdyr
http:///forum/post/2789351
Moving along very fast bro
I have been planning a simple move from a 40gal to a 75 for like a week now

a week? I got u both beat by a mile. Ive been setting up my 40 breeder for like 2 months now
http:///forum/post/2789351
Moving along very fast bro
a week? I got u both beat by a mile. Ive been setting up my 40 breeder for like 2 months now