Plumbing Re-design Blog

V

vince-1961

Guest
Then everything came to a grinding halt with this mistake. ...
Attachment 212957
Attachment 212958
1/4 turn too much. My fault.
$90 mistake. Oh well. I reckon the whole shebang will just have to wait a week. I'm taking a 7 day cruise, leaving Saturday. I'll do something about it when I return.


natclanwy

Active Member
You're not having very good luck with this project. It's a little late but a tip when threading pipe together, if you are using thread tape it doesn't need to be extremely tight just past snug (1/4 turn or so) is enough with about three wraps of thread tape also be sure you wrap the tape in a clockwise direction if the end of the fitting is facing you so that when you thread it together the tape doesn't unravel. If you are using rector seal or liquid teflon just snug it up and leave it alone for 24hrs before you put water to it. The threads on pipe fitting are tapered to help seal the fitting and it is the taper that caused your SCWD to split when you threaded it in so far.
Also it is a minor difference in head pressure but two 45's has more head pressure than one 90. It won't ever make any difference when setting up our aquariums but if you ever set up a very large pipeline it does become a factor
. I don't understand the physics behind it but I have done the calculations and it does in fact have more head loss than a single 90
.
P.S. Enjoy your cruise, I would love to go on one someday the closest I have come to the ocean is my aquarium.
 
V

vince-1961

Guest
Got the SCWDs replaced. Got the broken one fixed. So, to re-do the 2" piping, I decided not to use the long turn drainage elbows. Just used the regular elbows. Much sturdier.
Attachment 214162
This time I put clamps on the barbs.
Attachment 214163
Here it is laid out on the ground with a 5 gallon bucket for reference. Notice that top half of a 1.5" single union ball valve is closest to camera. As it turns out, there was a tiny leak, so I cut it off and replaced it with a union (no ball valve). Also notice that I got rid of the two 45 degree turns and replaced with just one elbow. Also moved the SCWDs further apart.
Attachment 214164
Primed the sytem. Notice that I re-designed the priming hole to have it as the highest point in the entire system. The old one had the opening lower than the water level of the tank. Recall that water seeks its own level. This one worked much better.
Attachment 214165
I also redesigned the water intake. Cut a few slits along the side and inserted a grate on the bottom. Just one 2" tube instead of two 1" tubes. This works better.


V

vince-1961

Guest
Here is the final version. Notice how I angled the 90 degree elbows to stick out a ways. That was to get the SCWDs off the wall and make them much easier to access in the future if they should ever need to be opened and cleaned. On this photo, you can also see the stright union w/o ball valve just above the pump. I still incorporated the ball valve on a discharge sticking out through the exterior wall, so the water can just drain straight outside for water changes. A lot less hassle (especially since a 10% water change is 25 gallons!)
Attachment 214168
Here's a better shot of the angle
Attachment 214169
Next I thought it would be a good idea to drill holes in the return pipes under water level so that the discharge would not be too strong a current.
Attachment 214170
Attachment 214171
Attachment 214172
Turns out that was a bad idea as it basically took away the current.
I'm still playing with other ideas for how to aim the water discharges.
I'm just glad it all came together and worked with only one tiny little leak this time.
No Venturi Effect! (Yippee.)


V

vince-1961

Guest
At last. Now I can start to think about moving the noisy sump pump outside! Yay!
 

natclanwy

Active Member
Glad to see you finally were able to get it put together
.
I used a horizontal spray bar for my return and I drilled holes along its length, and capped the ends. I also drilled some of the holes at an angle to make them somewhat directional. You could do the same with a verticle spray bar too.
 

valgae

Member
wow you've been busy. looks good. my only question is............ when you do water changes, would your waste water be going straight into the ground? you really don't want to do that. runoff could get into area waterways and introduce new diseases or organisms. waste water should always be discarded down a drain. hope your trip is great, FTS when u get a chance
 
V

vince-1961

Guest
VALgae,
I suppose I could run a hose out to the street and then let the public drainage system take it away, but I doubt that goes to the sewage treatment plant. It probably just leads to a drainage ditch somewhere. The only way I have to put it down a drain leading to the sewage treatment plant would be to pump the water upstairs to a sink or whatever.... NOT!
I figured the only thing I had to worry about was the accumulation of salt in the dirt which might kill some plants or grass.
Besides, I very seriously doubt that anything could come out of my tank that is not already in the local environment, which consists of the Atlantic ocean, barrier islands, marshes, and all the saltwater rivers snaking in and out of the marshes. Although my house is on an island, it has no waterfront, so the aquarium water will eventually (20 years or so) become part of the Floridan aquifer.
What does "FTS" mean?
 
V

vince-1961

Guest
Well, the FTS will have to wait since the lights have already turned off for the evening.
If I hadn't been feeling a bit under the weather this weekend, I would have re-aquascaped with my homemade rock. The pH values of the water in which I have had the homemade rock "curing", and which I've been changing very frequently, have finally stabilized near 7.0 (2 months later), so I think it's ready. I have a tub of rubble of homemade rock which I will be putting in the wet/dry part of the sump and will probably redesign the sump as well.
The sump re-design will be part of the plumbing re-design to move that gosh darn F'ing LOUD (and old) Iwaki pump on the sump, with american made motor, outside!
 
C

cristiangarcia

Guest
I know absolutely nothing on how to do anything you've done, But big"up's" to you...looks like and sounds like a hell of alota work and fussing around. But enjoyed reading all your posts as well as everyone else's. hope everything goes well for ya!!!!!
 
V

vince-1961

Guest
FTS = Full Tank Shot.
Attachment 214830
Notice the far right. That's the first bit of homemade rock. Here's a closer shot.
Attachment 214831
Will try to put the rest in this weekend and re-aquascape.
Just tonight I installed the pH monitor so that the CA reactor can run unattended. Am sure I'll have to make adjustments as need may require.

 
V

vince-1961

Guest
yep. made it 2.5 months ago. ingredients = crushed oyster shell, poultry feed, beach sand and portland cement. various batches with various recipes/proportions.
Been sitting in water leaching high pH since then ("curing"" with frequent water changes). Just put some in last weekend. Will put the rest in this coming weekend, hopefully. The pic above is the first bit in the DT, which is about 3.5 months mature.
 
V

vince-1961

Guest
B/c one of the recipes on this site suggested it. (it's mostly crushed shell.)
 
V

vince-1961

Guest
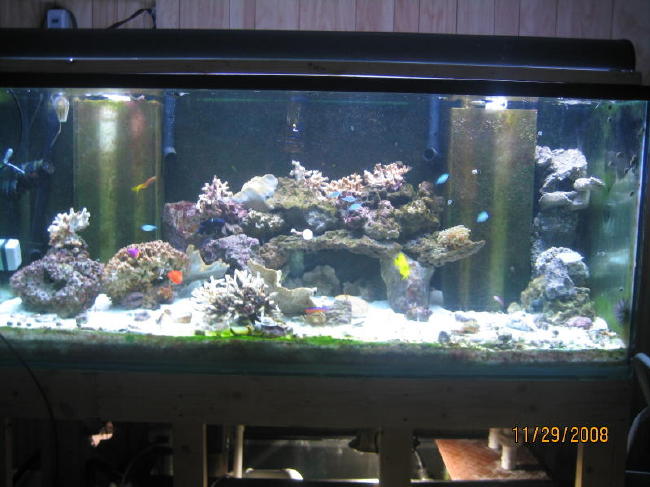
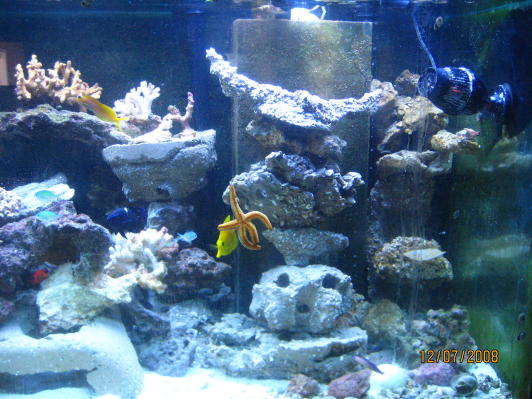
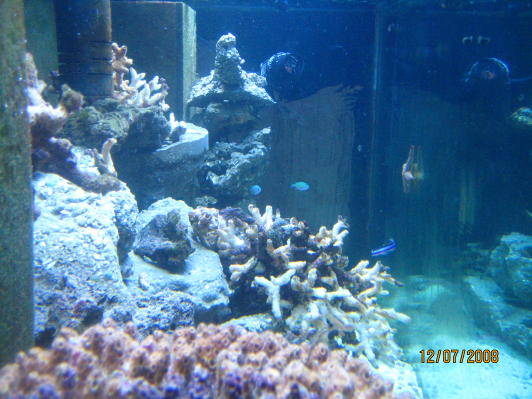
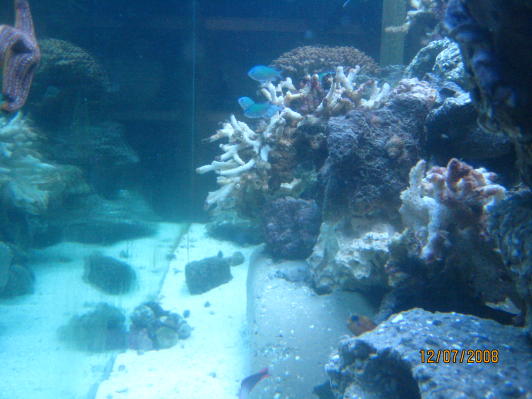
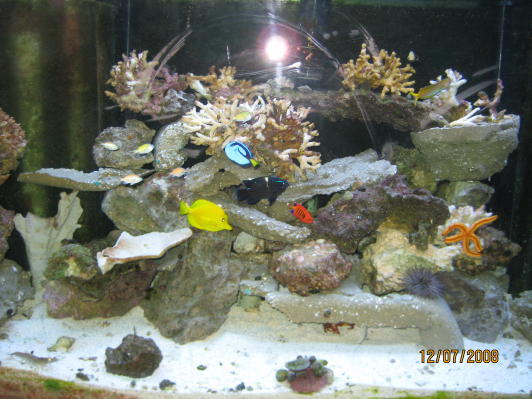
The homemade rock is finally ready. Here is the first shot at aquascaping. Any and all comments or suggesttions are welcome. It's a full tank shot, then the left, then the right.
A) The thing that looks like a half a ball (just to the left of the starfish on the front glass) with a flat top on the center-right is exactly that. It's hollow inside with lots of holes for fish to go in and out. The entire column has a piece of acryllic rod running up the middle of it.
B) The thing on the top of the column in front of the glass for the pipes is a donut with viking hat horns. GF made that one. Again an acryllic rod holds the column together.
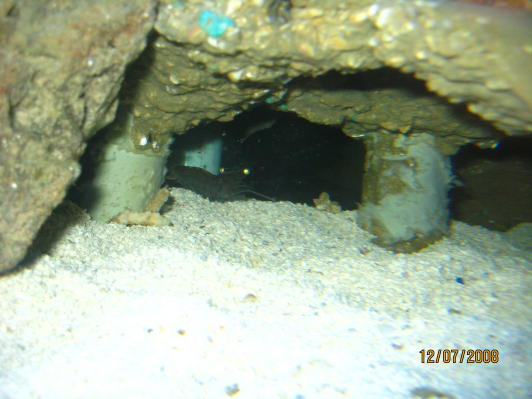
C) My "brilliant" idea is the huge grate on the bottom with the legs to lift everything up about 4 inches off the sand. It's the ugly smooth thing on the bottom in the center. The front left corner broke off. The last photo looks under this "grate."
D) I tried to arrange it to make as many bridges, ledges or flat surfaces as possible.
Attachment 214945
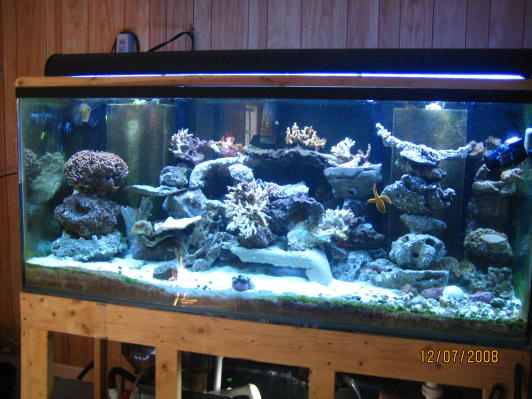
The large coral on the far right sits on a large live rock which sits on a homemade rectangle, about 11" by 9" (where the reflection of a rocking chair shows on the glass), so that the area under the large rock is an empty hidey hole. The yellow tang might adopt that as his home.
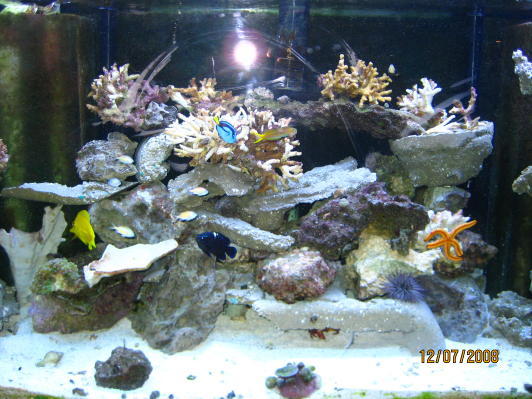
Attachment 214946
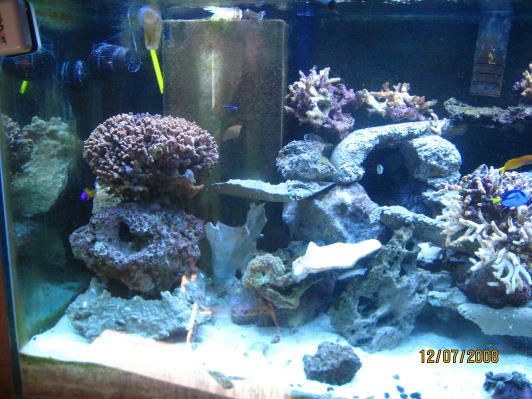
The midas blenny immediately took up residence in the "left eye" on the 2nd rock up from the bottom under the viking hat, although he's not there in this pic. It's a dead end hole. All the other holes in that piece connect up on the inside of the rock.
Attachment 214947
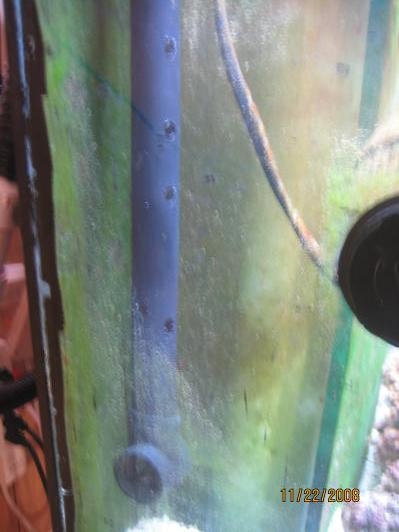
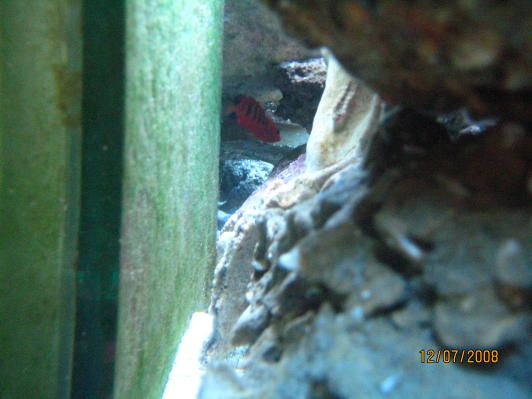
here is looking under my "brilliant" idea. Yes, that is a brown shrimp, the kind we eat. I saved him from a recent trout fishing last week where we used live shrimp as bait.
Attachment 214948


V

vince-1961

Guest
Looking lengthwise from the top of the left side of the DT.
Attachment 214953
Looking lengthwise from under and behind from the left
Attachment 214956
Looking lengthwise from the right.
Attachment 214955
and just another shot...
Attachment 214957
Now then, all I need are some corals, zooanthids, sponges etc for color, let some time pass and all ought to be cool!
Oh, BTW, today's water parameters are:
Ammonia .25
Nitrite 0
Nitrate 10
pH 8.3
Alkalinity 1.7
calcium 450 on one test, 520 on the other. (don't ask)


Top