240G Tank Stand & Canopy Build

acrylic51

Active Member
Quote:
Originally Posted by Xcali1985 http:///t/383662/240g-tank-stand-canopy-build/20#post_3381833
Here's a picture of the pump.

Just took notice to the pump choice...Excellent choice. What size are your drains? I took notice the tank has dual overflows, but I think your going to have to throttle that puppy back quite a bit.....Pushing that kind of flow through the tank might be hectic through the sump????? I tried pushing a HammerHead on my 240......and my sump was 6' long......Curious!!!!
 

xcali1985

Active Member
Quote:
Originally Posted by acrylic51 http:///t/383662/240g-tank-stand-canopy-build/20#post_3414820
I know what you mean about long days......Nothing in particular, just liked what I say from the pic and trying to get some ideas that's all!!!!!
Alright, I'll take a few. Nothing spectacular.
Quote:
Originally Posted by acrylic51
http:///t/383662/240g-tank-stand-canopy-build/40#post_3414823
Just took notice to the pump choice...Excellent choice. What size are your drains? I took notice the tank has dual overflows, but I think your going to have to throttle that puppy back quite a bit.....Pushing that kind of flow through the tank might be hectic through the sump????? I tried pushing a HammerHead on my 240......and my sump was 6' long......Curious!!!!
I have 2 over flows and each of them have 2 2" drains in them for a total of 4 drains. It handles the pump easily, however, I have it dialed back simply because it flows so fast that I get waves in my sumps, I mean 2-3 inch waves. I got this pump for free believe it or not :) If it ever does out I'll be buying something smaller.
Best thing about it is that the flow inside the tank is amazing. I probably won't need any supplemental flow from powerheads for basic LPS. If anything maybe 1-2 K-5s. I actually have to redo the return line its not far enough up in the tank for the skimmer i ordered.
BTW the lines on the pump are 1.5" and the return side Ts off into 1" lines and then both reduce into 3/4" lines for the loc-line returns. 2 x 3/4" = 1.5" so virtually 0 loss from reduction only headloss. I feed the pump with 2 1.5 inch pipes from both sumps and T it into the return so theres not to much friction on the part. The tank has no microbubbles. YAY! Although when I put the LEDs on it that may change.
Since I have to redo the pump I may do a T off the return and run it back in to the sump that way the pump can run freely and I can just dial back the extra drain. Probably easier.
 

acrylic51

Active Member
That's what I was referring to the flow through the sump is insane......My overflow had no issues handling the pump just the flow through the sump.....
 

xcali1985

Active Member
Quote:
Originally Posted by acrylic51 http:///t/383662/240g-tank-stand-canopy-build/40#post_3414858
That's what I was referring to the flow through the sump is insane......My overflow had no issues handling the pump just the flow through the sump.....
Yup, the flow is so fast that it actually created so many bubbles that the sumps became a virtual skimmer. Ill have to record a video of it in action for people to understand. Ill try to do it tonight.
 

xcali1985

Active Member
Didn't get a chance to take the pictures last night.... Dinner with the old lady and her parents ran way over... I'll try to take it today. Another 10hr work day though, plus I have to pick up my myster wrasse I just got.
 

xcali1985

Active Member
@acrylic51 haven't forgotten about you pictures coming soon.
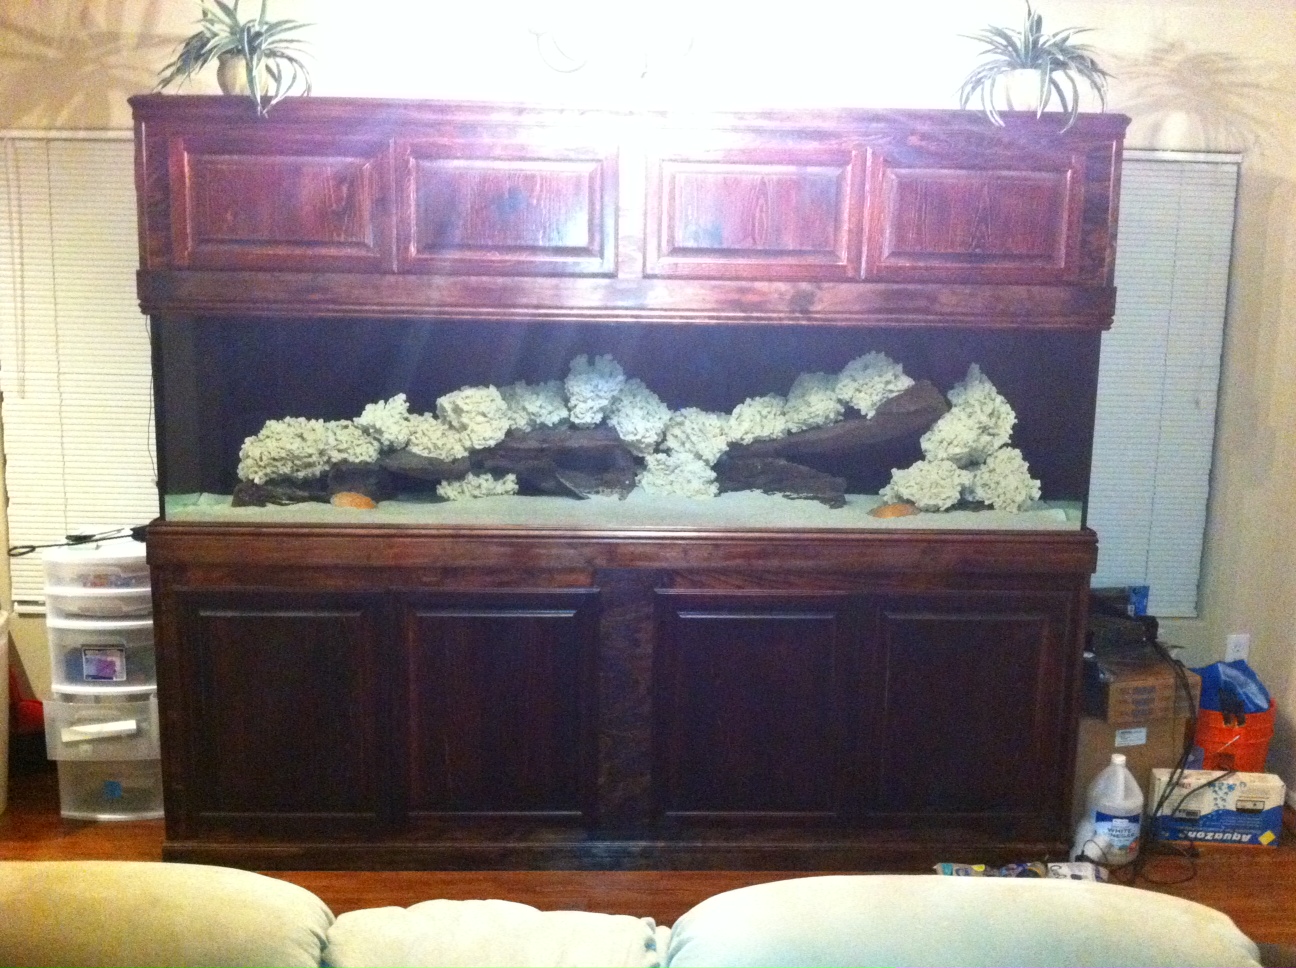
I just finished my canopy doors tonight and rehung them. This is the completed picture. It's not the best picture, took it with the iphone at night, however, ill take more tomorrow when its light. The canopy doors I used prestain on and it kept them lighter and closer to the canopy frame color. This was not done with the stand doors and they came out darker. So i will probably be ordering new doors for the stand to restain. I have been told that if I strip them and bleach them I can restain them. Not sure, ill do some research on it all. Here's the picture....
 

acrylic51

Active Member
Looks good!!!!! I've never had much luck stripping dark stain and re staining lighter.....I never tried the bleach idea though as well......
 

2quills

Well-Known Member
Quote:
Originally Posted by Xcali1985 http:///t/383662/240g-tank-stand-canopy-build/40#post_3414844
BTW the lines on the pump are 1.5" and the return side Ts off into 1" lines and then both reduce into 3/4" lines for the loc-line returns. 2 x 3/4" = 1.5" so virtually 0 loss from reduction only headloss. I feed the pump with 2 1.5 inch pipes from both sumps and T it into the return so theres not to much friction on the part. .
Actually that's not quite true. Each time you double the size of pipe, you increase the volume by about 4. Meaning a 1.5" pipe is equal to approximately four 3/4" pipes. Just a little FYI.
 

xcali1985

Active Member
@2Quills: The information I was given was wrong then. Thanks.
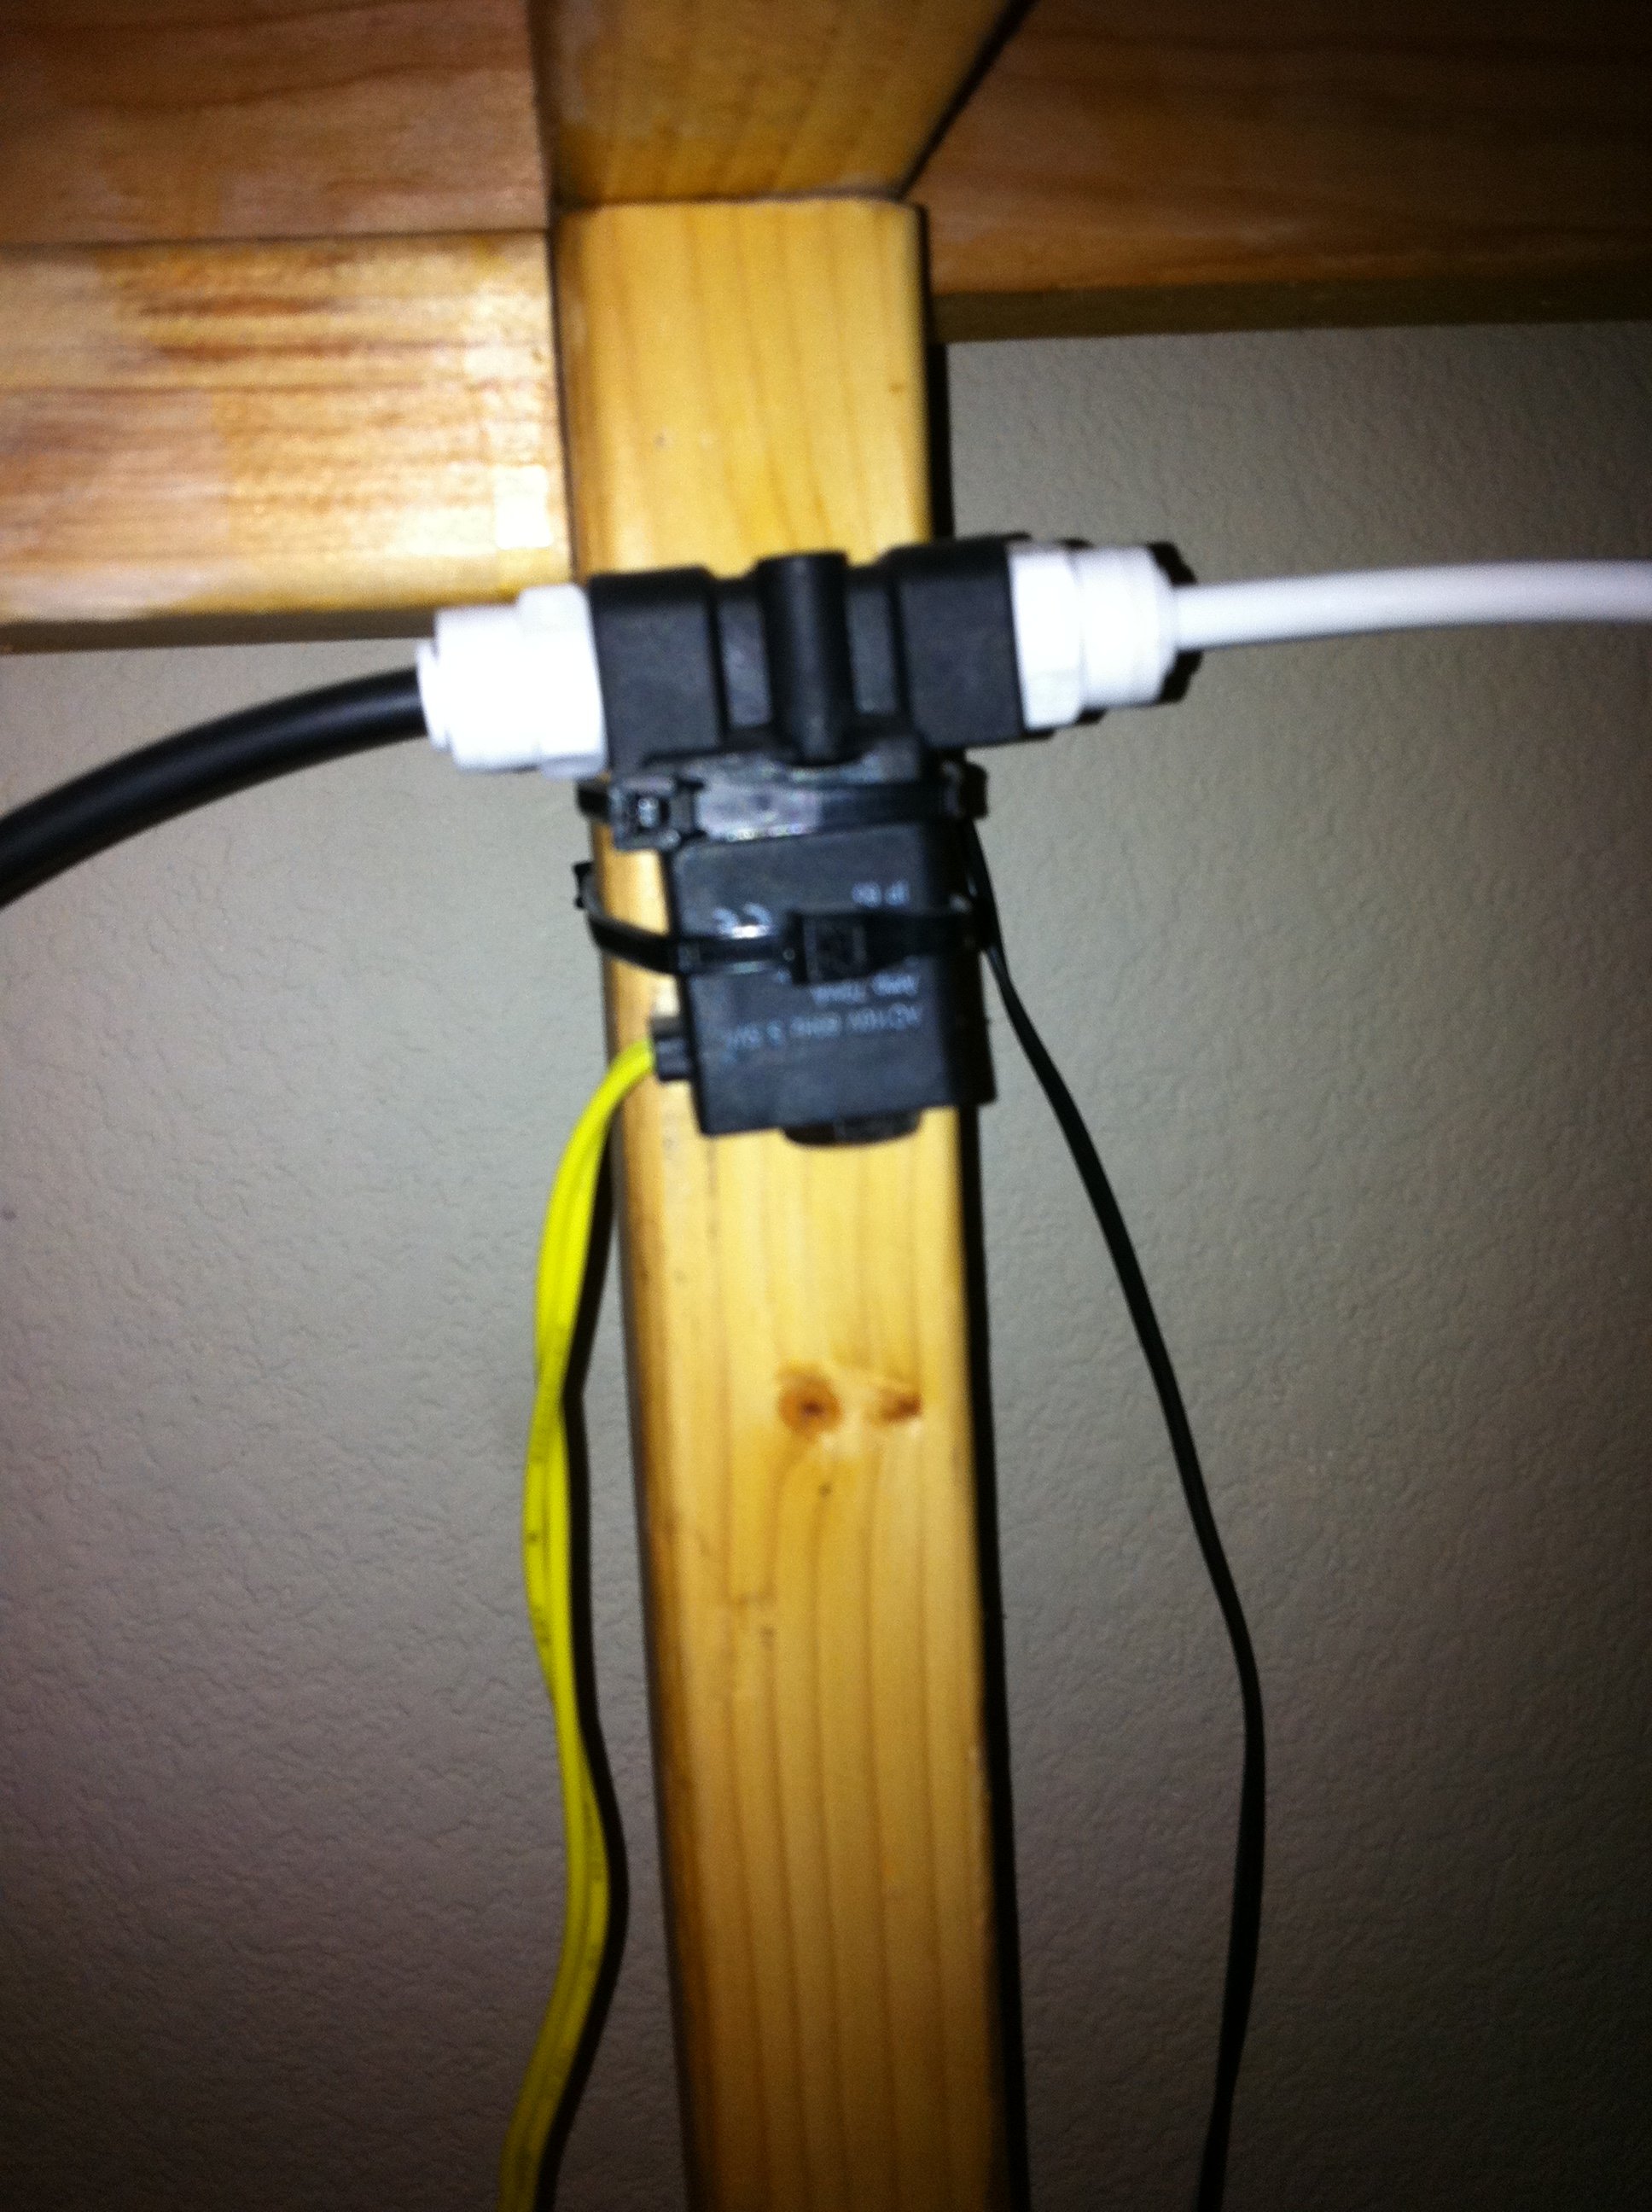
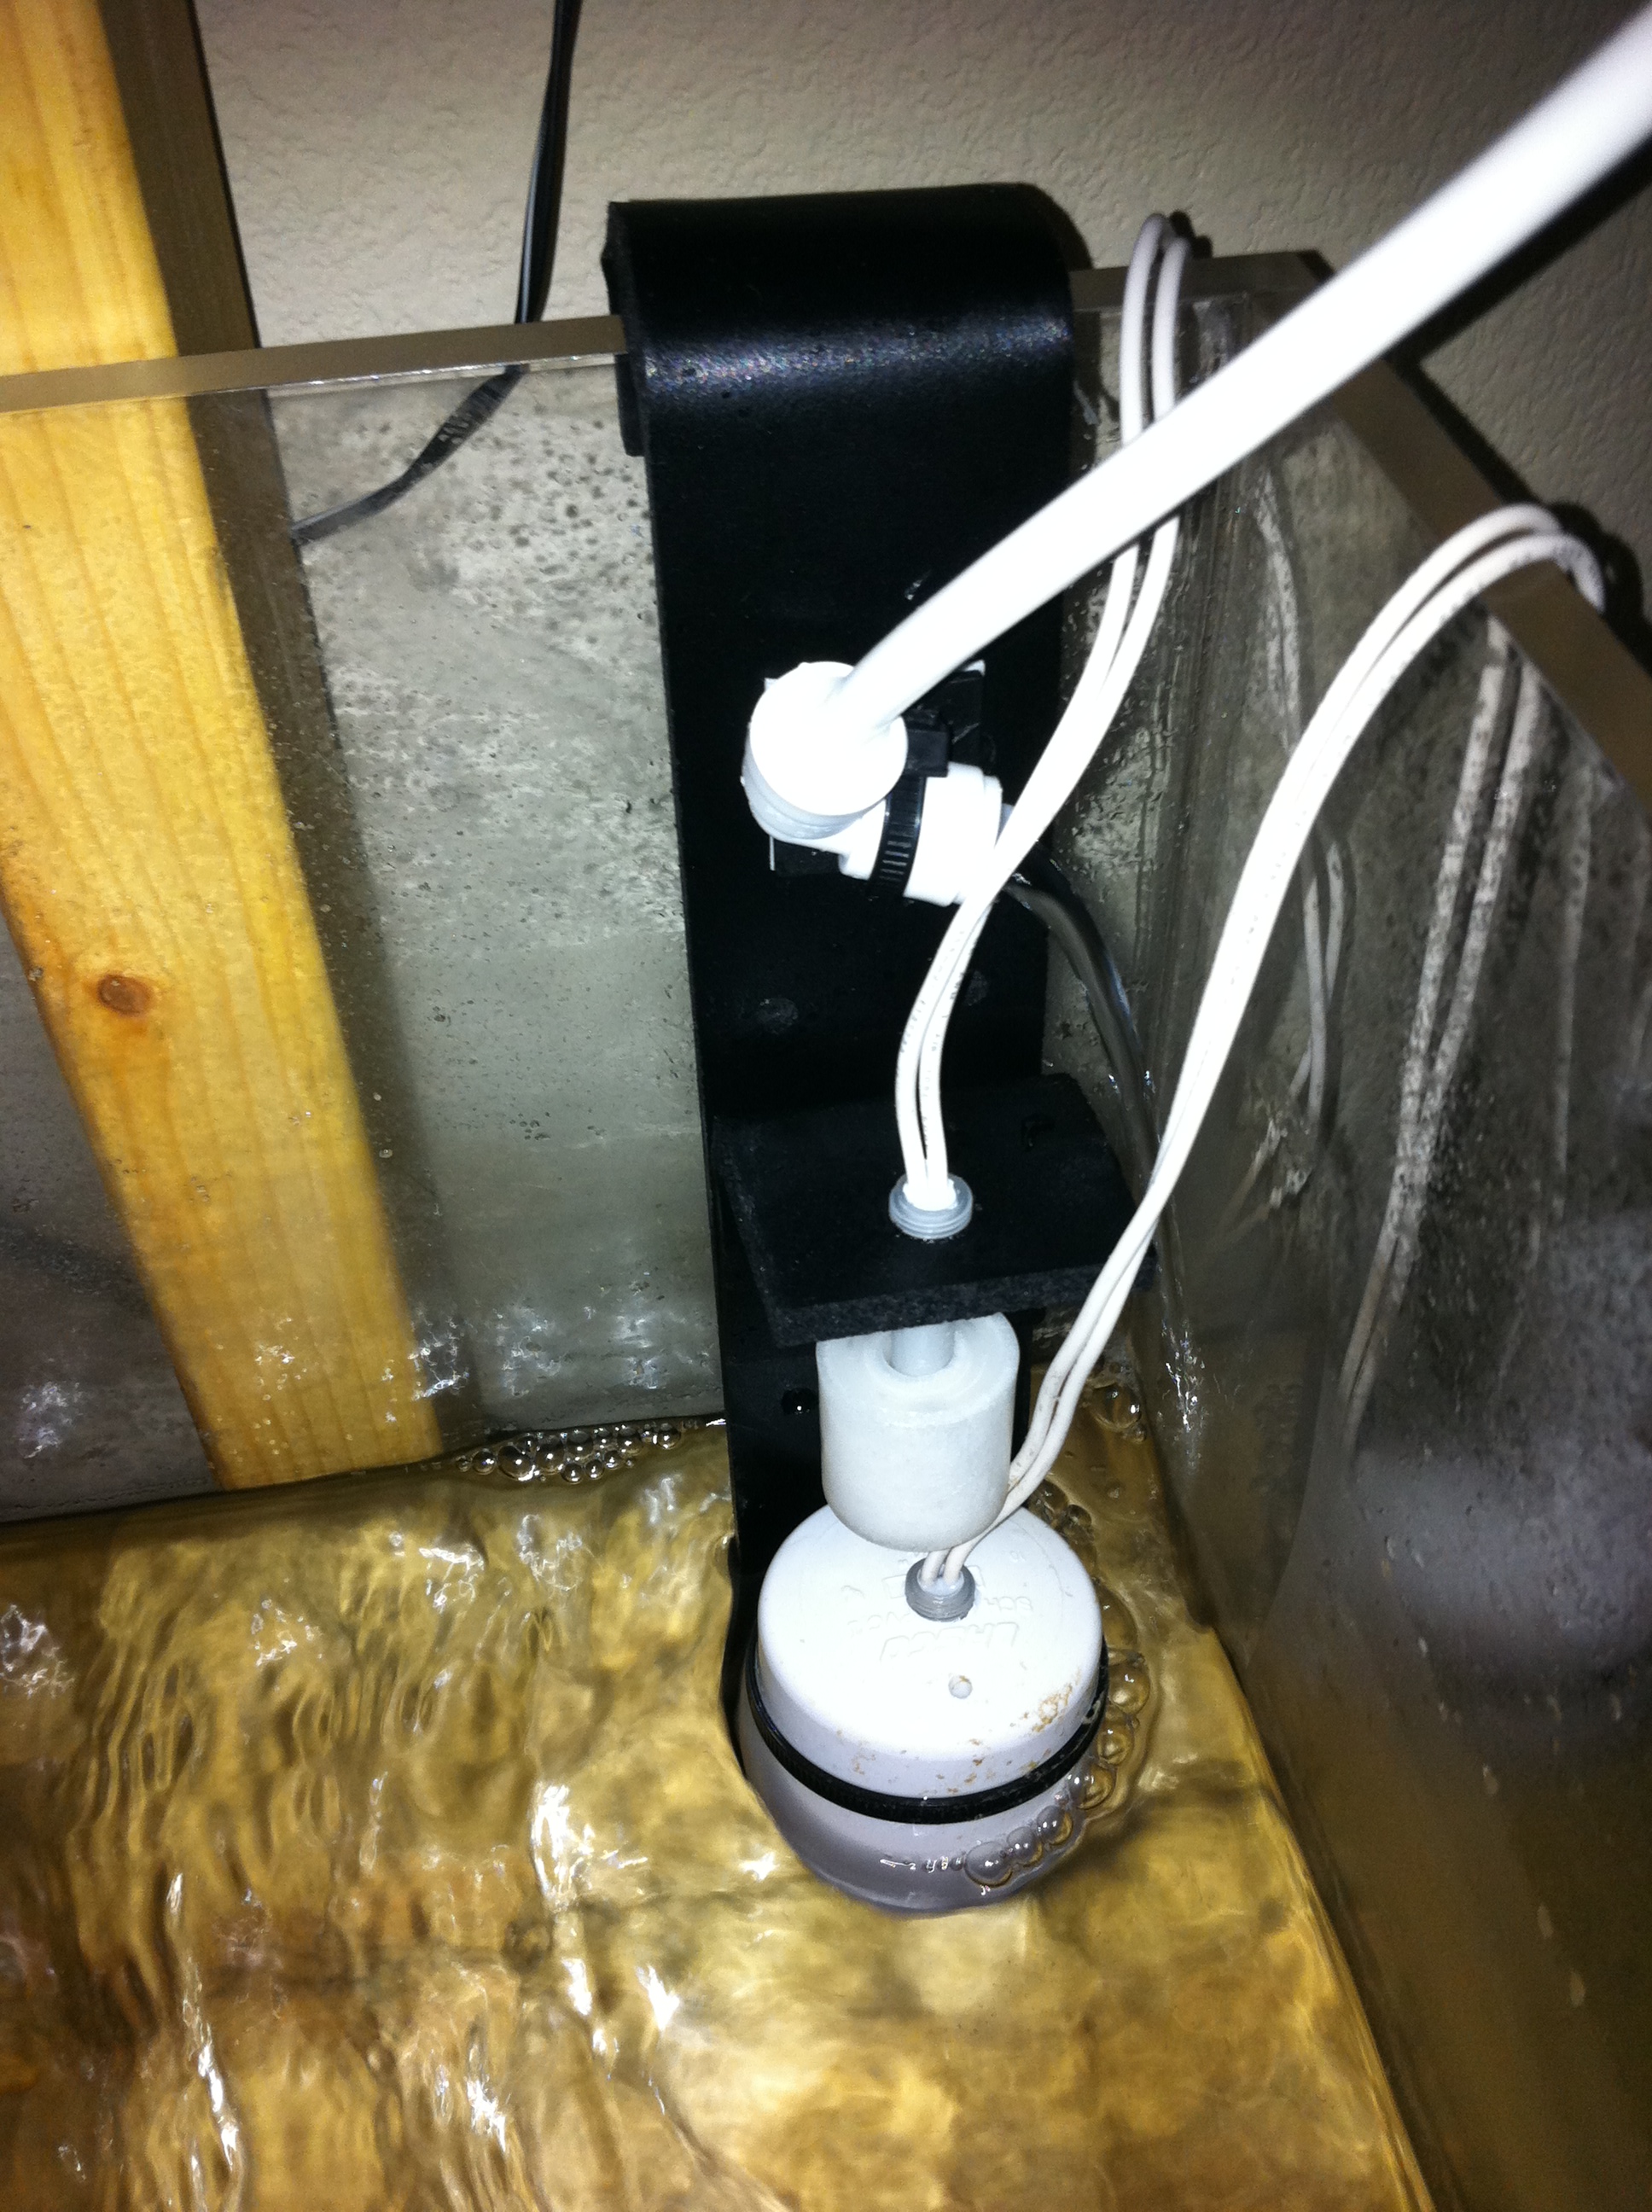
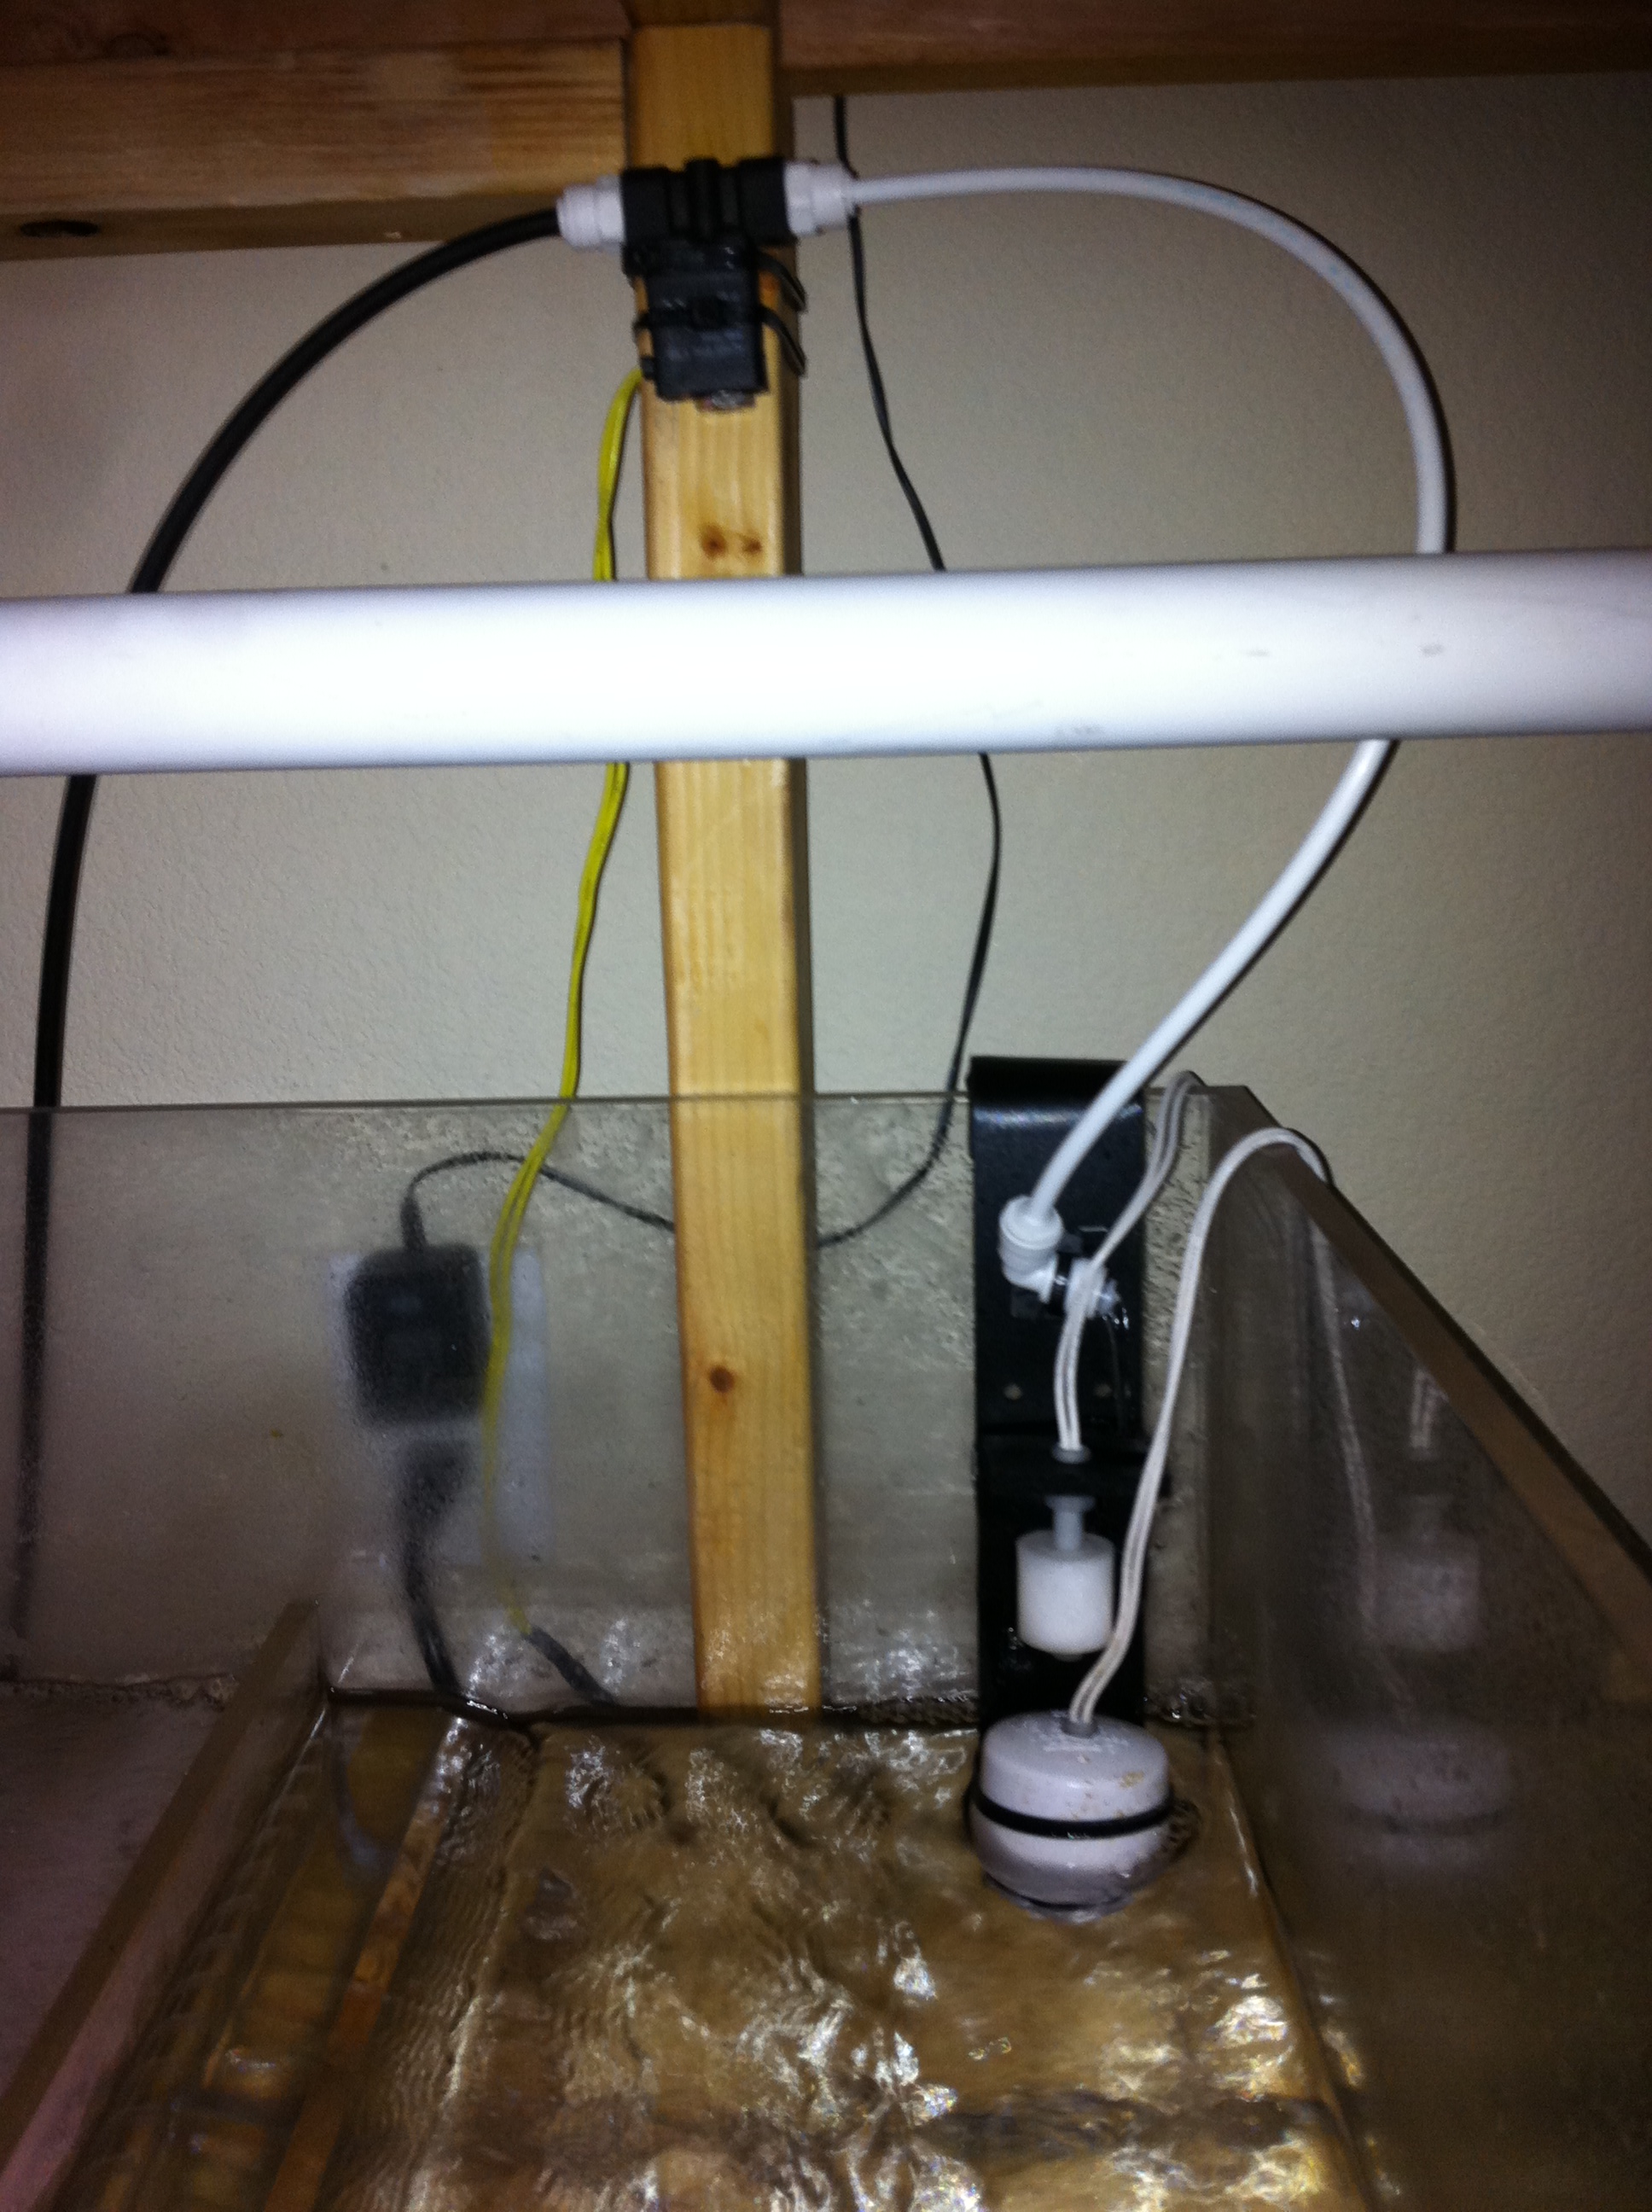
Here are pictures of my DIY auto top off.
The bottom piece is a float valve with a swash guard on it. The top is the safety valve in case the bottom one gets stuck. I think im also going to hang an additional on it the other sump and string them together. Never to much redundancy. I will maintenance them with my bi-weekly water changes. I quick rinse with RO/DI water and spin the float valve a few times.
The other piece is a solenoid that is naturally closed that when the float valve drops opens the gate inside and lets the RO/DI unit fill up. I'll probably flip this upside down so if it ever leaks it doesn't leak onto the electrical.
I'm still in the middle of setting up my water station and fish wall in the garage. When I do I will take pictures of the RO/DI unit. My RO unit is about 15 yards away from my unit as I ran the line inside my kitchen cabinets. The shutoff valve still works although it takes longer to shutoff the further you are away from the unit.
 

2quills

Well-Known Member
Quote:
Originally Posted by Xcali1985 http:///t/383662/240g-tank-stand-canopy-build/40#post_3417605
@2Quills: The information I was given was wrong then. Thanks.
Here are pictures of my DIY auto top off.
The bottom piece is a float valve with a swash guard on it. The top is the safety valve in case the bottom one gets stuck. I think im also going to hang an additional on it the other sump and string them together. Never to much redundancy. I will maintenance them with my bi-weekly water changes. I quick rinse with RO/DI water and spin the float valve a few times.
The other piece is a solenoid that is naturally closed that when the float valve drops opens the gate inside and lets the RO/DI unit fill up. I'll probably flip this upside down so if it ever leaks it doesn't leak onto the electrical.
I'm still in the middle of setting up my water station and fish wall in the garage. When I do I will take pictures of the RO/DI unit. My RO unit is about 15 yards away from my unit as I ran the line inside my kitchen cabinets. The shutoff valve still works although it takes longer to shutoff the further you are away from the unit.
Nice set up! The switches and valve look good. What kit did you use and if I may ask what are you using for a top off container?
Curious about the issue with your stand, the stain and all. I assume you had the doors made and you built the rest? What type of wood did you use for the skin on the stand/canopy and what did you seal it with?
Oh, btw. Yes, it sounds crazy about the pvc volume and such. When every you increase the size of pipe 100% you nearly increase the area within the pipe by a factor of 4. But not quite 4 in most cases. Here's a little chart that I've used as a guideline when thinking about drain lines and returns.
Notice the numbers in red, the area within the pipe increases between 3/4" and 1-1/2" by about 3.8 times. Nearly quadruple. That doesn't mean that you were off in your return line when you set it up. It just means that you split it up pretty much perfectly. So I guess in a sense that matters very little to anyone...you probably see some friction loss but it's minimal and nothing to be too concerned about IMO.


Nominal Pipe Size (in)


O.D.


Average I.D.


ID Cross Sectional Area in2


Min. Wall


Nominal Wt./Ft.


Max. W.P. PSI


1/2


.840


.608


.2903


.109


.161


600


3/4


1.050


.810


.5153


.113


.214


480


1


1.315


1.033


.8381


.133


.315


450


1-1/4


1.660


1.364


1.461


.140


.426


370


1 -1/2


1.900


1.592


1.991


.145


.509


330


2


2.375


2.049


3.297


.154


.682


280


2-1/2


2.875


2.445


4.695


.203


1.076


300


3


3.500


3.042
>

7.269


.216


1.409


260


3-1/2


4.000


3.520


9.731


.226


1.697


240


4


4.500


3.998


12.55


.237


2.006


220


5


5.563


5.017


19.77


.258


2.726


190


6


6.625


6.031


28.57


.280


3.535


180


8


8.625


7.943


49.55


.322


5.305


160
 

xcali1985

Active Member
Quote:
Originally Posted by 2Quills http:///t/383662/240g-tank-stand-canopy-build/40#post_3417623
Nice set up! The switches and valve look good. What kit did you use and if I may ask what are you using for a top off container?
Curious about the issue with your stand, the stain and all. I assume you had the doors made and you built the rest? What type of wood did you use for the skin on the stand/canopy and what did you seal it with?
Oh, btw. Yes, it sounds crazy about the PVC volume and such. When every you increase the size of pipe 100% you nearly increase the area within the pipe by a factor of 4. But not quite 4 in most cases. Here's a little chart that I've used as a guideline when thinking about drain lines and returns.
Notice the numbers in red, the area within the pipe increases between 3/4" and 1-1/2" by about 3.8 times. Nearly quadruple. That doesn't mean that you were off in your return line when you set it up. It just means that you split it up pretty much perfectly. So I guess in a sense that matters very little to anyone...you probably see some friction loss but it's minimal and nothing to be too concerned about IMO.


Nominal Pipe Size (in)


O.D.


Average I.D.


ID Cross Sectional Area in2


Min. Wall


Nominal Wt./Ft.


Max. W.P. PSI


1/2


.840


.608


.2903


.109


.161


600


3/4


1.050


.810


.5153


.113


.214


480


gn="middle" width="14%">
1


1.315


1.033


.8381


.133


.315


450


1-1/4


1.660


1.364


1.461


.140


.426


370


1 -1/2


1.900


1.592


1.991


.145


.509


330


2


2.375


2.049


3.297


.154


.682


280


2-1/2


2.875


2.445


4.695


.203


1.076


300


3


3.500


3.042


7.269


.216


1.409


260


3-1/2


4.000


3.520


9.731


.226


1.697


240


4>


4.500


3.998


12.55


.237


2.006


220


5


5.563


5.017


19.77


.258


2.726


190


6


6.625


6.031


28.57


.280


3.535


180


8


8.625


7.943


49.55


.322


5.305


160


Can't post the link to the kit here I think, it's a site that doesn't sell anything but top off equipment, but its a competitor I guess.
It's actually connected directly into my RO/DI unit. Thanks for the graph, I could actually use some more friction loss with this pump... LOL. I have it dialed back probably 20% to keep waves out the sump.
It's sealed with simple polyurethane 3 coats on the outside and 4 on the inside. I was going to go with something that they use to seal bar tops, but when looking at my current stand they didn't even seal the inside of it at all. That one was made by a company that specializes in nothing but aquarium stands. So I'm thinking it wont be a big problem.
I'm taking pictures of the aquascape tonight and will upload them tonight, hopefully. Been working 10+ hr days, exhausting.
 

xcali1985

Active Member
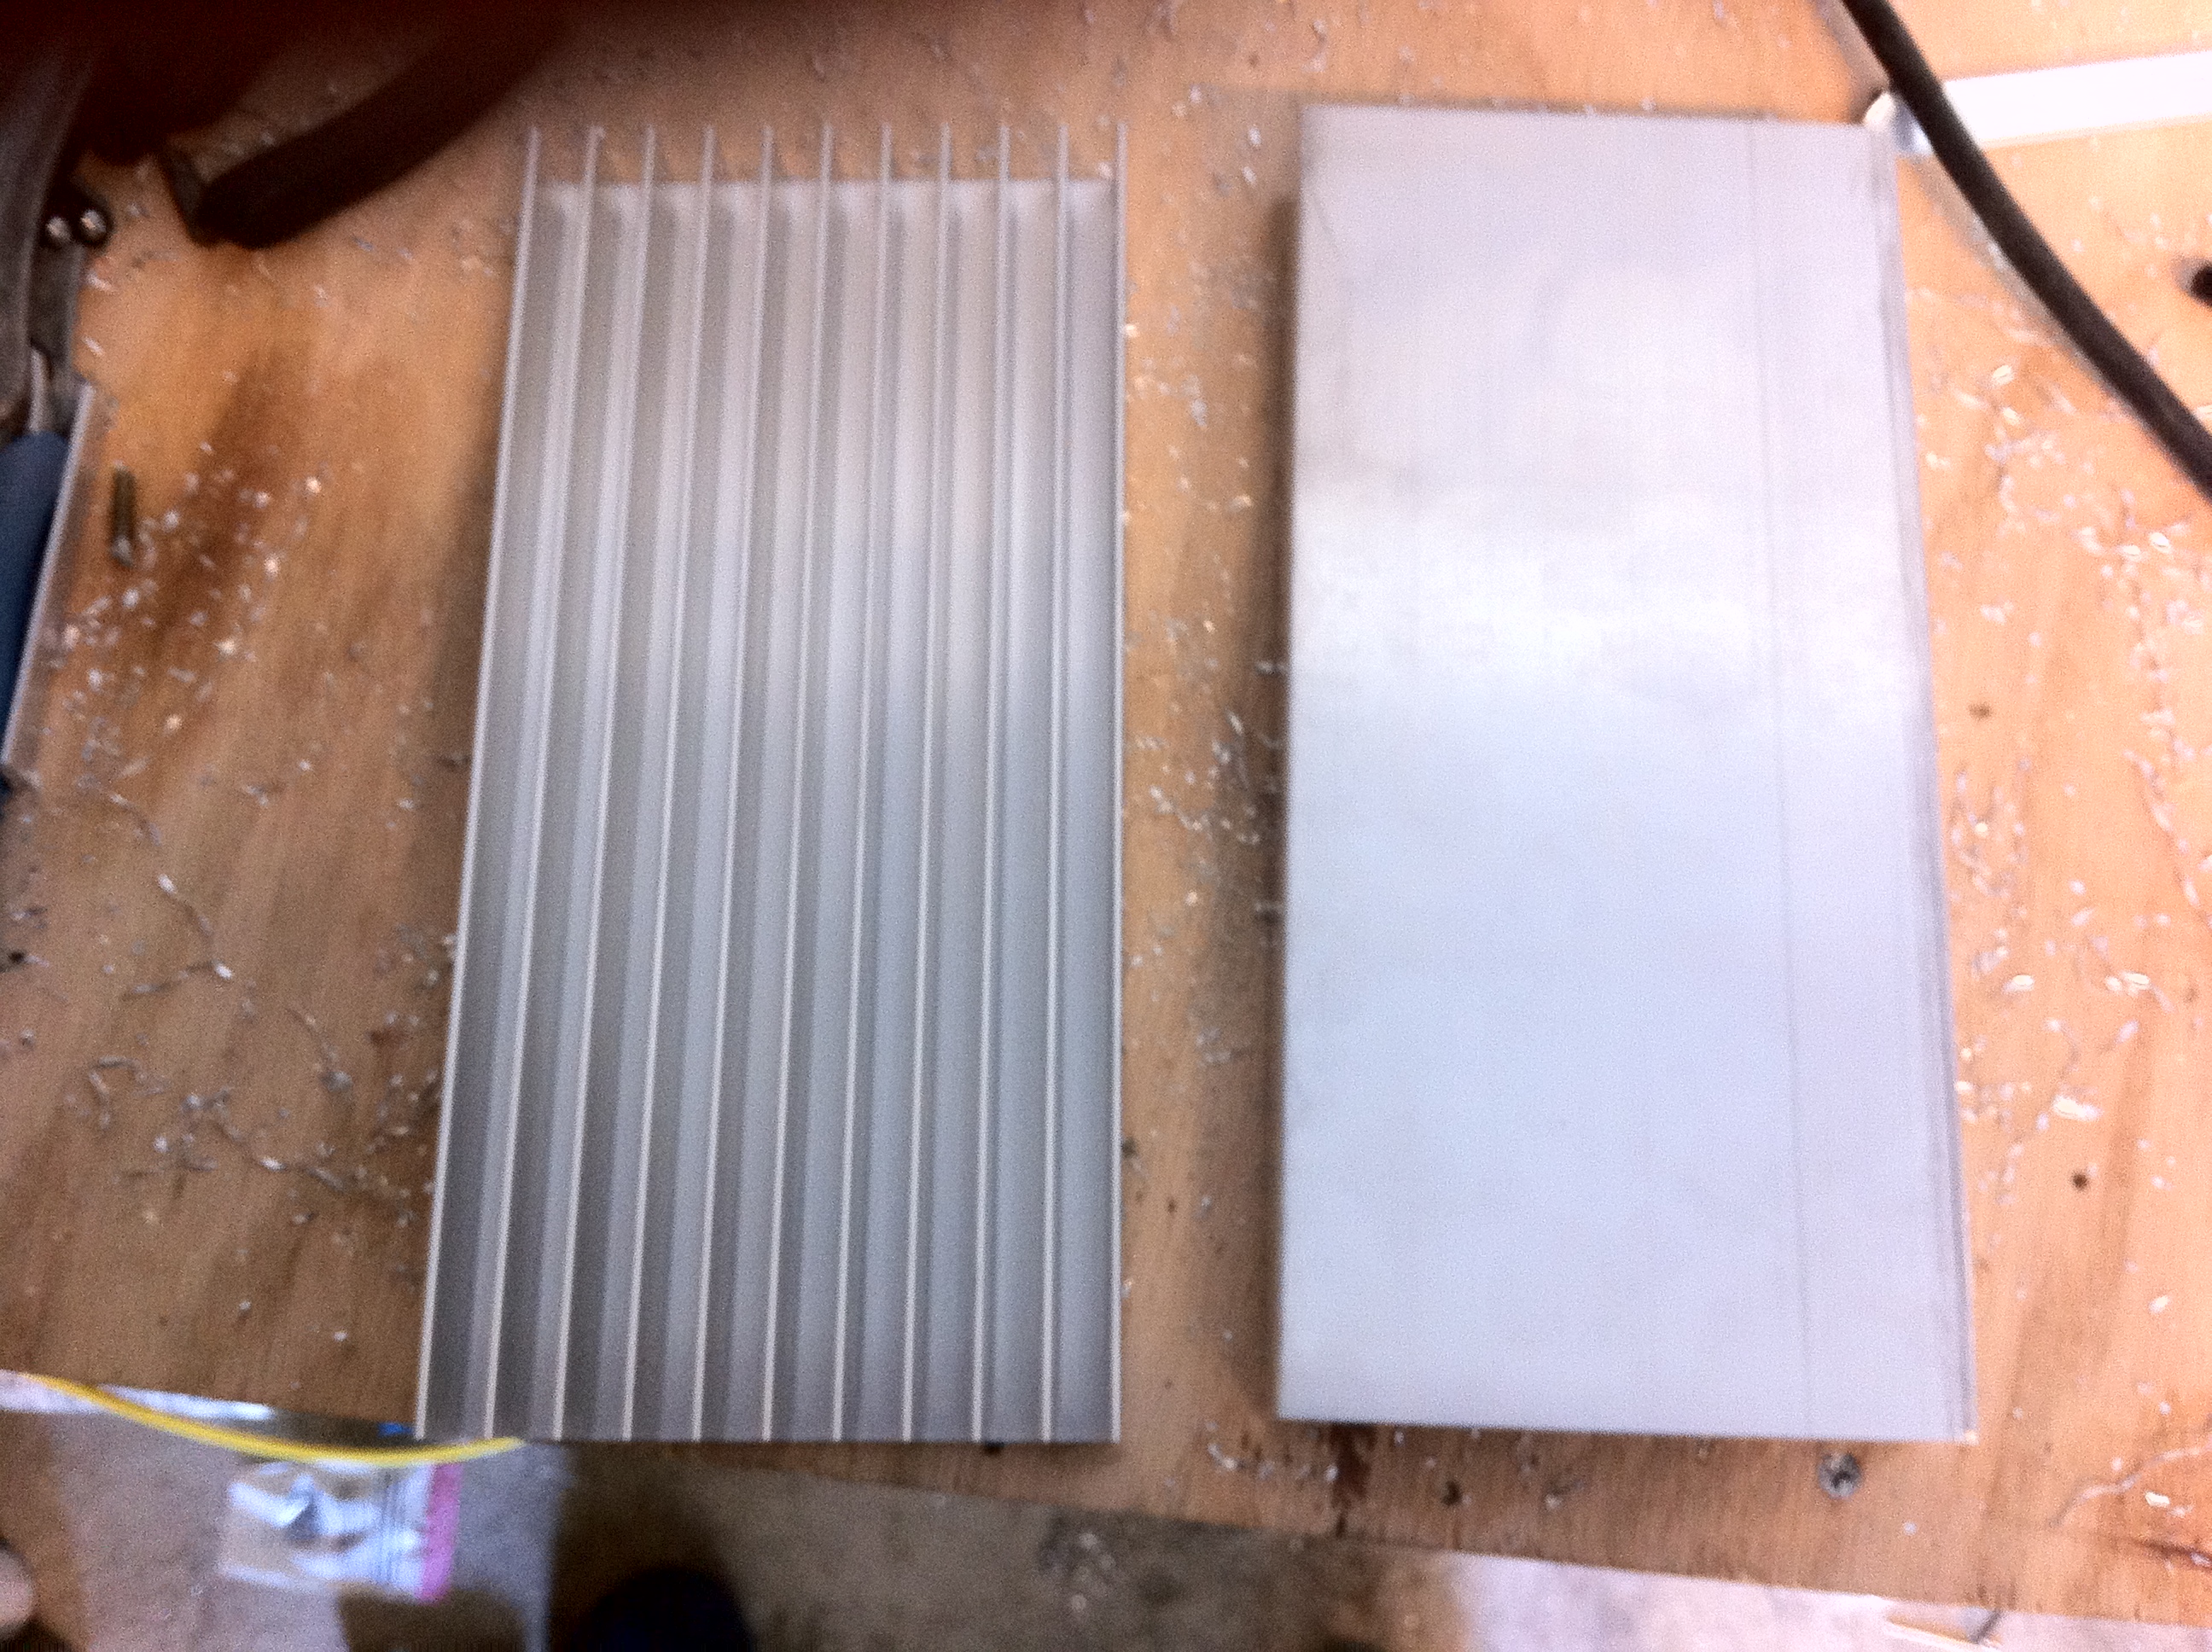
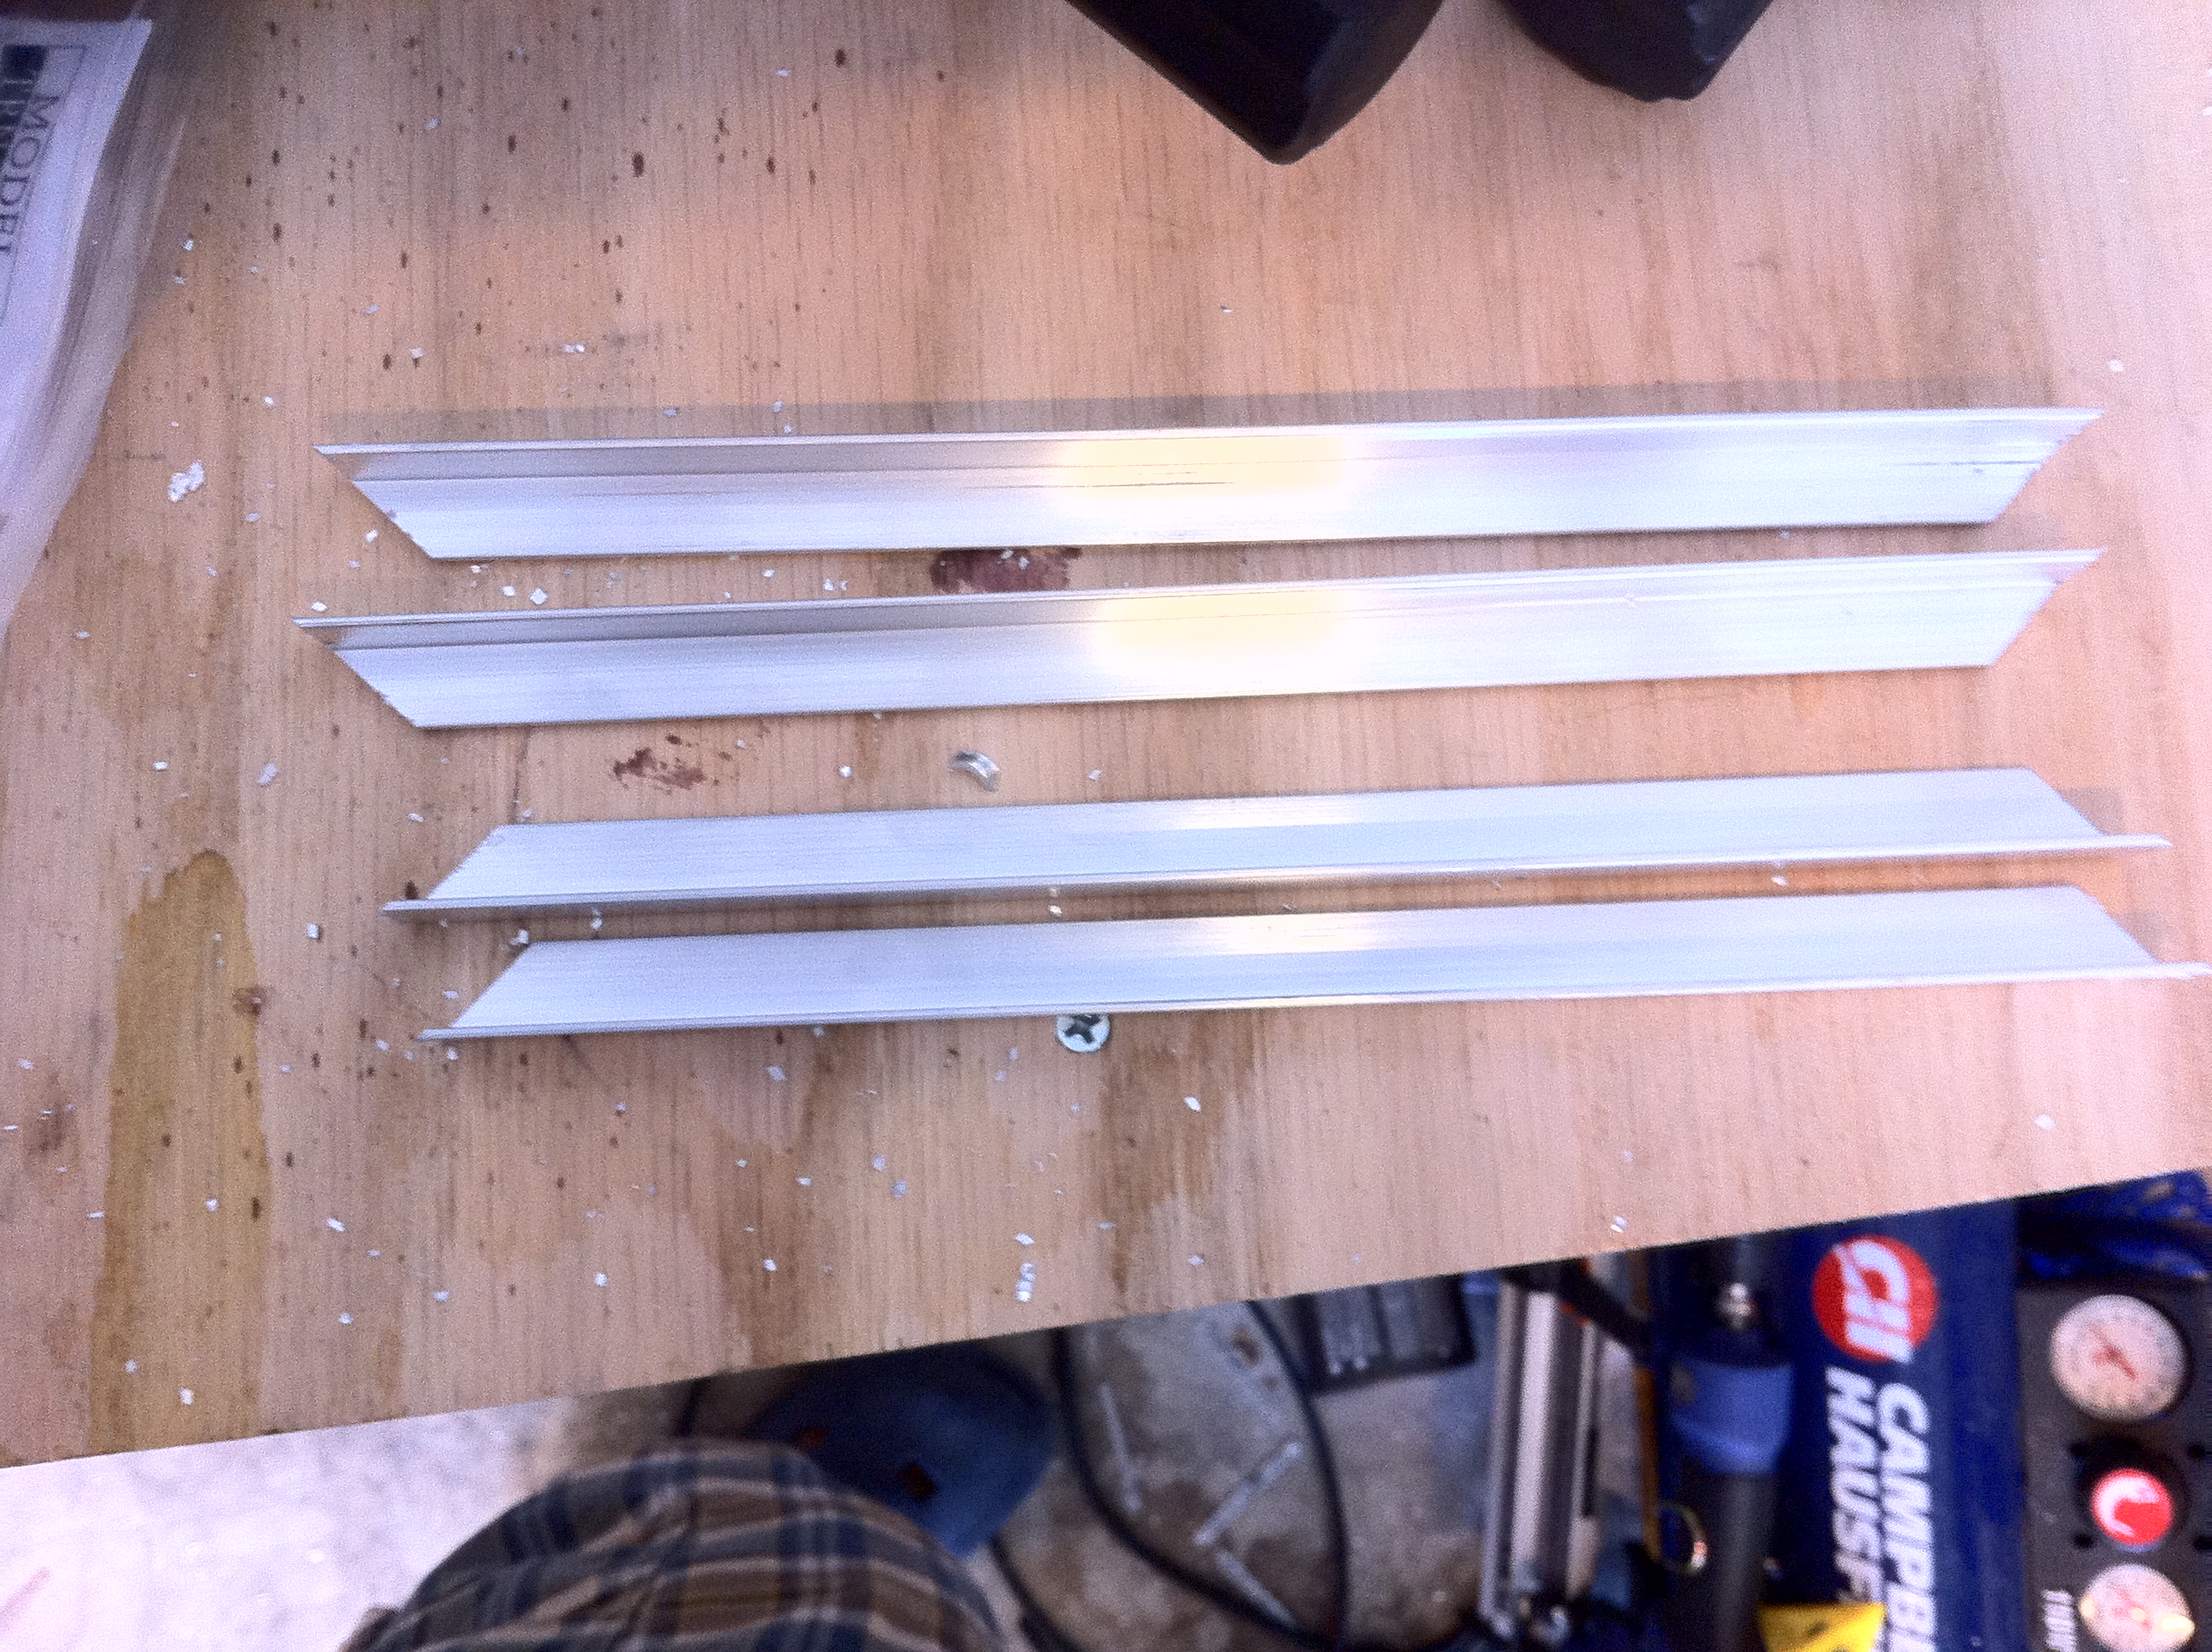
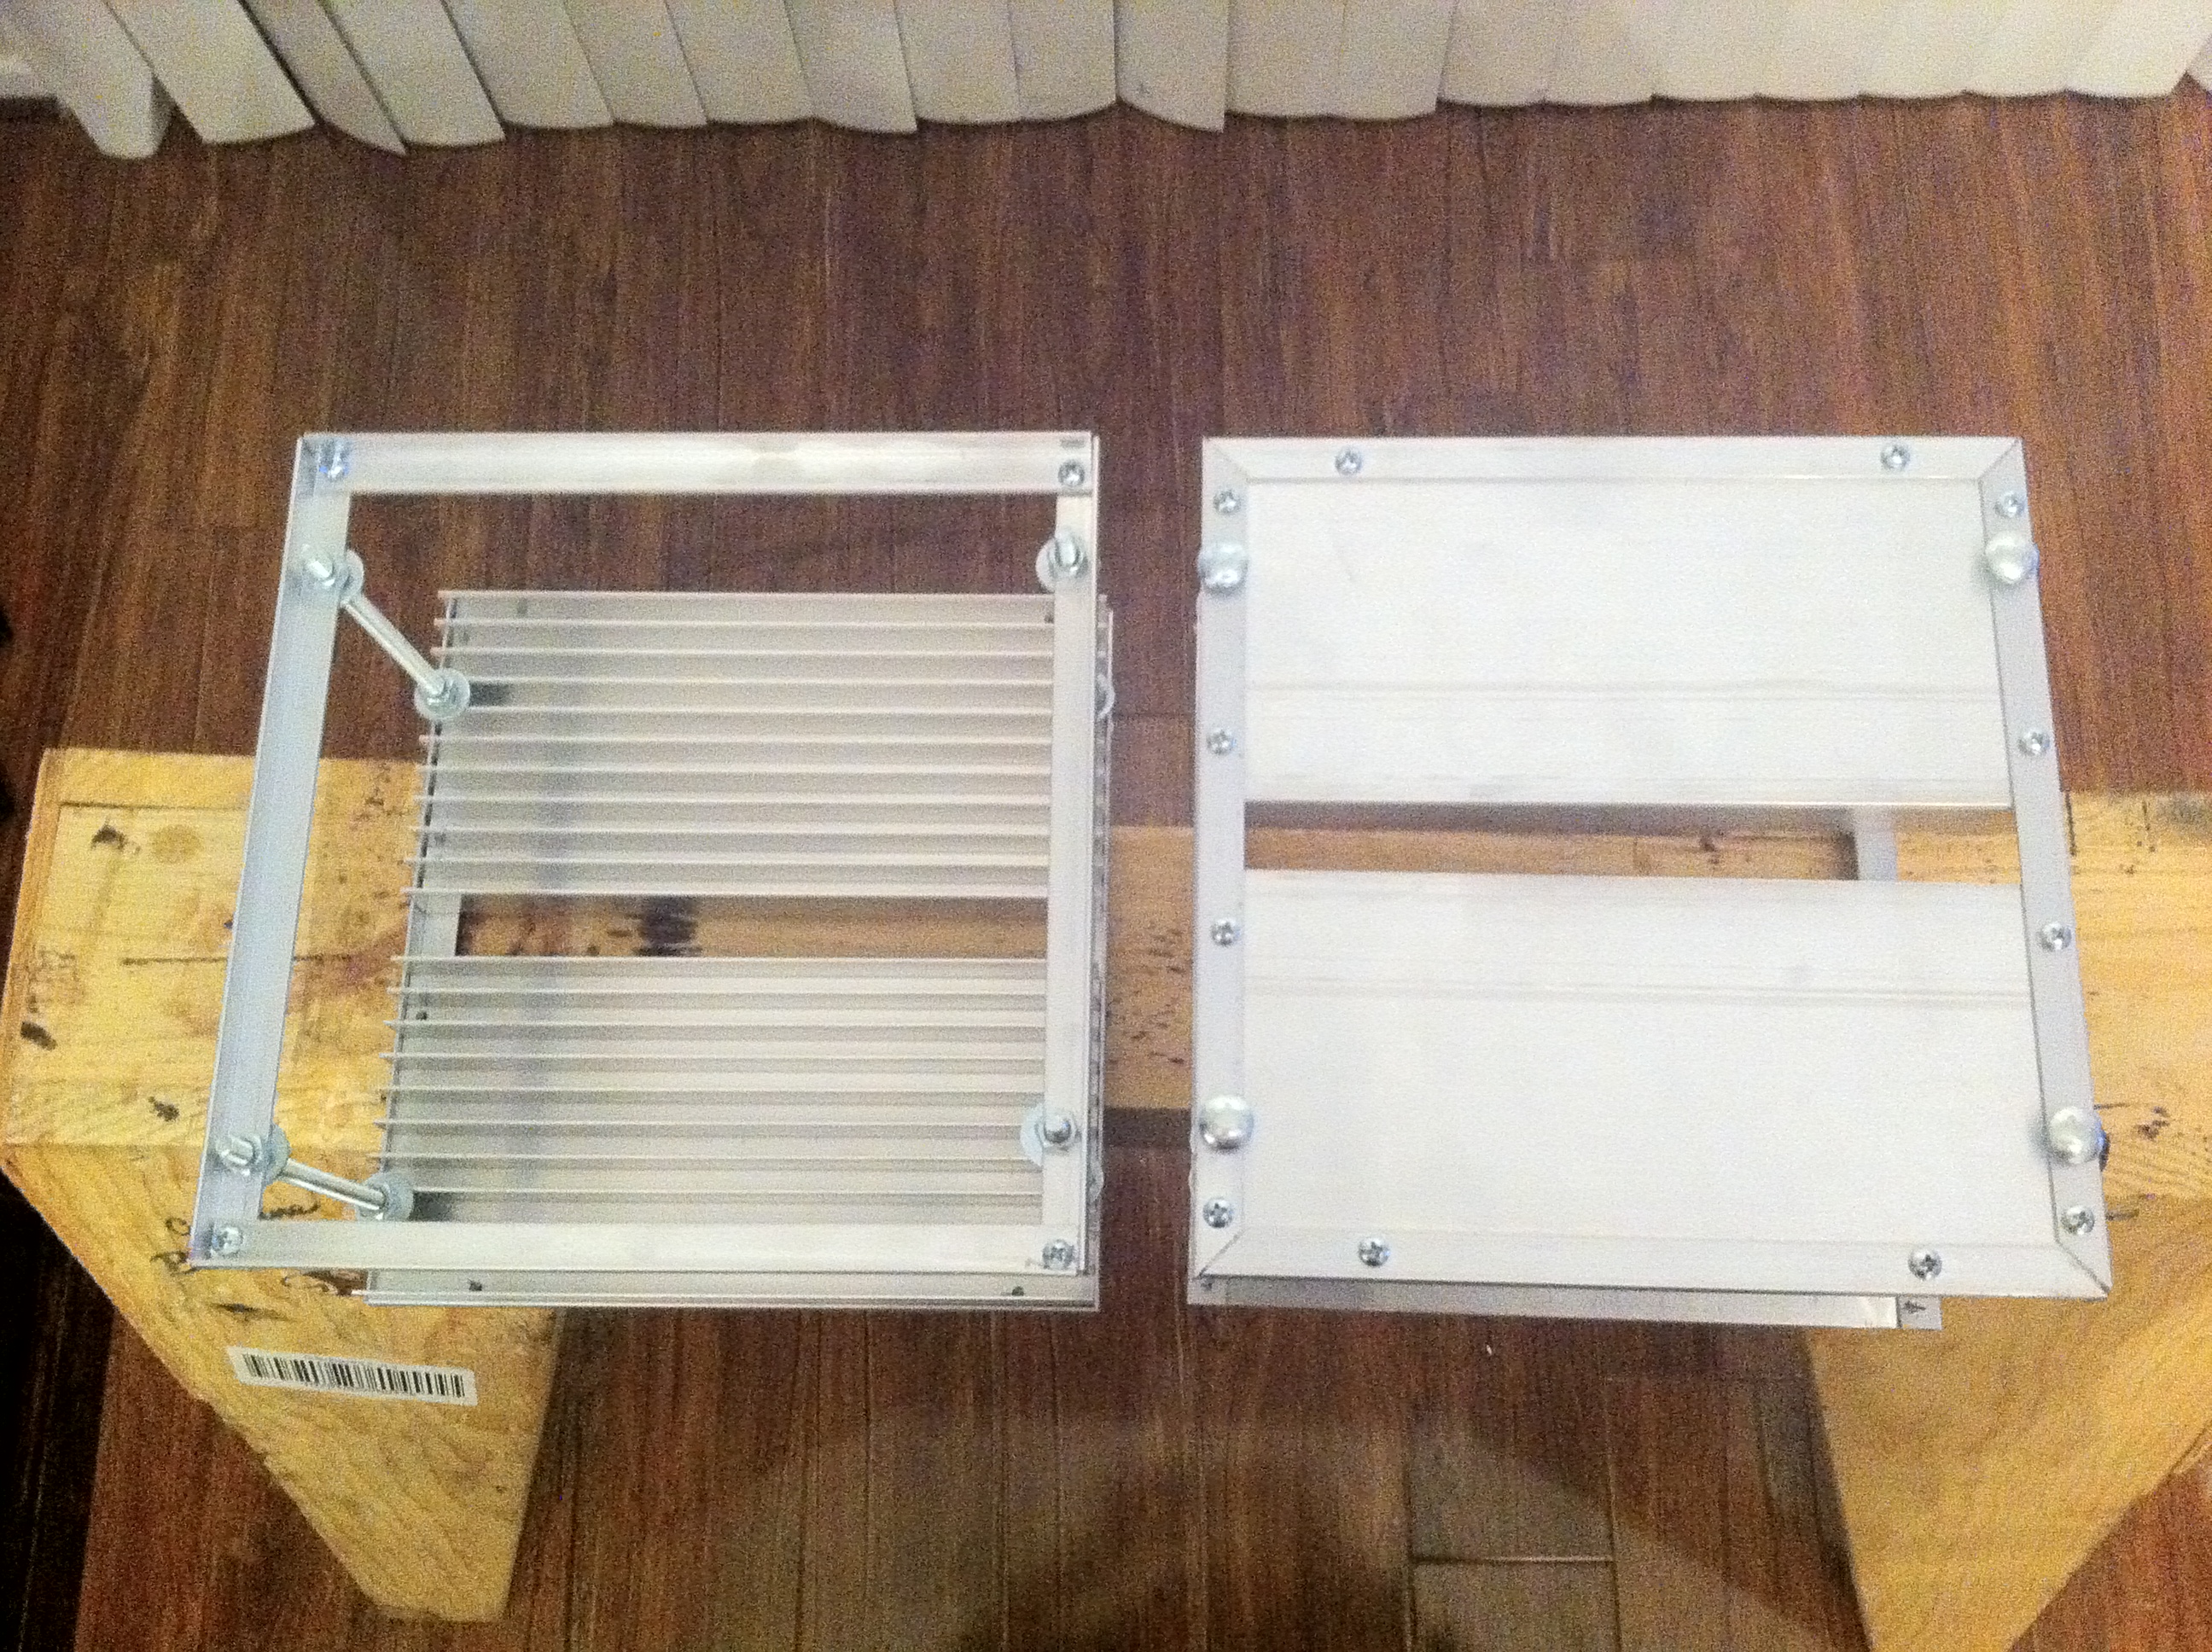
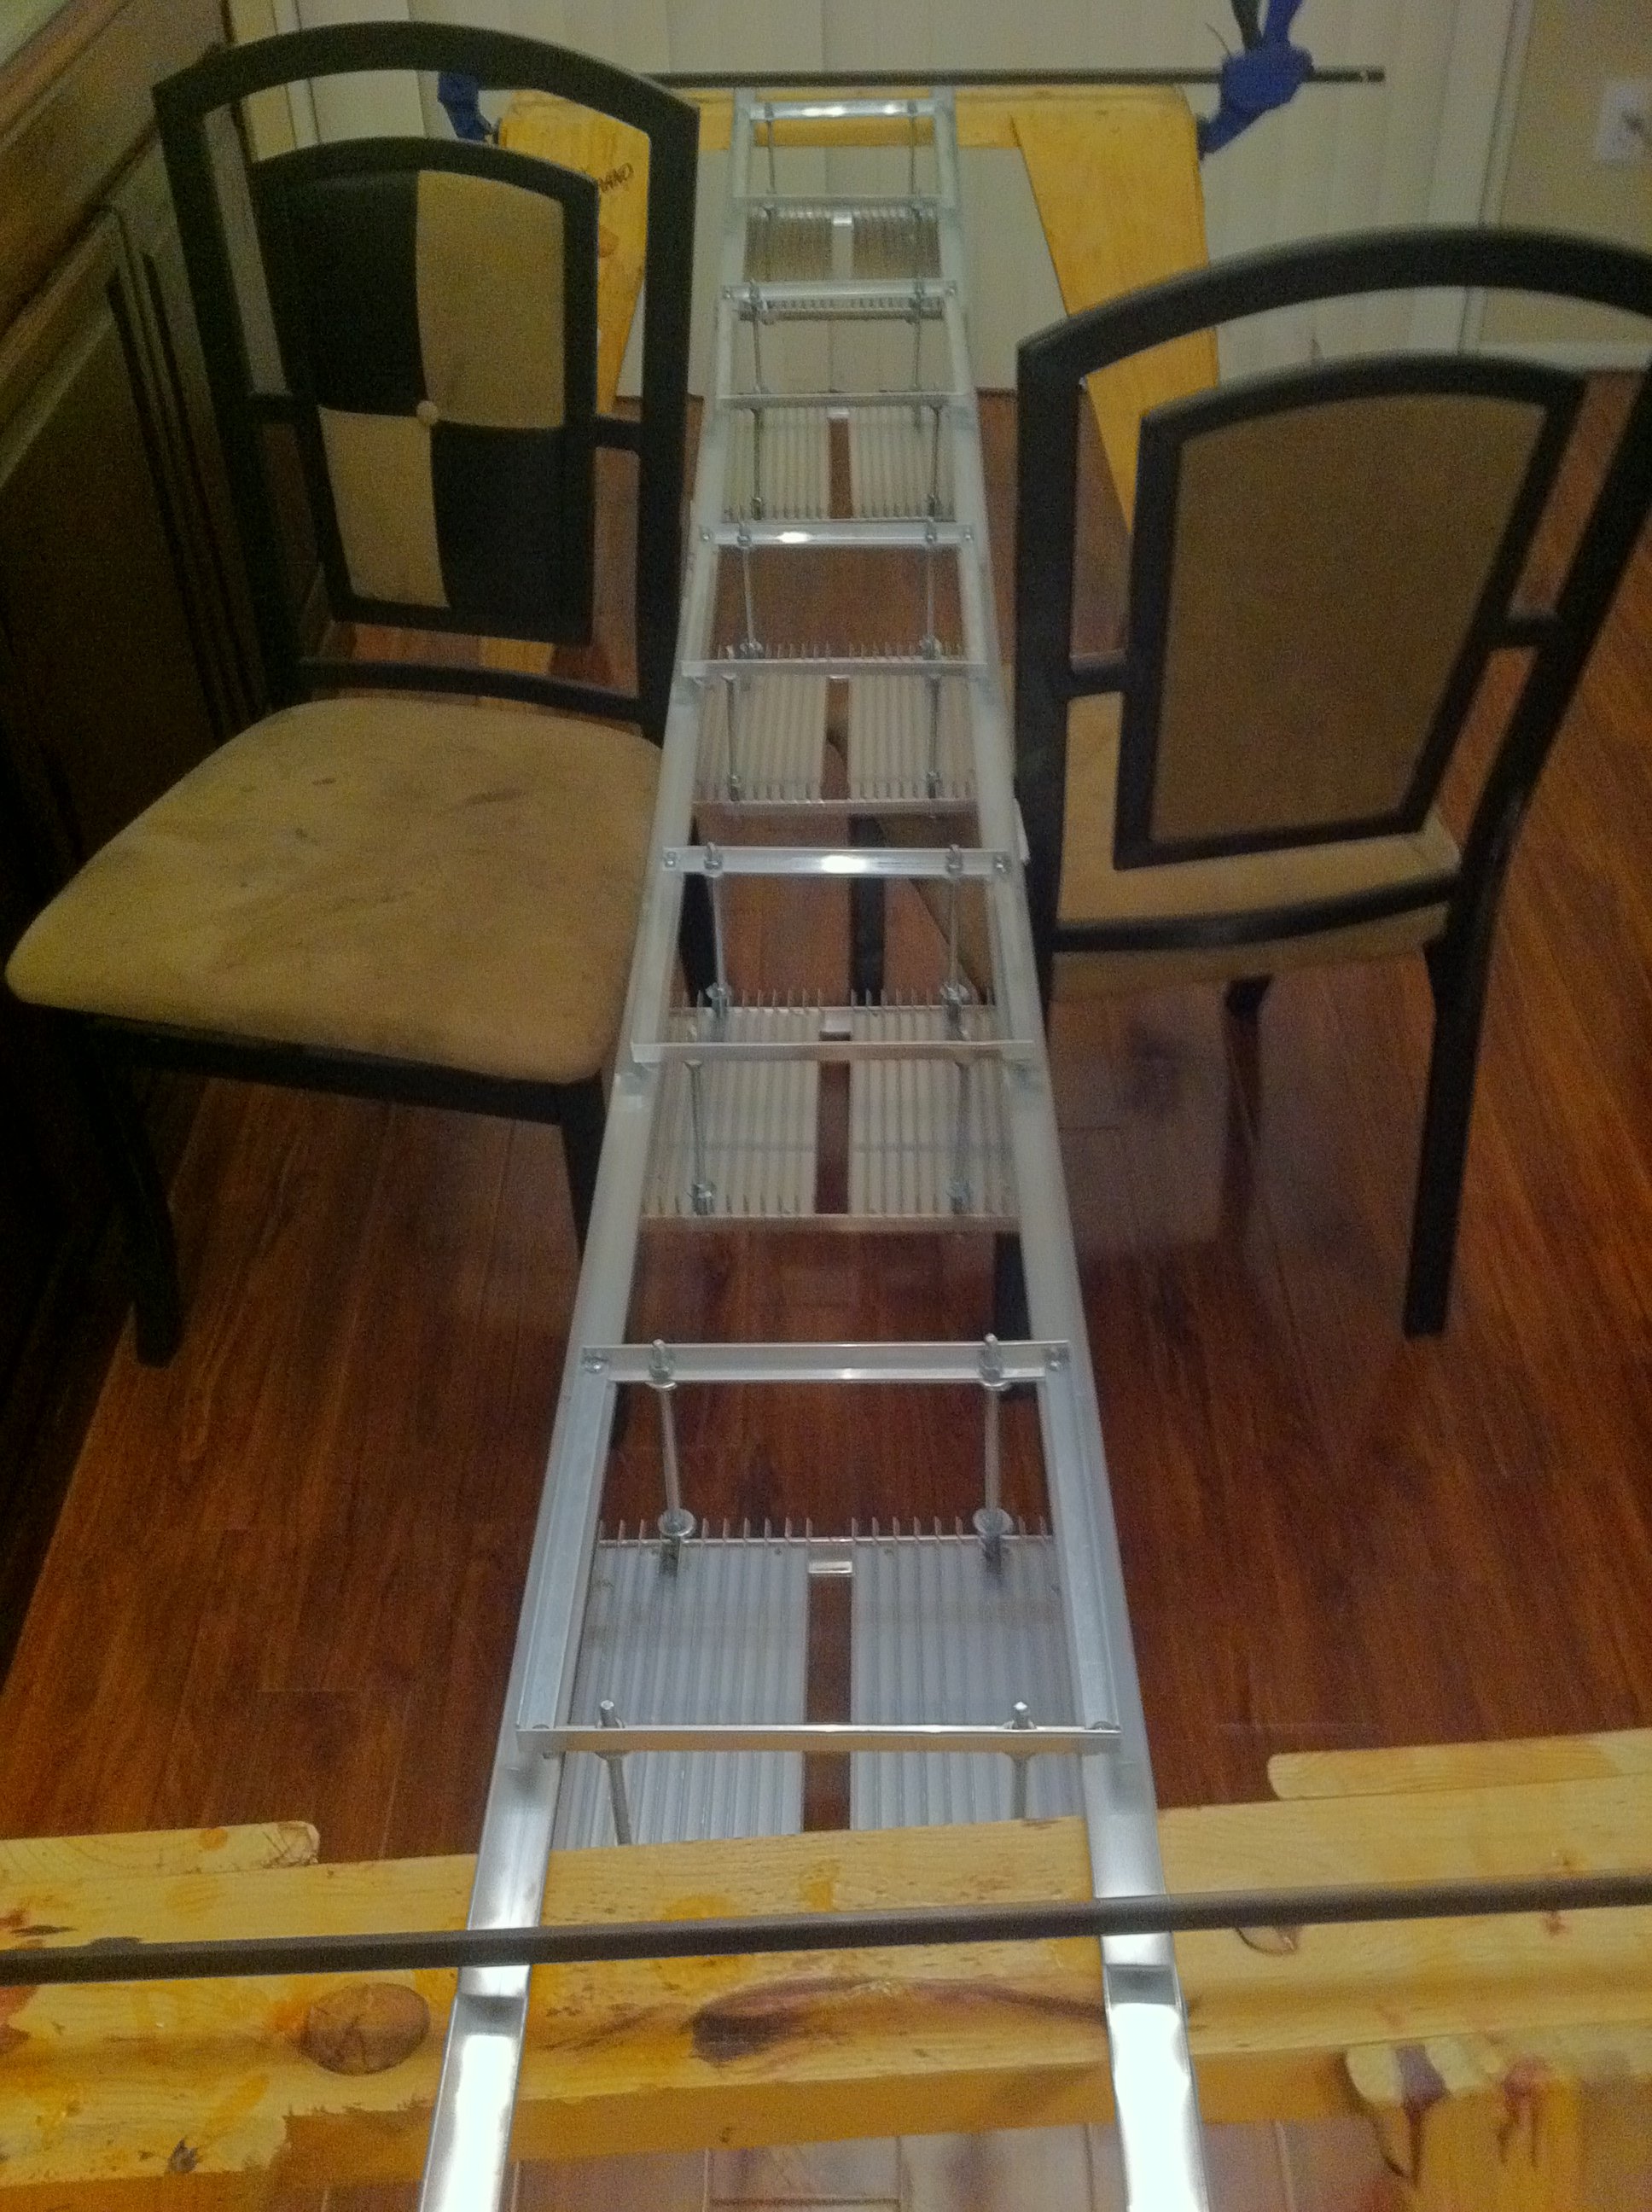
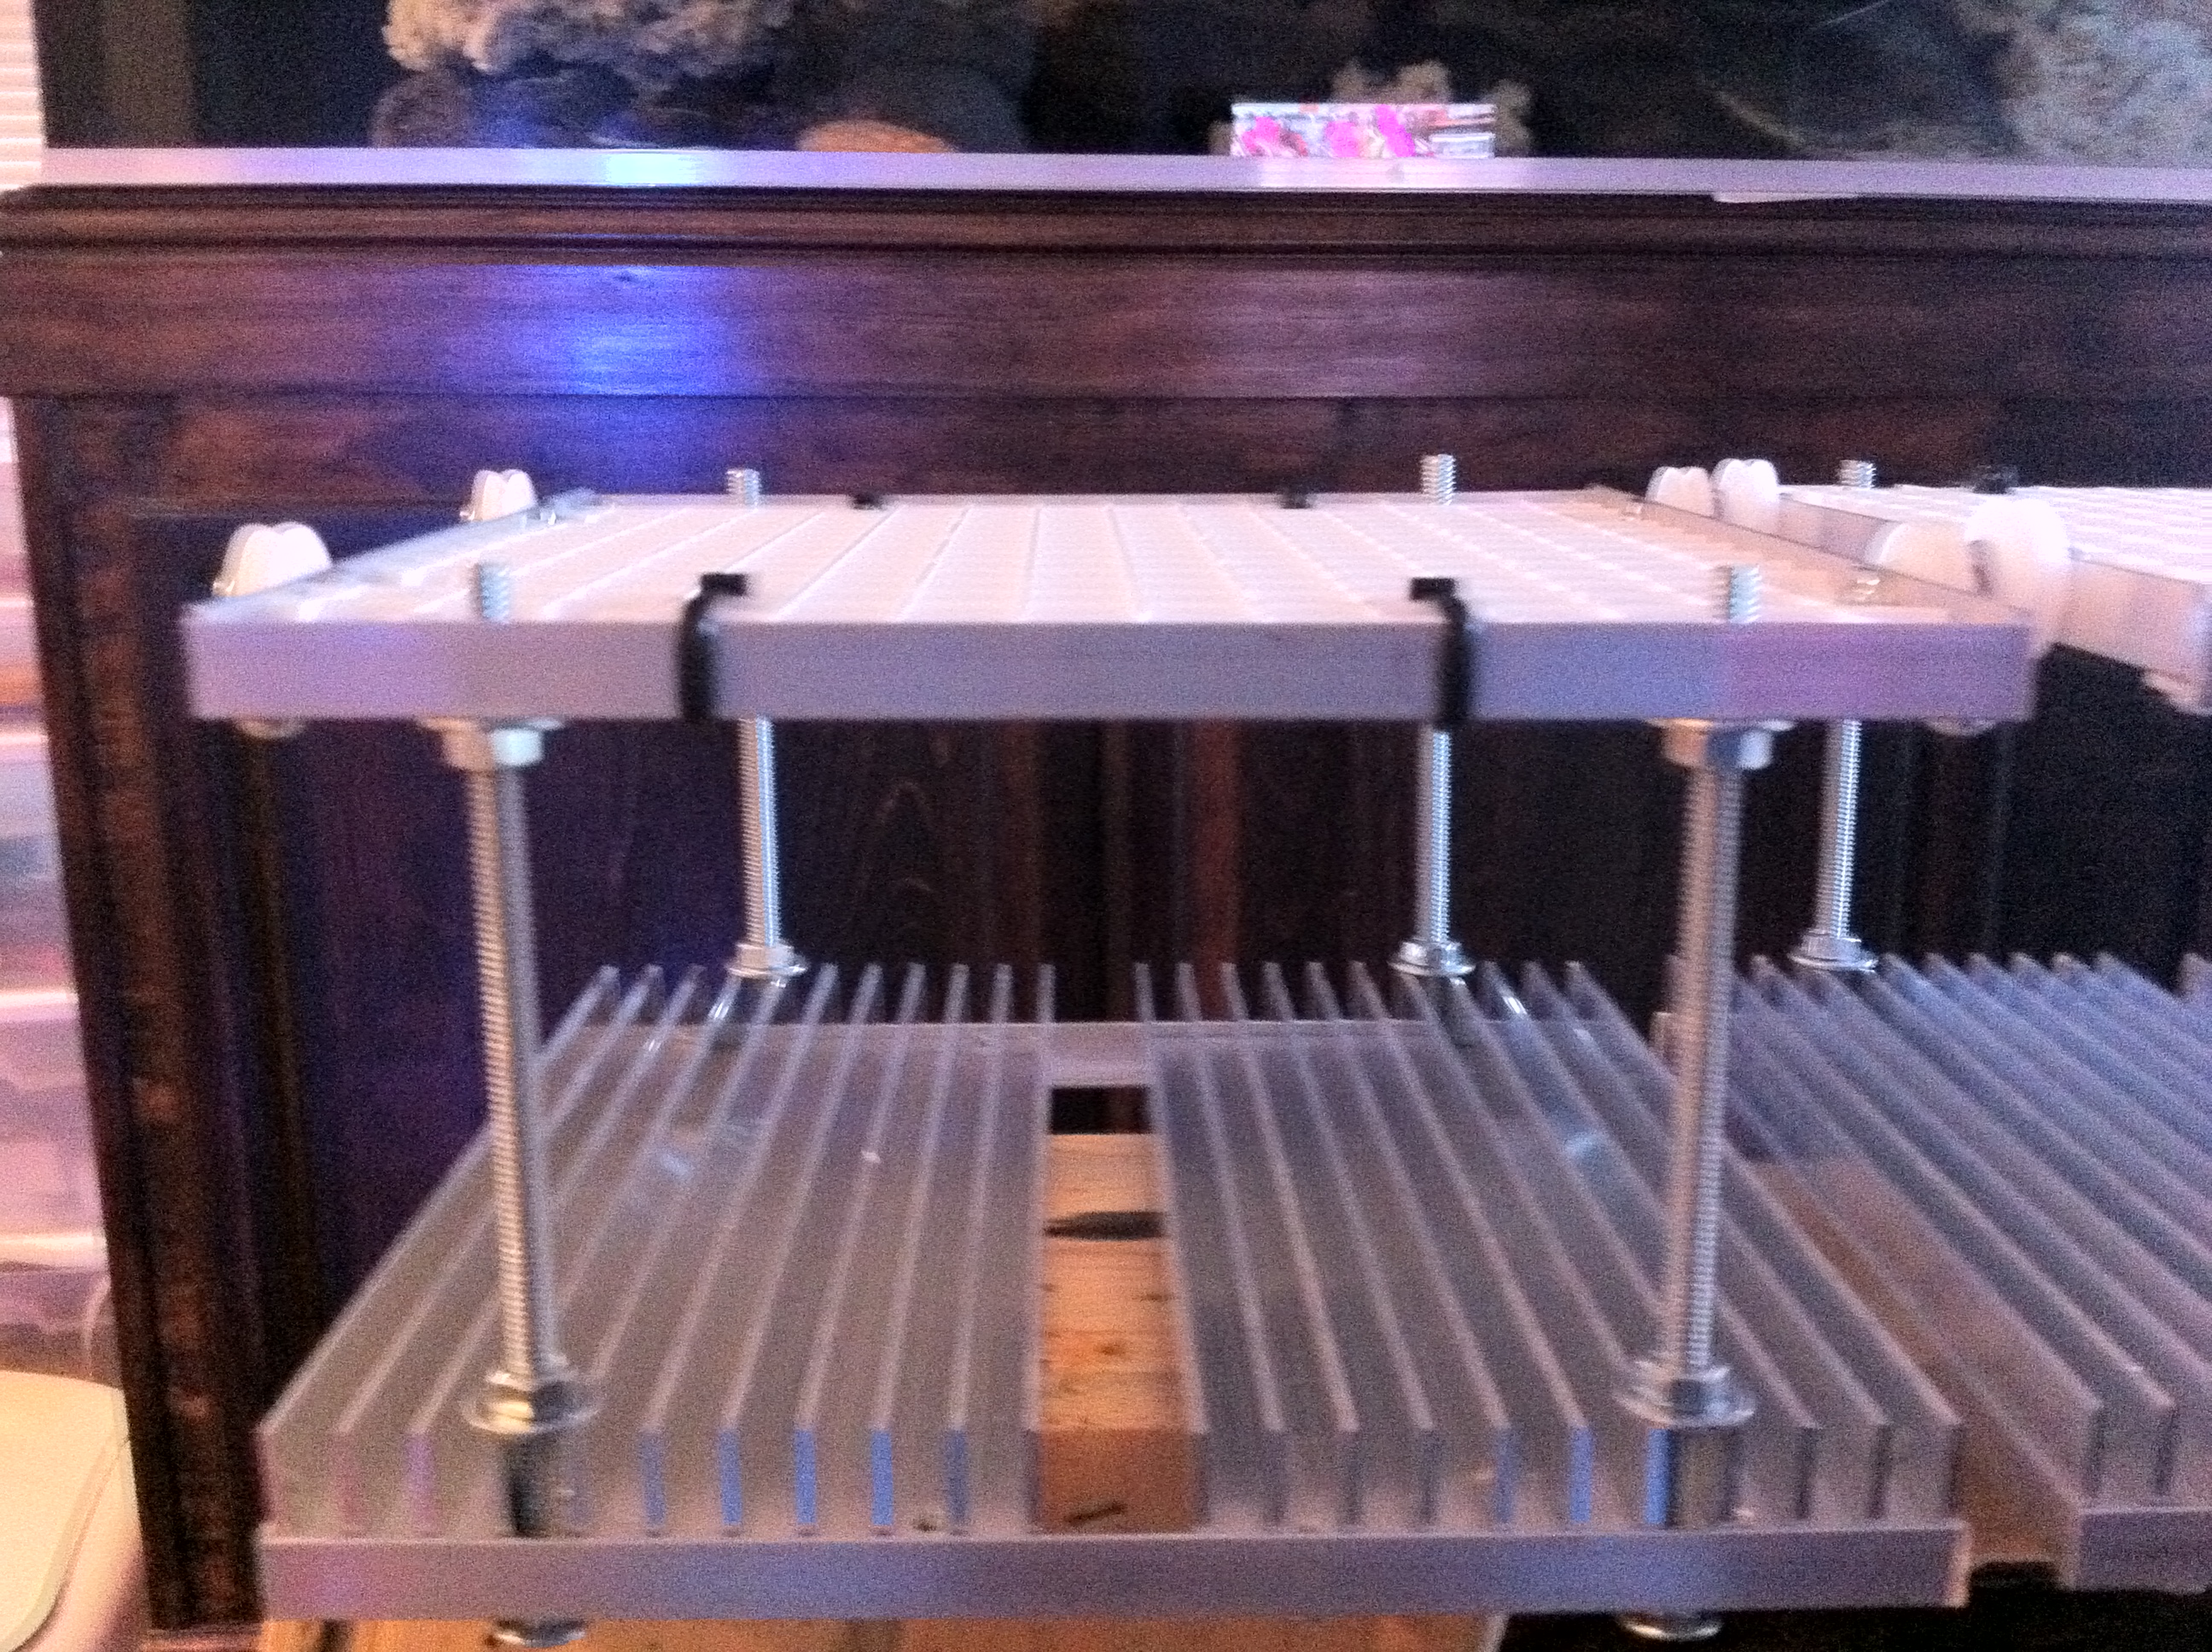
OK, so I framed the heatsinks into "banks" each bank will consist of 24 LEDs 12-W and 12-B. With 6 of each on both heatsinks. The pictures that I am posting is how the heatsinks came and how I cut the L rails to frame it. Lesson learnt during this process, purchase high quality drill bits when drilling metal. I had cheaper ones lying around and they got shredded within a few holes. Dewalt Cobalt drill bits work amazing and drill through with minimal effort and the bit never got hot.
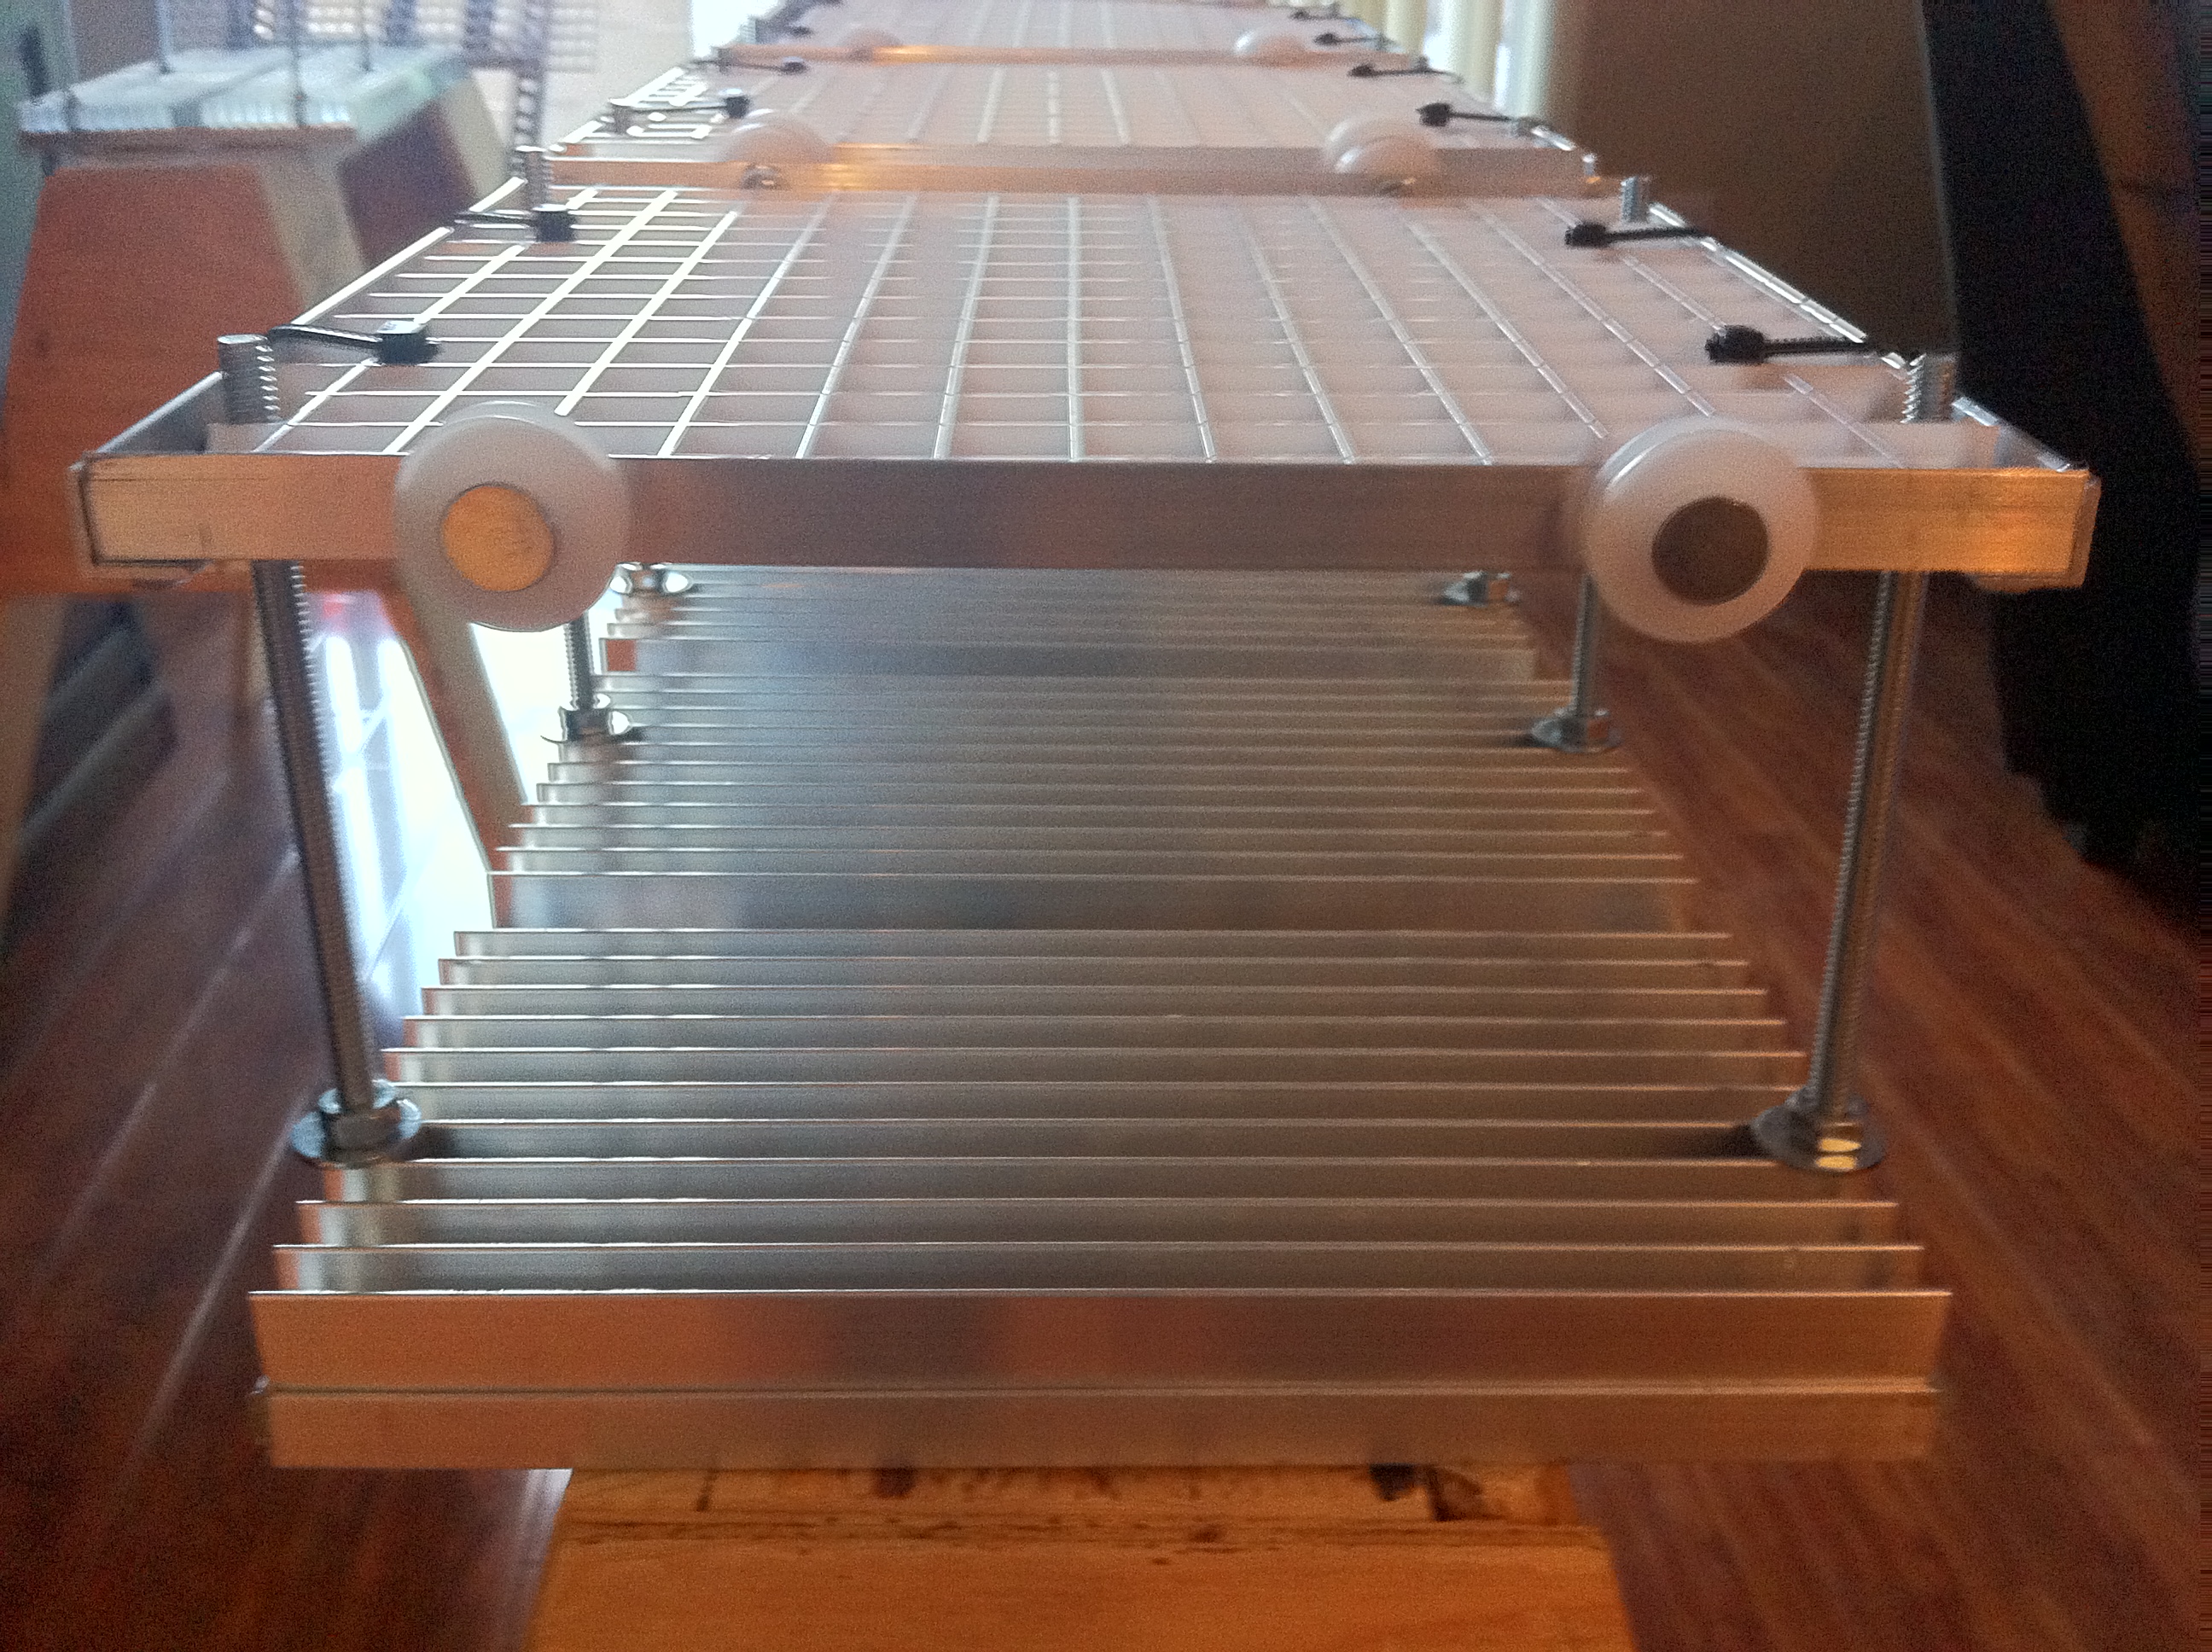
I'll go into more detail on how the design will work as I move along, however I want these each to function as modules so, if I choose to I can simply remove one bank of lights or if needed add another bank of lights. So the heatsink will actually have wheels attached to them so they can roll out the way for maintenance or rock removal. I initially though about having them raise up, but with 5 backs of 9" heatsinks I should be able to tuck them all off to one side of the tank if needed.
By the way Meowzer is my inspiration for the build of LED. Looking at her design gave me the idea. There are 5 led banks.


xcali1985

Active Member
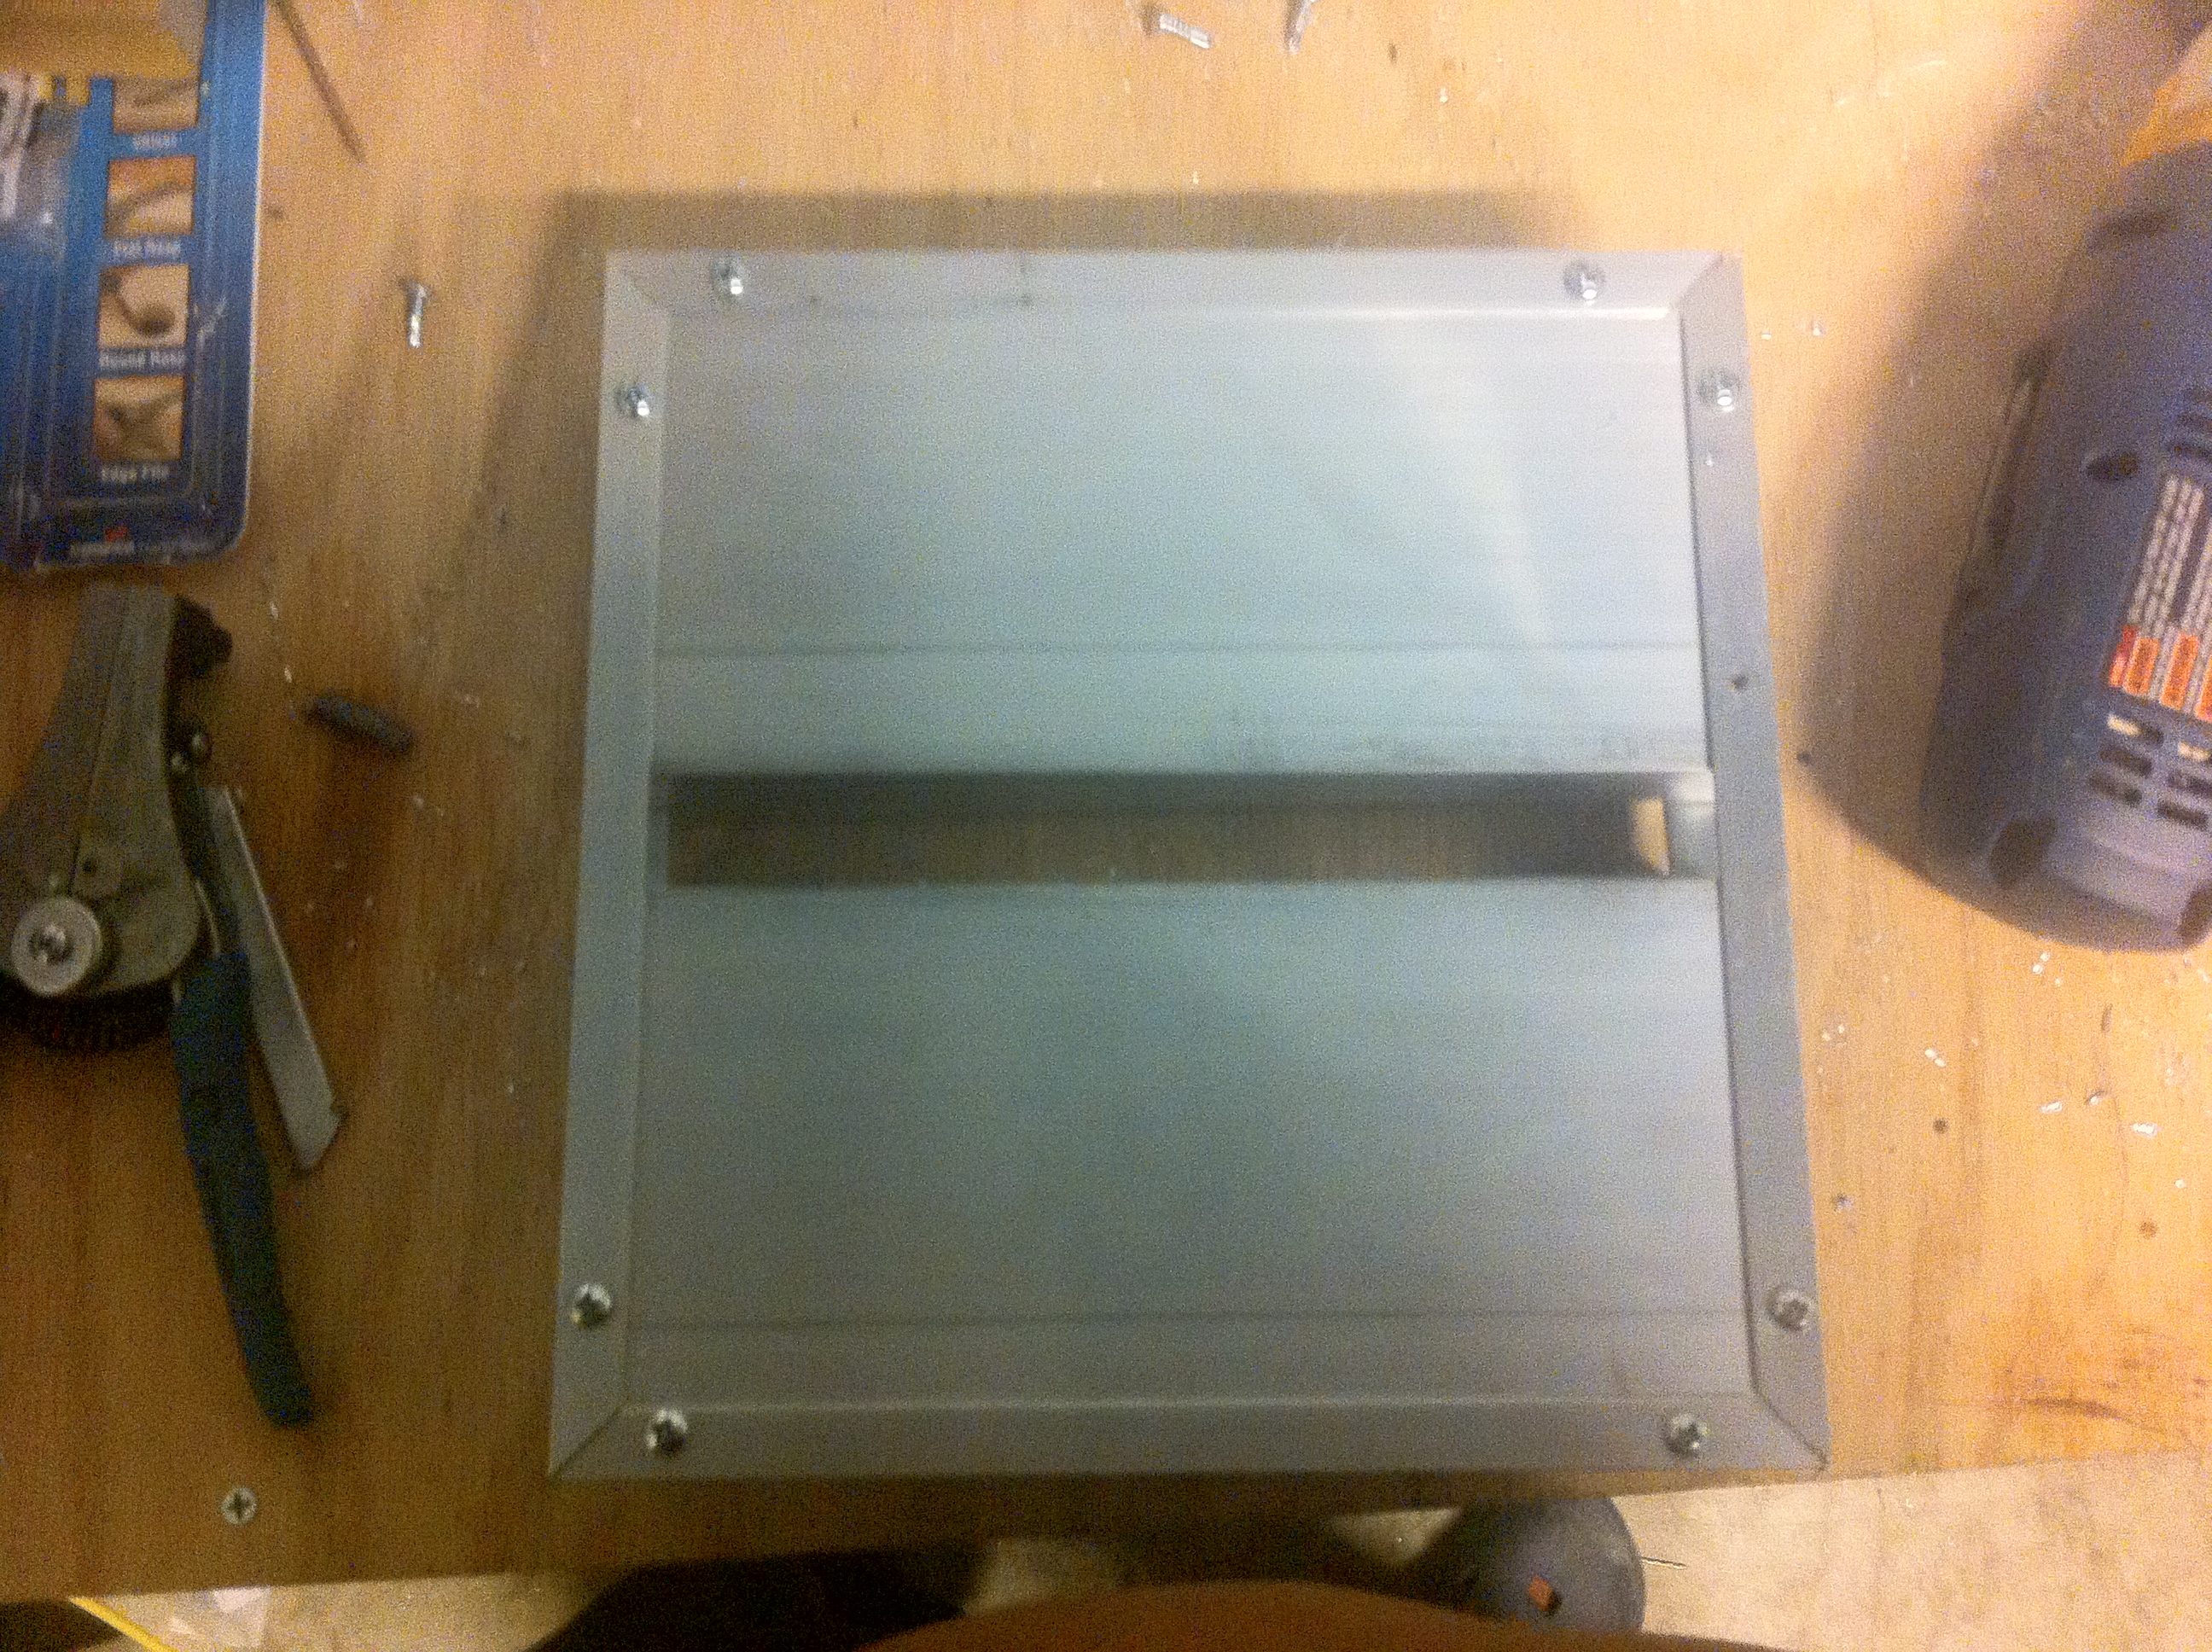
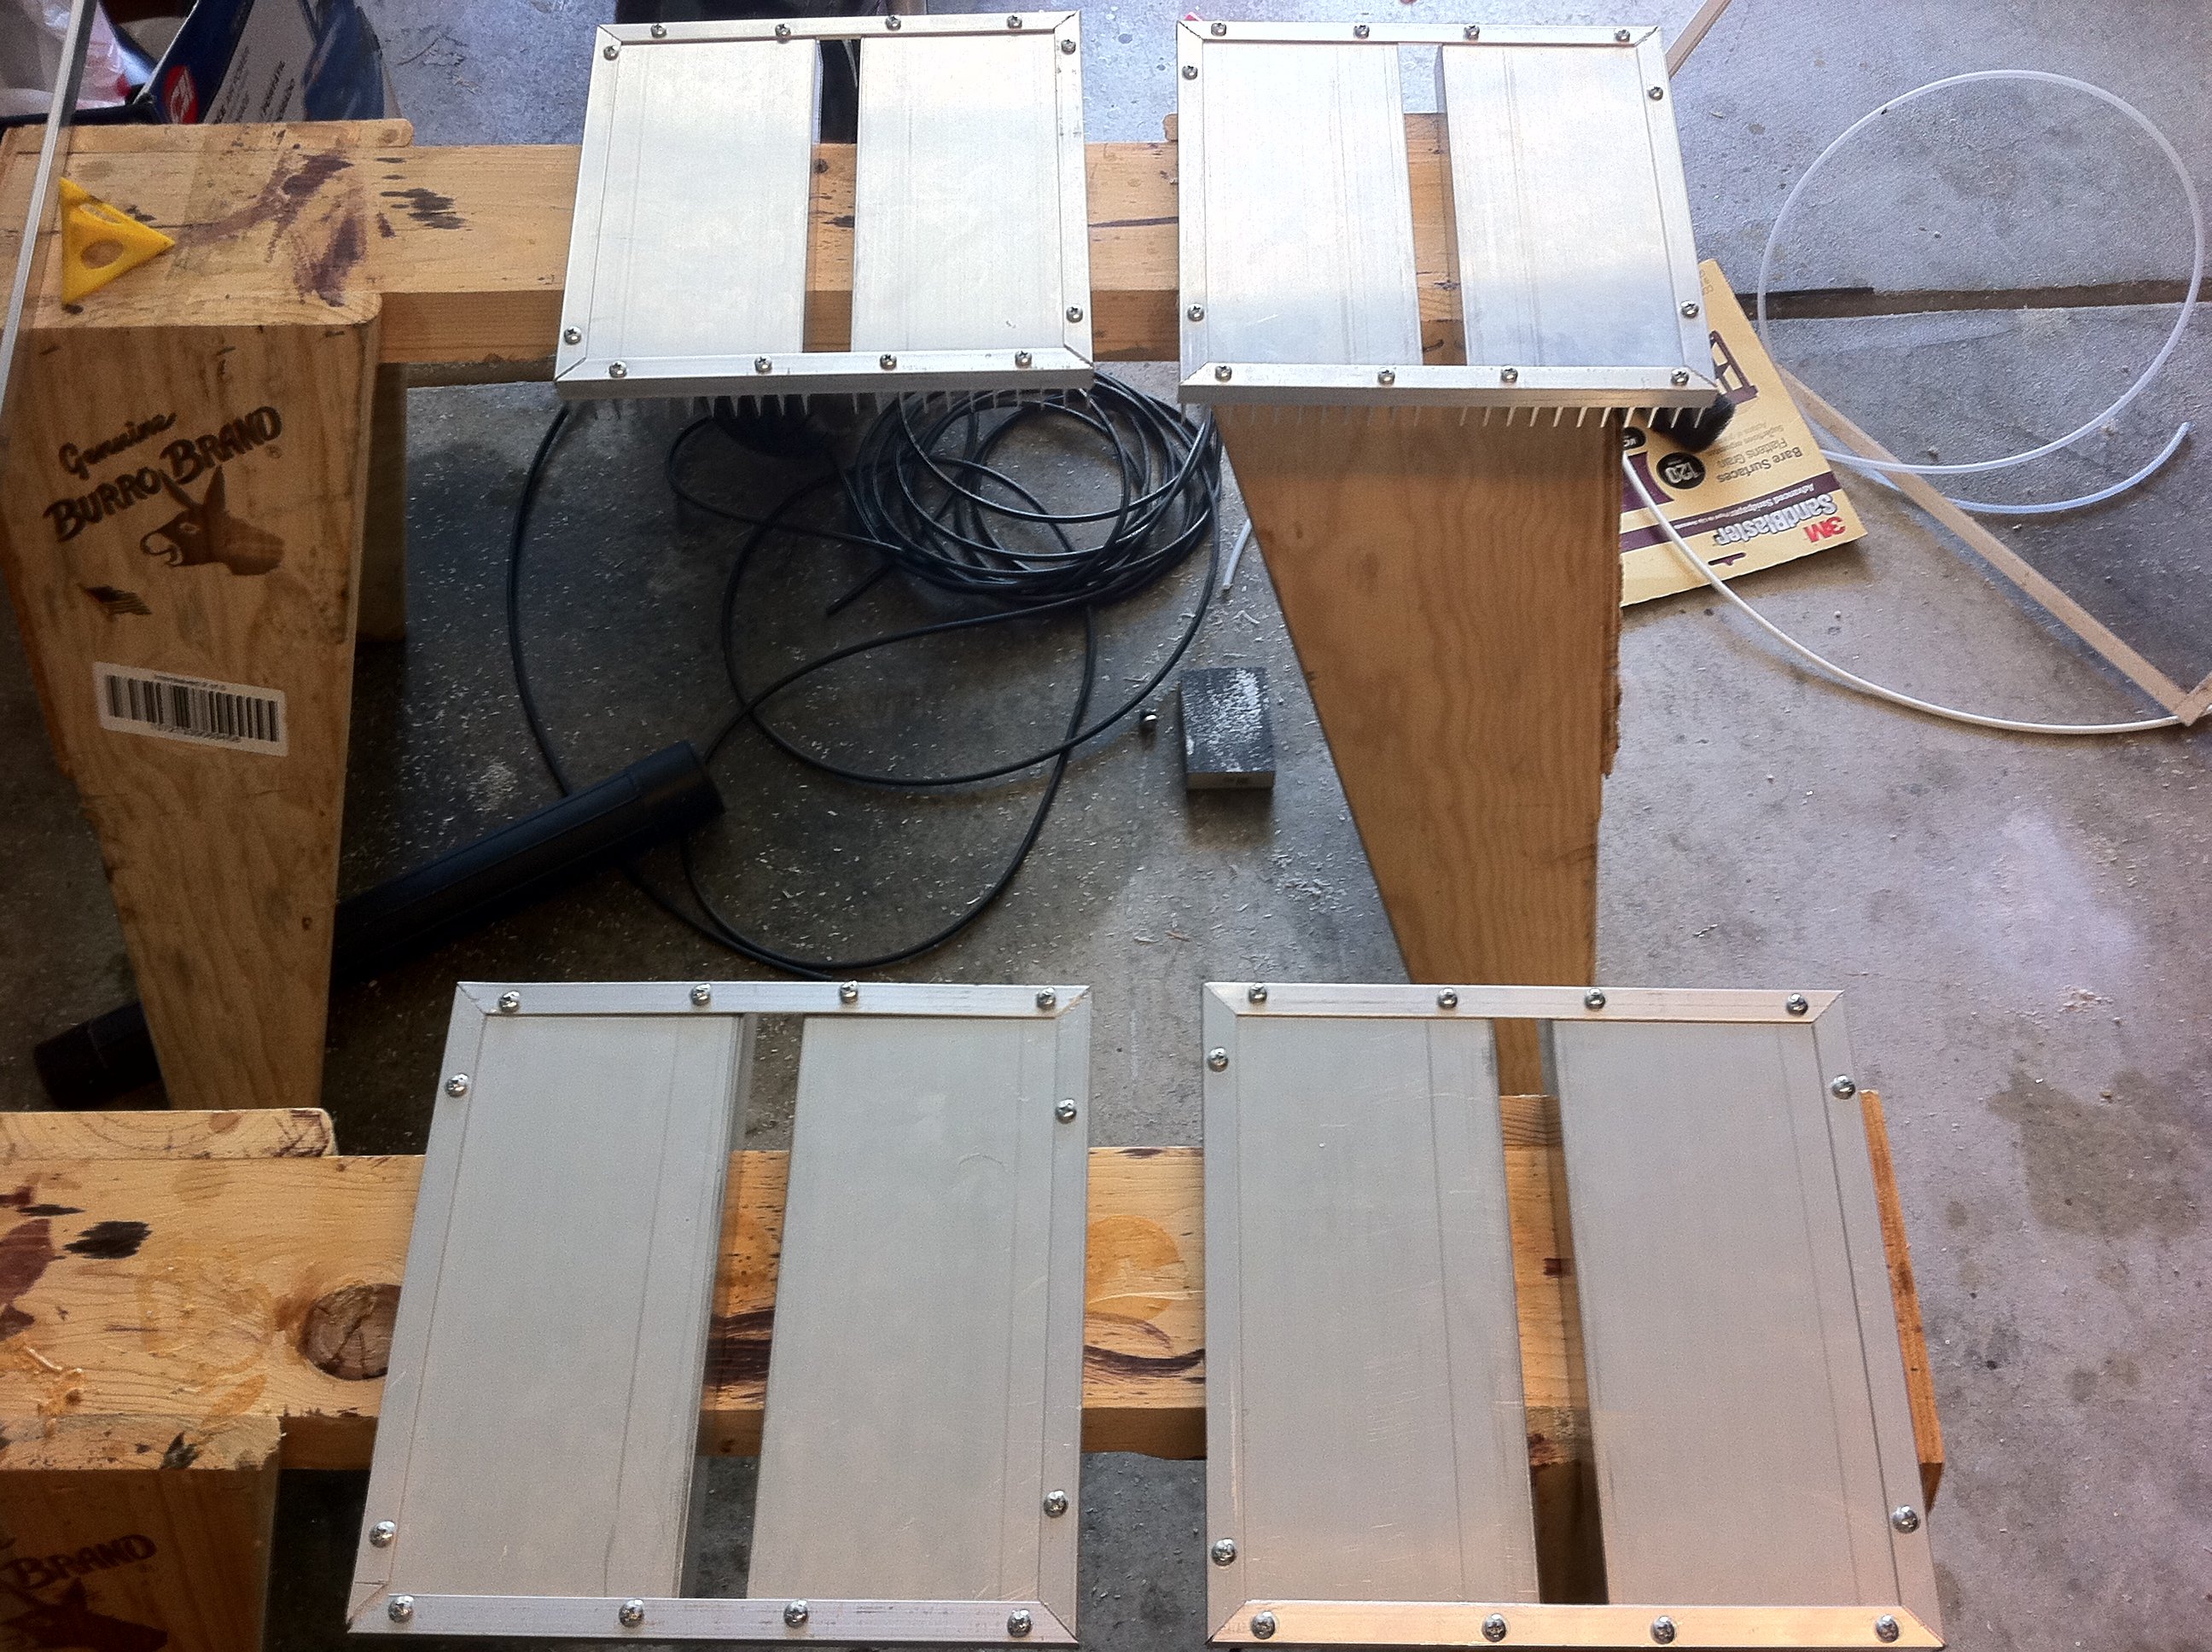
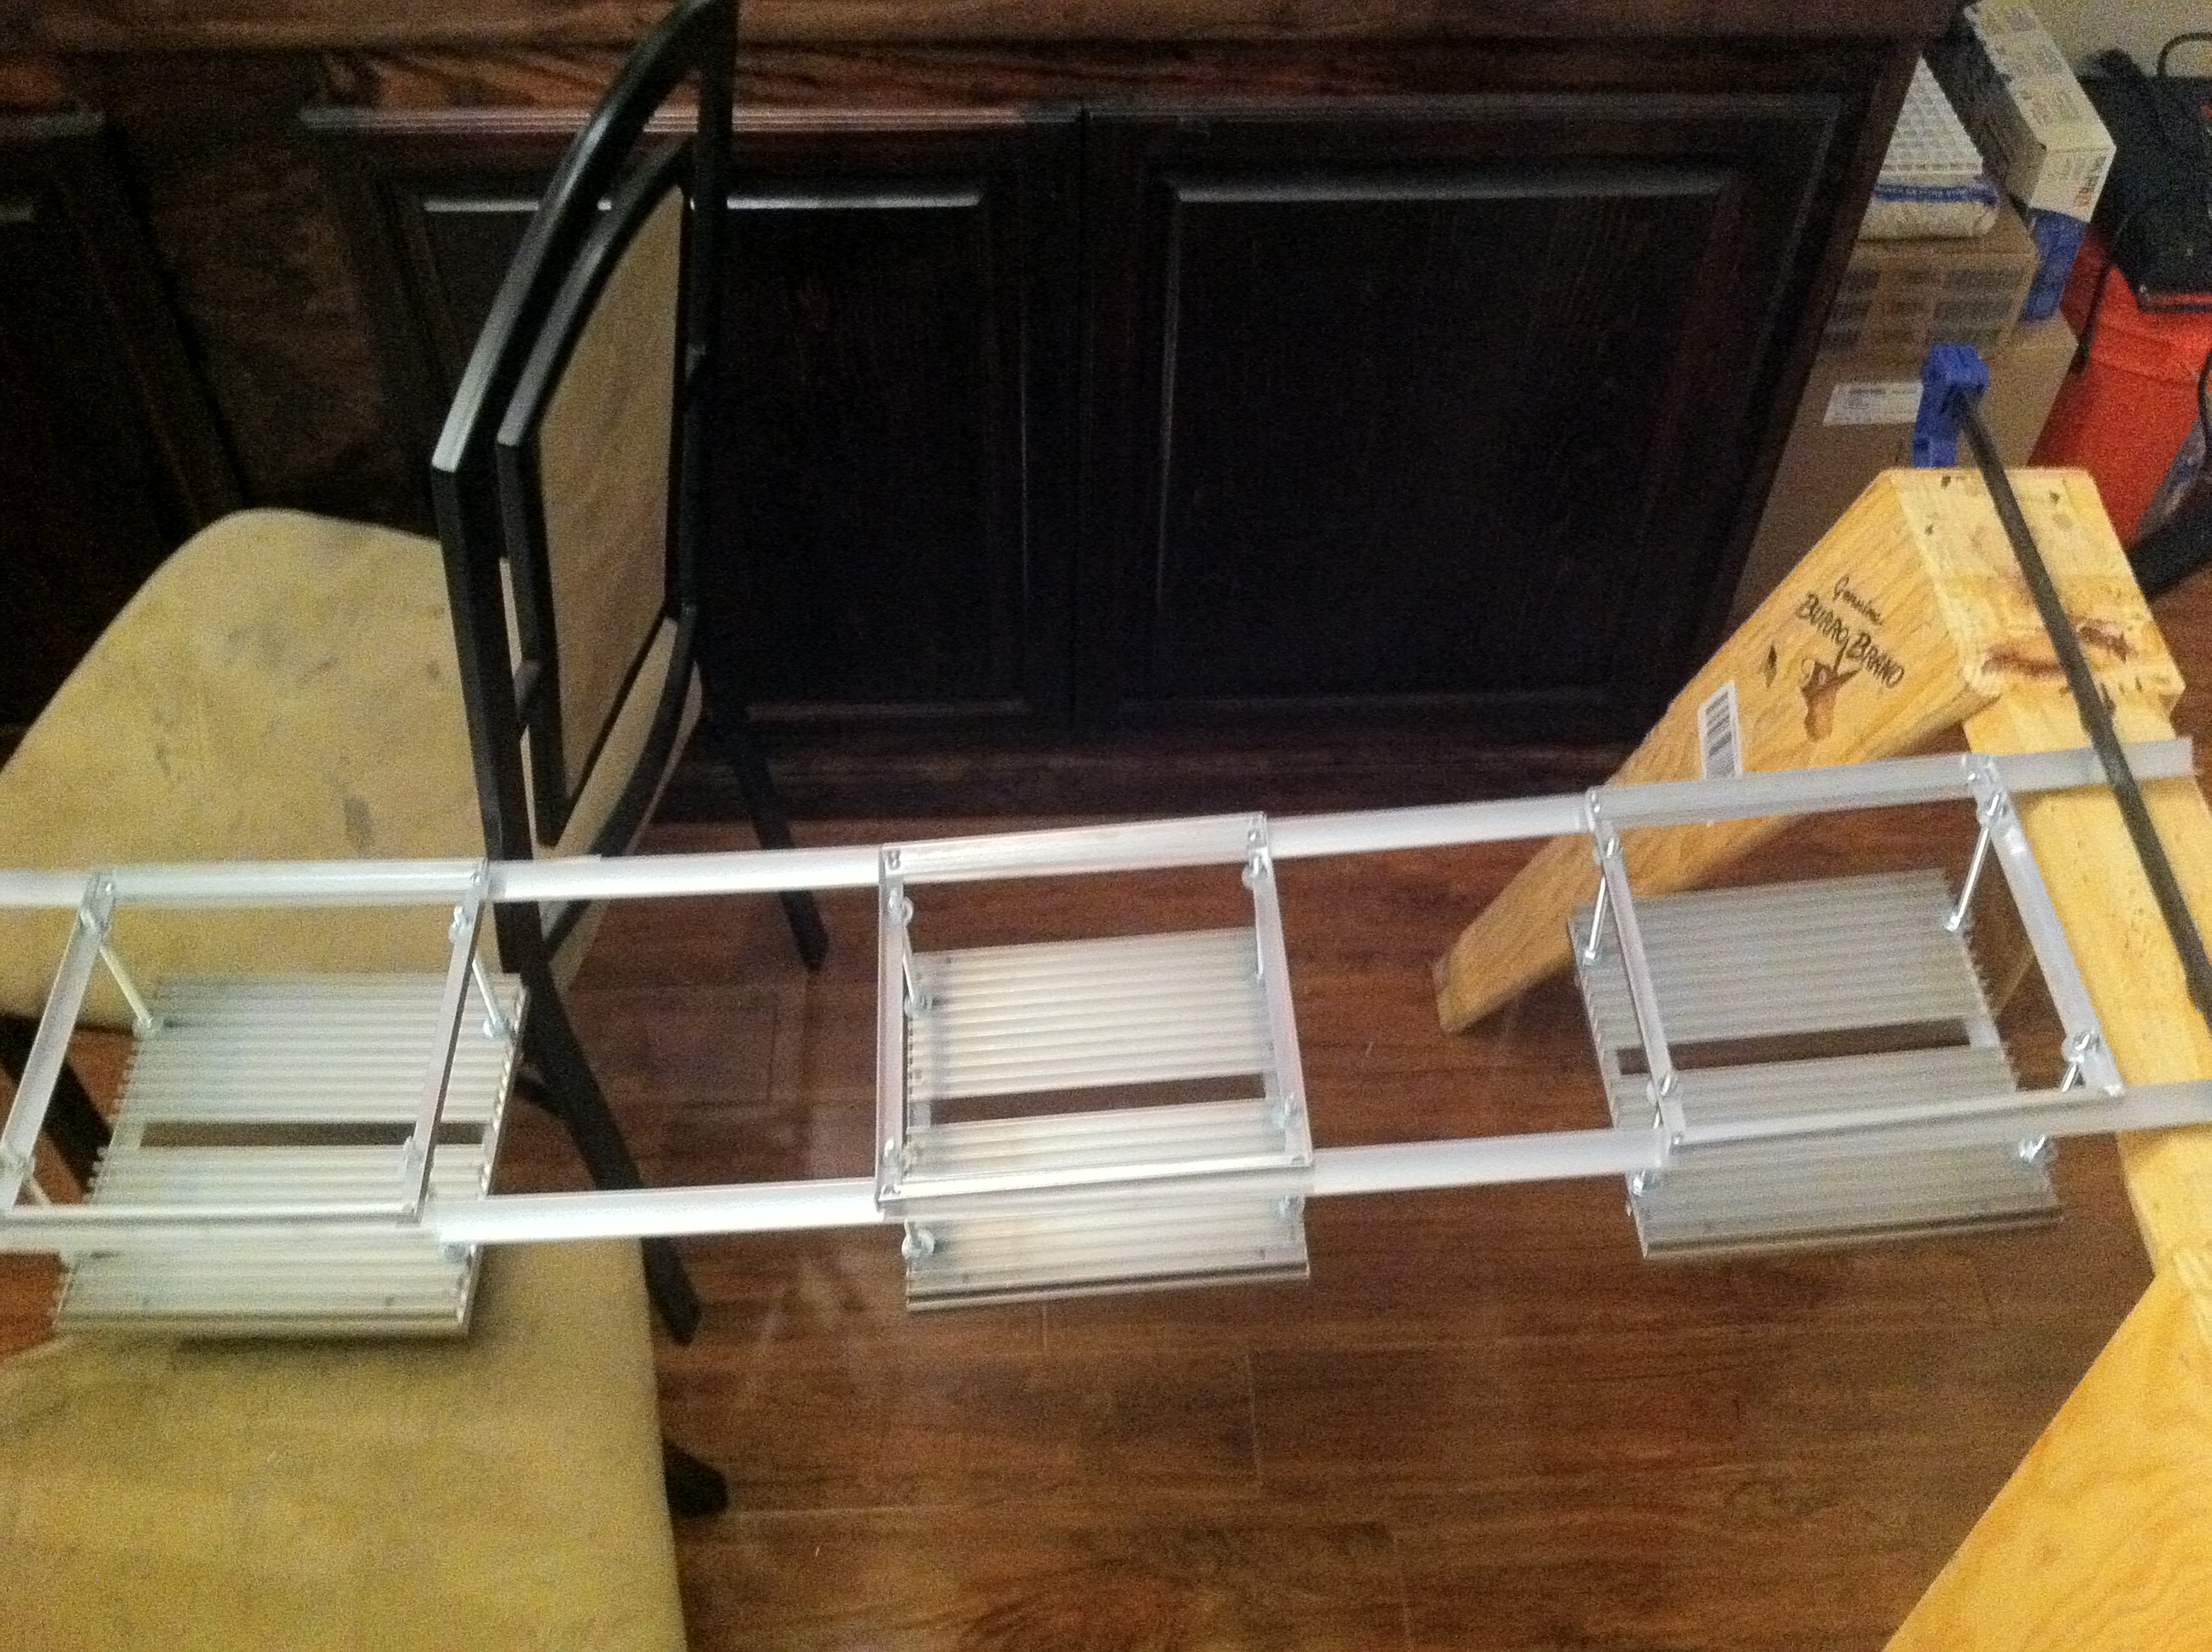
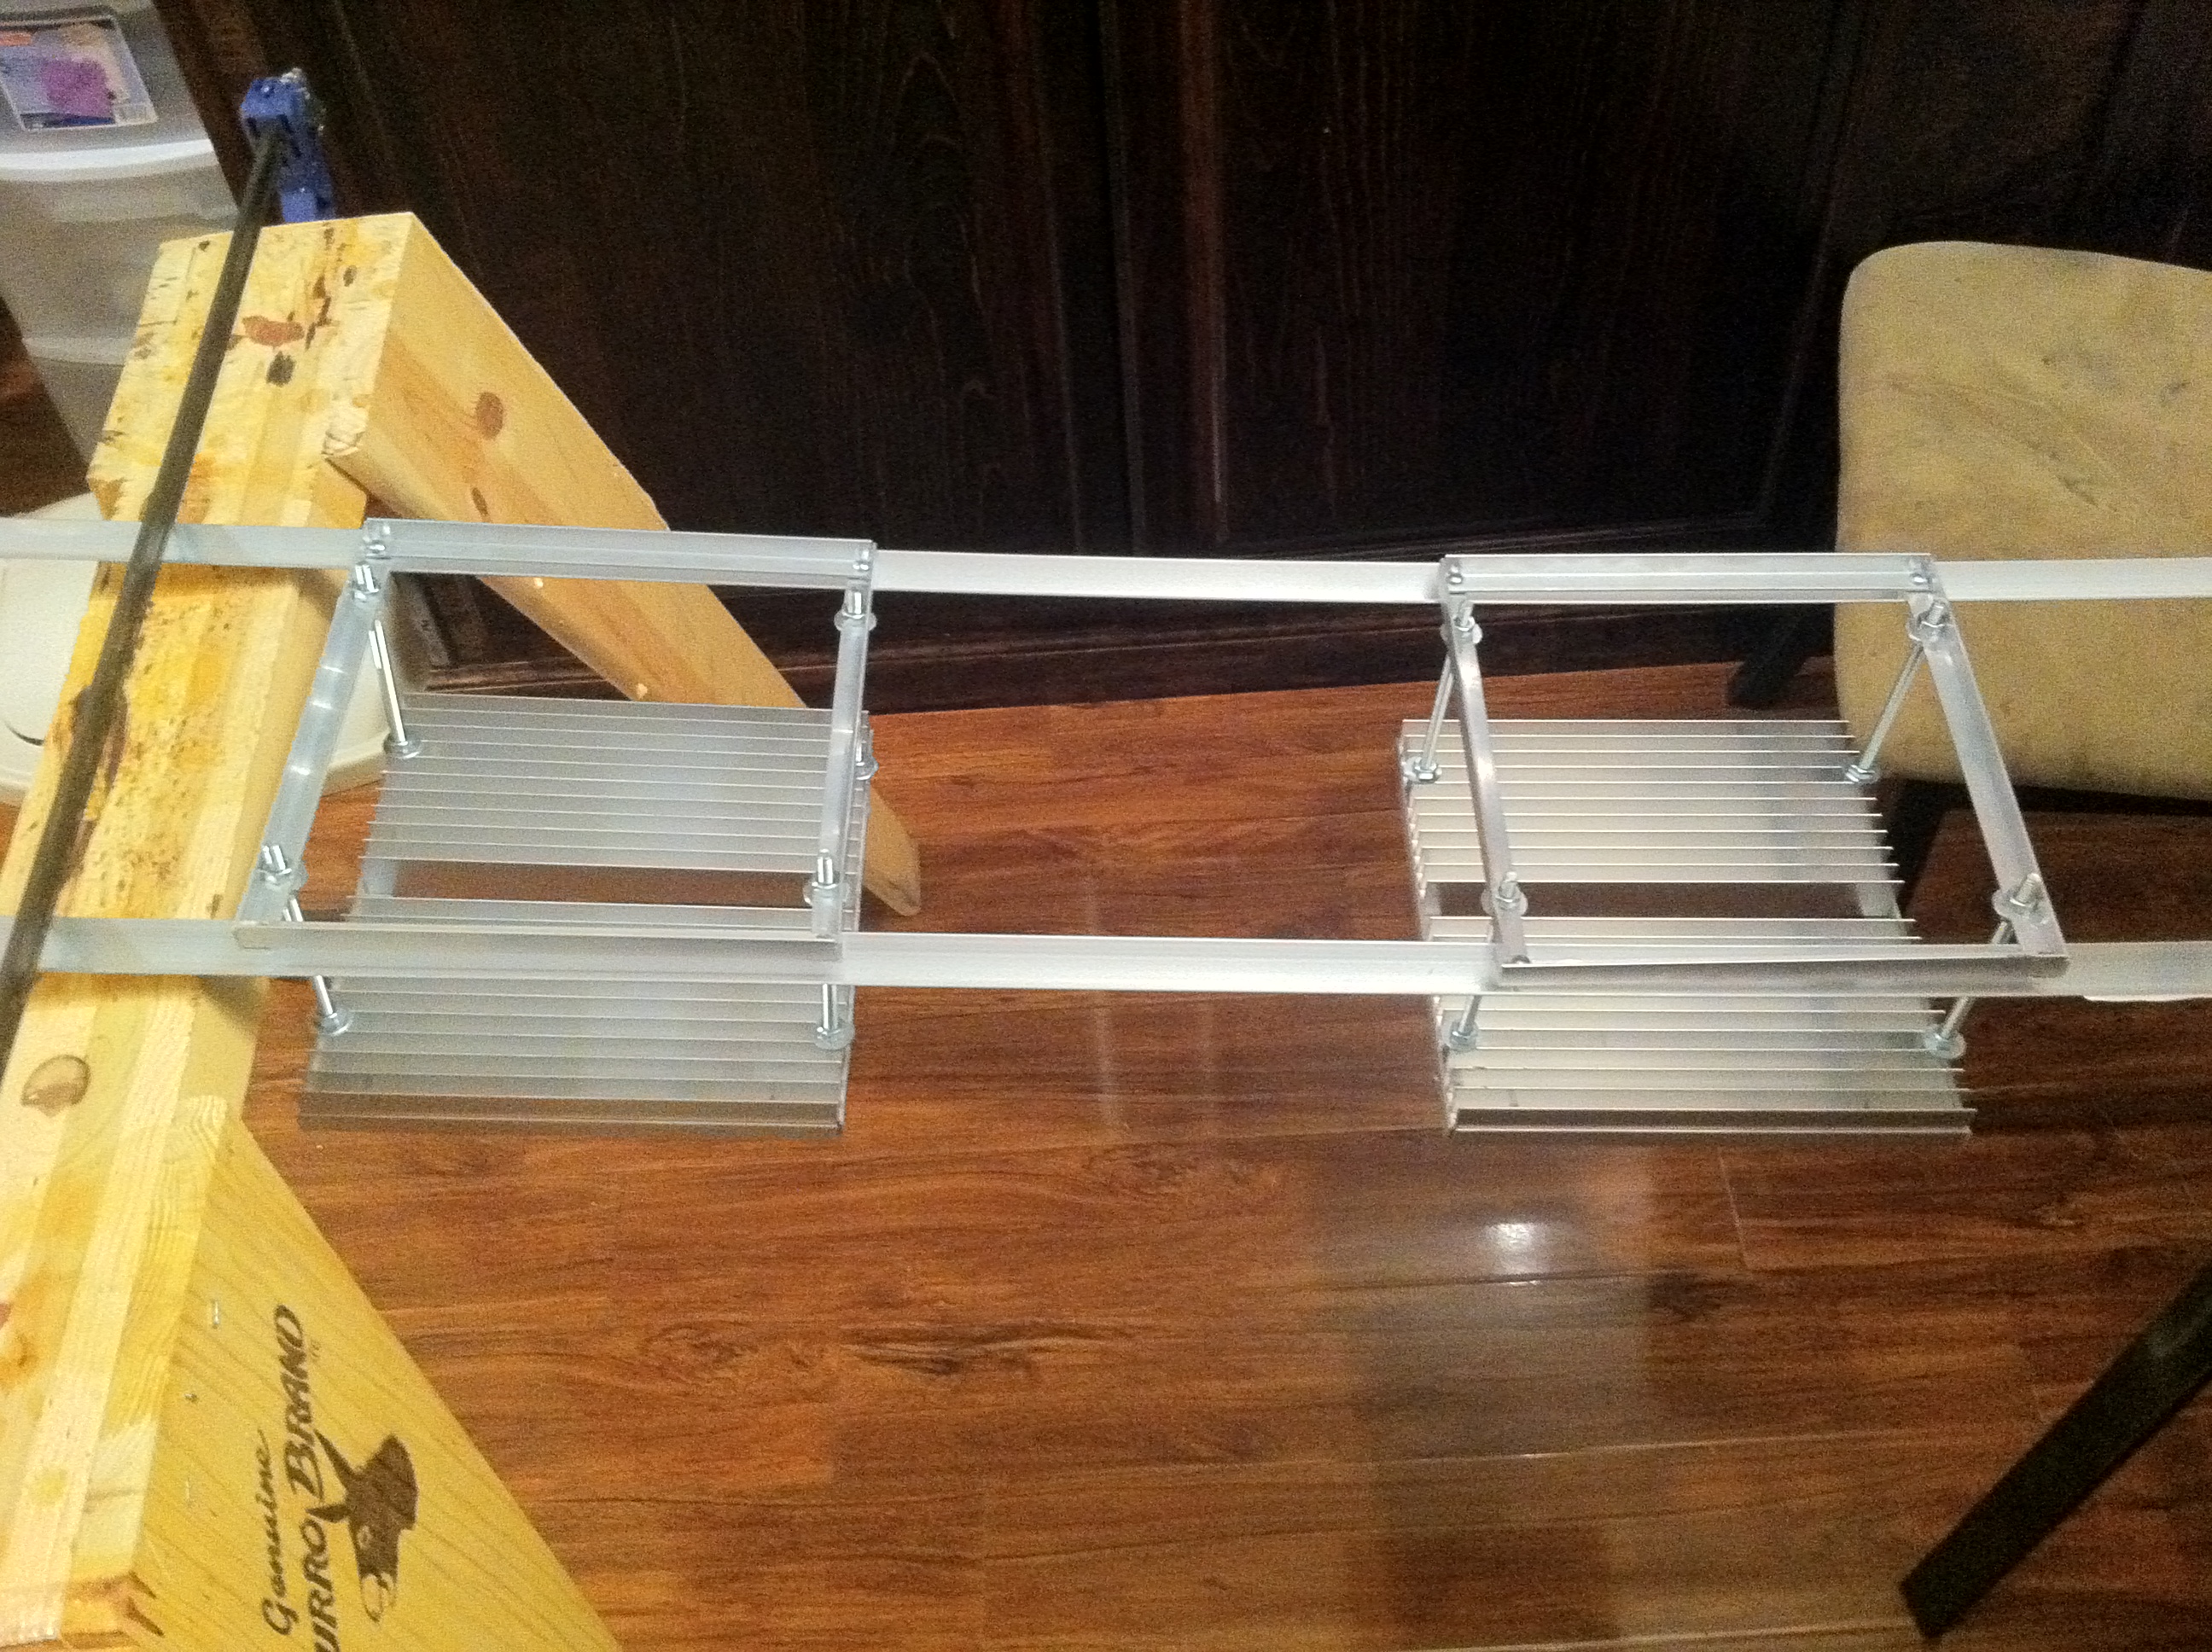
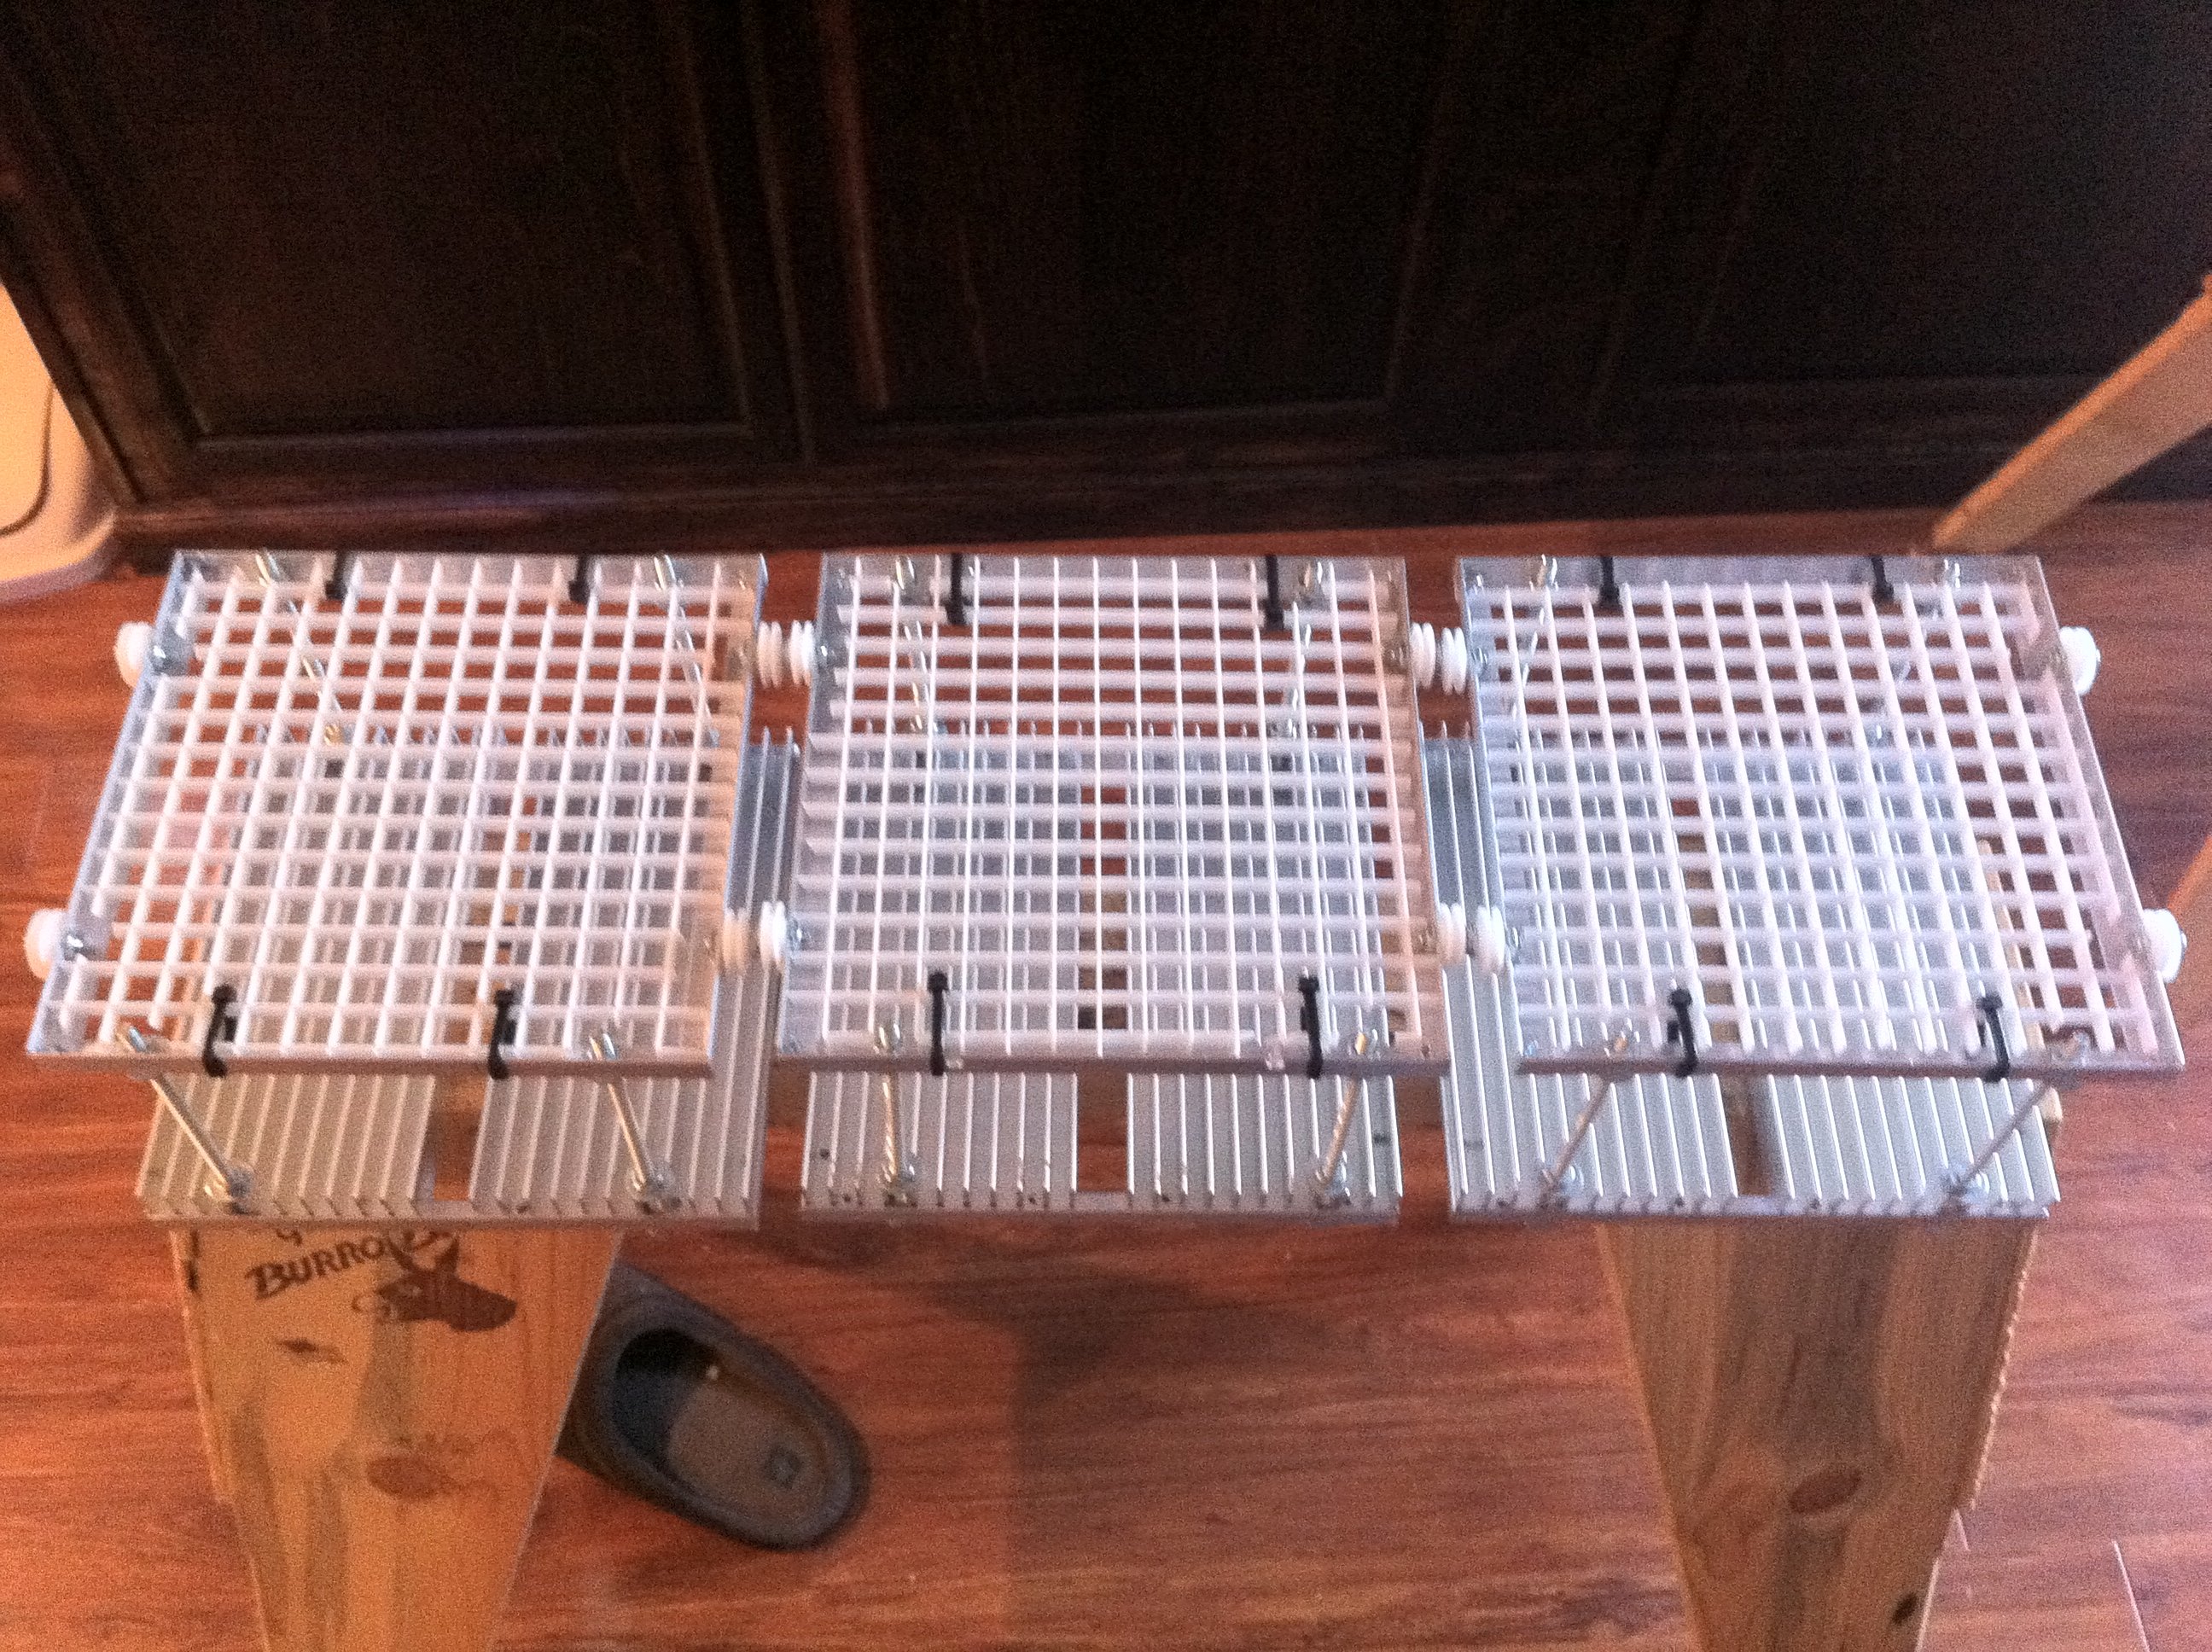
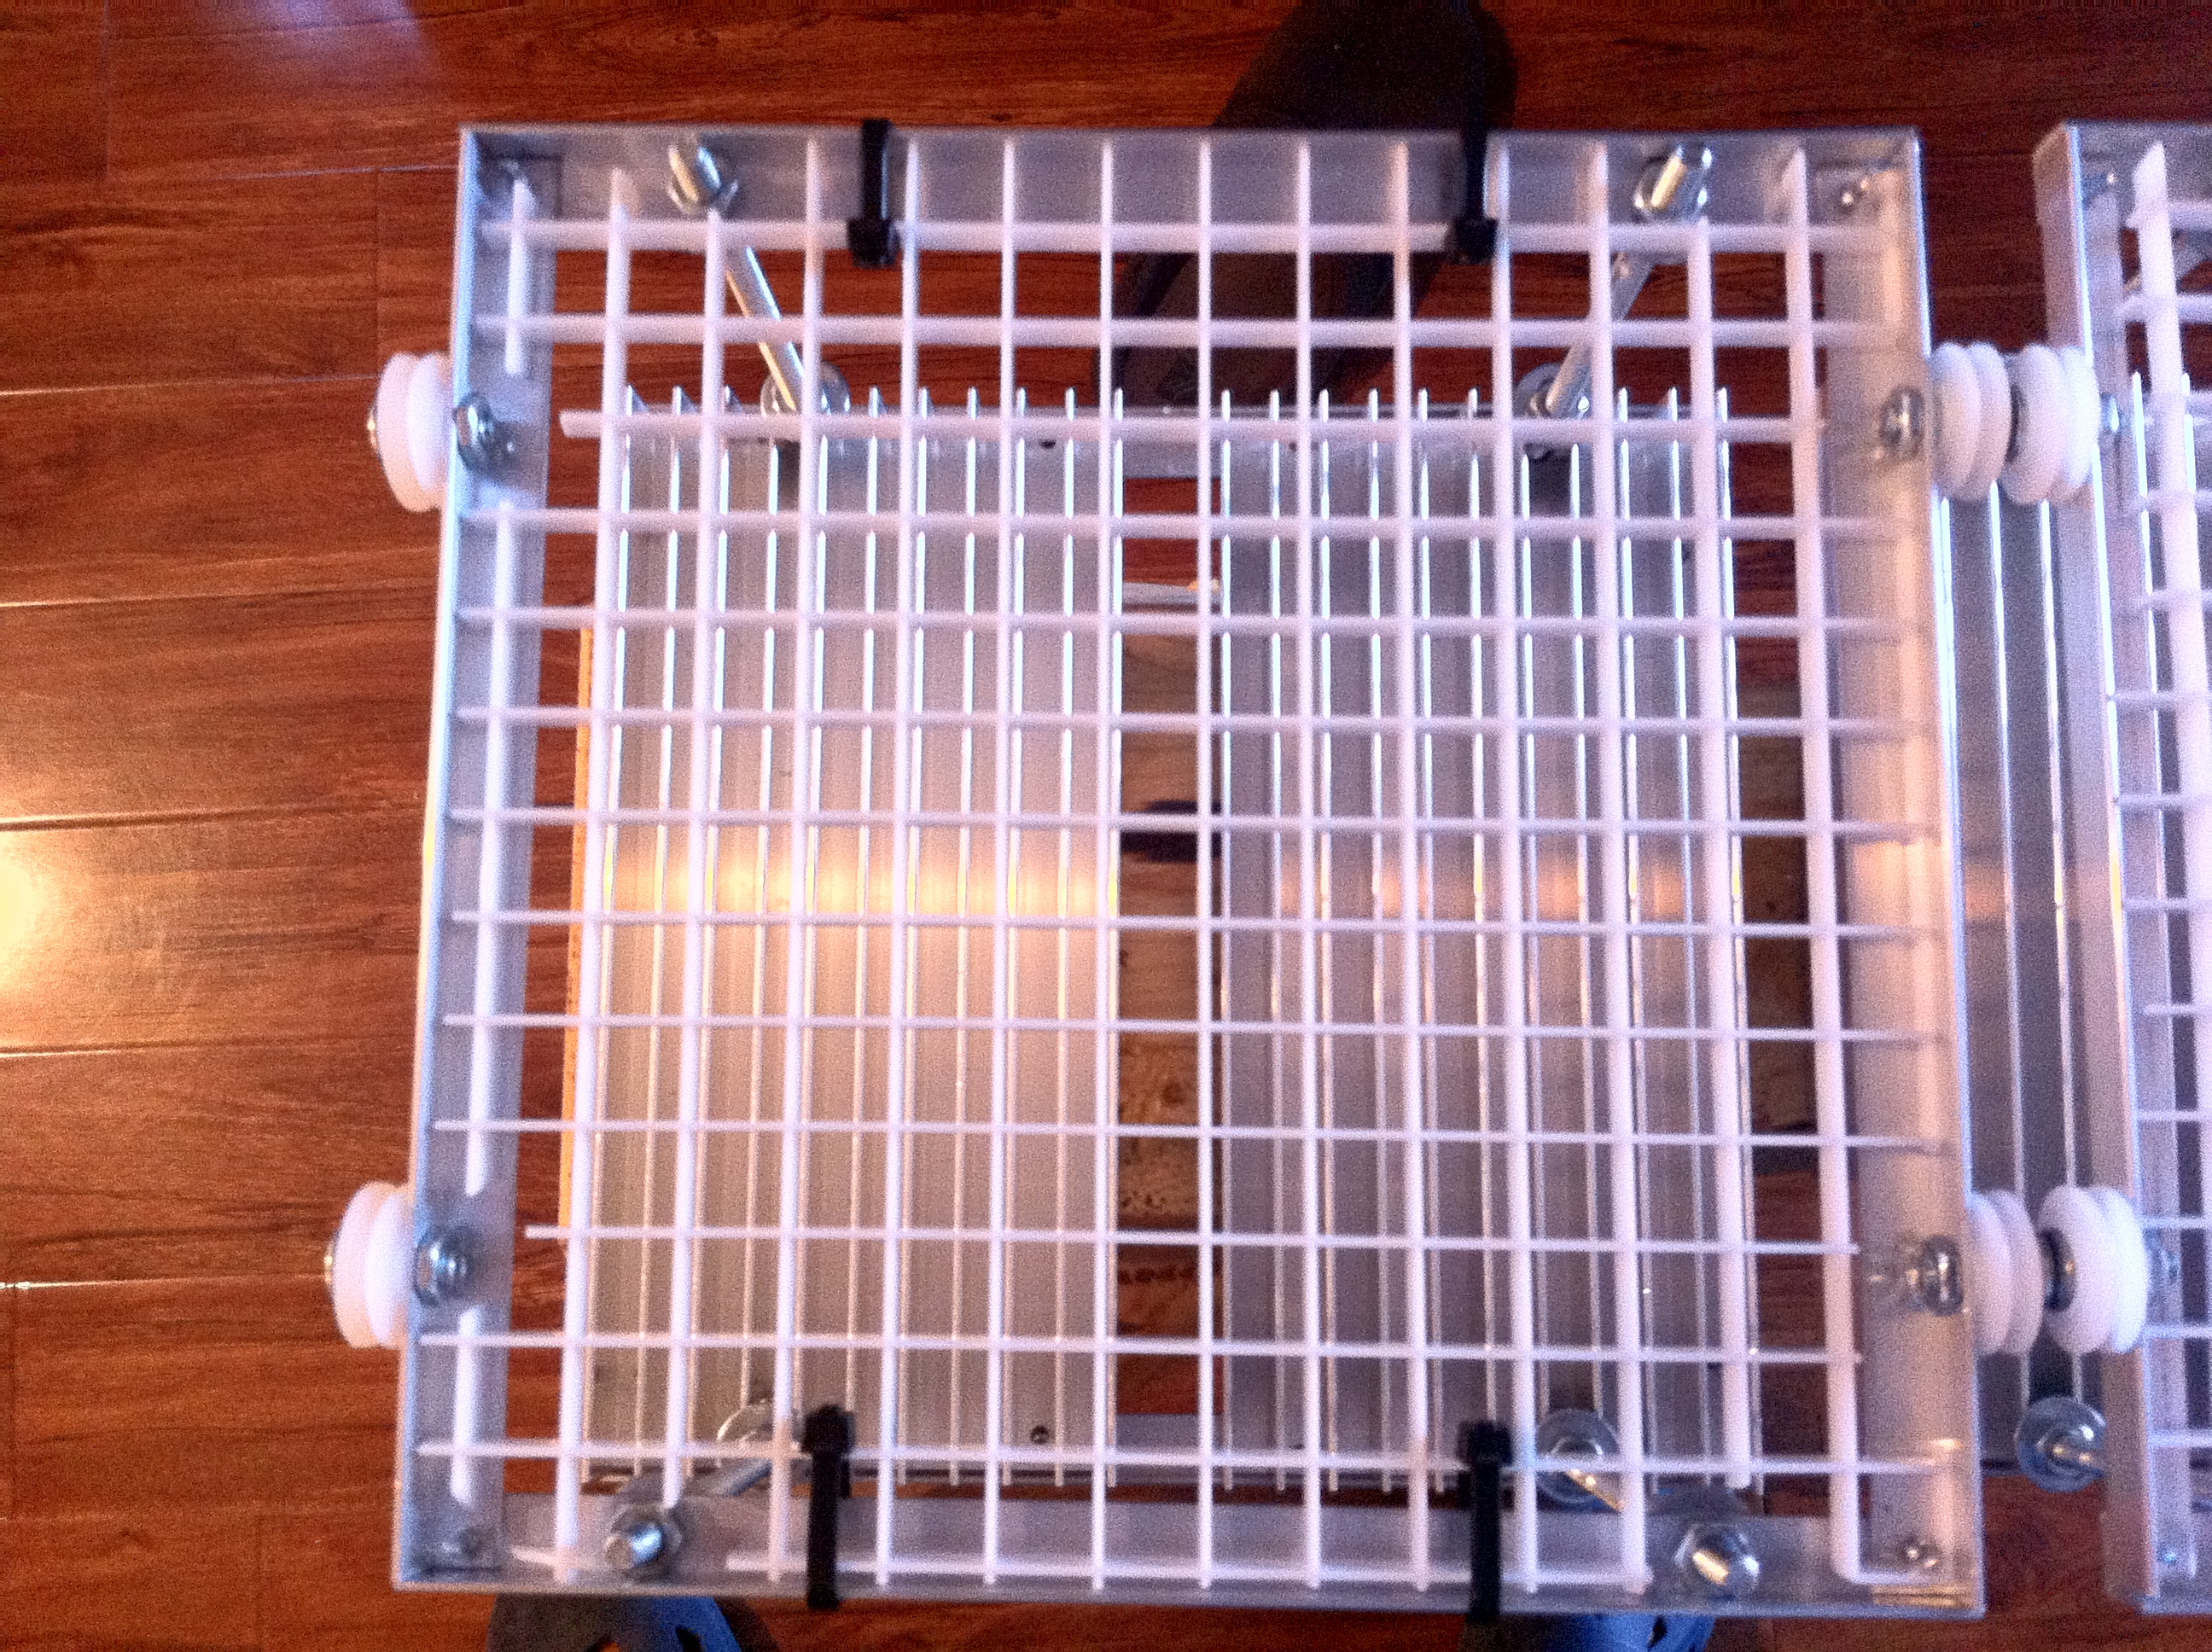
Little bit of an update on this, I made the bank "towers" where the drivers will sit above each heatsink on egg crate. The so there will be virtually no wire hanging around. I also took a picture of the banks sitting on the rail. It is not re-enforced yet so there is a dip in the line that will not be on the final product.
Here are the pictures. If you want an explanation of a certain photo let me know. Also the wheels have not been attached to the towers yet so its just sitting right now on the rails.


xcali1985

Active Member
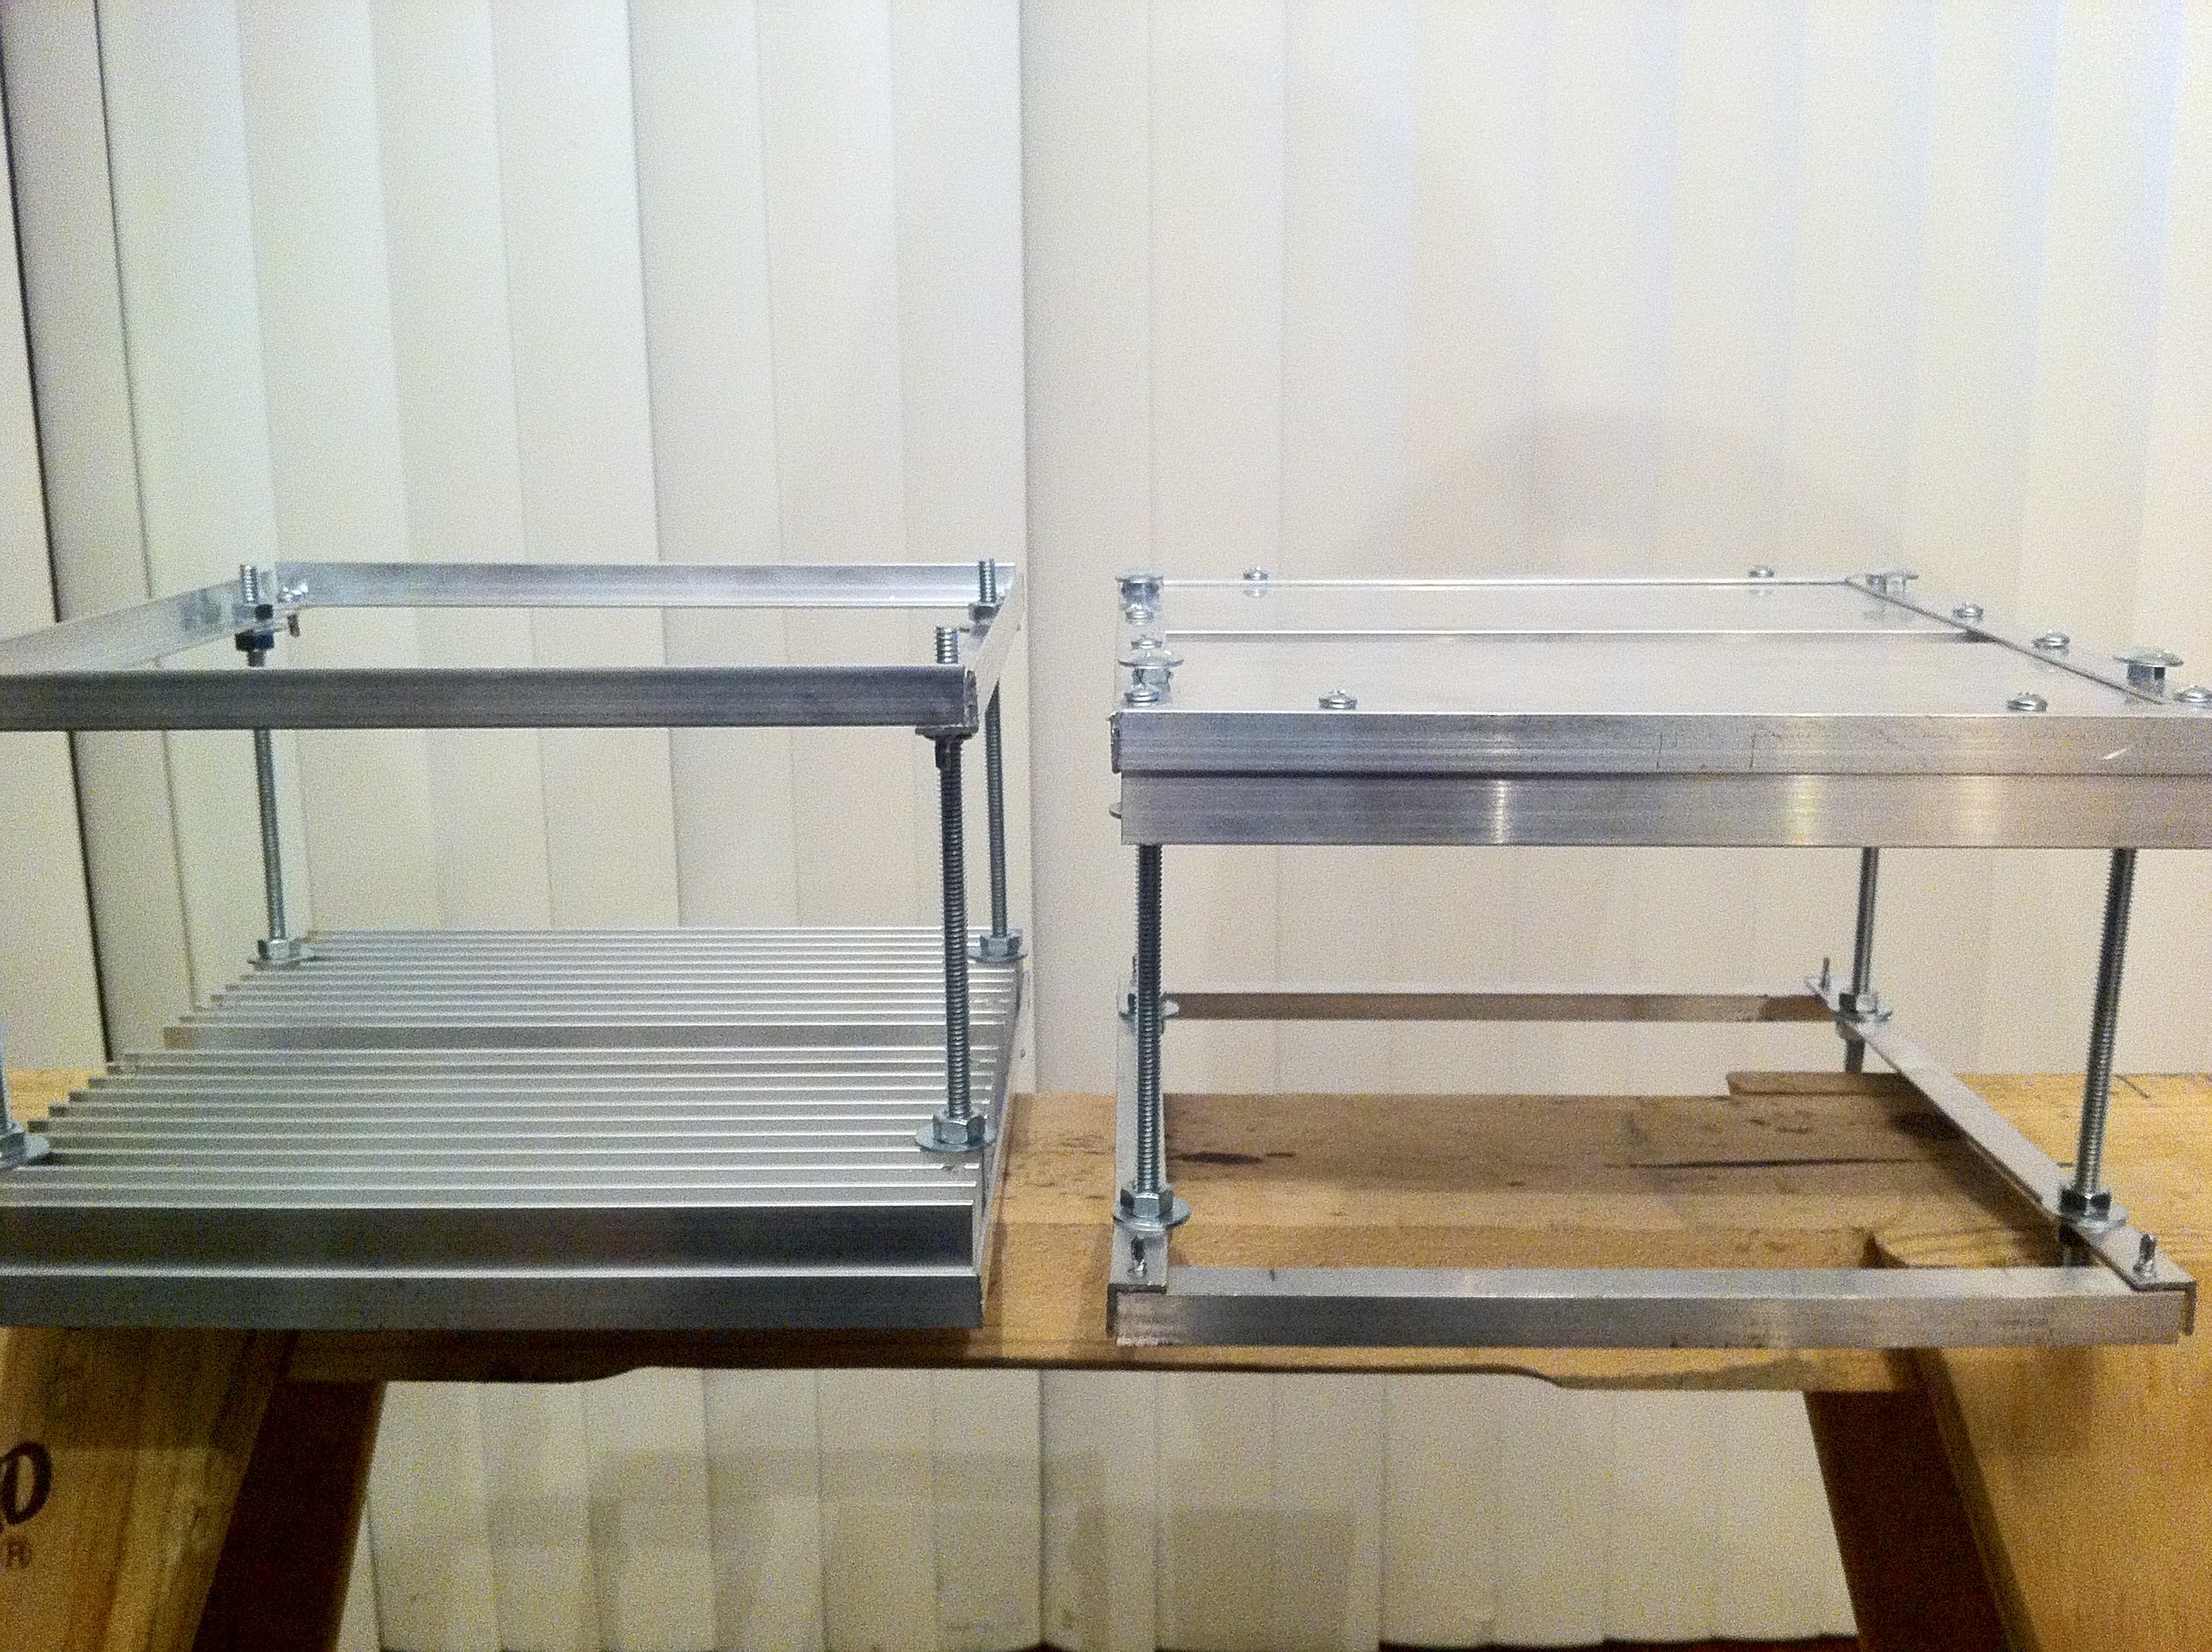
Ok, so with the car repair limiting me on major purchases for a while. I took the time to install the wheels on the heatsink and cut the light diffuser on the top. Since I already had these supplies it cost nothing to so. So here are a few pictures. Keep in mind that the drivers will be zip tied down to the egg crate.


xcali1985

Active Member
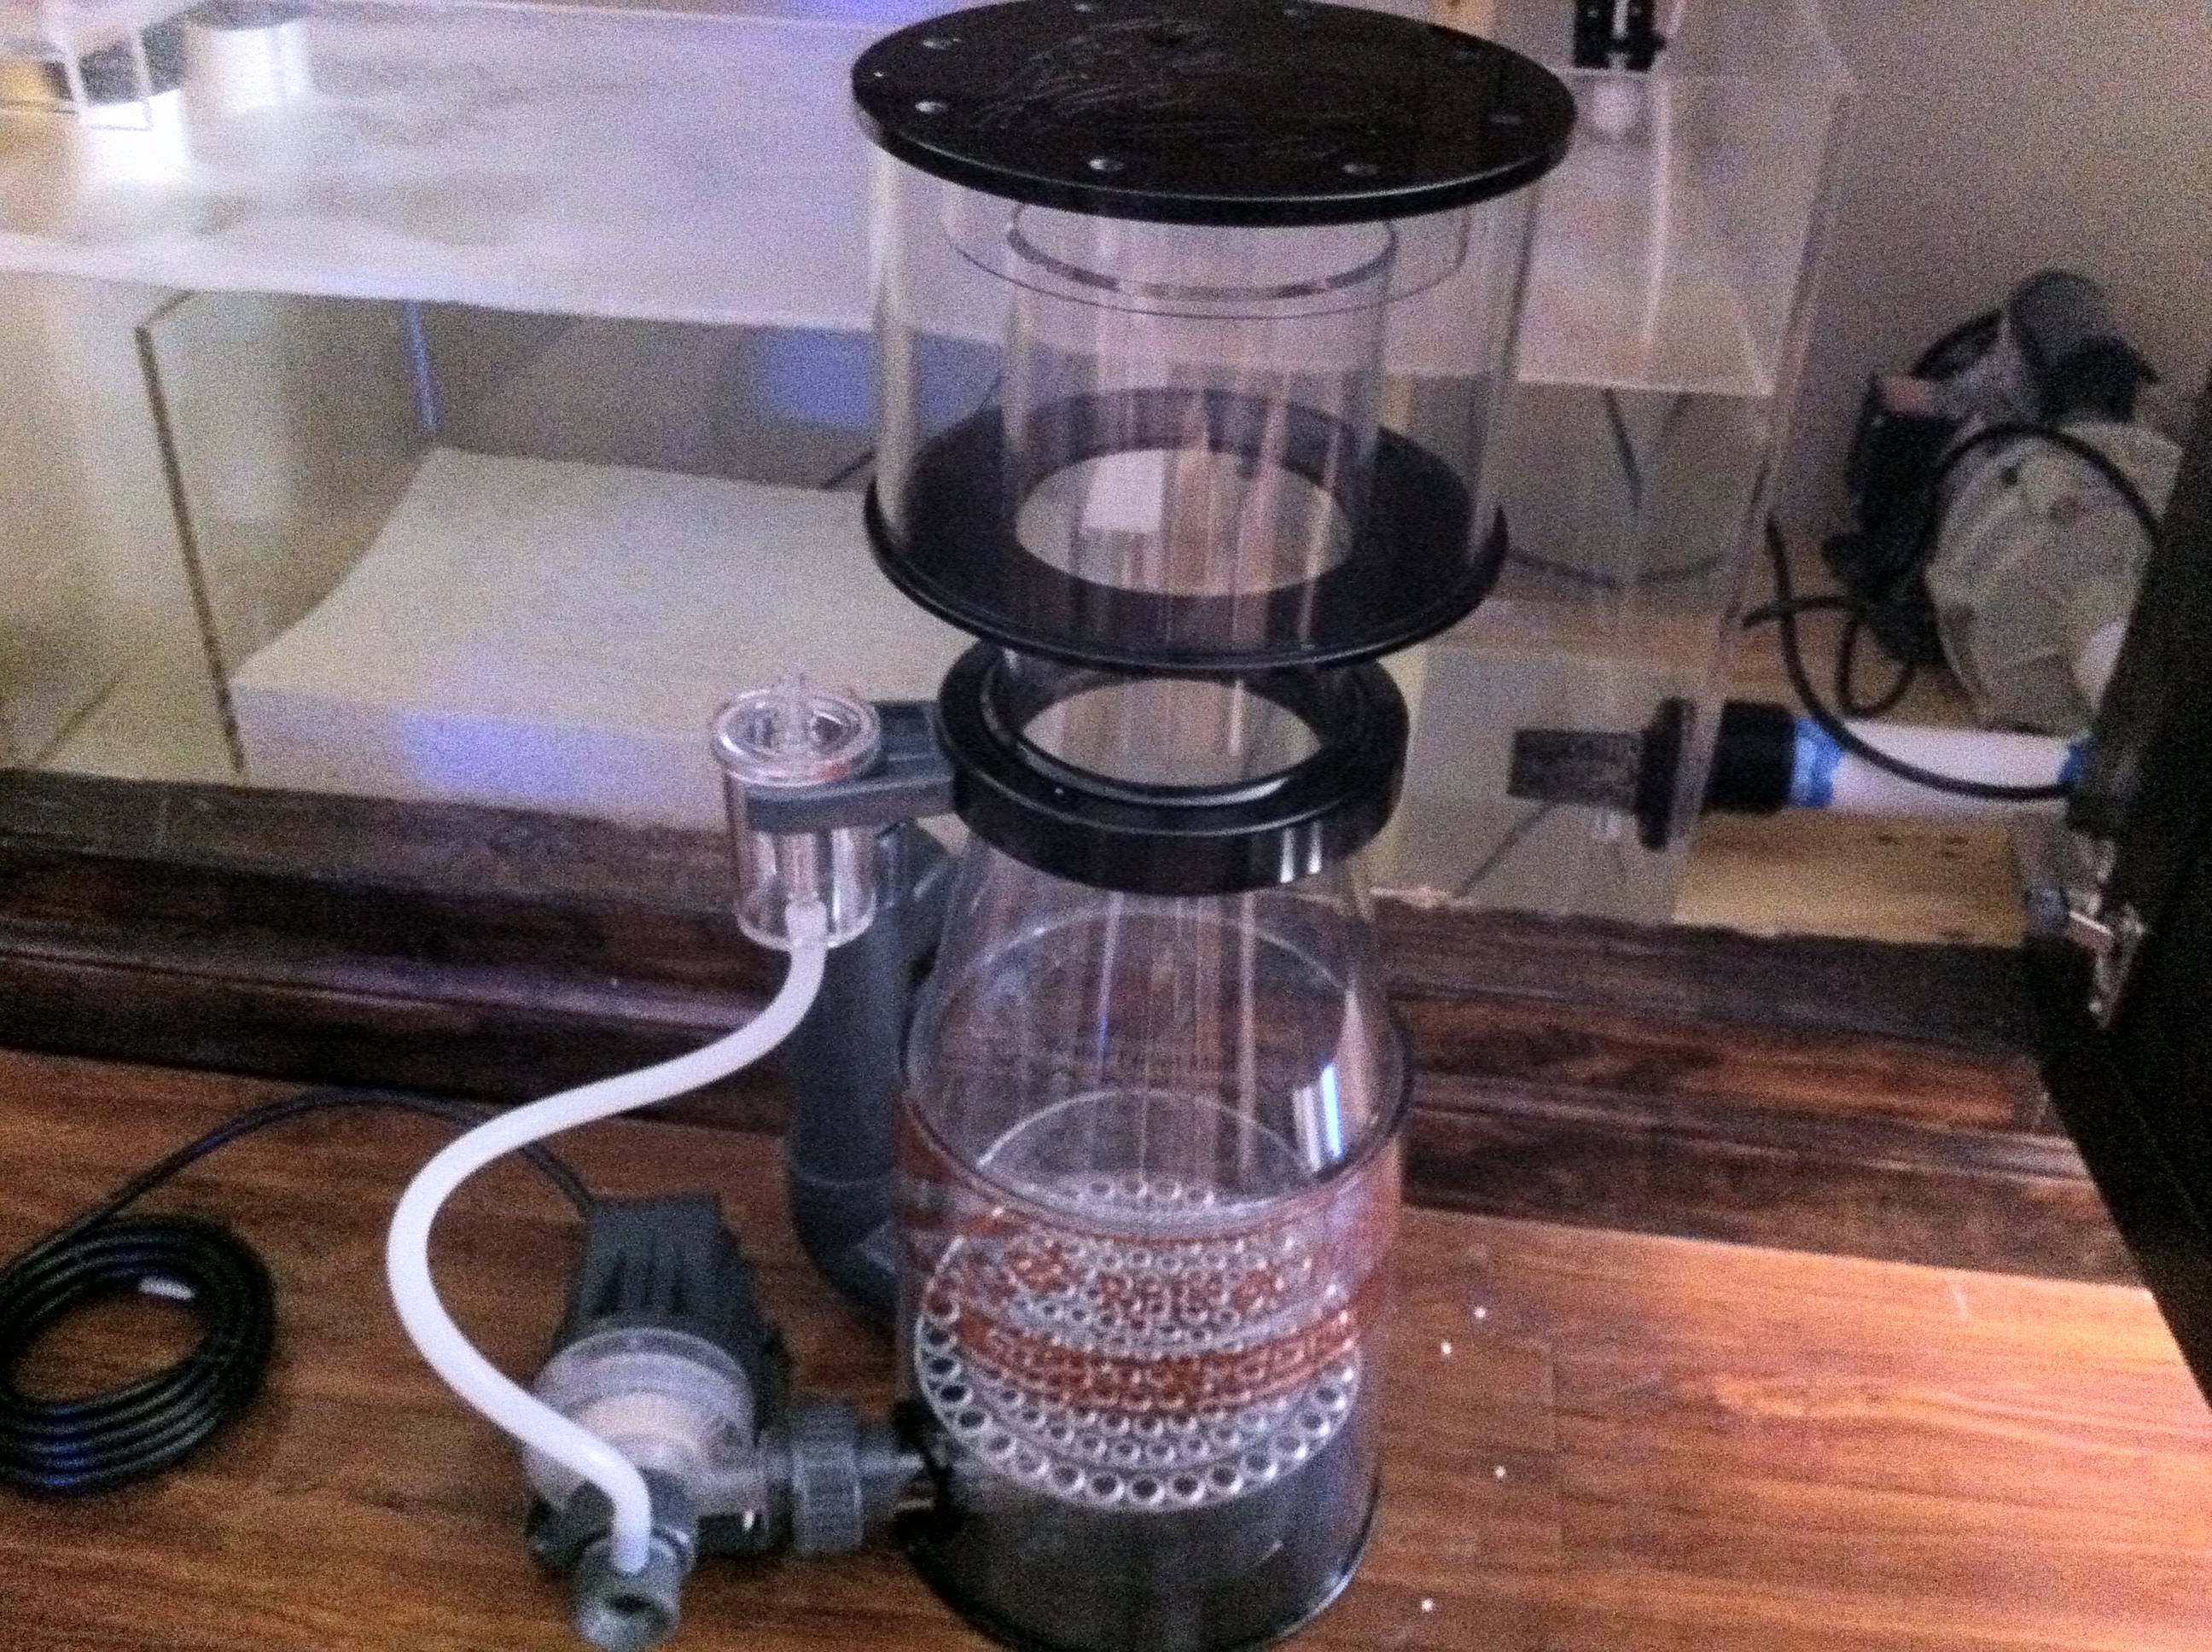
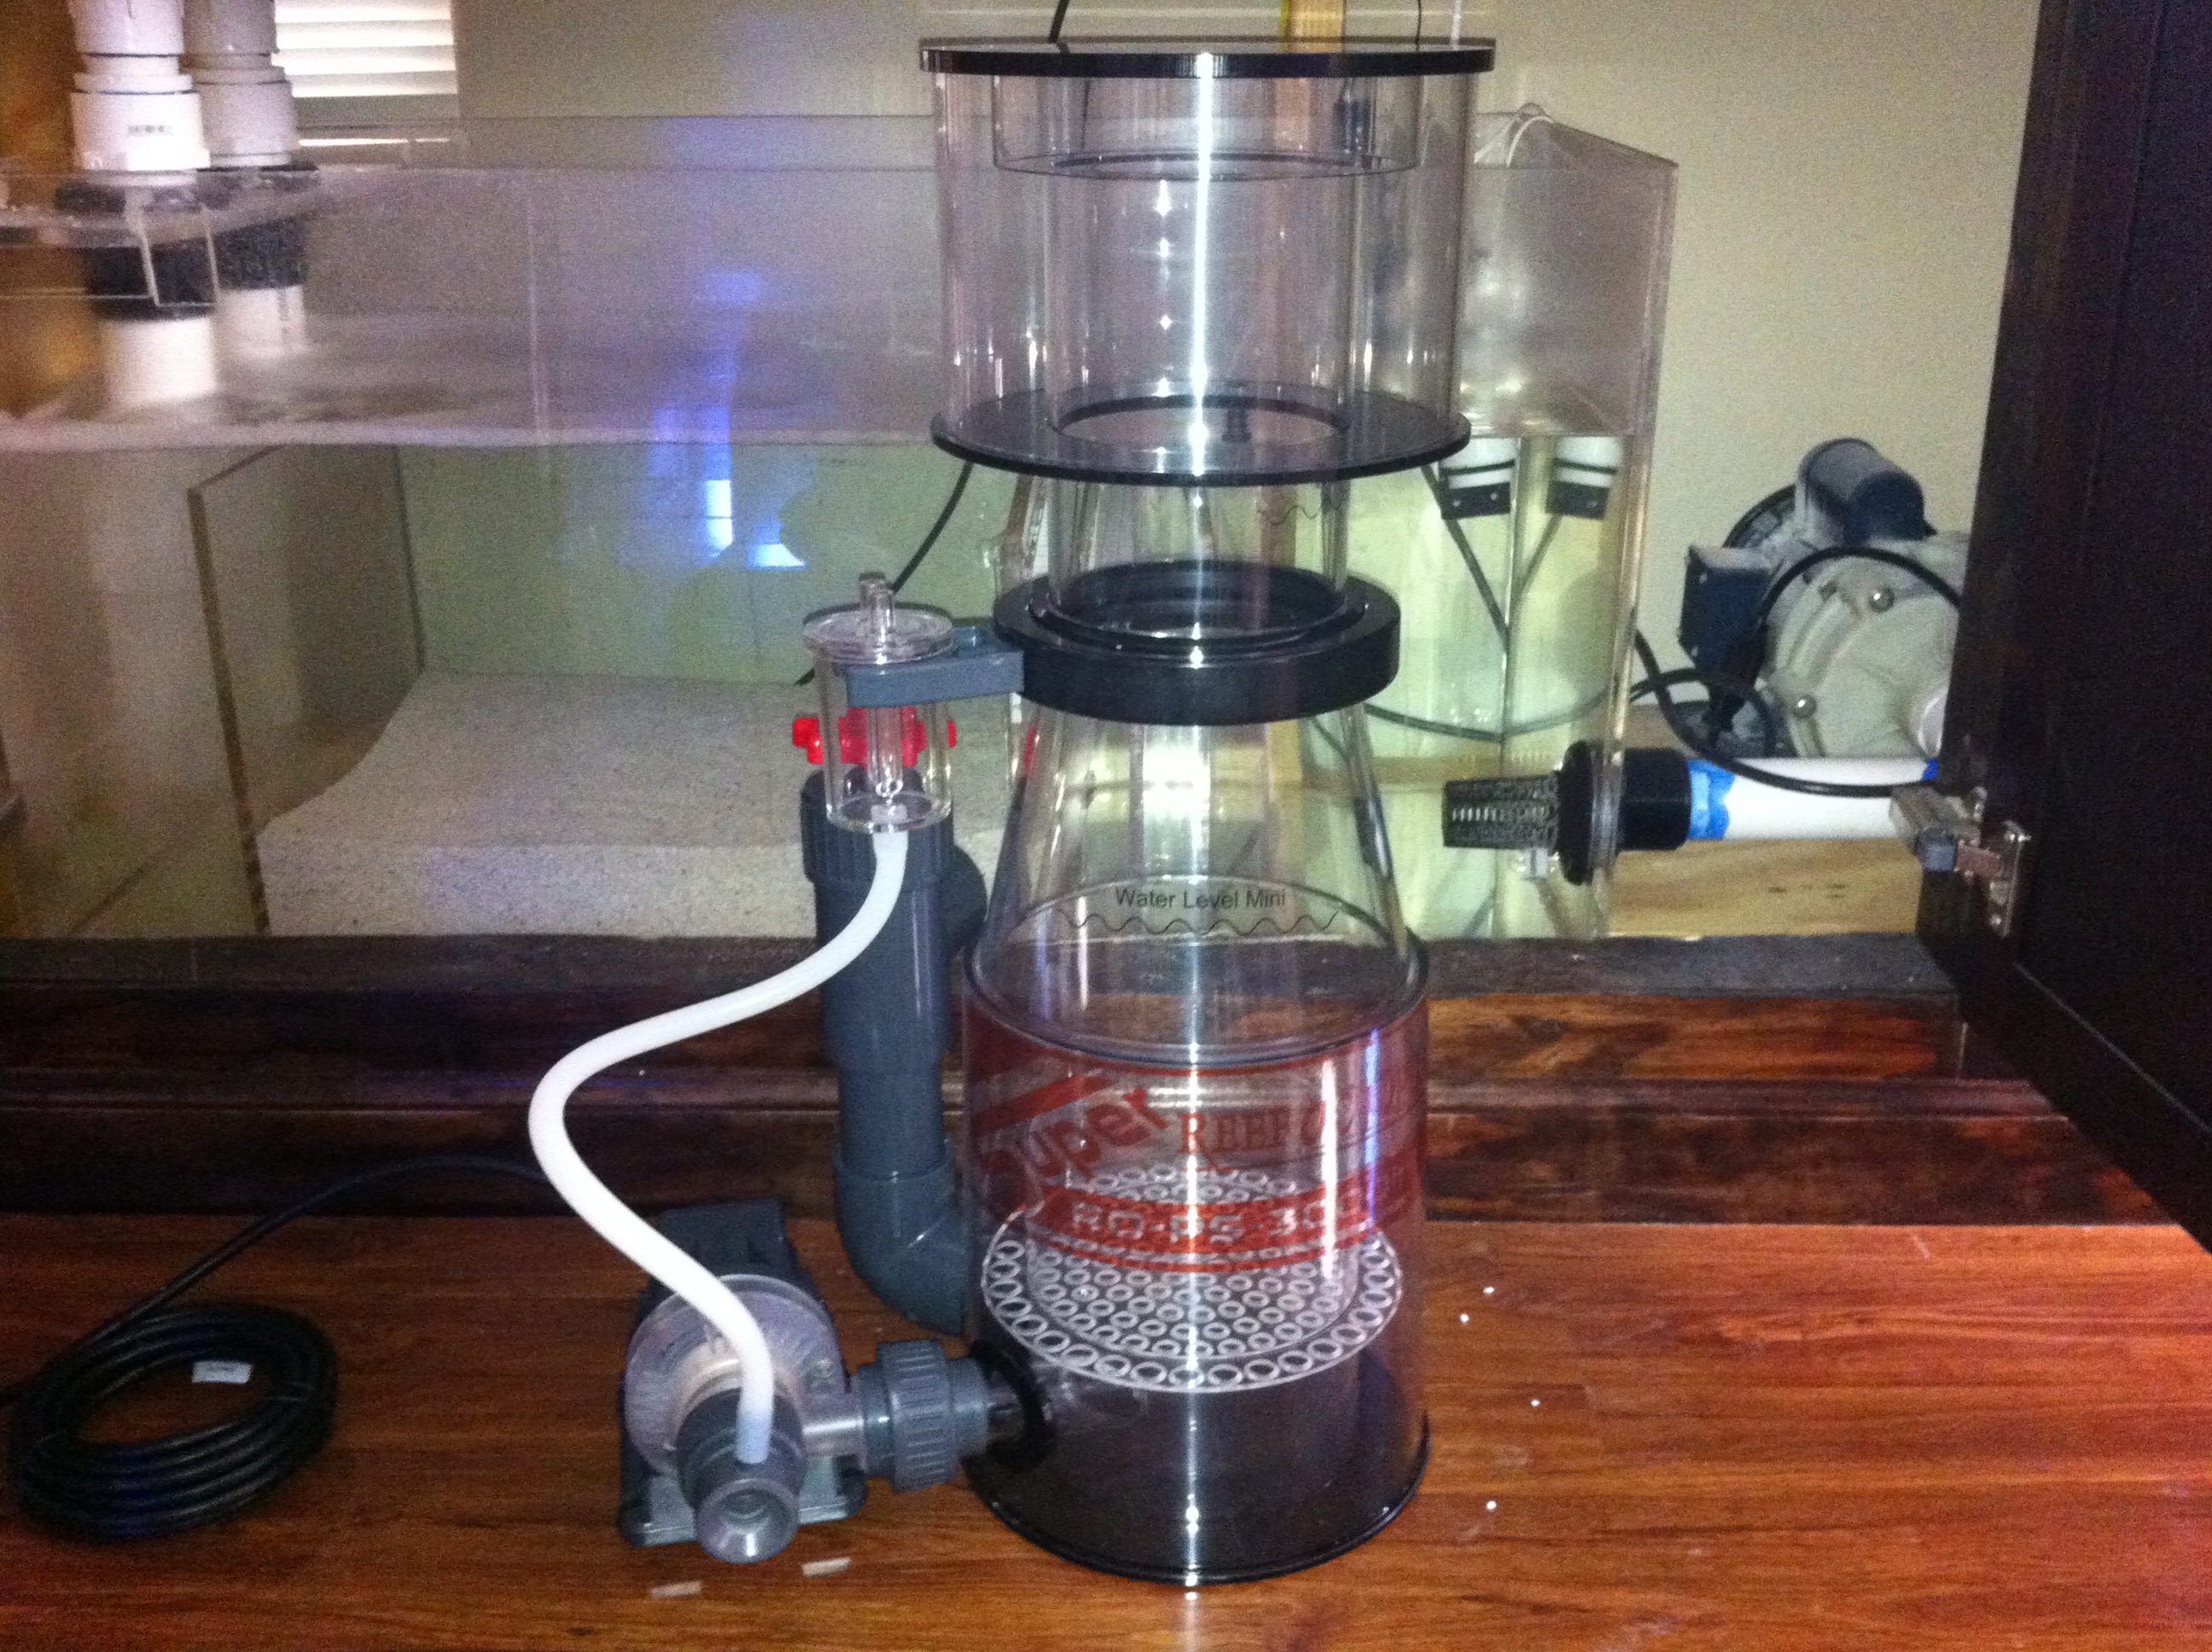
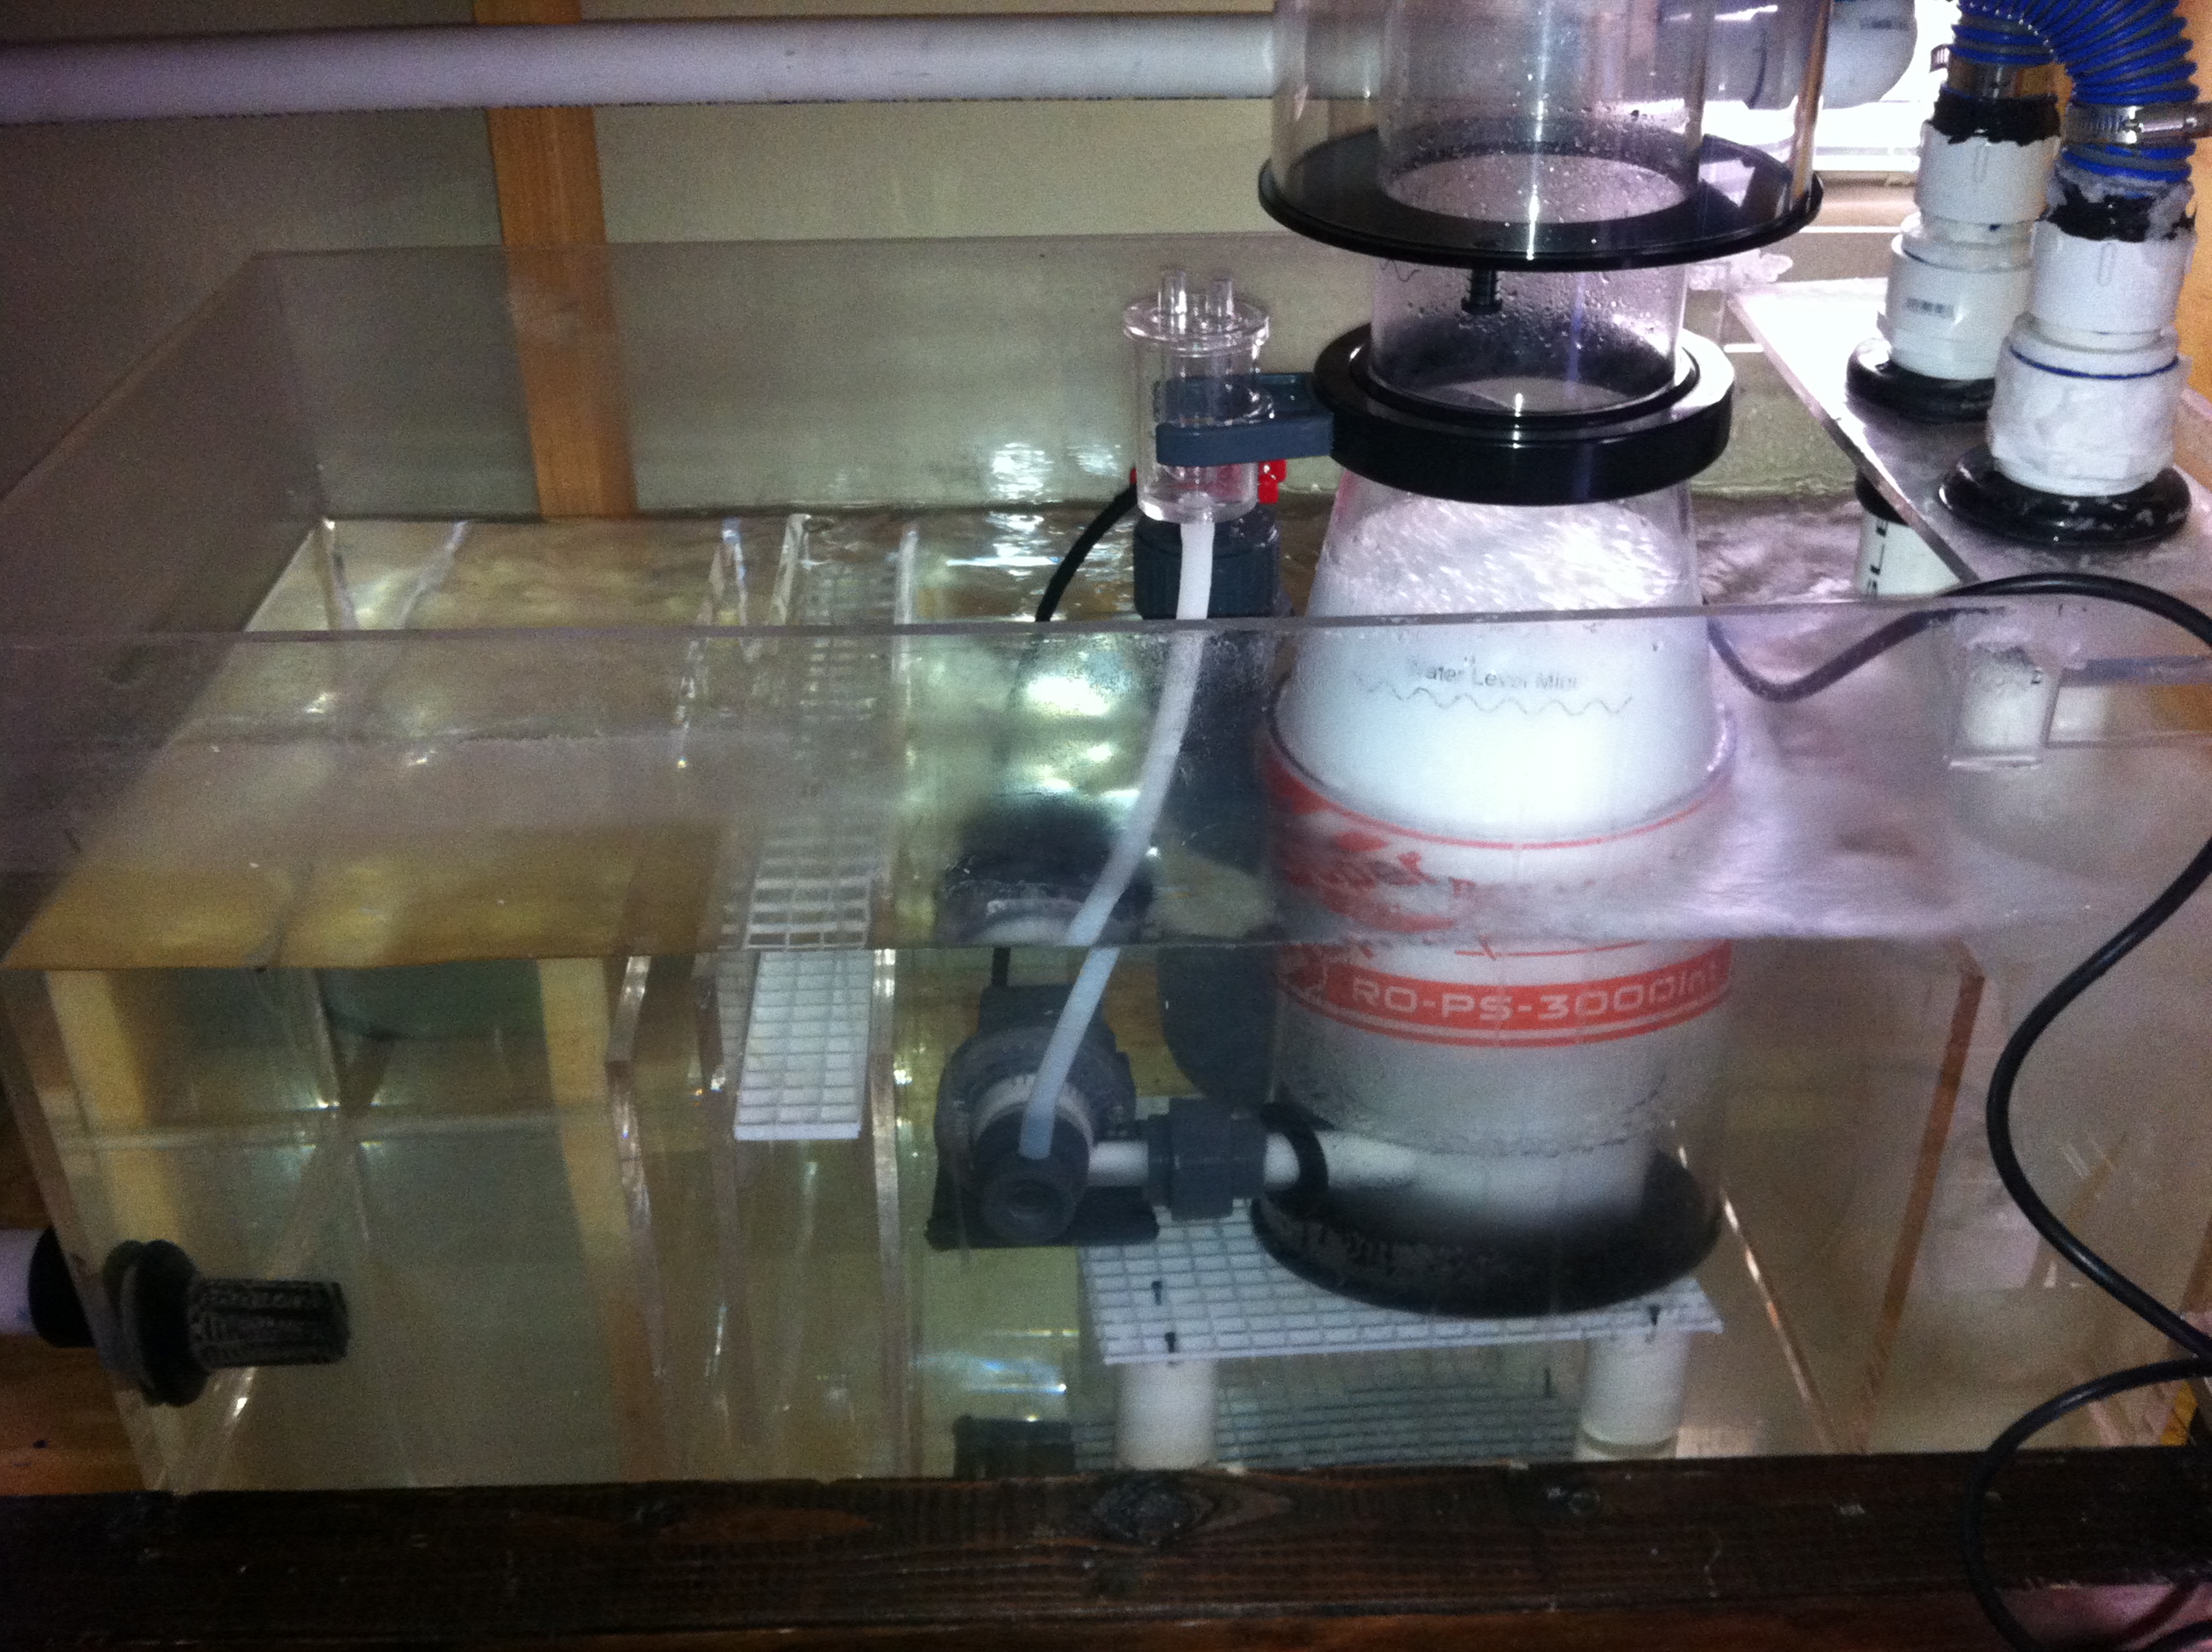
First off let me say what an amazing skimmer!!! You put your hand on it and it feels like there is a tornado running through it. It's dead silent. Easy setup and i'll keep everyone updated on the skimmate once it gets to that stage. There is no noticeable difference in the noise pollution from the tank since the skimmer was inserted. With that said. Here are some pictures.


xcali1985

Active Member
With the skimmer cranking away, I decided to add the livesand and begin the cycle. So over the next week ill be testing and hopefully I can put a school of chromis in the there soon.
 
Top