Neptunes 125 Reef Diary.

king_neptune

Active Member
Originally Posted by jpa0741
http:///forum/post/2941523
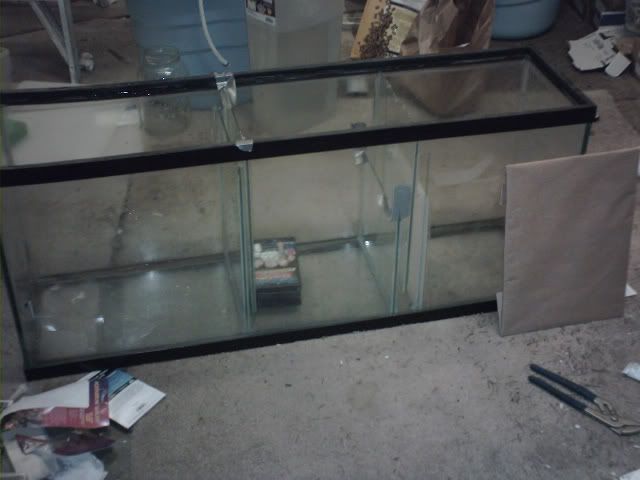
Bulkheads are the plastic insert you put in after you drill your holes. Your "dividers" in your sump are baffles
. Also you want to be careful with just picking up rock from anywhere. You really don't know what is in it and what will leach.
Also if you have the glass to replace your cutting board baffle, why try to prove it will work then go with the tried and true way. It will hold at first it is always after running for a while do they fail.
Ya, bulkheads...I'm still thinking like I'm on a navy ship...Bulkhead is dividing walls that keep out water...aka the walls.
_____________________________________________________________________________________________
I have talked to people who have used plastic cutting boards and they say just the oposite. just look at Mr. X's posts about plastic from walmart. Thing is, you hear both sides of the fence. I want to learn from experience, then I will tell people with absolute certainty....No....you use glass.
_________________________________________________________________________________________
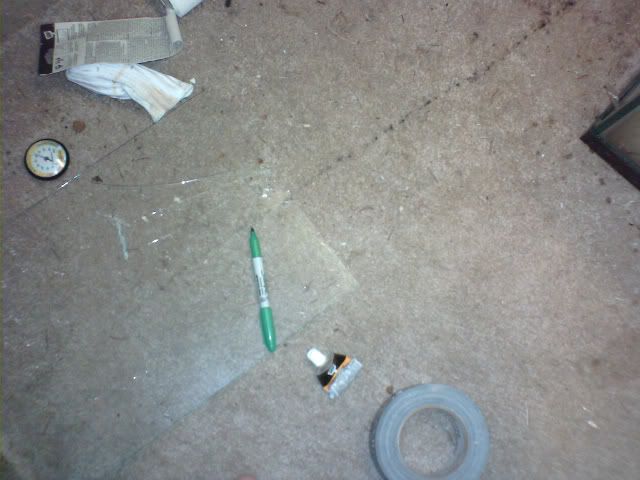
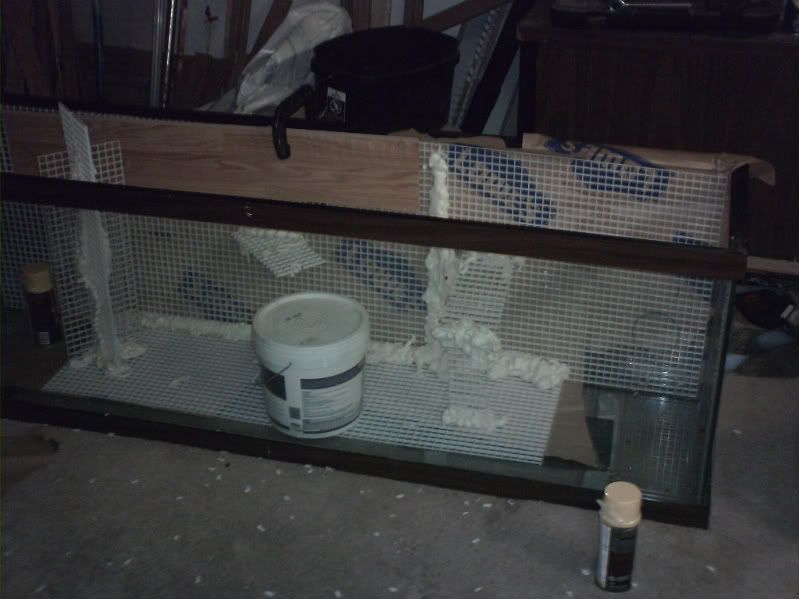
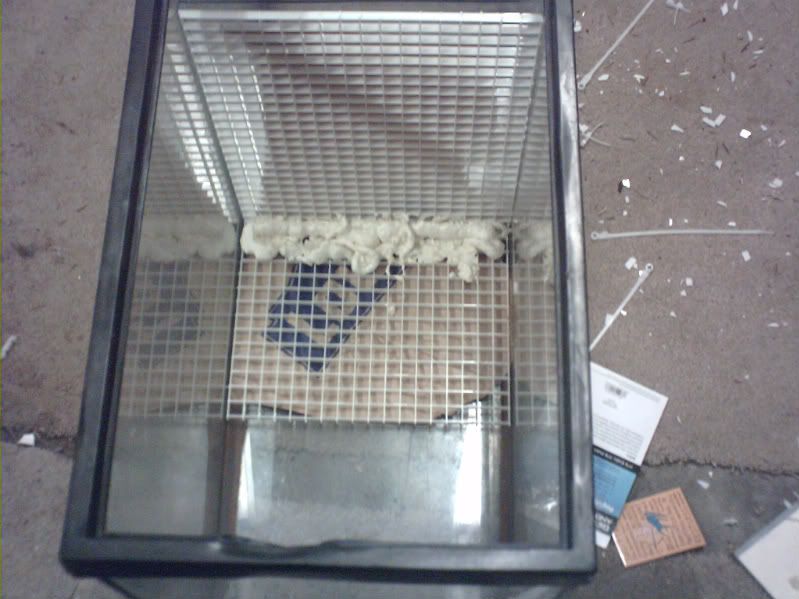
I think everyone is hanging on the acrylic vs glass combo. I need to remind that this is plastic cutting board, it is VERY rough from a saw-blade. It is not acrylic or glass. Don't get me wrong, it will be very unfortunate if I am wrong, and you are right. It will be an "I told you so moment". And I'll take my humiliation with a grain of salt...its something I asked for so I will be full well deserving of a failure. Don't get me wrong, your advice is not going unheard. Its just a matter of if ill take it or not. And a majority of what I'm told alters this project. Some of you have altered my plans significantly already.
 

king_neptune

Active Member
Originally Posted by wattsupdoc
http:///forum/post/2941531
A bulkhead is a fitting used to connect a piece of pipe to a hole in the glass. I don't see any bulkheads here yet? Personally, I like a fuge to have better control of the flow through it. In my drawing you see a bubble trap between the drain from DT and the fuge itself. This does two things. Stops bubbles from entering the fuge, getting trapped in the cheato and floating it. And because it has a slit in the glass, thuis directs the flow THROUGH the cheato or other macros. As opposed to the water moving just along the surface. Additionally the water dumping into the fuge compartment can and likely will stir your SB. I know many people build 'em without the first set of baffles, I wont though.... You can if you like silicone a large diameter pvc to the bottom of the 55. Drill several holes in it about 6 in. up and let the drain dump in that. It wont stop the bubbles, but will help with turbulence and direct the flow.
additionally, base rock is white and dead. Live rock is something much different it is ALIVE. You shouldn't just add rock you pick up, even if it's limestone it MAY be contaminated with crud....It doesn't look very good either. In my system I have some limestone buried under my LR. It was from a construction zone where they had blasted it out. Been there for thousands of years. It doesn't look very good but serves as a filler for the bottom layer under my good rock. However, because it was underground for eons, it was likely not contaminated. Luckily it did not naturally contain any metals.

I like that Idea about the "Pre sump" baffles. I have built my main drain section large enough that If I want too...I can put in another set of baffles. Wouldn't a sock also help reduce bubbles? Or evin a couple socks and a bag over top the drain.
I was planning on having the drain bagged anywyas, but The PVC method is also interesting. Ill do several dry runs in my garage to see what system works best.
The fuge is on the opposite side of the main drain. It will be fed by the return line on its way back up top. It will "T" and go to a flow control valve where I will probably let about 400GPH flow through into the fuge. This will be overall slower movement than the rest of the tank. I initially planned on an 1800GPH pond master at 11feet vertical. But I may go for a good 2200-2400 pump instead, simply because the pump will bleed off into the fuge again. Any suggestions?
 

str8salt

Member
I say if plastic is what you want then go with the plastic. I dont think it is the roughness of the plastic but maybe the flexion of the plastic. Porosity would be greater with the plastic. Just thoughts. If nothing else your plastic baffle has created some dialog about something on this board. can't wait to see the surprises you were talking about. Maybe it will create some more stir. Happy reefing
 

king_neptune

Active Member
Originally Posted by Eric B 125
http:///forum/post/2941541
+1
I agree about changing out the cutting board baffle. I dont have any experience with sumps, but if the seals fail, then that 55 will be a real pain to remove from your stand to drain, dry, and re-seal, should the cutting board give-way to constant water pressure and flow. So far your baffles look good though, nice and straight. I've never heard having the fuge and return compartments the same size. do you know why this is suggested? That's clutch that you can get LR for $2/lb! around here it starts at $6.99 and i've talked to people who have paid up to $12/lb just for fiji. next time i get LR i'll be getting it online, or just buying base rock. cant wait to see the wall!
Im sorry. I said LR I meant dead "L"ava "R"ock that can become live. it's 1.99 lb, it will take about 2 years to become live. I wanted it light so I can hang it on the back. When I do buy LR Ill order from hear. Prices are average. All the rock I got so far came directly from the pet store and was meant for auqua scaping. Lonzo isnt going to ruin his 15 year buisness by letting me walk out the door with something that will kill my reef.
As for fuge and return the same size...Ive had several tell me they should be because this is were the evaporation occurs..this is misleading, this is where the evaporation SHOWS, but it occurs over the whole system.
 

king_neptune

Active Member
Originally Posted by str8salt
http:///forum/post/2942473
I say if plastic is what you want then go with the plastic. I dont think it is the roughness of the plastic but maybe the flexion of the plastic. Porosity would be greater with the plastic. Just thoughts. If nothing else your plastic baffle has created some dialog about something on this board. can't wait to see the surprises you were talking about. Maybe it will create some more stir. Happy reefing
I'm still trying to come up with a name for my new idea.
I showed the local fish store, hes got a pretty big shop. The biggest aquarium store Ive ever seen. He looked at in silence, and then made a small suggestion. He asked me to take pictures of it up and running and let me know if it worked. I know the secrecy is killing you all. But if you follow me with this it will be another week or two I should have it finished and a sample running by then.I'll post the screen shots. It may completely fail, but then again it may be completely bad ass!!
Ill be shocked if its been done and tried before, I haven't seen anyone do it..but if it has been done..then great minds think alike.
 

king_neptune

Active Member
OK so I did the water test on the fuge side. I was worried that it wouldn't seal good because the glass was raised off the bottom. But it held nice. I let it sit for a couple hours to make sure it was good. then I removed the water and added the second piece in.
Next I went to the other side, I reached for the pen to mark it...and when I leaned over...SNAP!

The very thing Ive been painstaking about happened in a moment. Back to low's. Oh never mind..the kid who did my order last night bundled up a spare. Lucky me. I am saved a trip. I added the third and final peice to the skimmer side.

Tomorrow Ill do the last piece on the Fuge side and then a water test with some old hydroponic pump that's left over from when I used to do indoor growing, this weekend.
Some tips I learned when sealing:
Stand over the tank and pull up to your chest with both hands as you draw the bead...this gives you the best control.
A bucket is good for the removal of water,but that last couple inches goes by fast with a sponge. Be sure to use the kind that doesn't have soap on them.
To save your cap on the silicone tube a nail to scrape it out is a good idea...I used dry spaghetti noodles.
Marker on the outside of the glass is a life saver.
Corners are especially susceptible to leaks.
Duct tape is a quick easy way to get shards of broken glass off the surface you break it on^^
____________________________________________________
Now on to the foam wall. After measuring the back wall I began to break off pieces with pliers. Then I just went fast and swiped right down the line. They break easy. I left 1/2" gap on each side to allow expansion of the wall, so when the foam lips past...it wont prevent me from putting it in the tank.
I took zip ties and fastened the pieces together. I use a 45 degree angle, it binds the pieces nice and tight when you fasten it across to the row above or below. Straight across allows the zip ties to slid up and down half an inch.

Remember to put your ties in and lock them at the front. not the back, you want the back to be smooth as possible to allow it to sit flush. I spent a lot of time reading on foam walls and I got a good picture in my head how it will turn out. Its going to be really nice addition to my tank, for a relatively little amount of money.
 
E

eric b 125

Guest
lookin good nep! any idea when the glassholes bit will be coming in? i cant wait to hear what you have to say about drilling those holes! i've heard mixed reviews about self-drilling, mostly good, but those bad stories stick with me. really, i guess one of two things can happen, right? why did you decide to go with a rock wall? personally i like the idea, but i havent seen it done tastefully yet. i have faith in you though.
 

king_neptune

Active Member
If I could I'd link you to some good ones. My favorite is off Reef Central. Speckled Grouper did a fantastic job, on her 260. One of my favorites. I am keen on doing this foam wall thing. Its going to really add a lot more depth than a boring pile of rocks lined in the middle.
Don't know about the bit's. Its cod, and I haven't had a ring at the doorbell yet. Hopefully by Friday. It is 1st class. I'm not really worried about the glass honestly. I watched plenty of videos and its all about going slow and steady. no pressure. Let the bit do the work. Key is...you add pressure and you cause vibrations, vibrations kill glass. I'm going to tape the back side as well to dampen the vibrations.
 

king_neptune

Active Member
Started on the egg crate foam wall. I took the crate and played with various peices for an hour. I just kept looking at shapes and sizes all stacked up and at diffeent angles. My goal was to stay away from symitry. I have always sucked at art and am out of my league. But Im gonna take a stab at it and see what happens.
The size of this thing will be the whole back wall, and a few peices to add depth to it. I am limited to what I can do because of size constraints. But you get the over all Idea.
I tried zip tying it outside the tank but all that did was frustrate me, so I put it inside, clamped it down and dabbed the seams.


It should pull out pretty easy. And if I do it right, it will fit back inside in one shot, evin after I finish it. It will take 2 people to place it in properly, but I know it can be done.
I cant really do much more until I kow where the overflow bulkheads will go, so hopefully I get my bits in the next couple days.

I made this for the sump to protect the thin glass. If this doesn't work Ill glue one of the plastic cutting board instead.
One thing I got 2 spare egg crate panels left. So I can take those back for a $30 dollar refund YAY!!
Im also taking the three unused cans of great stuff foam and getting the UV protecting instead. Ill put a thin layer over the foam I already have in place, after I shave it down. I basically wanted to "Glue" the eg crate together to help me work with it easier.
Also note I put paper behind the foam so I wouldn't stick it to the glass.
 

reefforbrains

Active Member
You sir have been bitten by the hobby in the worst way. Knew the 55g would not satisfy your lust.
Glad to see your went larger. You should be much happier in the long run.
I am curious about the sump height being workable.
Since you are already in a dry dock stage, would it not be more prudent to build a new taller stand so you can reach into the sump during operation for maint.?
Please I am not trying to be critical, just have fought this fight myself and it is infuriating when you cannot reach into the sump.
 

king_neptune

Active Member
I am highly tempted, believe me. Its definitely on my mind.
After this tank is finished and setup in the garage I will be moving it 10miles away to my new home for the next 3-5 years.
When I take it there, I considered building a new stand from scratch since this current one is a little short. And really worn out. My dad has a great tool shop at his place and the house I'm moving into is my brothers empty house that's across the street. Since I am forced to build a cover anyways, I might as well do the stand too. And give them both the same finish and look.
Everything I am designing and building is modular. So Ill be able to plug and play the plumbing to fit a taller stand, with a few minor inserts in places that wont effect water pressure and flow. I payed a little extra to have couplings that disconnect, so I can do just that.
 

nigerbang

Active Member
Originally Posted by ReefForBrains
http:///forum/post/2943189
You sir have been bitten by the hobby in the worst way. Knew the 55g would not satisfy your lust.
Glad to see your went larger. You should be much happier in the long run.
I am curious about the sump height being workable.
Since you are already in a dry dock stage, would it not be more prudent to build a new taller stand so you can reach into the sump during operation for maint.?
Please I am not trying to be critical, just have fought this fight myself and it is infuriating when you cannot reach into the sump.
+1
I battled with that for months with my 180 before I got pissed enough to sell the whole system and start over.. God forbid you drop something in there...Takes tongs and alot of luck to get it back..
 

king_neptune

Active Member
Originally Posted by NigerBang
http:///forum/post/2943201
+1
I battled with that for months with my 180 before I got pissed enough to sell the whole system and start over.. God forbid you drop something in there...Takes tongs and alot of luck to get it back..

I prefer tiny elves
 

nigerbang

Active Member
Originally Posted by Veni Vidi Vici
http:///forum/post/2943210
I just noticed something,where are your cross braces on your 125?
Wow... good point!!
Kinda just browsed over.. Did you leak test this thing? I seen where it was a reptile tank...
 

king_neptune

Active Member
On glass tanks the braces are just to hold lids and lights. They have no structure beyond that purpose.
On acrylic tanks, the brackets are structural and hold the rim from bowing out from the weight of the water. It's probably not going to break (acrylic doesn't shatter), but it could permanently deform over time.
 
Top