New 240 Tank Diary
- Thread starter clsimons29
- Start date
clsimons29
Member
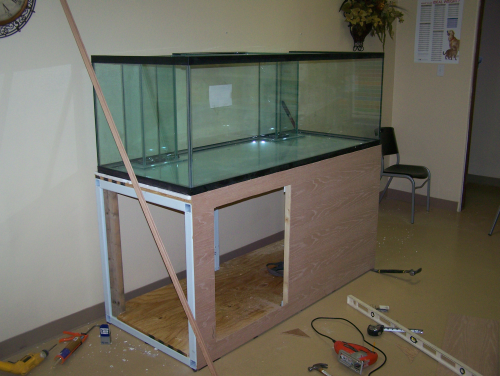
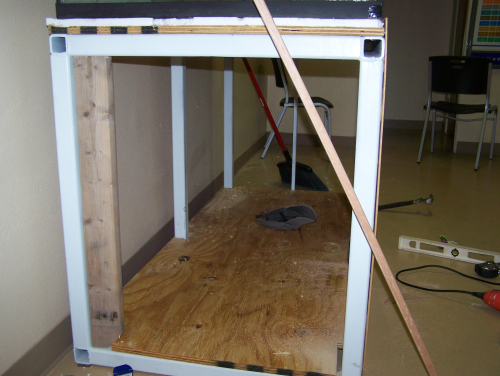
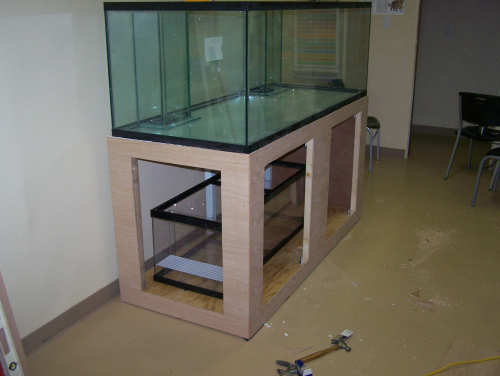
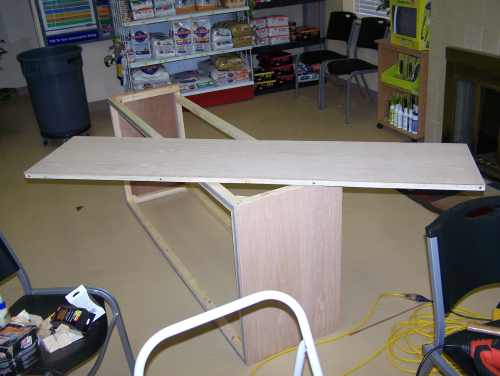
Sorry I have not updated in awhile. I got the stand in and leveled and began the work of getting it set up. I placed 3/4" ply on the top and screwed it down into the metal. I then placed 3/4" of Styrofoam on the top to give me a nice soft surface for the tank. I then placed 2x4s in the tabs we welded into the stand and this will hold the recessed euro hinges for the doors. I then skinned the stand w/ 1/4" oak plywood and cut out the door openings. Me a several buddies placed the tank and thank goodness my overflow cutouts fit perfectly for the bulkheads.
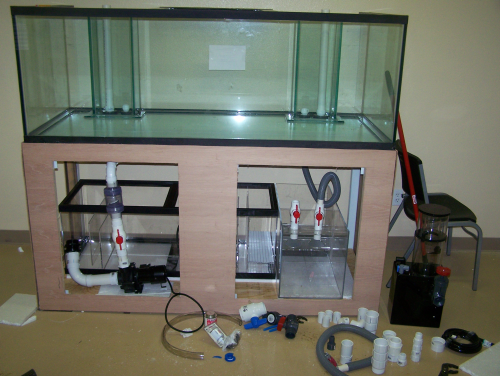
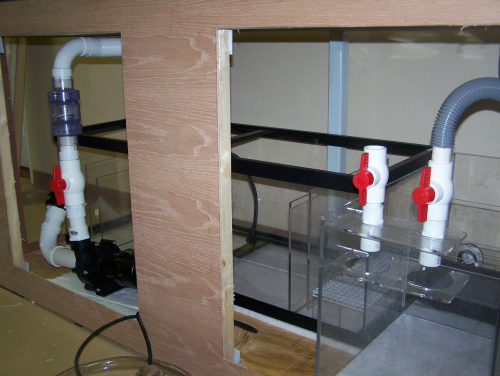
I started setting up the sumps today and getting the plumbing dry fitted. I am short a bulkhead and some misc stuff so won't get water in until later in the week.
I do have one question though as far as what will work better on my overflow bulkhead in/out lines. I have a 1" bulkhead and a 1 1/2" bulkhead in each overflow. My dart pump takes a 2" in line and 1 1/2" out line. Right now I have the 1" lines going into my 1st sump as it was set up to do and I have the 1 1/2" line splitting w/ a WYE joint from the pump splitting to the 1 1/2" return bulkheads. I have a 2" water column coming into the sumps and a 2" water column going into the pump but then I essentially have a 3" water column from the WYE joint unless I reduce it to 3/4" out the bulkhead. Any ideas on this being okay or should I switch to the 1 1/2" bulkhead going to the sump and use the 1" lines as tank returns?
Thanks
alexknight
Member
nice nice, its coming along.
reeferman75
Member
Looking good keep the pics coming
kjr_trig
Active Member
Originally Posted by clsimons29
http:///forum/post/2742126
I do have one question though as far as what will work better on my overflow bulkhead in/out lines. I have a 1" bulkhead and a 1 1/2" bulkhead in each overflow. My dart pump takes a 2" in line and 1 1/2" out line. Right now I have the 1" lines going into my 1st sump as it was set up to do and I have the 1 1/2" line splitting w/ a WYE joint from the pump splitting to the 1 1/2" return bulkheads. I have a 2" water column coming into the sumps and a 2" water column going into the pump but then I essentially have a 3" water column from the WYE joint unless I reduce it to 3/4" out the bulkhead. Any ideas on this being okay or should I switch to the 1 1/2" bulkhead going to the sump and use the 1" lines as tank returns?
Thanks
I think you are great with what you have...I have a 240 (8x2x2) with 2 overflows, I have 1 inch drain going to the sump, and 3/4 on the returns, I have DIY Durso standpipes....I only have a Mag 18 powering both returns....I like the direction you are going better, my sump is a little smaller than I should have done.
I like the plumbing you have done thus far.
Are you going to do a colored background?
clsimons29
Member
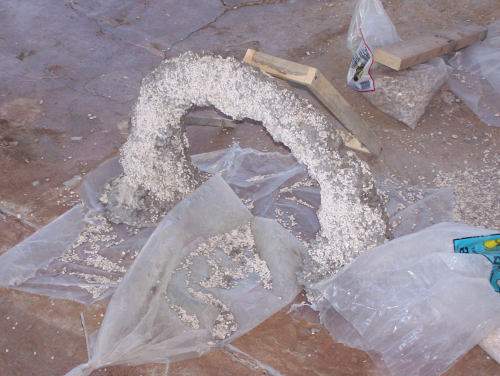
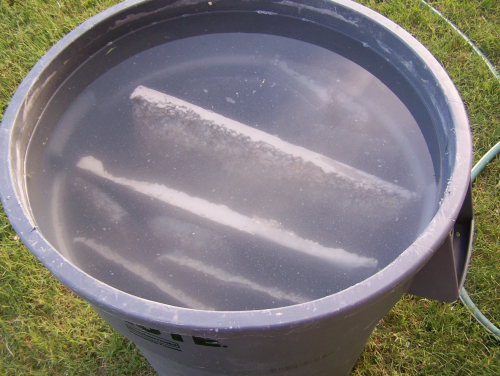
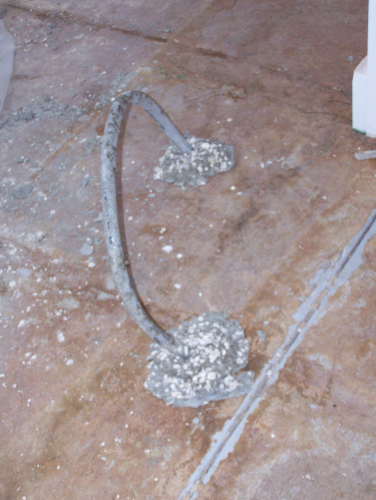
Thanks! In answer to the background I am trying something different. I have always had problems in getting rock to stick just right against the back of the aquarium so I have made my own custom fit rock background that will cover the full back of the tank and the overflows. It is made with portland cement, agronite, and shell sand. I also made an arch to go between the two rock scapes I am planning on. I built the arch using a rubber hose cut sliced open filled w/my mix and stuck into footers, I then laid it over and covered one side and then did the other side. I am currently curing the backgrounds in water to get the PH stablized and this process may take 1-2 months.
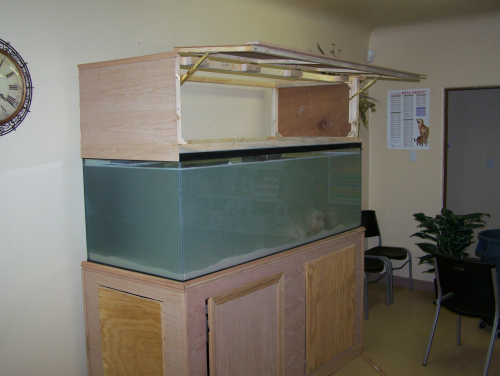
I have only been able to do a little more work on the tank so far this week. Got most of the trim work done and am starting on the doors. I have also started filling the tank with water and this will take some time as I am making my own RO/DI water. I will have a new water line and electrical lines installed next week and should have my additional plumbing parts order in next week. I will probably start working on the canopy this weekend.
Will update again this weekend.
Thanks
kjr_trig
Active Member
Originally Posted by clsimons29
http:///forum/post/2746810
Thanks! In answer to the background I am trying something different. I have always had problems in getting rock to stick just right against the back of the aquarium so I have made my own custom fit rock background that will cover the full back of the tank and the overflows. It is made with portland cement, agronite, and shell sand. I also made an arch to go between the two rock scapes I am planning on. I built the arch using a rubber hose cut sliced open filled w/my mix and stuck into footers, I then laid it over and covered one side and then did the other side. I am currently curing the backgrounds in water to get the PH stablized and this process may take 1-2 months.
I have only been able to do a little more work on the tank so far this week. Got most of the trim work done and am starting on the doors. I have also started filling the tank with water and this will take some time as I am making my own RO/DI water. I will have a new water line and electrical lines installed next week and should have my additional plumbing parts order in next week. I will probably start working on the canopy this weekend.
Will update again this weekend.
Thanks
 I just got even more interested in this project....Very cool idea.
http:///forum/post/2746810
Thanks! In answer to the background I am trying something different. I have always had problems in getting rock to stick just right against the back of the aquarium so I have made my own custom fit rock background that will cover the full back of the tank and the overflows. It is made with portland cement, agronite, and shell sand. I also made an arch to go between the two rock scapes I am planning on. I built the arch using a rubber hose cut sliced open filled w/my mix and stuck into footers, I then laid it over and covered one side and then did the other side. I am currently curing the backgrounds in water to get the PH stablized and this process may take 1-2 months.
I have only been able to do a little more work on the tank so far this week. Got most of the trim work done and am starting on the doors. I have also started filling the tank with water and this will take some time as I am making my own RO/DI water. I will have a new water line and electrical lines installed next week and should have my additional plumbing parts order in next week. I will probably start working on the canopy this weekend.
Will update again this weekend.
Thanks
clsimons29
Member
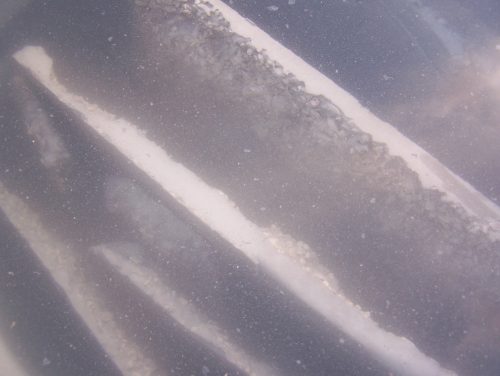
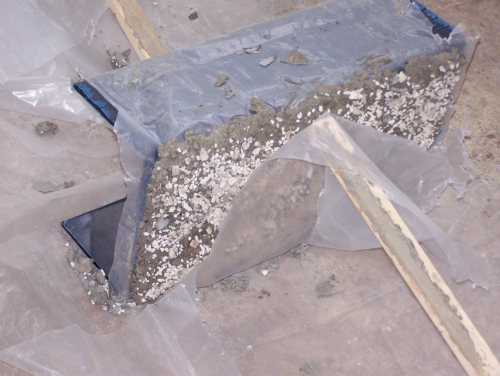
Thanks. Just realized I did have two pics from when I was making the arch and starting the overflow cover background. Thought I would post.


clsimons29
Member
Originally Posted by kjr_trig
http:///forum/post/2747452
How will you get the background to "attach"? Just curious, heavy like concrete, or somewhat porous? Where did you get the idea, this is rather new to me.
To attach the backgrounds are slightly sloped and are larger on the bottom, not as apparent on the smaller one in the photo but on the larger pieces is more pronounced. I will also have about 1" buried in the sand bed and will use a dab of epoxy to the glass if needed. Each piece is formed to the next piece so they will also "lock" together.
I had read up on making your own live rock on the net and just applied that information to the idea of making a background. The pieces are fairly heavy as they are a solid mix of concrete, shell, and agronite. I mixed the concrete until it was a thick liquid, and then added shell & agronite until I got a real thick paste. Then I just dollop it in my forms, gave it some texture with bumps and valleys and then gave a top layer of shell & agronite. I am only using this to make my “special” pieces as I have close to 300lbs of actual LR.
clsimons29
Member
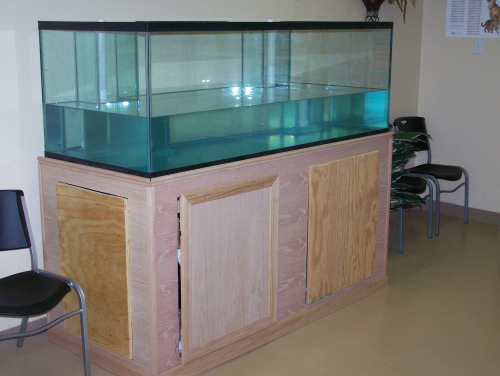
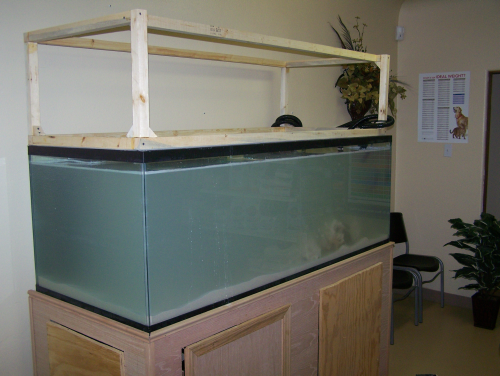
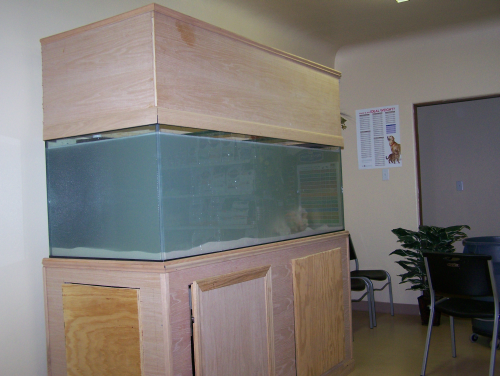
Well I got the canopy put together this weekend. Still need to finish some details on the trim work and finish the doors. Should hopefully finish this week and start to stain and finish. Also got as much water in as i can until the rest of my plumbing parts come in to finish the sumps. Got some of the sand in and placed some of my new rock.


clsimons29
Member
Originally Posted by dsgmm9
http:///forum/post/2750487
nice tank
Thanks.
Originally Posted by grubsnaek
http:///forum/post/2750524
nice you got the tank, sump, stand, and canopy all from same place,,,,they luv you .hahahha
I still don't get some of your post?.... I built the stand & canopy from scratch. If you were being more subtle in your meaning I guess I missed it.
ick
New Member
Originally Posted by clsimons29
http:///forum/post/2751081
Thanks.
I still don't get some of your post?.... I built the stand & canopy from scratch. If you were being more subtle in your meaning I guess I missed it.
Very Very nice setup. Can you link me to the web info you used to "inspire" your background.. i belive you said "make your own live rock - you found a reference on the internet"
thanks!
dse
Member
nice tank looks simular to mine in a way. but home made! (much better imo)
alos are you putting fans inside the canopy? just that you said your going to be using MH's and you made no cut out's for fans?
Originally Posted by ick
http:///forum/post/2755968
Very Very nice setup. Can you link me to the web info you used to "inspire" your background.. i belive you said "make your own live rock - you found a reference on the internet"
thanks!
+1 same here as i got a new tank and posted my tank in wrong forum room lmao.
but making sounjds fun and can give me idea's of wall's, overhangs, bridges caves, shelter ooh the list goes on so send me the link too thank you.
clsimons29
Member
Originally Posted by ick
http:///forum/post/2755968
Very Very nice setup. Can you link me to the web info you used to "inspire" your background.. i belive you said "make your own live rock - you found a reference on the internet"
thanks!
Originally Posted by dse
http:///forum/post/2756324
nice tank looks simular to mine in a way. but home made! (much better imo)
alos are you putting fans inside the canopy? just that you said your going to be using MH's and you made no cut out's for fans?
+1 same here as i got a new tank and posted my tank in wrong forum room lmao.
but making sounjds fun and can give me idea's of wall's, overhangs, bridges caves, shelter ooh the list goes on so send me the link too thank you.
Thanks, here is the link I found: http://www.geocities.com/CapeCanaver...ementRock.html
great page of information is fairly lengthy but is a good read and has pictures.
Thanks, I will add fans as needed once I move the lights. I am planning on moving to a solaris system in the near future so I will probably not make any cutouts in the canopy. I have a clip on fan if I need it.
M
mr.reef
Guest
how did u make that rock i am really wanting to know who to
