ok 540 again

rickross23

Active Member
Width? Get a ray or shark!
Talking sharks, what do you think is minimum for one? I am thinkin about upgrading in the future and want a ray shark tank.....I am thinkin of hatching the shark egg or gettin a kalamantan shark sold from LA. Anyone have a shark? I was planning a 180 gallon. Could I keep a shark/ ray in this?
 

2quills

Well-Known Member
Quote:
Originally Posted by deejeff442 http:///t/391633/ok-540-again#post_3474622
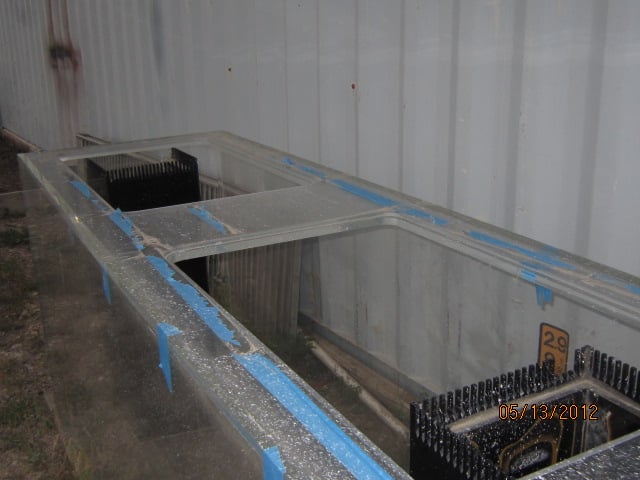
ok here is the top i took the plastic off but the tape it on there pretty good.so 1 inch is not thick enough? there is no bracing.can i make a tight angle iron rim? that would be no problem.
how is it then silicone can hold glass and this weld that imo is much stronger fail?ok the top openings are bigger than 12 inch square

Joints fail from either a poor weld job, poor quality material or a poor weld job on poor quality material or it's just plain under built for it's design. In which case too much stress is what causes these failures to occur. The fact that there is a failure could be attributed to the 1" material for this size of tank. My guess is that might be the reason why it came so cheap. Patches are iffy territory when it comes to recommendations. If it were my tank I'd gamble and patch it. Just not sure I'd feel comfortable recommending it to someone else. Too little experience in this area for me with tanks this size.
 

tangs rule

Active Member
I would still go glass for a reef Jeff - I found u a glass 450 with cedar stand cheep - only an hour away....pm'd you.
 

acrylic51

Active Member
That's my point Corey......If I'm understanding correctly I don't have any issue with an 8' tank, but 42" tall is way thin for 1" material.....The other thing is the radius is a bit small in the corners for my liking to distribute the stress......
A lot comes into play when deciding material thickness.....Length of panel, but height is the biggest considering factor........
Jeff I hope that's your name......I will tell you how to do it, but there is no guarantee at all on my part......As I mentioned earlier you'll want to ensure you can get entirely underneath that front panel from corner to corner.......Perferrably if you can slide straight pins underneath the bottom and front panel would be ideal IMO.......What you need to do and check for is you don't want any residue or crap inside that joint at all.......Your going to need to take an air compressor and blow gun and blow that seam out....Make sure it's completely clean and dry..........If there is any old residual solvent or such along the entire seam or any particular spot your chances of a good joint are poor.......
Here goes.........
You'll want to get yourself a handful of twisty ties and strip the paper off of them.......What you'll want to do is every 6" or so slide a twisty tie halfway into the joint....meaning you'll want the twisty in roughly a tad more than 1/2".......What you'll also need to ensure is that you have a almost perfectly level area/table your going to work on.......What you will do everywhere you have a twisty tie slid into the joint you will need a wood shim.....I prefer the composite shims over the cheapo wood shims. What your going to do is slide the shims under neath the tank......What you are trying to do is level everything out and create even drag on all the little twisty ties......Again this is something your not going to get the feel for over night.....This techinque takes a bit of practice.....(a lot of practice). You want to ensure that all the pins (twisty ties) have about the same drag on them.......
What happens next......(again I advise to practice first cause you have 1 shot), no do overs!!!! You'll start from 1 end and start apply your solvent.......Don't force the needle applicator under the panel......Don't squeeze the bottle. The solvent should run and wick (seep under the panel)......You should see the entire joint become wet.......Again practice with working the bottle and how fast to move it.......You'll want to wet the entire joint and it should be completely wet, and shouldn't consume a lot of solvent......Waiting roughly 30 seconds and that has a lot of variables depending on temp and humidity, but as soon as you get the entire joint wet out, you need to go back and start pulling the pins (twisty ties) out of the joint.....What is happening and the reason behind the pins (twisty ties) is your allowing the solvent to actually attack; melt the acrylic a bit, so you get a good bite......As you pull the pins you'll see a bit of solvent ooze or push out of the joint.......Again you don't have a lot of time to play with, so again I stress practice; a lot of practice with the procedure......Another handy tip I have for you is to keep a pair of needle nose pliers in your pocket.....I used pins, and had a head come off and the weight of the acrylic will actually start to push the pin into the material....What this can do if your not prepared is create a void in your seam for a possible leak, so keep the handy and be prepared......
Again with all the pins pulled you'll want to go back to your shims and just snug them up even along the entire seam.....Snug to much and you'll see the joint push solvent or become dry.....You want even pressure along the entire joint.......Allow the seam to setup 24hrs before handling.......
I would suggest probably the easiest solvent would be the WeldOn 4......I would try to do the glue job on a cool day or coolest part of the day....With your location and Corey can attest humidity is a big enemy.......I can't remember and way to technical, but there is a way to slow the reaction down a bit, but not entirely sure of the components to do it........
Once you get that setup and let it set for 24hrs, I'd probably use the triangle gusset as I'll call it.....Again this is not guaranteed........Here's is the gussett, I'd recommend using on the patch job......
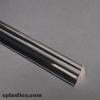
Large Triangular Rod 1 x 1 x 1.375 Base x 6ft long
You'll need (2) of them since the tank is 8' long......They are $16.19 a piece...........
To lay this gussett as I'm calling it you can either use WeldOn 4 again......This step or process will vary.....Depending how good you glue or confident you feel you can opt to use WeldOn 40 for laying the gussett.....Personally I'd feel a bit better with using the WeldOn 40, but it offers no real strength value over the WeldOn 4 unless it's annealed which you can't do.........
With that being said the reason I like the WeldOn 40 for this application, you can almost eliminate your chances of any micro bubbles or pin heads if you work carefully........What you would do then IMO would be to set the tank on a 45 degree angle so you can pour a fillet joint of WeldOn 40 in the seam.......You don't want to use a lot of this product as well, and it does generate quite a bit of heat so be ware!!!!!! But with pouring it at a 45 degree fillet, you would then take the triangle gussett and sit down into the poured fillett, and press it down into the solvent which in turn would completely cover all sides of the triangle piece.....This is why I say don't use a lot of solvent, because when you press it down into place the solvent will spread and you don't want it oozing all over the place..........
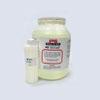
This is the WeldOn 40 and is a 2 part mix....Sort of like an epoxy mix.......It's expensive and it runs $155.00 for the kit.....
 

2quills

Well-Known Member
My memory is a bit hazy and I know we discussed this tank once before but where again was the failure? I'd be curious to see a close up of the actual point in question. The nature of the way the joint failed would be a big thing for me. If the joint gave way at the seam (indicating a bad welded joint) that would put the whole integrity of the tank in suspect and I would have to reinforce every joint along the bottom and all 4 sides if I were to ever use it again. If it cracked under the stress then I'd think twice about ever filling it again, even being reinforced.
 

2quills

Well-Known Member
Shawn are those acrylic pieces cast or extrude? I'd looked into them before and thought they were extrude. If I couldn't find it in cast material I'd get a hold of some 1" sheet acrylic and cut my own.
 

deejeff442

Active Member
i plan to buy a glass tank around a 490.i got a price from a tank builder in dfw with a 10 year guarantee. but i figure i could use this one in the small house and then transfer the stuff to the glass one when i get it.probably a year or two.if i cant use this tank it wont be that big of a deal.i still have my 250 going.i got this tank for $300 because the guy had it on craigslist for a couple weeks.i went to see it on a saturday and the storage unit he had it in was empty except for this tank. he had a uhaul parked there full of his stuff .he was moving to N.J. the next morning and could not take.
 

acrylic51

Active Member
Quote:
Originally Posted by 2Quills http:///t/391633/ok-540-again/20#post_3474652
Shawn are those acrylic pieces cast or extrude? I'd looked into them before and thought they were extrude. If I couldn't find it in cast material I'd get a hold of some 1" sheet acrylic and cut my own.
Corey you can get them in cast material......I actually bought mine from TotalPlastics last summer......It was just a pic to show the shape he'd be looking for.....
 

2quills

Well-Known Member
Cut the thing up. Take the left over material to a builder and have them make a large sump out of it for the new big tank thats coming.
 

2quills

Well-Known Member
If anything Id go with Shawns recommendations as far as the reinforcement. Id do it on all the joints. Give everything ample time to cure, fill it up and leak test it for a little while. Chances are it will be fine. Its just one of those things youll never really know unless you try I suppose. But Ive know its deffinately been done befor succesfully. Wish I lived a little closer or Id take it off of your hands for a few bucks.
 

deejeff442

Active Member
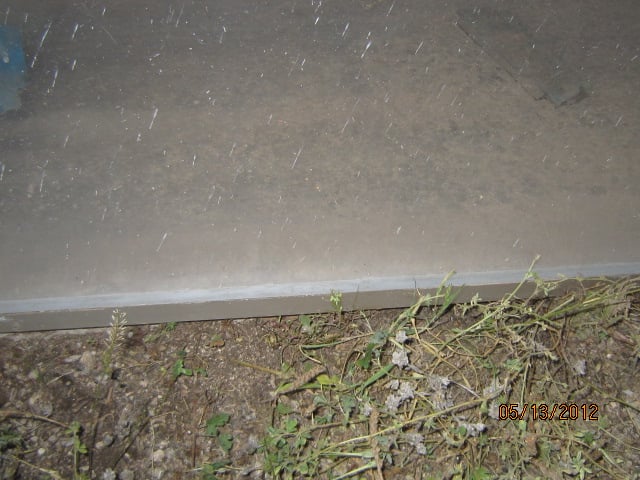
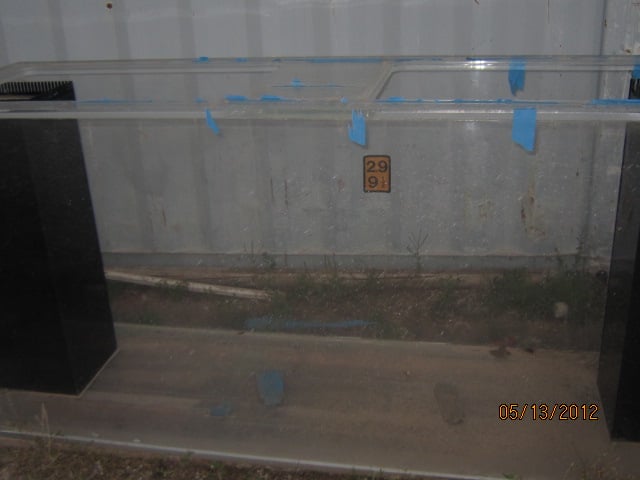
for the cost i figure i would try. maybe next week get on it.like i said i will try the fix on the blow out and fill it with water for a month. i took a pic of the tank but you really cant see the break. its on the front bottom right in the middle. well here is the pic not that it does any good.i figure if i can just use it and fill it with fish .i plan a new glass tank around the same size .i would have a nice establised tank to transfer to the bigger house which will be around 100 feet away.if i cant fix it oh well i have pissed away alot more than $300 on other stupid things over my life


deejeff442

Active Member
by the way the stuff you see on the tank is slurry from some concrete countertops i was making .the tank got in the way of my polisher lol. it will wash right off.
 

2quills

Well-Known Member
Under the circumstances and if I were in your shoes I would give it a shot too. Even in a worst case scenario there's still value in the material that the tank is made of. 1" acrylic isn't cheap and I know that at some point someone once spent close to a few thousand dollars just for the acrylic sheets in order to build it. The front and back panels alone if you were to cut them out and re-sell them a few inches shorter than a full size sheet then there has to be someone around the DFW area that could find some value in it.
Hard to tell from the pics but as long as the tank doesn't have any cracks going through the material then you're probably good to go on the patch/reinforce job. The joints will still have to carry some of the load even once they're reinforced so any crack that goes all the way through the material (even if it's small) can grow to be a big one. Once that happens then you might as well just feed the wife and kiss the dog good bye because it's only a matter of time before the inevitable happens.
I think Shawn was giving you some good advice when he advised that you use the Weldon 40 product over 3 or 4 and also the method of rotating the tank to have it sit on a 45 degree angle when you go to weld the joints. Weldon 3 and 4 both have a water like consistency to them. 40 is more like a thin syrup. So you'd be able to pour it into the joints and lay in your pieces. I think this would be the best way to not only get the most optimal/strongest joints without bubbles but it will look a lot cleaner as well.. This I believe would be much more difficult to achieve trying to use weldon 3 or 4 due in part because of their water like consistency and the way the solvent evaporates so quickly. You'll also want to find a way to support or keep some slight pressure on them while they cure. There was a thread with some great pics that showed it can be done I'll try to find it again for you.
 

deejeff442

Active Member
ok by next week i will order the triangle piece and weld it in .fill it with water and let it sit.thanks everyone for the help.i have taken apart so many glass tanks i can count but this is my first acrylic .so lets see how it goes
 
Top