Saltn00b's Multi-Phase Upgrade Diary!
- Thread starter saltn00b
- Start date
saltn00b
Active Member
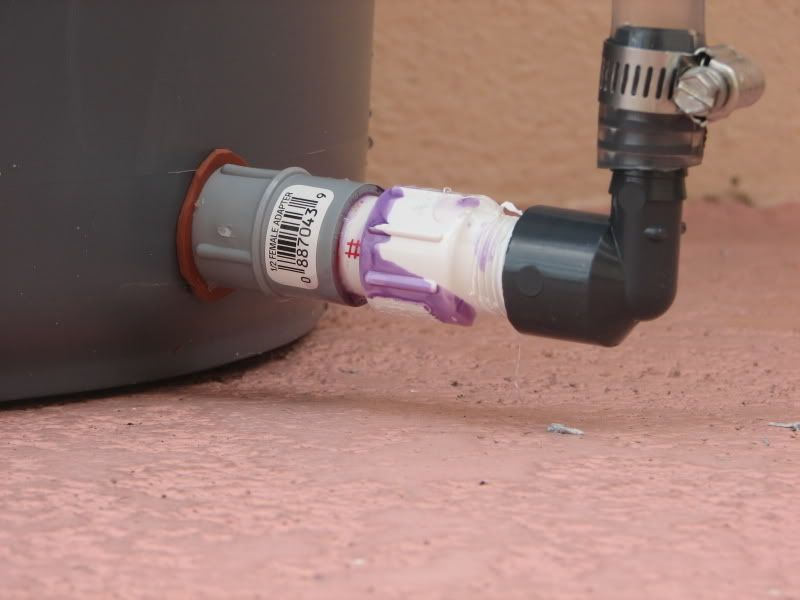
f)install RO/ DIDONE see below pic. DI In - 3 PPM, DI Out - 0 PPM
g)Build wooden water can "tower". structure will hold support garbage can on top to hold RO water, and a second can beneath as a mixing can. this is very similar to what T316 has already built. i am working with him to hammer out some details.
DONE pics coming soon! painted in KILZ water sealing primer. debating the external gloss white finish....


t316
Active Member
Nice...

I painted mine, and I'm glad I did b/c I'm constantly splashing sw or spilling a little salt on it when mixing. I don't think the salt will harm the wood, but it can cause the nails/scr*ws to rust. Not that big of a deal, but might look ugly.
....I thinking I'm sniffing a bike there on the right in the pic, yes...
gatorwpb
Active Member
Originally Posted by saltn00b
http:///forum/post/2879822
thanks , gator. how are those frags doing? did i super glue those zoos shut? lol , your frags look good. oh, and let me know about that mag 7.
Hey - sorry just checking in SWF... on the "other forum" more now lol
I replugged them all and broke off as much as I could so that almost just the frag was left (if that makes sense).
the zoos have all opened up, the two tubs doing great, the pink with green center actually just opened like 3 days ago with 2 polyps, they had to grow through the super glue gel lol
That large zoo frag is in the crevice of two rocks and growing on to both, filling in space nicely.
also the sunset looks like its taking off already
The RODI and stand look great!! Once youre done with the system, you're going to have to find a new project.
I am still looking for a replacement return pump, but once I find one, Ill let you know.
saltn00b
Active Member
cool gator, thanks for the update. i think i am seeing growth on the M. undata (grape) and everthing else looks happy, but i cant tell if there is growth or not. glad everything made it.
i think when i am done with this project i will just be maintaining my tank and finish restocking with fish. possibly converting the QT into a frag tank. with my new found time i am going to start looking into a side business with the motorcycle that t316 was just pointing out for some side cash.
i think when i am done with this project i will just be maintaining my tank and finish restocking with fish. possibly converting the QT into a frag tank. with my new found time i am going to start looking into a side business with the motorcycle that t316 was just pointing out for some side cash.


saltn00b
Active Member
PROJECT UPDATEa) replace hot water heater tank with tankless hot water heater. this will save valuable square footage, and some money on the electric bill.DONE
b) remove the existing wood shelving, and relocate contents. open up square footage.
DONE
c) drill hole through wall to the tank (original exterior concrete). allowing for FW line, SW line, and possibly 2 electric cords (for tank-site on/ off) to pass through.
DONE
d) install nifty electric switching stations for water feed on/offs
DONE
e) Purchase RO / DI unit
DONE
f)install RO/ DI
DONE
g)Build wooden water can "tower". structure will hold support garbage can on top to hold RO water, and a second can beneath as a mixing can. this is very similar to what T316 has already built. i am working with him to hammer out some details.
DONE
h) Pumps, PVC and vinyl tubing assembly
not started
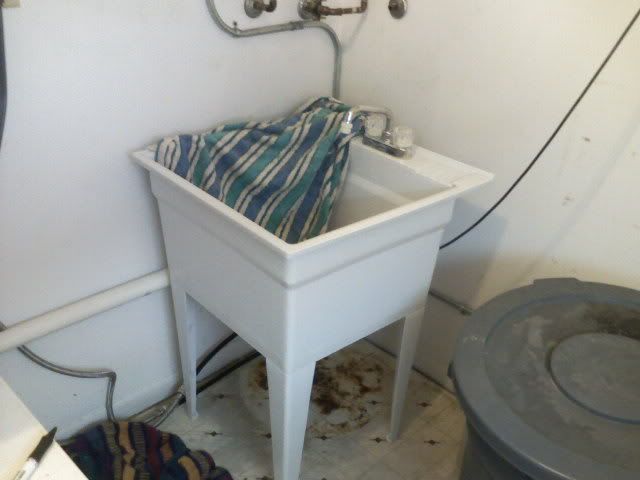
e) addtional: in another corner of the small room, place a utility sink. this will help with dirty tank water from water changes, and an overflow catch for the top RO can.
DONE
f) replace my fried garage door opener! nothing to do with this project but it is in the garage and needed to be done, it also took time from other things.
DONE
here is a pic of the installed sink as of last night, everything working! the RO/DI saddle on the sink drain is also installed. (the black line)
b) remove the existing wood shelving, and relocate contents. open up square footage.
DONE
c) drill hole through wall to the tank (original exterior concrete). allowing for FW line, SW line, and possibly 2 electric cords (for tank-site on/ off) to pass through.
DONE
d) install nifty electric switching stations for water feed on/offs
DONE
e) Purchase RO / DI unit
DONE
f)install RO/ DI
DONE
g)Build wooden water can "tower". structure will hold support garbage can on top to hold RO water, and a second can beneath as a mixing can. this is very similar to what T316 has already built. i am working with him to hammer out some details.
DONE
h) Pumps, PVC and vinyl tubing assembly
not started
e) addtional: in another corner of the small room, place a utility sink. this will help with dirty tank water from water changes, and an overflow catch for the top RO can.
DONE
f) replace my fried garage door opener! nothing to do with this project but it is in the garage and needed to be done, it also took time from other things.
DONE
here is a pic of the installed sink as of last night, everything working! the RO/DI saddle on the sink drain is also installed. (the black line)
t316
Active Member
Originally Posted by saltn00b
http:///forum/post/2901564
PROJECT UPDATE
f) replace my fried garage door opener! nothing to do with this project but it is in the garage and needed to be done, it also took time from other things.
It's always something isn't it?....

t316
Active Member
From the drawing, if that is in fact the grade level from one room to the next, I would just let gravity take care of the RO water and just have a ball valve shut off on the tank end. But it looks like you are going to need a pump for the salt water, to be able to rise up and go over to where you want it. And as long as the sump end is up above the water line, it can't syphon back to the sw trash can. I don't think it's going to syphon from the sw can, because the pipe is going up, just not sure if it's going "up" enough. You could bring that pipe up as high as you can, to make sure you are getting above the water line in the sw can.
saltn00b
Active Member
since your following me again today .....

last night i had to solder my tankless water heater plumbing, and manage to do so with successfully removing leaks and NOT burning the house down.
so NOW i can finish the real project on hand!
Originally Posted by T316
http:///forum/post/2901778
From the drawing, if that is in fact the grade level from one room to the next, I would just let gravity take care of the RO water and just have a ball valve shut off on the tank end. But it looks like you are going to need a pump for the salt water, to be able to rise up and go over to where you want it. And as long as the sump end is up above the water line, it can't syphon back to the sw trash can. I don't think it's going to syphon from the sw can, because the pipe is going up, just not sure if it's going "up" enough. You could bring that pipe up as high as you can, to make sure you are getting above the water line in the sw can.
i get you , i think. the RO wont need a pump.
i think that the salt may only need a pump to prime a syphon, and i will still need a ball valve. make sense?
saltn00b
Active Member
PROJECT UPDATEa) replace hot water heater tank with tankless hot water heater. this will save valuable square footage, and some money on the electric bill.DONE
b) remove the existing wood shelving, and relocate contents. open up square footage.
DONE
c) drill hole through wall to the tank (original exterior concrete). allowing for FW line, SW line, and possibly 2 electric cords (for tank-site on/ off) to pass through.
DONE
d) install nifty electric switching stations for water feed on/offs
DONE
e) Purchase RO / DI unit
DONE
f)install RO/ DI
DONE
g)Build wooden water can "tower". structure will hold support garbage can on top to hold RO water, and a second can beneath as a mixing can. this is very similar to what T316 has already built. i am working with him to hammer out some details.
DONE
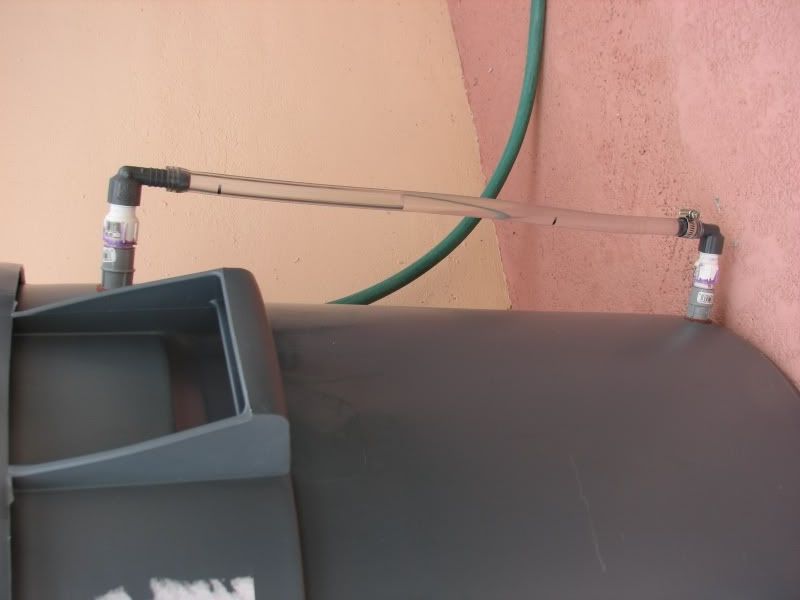
h) Pumps, PVC and vinyl tubing assembly
DONE with make-my own bulkheads! pics below
e) addtional: in another corner of the small room, place a utility sink. this will help with dirty tank water from water changes, and an overflow catch for the top RO can.
DONE
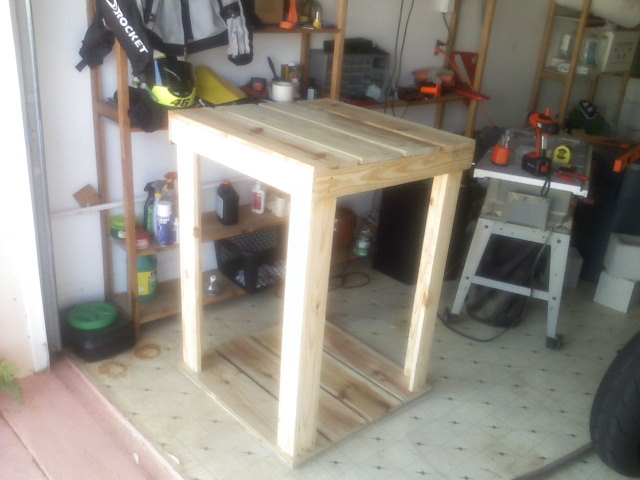
this last phase took a while longer than i thought. i am 99.99% done with this whole project!
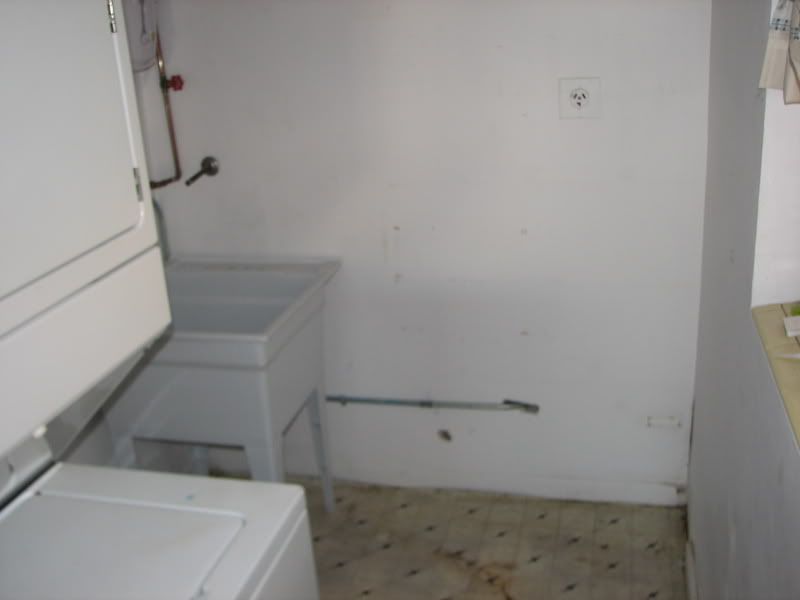
here is where we are:
the area where the stand will be fitting, and the new utility sink installed. part of the reason for the delay was that the sink had both a bad seal on one of the PVC drain joints and a bad connection from the hot water feed line. these needed to be redone after flooding the garage....
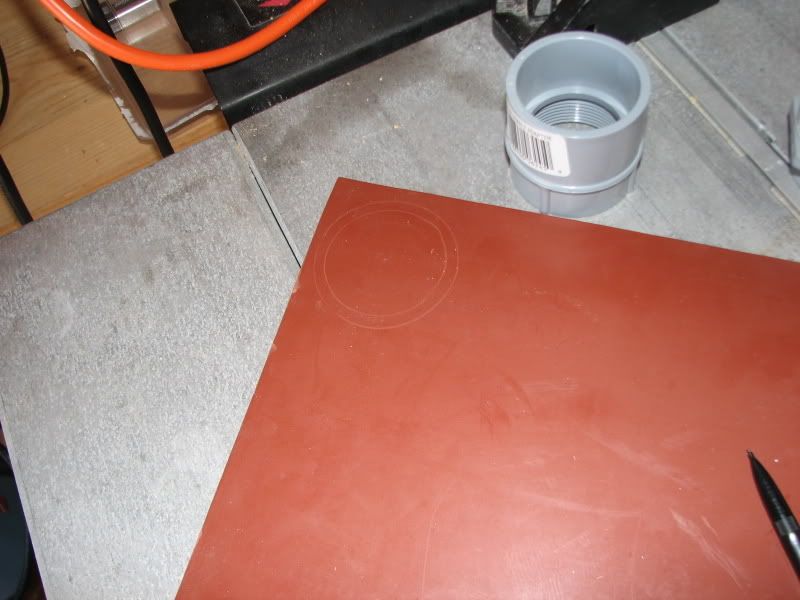
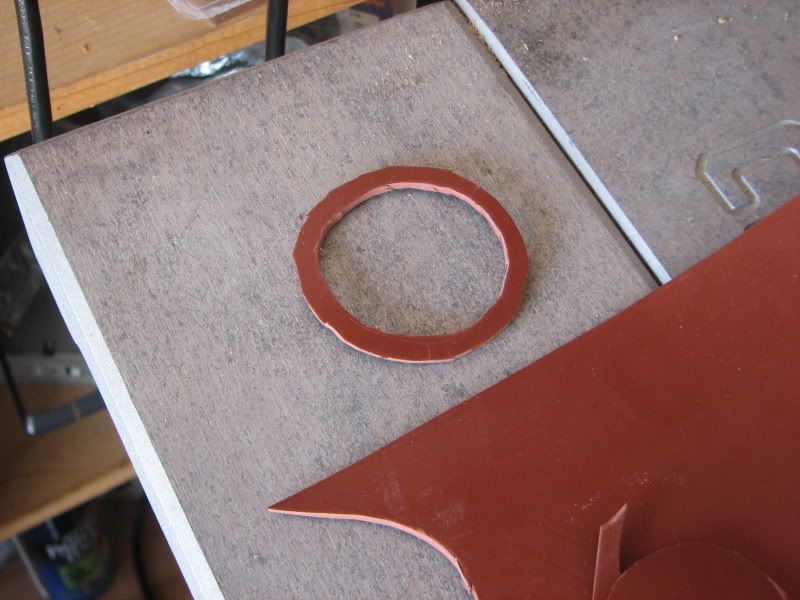
the make my own bulkheads:
the rubber gasket sheet and $1 childrens compass for making circles on it.
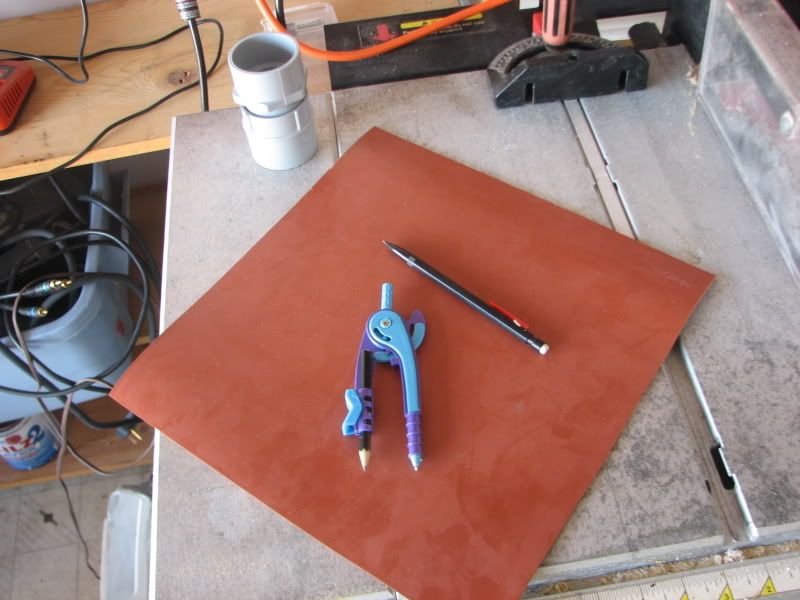
circles drawn
first attempt
drilled Brute
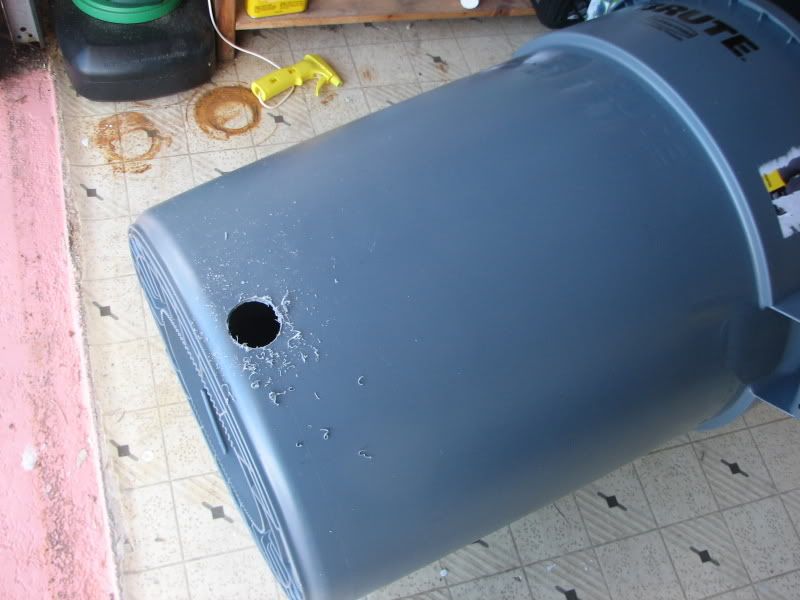
1.5" bulkhead not leaking! - i only threw one gasket out and still have a big sheet left!
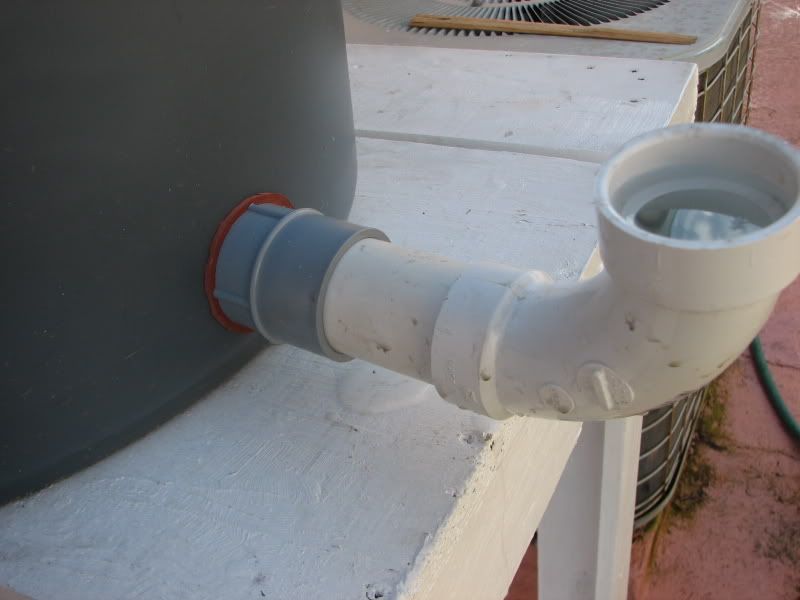
installing the hardware - no leaks

moving on to the small .5" BHs and the water level system
b) remove the existing wood shelving, and relocate contents. open up square footage.
DONE
c) drill hole through wall to the tank (original exterior concrete). allowing for FW line, SW line, and possibly 2 electric cords (for tank-site on/ off) to pass through.
DONE
d) install nifty electric switching stations for water feed on/offs
DONE
e) Purchase RO / DI unit
DONE
f)install RO/ DI
DONE
g)Build wooden water can "tower". structure will hold support garbage can on top to hold RO water, and a second can beneath as a mixing can. this is very similar to what T316 has already built. i am working with him to hammer out some details.
DONE
h) Pumps, PVC and vinyl tubing assembly
DONE with make-my own bulkheads! pics below
e) addtional: in another corner of the small room, place a utility sink. this will help with dirty tank water from water changes, and an overflow catch for the top RO can.
DONE
this last phase took a while longer than i thought. i am 99.99% done with this whole project!
here is where we are:
the area where the stand will be fitting, and the new utility sink installed. part of the reason for the delay was that the sink had both a bad seal on one of the PVC drain joints and a bad connection from the hot water feed line. these needed to be redone after flooding the garage....
the make my own bulkheads:
the rubber gasket sheet and $1 childrens compass for making circles on it.
circles drawn
first attempt
drilled Brute
1.5" bulkhead not leaking! - i only threw one gasket out and still have a big sheet left!
installing the hardware - no leaks
moving on to the small .5" BHs and the water level system