2Quills, 120G Re-build thread.

2quills

Well-Known Member
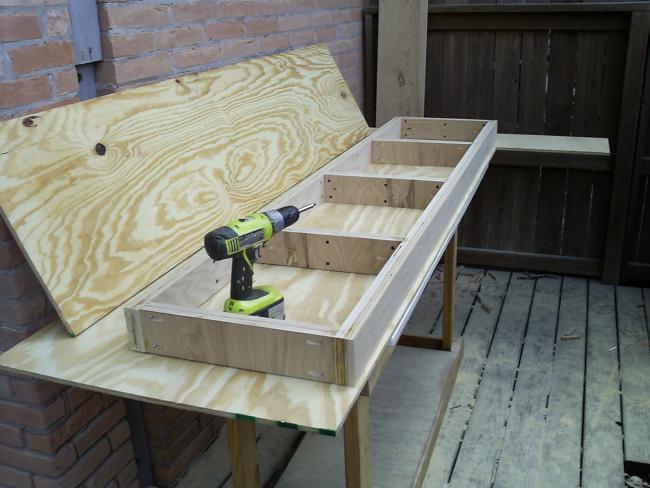
I'm going to be re-vamping my entire setup so I figure I would start a thread on the entire build process. The goal is to build a nice setup that I can be proud of to call my own with hopes of creating a beautiful reef environment in our home.
When it's all said and done I will have a new stand and canopy, new sump system, new skimmer, new lights, powerheads, timers...etc.
I will probably post a few pics from some previous threads and touch upon some of the stuff that I've already done, such as...drilling the tank for overflows and return plumbing, pluss re-sealing the tank.
This will be my first reef tank. And as I am still fairly new to saltwater systems I always welcome anyones thoughts and opinions when it comes to tips and techniques or just regular discussion in general.
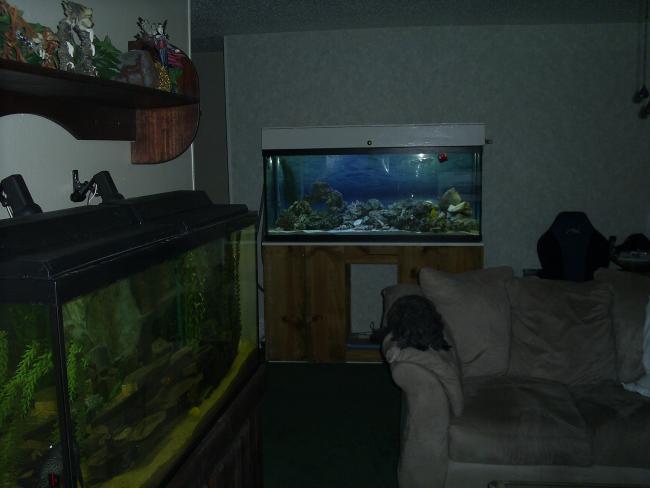
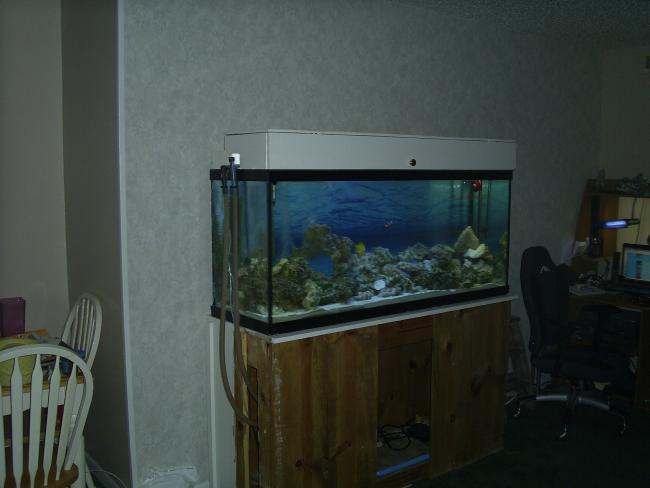
Here's a couple shots of the old setup...Isn't that stand ugly?


2quills

Well-Known Member
So I picked up a little bit of lumber this weekend and started working on the frame for the new stand. The tank is 60" long...the new stand will be 84" long. It will also be tall...40", this will allow me to accomidate a 55G tank underneath that I plan on using for my sump as well as some other stuff. :)
Here's some shots of the work I got done this weekend.


acrylic51

Active Member
Mmmmm.....following along!!!!!!
Is that pocket holes I see there in the early part of construction? Was your better half home as the miter saw was sitting on the table???? I think if I did that, I would wind up in the emergency room having them remove mine from the back of my skull.....Good start looking forward to the build and maybe I'll steal some of your ideas along the way!!!!!!
 

meowzer

Moderator
LOL.....I'll be following along too...and I have to agree with Acrylic....If that were my table I'd kill you
 

2quills

Well-Known Member
Why yes, that is a miter saw on the dinning room table
. And in my defense, I do take it outsite to the back patio when I do my cutting. Since we live in a townhouse I don't have a garage to build in so ya do what ya gotta do. I did have to make the wife a deal though when we first moved into the new place. In order to use the dinning room to build the project in...come the first of the year, once the tank and stuff is built, my work truck will be payed off and so will our living and bedroom furniture. So the wife gets to pick out a brand new dinning room set, her choice. So I get a free pass...this time!
 

2quills

Well-Known Member
Originally Posted by acrylic51
http:///forum/post/3291295
Mmmmm.....following along!!!!!!
Is that pocket holes I see there in the early part of construction? Was your better half home as the miter saw was sitting on the table???? I think if I did that, I would wind up in the emergency room having them remove mine from the back of my skull.....Good start looking forward to the build and maybe I'll steal some of your ideas along the way!!!!!!
Yep, those are pocket holes. Dunno if you can tell from the pics but I'm using 3/4" oak plywood for the frame. I've ripped the pieces to size and then laminated them together to get the same dimensions as 2x4 lumber. Actually I made them slightly wider than 2x4...they are 3 5/8" wide. I'm following a technique used by Riches Carpentry...who build custom aquarium stands and this is their new technique for building stands for 120G aquariums and up. It's a little more expensive and time consuming but if it's done right then supposedly it's supposed to be stronger than traditional 2x4 construction. Every single piece is glued and screwed on the frame. And since I don't have to rip any 2x4's down to get square edges, I still end up with the thickness that I want while have nice, square and true lines to work with and not have to worry about any warping.
The reason I went with the pocket holes is because I didn't want to take the chance of spliting the plywood by setting the screws in the ends the way most folks normaly would. This way, if I go in on an angle then the screws bite the wood a little better and help pull everything together withough fear of splitting. I probably would have been ok doing it the other way by just drilling some pilot holes and sinking some 3" screws in the ends but this was a new way of building for me and didn't wanna take any chances. I'll get some close up pics of the joints when I get home from work tonight.
All the drywall screws you see in there are just temporary while the glue was setting. I plan on removing them and then puddying the holes before I give it a good sanding and then ready for the epoxy paint.
 

acrylic51

Active Member
Originally Posted by 2Quills
http:///forum/post/3291391
Yep, those are pocket holes. Dunno if you can tell from the pics but I'm using 3/4" oak plywood for the frame. I've ripped the pieces to size and then laminated them together to get the same dimensions as 2x4 lumber. Actually I made them slightly wider than 2x4...they are 3 5/8" wide. I'm following a technique used by Riches Carpentry...who build custom aquarium stands and this is their new technique for building stands for 120G aquariums and up. It's a little more expensive and time consuming but if it's done right then supposedly it's supposed to be stronger than traditional 2x4 construction. Every single piece is glued and screwed on the frame. And since I don't have to rip any 2x4's down to get square edges, I still end up with the thickness that I want while have nice, square and true lines to work with and not have to worry about any warping.
The reason I went with the pocket holes is because I didn't want to take the chance of spliting the plywood by setting the screws in the ends the way most folks normaly would. This way, if I go in on an angle then the screws bite the wood a little better and help pull everything together withough fear of splitting. I probably would have been ok doing it the other way by just drilling some pilot holes and sinking some 3" screws in the ends but this was a new way of building for me and didn't wanna take any chances. I'll get some close up pics of the joints when I get home from work tonight.
All the drywall screws you see in there are just temporary while the glue was setting. I plan on removing them and then puddying the holes before I give it a good sanding and then ready for the epoxy paint.
Excellent work/technique IMHO
Boy if you were my neighbor we'd always be in the garage and my neighbors would have someone else to hate!!!!!!!
Pocket hole jointery is super strong and with the lamination process it will/is stronger than traditional lumber....Again excellent start!!!!!!
 

2quills

Well-Known Member
...thanks! Ticking off neighbors is a skill I usually take great pride in. Fortunately we have some pretty cool neighbors here who don't mind a little noise on the weekends.
Here's a couple of closer shots of the joints. Just trying to maximize space inside the stand by setting the supports flush with the frame.


acrylic51

Active Member
Very nice!!!!! You could cap off the exposed area of the plywood with hardwood trim....Alittle epoxy would work to seal it right up.
 

2quills

Well-Known Member
That's a good idea. I was origionally thinking of sealing them up with wood filler then give a little light sanding but I think I like your idea better. Especially if I decide to go with the style of hinges that would have to screw onto the inside lip of the door openings.
 

acrylic51

Active Member
Your referring to the European style hinges??? I actually think that gives a stand a cleaner look IMO....Wood filler would work as well, but using the solid hardwood, be it oak, maple, whatever it gives you a solid area for your screws to hold fast too....Plus with sealing it with a little epoxy, it seals out moisture, and also will bond to the solid wood better than glue.
 

2quills

Well-Known Member
Yea the european style hinges. Actually, I guess they'll end up attaching to the skin instead of the frame which will be solid oak, but still, I like the idea. Any recommendations on what type of epoxy to use for the frame and ******** of the stand? I'd like to go with white so it will be easier to see things going on inside the cabinet. I'll probably run some puck lights or something on the ******** as well.
 

acrylic51

Active Member
The European hinges will be drilled into the back of the door skin, and attach to the inside of the stand frame rail.....Super easy setup. I'd recommend checking out WoodCraft. They actually sell the Forstner bit and guide, so you drill all the holes for the hinges correctly....It's only $11.00 for the setup.......
There are several good recommendations as far as epoxy, and it will really come down to what you want to spend. I like the West Epoxy; then there is MAS which isn't much price difference and same quality IMO....you have an epoxy called 3Systems, which is cheaper in price, and there is another, but can't recall it off the top of my head, and it is also cheaper, but with the cheaper of the 2 epoxies, I've heard complaints with the setup time with them.....Takes longer for it to setup and harden.....I prefer using the slow hardner which allows plenty of time to work out any air bubbles. The quicker hardner you use the less time you have as far as working the epoxy. If you check out Jamestown Distributors, it will give you an idea as far as prices on West, MAS and 3 System epoxy.....I will try to dig up the link and such for the other epoxy used....
As far as the inside of the stand, you could use the epoxy, but it's tricky getting it completely water proof by painting it on....IMO and alot of others it's easier and more effective to pour the epoxy, which means you have to be able to move the stand around and be able to stand it on edge and all to get into all the little cracks.....That is why I had built those nifty 45 degree braces/blocks, so when I pour the corners of my tank, the tank is sitting exactly at 45 degrees getting deep into the corners.......I actually checked the angle before when the tank is up like that and almost dead on!!!!!!!!
A simplier way and cheaper way IMHO to seal the inside of the stand would be to use FRP board.....It's cheap, can be found at Lowes, HD, and easily cut, with a table saw or router, and you can get the FRP glue for around $20.00 or a gallon which is plenty, and you can do the inside of the stand with that and even on the sides and create a waterproof/tight box inside the stand to contain water spills and minor leaks.....To get a water tight seal you could go back to all the seams where the corners/edges meet and seal it with either white or clear caulk/silicone. I found the white tends to discolor.
Forgot to mention with the epoxy you could tint the epoxy white or whatever color after the first couple thin pours.......
 

acrylic51

Active Member

2quills

Well-Known Member
Deffinately will do some more research in this area. I remember helping a buddy of mine re-finish some countertops with an epoxy that we rolled on with resin rollers, tinted with white. It was fairly easy and dried to a really hard finish. I was kind of hoping it would something as simple as that was even if I sealed all the corners and seams before hand. I'm not 100% sure I want to try pouring it or not without a little more experimentation under my belt.
I'm fairly confident I could pull it off but, honestly...I'm not so sure if i'm looking so much for 100% waterproof inside of the stand as much as I am more or less looking for moisture resistance. Perhaps if I sealed everything up, then primed and painted it with, say...a high gloss acrylic finish paint, I wonder if I could achieve what I'm after with that since it dries fairly hard. Gonna give this some more thought but the epoxy is definately not out of the question. Just wanna explore some options here. I've seen guys do it with less attention to detail but I do want this thing to be able to outlast a tank or two.
 
Top