415 Gallon Plywood Tank Build
- Thread starter acrylic51
- Start date
desertdawg
Member
Nothing says you can't mix a couple of those colors together to get what you want, I would think the problem would be getting the separate layers to blend properly so there isn't defined lines where they merge....
If the sanded background doesn't work then maybe ask the epoxy guru's if you can paint then layer... But I'm hoping the sanding is the trick!
Oh, and I'm dangerous alright, but I don't need you yahoo's to help, I can screw up real good all by myself !!! Click!
If the sanded background doesn't work then maybe ask the epoxy guru's if you can paint then layer... But I'm hoping the sanding is the trick!
Oh, and I'm dangerous alright, but I don't need you yahoo's to help, I can screw up real good all by myself !!!
 Click!
acrylic51
Active Member
Well a bit of an update.....I did test the epoxy sample this morning, and purposely left a edge not sealed good, so I could dig at it a bit with a razor blade....I just have a$$ sanded the background last night, and I was still able to slide the razor blade under the epoxy, and I did find sanding it did at least make a small adhesive bond between the epoxy and the background material....Still not exactly what I wanted to see, but I haven't given up totally. I was a little worried about roughing the background up and making it look bad, but once the epoxy is applied you honestly can't see the scuff marks, so what I might try later is really roughing it up without eating through the background and pouring another test piece......Possibly just not rough enough with the sanding.....

On another note, here are a couple pics to show the progress of the initial "white" safety layer that has been poured. Again if I would ever happen to see white, then I know something is going on with the epoxy structure, and gives me a little heads up before possibly something catastrophic happens......
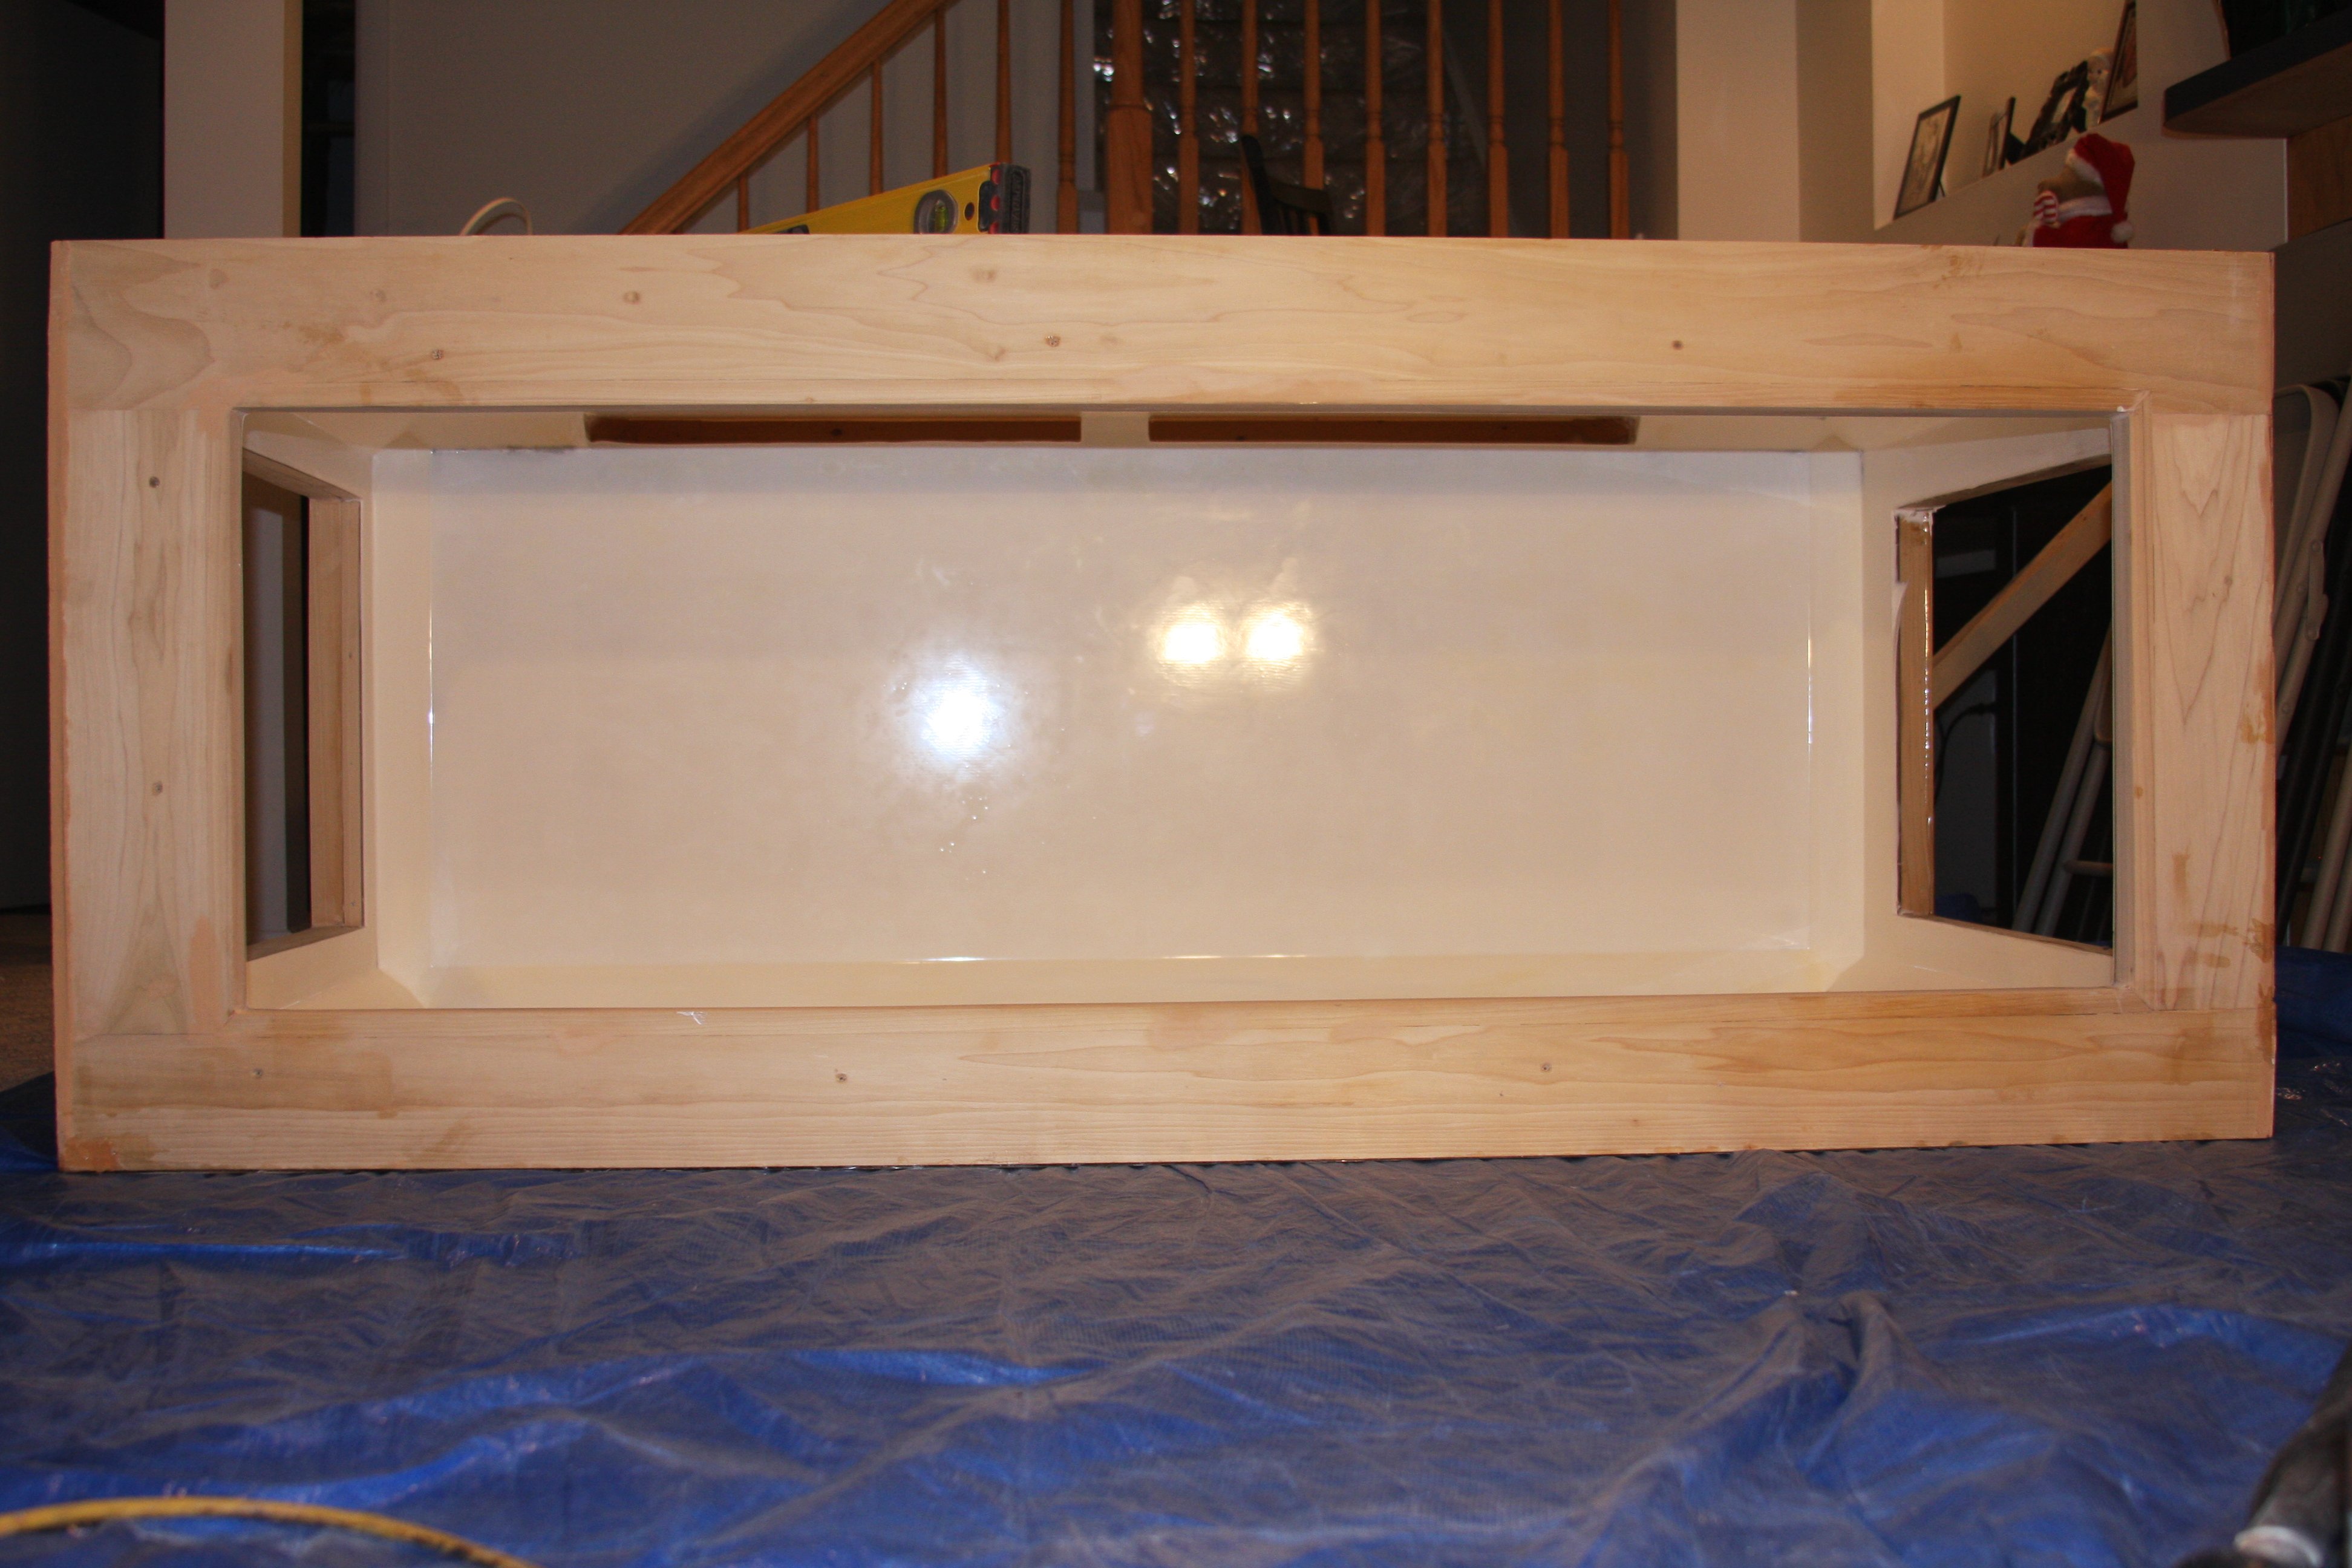
Sorry for the bad pics....still have a lot of clean up and sanding work to do from me being sloppy with the epoxy......
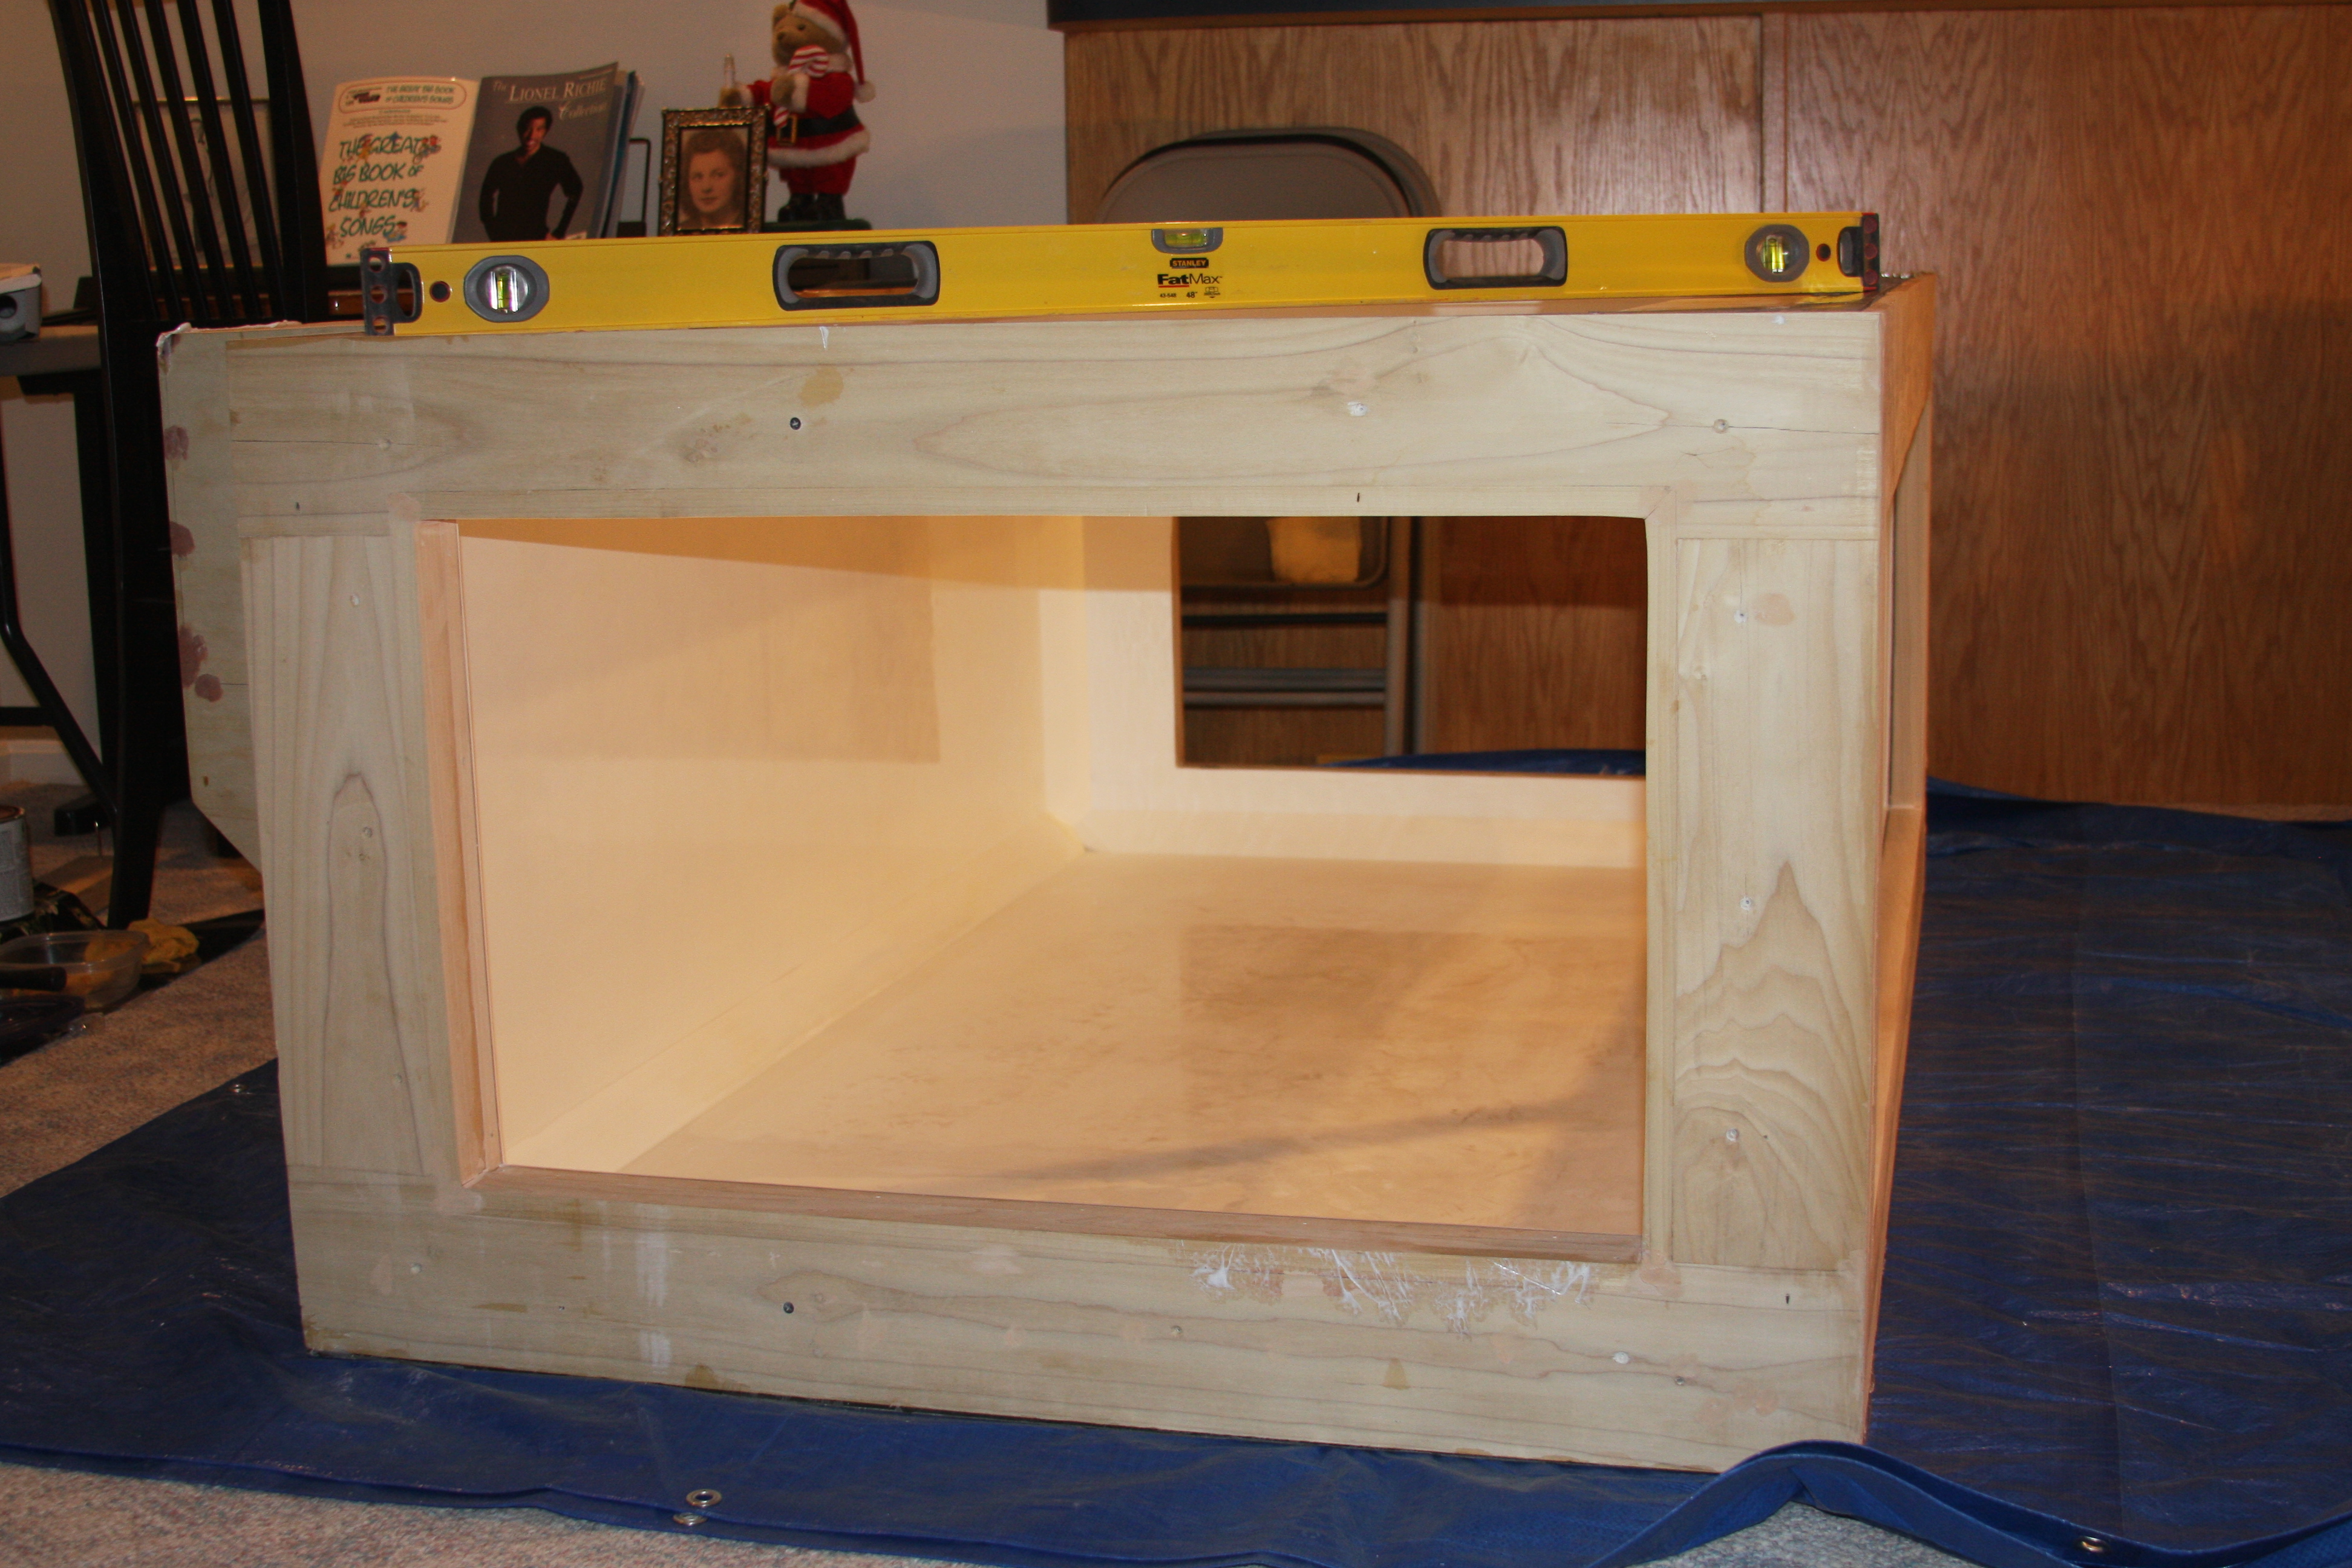
Shot from the left end which will be a viewing panel installed.....
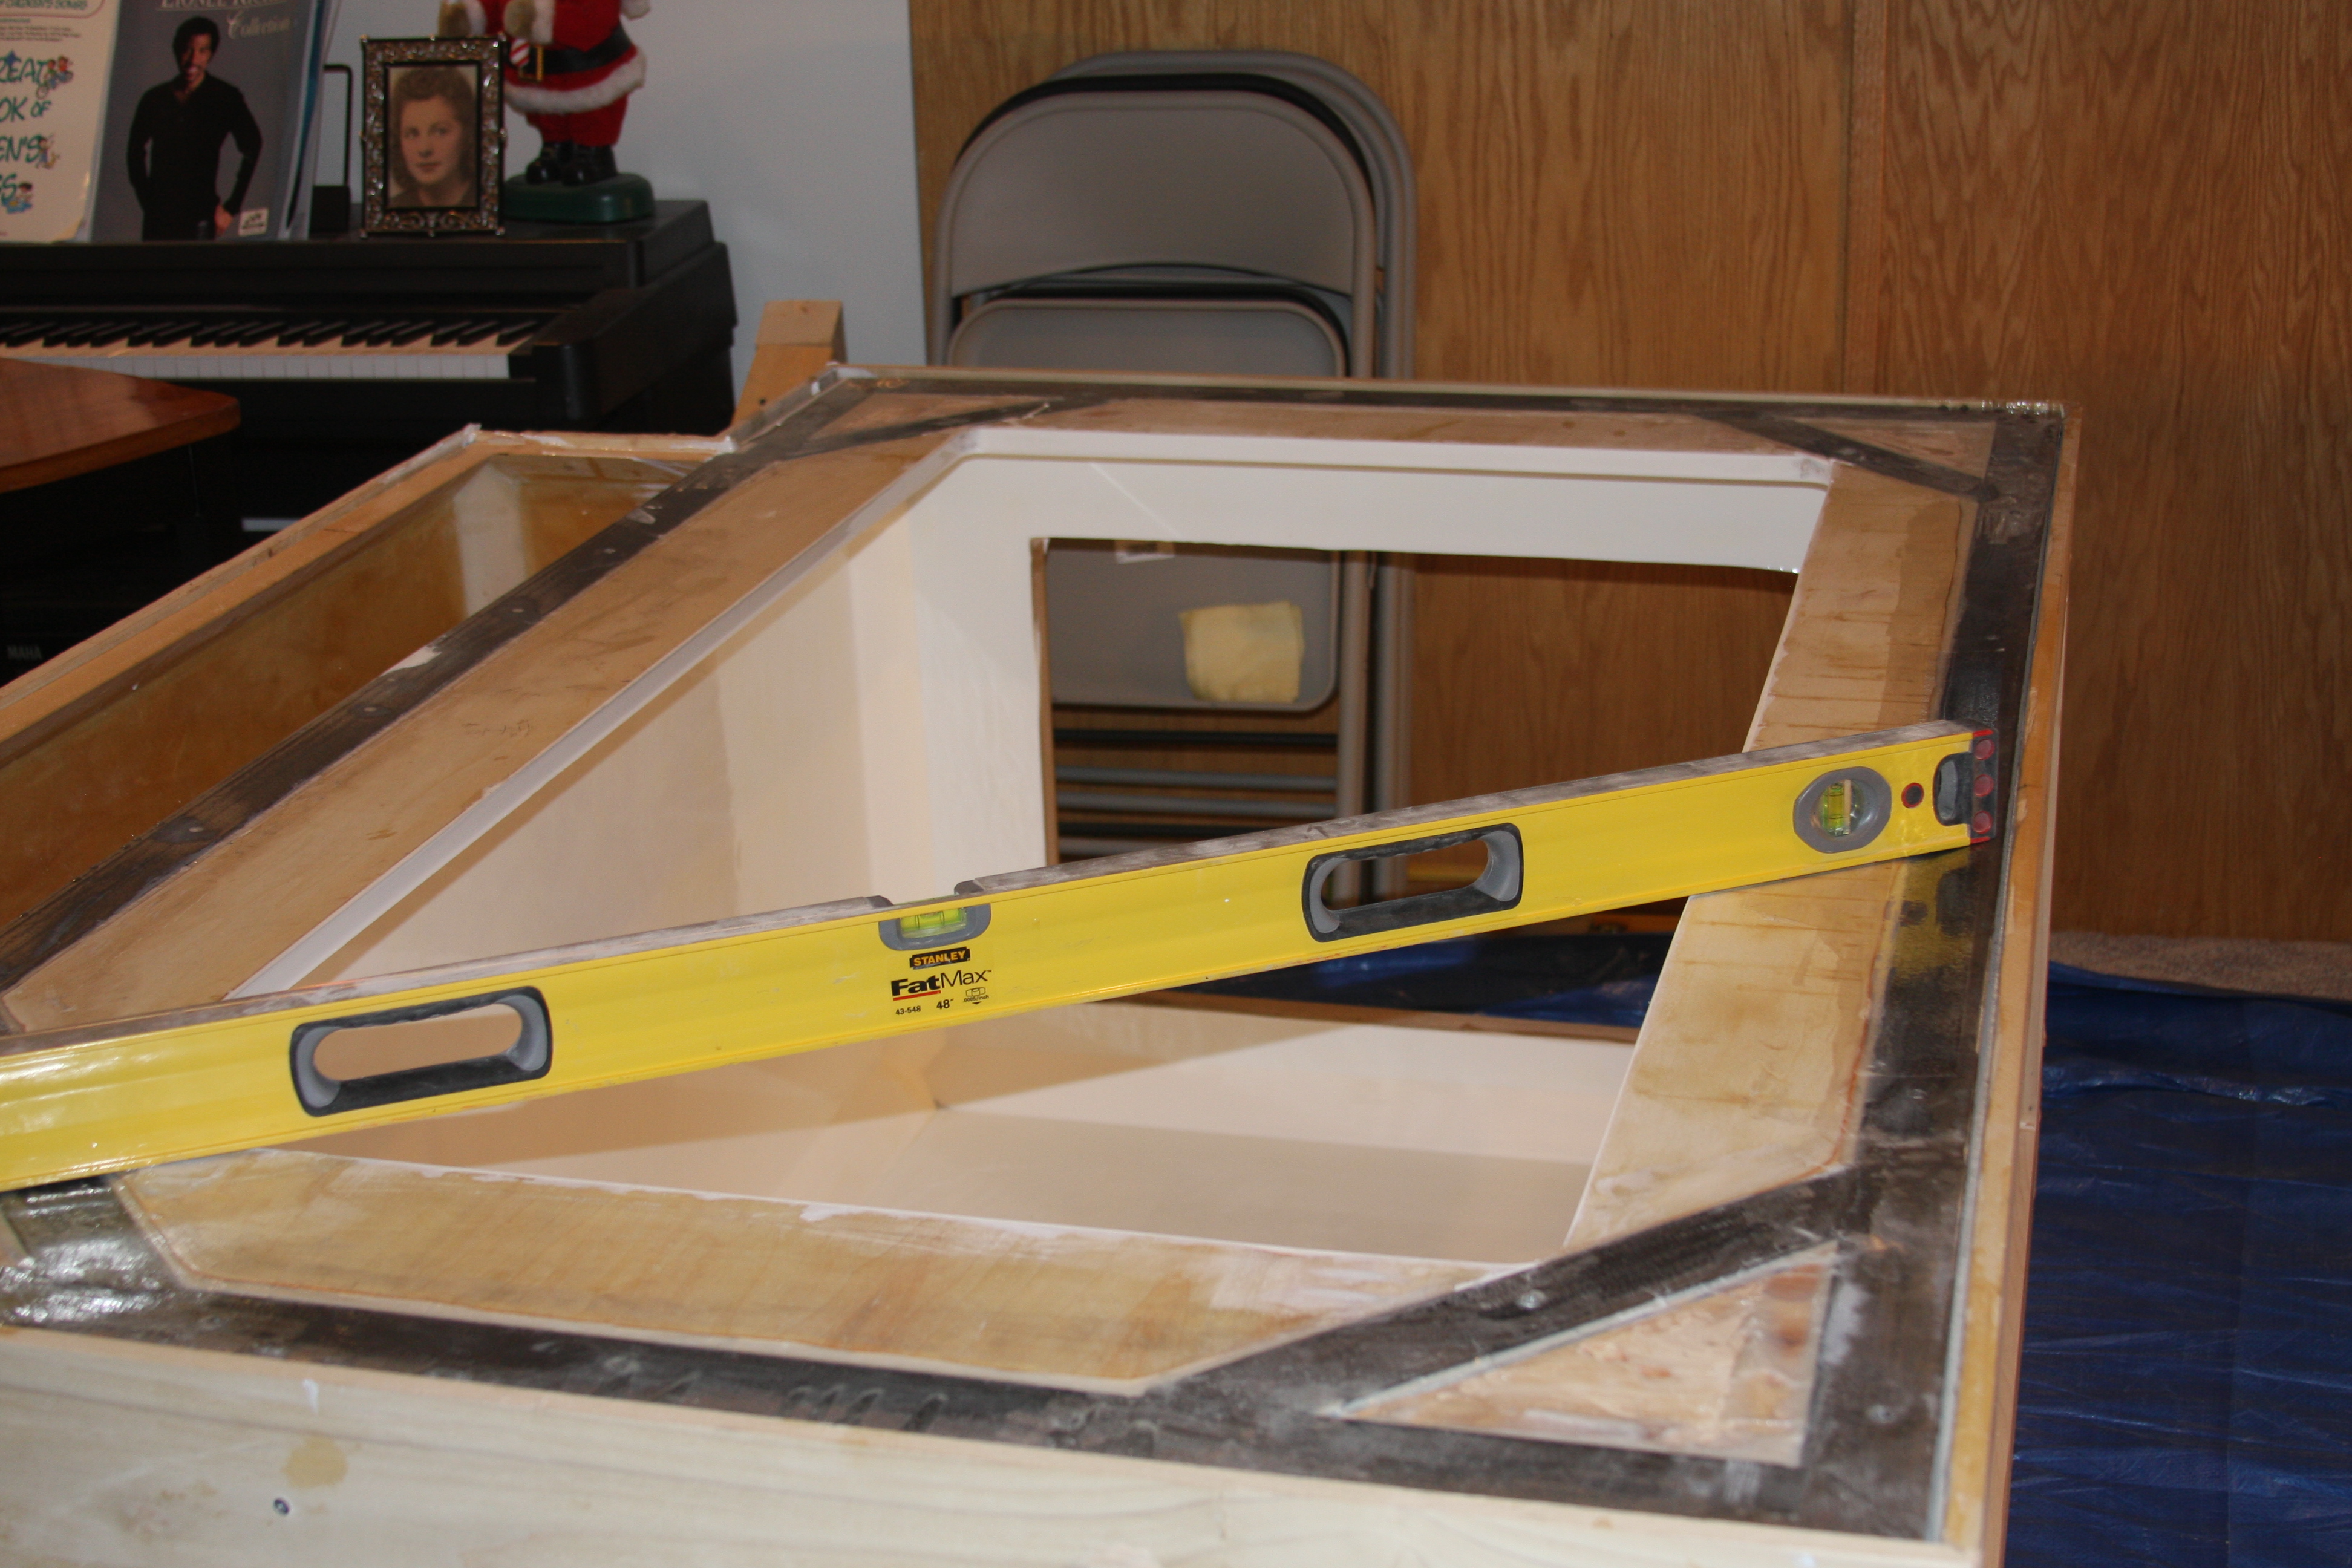
Just a random shot....More or less showing all the bracing involved in the tank construction....This isn't normally the process, but for my own piece of mind, and again to try to avoid any cross bracing on the tank......You can see how the steel is angled in the corners....This also ties the corners together and in the center of the triangle at some point they will be drilled to allow me to either run the outlets for the OM CL's or my other idea are 4 Tunzes; 1 in each corner for flow.......You can also see that I've also started the epoxy work on the edge of the euro bracing facing inward to the tank. Some might not feel totally necessary, but some of us have read as what could happen if we skimp......So the euro bracing is receiving the same epoxy treatment as the rest of the tank......
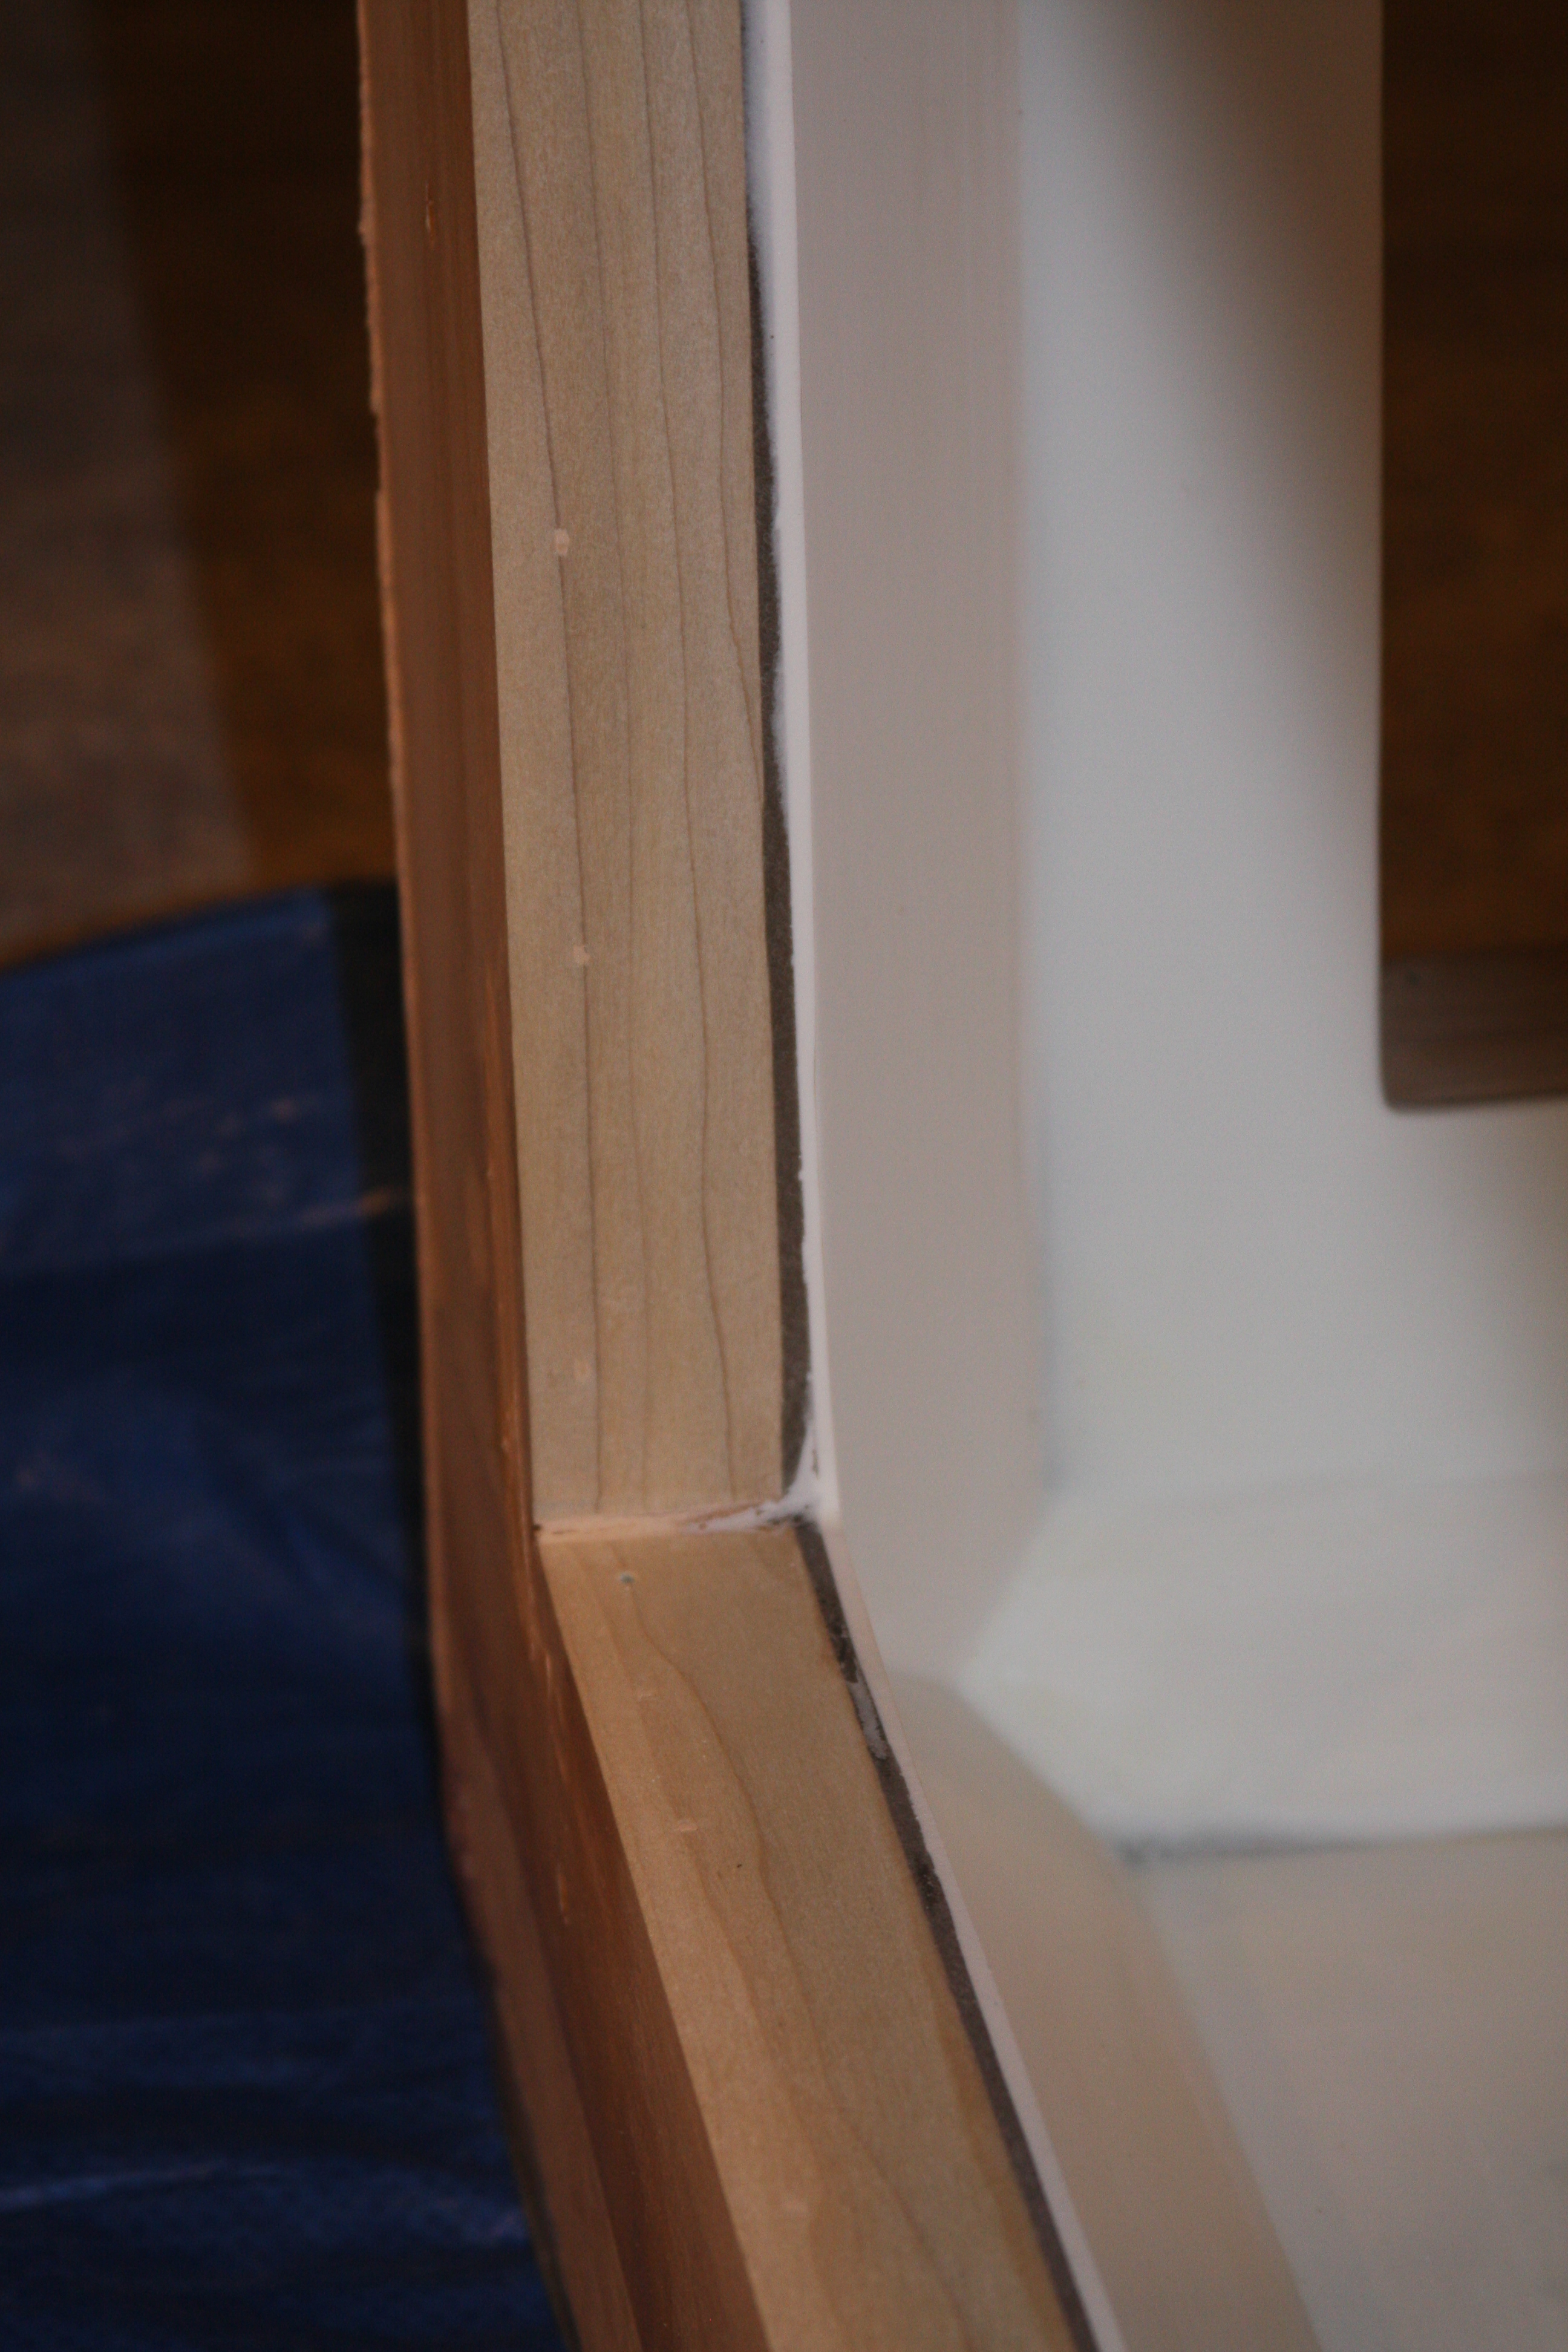
Again even with areas being taped off you can get little run marks, but no biggie. The sander can clean that up pretty quickly......In this pic you can see from the edge of the wood inward to your right, a brown area.....That is the area that has the 37oz biaxial fiberglass wet out with epoxy......Then you can also see the build of the layer of tinted epoxy......Right now without anything being prep sanded were a little more than 3/16".....I am shooting for 1/4" thickness the hole way around....I actually won't know the thickness on the bottom and back of the tank till I cut my bulkhead holes. Then I will be able to gauge my depth or thickness of pour by looking at where the wood is, and how high the epoxy layers are......

On another note, here are a couple pics to show the progress of the initial "white" safety layer that has been poured. Again if I would ever happen to see white, then I know something is going on with the epoxy structure, and gives me a little heads up before possibly something catastrophic happens......
Sorry for the bad pics....still have a lot of clean up and sanding work to do from me being sloppy with the epoxy......
Shot from the left end which will be a viewing panel installed.....
Just a random shot....More or less showing all the bracing involved in the tank construction....This isn't normally the process, but for my own piece of mind, and again to try to avoid any cross bracing on the tank......You can see how the steel is angled in the corners....This also ties the corners together and in the center of the triangle at some point they will be drilled to allow me to either run the outlets for the OM CL's or my other idea are 4 Tunzes; 1 in each corner for flow.......You can also see that I've also started the epoxy work on the edge of the euro bracing facing inward to the tank. Some might not feel totally necessary, but some of us have read as what could happen if we skimp......So the euro bracing is receiving the same epoxy treatment as the rest of the tank......
Again even with areas being taped off you can get little run marks, but no biggie. The sander can clean that up pretty quickly......In this pic you can see from the edge of the wood inward to your right, a brown area.....That is the area that has the 37oz biaxial fiberglass wet out with epoxy......Then you can also see the build of the layer of tinted epoxy......Right now without anything being prep sanded were a little more than 3/16".....I am shooting for 1/4" thickness the hole way around....I actually won't know the thickness on the bottom and back of the tank till I cut my bulkhead holes. Then I will be able to gauge my depth or thickness of pour by looking at where the wood is, and how high the epoxy layers are......
desertdawg
Member
It's hard to believe that even roughed up the background didn't stick to the epoxy. I'm at a loss as to what to suggest next.
Ok, new brain fart, how about getting the background reprinted on paper so that the epoxy will impregnate the fibers and bond to the layer below? You should be able to get it reprinted at any graphics place like Kinko's...
Ok, new brain fart, how about getting the background reprinted on paper so that the epoxy will impregnate the fibers and bond to the layer below? You should be able to get it reprinted at any graphics place like Kinko's...
gemmy
Active Member
Quote:
Originally Posted by acrylic51 http:///forum/thread/376802/415-gallon-plywood-tank-build/740#post_3350327
Gemmy I'm gonna have to get busy an dig those measurements up for the area.
 Did I miss the measurements? (I'm just bored due to all the snow)
Originally Posted by acrylic51 http:///forum/thread/376802/415-gallon-plywood-tank-build/740#post_3350327
Gemmy I'm gonna have to get busy an dig those measurements up for the area.

acrylic51
Active Member
Sorry guys been super busy.....Al not really a new job; with the same company UPS, but running a 53' tractor and trailer all day long picking up city freight now, just changed job class within the company......Long hours, but Monday through Friday now... usually 5-6 am start time and don't get back to the terminal till around 8 pm, so not a lot of free time during the week for the tank.
On another note, the transmission finally went on my trusty 97 Chevy Blazer so out car shopping in between work, can't decide what I actually want. Heart is set on a mustang, but wife has other ideas.....

Have done a little work, but my main laptop where I usually post pics from is giving me fits again, but will try to get it up and working this weekend. Got the bottom of the tank poured in white as from the last update, but also started pouring the black along the bottom and the walls. Still have the back of the tank to pour with the black epoxy, and hopefully will get that finished this weekend and get some pics taken. After the back is poured I still need to fiberglass the inside of the overflow, and pour the final coats there, but that is a really small area and doesn't take a long time at all. With the weather getting a little warmer the epoxy seems to set up a bit quicker these days. After the back is poured in black, the final step is to pour 2 pours of clear (straight epoxy mix) and the actual epoxing of the tank will be complete.
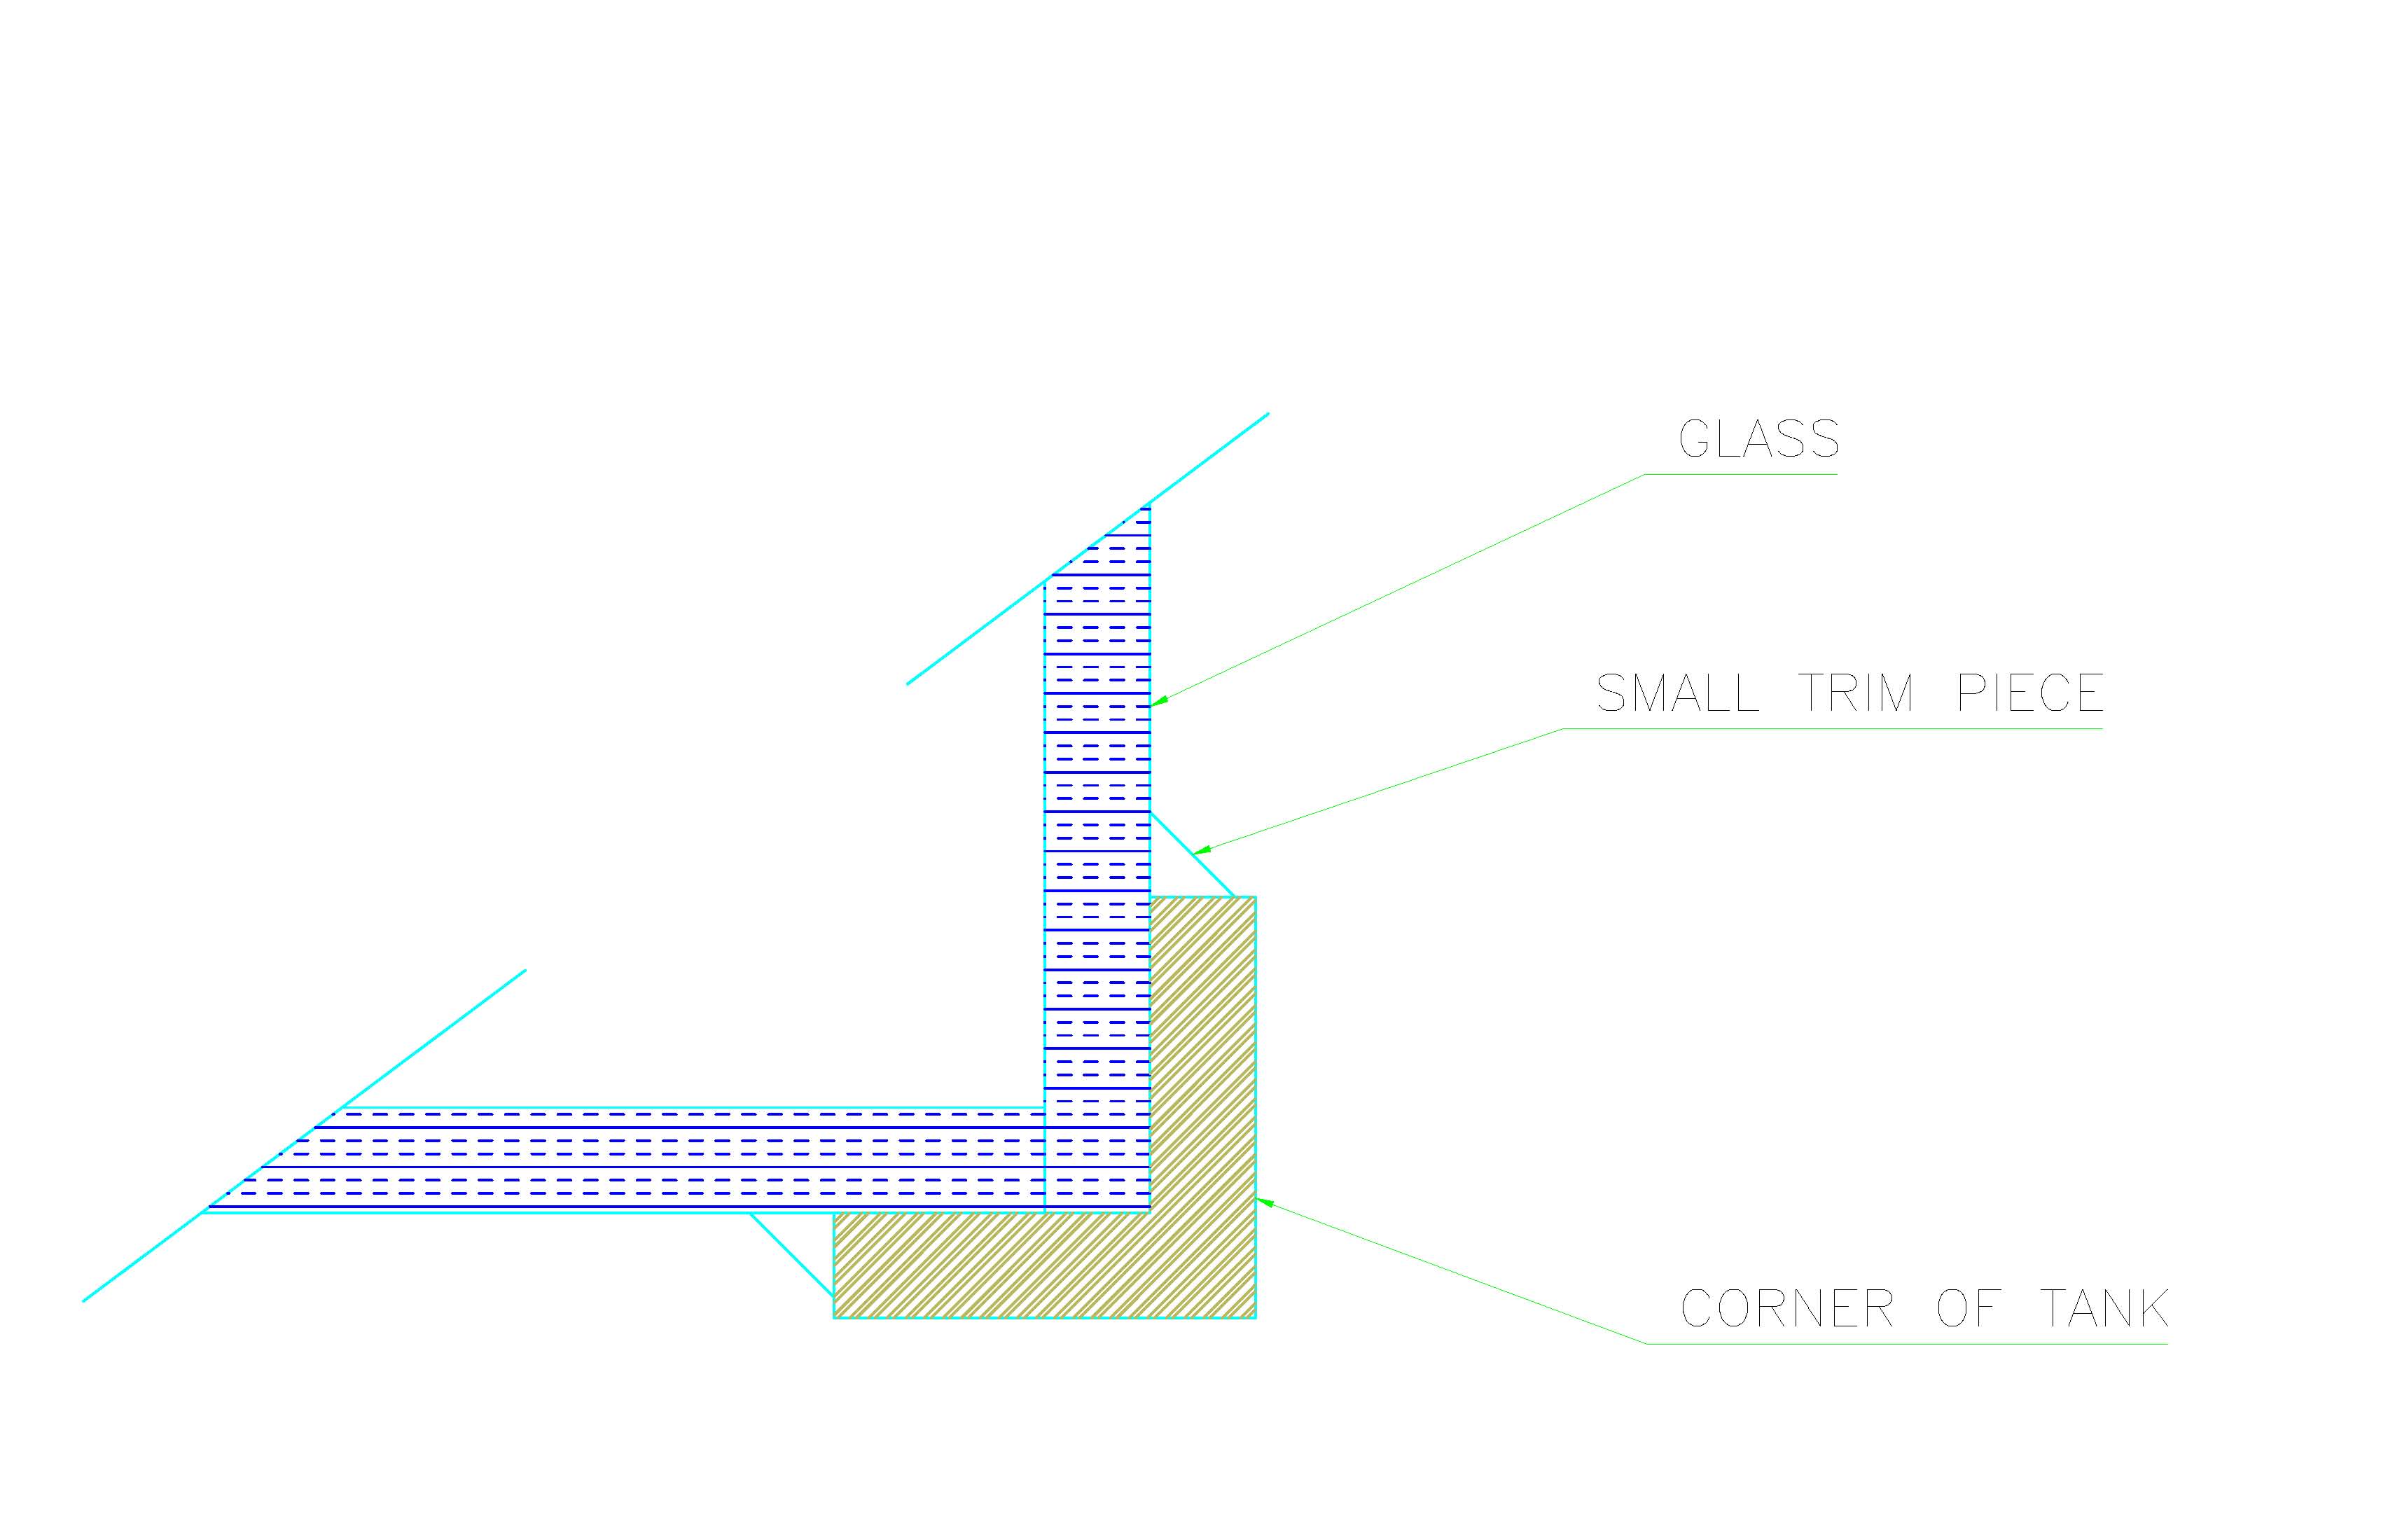
I have been getting prices on glass and acrylic, and both are reasonable. Still haven't made a final decision. As I had mentioned to Corey a long time ago about my idea of doing a rabbet joint along the edges of the acrylic to make the acrylic somewhat flush with the front of the tank. Then it was brought to my attention that maybe cutting the rabbet joint might weaken the acrylic. It was suggested to possibly radius the rabbet joint vs square cut the joint. What do you guys think? I haven't talked to the acrylic "God" yet about this idea, but will have to. If I opt the acrylic route I'd be using 1 1/4" or 1 1/2" acrylic and honestly don't see how the rabbet joint would compromise the structural integrity of the panel. The panel thickness is way overkill for the height of the tank.
What is everyones thinking????
On another note, the transmission finally went on my trusty 97 Chevy Blazer so out car shopping in between work, can't decide what I actually want. Heart is set on a mustang, but wife has other ideas.....

Have done a little work, but my main laptop where I usually post pics from is giving me fits again, but will try to get it up and working this weekend. Got the bottom of the tank poured in white as from the last update, but also started pouring the black along the bottom and the walls. Still have the back of the tank to pour with the black epoxy, and hopefully will get that finished this weekend and get some pics taken. After the back is poured I still need to fiberglass the inside of the overflow, and pour the final coats there, but that is a really small area and doesn't take a long time at all. With the weather getting a little warmer the epoxy seems to set up a bit quicker these days. After the back is poured in black, the final step is to pour 2 pours of clear (straight epoxy mix) and the actual epoxing of the tank will be complete.
I have been getting prices on glass and acrylic, and both are reasonable. Still haven't made a final decision. As I had mentioned to Corey a long time ago about my idea of doing a rabbet joint along the edges of the acrylic to make the acrylic somewhat flush with the front of the tank. Then it was brought to my attention that maybe cutting the rabbet joint might weaken the acrylic. It was suggested to possibly radius the rabbet joint vs square cut the joint. What do you guys think? I haven't talked to the acrylic "God" yet about this idea, but will have to. If I opt the acrylic route I'd be using 1 1/4" or 1 1/2" acrylic and honestly don't see how the rabbet joint would compromise the structural integrity of the panel. The panel thickness is way overkill for the height of the tank.
What is everyones thinking????
al&burke
Active Member
Quote:
Originally Posted by acrylic51 http:///forum/thread/376802/415-gallon-plywood-tank-build/760#post_3360754
Sorry guys been super busy.....Al not really a new job; with the same company UPS, but running a 53' tractor and trailer all day long picking up city freight now, just changed job class within the company......Long hours, but Monday through Friday now... usually 5-6 am start time and don't get back to the terminal till around 8 pm, so not a lot of free time during the week for the tank.
On another note, the transmission finally went on my trusty 97 Chevy Blazer so out car shopping in between work, can't decide what I actually want. Heart is set on a mustang, but wife has other ideas.....

Have done a little work, but my main laptop where I usually post pics from is giving me fits again, but will try to get it up and working this weekend. Got the bottom of the tank poured in white as from the last update, but also started pouring the black along the bottom and the walls. Still have the back of the tank to pour with the black epoxy, and hopefully will get that finished this weekend and get some pics taken. After the back is poured I still need to fiberglass the inside of the overflow, and pour the final coats there, but that is a really small area and doesn't take a long time at all. With the weather getting a little warmer the epoxy seems to set up a bit quicker these days. After the back is poured in black, the final step is to pour 2 pours of clear (straight epoxy mix) and the actual epoxing of the tank will be complete.
I have been getting prices on glass and acrylic, and both are reasonable. Still haven't made a final decision. As I had mentioned to Corey a long time ago about my idea of doing a rabbet joint along the edges of the acrylic to make the acrylic somewhat flush with the front of the tank. Then it was brought to my attention that maybe cutting the rabbet joint might weaken the acrylic. It was suggested to possibly radius the rabbet joint vs square cut the joint. What do you guys think? I haven't talked to the acrylic "God" yet about this idea, but will have to. If I opt the acrylic route I'd be using 1 1/4" or 1 1/2" acrylic and honestly don't see how the rabbet joint would compromise the structural integrity of the panel. The panel thickness is way overkill for the height of the tank.
What is everyones thinking????
Shawn - I am going to ask an engineer buddy at work - I will get back to you - might take a couple days - got some things going on. What are the basic dimensions of the tank?
Originally Posted by acrylic51 http:///forum/thread/376802/415-gallon-plywood-tank-build/760#post_3360754
Sorry guys been super busy.....Al not really a new job; with the same company UPS, but running a 53' tractor and trailer all day long picking up city freight now, just changed job class within the company......Long hours, but Monday through Friday now... usually 5-6 am start time and don't get back to the terminal till around 8 pm, so not a lot of free time during the week for the tank.
On another note, the transmission finally went on my trusty 97 Chevy Blazer so out car shopping in between work, can't decide what I actually want. Heart is set on a mustang, but wife has other ideas.....

Have done a little work, but my main laptop where I usually post pics from is giving me fits again, but will try to get it up and working this weekend. Got the bottom of the tank poured in white as from the last update, but also started pouring the black along the bottom and the walls. Still have the back of the tank to pour with the black epoxy, and hopefully will get that finished this weekend and get some pics taken. After the back is poured I still need to fiberglass the inside of the overflow, and pour the final coats there, but that is a really small area and doesn't take a long time at all. With the weather getting a little warmer the epoxy seems to set up a bit quicker these days. After the back is poured in black, the final step is to pour 2 pours of clear (straight epoxy mix) and the actual epoxing of the tank will be complete.
I have been getting prices on glass and acrylic, and both are reasonable. Still haven't made a final decision. As I had mentioned to Corey a long time ago about my idea of doing a rabbet joint along the edges of the acrylic to make the acrylic somewhat flush with the front of the tank. Then it was brought to my attention that maybe cutting the rabbet joint might weaken the acrylic. It was suggested to possibly radius the rabbet joint vs square cut the joint. What do you guys think? I haven't talked to the acrylic "God" yet about this idea, but will have to. If I opt the acrylic route I'd be using 1 1/4" or 1 1/2" acrylic and honestly don't see how the rabbet joint would compromise the structural integrity of the panel. The panel thickness is way overkill for the height of the tank.
What is everyones thinking????
Shawn - I am going to ask an engineer buddy at work - I will get back to you - might take a couple days - got some things going on. What are the basic dimensions of the tank?
desertdawg
Member
Quote:
Originally Posted by acrylic51 http:///forum/thread/376802/415-gallon-plywood-tank-build/760#post_3360754
Heart is set on a mustang, but wife has other ideas.....

Hopefully your wife is thinking Corvette.... I love my 08!
Are you just going black on the back wall then? I thought my idea above was a good one.
Originally Posted by acrylic51 http:///forum/thread/376802/415-gallon-plywood-tank-build/760#post_3360754
Heart is set on a mustang, but wife has other ideas.....

Hopefully your wife is thinking Corvette.... I love my 08!
Are you just going black on the back wall then? I thought my idea above was a good one.
al&burke
Active Member
Quote:
Originally Posted by acrylic51 http:///forum/thread/376802/415-gallon-plywood-tank-build/760#post_3360824
Al we had mentioned that idea somewhere in the thread, and really trying to avoid the trim. Why? honestly don't know, but something about using trim in that area just not appealing to me. What dimensions are you looking for?
L x W X H
acrylic51
Active Member
Desertdawg she was thinking family car. It's only her, myself and 10 year old basically. She's thinking more SUV. I'm an actual Ford guy though!!!!
The back is going to be black. I have played with sanding both sides of the background with 60 grit sandpaper to get better adhesion, and it got better but still not to my liking. I've come a little to far to have a failure to to some vinyl background, but I will make a call today to tech and run your idea by them as well. They told me there should be a bond between the background and epoxy, but I think if the epoxy would totally penetrate the background wouldn't it somewhat bleed through or distort the actual background?
The back is going to be black. I have played with sanding both sides of the background with 60 grit sandpaper to get better adhesion, and it got better but still not to my liking. I've come a little to far to have a failure to to some vinyl background, but I will make a call today to tech and run your idea by them as well. They told me there should be a bond between the background and epoxy, but I think if the epoxy would totally penetrate the background wouldn't it somewhat bleed through or distort the actual background?


