SCSInet's 180g Reef Build!

scsinet

Active Member
BALLASTS - Version 1
My plan was originally to have (3) 400w halide lamps over the tank, plus (2) 54W Actinic T5 lamps.
This plan ultimately was changed, but the construction and effort was a big part of it so I wanted to document it.
My reasons for picking 400w were...
- I had the ballasts. We had some extra 400w ballasts lying around at work that I could get my hands on. All I needed was about $9 for capacitors.
- I had some test lamps. I shagged a trio of Coralife 20K halides for $25 each at an LFS a while back, so I figured they'd be great to test with. I had no intention of using them for the set up tank though.
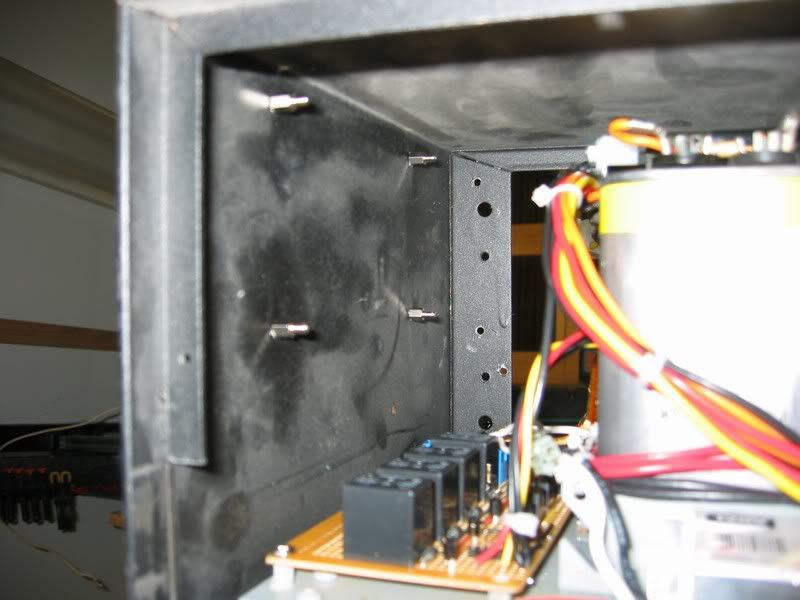
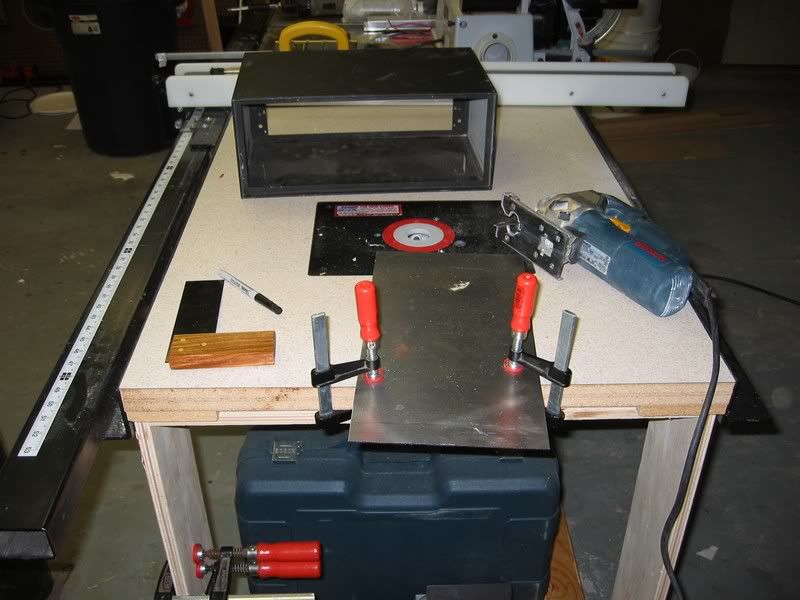
I had a metal enclosure I bought a good 20 years ago at American Science and Surplus (Great store, BTW).

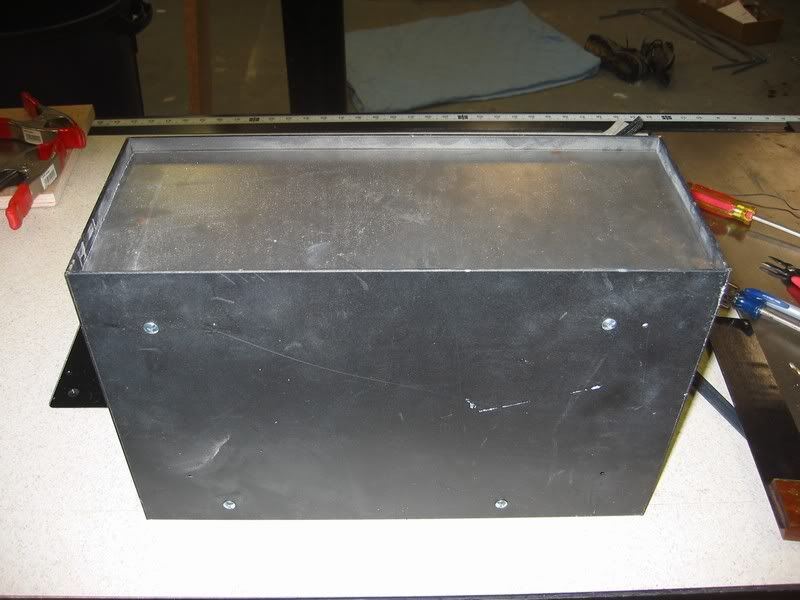
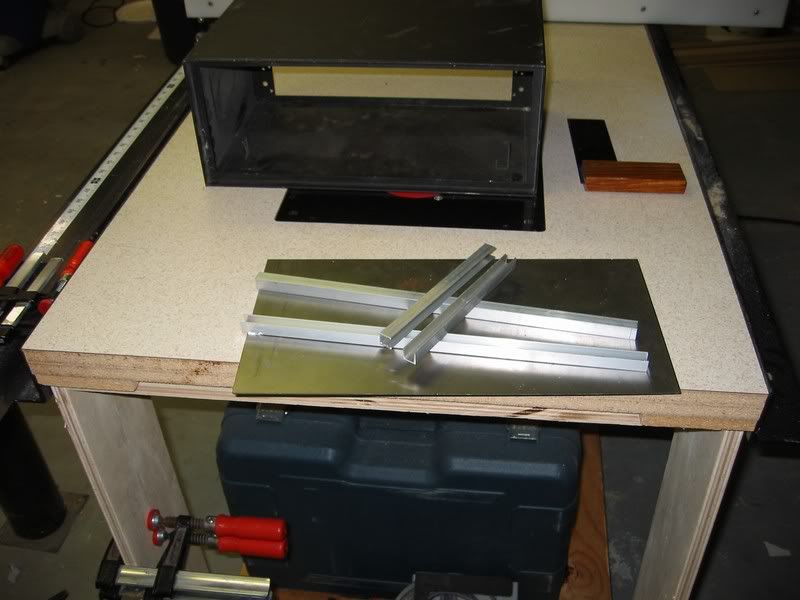
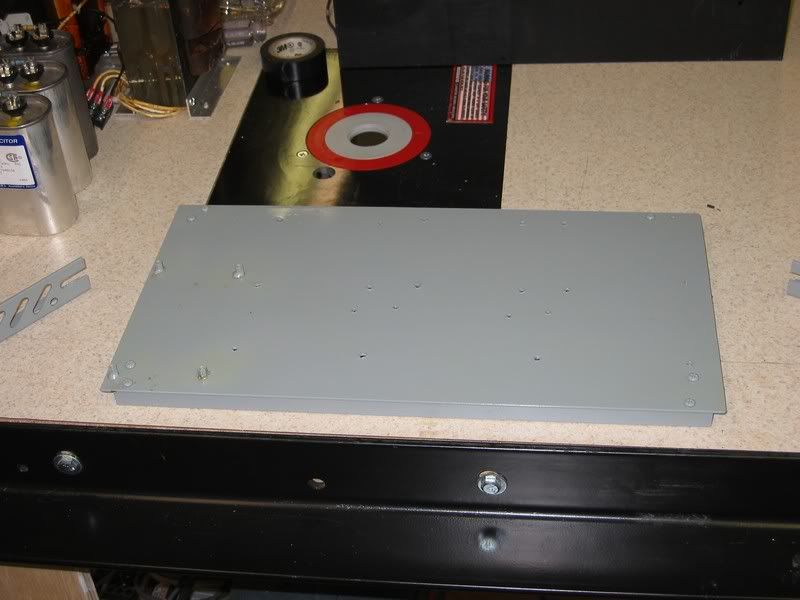
I used some angle aluminum and some sheet steel to build a chassis for everything to bolt to, making the works easily removable for maintenance and making for a minimum of ugly exposed bolts on the outside...


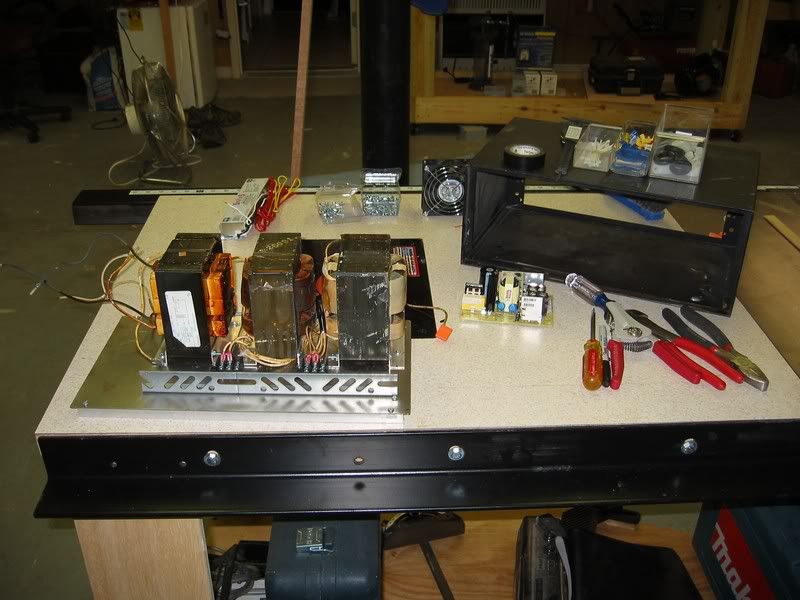
I painted it with gray primer, plus 3 coats of clear laquer for rustproofing.

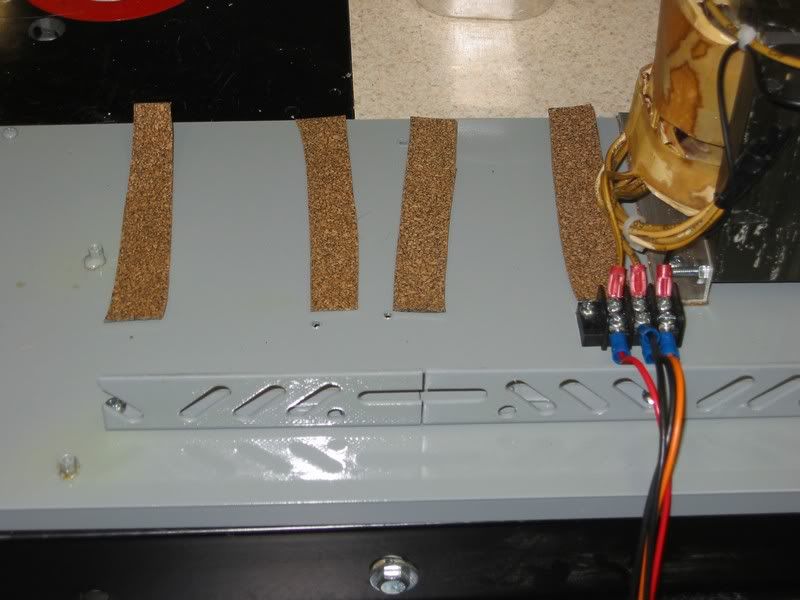
Some strips of cork from the local auto parts store were cut to sit below the ballast brackets, to provide vibration and hum isolation.

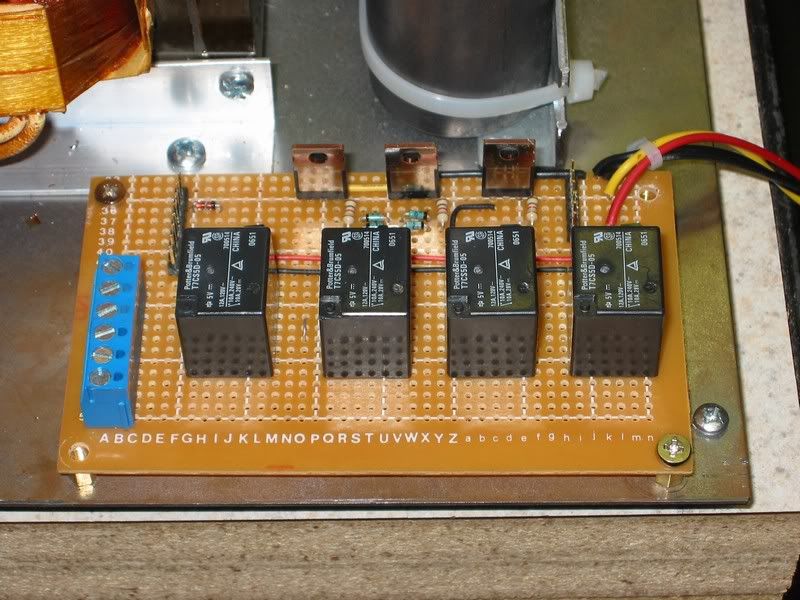
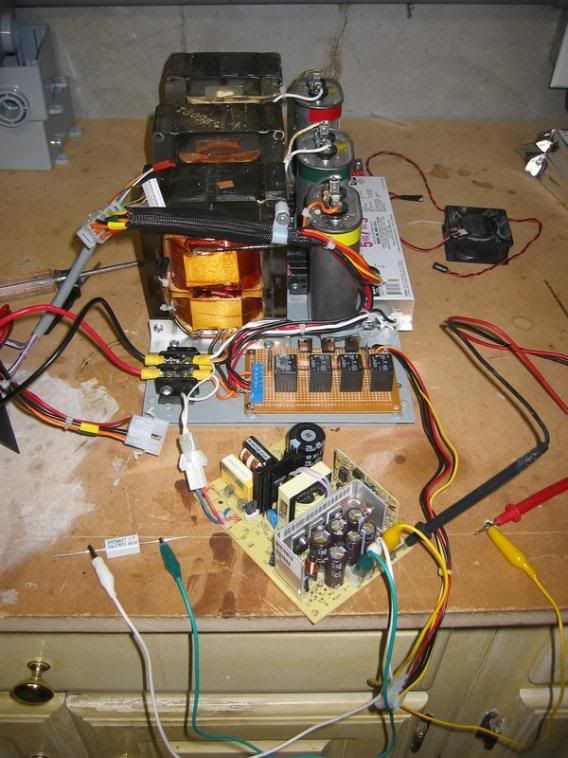
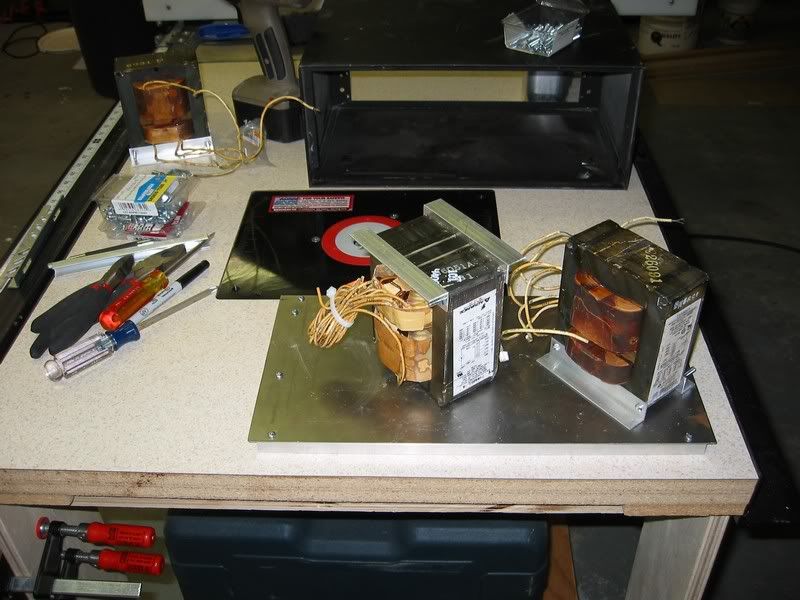
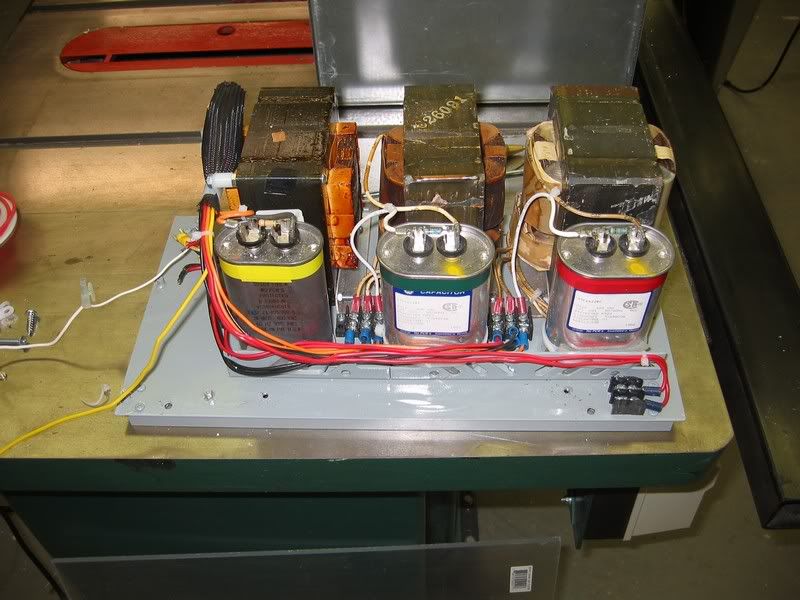
All the ballasts being mounted up...


scsinet

Active Member
At this point, I started to get a little worried about all of the heat producing components jammed so close together. It was getting very difficult to put components into place, and the unit was incredibly heavy...
Nevertheless, I pressed on...
Earlier, I built a control board for the system. It has relays to control the main lights, and power darlington transistors that switch on and off the canopy fans, ballast fans, moonlights, and the white-LED worklights.
All of this was to be controlled by my computer based tank controller (not yet built).

A small switching power supply provides the power for the fans and LED lighting.

It had to be mounted up on the side of the enclosure, no room anywhere else. Again, I was getting nervous about how tight the enclosure was.

Final power and systems check before assembling the ballast pack.


So I don't have any pictures of what happened next so I'll just explain it.
I powered up the system, and had a few issues. One, the transistor circuit behaved differently with my test fans than the fans that were in the canopy. Like a dummy, I didn't bother to test with the actual parts being used, not thinking it was necessary. The fans refused to start, instead just jerking every few seconds. I won't get into the technical reasons why, but some circuit reworking was in order.
Also, two of the 3 ballasts would not bring the lamps up to full brightness. I discovered this to be that two of the ballasts were in fact defective (obviously why they were "extras" at work), not just the capacitors as I thought.
Faced with
- The ballast enclosure being very, very heavy
- The heat being a major disaster should the ballast fans fail
- The prospect of buying two new ballasts just to get this working
- The fact that 400w is really an awful lot of light that I'd have to get rid of with chiller power (and therefore more electricity)
... I decided to completely rebuild the ballast enclosure, using (3) 250w electronic metal halide ballasts. I decided not to try to cheap out this time. I bought all new ballasts, a new larger, more suitable enclosure, and decided to "do the job right."
That is version 2 of the ballast, which I'll cover next time.
 

al mc

Active Member
Thanks..I am learning much from your project. I have no doubts I can keep up on the rough and finish carpentry work..but you are way beyond me with the electronics
 

stdreb27

Active Member
Originally Posted by SCSInet
So I don't have any pictures of what happened next so I'll just explain it.
I powered up the system, and had a few issues. One, the transistor circuit behaved differently with my test fans than the fans that were in the canopy. Like a dummy, I didn't bother to test with the actual parts being used, not thinking it was necessary. The fans refused to start, instead just jerking every few seconds. I won't get into the technical reasons why, but some circuit reworking was in order.
Also, two of the 3 ballasts would not bring the lamps up to full brightness. I discovered this to be that two of the ballasts were in fact defective (obviously why they were "extras" at work), not just the capacitors as I thought.
Faced with
- The ballast enclosure being very, very heavy
- The heat being a major disaster should the ballast fans fail
- The prospect of buying two new ballasts just to get this working
- The fact that 400w is really an awful lot of light that I'd have to get rid of with chiller power (and therefore more electricity)
... I decided to completely rebuild the ballast enclosure, using (3) 250w electronic metal halide ballasts. I decided not to try to cheap out this time. I bought all new ballasts, a new larger, more suitable enclosure, and decided to "do the job right."
That is version 2 of the ballast, which I'll cover next time.
Well, don't take this the wrong way, but I'm glad I'm not the only one whose stuff doesn't quite work, when I try to build something. I was beginning to thing that something was wrong with me.
where do you buy all your capasitors and stuff?
 

scsinet

Active Member
Originally Posted by stdreb27
Well, don't take this the wrong way, but I'm glad I'm not the only one whose stuff doesn't quite work, when I try to build something. I was beginning to thing that something was wrong with me.
where do you buy all your capasitors and stuff?
Do you meant the components for the electronic pieces or for the halides?
The caps for the halides are from a local electrical supply house.
The electronic components come from Digi-Key mostly. I get the perfboard from Radio Shack (for some reason it's really cheap there). Power connectors from from Stayonline, DigiKey, MCM Electronics, and equipment I gutted for parts.
 

stdreb27

Active Member
Originally Posted by SCSInet
Do you meant the components for the electronic pieces or for the halides?
The caps for the halides are from a local electrical supply house.
The electronic components come from Digi-Key mostly. I get the perfboard from Radio Shack (for some reason it's really cheap there). Power connectors from from Stayonline, DigiKey, MCM Electronics, and equipment I gutted for parts.
that is funny, something cheap at radioshack. Do you want to post pictures of where you store your 20 year old project box? Maybe adam and jamie should hire you to be on mythbusters.
 

scsinet

Active Member
Originally Posted by stdreb27
Maybe adam and jamie should hire you to be on mythbusters.

I'd be in FREAKIN' HEAVEN, although they'd probably make me a lab monkey.
I would get to hang around Kari... that's a good thing.
Funnily enough, I actually copied Jamie's storage system. I loved his giant wall of rubbermaid bins, so I started doing the same thing... wire assemblies, transformers, mechanical, fans, casters, etc etc.
 

stdreb27

Active Member
Originally Posted by SCSInet
I'd be in FREAKIN' HEAVEN, although they'd probably make me a lab monkey.
I would get to hang around Kari... that's a good thing.
Funnily enough, I actually copied Jamie's storage system. I loved his giant wall of rubbermaid bins, so I started doing the same thing... wire assemblies, transformers, mechanical, fans, casters, etc etc.
I'm 24, one day, I've have enough knowledge to deserve and enough money to have such a specatular shop.

As for kari I dunno she is a vegan, that is a dealbreaker for me.
 

groupergenius

Active Member
Originally Posted by stdreb27
I'm 24, one day, I've have enough knowledge to deserve and enough money to have such a specatular shop.

As for kari I dunno she is a vegan, that is a dealbreaker for me.
Who cares what her religious beliefs are...she's still hot.

BTW, I do know what a vegan is. Just couldn't pass on the joke opportunity.
 

chilwil84

Active Member
i hope you have a large fuge going into the tank cause when you pull off what few major aquariums pull off and have a large scale spawning in your tank that is gonna be some major waste that needs to be dealt with. i'm gonna take a stab and say your a loews and sears fan.
 

scsinet

Active Member
My hand tools mostly come from Sears, but I've been to Lowe's at least 6 times in the last few days.
My fuge is not as big as I'd like... I don't know if you've read through, but I was talking about how I don't have the fish room I'd like, I have to pretty much deal with space under the stand, so my fuge is only about 15 gallons.
Fenner has always recommended 5% minimum, I'm at 8, but I still wish I had at least double that size.
I do however have a very powerful skimmer, which should help significantly.
 

stdreb27

Active Member
Originally Posted by GrouperGenius
Who cares what her religious beliefs are...she's still hot.

BTW, I do know what a vegan is. Just couldn't pass on the joke opportunity.

vegitarian
one thing I don't understand is the need for "huge" sumps, I mean, for filtration you pretty much just have biological filtration, and you can put all that stuff in the DT, except for the macro algea. And how big of a tank do you really need for chaeto?
 

scsinet

Active Member
Originally Posted by stdreb27
vegitarian
one thing I don't understand is the need for "huge" sumps, I mean, for filtration you pretty much just have biological filtration, and you can put all that stuff in the DT, except for the macro algea. And how big of a tank do you really need for chaeto?
The nice thing about huge sumps is that you can increase your bioload and make for a more dense display.
If I have a 180g tank, I might be able to have maybe 4 biggish fish like tangs and maybe 8-10 smaller fish (just throwing out numbers, not being exact). That's fine, but lots of people like to have many more fish... if you have a 180g sump as well, you can put nearly twice the number of fish into the display tank and still handle the load, provided you don't crowd the fish.
 

reefkprz

Active Member
also gives you maxmum room to hide equipment, its darn hard to cram a powerhead, return pump, large skimmer, heater, top off float, macro algae, and lr rubble into a 10g (I know from expirience I have a 10g sump on my 65 and hate it)
 

chilwil84

Active Member
Originally Posted by stdreb27
vegitarian
one thing I don't understand is the need for "huge" sumps, I mean, for filtration you pretty much just have biological filtration, and you can put all that stuff in the DT, except for the macro algea. And how big of a tank do you really need for chaeto?

depends on the bioload of your tank and how much nitrate and phosphate removal you want. the size of your skimmer also makes a big dent in your sump if you dont want to drill glass many skimmers for large aquarium will fill a 20 long, return pump location again if you dont want to drill. then heaters and phosphate reactors if you need them. if you have a 150 or 180 display you can use every bit of a 55 or 75
 

scsinet

Active Member
Originally Posted by chilwil84
depends on the bioload of your tank and how much nitrate and phosphate removal you want. the size of your skimmer also makes a big dent in your sump if you dont want to drill glass many skimmers for large aquarium will fill a 20 long, return pump location again if you dont want to drill. then heaters and phosphate reactors if you need them. if you have a 150 or 180 display you can use every bit of a 55 or 75
Stay tuned for my posts on plumbing, filtration, and sump. That'll give you a better picture on how I did it.
 

scsinet

Active Member
Does anyone have any ideas as to what to put on bulkhead gaskets to improve the seal?
I'm afraid to tool tighten (instead only hand tightening) the locknuts on my bulkheads... I don't want to break the glass obviously. I have a slight leak (a couple drips per day) on one of the bulkheads. That'll turn into a giant mass of salt if left for a couple years, so I'd rather that not happen.
Is there anything I can spread on the gaskets to improve the seal? I'd use silicon, but removal one day will be difficult.
 

reefkprz

Active Member
replace the gaskets with a softer/thicker gasket (maybe a foam rubber gasket instead of a hard rubber gasket) this will allow better compression and conformity to any irregularities. About the only "safe" thing to spread on them would be silicone, and silicone wont adhere to plastic or rubber for any length of time. you would need to use something like geocel for plastic/rubber adhesion and geocel is not considered reef safe (and like you mentioned would make removal later difficult) thats about the only thing I can think of. hopefully some one else has another idea.
 
Top