Snake's 75g build thread

snakeblitz33

Well-Known Member
Thanks, and she is. lol
Yeah, really easy. Like, I thought that it was going to be something mystical and eerily magical about putting a hole in glass - but it's much easier than I thought. Like I said, just set your clutch really low and go easy - don't put pressure on the glass and you're good to go. :D
I like the drill on the side as well. I think that it is really going to work out for me. That side is the side that we aren't really going to look at that often, so I figured that would be the best place to do it. It gives a lot more viewing space for the two rooms. Where my small office area is, I can turn around and the small visible end of the tank is almost directly behind me. So, I like it.
I'm trying to design a canopy and side cabinet in my head all morning. I'm thinking that I am going to use one sheet 3/4" oak plywood to make both of them.
I really like the Chinese LED lights, but I am hesitant to wire money overseas. lol Nova said that it was completely legit - and the evidence (his unit) speaks for itself. I just don't want to have washed out colors and a unit that doesn't put out enough PAR.
Nova - if you are reading - did you ever get a hold of that Lux Meter?
I guess I could wait to build the canopy before I really decide what lights to get. If anyone has suggestions, let me know.
 

novahobbies

Well-Known Member
Of course I'm reading this!! Goofball. ;-)
First.....WOW. That is one pricey fish. But she's absolutely adorable, so definitely a "must-have."

Second, I love......*LOVE* the side-drained tank idea. For the space you're putting it in, it's brilliant. If you're building a small side cabinet....have you considered also building a sleeve to cover the plumbing coming out from the side? It will give you the "feel" of a peninsula style tank even though it's a standalone unit. I'm also thinking of things like small toddlers hanging on exposed plumbing....kind of a scary thought.
Finally, regarding the light. If you want to wait until I've ordered the second unit, I'll give a report on that one when it comes in as well. The guy I'm ordering from SEEMS on the level (you can access his website if you feel like translating chinese) and he was great with the first order, but......maybe we wait and see how he does with the second. I never got a hold of a lux meter or par meter. If Siptang comes back online sometime soon, I may try and finagle one of his southern buddies to come "up" to my place for some pizza, beer, and a light-testing party.
I would definitely hold off on building the canopy until you know what lights you'll be getting. Just my $0.02
 

snakeblitz33

Well-Known Member
It will be a little while till she gets mobile enough to figure out how to pull on the plumbing. Lol, but scary thought it is.
Ill wait a little while, but i cant wait for long. I have an actual budget now for stuff and i would like to start packing thr tank with corals sometime before december. I know you just had to spend 2k on something so it will be awhile until you get your second unit.
I am thinking that my next step is going to be getting thr system just up and running. I am going to get the plumbing done today and the baffles siliconed into place and keep puttig water in it every chance i get. I will have to figure out a way to wash the sand that i have. Its at my parents house right now sitting in saltwater. I also need to pick out my rocks this weekend too.
Only thing that is really holding me uP at this point is the lights.
 

novahobbies

Well-Known Member
Actually I *might* get lucky with the light. If the lathe sells this weekend, I'm going to order the light. I have a prospective buyer who is interested, just for less than I was hoping for. Fingers crossed that he can meet me in the middle a little.
 

snakeblitz33

Well-Known Member
Crossing my fingers too man. I hope that you do sell it. Can't wait to see about the second LED light. I've been doing some research online about them and I am figuring out that I am liking them more and more. While most of them can't be controlled with a controller - the price is hard to beat.
Like I said, I think the only thing that is holding me up at this point is the lights/canopy. I can add a ca reactor, skimmate locker and other little odds and ends as I go. I'll replace those koralias with MP40s when I get some money together.
So... I guess that is the next thing on my list... lights and canopy.
 

snakeblitz33

Well-Known Member
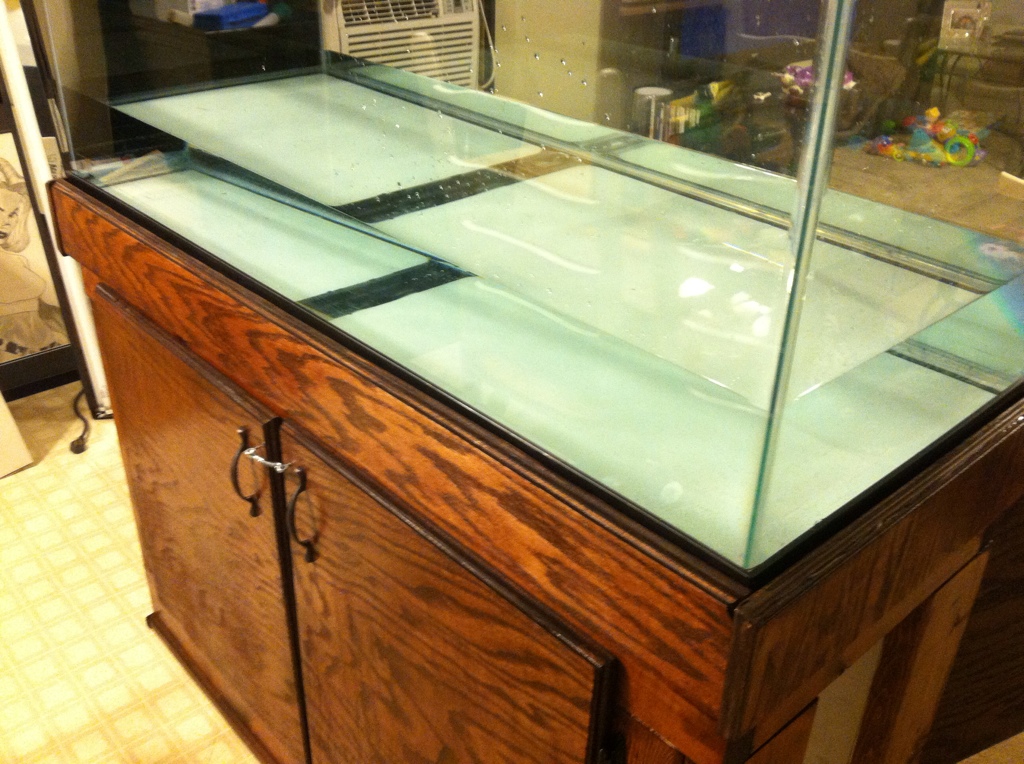
So, even though the plumbing isn't done, I knew it was going to take a little while to actually fill the tank - so I started last night.

I also bought the plumbing parts that I need today - and I am going to get the plumbing done over the weekend. I couldn't get anything done tonight, unfortunately. But, hopefully I will be able to start on it tomorrow morning.
 

snakeblitz33

Well-Known Member
Quote:
Originally Posted by novahobbies http:///t/392906/snakes-75g-build-thread/120#post_3493523
Hey, it's water!

Yeah, I'm really excited. It's all still pretty level too. I had to shim one side of the tank, but hey - at least it's all level. I think it will be fine in the long run.
Quote:
Originally Posted by mxsnow145 http:///t/392906/snakes-75g-build-thread/120#post_3493529
hey whats the GPD on your RO filter?
It's the ReefKeeper Elite Typhoon III from Air Water Ice. It has a 75gpd membrane in it at 75psi and 77F water temp. I am running about 60psi and my water temp is 74F. So, it's outputting a little less than what it potentially could.
Quote:
Originally Posted by reefkprZ
http:///t/392906/snakes-75g-build-thread/120#post_3493530
making a lot of progress fast on this one man. looking good.
Thanks buddy. I'm running with this build. My wife and I finally got caught up on bills and everything and came up with a new budget plan that allows us to spend a little money on ourselves every week. It's exciting that we finally have a little money to do what we want.
Quote:
Originally Posted by mxsnow145
http:///t/392906/snakes-75g-build-thread/120#post_3493531
j,w why did you leave the sides open on the stand?
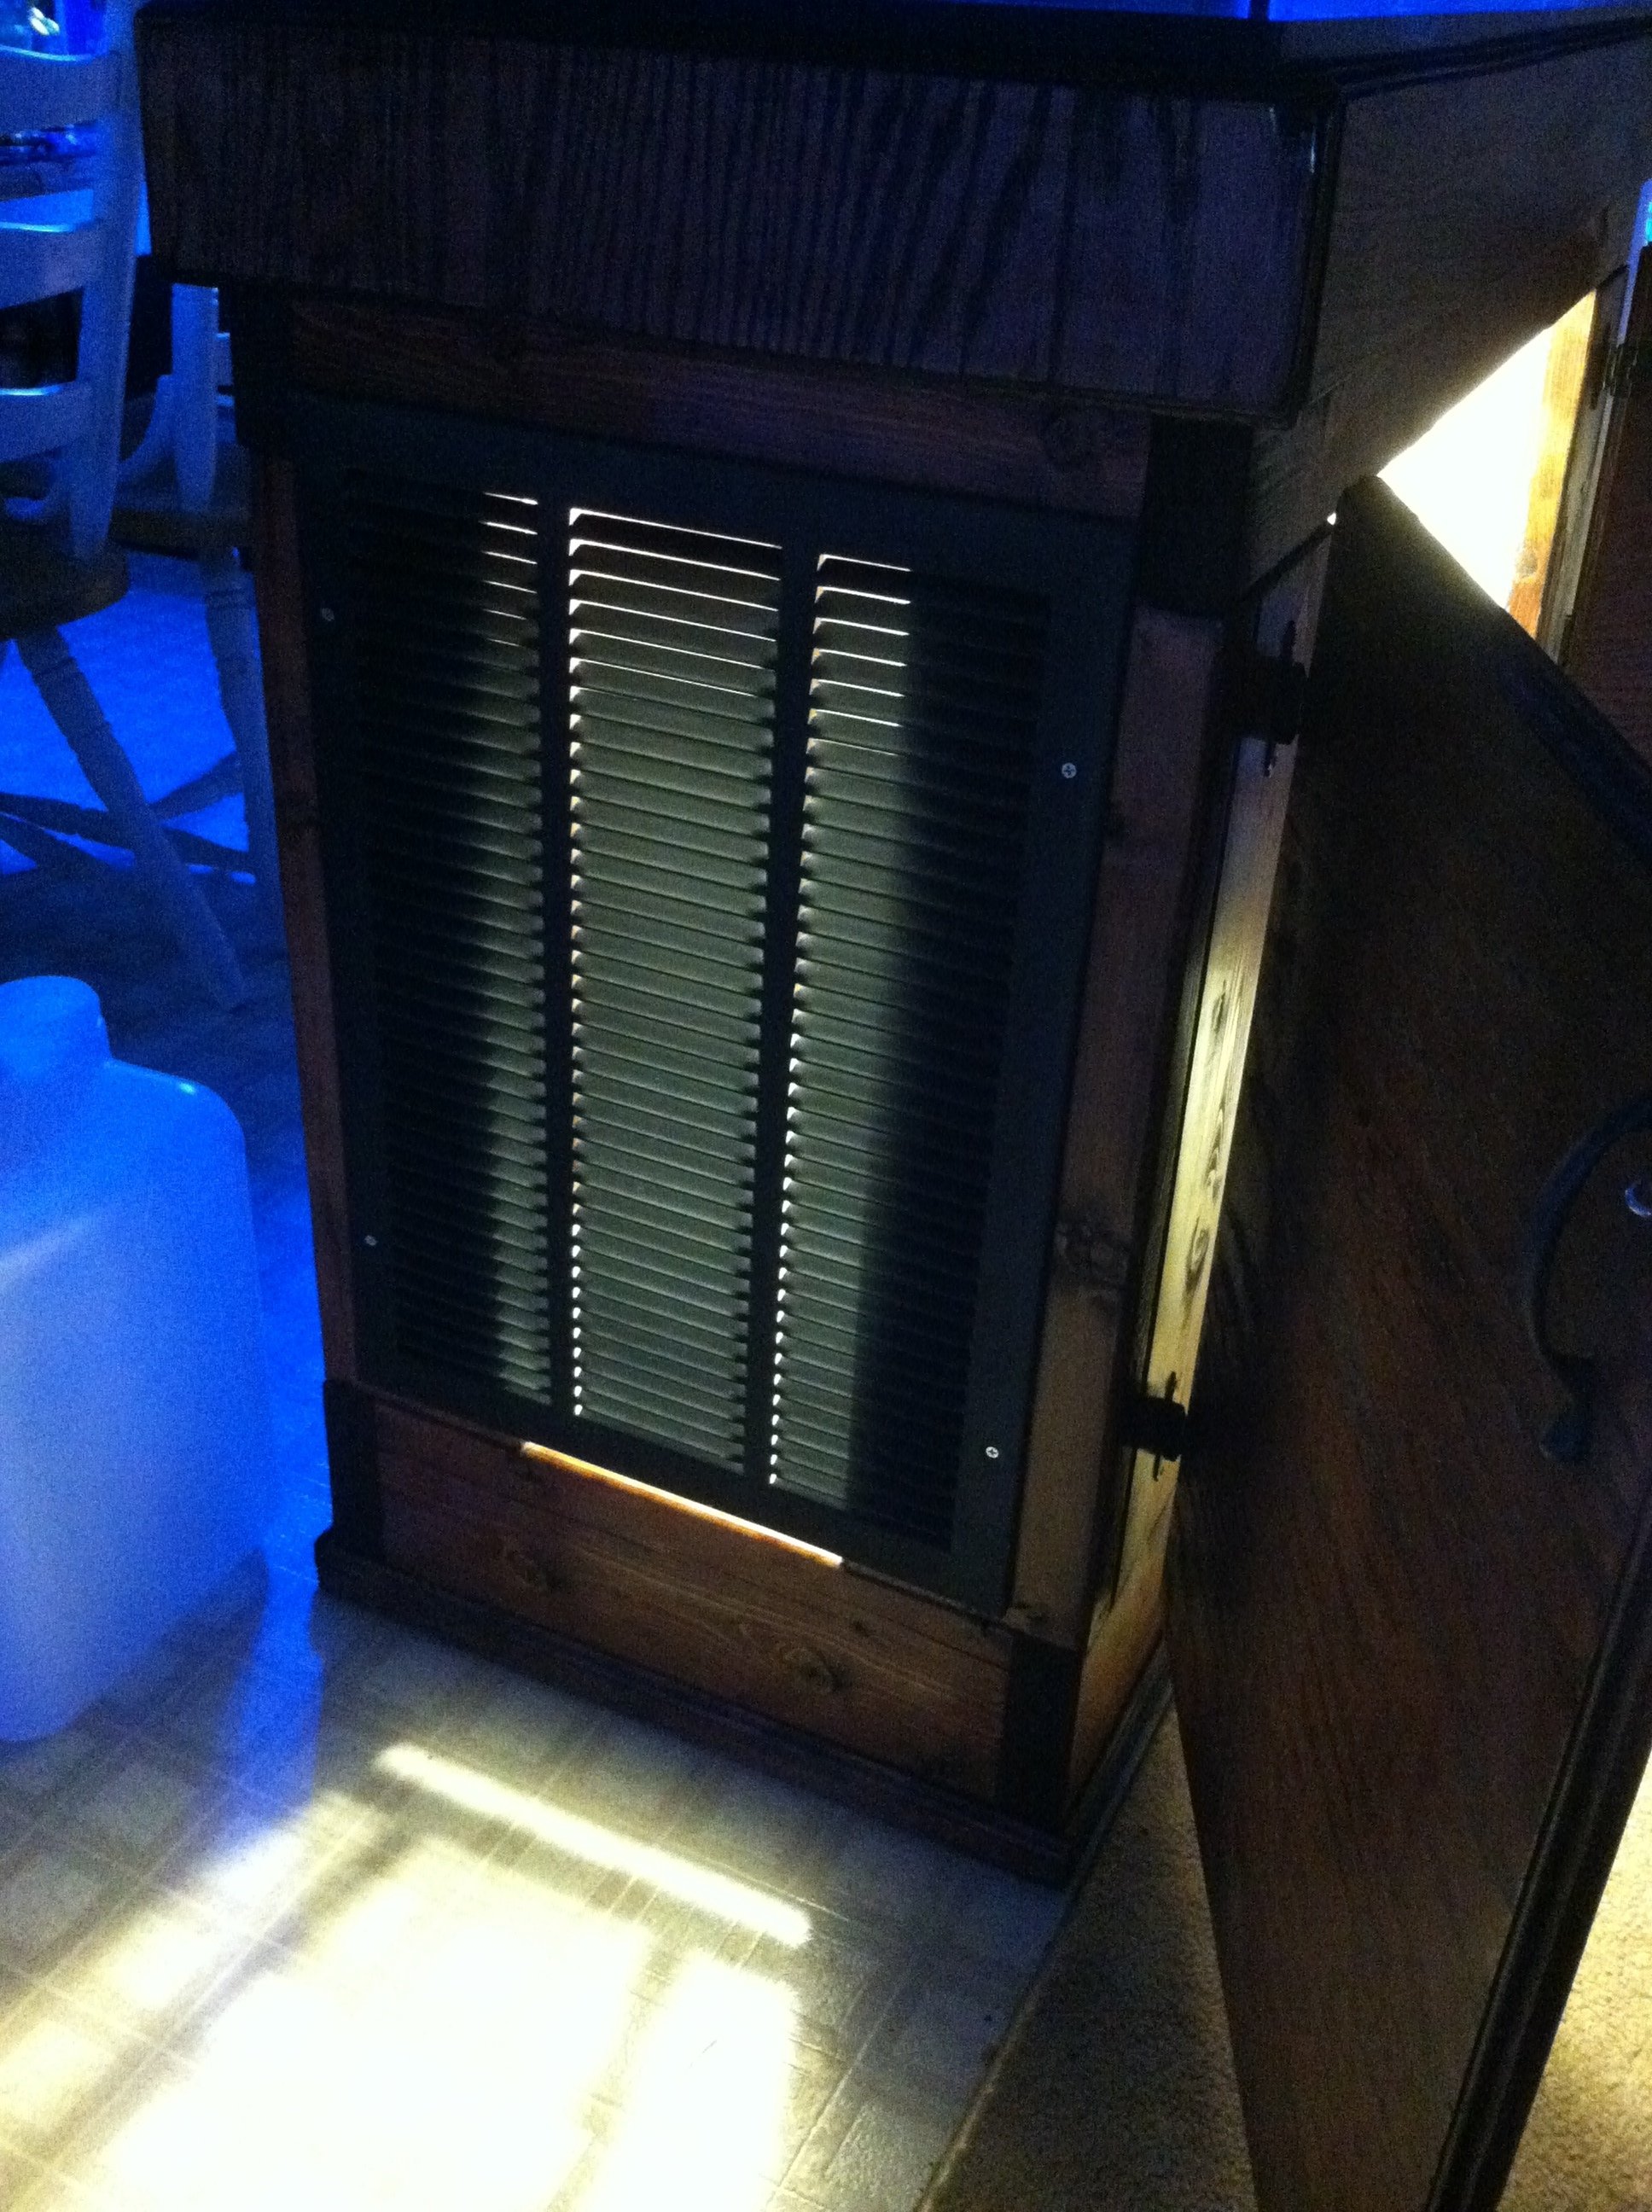
I left one side open so that I could put a vent grate over it. The other side is open so that I can fit cords and equipment through. The side without the vent will have a side cabinet built next to it that will hold my excess equipment, ATO Reservoir and also and most importantly, keep my daughter from tugging on the plumbing and cords later on.
The side with the vent is ... I hope,... going to help air circulation in the sump so that I can keep the pH pretty stable. It's also there to increase evaporation in the warmer months. I'm going to add a couple of fans built into the stand so that I can accomplish this.
 

snakeblitz33

Well-Known Member
Today, I am going to install the vent grate and finish the plumbing and keep putting water in the tank.
I'm going with a single baffle in the sump - to keep the water level stable in one chamber for the protein skimmer. Hopefully by the end of the day I will have a lot of things going for this tank build. :D
Maybe by monday or tuesday I will have enough water in the tank to be able to start it. The silicone has to dry in the sump though for it all to start.
 

snakeblitz33

Well-Known Member

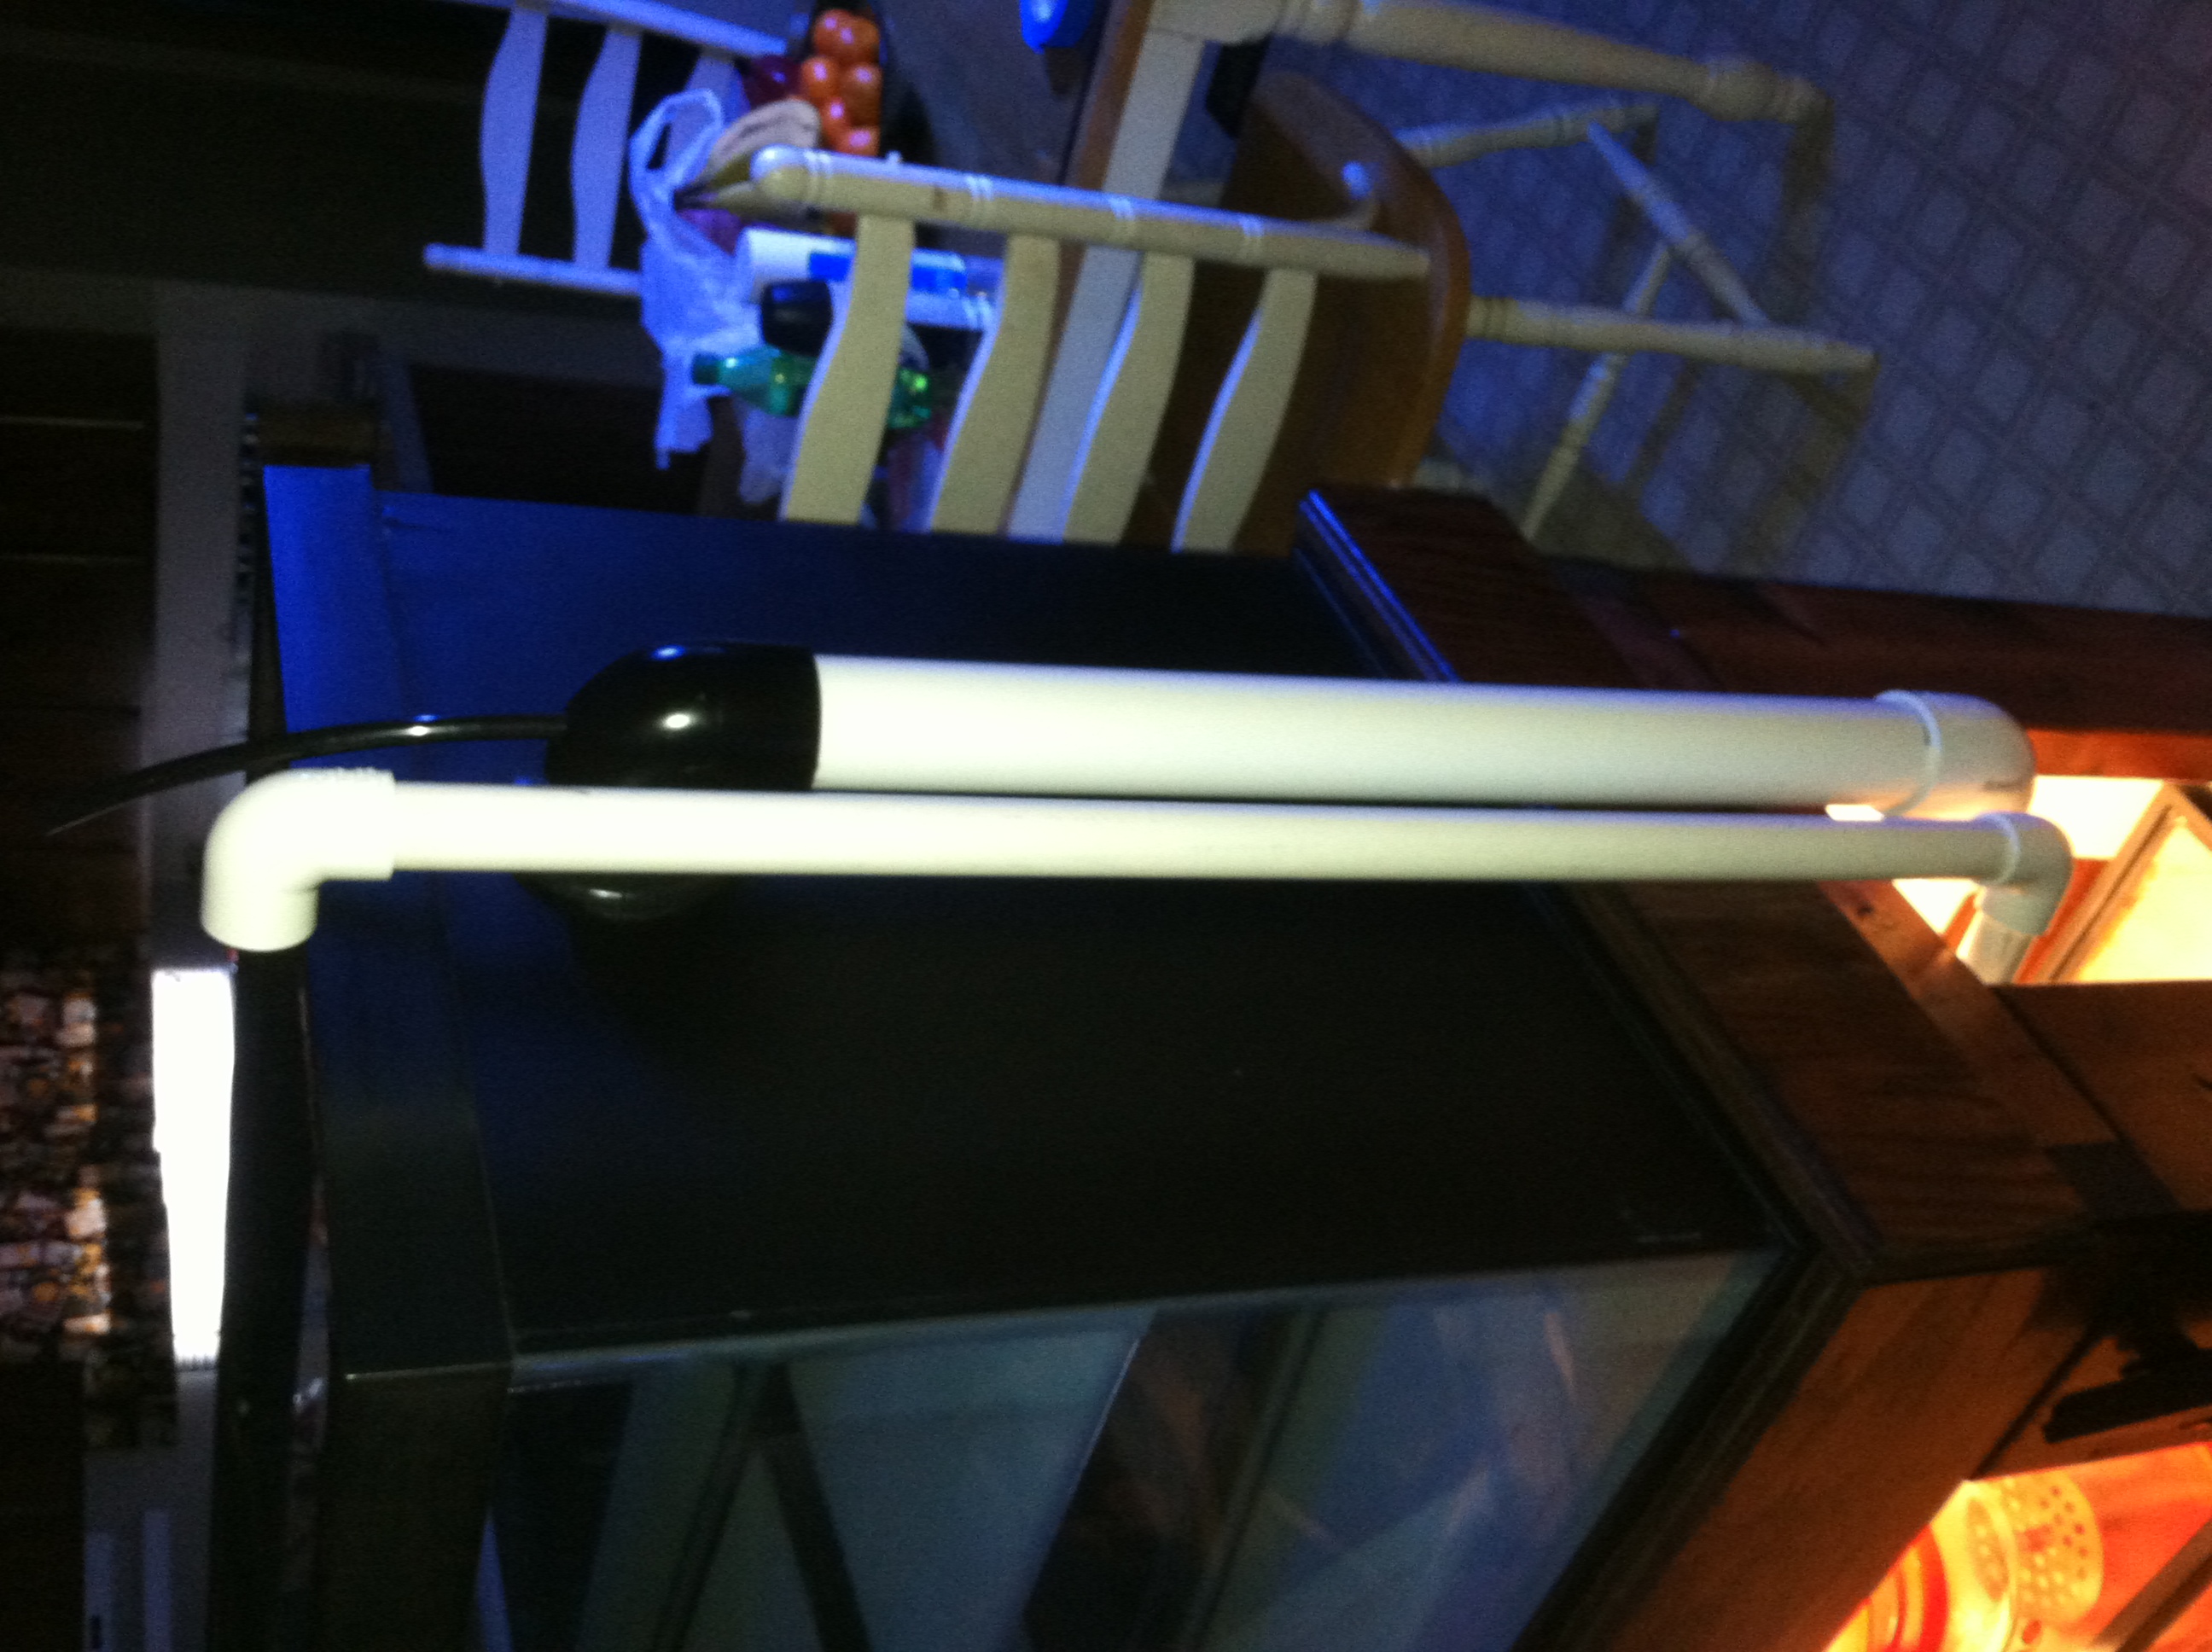
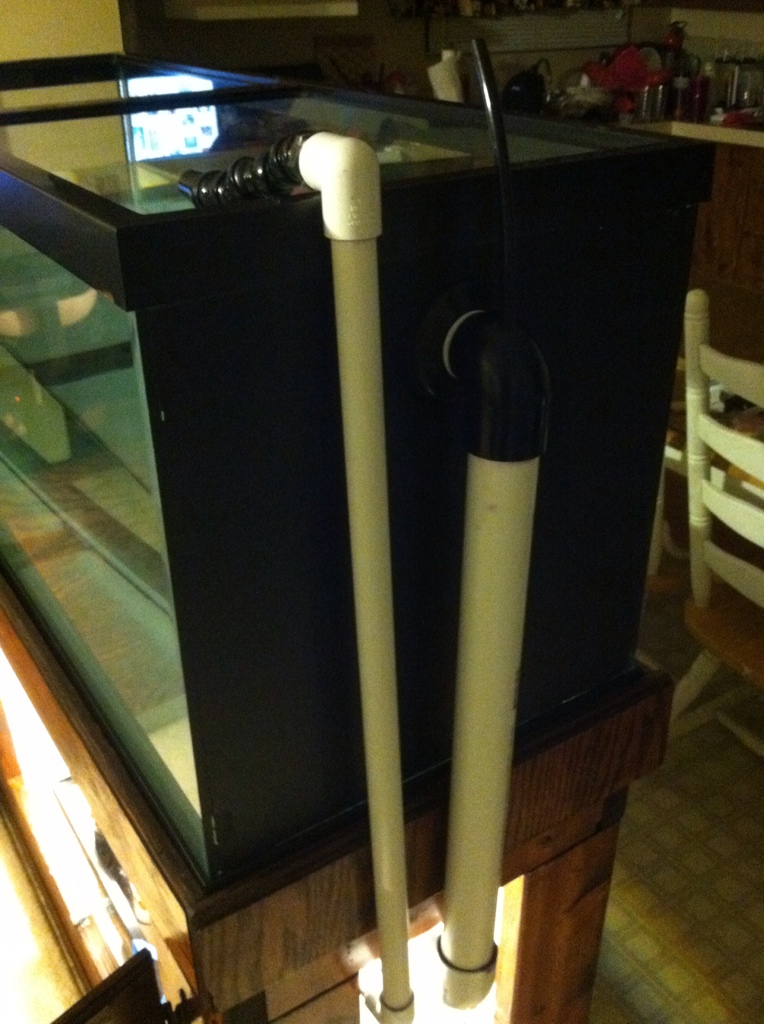
Since I am going to be covering this side of the tank with a side cabinet, I decided not to paint the plumbing black. Nothing is cemented in place yet. I am also going to use electrical conduit holders to hold the plumbing in place. I was thinking that I may use some insulation or something around the back of it to cut down on vibrations and keep the tank a little quieter.

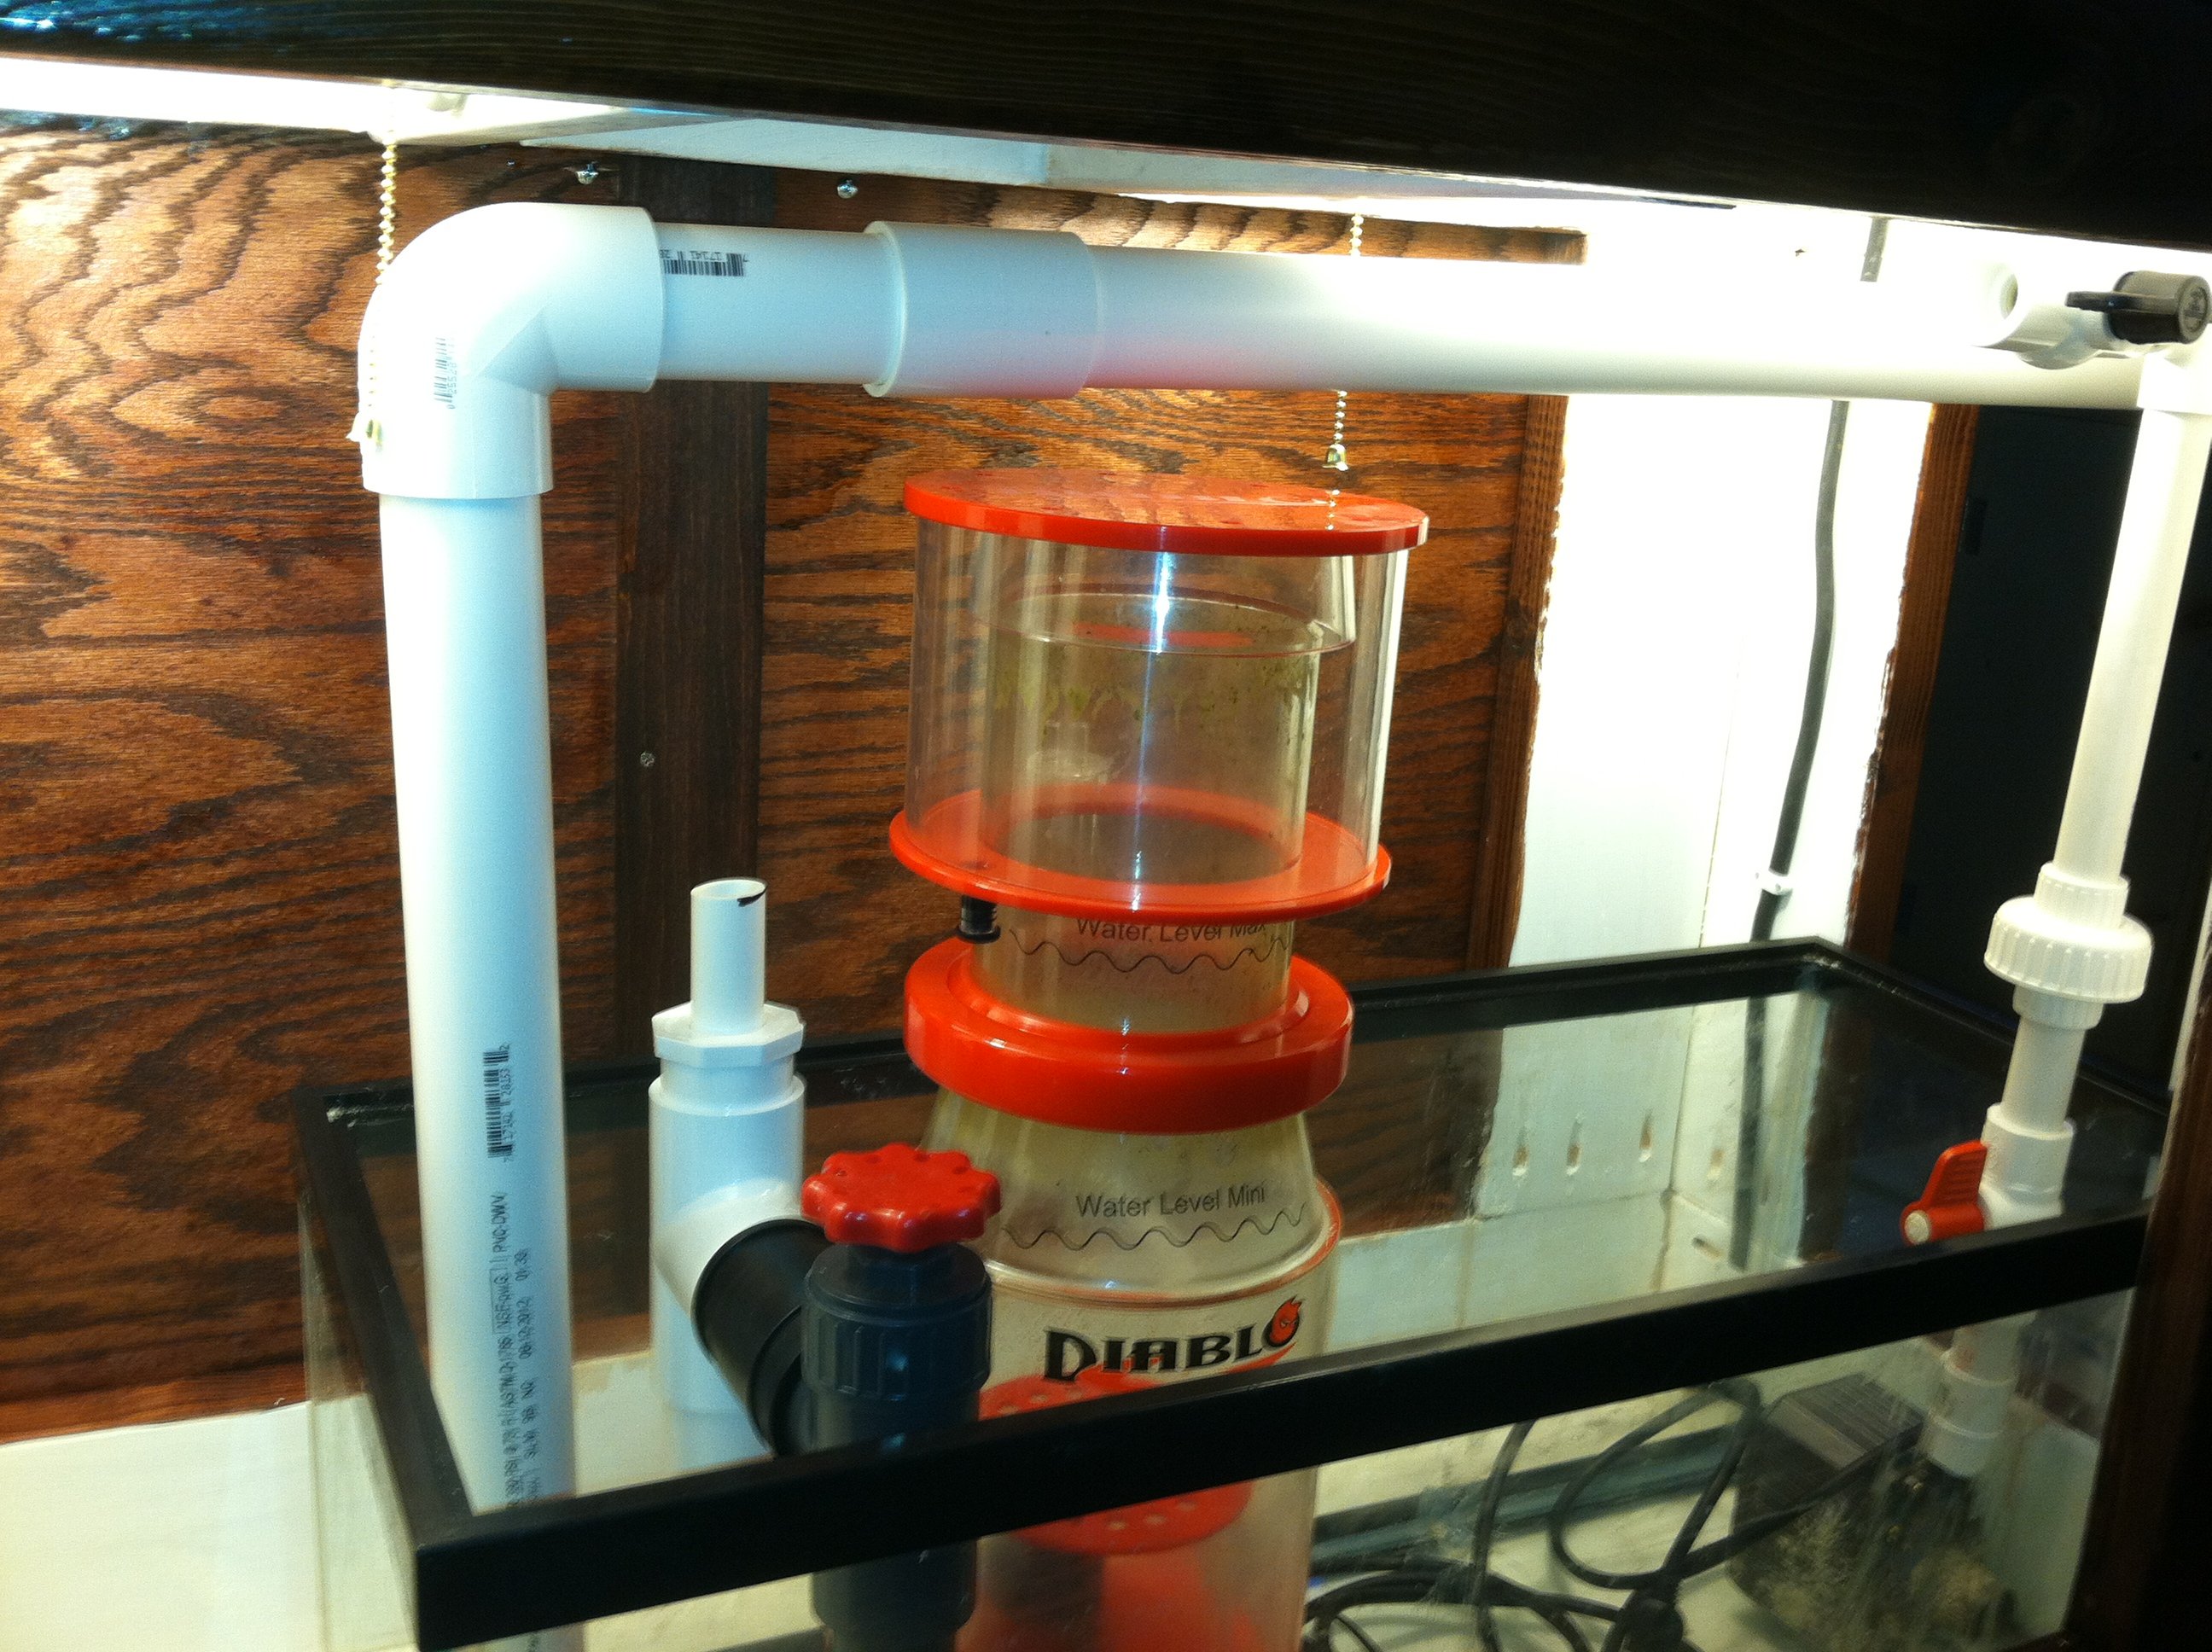
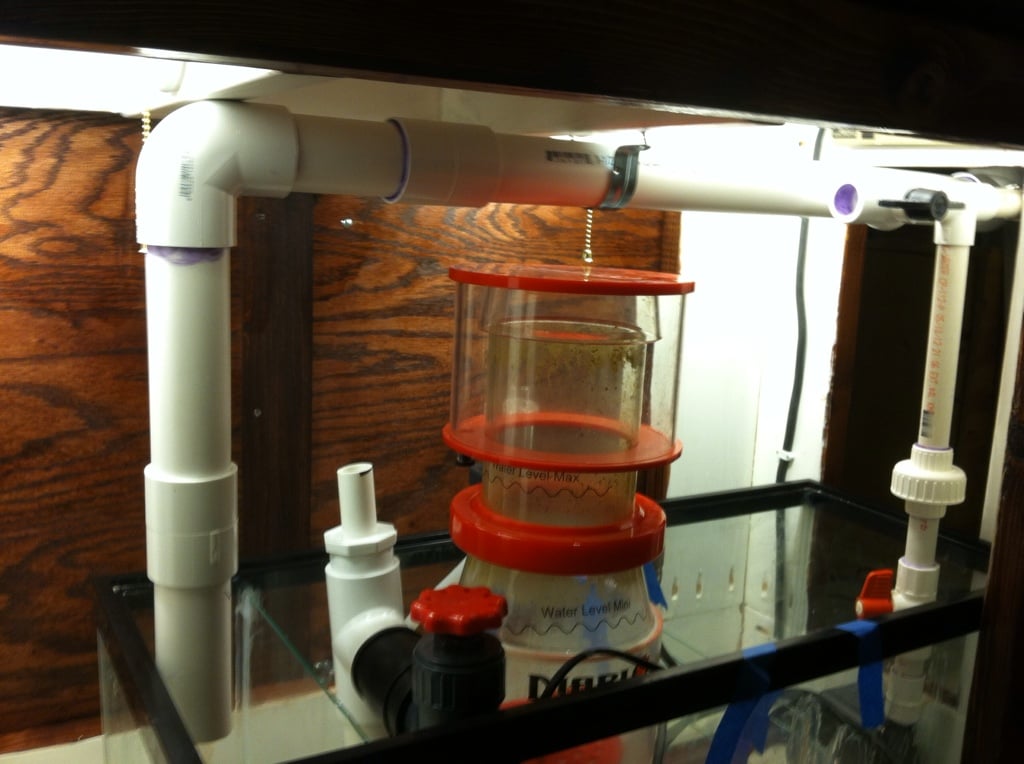
Here you can see the rest of the plumbing. It's really simple - in and out. As you can see, the return plumbing also has a T off of it which will be available for other reactors, like the calcium reactor and the phosphate reactor. Cutting down on the number of pumps will help me cut down on heat issues during the summer.

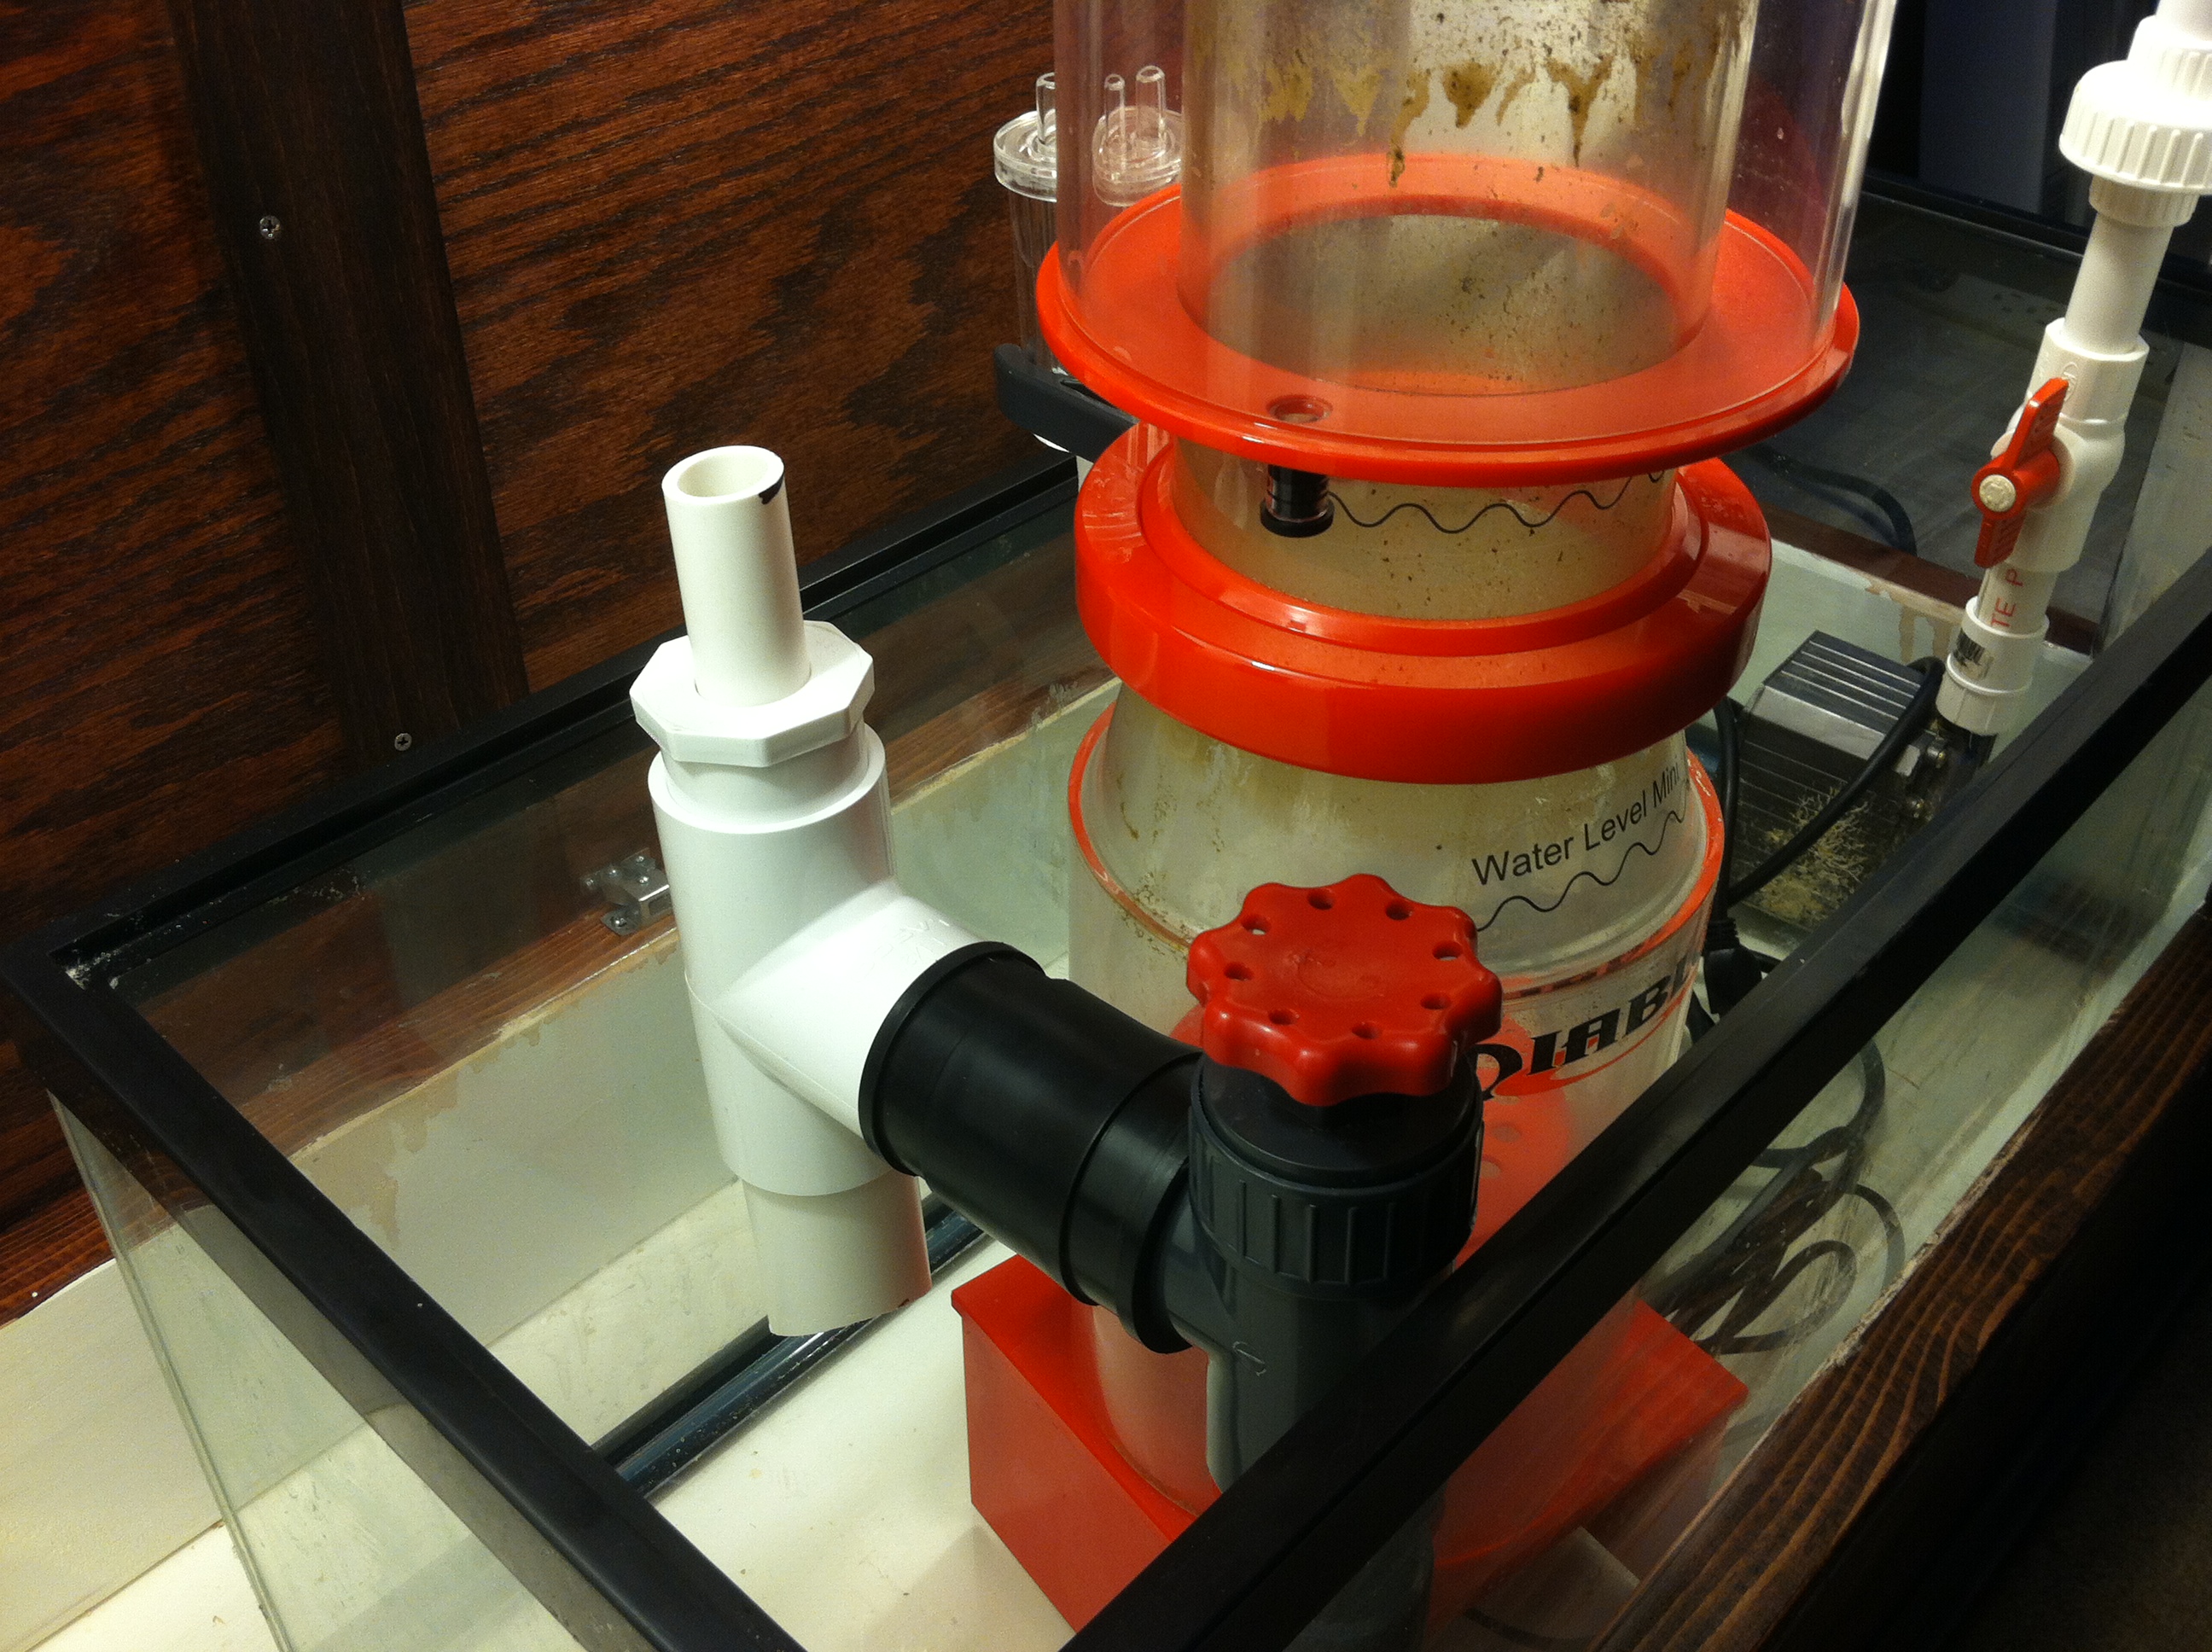
Here you can see the mod that I made to my protein skimmer. I saw the design on another forum and it made a lot of sense to use the rubber coupling to fit over the british /metric PVC to mod it onto 1 1/2" PVC. I may or may not add a filter sock to the skimmer afterall. But, I think this mod is going to definitely be worth it.
 

snakeblitz33

Well-Known Member
Here is the vent grate that I painted black... I am going to add filter floss to the inside of it as well as a couple of fans to increase the amount of air circulation in the sump.
 

snakeblitz33

Well-Known Member
I'm going to buy a couple of mouse pads to set the skimmer and the return pump on. It should cut down on vibrations pretty good. I have a plumbing idea but I don't know if it is even feasible. I may keep it to myself for a little while, or experiment with it a little to see if it has any merit before I introduce the idea to the forums.
My daughter is getting to the point where she is watching TV a little more and able to play on her own and be on her own a little more - to be more independent. It makes me feel good. She's growing up a lot!!
ANYWAYS, tonight i am going to finish the plumbing. i am steadily getting water in it. i had glass cut. seems like i might add a couple baffles tonight as well..
 

snakeblitz33

Well-Known Member

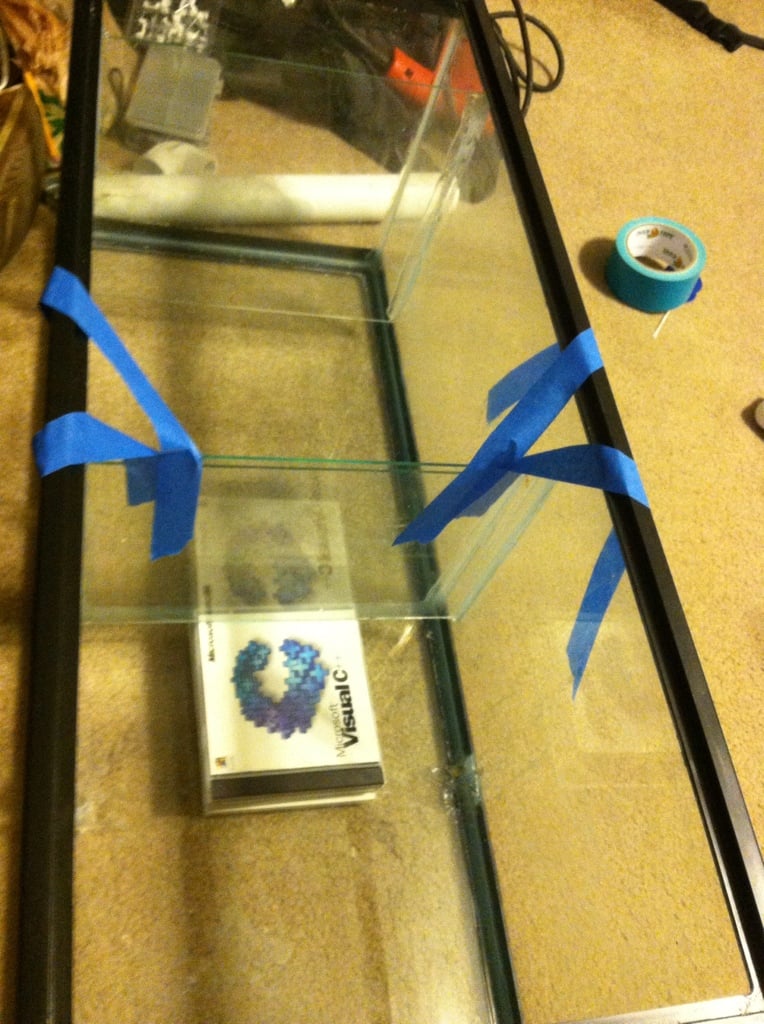
Yeah, I'm the nerd with a Visual C++ CD. LOL
Anyways, I got the baffles all in the sump. There are actually four baffles - I just took a pic in the middle of it.

Got the plumbing all done - everything is cemented into place. I'm going to turn off the second ball valve once the cement has permeated the rest of the pipe and has sealed and cured. I like it so far. I know I am going to have enough room for the skimmer neck cleaner - I measured everything out and it looks like it is definitely going to work out. The mechanical filter section is going to have some modification with egg crate and four PVC legs attached to it ... I might make it two tier, I am not sure just yet. The blue painters tape will come off in the morning when the silicone has cured more.
 

snakeblitz33

Well-Known Member

I have the plumbing tacked in place with a couple of electrical conduit holders. Seems like it is going to do a good job. If they rattle/vibrate too much, I will add some insulation between the metal and the pipe to cut down on the noise. I don't think it's going to be too big of a problem though.
There is a small problem with this though. I would really like the return pipe to actually blow surface water into the overflow from the other end - however, I think this will be "acceptable" for the time being. I know there is a lot of water flow theory which would state differently - and I completely agree with it - and if I had my choice I would try to figure out a way to push water from the other end through the return, however - I require a larger pump - and more than likely a larger aquarium to make it worth having to work around a 3/4" return line on the top of the tank.
 

snakeblitz33

Well-Known Member

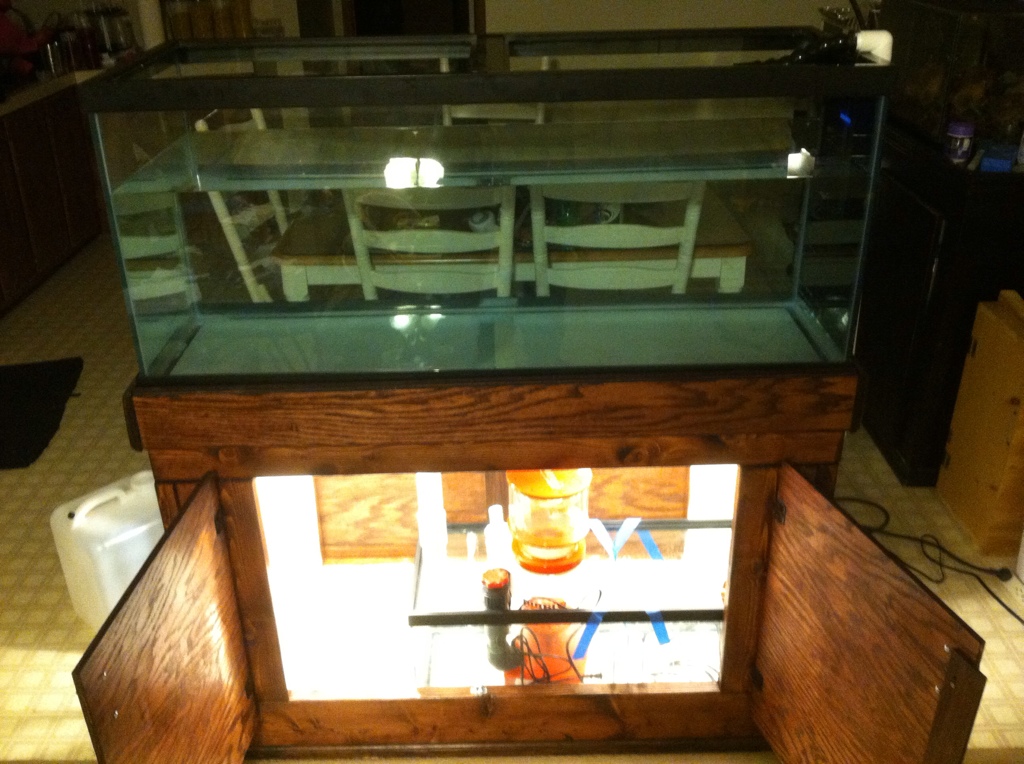
Just kind of an overall view of the system so far. I know that the lights underneath kinda washed out the colors of the sump underneath - but you get the basic idea. I thought this was an interesting pic - and one that I like to see in other peoples tanks.

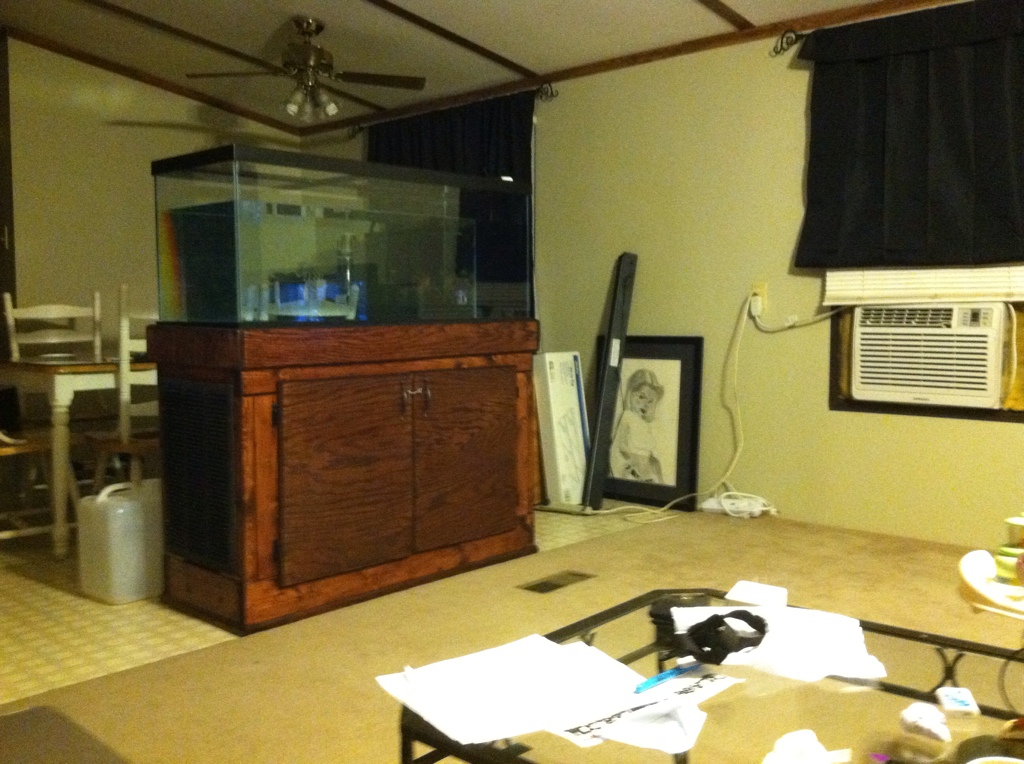
And the best pic of them all so far - the view of the tank from my "spot" on the couch. :D
Please keep in mind that we just moved into this place three weeks ago - and it's still kinda hecktic putting everything away and getting organized. I am usually a lot cleaner than this.
 
Top