2Quills, 120G Re-build thread.

2quills

Well-Known Member
Thanks Shawn, that's what I thought you had said yesterday. I just want to get all the little kinks worked out with this little project before I move on to the sump. I just used the cheap cell cast from mexico on this tank to get a feel for the material. I think I'll go with either the Spartech or Acryilite stuff on the sump.
In retrospect, the tank has not leaked yet but I am getting some bowing in the center with the tank full. About an 1/8" of an inch. Do you guys think it's getting ready to blow? It's been like that since last night right after I filled it. I might be pushing the 1/4" material a little too much huh?
 

2quills

Well-Known Member
Quote:
Originally Posted by acrylic51 http:///forum/thread/378912/2quills-120g-re-build-thread/440#post_3385737
Hey Josh!!!!! I have to be honest man....not to much progress as of lately....Work has kinda crushed the free time at the moment for the tank, and with the weather being warmer; more to do outside the house at the moment....I have all the epoxy work done except for the final clear coat in the overflow. Bulkheads holes are drilled, still trying to decided if I want to drill the bottom of the tank for CL though....Have mixed feeling on it at this point
.Hopefully here after the dust settles a bit, with the oldest daughter moving out getting her own place, a new puppy for the youngest daughter, and helping my friend Jerry out if you guys remember the thread awhile ago about his ups and downs with his tank.
Currently I'm in the process of building him a sump for his setup, to see if we can get things headed in the right direction for him.....He's put a lot of time and effort into the setup and wanna see it turn out for him; so if it means I go a bit longer away from mine well worth it.....I've known Jerry for quite a long time so.....Plus he's a super IT guy, so hopefully down the road when I get ready to totally wire the house with all the IT stuff he'll be there to bail me out......I'll have to dig up his thread and get his ok to take some pics and post pics of the sump up there for him......
The cool thing about it is that while at Jerry's dry fitting everything we had a chance to a 1 on 1 with Marc Melev.....Really enjoyed picking 1 of the masterminds of the hobbies brain IMHO.....Marc does super work, and was a treat to have him look over my sump plans, and the weird thing about it, Marc and I both had the same idea on how the 1 baffle/fuge wall should be built......Kind of scary!!!!!!
I'd love to see the plans if you don't mind Shawn, via pm or whatever.
 

1snapple

Active Member
I swear, as soon as corey and shawn enter a thread together it gains 10 posts in an hour.

I too would like to see the plans, and a link to that thread would help too.
 

acrylic51

Active Member
Quote:
Originally Posted by 2Quills http:///forum/thread/378912/2quills-120g-re-build-thread/460#post_3385745
Thanks Shawn, that's what I thought you had said yesterday. I just want to get all the little kinks worked out with this little project before I move on to the sump. I just used the cheap cell cast from mexico on this tank to get a feel for the material. I think I'll go with either the Spartech or Acryilite stuff on the sump.
In retrospect, the tank has not leaked yet but I am getting some bowing in the center with the tank full. About an 1/8" of an inch. Do you guys think it's getting ready to blow? It's been like that since last night right after I filled it. I might be pushing the 1/4" material a little too much huh?
Sorry didn't read the specs of the tank, but assuming you used 1/4" material, how high is the tank? Spartech is going to my choice if I go with acrylic viewing panels. Although Acrylite is good and a tad cheaper price wise, but why skimp at this point.
Corey I've used the Mexico made material and had no issue....I don't think it finished as nicely as the better quality material though. Quality control is a big issue with the Mexico acrylic.
 

acrylic51

Active Member
Quote:
Originally Posted by 2Quills http:///forum/thread/378912/2quills-120g-re-build-thread/420#post_3385419
Sure, the camera has a hard time focusing in but here's a couple with the tank flipped over. I have a few tiny micro bubbles here and there. I've seen a lot worse on the acrylic tanks up at the lfs. The guy who owns the one I go to build all of tanks in the store himself so I'm holding out hope that this one will be ok. I'd also like to pick up a new bottle for my torch so I can try flame polishing it to give it that nice crystal clear look on the edges.


Mad Skill Brother!!!!!!!
 

acrylic51

Active Member
Quote:
Originally Posted by 2Quills http:///forum/thread/378912/2quills-120g-re-build-thread/420#post_3385414
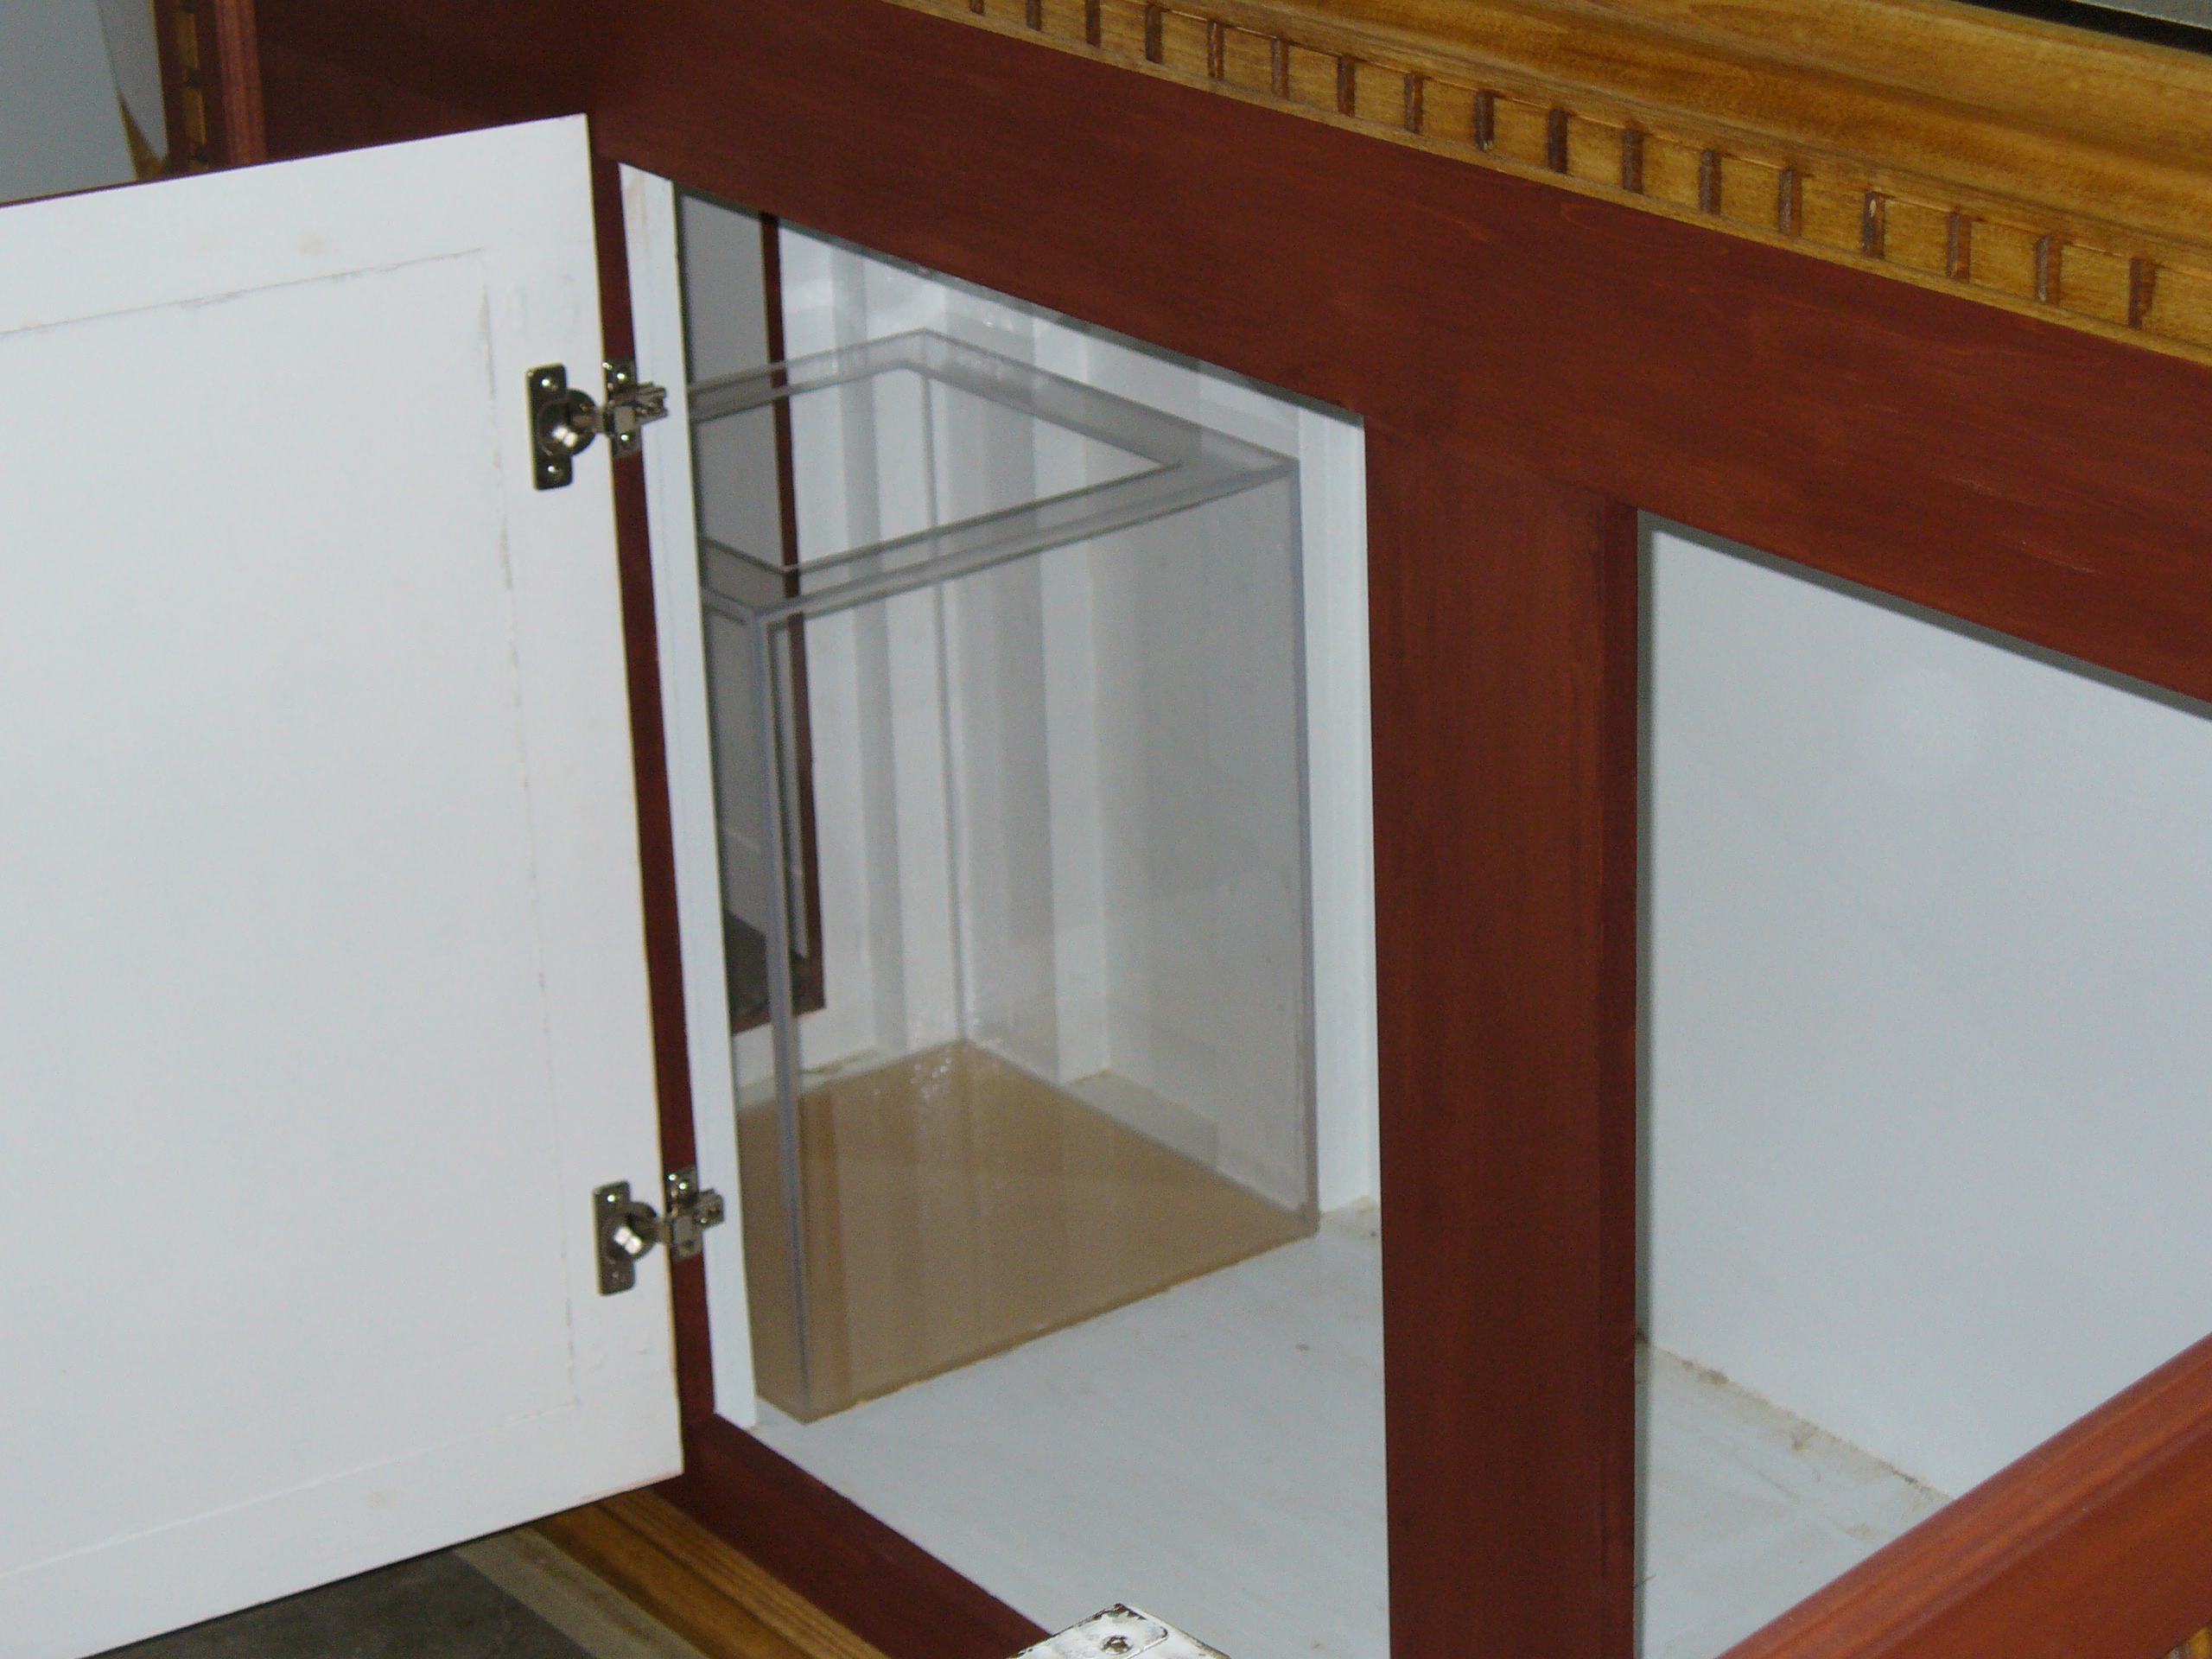
Some shots of my first DIY acrylic tank... 15 gallon ATO reservoir tank 14" x 14" x 18", 1/4" cast material with 2" euro bracing.
I figured that I would try to get a little bit of practice in before I go out and spend the money on materials for my sump. I think it turned out pretty good but time will tell once I leak test it.
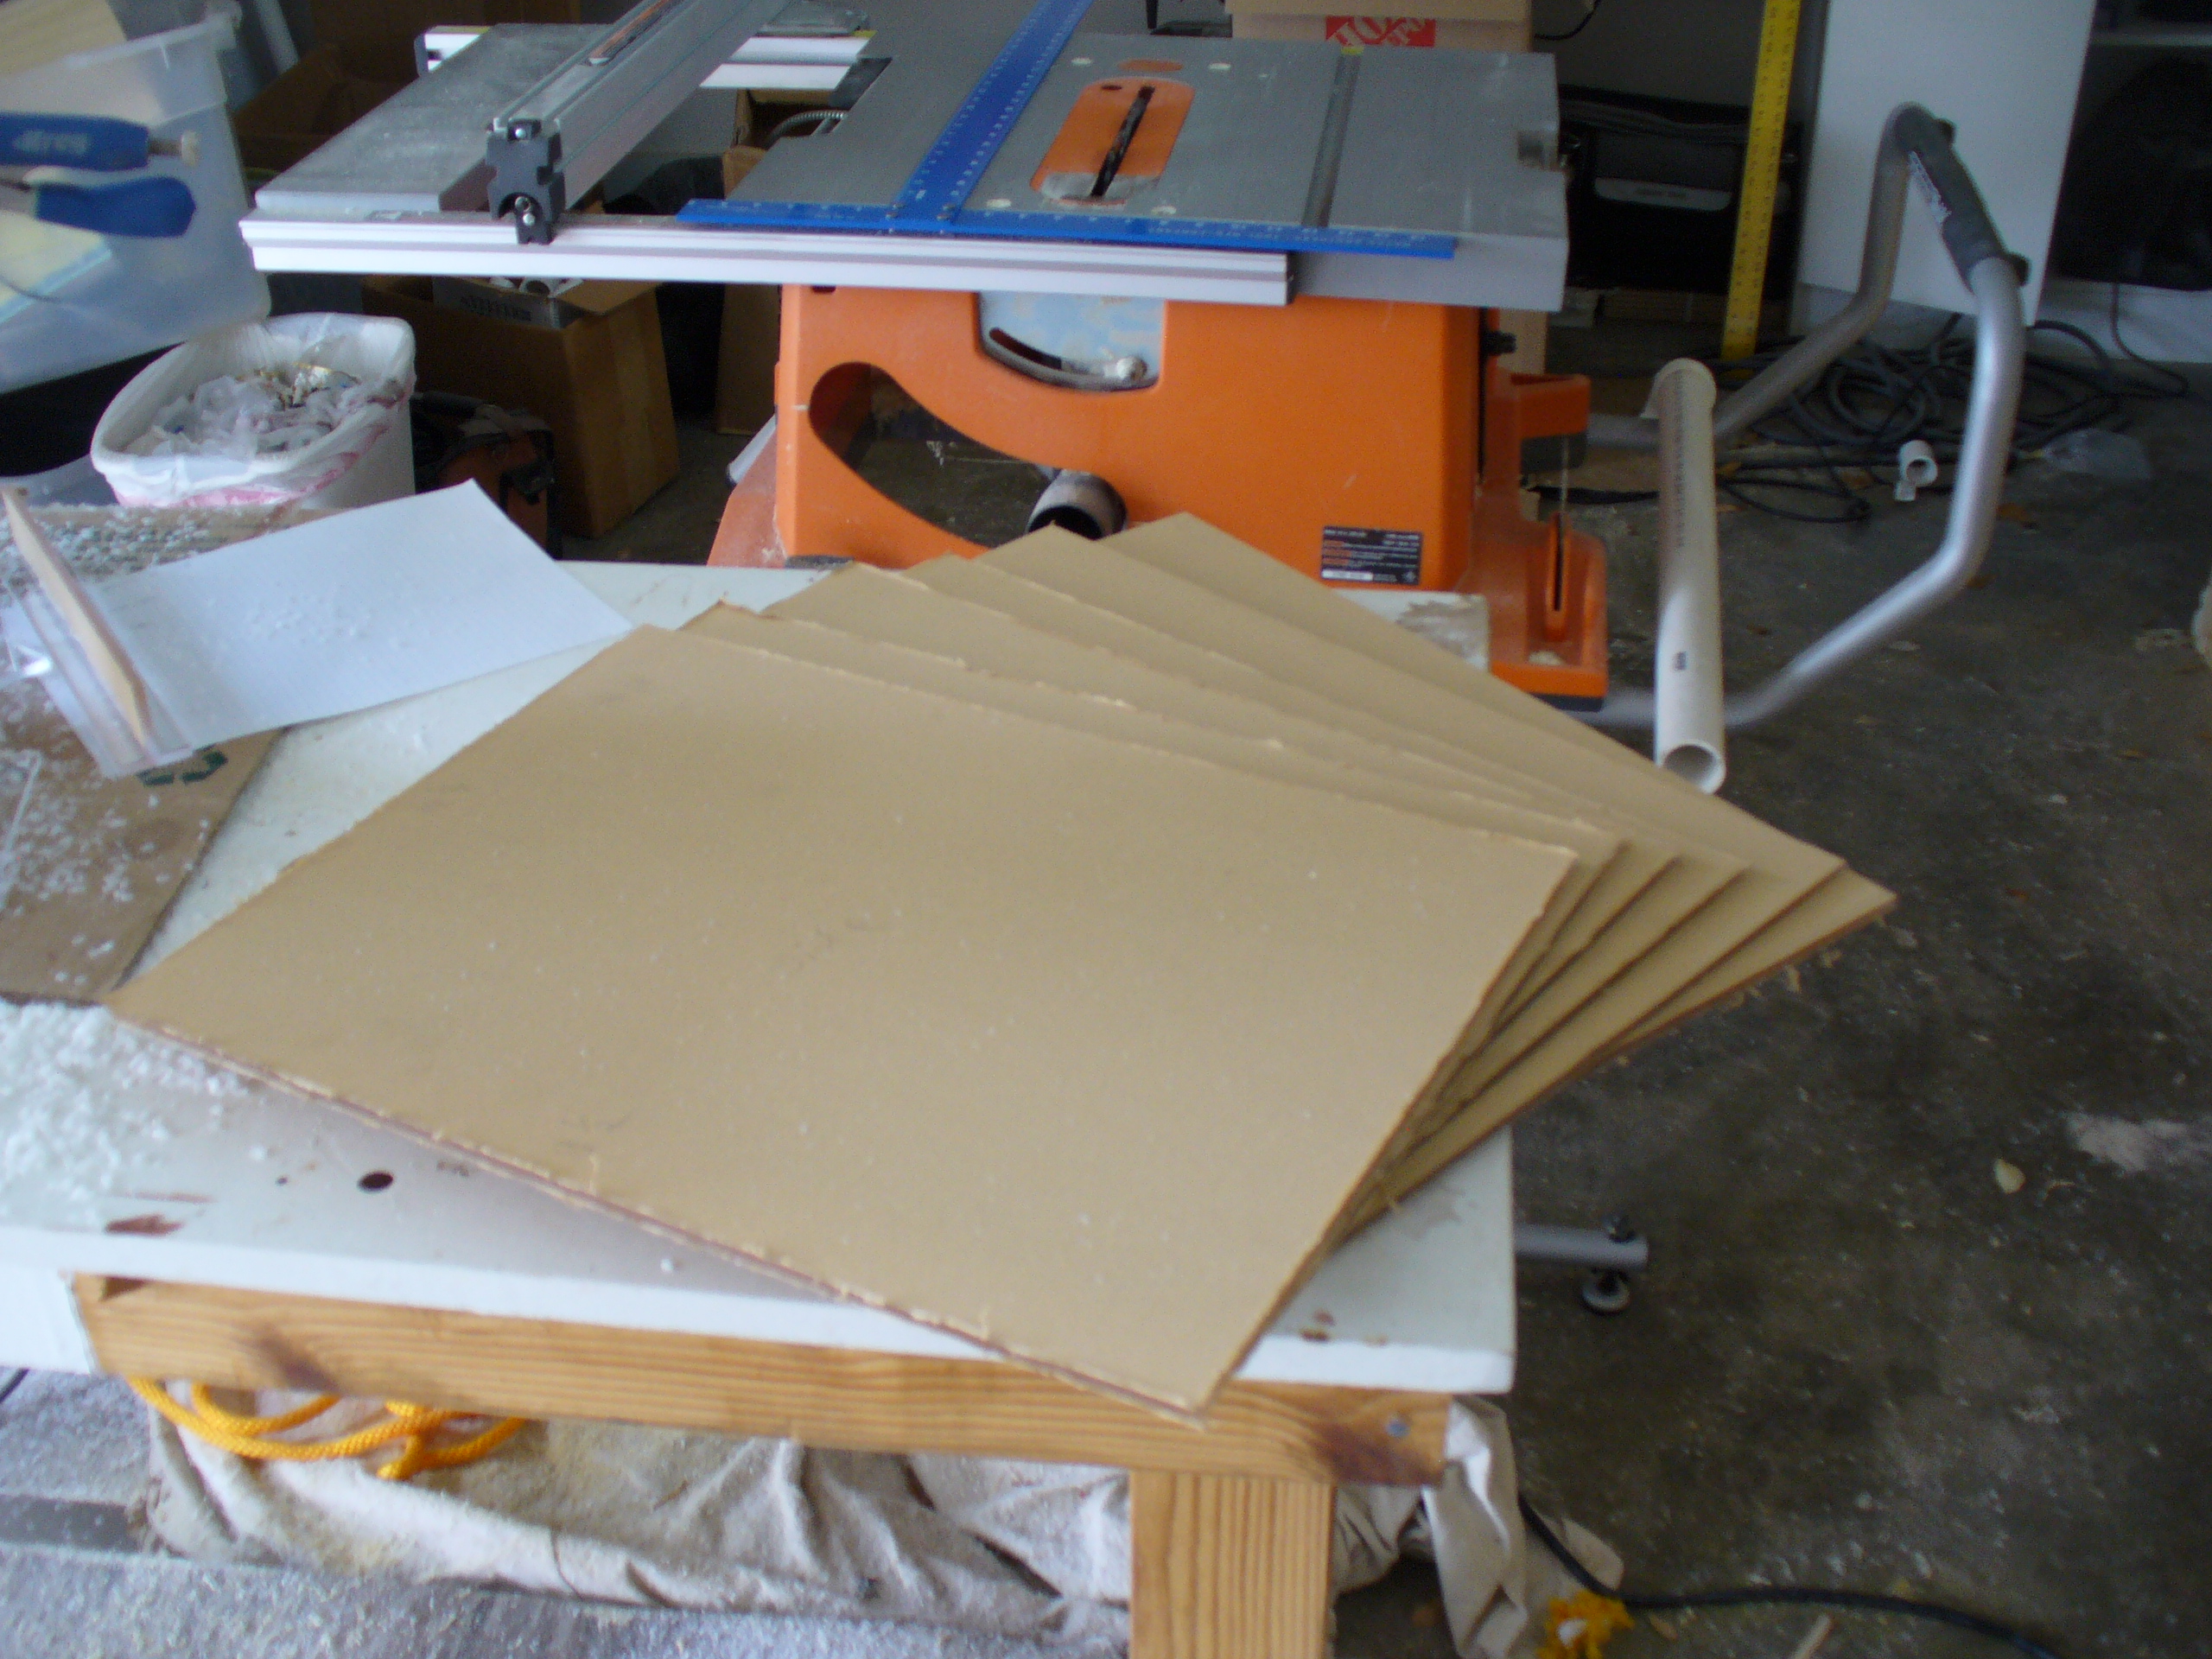
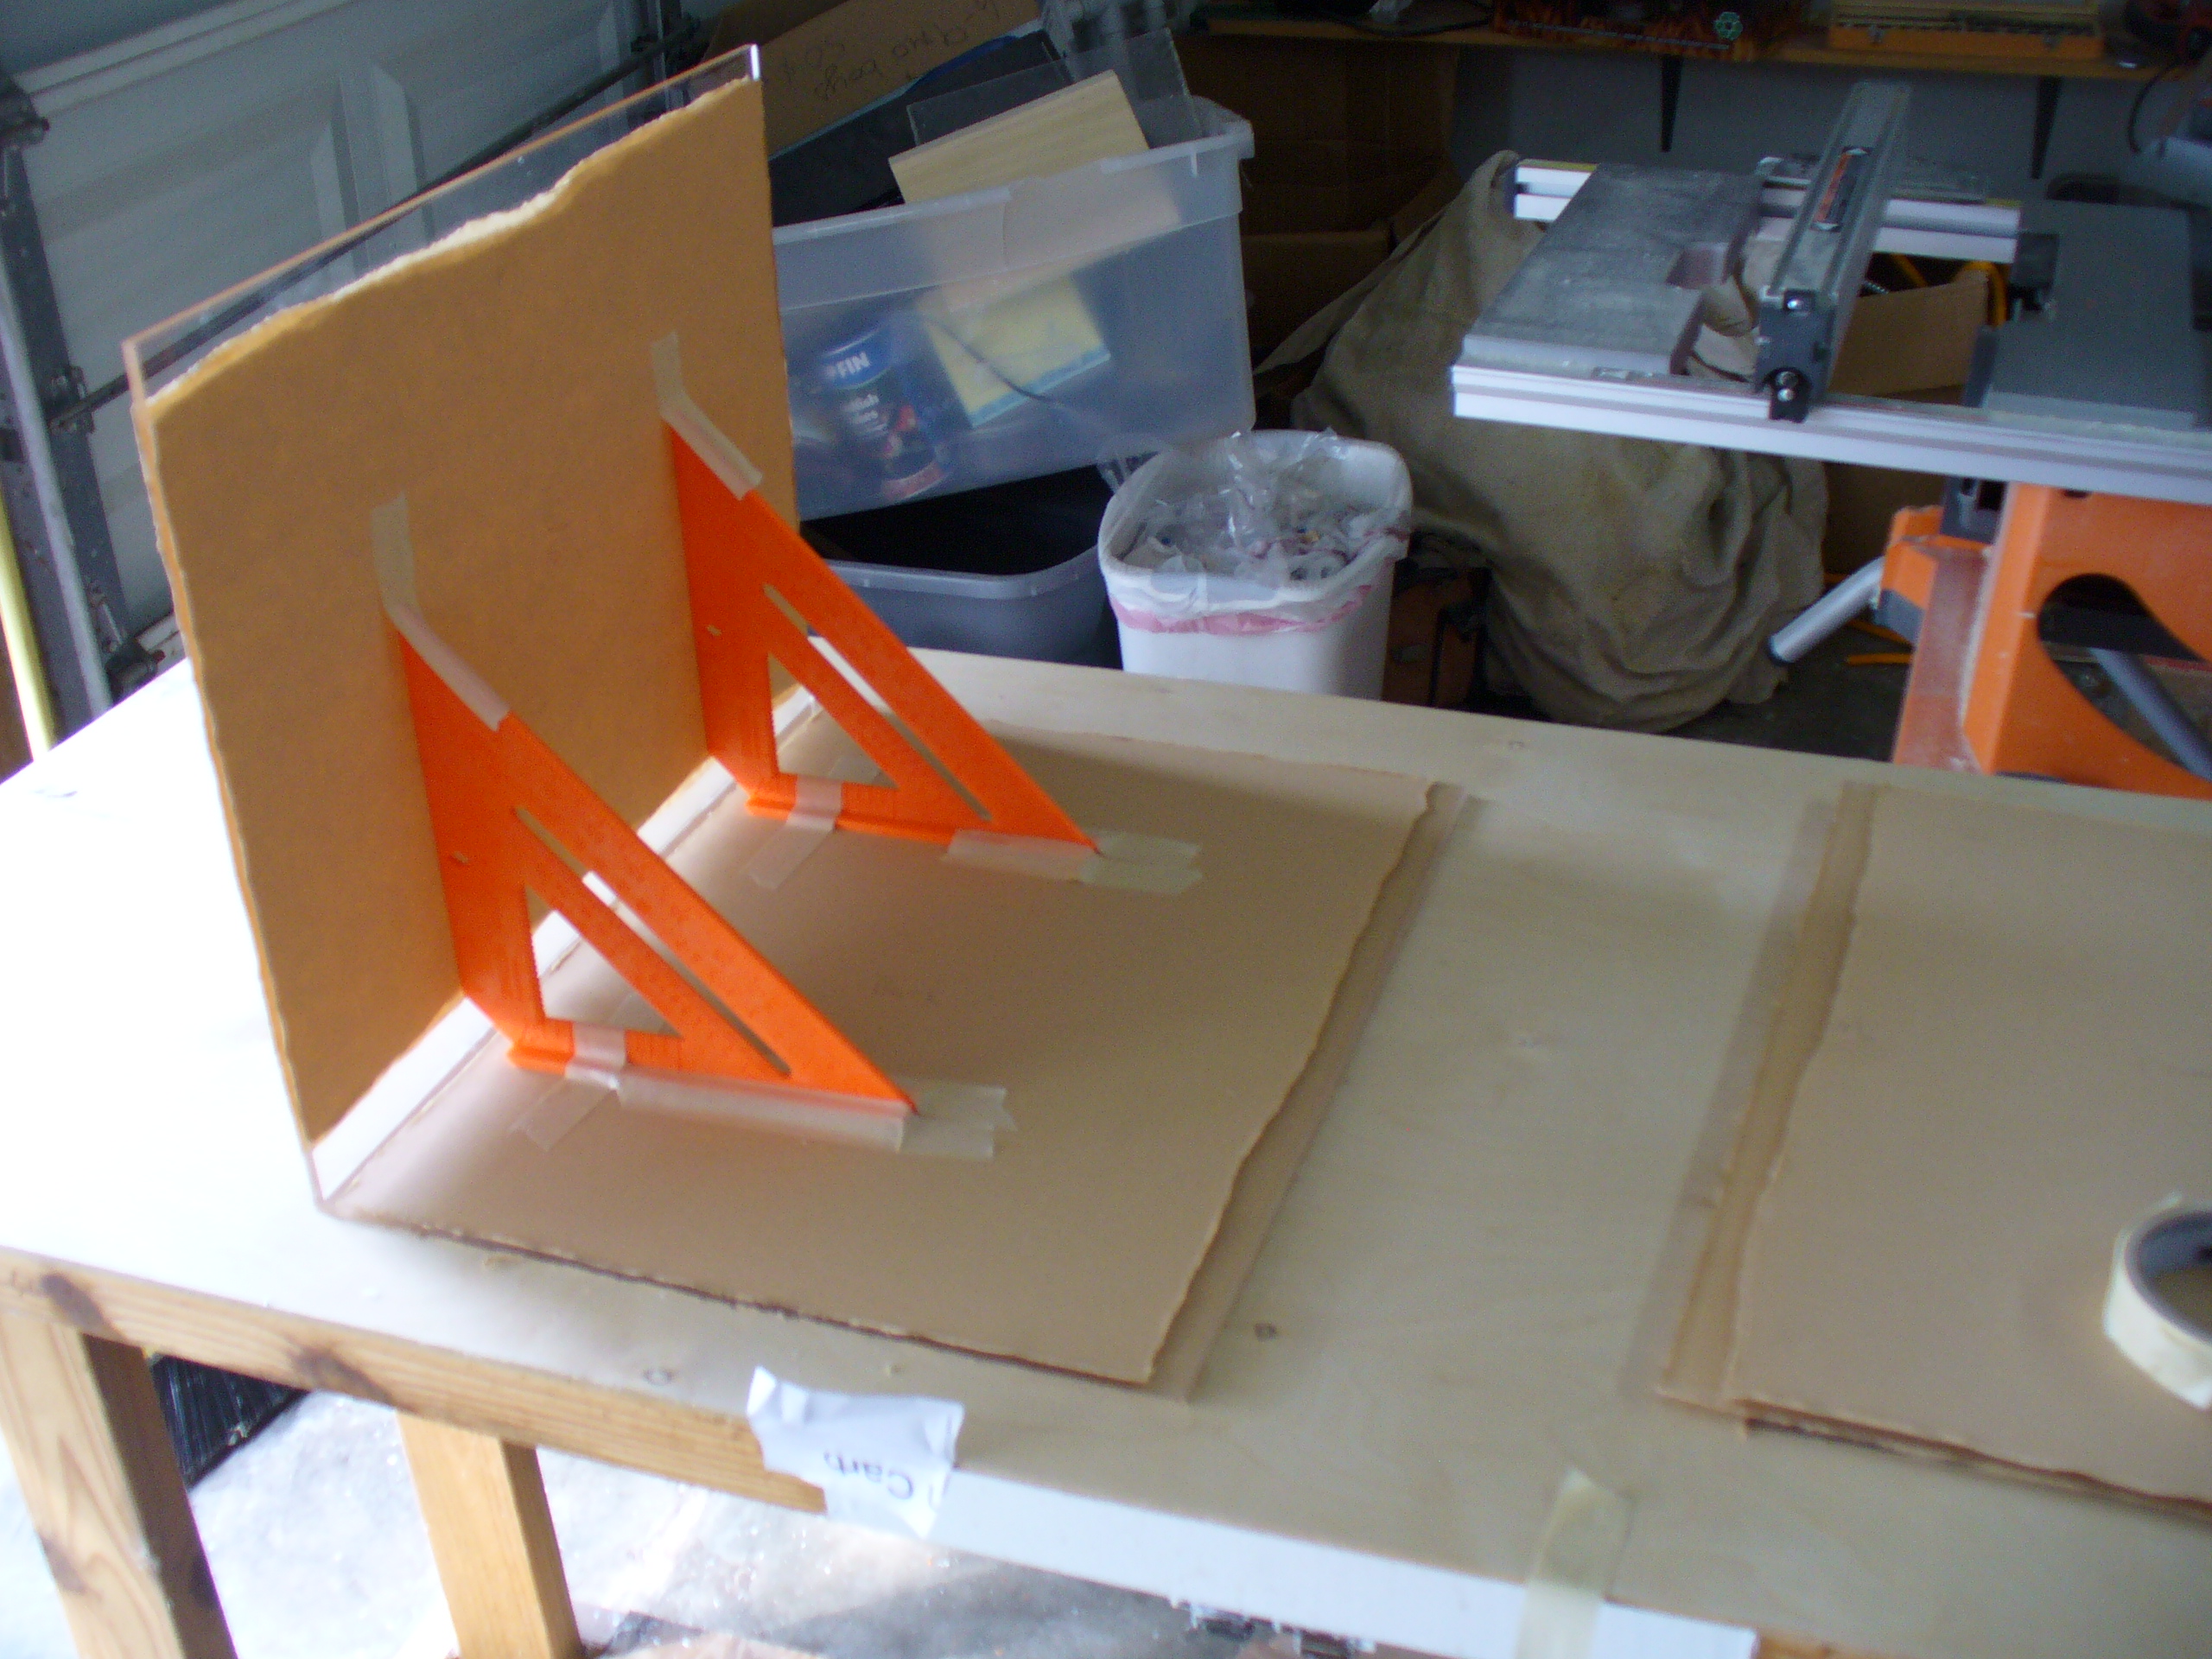
Cut pieces...

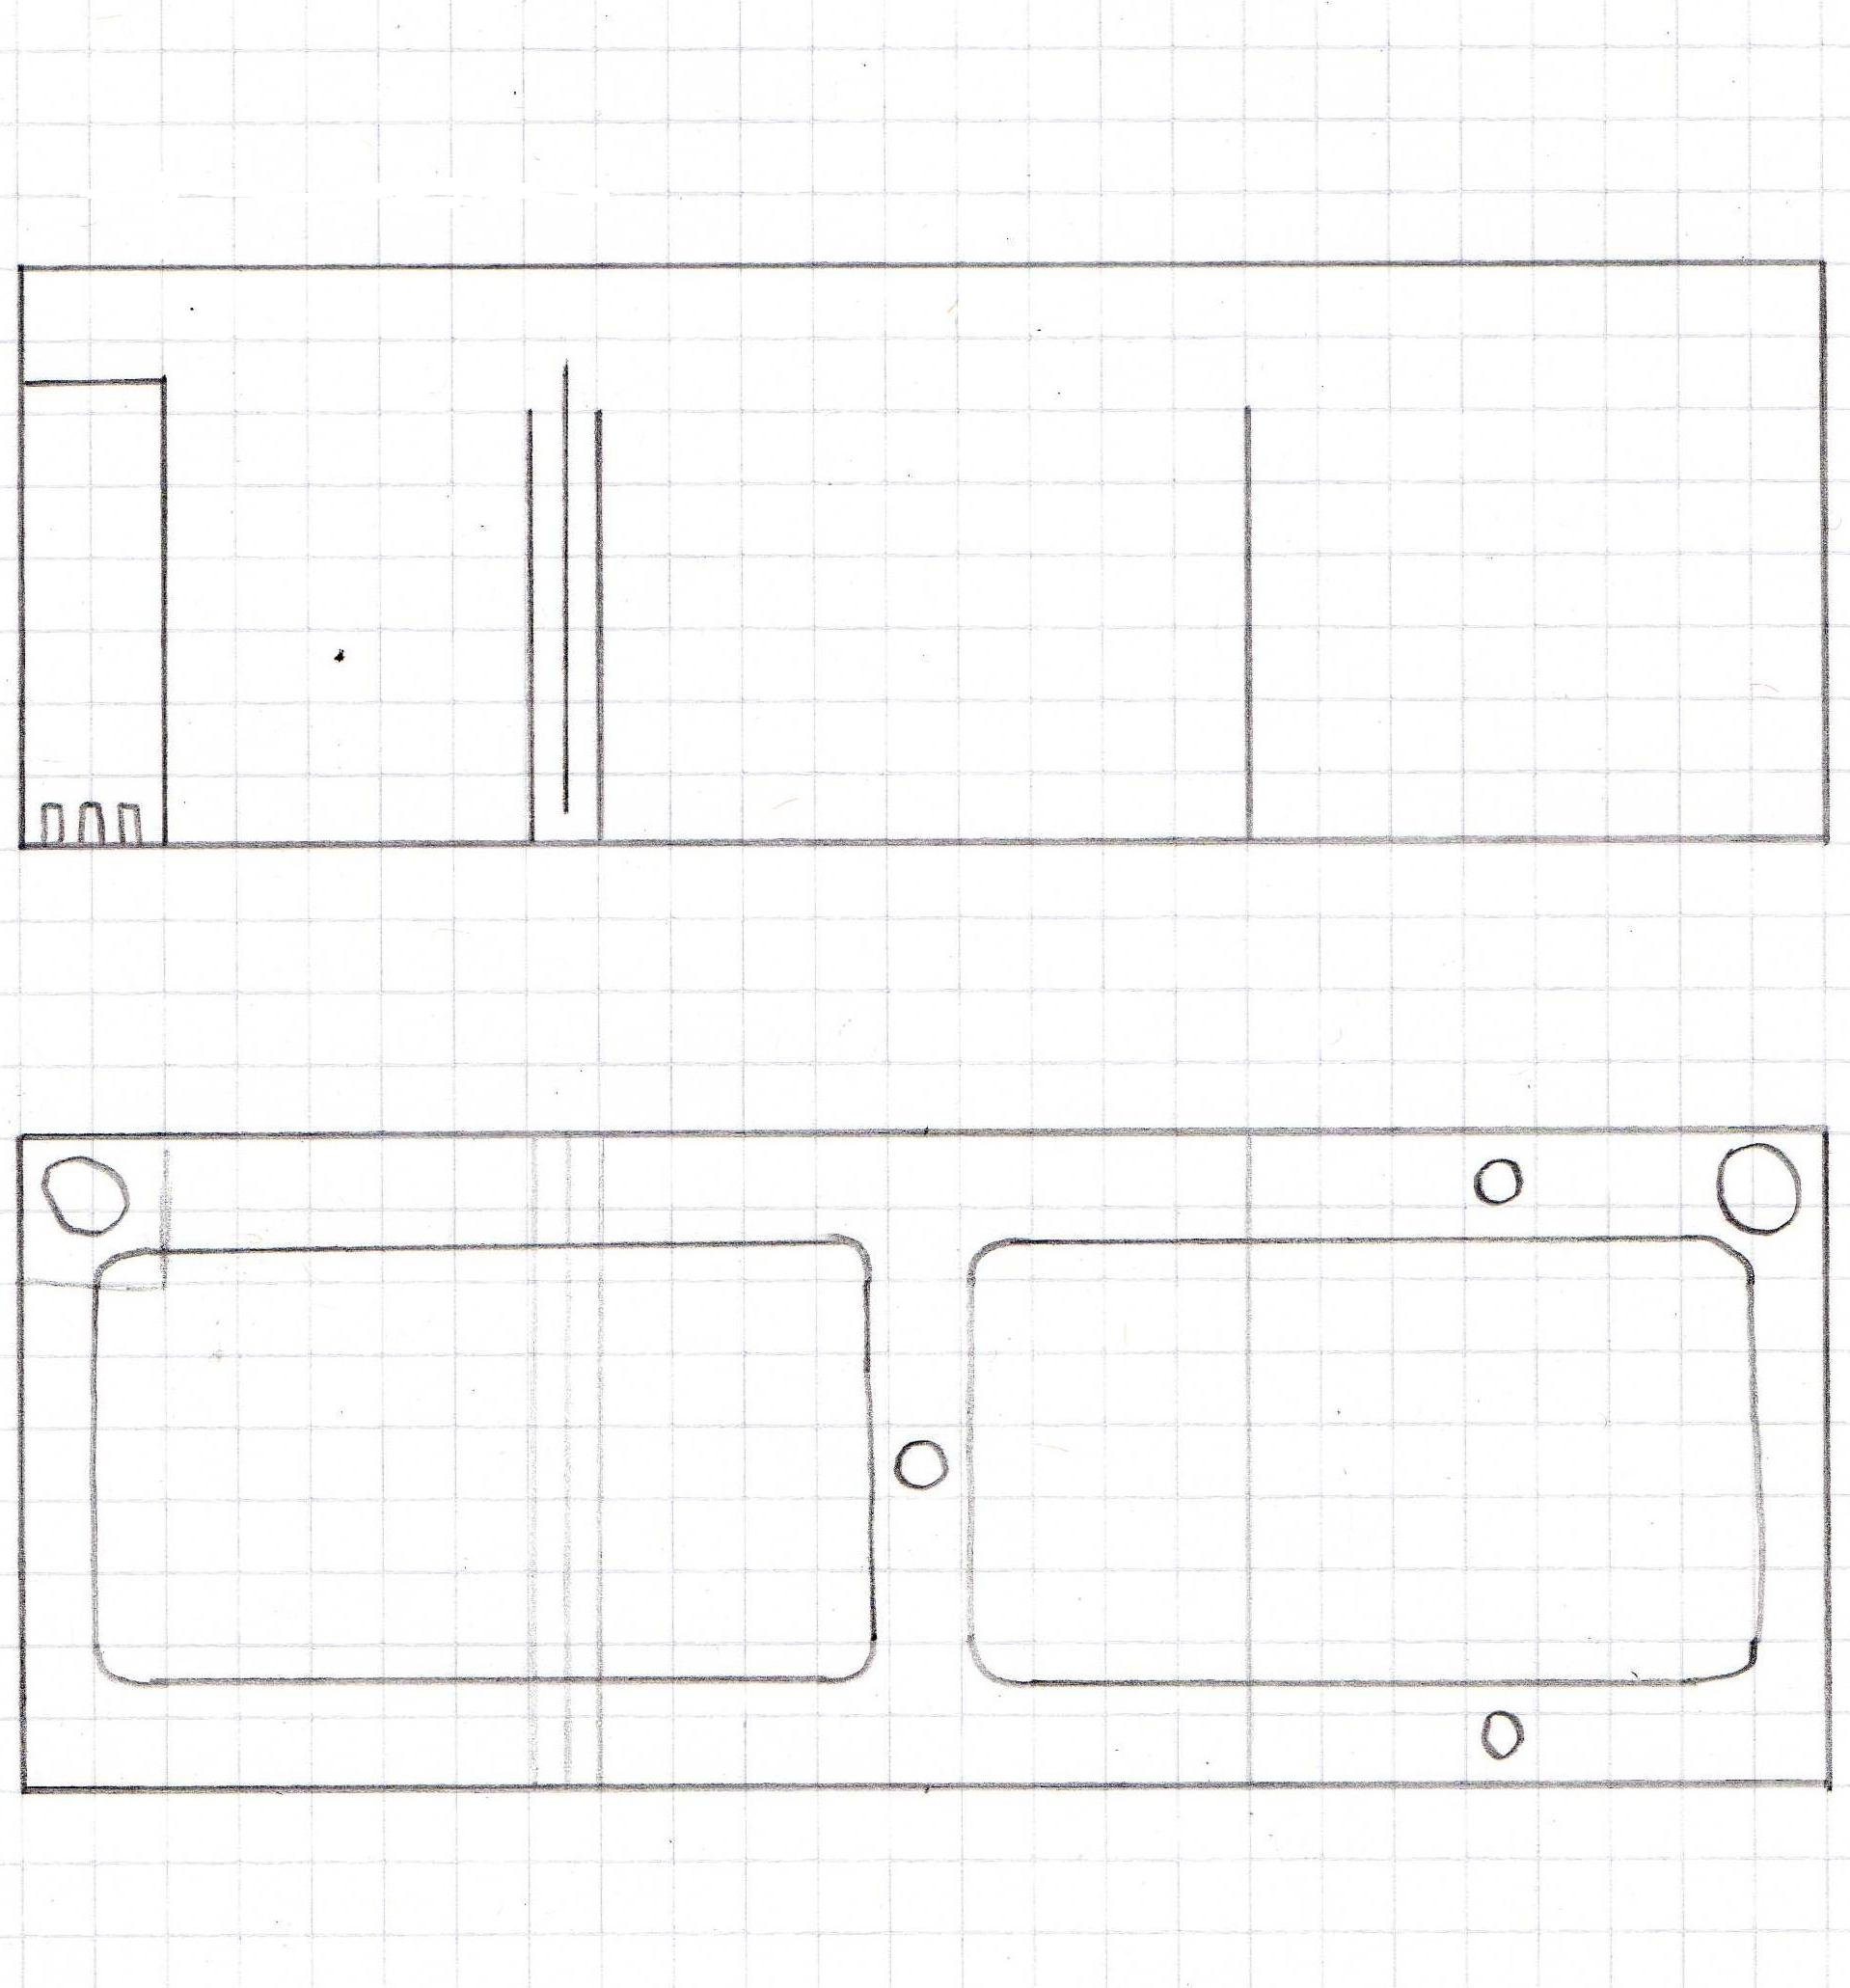
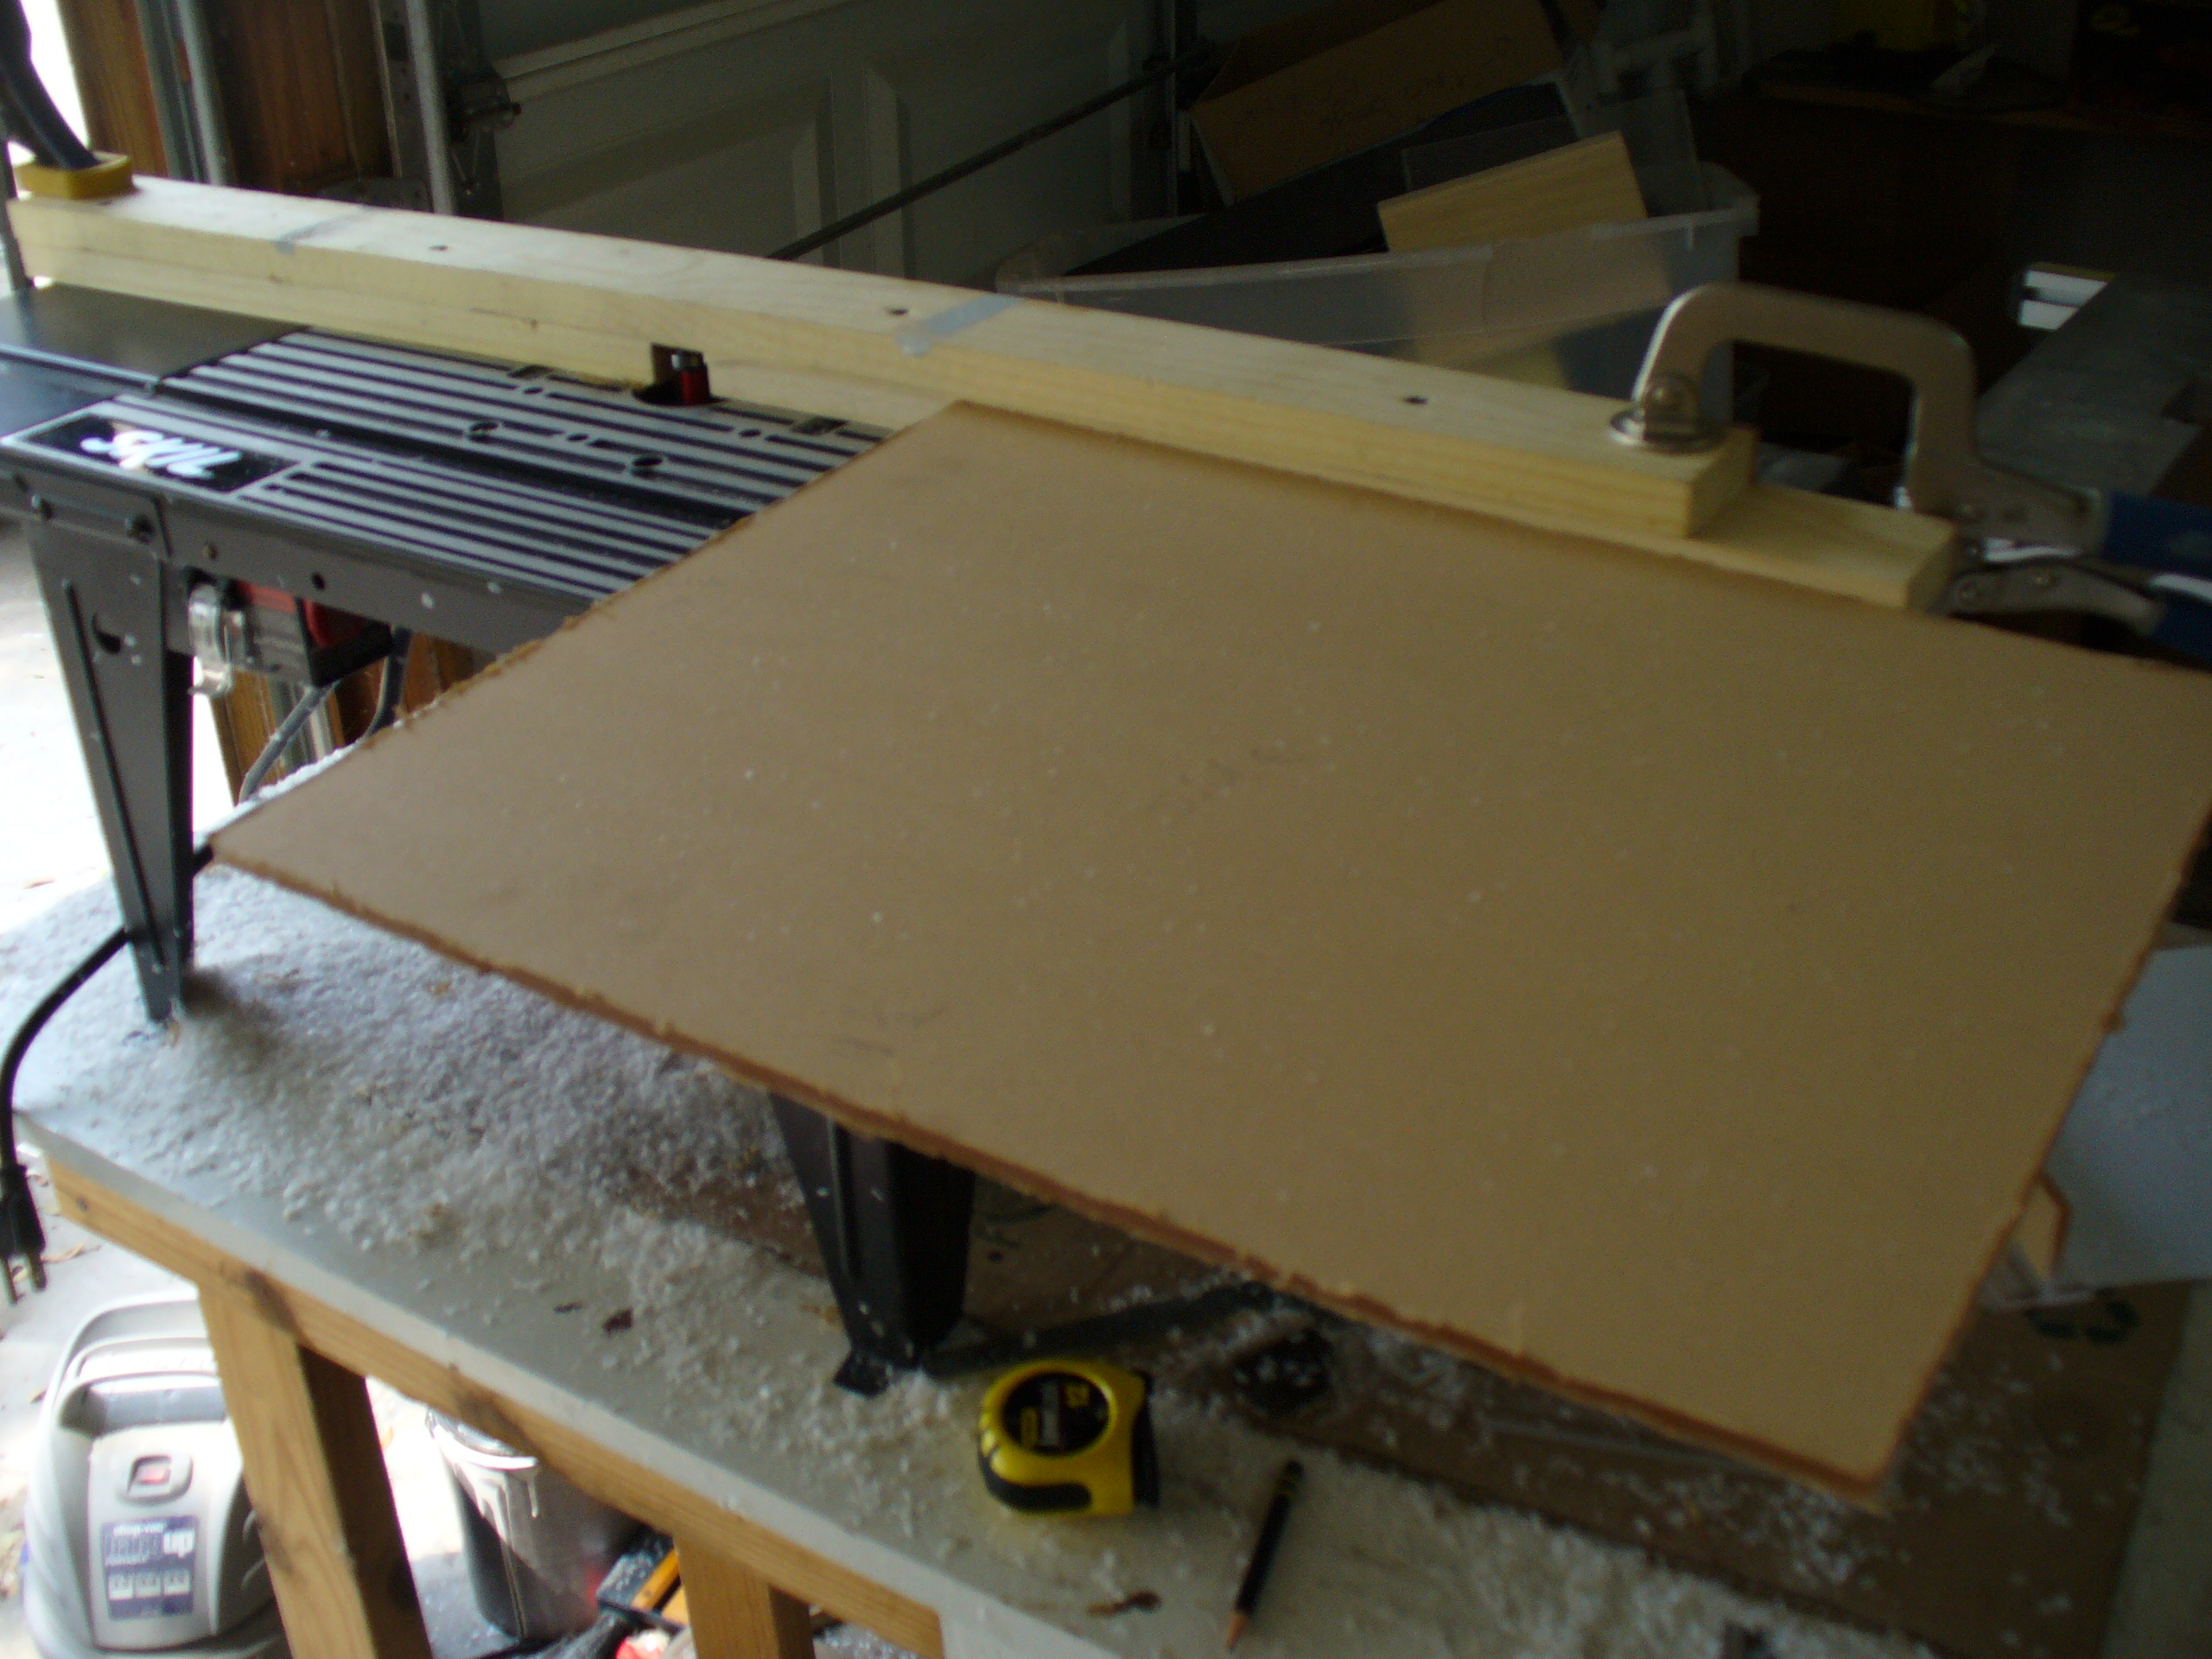
I made a jig for the router...I took approximately 1/8" off of the right side of the wood jig, essentially using my router as a joiner to clean up the edges. It took a little bit of tweaking with a couple of scrap pieces but it ended up working out great.

First joint coming together...

I did all 4 sides first and then set the whole thing on top of the bottom piece, welded all the way around the bottom then set a piece on top of the tank and added some weight.

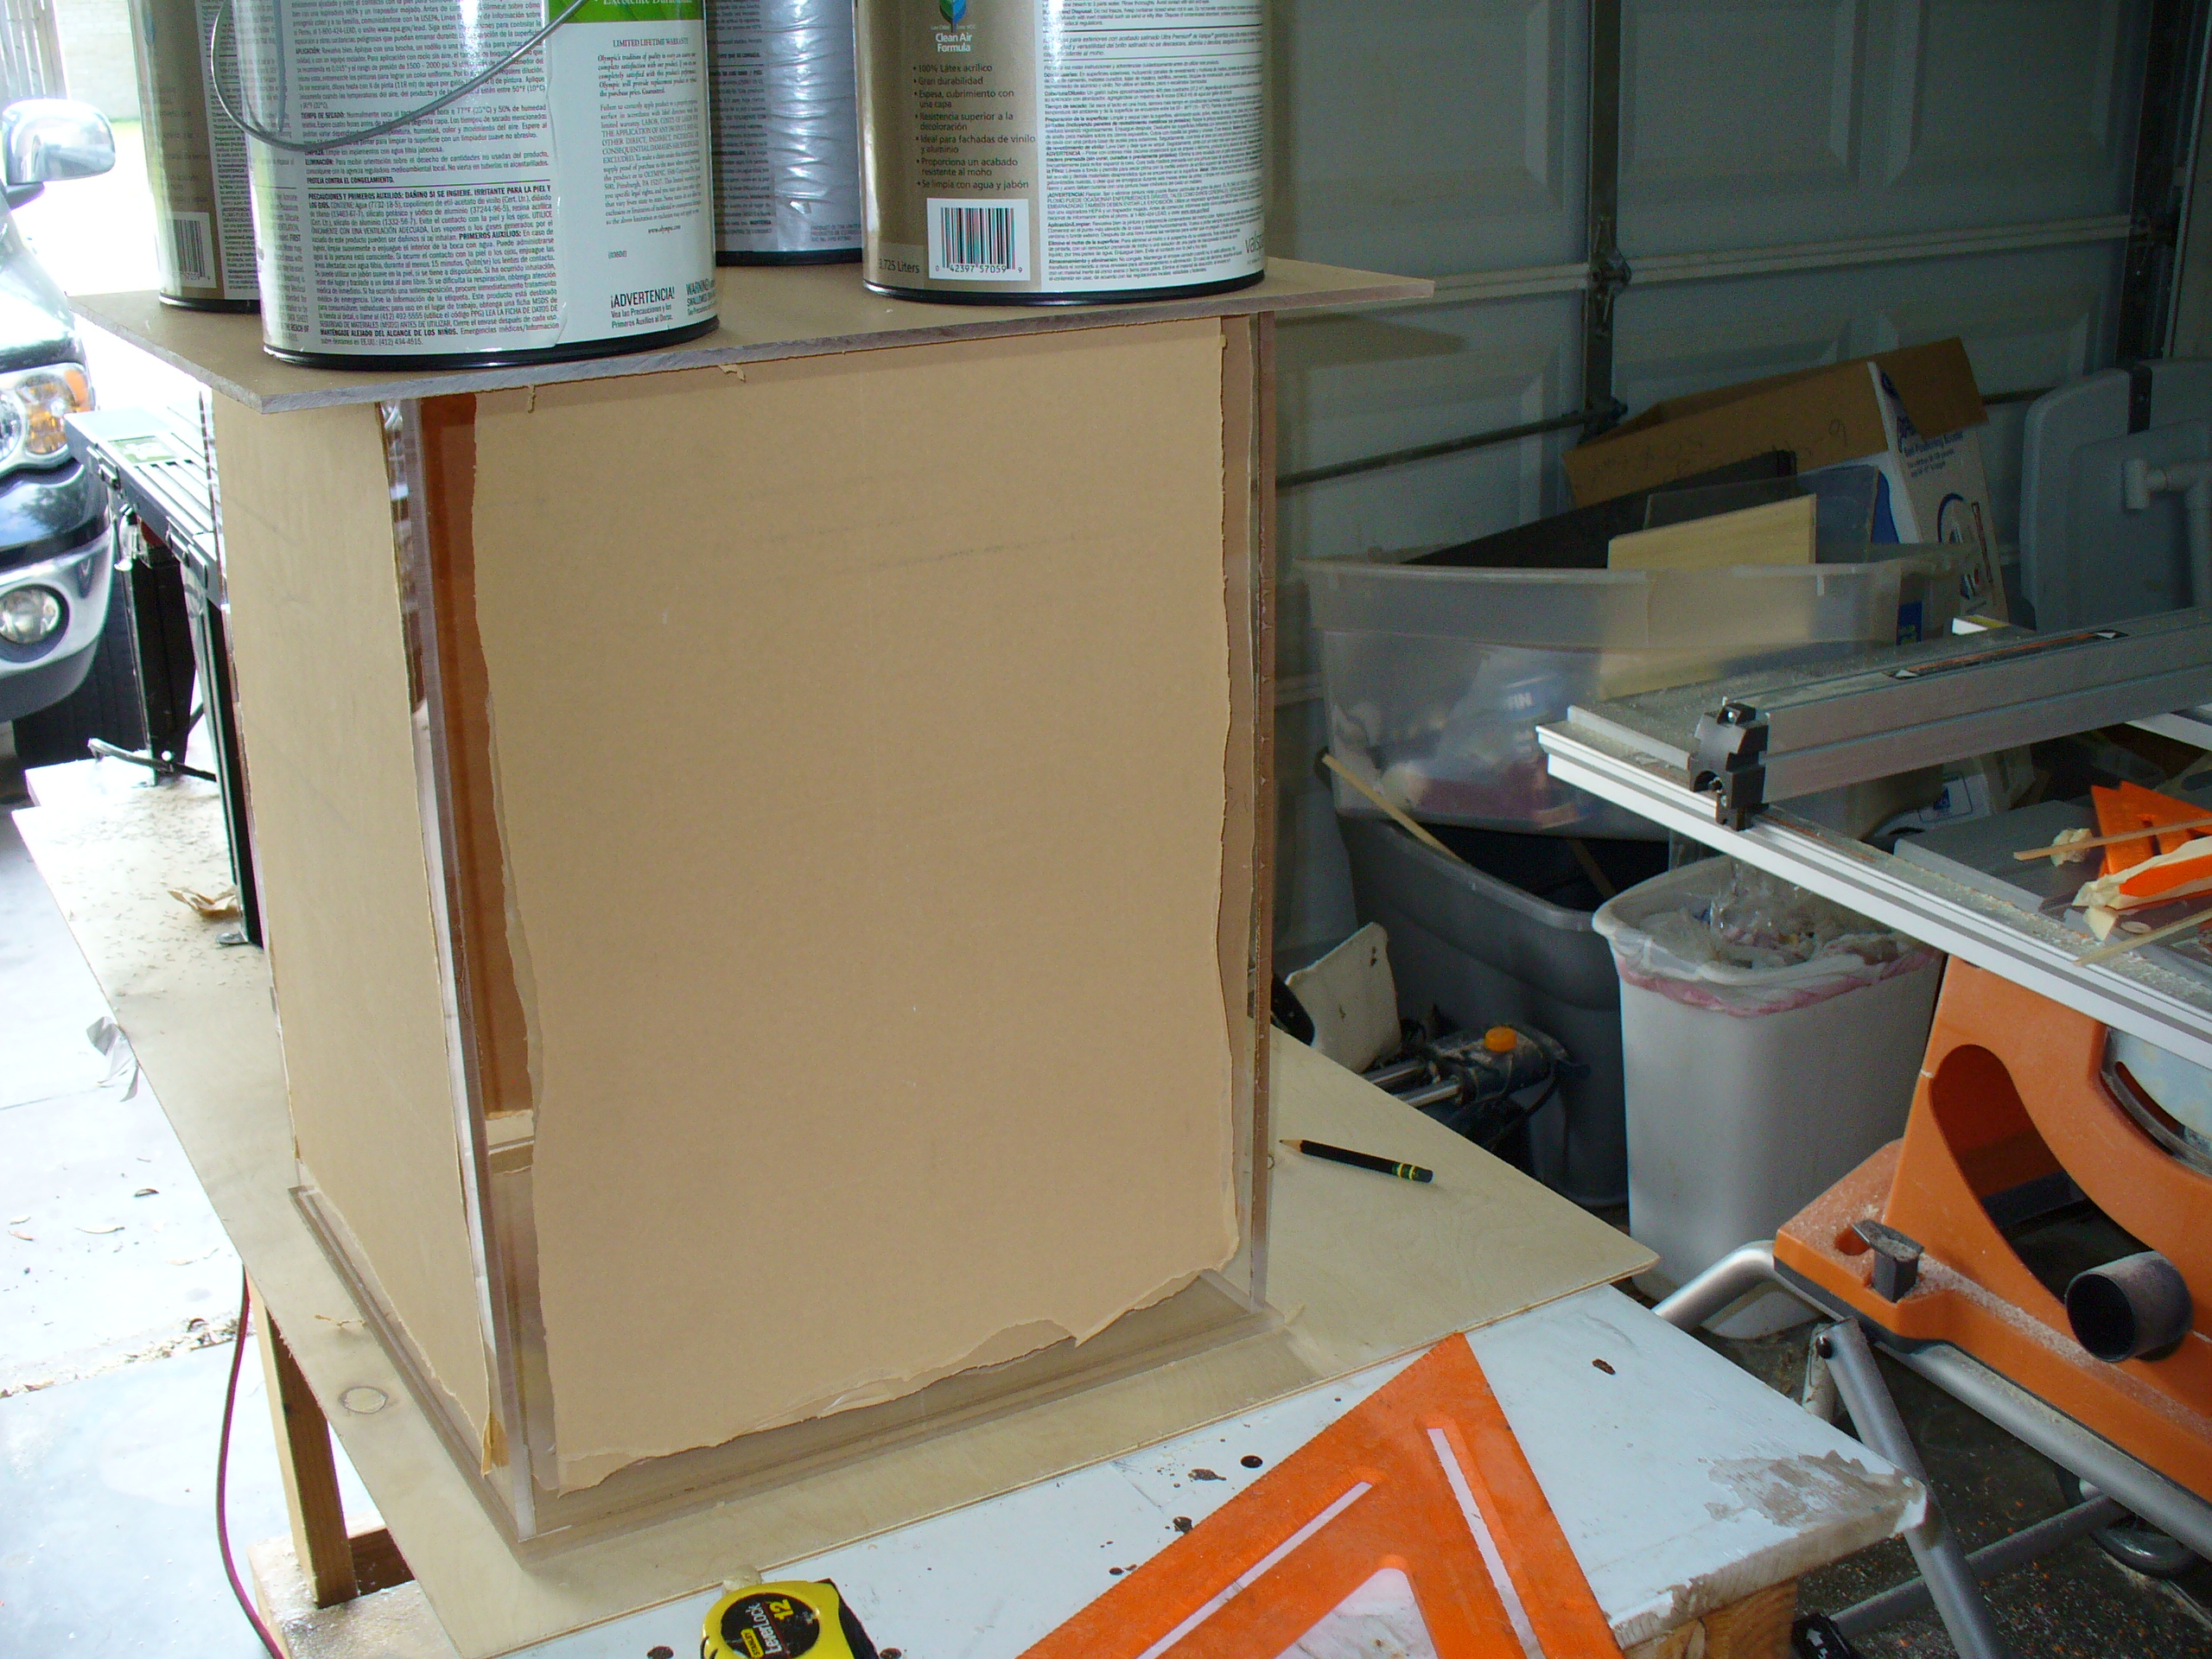
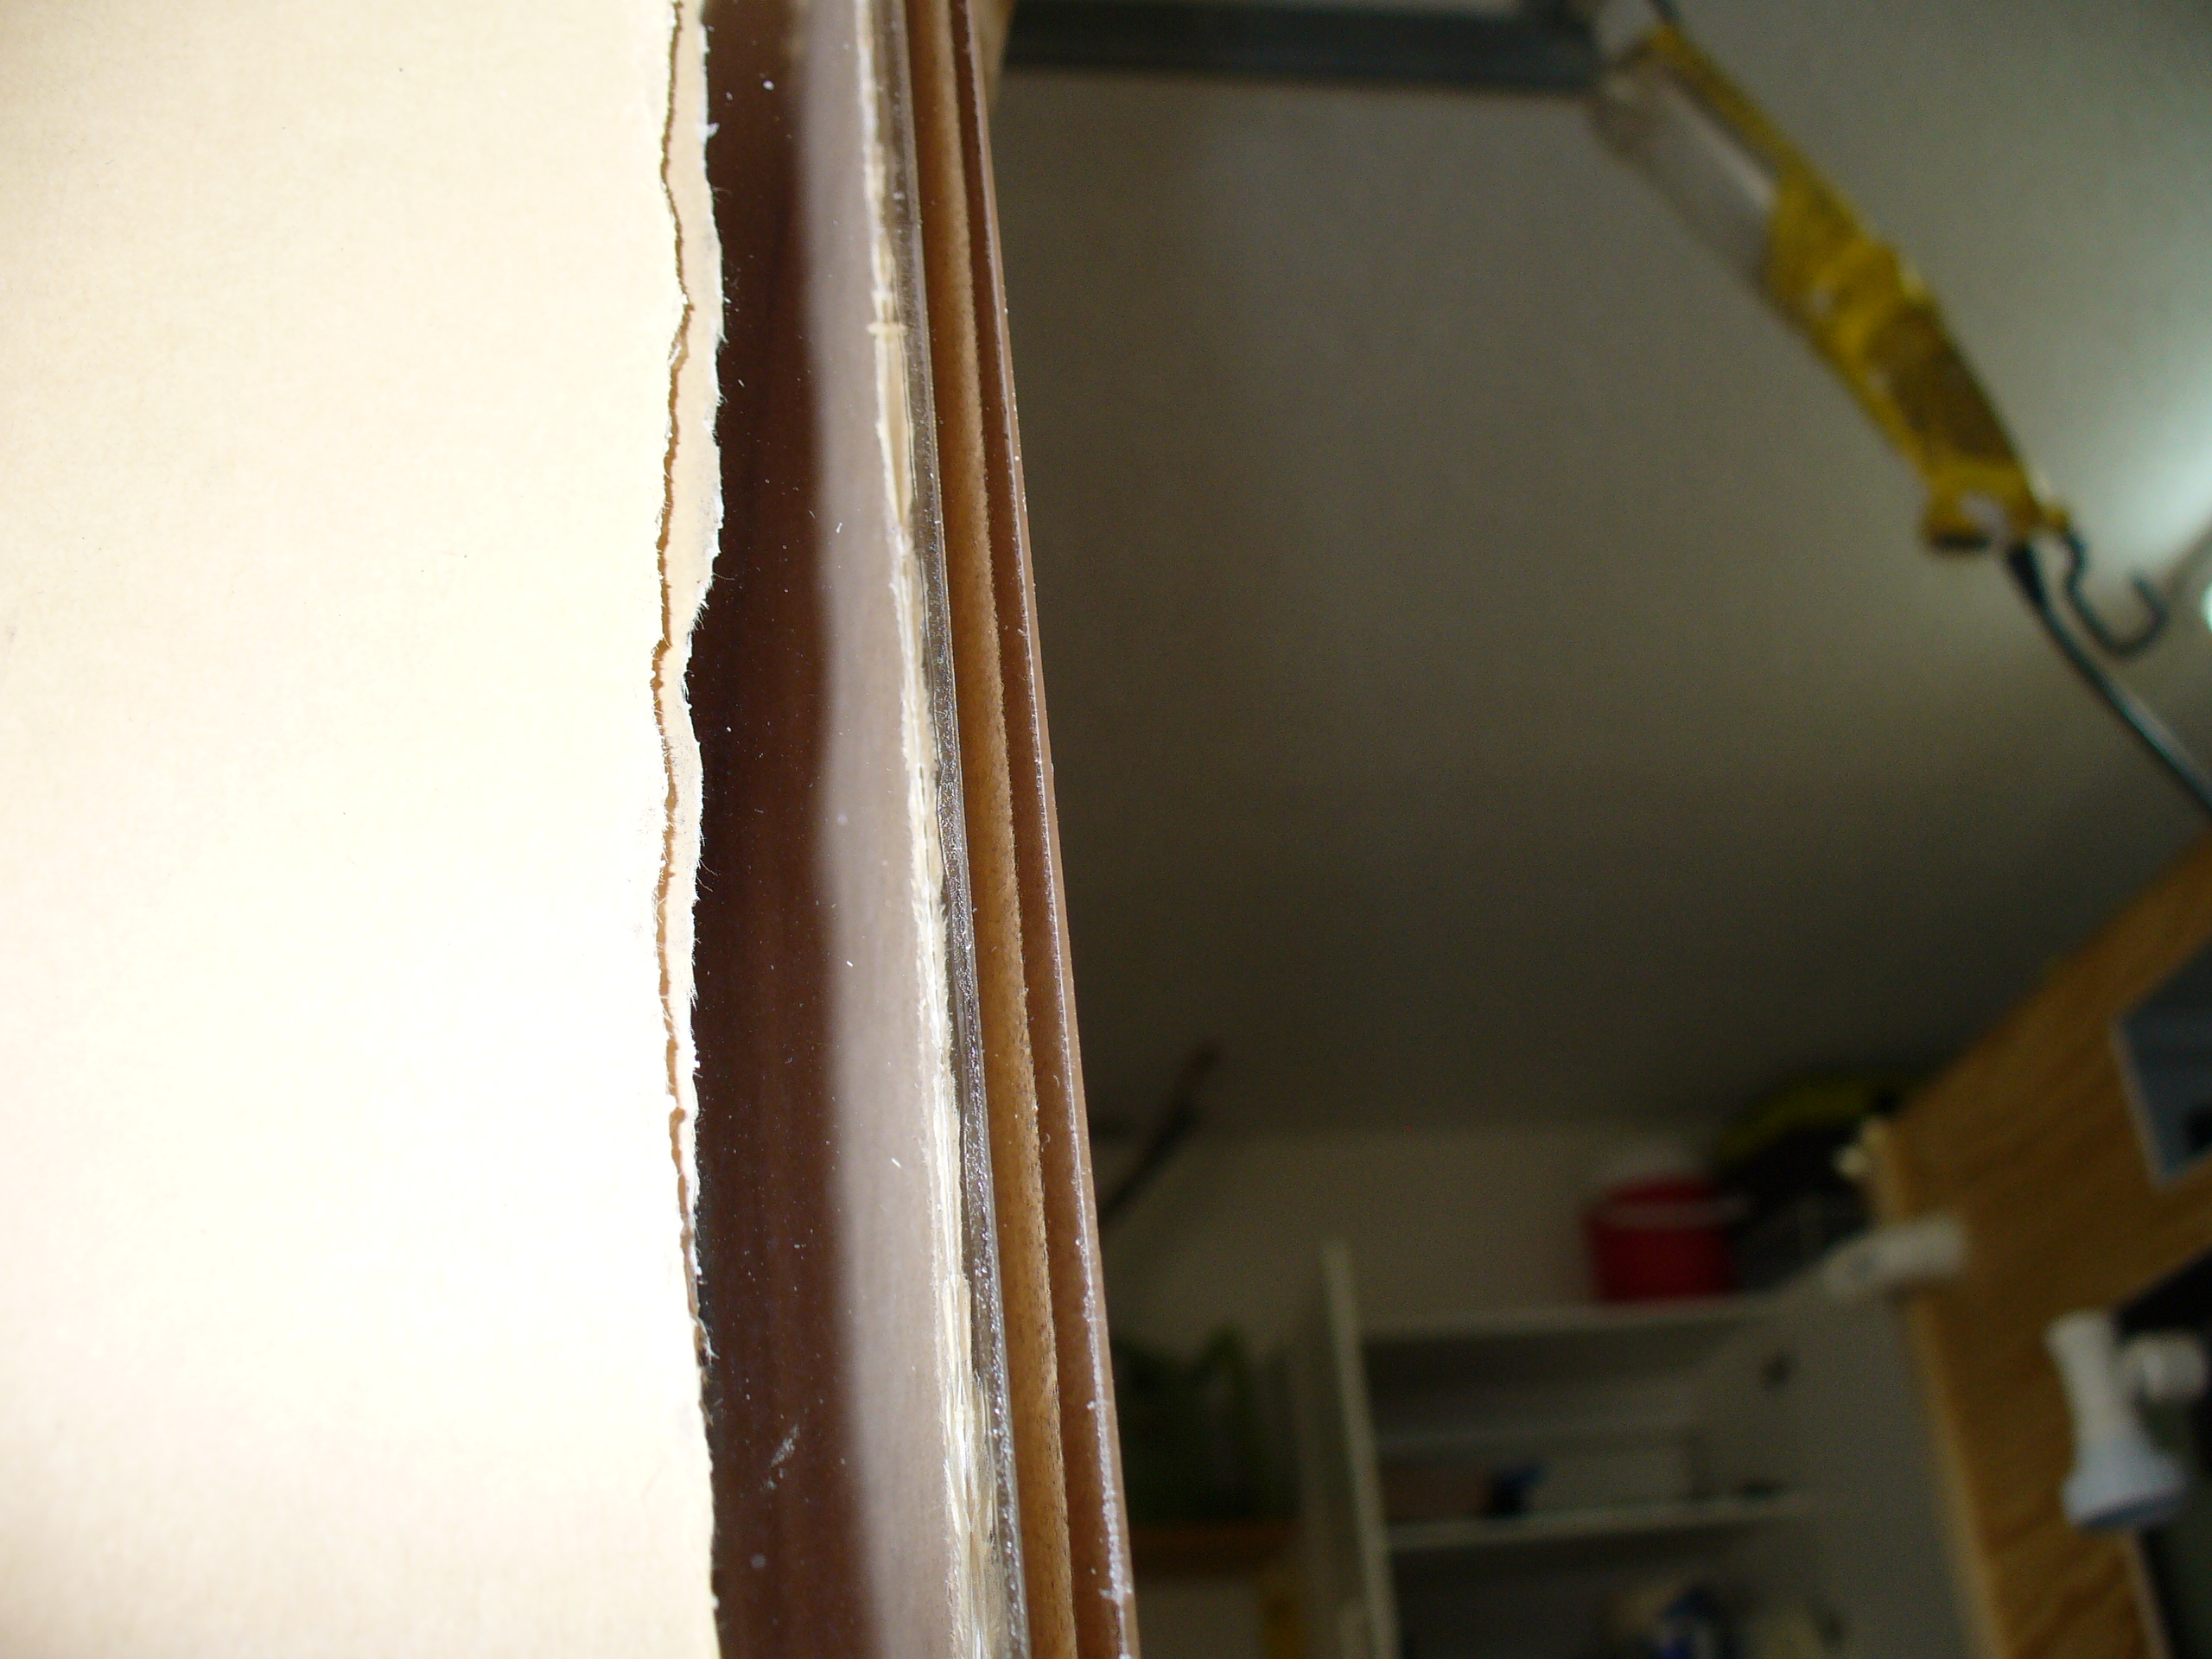
The joints came out pretty clean, not perfect, but I think it will hold (fingers crossed).


>
Stay tuned for the results of the leak testing...coming soon.
Corey again everything looks good!!!!!!

Just a couple tips.....Don't use weight on the project when gluing. In our rational thinking we would assume we would want that but you really don't need any downward pressure on the glue joints.
Setup looks fantastic!!!!!! Like the idea on the router table....That use to be my issue with shaving a tic off the acrylic to clean up the edge....Still contemplating that fancy dancy freud fence setup with micro adjustments.....An easy trick to hold your squares in place is double sided tape....I read about it for years and finally broke down and bought some and after using it can't understand what took me so long......
I did read the height spec on the ATO and 18" is pushing it, but maybe a wider euro bracing could have solved the issue.....I don't think it's going to burst, might bow more as time goes on and as it absorbs.
 

al&burke

Active Member
Hey Corey if you are worried about the bowing - you could glue a baffle in the middle if the tank, it is only top off water so it won't really affect anything. Glue like a three inch verticle piece. Do you have any cutoffs that were cut with the tank they would fit perfectly.
 

acrylic51

Active Member
Quote:
Originally Posted by 2Quills http:///forum/thread/378912/2quills-120g-re-build-thread/440#post_3385491
62 gallon sump. 50" x 18" x 16". It will hold 42gallons when it's running.

Yep that's a good idea Al. Is it not possible to still drill a hole in yours? Can you maybe hold some type of container under it or something to catch the shavings? Hey what do you think is a good amount of time to let the solvent cure before I leak test? I've read anywhere from 24 hours to a week. The guy down here at the local plastics shop sold me a mixed bottle of weld-on 3 and 4. 50/50 mix. He said that's the best thing to use down here with our temps and humidity.
Hey love the plans Corey......I know the far left is the intake side, I'm assuming the middle section is the return section and fuge on the right?
Make sure when you do your euro bracing you go extra wide in the area where your going to drill the euro bracing to accept your drain pipe to the sump....
 

al&burke

Active Member
Hey Corey did I ever finish that drawing for you, I am going to have a lot of spare time in the evening coming up, let me know.
 

2quills

Well-Known Member
Quote:
Originally Posted by acrylic51 http:///forum/thread/378912/2quills-120g-re-build-thread/460#post_3385810
Corey again everything looks good!!!!!!

Just a couple tips.....Don't use weight on the project when gluing. In our rational thinking we would assume we would want that but you really don't need any downward pressure on the glue joints.
Setup looks fantastic!!!!!! Like the idea on the router table....That use to be my issue with shaving a tic off the acrylic to clean up the edge....Still contemplating that fancy dancy freud fence setup with micro adjustments.....An easy trick to hold your squares in place is double sided tape....I read about it for years and finally broke down and bought some and after using it can't understand what took me so long......
I did read the height spec on the ATO and 18" is pushing it, but maybe a wider euro bracing could have solved the issue.....I don't think it's going to burst, might bow more as time goes on and as it absorbs.
Those are some good tips Shawn. The whole downward pressure thing I'm seeing more and more in practicing with the joints, it just doesn't seem needed. The router jig actually worked remarkably well, I just took a couple of scrap pieces and made a few passes until I had the difference in the fence and the bit perfect and voila. Saved myself $250 on a new joiner. The guy up at the local plastics shop is selling one of his old delta joiners. The thing is a beast but it works and he's only asking $200 for it. Needs a new blade though.
Quote:
Originally Posted by Al&Burke http:///forum/thread/378912/2quills-120g-re-build-thread/460#post_3385811
Hey Corey if you are worried about the bowing - you could glue a baffle in the middle if the tank, it is only top off water so it won't really affect anything. Glue like a three inch verticle piece. Do you have any cutoffs that were cut with the tank they would fit perfectly.
That's a good idea Al. I picked up a 4'x4' sheet and have plenty of scrap pieces left. I could add some cross pieces or a baffle. I just might do that for piece of mind. Good thinking.
Quote:
Originally Posted by acrylic51
http:///forum/thread/378912/2quills-120g-re-build-thread/460#post_3385812
Hey love the plans Corey......I know the far left is the intake side, I'm assuming the middle section is the return section and fuge on the right?
r />
Make sure when you do your euro bracing you go extra wide in the area where your going to drill the euro bracing to accept your drain pipe to the sump....
Correct Shawn, it's the typical F design basically. The holes in the back corners are for the split intakes, the one in the center brace will have the return line pass through it. The two small holes on the fuge side will have the turf scrubber build into the sump. Bulkhead on each side...one will be caped off on the bottom and the other will have the pump plumbed into it with two vertical pipes that rise on each side and a spray bar running across connecting them with two unions for easy removal of the bar for cleaning. I am going to go fairly wide/thick on the euro brace because of that fact. I might actually square off the brace in the two back corners to kind of contour the bubble tower so to speak.
Quote:
Originally Posted by Al&Burke http:///forum/thread/378912/2quills-120g-re-build-thread/460#post_3385813
Hey Corey did I ever finish that drawing for you, I am going to have a lot of spare time in the evening coming up, let me know.
Al I'm not sure I ever sent you a finalized sketch yet, I've still be tweaking it but I think that's pretty much the design that I'm going with now. I'll throw in the final dimensions and baffle heights and send it off to ya. You know I love those drawings.
 

acrylic51

Active Member
Cool setup.....I'm actually building the model "J" with small variations.....Did you decide on a skimmer yet? Honestly I wouldn't go any taller than 10" on my baffle used to set the water height for the skimmer.....Teeth on the fuge 1"-1 1/4" tops.....
 

acrylic51

Active Member
Quote:
Originally Posted by 1Snapple http:///forum/thread/378912/2quills-120g-re-build-thread/460#post_3385751
I swear, as soon as corey and shawn enter a thread together it gains 10 posts in an hour.

I too would like to see the plans, and a link to that thread would help too.
https://forums.saltwaterfish.com/forum/thread/385231/at-a-loss/20#post_3377676
This was a thread I started for my friend Jerry and I'll be posting pics at some point of the sump here Josh......Hopefully I'll meet the deadline of having it complete by Friday to install the thing over the weekend......I'm going to take lots of pics of his setup during the install. He actually has a pretty cool plumbing setup, and a nifty way of how he does his water changes......
 

1snapple

Active Member
LOL!!! and Corey, with the acrylic bowing on your ATO It shouldn't break, the joints are actually stronger than the acrylic by its self, when you "glue" acrylic together your actually fusing the 2 pieces into 1 peice and making that joint stronger than the sides.
Also corey, there is a local guy by me who just started his own buisness and he makes handmade sumps, skimmers, and tanks. What he does is make custom cone skimmers and recreations on
different companies skimmers. check out his website www.Elite-Aquatics.net
 

2quills

Well-Known Member
Quote:
Originally Posted by 1Snapple http:///forum/thread/378912/2quills-120g-re-build-thread/460#post_3385839
LOL!!! and Corey, with the acrylic bowing on your ATO It shouldn't break, the joints are actually stronger than the acrylic by its self, when you "glue" acrylic together your actually fusing the 2 pieces into 1 peice and making that joint stronger than the sides.
Also corey, there is a local guy by me who just started his own buisness and he makes handmade sumps, skimmers, and tanks. What he does is make custom cone skimmers and recreations on
different companies skimmers. check out his website www.Elite-Aquatics.net
Cool, I'll check it out. I understand that a "properly" glued joint is supposed to be stronger. But that's only if it's proper lol. I've heard stories of acrylic tanks blowing out. And I'm like a nervous new daddy, I don't want anything to happen to my baby.
 

acrylic51

Active Member
I'm with Josh on that 1 Corey......Your joints are good!!!!!!
Josh I did briefly check out the site you had mentioned...........He's local to you?? How close?
 

2quills

Well-Known Member
Yeah it seems to be holding pretty good. I think it's just the thinner material flexing a little bit more than what i was expecting to see but it doesn't seem to be getting worse or anything. Joints aren't showing any signs of stress that I can tell. Probably just me over worrying.
Josh, that guy has the same idea I'm going to use for my intake lines going into the sump. We'll I'm sure I'm probably not the first to think about it. Al is working on my finalized sketches of the sump. The euro bracing in the corners is going to look similar to the couple of sumps that I seen on that site. I am hoping the sump project turns out really good. If it does then I've talked to some of the guys at the lfs, Might have some people interesting in having some sumps made. There used to be a guy down here locally that did custom sumps but nobody has heard from him in a while. Possible business op?
 
Top