415 Gallon Plywood Tank Build

2quills

Well-Known Member
Yep, that's what I've always done...works like a charm. Just keep a bowl of water handy because I've noticed the poplar will dry out the rag quick. What I did was just whiped the skinn down really good with the rag then let it sit for a minute. You'll feel the grain raise almost immediately. You'll have quite a few minutes to sand an area before it starts to shrink up again...if it does just whipe it down again.
 

posiden

Active Member
That's looking good. Nice work. What are you using for a miter saw?
 
 
What about just routing a relief on the back side of the door panel? It would appear untouched and give a nice finger hold to start the struts off.
 

acrylic51

Active Member
Quote:Originally Posted by Posiden http:///forum/thread/376802/415-gallon-plywood-tank-build/280#post_3302609
That's looking good. Nice work. What are you using for a miter saw?
 
 
What about just routing a relief on the back side of the door panel? It would appear untouched and give a nice finger hold to start the struts off.
Thanks guys !!!!!! My miter saw is the DeWalt 12" compound miter.... Nothing fancy, keep telling myself about getting the laser attachment, but haven't so far.
Posiden I had thought about using relief cuts on all the doors. I know your a more experienced wood worker what type of bit would you recommend? Also don't want to really touch the crown molding over the front panel. Any thoughts on what type of relief cut to keep the molding and the door appearance seamless as well up top?
 

posiden

Active Member
Ok, new idea. Though this will take away from your struts.
 
Make some metal bracket and secure them to the inner edge of the cutout. You can then use a forstner bit to drill relief holes to epoxy in some magnets. Then the door would just "stick" up there. You know, like the folks with the metal stands, that just stick on the skins. You might get a little trick by just having a small key hole in the front with a box behind it block the light. Like a skeleton key. Slide in your key, turn it to catch the panel and pull to break the magnets???
 
I don't know. Just thinking out loud. To be honest, I had several beers last night and I wasn't quite up to speed on you project. I see this morning much more better.LOL. I like the 45 idea that you did, but it makes any hinging a bit hard. I don't think a piano hing would work for you. Your stuck with the European hing, no?
 

acrylic51

Active Member
I think the European hinge would b easier to work with. I had thought about your idea of using magnents, and actually have a few on hand....the struts were just an idea I thought that would be neat, but since I do everything honestly from behind is there a true need?
How would you go about relieving the crown molding a bit for ease of install and removal of panel? I might have to take a closeup pic to show what I'm really getting at.
 

posiden

Active Member
 
Quote:
Originally Posted by acrylic51 http:///forum/thread/376802/415-gallon-plywood-tank-build/300#post_3302876
I think the European hinge would b easier to work with. I had thought about your idea of using magnents, and actually have a few on hand....the struts were just an idea I thought that would be neat, but since I do everything honestly from behind is there a true need?
How would you go about relieving the crown molding a bit for ease of install and removal of panel? I might have to take a closeup pic to show what I'm really getting at.
I think I know what your talking about. That molding covers the front panel along the top right?
 
I don't think I follow the idea of how the tank is going to be under the canopy facade? Is it going to be flush also? Like an in wall?
 

acrylic51

Active Member
Yes Posiden the molding covers the front panel maybe 1/4" max, but probably more like 3/16". Will have to get an exact measurement. Here are a some pics to give you an idea of how the tank will sit in relation to the room and where the canopy will be in place.


This is a pic from behind the tank in the fishroom.
 

acrylic51

Active Member
Curious!!!! Is there a way to go to our albums, and actually pull pics from there instead of browsing our computers for the images?
 

acrylic51

Active Member
A little more of an update not much.....Was toying with the area where the speaker is mounted in the canopy area, and started working on ideas to cover it....Here is what I've toyed with or played with so far!!!!!

This is just the frame to fit the cutout in the canopy....Sorry for the sloppy glue work, but just tinkering around!!!!!

Had some free time and used the neighbors scroll saw!!!!

I would have to line the back with some type of speaker cloth to block the white speaker color itself.
 
What are you guys thinking???
 

acrylic51

Active Member
I was giving it alittle thought about tying the speaker area in with the rest of the stand and canopy. With that said, I'm going to have to cover the back portion of the speaker area with some type of speaker grill cloth, so black would be in the scheme of things.....With that said, I'm thinking about all the insert or depressed areas of the stand and canopy to paint the inside portion black, and stai accordingly everywhere else. I'll post a couple pics to give you guys and idea of what I'm talking about and see what your thoughts or suggestions might be!!!!!

The inset/depressed area I am considering doing in black, and
raised insert staining to match the rest of the stand and canopy.
 
What do you guys think? Opinions? Suggestions? Ideas?????
 

2quills

Well-Known Member
I like the cover. But I think i'd have to see a mock up of the depressed areas in black to know if I would go with that on the rest of the skin. I don't think it would be so bad as to just leaving the area beind the cover black by itself. Just me.
 
I notice that you cut your miter joints off a little bit than the typical 45 degree (maybe 40 and 50), is that true or do my eyes decieve me? I think I noticed you did the same thing on your doors...any reason for this or is that just how you like to cut them?
 

2quills

Well-Known Member
Hey, I was thinking that if you wanted to go with the 2 tone look to match the cloth maybe you could just do a darker stain on those areas as apposed to painting them. Just trying to invision it but I think the paint with the stain would look a little bit, oh, I don't know...not quite right, maybe?
 
When I get home tonight I'll get you some close up shots of the Ebony stain samples that I did. It's like black but it still lets some of the grain show through depending on how many coats you do. The more I think about it, the more I think that might actually turn out to look kind of nice.
 

acrylic51

Active Member
Quote:
Originally Posted by 2Quills http:///forum/thread/376802/415-gallon-plywood-tank-build/300#post_3303630
I like the cover. But I think i'd have to see a mock up of the depressed areas in black to know if I would go with that on the rest of the skin. I don't think it would be so bad as to just leaving the area beind the cover black by itself. Just me.
 
I notice that you cut your miter joints off a little bit than the typical 45 degree (maybe 40 and 50), is that true or do my eyes decieve me? I think I noticed you did the same thing on your doors...any reason for this or is that just how you like to cut them?
Yes I had to cut them off due to some trimming and slight changes along the way......Actually I built the doors before I started framing the stand in, and when it came time to hang doors......Well some trimming had to be done or fab whole new doors again.....Easier to cut them down a bit IMHO......
 

acrylic51

Active Member
Quote:
Originally Posted by 2Quills http:///forum/thread/376802/415-gallon-plywood-tank-build/300#post_3303685
Hey, I was thinking that if you wanted to go with the 2 tone look to match the cloth maybe you could just do a darker stain on those areas as apposed to painting them. Just trying to invision it but I think the paint with the stain would look a little bit, oh, I don't know...not quite right, maybe?
 
When I get home tonight I'll get you some close up shots of the Ebony stain samples that I did. It's like black but it still lets some of the grain show through depending on how many coats you do. The more I think about it, the more I think that might actually turn out to look kind of nice.
I'd love to see a sample of the Ebony stain, and the more I thought about what you were saying I'm leaning against the dark color in the inset area.....I told you guys along time ago, that this is always the hardest/worst part of the job....You only get 1 shot at getting the color right, and you have to live with it, till the next build
.
 
Corey can you shoot me sample of the English your looking at and the Ebony as well. I saw in your sample chart something I did actually kinda like.....Even though I told you I was a little more partial to a little more red tint, but there was 1 that kind of stuck out that I might actually give it a shot on some samples myself this weekend. I did get a chance to mock the grill cover up and clamp it into place....I had to simulate speaker cloth behind it using a trash bag, so don't laugh!!!!!!! But will give some idea as to what it will look like with black behind it, and not sure what stain yet.....The canopy is all sanded down, and actually ready for stain. I'd like to get all my major sanding done on everything that way I can get the garage all cleaned up again, but I'll be staining everything inside dust free.
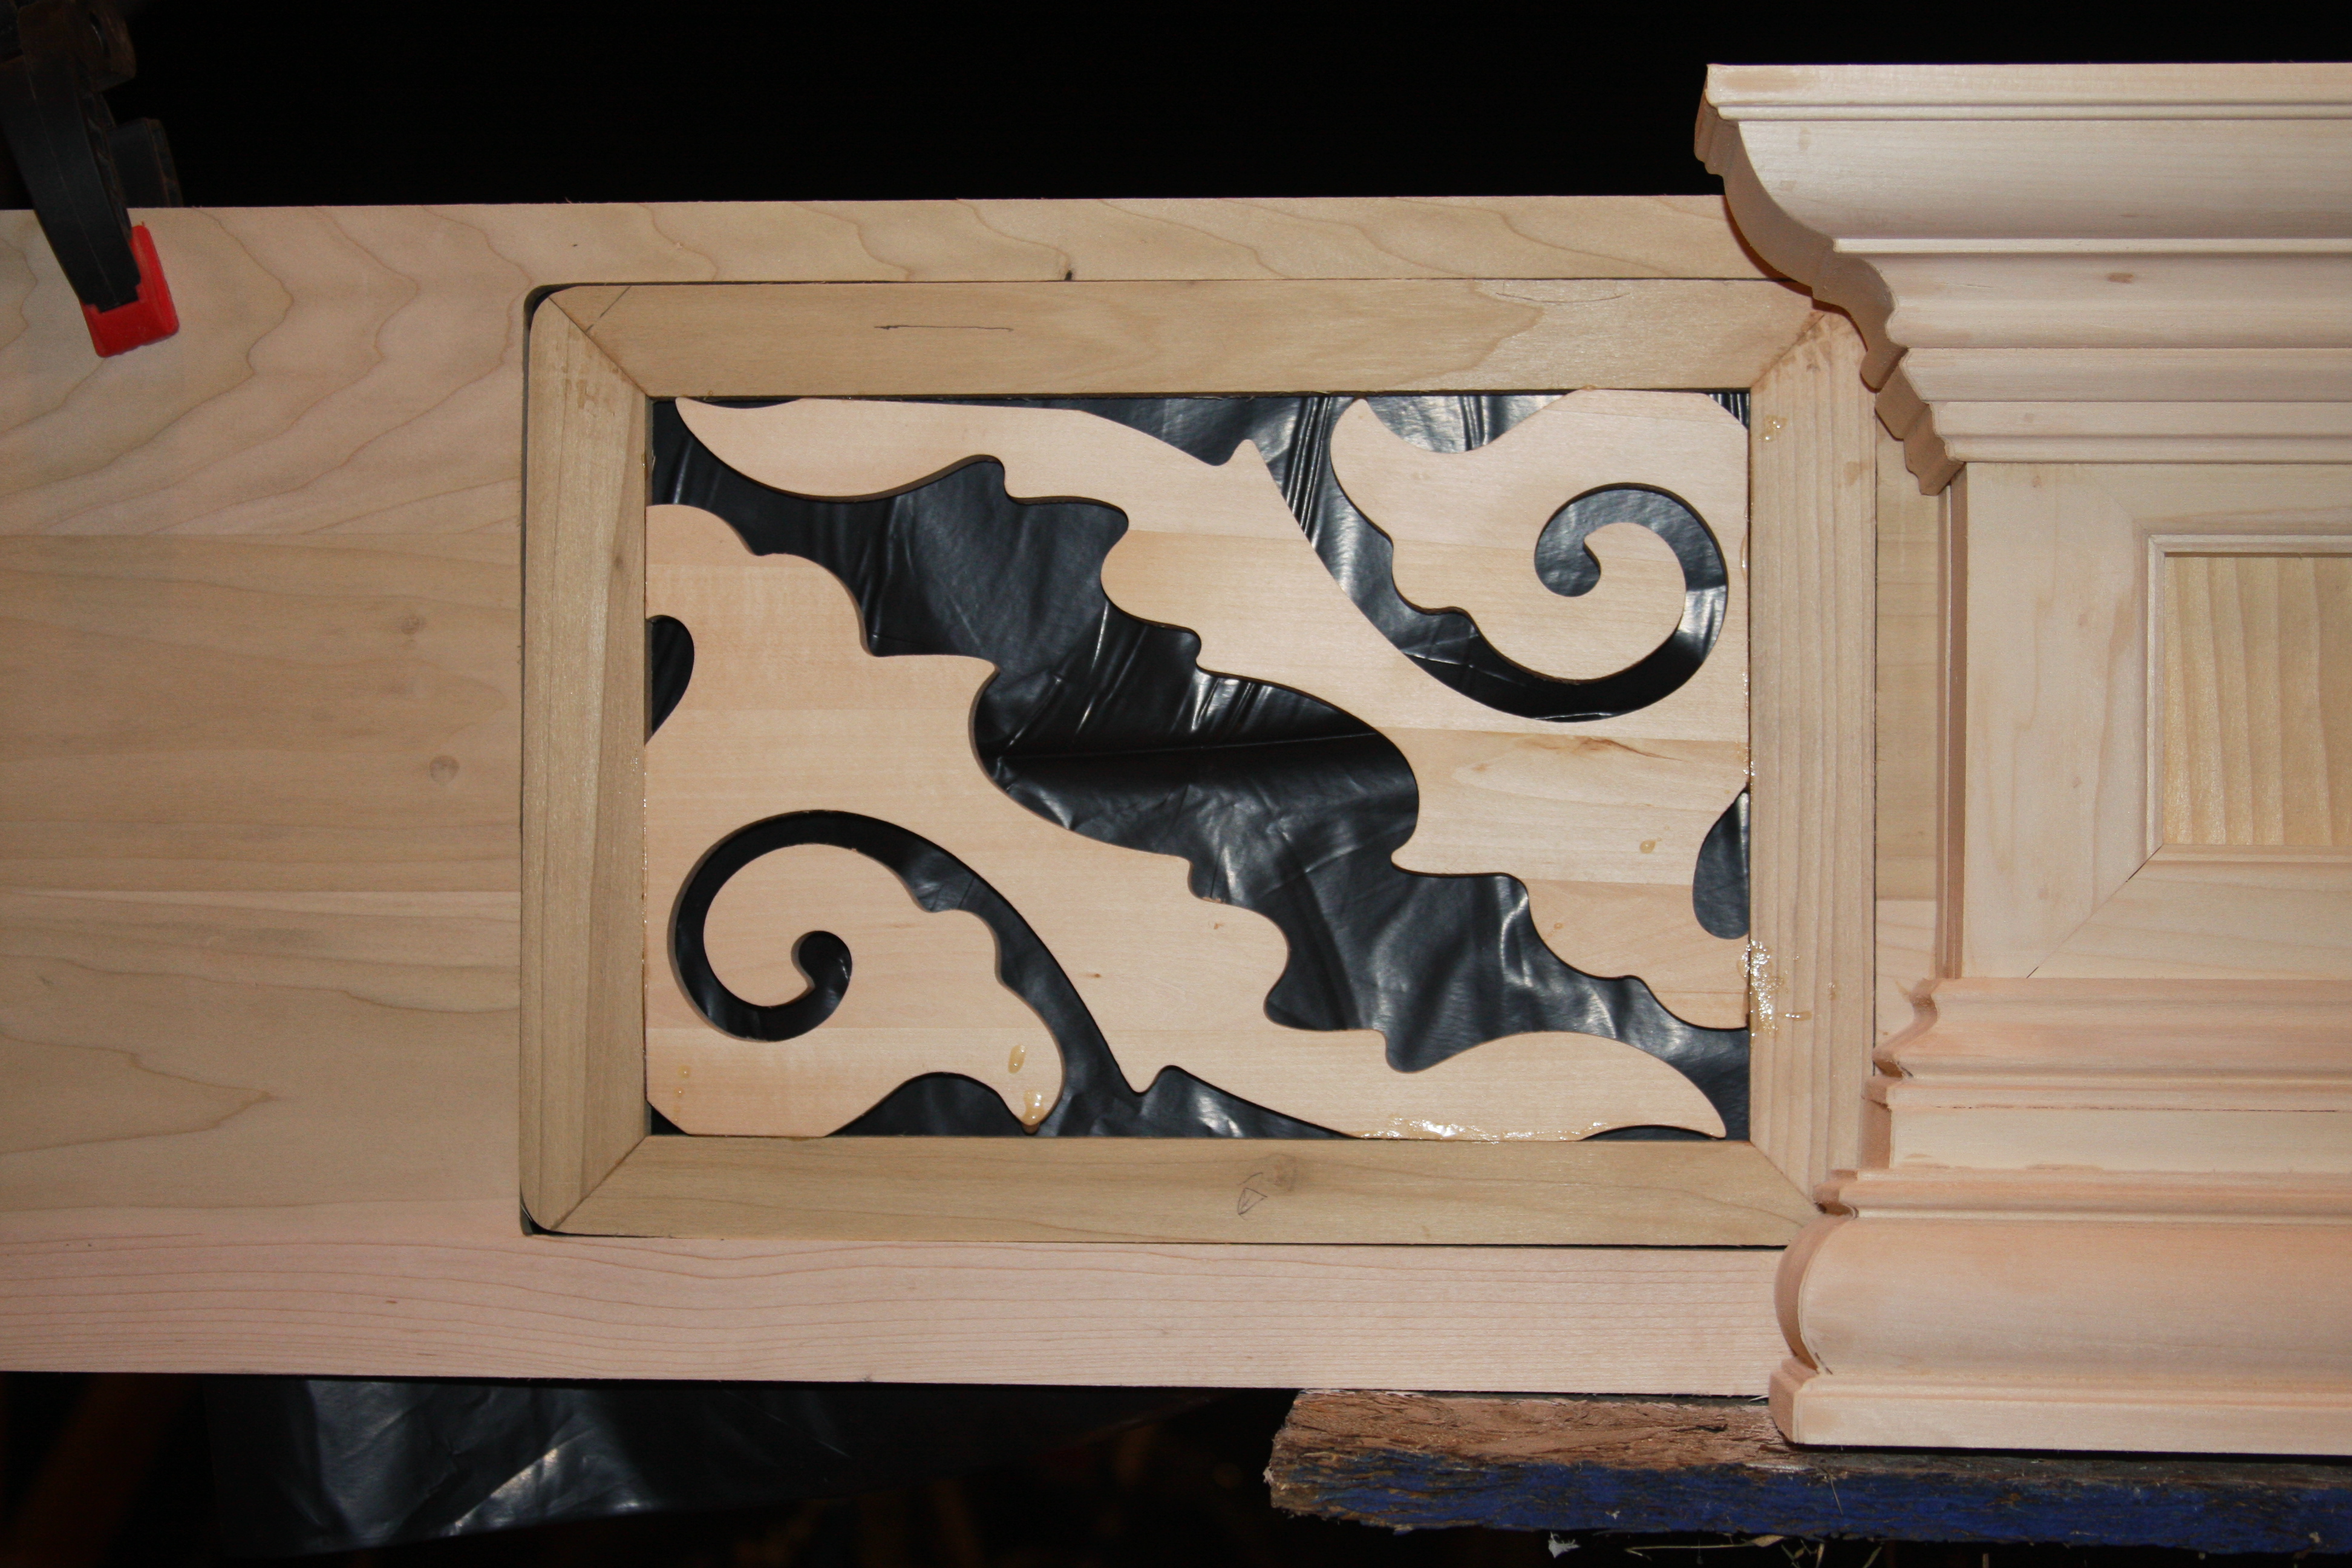
 

Don't mind the trash bag!!!!
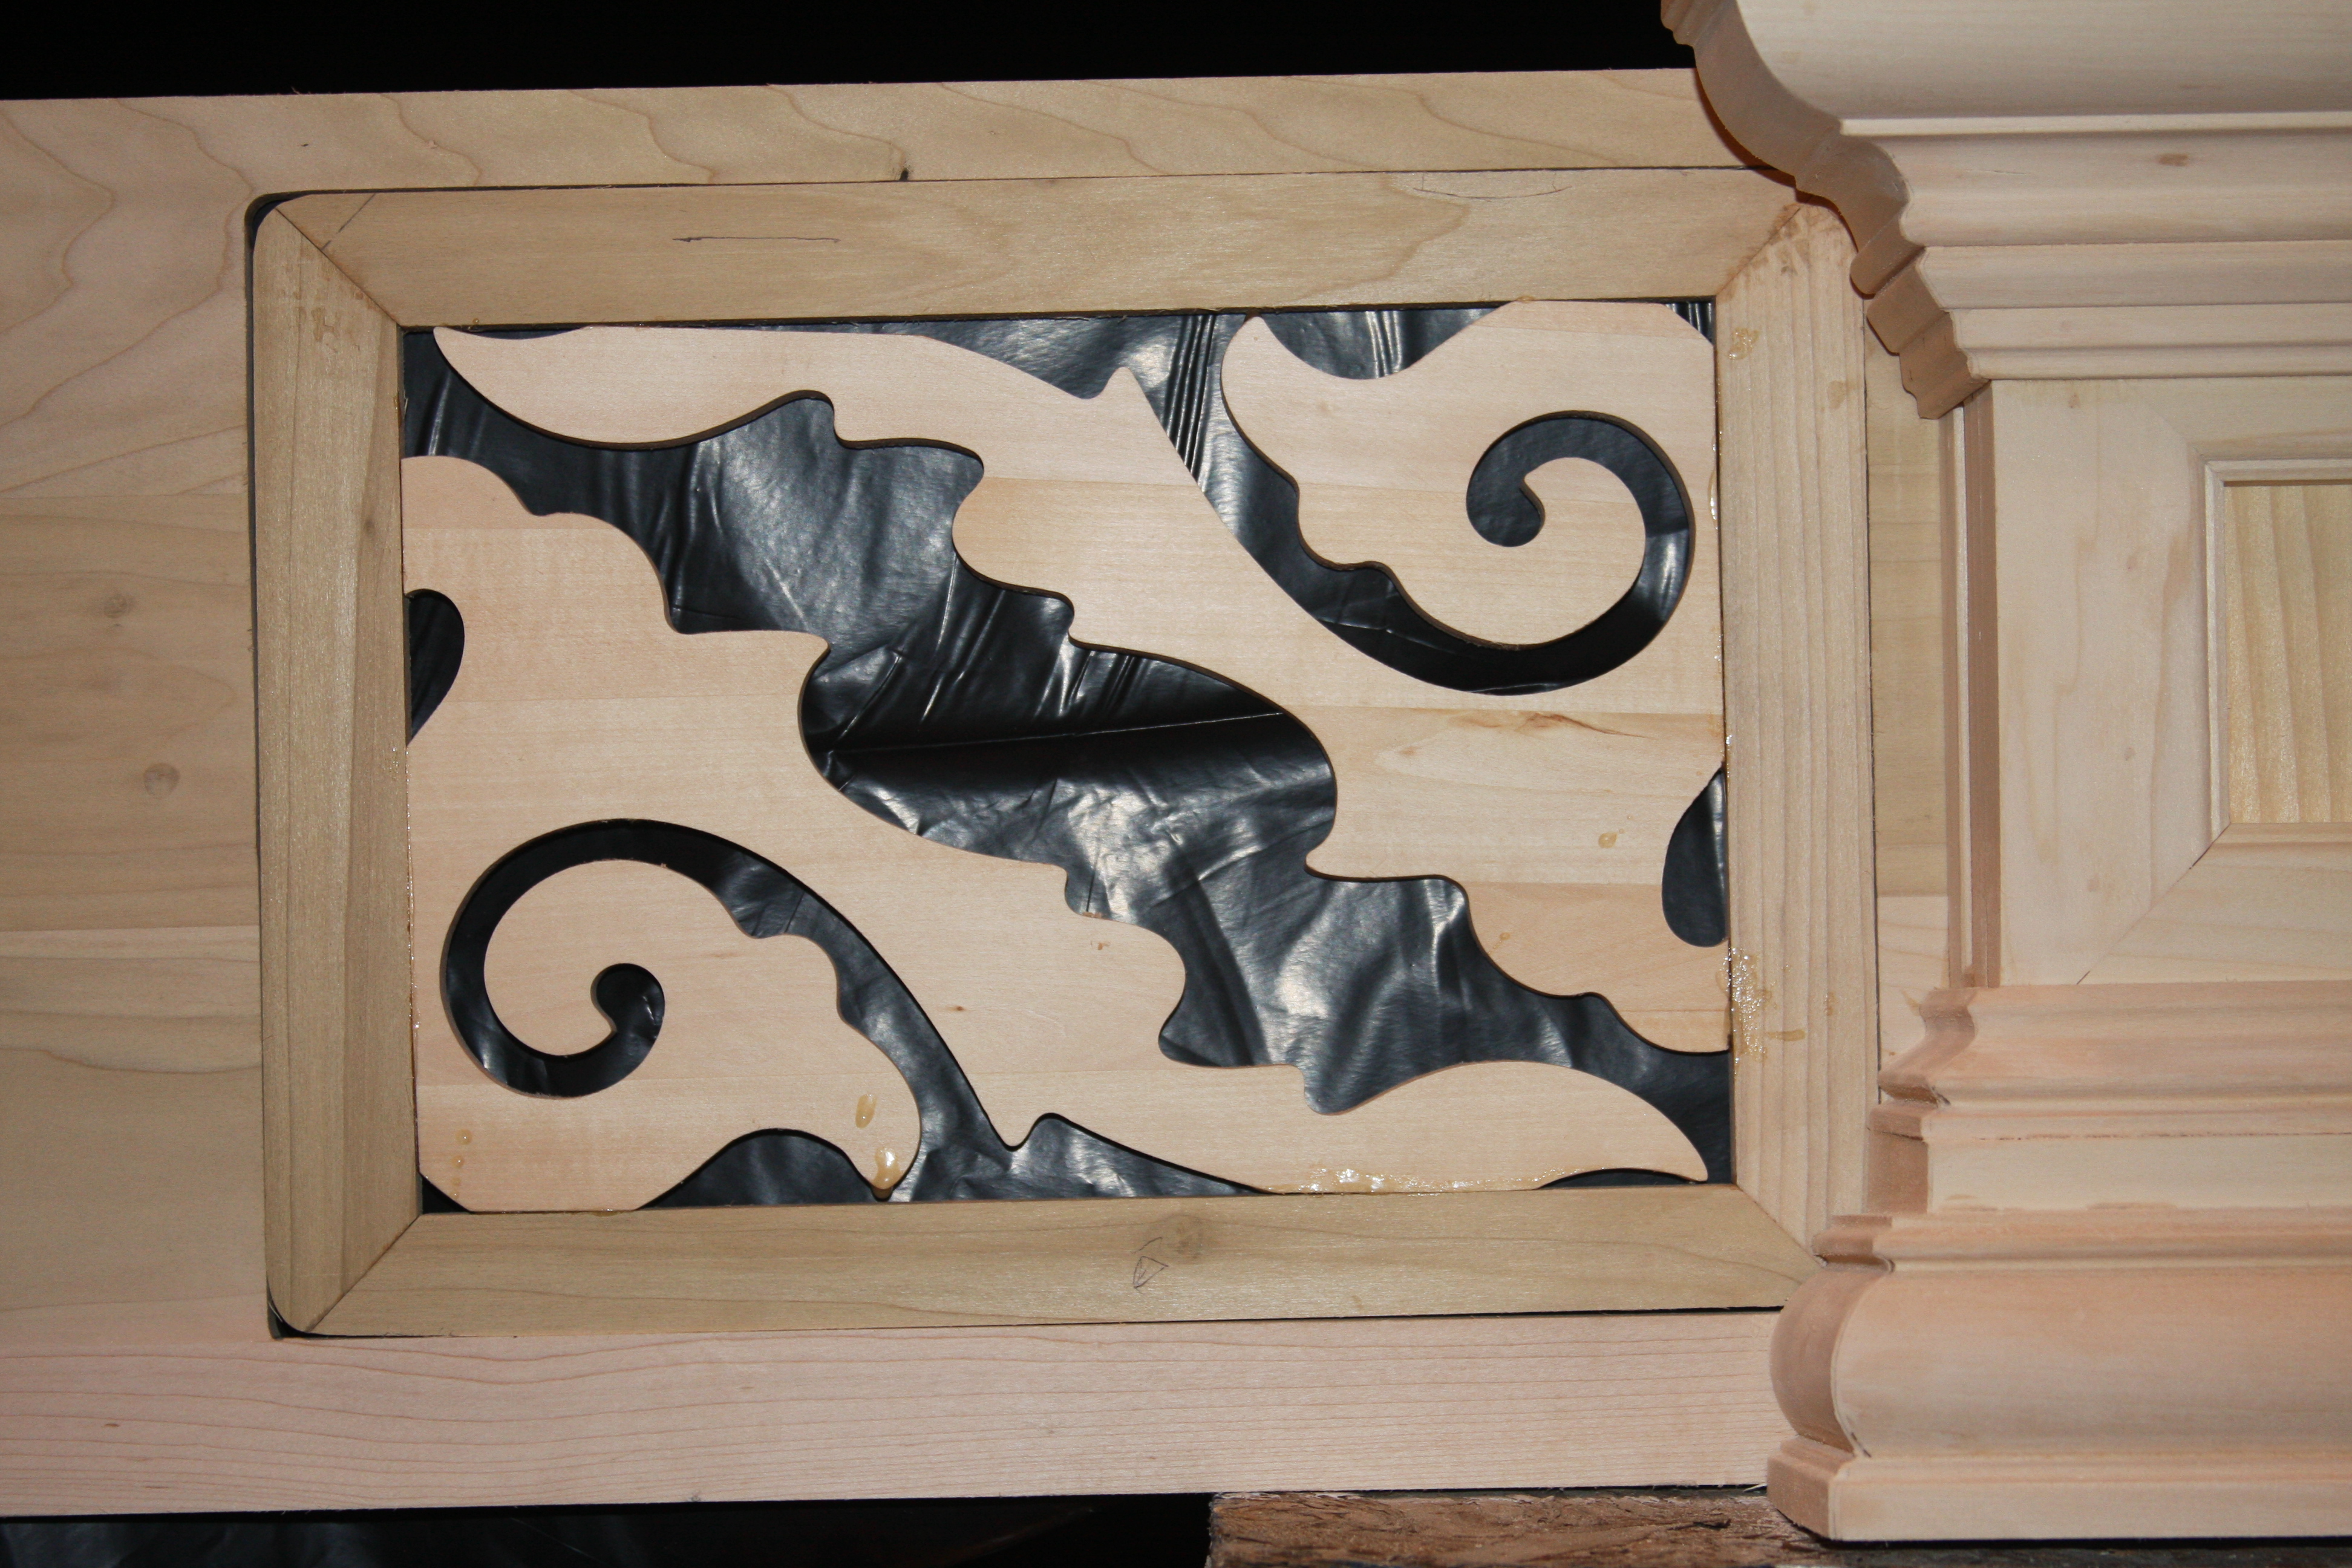


acrylic51

Active Member
Did actually get a little work done today.....finished off some of the trim work on the stand and got the initial cuts of the bar top done for the ledge around the tank. Well I got the short side done anyways and hopefully tomorrow, I'll tackle the long front side....After I get the initial cuts out of the way a little prep sanding and then on to the router to put the finish edge on it, and hopefully will have some pics taken of the progress of that as well.
 
I was also thinking of the area of the front panel Posiden and I had been discussing about using magnets vs catches vs dual action dampers. I don't want to have to touch the crown molding (meaning cutting away at it) to allow super easy on/off. I've thought about making a sub piece; which would be permanently attached under the crown molding and maybe stick down about 1/2" -1" and on the edge facing down use a table leaf router bit. It kind of reminds you of a roundover bit, but is actually used on dining room tables that have drop leafs to allow the 2 pieces to move independently of each other, but when the align the joint is all but seamless. My other option would be to take the front panel and round it over a bit, with a roundover bit, and it should allow enough clearance to allow to easily go on and off? Any thoughts or experience??????
 

2quills

Well-Known Member
Quote:
Originally Posted by acrylic51 http:///forum/thread/376802/415-gallon-plywood-tank-build/300#post_3303924
Yes I had to cut them off due to some trimming and slight changes along the way......Actually I built the doors before I started framing the stand in, and when it came time to hang doors......Well some trimming had to be done or fab whole new doors again.....Easier to cut them down a bit IMHO......

oh...haha, gotcha! I was wondering if that was like your own personal signiture on your builds was to do miters a little bit differently than the norm. I'll shoot you some pics this evening, I took a bunch but only posted a few. The english chestnut really does look good, my camera doesn't do the samples a whole lot of justice.


acrylic51

Active Member
Thanks!!!!! Getting kind of anxious to start looking at stains/options. Can finally start to see it coming together. You have any experience with spraying the finish?
 

2quills

Well-Known Member
Quote:
Originally Posted by acrylic51 http:///forum/thread/376802/415-gallon-plywood-tank-build/300#post_3304022
Thanks!!!!! Getting kind of anxious to start looking at stains/options. Can finally start to see it coming together. You have any experience with spraying the finish?
I don't personally, but I've seen it done. And if I had a place to set up for it I would try it. You'll need to thin the finish in order to spray it and it' s done in multiple, light coats. I was kicking around the idea of purchasing a sprayer for the compressor and try it out but I'll have to create a clean room in the dinning room to do it
. I do know it's a heck of alot easier to spray and if you're carefull you don't have all those pesky drips to contend with.
 

acrylic51

Active Member
The spraying I've seen my buddy 2 houses up do as well and it's incredible, but he does it all the time!!!! I thought about looking into a decent unit an practicing quite a bit. I've never really had issues with runs in the past. Just easier to do it in the family room. No dust or dirt, no flying; annoying bugs, and the house is air conditioned for my comfort!!!!
 
Top