415 Gallon Plywood Tank Build

desertdawg

Member
Just catching up on your build... All I can say is awesome

I'm surprised with the size of your light rack you didn't incorperate a small steel tube frame for support and strength, it would have prevented the warpage your getting now.
 

posiden

Active Member
My first thought with trying to straighten it out, is the corners. Since you cut them on 45s their going to open up when its pushed back into flat. It almost seems to me that the ends aren't quite square. Across the grain. As you know a degree will be magnified by a whole lot at the other end.
 

acrylic51

Active Member
Thought about using aluminum, but then plans changed mid way through the build......Steel would keep it straight, but in the environment wouldn't be to good for long.....Even getting it powder coated isn't cheap....the setup fee is insane....
Quote:
Originally Posted by Desertdawg http:///forum/thread/376802/415-gallon-plywood-tank-build/460#post_3322859
Just catching up on your build... All I can say is awesome

I'm surprised with the size of your light rack you didn't incorporate a small steel tube frame for support and strength, it would have prevented the warpage your getting now.
 

acrylic51

Active Member
I've checked and rechecked my miter saw, and can't find it off.....That is 1 piece I'm rather particular about setup on....I did know when I originally cut them that the 1 piece did have a twist to it, but didn't think it would be magnified this much........Actually it isn't bad, because I can get it level on the rack, just I'm anal about it!!!!!

Quote:
Originally Posted by Posiden http:///forum/thread/376802/415-gallon-plywood-tank-build/460#post_3322870
My first thought with trying to straighten it out, is the corners. Since you cut them on 45s their going to open up when its pushed back into flat. It almost seems to me that the ends aren't quite square. Across the grain. As you know a degree will be magnified by a whole lot at the other end.
Corey!!!!!!! Somehow were usually on the same thought track.....I went out at lunch time and bought a little more lumber, and did exactly what you had suggest!!!!! Scary in a sense.....
After I had built the original "structure", that's when I noticed it was tweaked a bit.....I did as you had mentioned for about 4-5 days, with weighting it down and did help some, but stil not, what I was totally after......I should have checked my lumber a little better. I think I purchased this during lunch, which would mean I was a little pushed for time......
After installing the pieces like you had suggested it did help a bit. I then got curious, and went back to the garage and with some scrap; I had laying around, I cut some 45's and slid them into the 3/4" dado joint I had cut previously with intentions to use for the track work inside the canopy.....Plans change as we know, and the thread I shot you made me rethink how I wanted to mount my heat sinks......Actually putting those 45's in the corners helped a good bit....I have it know where it will sit all but flat....maybe out a 1/16".....Still going to try to play and tinker with it a bit more.....I didn't nail the 45's into place as of yet, still want to try a couple things, and see if we can't get it completely level. I did re hang the light rack with the 45's in place, and damn did it hang a lot easier and I have a hard time eyeing it, but know it's still out.....
I did notice that I will have to make some support pieces though for the threaded rod.....With the light rack empty it rolls good, but I added a little weight to the rack.....2 cinder blocks, and man did it move smooth with the weight.....I was actually shocked.....

Now, I have to see if I can rebuild the fuge section for Flower without blowing it apart with another router bit......

Quote:
Originally Posted by 2Quills
http:///forum/thread/376802/415-gallon-plywood-tank-build/460#post_3322850
So how do you like the friction hinges, aside from they could be a little more heavy duty?
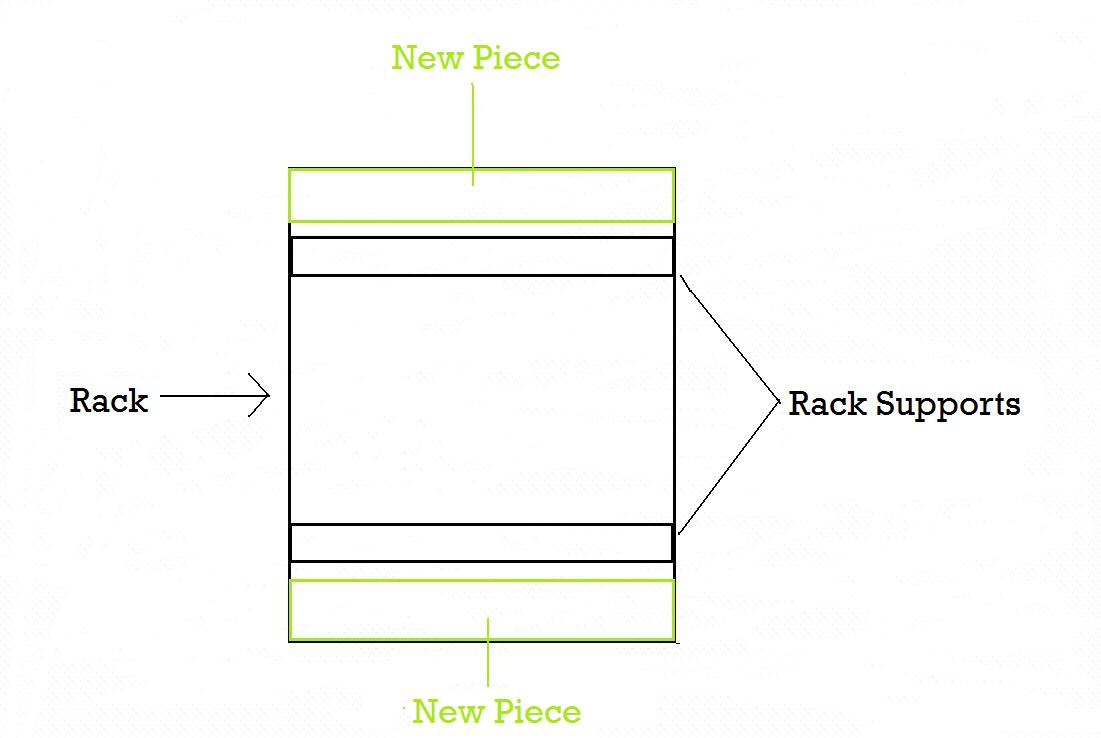
Ok...so a simple idea that I think might work would be to take it down (like you have). Lay it out on a flat/level surface. Maybe take some weights and set them on the support pieces or something to keep it flat, perhaps clamp it down. Get yourself 2 boards and cut them to the width of the frame. Set them on top of the rack from one corner to the other. Glue and tack them in each of the corners and all the way down the side of the frame. Let the glue set up and cure for a day or however long it takes.
If the frame is racked then it must mean that it's twisting in the corners. So with the corners secured then in theory it shouldn't twist like that because it won't be able to. Plus, I think it will only help to further support and beef up that rack. You'll probably want it to be pretty rigid I'd imagine. Even if it seems rigid right now if you do decide to use the heavy heat sinks like you mentioned then that might change a little. Especially with the rack being moved or slid around. I'd imagine that you want to keep it as light weight as you can, perhaps you could do some simple trim around the rack with some 1x3 stock and figure out a nifty way to tie in all the trim in a way that it could act as some measure of support at well. Just a thought.
Top down view of the rack and the boards that I was talking about....
 

acrylic51

Active Member
This is a good thread for anyone that is interested, and it shows the heat sink mounts, that made me rethink my original design......
http://www.reefcentral.com/forums/showthread.php?t=1861593&page=5
 

acrylic51

Active Member
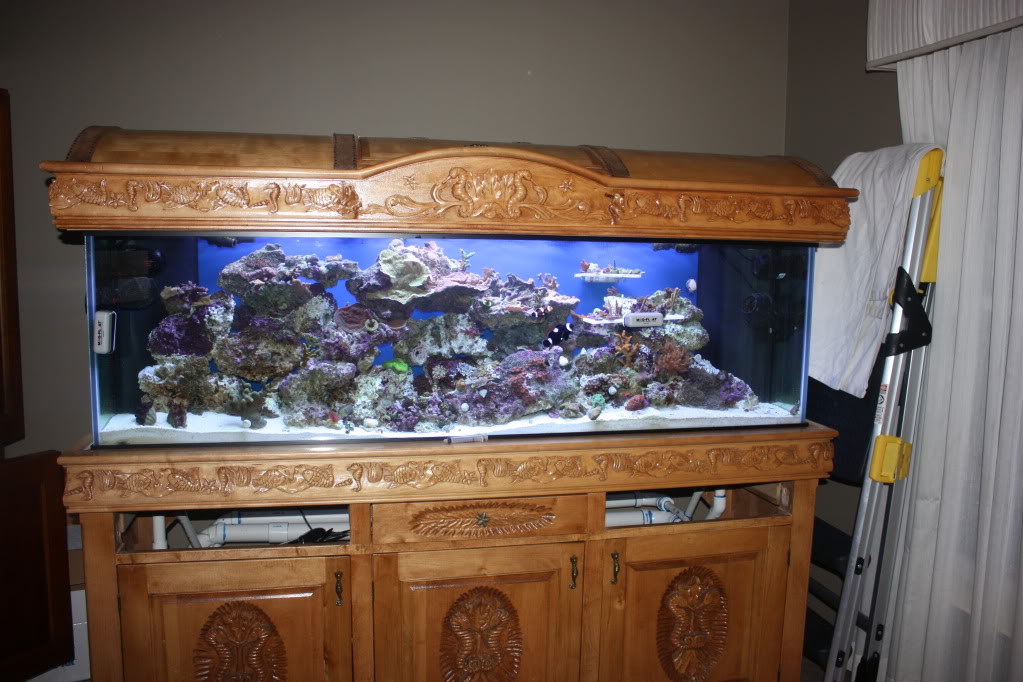
Hey Corey.....This is the pic of the stand I had mentioned long ago, that is just totally insane.....

Incredible work....
 

2quills

Well-Known Member
That is sharp!!! Are those leather straps he's got on the top there? It looks like a treasure chest...
 

acrylic51

Active Member
Not exactly sure Corey.....I don't think the OP elaborated to much.....It's a dedicated thread just for showing of your stand and canopies.......
Quote:
Originally Posted by 2Quills http:///forum/thread/376802/415-gallon-plywood-tank-build/480#post_3323332
That is sharp!!! Are those leather straps he's got on the top there? It looks like a treasure chest...
No it's a reef tank, so doubt any sea horses......
Quote:
Originally Posted by 1Snapple
http:///forum/thread/376802/415-gallon-plywood-tank-build/480#post_3323334
I want the treasure =D That looks really cool, any seahorses in it?
 

acrylic51

Active Member
I think the thread has 17-18 pages.... Some really nice work out there, and gives tons of ideas..... I thumbed through looking for different ideas.
 

acrylic51

Active Member
Corey.....This might peak your interest......Every time we talk about LEDS, I seem to stumble on something a little different.....Again good reading material for everyone interested in alternative lighting to MH's and such....
http://www.reefcentral.com/forums/showthread.php?t=1739386
 

acrylic51

Active Member
Back a few posts I was annoyed with the mounting of the light rack......
Stupid me didn't take into account where the rack would actually be mounted....so after toying around for a couple hours with different methods and devices....I just moved the rack itself up to it's permanent location and a couple double nuts and such and was able to get it all but perfect......
Why is it sometimes we make thing harder than they need to be or we over look the obvious? What was happening is with the rack mounted down low, the threaded rod mounted to the roller assemblies inside the track were actually binding, because of excessive movement in the rods.....With moving them up, the excessive travel was eliminated, and all is happpy!!!!!
 

acrylic51

Active Member
All righty....did have a chance to do a little work not much on my setup, but I had posted way back about installing bi axial fiberglass cloth in the tank, and just a quick wrap up......I gave the tank a little attention and started knocking down some high spots and scuffing the surface to get it ready for the next fiberglass work to be done on the tank.....I still have the sides and areas where the glass/acrylic will be installed. I was going to skip fiber glassing the area under the euro bracing, and the back/front and sides of the overflow, but after reading another tank build going a little off, I decided to go back to my original plan and glass everything.......with 37oz bi axial fiber glass cloth.....Sorta a pain to cut and wet it all out, but I think it will add to the overall structurability of the tank itself.

Again just a quick shot of the bi axial fiber glass cloth showing you the thickness....Biaxial is alot stronger than regular fiberglass cloth due to it's construction.

Just a quick shot of the fiber glass being sanded and knocked down prepping it for another pour.......A lot of prep work getting it all cleaned up!!!!!!!

Another shot of the fiber glass wet out and being sanded. If I would have kept pouring the different layers of epoxy I wouldn't have had to sand at this point for proper adhesion.

Again a lot of knock down sanding to do.....


acrylic51

Active Member
I have been really slow working on the stand and canopy wood work, with all the tedious sanding, but here's a little eye candy to get things started.....

The corner stand off is stained....you can see Flower's sump/fuge slightly in the background as well.....

Another angle of the corner stand off.

Poor pic of the ledge for the stand.....This will be finished with the bar top epoxy instead of regular poly......The bar top epoxy IMHO will hold up better than poly.....
 

2quills

Well-Known Member
How many coats of the cloth do you plan on doing and what grit are you using to to knock down and prep the epoxy for it's next coat? The corner piece looks amazing with the color on it...that is the traditional cherry, no? I may steal your idea for the bar top. But in my defense I was already thinking about it before you made yours. Slightly different but I like the idea of having a little shelf so to speak pluss I think it adds a nice touch to the overall look of the design.
 

acrylic51

Active Member
I'm just going to be applying 1 layer of biaxial cloth.....The stuff looks super thin already wet out in the pics, but when you actually handle the stuff it's pretty thick. Comparable to the old style cloth baby diapers more or less. Honestly a pain to cut, but I did find 1 good thing at Home Depot, and that is their Titanium scissors they sell, and they actually cut the stuff very easily and clean....Go figure Home Depot would actually have something I want or need.....
The entire inside of the tank will be wet out with 1 layer of 37oz biaxial cloth. Even the underside of the euro bracing will be fiber glassed as well. I don't know if any of you followed DMWZ's build thread over on RC, but he ran into an issue where he didn't get a good seal around the bracing on the top of the tank, which has caused him some issues. I'm not very concerned about that issue, since I did what I call a "primer" pour of epoxy. I poured a thin layer maybe a 1/16th thick in the entire inside of the tank including the bottom side of the euro bracing as well.
After the initial "primer" pour was done, and before I could start wetting out the fiberglass I had to scuff the surface with 60 grit sandpaper. I called West Systems tech people and asked them personally, and this was their recommendation. I not only called 1, but 3 times total, just to make sure. During normal build as long as there isn't more than 8 hours between pours no sanding is required, but because of delay with getting epoxy and work schedule that isn't always practical. So after the sanding was done with 60 grit, the fiberglass was cut and fitted and then epoxy was measured, mixed and poured on top of the fiberglass and then you start working the epoxy outwards towards the edges. You have to watch that you don't put to much epoxy, or the fiberglass will float, which will be another issue for you.....At this point you can wait for the epoxy to setup and then pour another coat, or as in my case, I had down time, and I have to scuff again with 60 grit, to take high spots out, and take away the shiny areas, and give the next coat of epoxy a good bonding surface. You will keep pouring until the fibers in the cloth are completely embedded in epoxy. I figure the next coat should conceal the fibers. Then I will probably do another 2-3 thin pours, and then I will add pigment to the next batch of epoxy and start tinting the inside of the tank. I'm planning on tinting the epoxy for the bottom of the tank with a white pigment, and the back will be tinted black. I chose black since I'm seriously leaning towards using acrylic for my viewing panels for a couple reasons, that I won't get into now; other than the end where the external wavebox will be, will be a black acrylic panel with the wavebox, glued to the outside of that panel, and cutouts for the Tunze's to nestle into the openings to shoot out into the tank. The wavebox will house (3) Tunze's total. I might have to fab up some fancy grates for the wavebox like I did for Flowers fuge setup.
As far as the staining of the stand off corner piece; yes Corey I went with your recommendation......Honestly each time I stain with it I get a different look it seems, but each 1 I like a little better. When I first applied the stain I didn't care for it, but the next day I was actually pleased......The bar ledge wasn't actually planned the way it is, but then I started thinking about when company does come over which I hate!!!!! There always seems to be a drink of some sort by my tank. I figured make ledge wide enough to accomodate a beverage, so it won't spill on the floor, but the finish has to be tough enough to withstand a sweating cup or beer.....The epoxy will easily do that. I wish I could do the whole stand and canopy with the epoxy, but it would honestly be a PITA turning and moving the pieces with all the detail trim work to get good coverage, and not having areas super thick. A flat surface is super easy to get a good thin coverage, and easy to work any bubbles out of.....
Side note Corey WoodCraft has the bar top epoxy on sale this month for like $28 or $38 bucks.......I might have to sneak there this weekend and pick some up and hide it........
 

acrylic51

Active Member
I've been doing some thinking about circulation inside the tank....With the planned external wavebox, I was considering doing something like Tunze 6055 or 6080 in each corner with custom mounting brackets.....
Also for the CL I had tipped my hand in another thread here, but I'm considering going with something on the line of a VFD pump, that can be ramped up and down, which would be something similar to the tunzes or having the OceansMotions on this tank.......Do some searching on VFD pumps, actually very interesting for people considering CL's IMO.....
 
Top