Critique my tank-sump design…

acrylic51

Active Member
With your current or first plan it could work, but some of the logistics just need to be worked out or fine tuned IMO.........
My first question is what are your space constraints or limits for a setup? Just with what you had proposed earlier, I feel you are wasting space by trying to stuff all that stuff into the back of the tank, that would really be limited use IMO.....inadequate to a degree.
With an open top tank, your material thickness is really going to have to increase....with something like your proposing I wouldn't do the tank unless you use a minimum of 3/4" acrylic....With thinner material, which people will do you will see deflection, and it just isn't appealing to the eye....Plus I feel a beefy looking tank done in acrylic is rather appealing. Have you thought seriously about doing a cube....Something in the line of 24"x24" or 36"x36". You could do a sump under the stand, and could add all the add ons your wanting.....
Looking at the above listing(last post) where are you located??? Curious, because I see chiller listed. Why would you need a chiller? An ATO doesn't have to be big or intrusive to be affective IMO.....Putting a skimmer actually in a sump setting expands your options as to skimmer choices vs trying to find something decent to stuff in the back of the tank....Honestly you could still run your overflow and such back there, but would suggest doing it externally to free up room inside the tank, and depending on size your looking at chiller options, and keep everything tidy in the stand......
 

geoj

Active Member
Thanks for that last post. That was just what I needed to hear…

Space constraints I have about 2’x3’ of prime tank territory. I want to keep the total gallons under 60 to keep the weight down. Creaky floors in some parts of the house.
I am down in San Diego some of the best weather if I may brag a bit.
I get about 3-4 weeks a year up in the 85-95s. I can remotely place the chiller if I plumb it outside and that is probably a good place for it. I have AC but we like to use it off and on. I mean when I get home I crank it on. Others in the house would rather sweat all day.
Lighting 250w 15k MH on Icecap plus some LED for color. I plan on keeping a SPS mixed reef.
Honestly you could still run your overflow and such back there, but would suggest doing it externally to free up room inside the tank
So when you say run the overflow externally what do you recommend?
I was thinking like a drilled Glass-Holes overflow. And return over the top of the tank
 

acrylic51

Active Member
Since the tank would be done with acrylic, I would place the overflow actually outside the tank on the back. Doesn't have to be super wide or deep. That way it wouldn't occupy room inside the tank, even if it's hidden behind a false wall. Honestly depending what type of lighting you could probably get away without using a chiller and there are some other alternatives to trying to cool it.
Since you said you have a 2'x3' area to play with......With that said lets look at doing a 2'x2' cube with the overflow off the back wall on the outside of the tank.....So theoretically you have 2'x2' of space available inside the tank. If you take 24"W x 24"H x 24"D you come up with 13,824/231= 59.8441558 gallons. Haven't worked the overflow sizing out as of yet!!!!!
Ok some quick playing on the calc lets say max you'd want to run through your sump would be 500gph....That would be max. You would need 8" of linear overflow, and bulkhead piping 1" min. With that said it wouldn't be to hard to fab up a external overflow box. I'm not familiar with the Glass Holes overflow kit, so I can't comment on it, but being done out of acrylic, a simple cut with a router for the overflow box, and a basic holesaw to drill your holes for your bulkheads is all that is needed......
Depending what you want to spend on materials is a matter of choice. I'd opt for 3/4" quality cell cast acrylic. I would honestly opt for a small eurobracing around the perimeter of the top of the tank, to tie things structurally together and also tie the overflow box to the tank as well. JMO......
As far as returns back to the tank that is totally up to you and your personal tastes....Personally I don't like the look of anything coming up over the top....Just with it being an open top, it would seem to take away from the clean lines of the setup. You could drill the overflow box and run your returns back through the overflow box, or you could drill the back of the tank on opposite sides of the overflow box and put bulkheads in place. They also make bulkheads with moveable "eyeballs" that you can move and direct the water flow. They can be restrictive depending on size. Another option could be to use standard bulkheads and use something like loc line to direct water flow. I guess I should ask what are you intending to stock in the tank? This will also dictate what type of flow you will need or be looking at. You want the majority of your water flow/movement to come from within the tank, so there are plenty of easy ways to deal with that as it progresses......
On to the lighting in a little more detail.....With a tank of this size, I would all but consider using LEDs for the setup. Several reasons.....More adjustable than MH, less upkeep cost, electrical consumption less, and heat output and transfer to the tank itself would be min....Almost to the point where you might not need a chiller.......Are you looking to do a canopy or some type of suspension lighting?
 

geoj

Active Member
Attachment 244599
Ok here where it looks I am going with 24” x 24” x 20” inches tall. Two baffles one with teeth one for the return.
Sump and ATO in the stand.
SRO-XP1000SSS Super Reef Octopus® 6” Space Saver Cone Skimmer Dimensions: 9.5" x 7.5" x 20.5".
30" tall oak stand w/ 10" canopy
250w MH 15k on IceCap
Two blue PowerBrite LEDs
 

acrylic51

Active Member
Looks good.....what is the size of the overflow? Only thing I see is by setting the overflow diagonal you cut down your surface skimming area......other than that, very anxious!!!!!!!
 

acrylic51

Active Member
Sorry forgot to ask....any ideas on how you'll finish the front corners of the tank???? Instead of leaving them squared off you could round them over and then polish them out crystal clear by hand instead of using a torch. Torch is clean and quick, but you run a chance of crazing/stressing the material........
 

forcrz6

Member
I think it looks great. The only concern that I have, and I have ran in to this issue myself. What are you going to do if you change to new equipment? I built a sump out of a 35g long tank just like you are. I then Mounted in the plexi. I made it so everything fit nice and comfy in the sump. The Issue I ran in to was, I upgraded the skimmer, added a new down pipe from the tank I then needed to rearrange, and well I was VERY Very limited. Make sure you plan for expansion in this hobby as you do not want to limit yourself with 1 design that you will have to replace later.
Few things that I would suggest.
1 Use a grid system. I did this when I bought my plexiglass. What I did is I bought a strip of 1"x1"x10' square plexi I( then chopped this up in to 1"X1"x2" pieces. I then set these up in 1" from the end of the last 1 patteren so I would beable to move the Plexi glass in case I needed to re size the sump or the Fuge. and not the skimmer area. So I can move my plexi around with out issue.
Here is a rough sketch of what I did showing the areas where I can slide the Plexi glass into or move it to or add more or take away stuff
 

geoj

Active Member
Grid system Nice idea

I don’t have the time to do the build my self. I think I am going Glass for the tank. I have some good local people that will give me what I want cheep as long as it is glass. They will mod a standard 60 cube for me. While they will be doing the tank I will be beefing up the foundation under the house.
 

geoj

Active Member
Originally Posted by acrylic51
http:///forum/post/3288959
Looks good.....what is the size of the overflow? Only thing I see is by setting the overflow diagonal you cut down your surface skimming area......other than that, very anxious!!!!!!!

The overflow will be 6" long with 1" bulkhead. The return will be smaller probably a 3/4" PVC
 

acrylic51

Active Member
Grid system or "teeth" are nice, but again cut down on flow......What I was getting out is there is a calculator over on the other forum that you can use to figure what the overflow will do......But being that you only have 1 surface skimming area it isn't nearl as affective as a rectangular overflow box........That can be resolved by extending your overflow size.....Just some thought.....As far as material thickness.....I see your considering going glass which is cool!!!!! If considering acrylic 1/2" will work but need to be eurobraced though to stop any bowing......
 

acrylic51

Active Member
Are your dimensions of the tank still the same???? 24"x16"x22" With 3-5x turnover of the size 37.5 gallons 5x turnover would be 185....So with your overflow sizing at 6" and 1" drain, you could handle roughly 400gph with the overflow.....
Here are some numbers I ran with different overflow sizes:
300 gph .72 bulkhead 5" linear surface of overflow
400 gph .83 bulkhead 6" " " " "
500 gph 1" bulkhead 8" " " " "
600 gph 1.01 bulkhead 9" linear surface of overflow
 

geoj

Active Member
Originally Posted by acrylic51
http:///forum/post/3289419
Are your dimensions of the tank still the same???? 24"x16"x22" With 3-5x turnover of the size 37.5 gallons 5x turnover would be 185....So with your overflow sizing at 6" and 1" drain, you could handle roughly 400gph with the overflow.....
Here are some numbers I ran with different overflow sizes:
300 gph .72 bulkhead 5" linear surface of overflow
400 gph .83 bulkhead 6" " " " "
500 gph 1" bulkhead 8" " " " "
600 gph 1.01 bulkhead 9" linear surface of overflow
Tank size will be 24"x24"x20" tall
 

geoj

Active Member
The tank is in

 
60 cube 24x24x25 with 1.5 bulkheads two corner baffles.
 
The stand will be in Tuesday
cant wait.
 
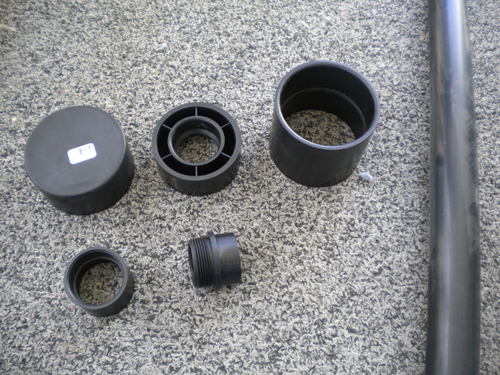
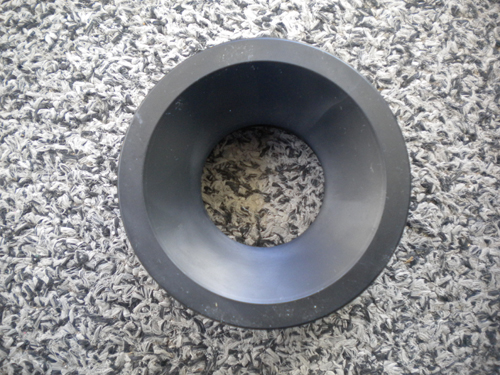
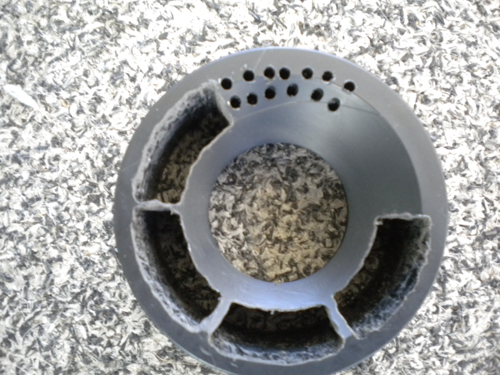
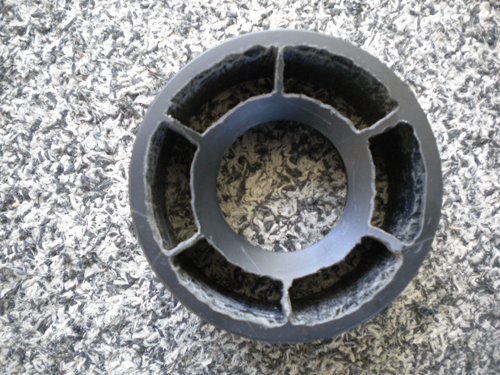
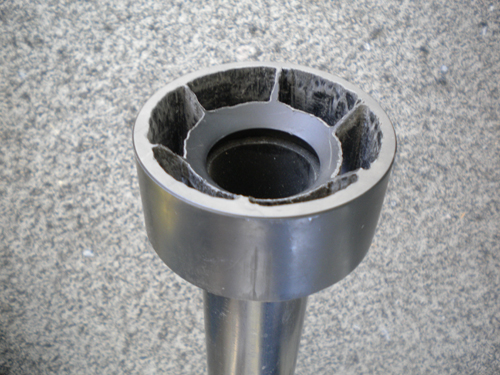
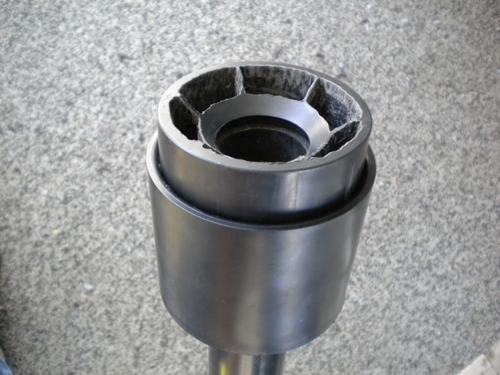
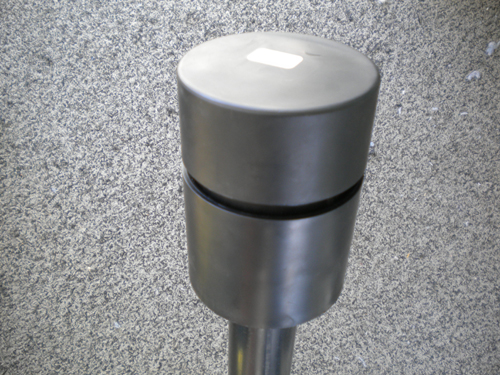
Making up a stand pipe here are some pic's of my mod....
 
3" abs cap, 3"x1-1/2" abs bushing, 3" abs coupling, 1-1/2" abs pipe
1-1/2" abs coupling, 1-1/2" abs trap adapter


geoj

Active Member
Thanks Shawn
 
So as you can see I went a little bigger on the bulkheads 1-1/2 and my over flow is about 10-1/2 wide. So my question is what is my max flow going to be?
 
I have been eye-balling The new EHEIM Compact+ Pumps. I will either go the 3000 or the 5000. These pumps are cool with adjustable flow...
 

geoj

Active Member
On the over flow bulkhead size to have more flow than I need. For the stand pipe I did not plan it all out, the size was to match the bulkhead, I just poped in to the local an mixed and matched the parts till bingo.
 
I will have to play with it some but the bushing looks to have more flow than the pipe so it should not choke the flow much. I might need an air valve in the cap but I will try and make it flow just by the stack hight.
 
Top