Last time I talked about the general principals of photography. Now it's time to put those principals into practice. From here on out I will try to also include the camera settings with the images that I show. These numbers will show the starting point of the image. Keep in mind that I shoot RAW so each and every image has to be post processed either in Lightroom or Photoshop. I normally get real close to the perfect exposure in the camera and then I tweek it just a tad with the software while I am processing to really make it pop. I am mainly posting the camera settings so you can get an idea of the correlation between them and any given image.
If you decide you want to go 100% manual... a great way to learn is to go buy a bouquet of flowers. Set them on the table under the light and hang a black shirt behind them to act as a backdrop. Then start playing around with different combinations of shutter speed and aperture. You'll start to see how they correlate between each other. Once you get the right exposure you'll see that if one setting goes up, the other has to go down in order to maintain the correct exposure.
For this installment I'd like to discuss Shutter speed. I have decided to process some images from my trip to the Cossatot River just for this example. So ya'll are the first ones to ever see these images (well besides me of course
")
)
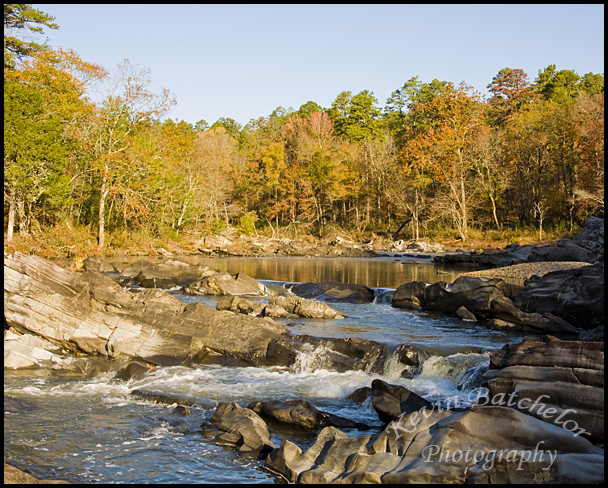
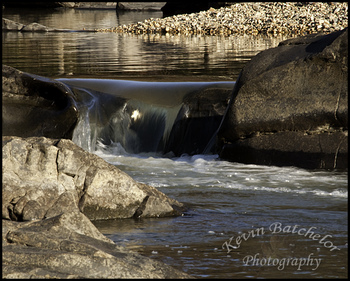
In this first photo I was photographing the overall scene. Therefore I wasn't really worried about slowing down the flow of the waterfalls. You can see that the water is more or less just frozen in place. It doesn't really "flow"
Shutter 1/250 sec, Aperture f/11, ISO 400

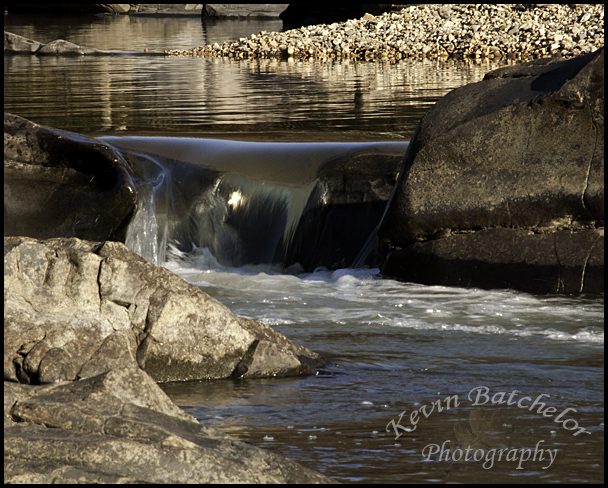
Now lets say I wanted to make that water less chaotic. Slow it down just a bit but not really have the white streak that you see in some posters. In this next photo I shot the image at a shutter speed of 1/40 sec, Aperture f/32, ISO 400
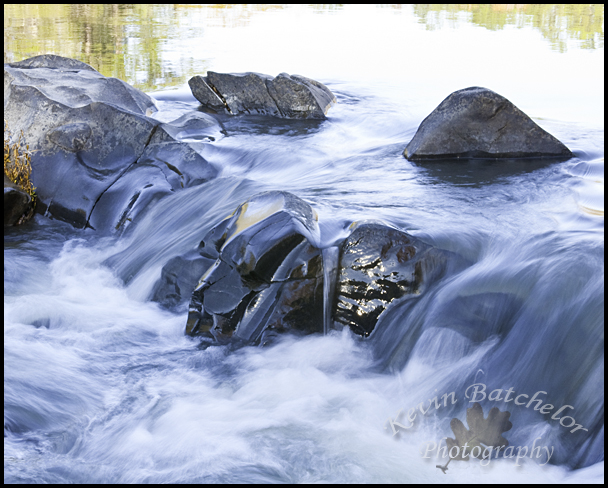
If you're going for that really white streaked look where the water movement kinda blurs then you have to really slow down your shutter speed. In this next photo I slowed the shutter all the way down to 1/6 sec, Aperture f/32, ISO 400

Now that we have seen what slowing the shutter down can accomplish... lets move in the other direction. Most times when you're photographing animals you will want a much faster shutter speed. The reason for this faster shutter speed is to freeze any small or even large movements that the animal may make.
The following image is a perfect example of jacking up the shutter speed to freeze movement. This photo was taken with a shutter speed of 1/1000, Aperture f/5.6, ISO 400
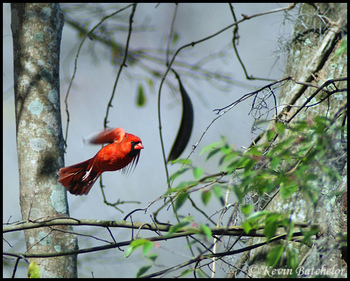
The Cardinal had just lifted off. If I would have had my shutter even higher that closet wing would have been completely frozen and not semi blurred. But in a scenerio like this... you just have to spray and pray. Only we aren't using bullets but camera clicks instead. My Nikon will shoot at either 4 or 5 frames per second and I always keep it on burst.
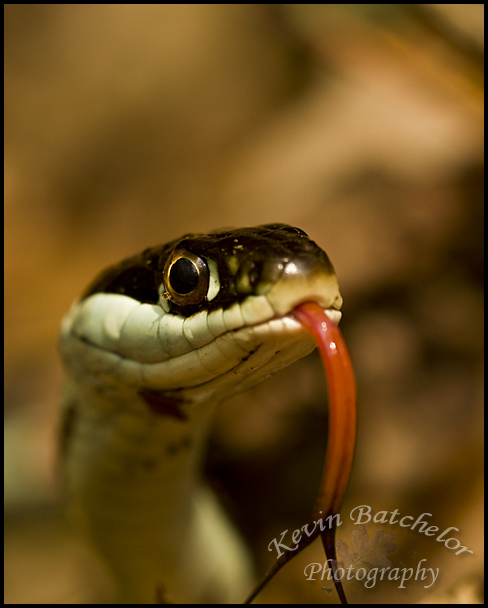
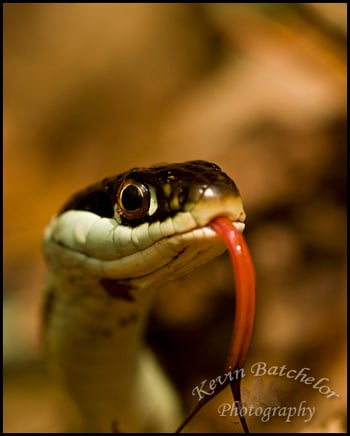
I think we will all agree that when a snake flicks out it's tongue it's a pretty quick movement. You may be surprised to know that you don't have to have insane shutter speed to catch it though. The following image was captured using only a shutter speed of 1/500 (that's right... half that of the cardinal above), Aperture f/ 5.6, ISO 400
And I'll end this post with one of my African Cichlids. The reason I'm using this image is because it's a learning tool. Both for me and everyone else. You may be surprised at the slow shutter speed needed when photographing slow moving fish. HOWEVER... those slow moving fish can change directions in a quick manner and thus give you a partial blur. That's probably what happened with this image.
This guy was photographed with a shutter speed of 1/60 at f/4.8 with an ISO 250
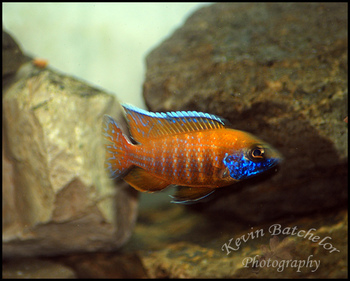
You'll notice that his body is in great focus, but all of a sudden the top part of his head is a slight blur. If I would have used a shutter speed faster than 1/60 I could have compensated for that movement. So for photographing your fish you can start off with 1/60 on your shutter speed, but you may want to bump it up just a bit that way you can take the chance out of your shots.
If ya'll have any questions... please feel free to ask.
This is an awesome thread, thank you for shearing your experience. :t^:
I am using an Nikon S220 point and shoot and have been thinking of upgrading to a PS camera with MF in the $150 range. Of course the more I learn about photograph the better my shots become with the camera I have. So to my question when I shoot with very little zoom I can take ok macro shots that are in focuses, but when I try to take the same shot in the back of the tank with the camera zoomed all or most of the way out I can't get the AF to focuses. Is this the limit of the camera or my use of it.