Saltn00b's Multi-Phase Upgrade Diary!
- Thread starter saltn00b
- Start date
saltn00b
Active Member
The tank has officially been moved to my new house! an all day affair, and so far everything is happy and alive. i have pretty much all of my livestock sitting in 2 clean 30g QT tanks (w/ no lights), while the 150 DT is running with just sand and rock trying to let her settle down. about 30 gallons ready for another water change shortly and tonight everything goes into the DT so they get some lights for tomorrow. i took some final pics of the setup before she was broken down.
looks like i will be ordering a RO/DI unit shortly and looking to build a somewhat automated auto top off in the last remaining space under the tank. more to come!
looks like i will be ordering a RO/DI unit shortly and looking to build a somewhat automated auto top off in the last remaining space under the tank. more to come!
saltn00b
Active Member
Originally Posted by Isistius
http:///forum/post/2702799
next time - you're on your own.
how brotherly
http:///forum/post/2702799
next time - you're on your own.
how brotherly

saltn00b
Active Member
well now that i have had some time to make some adjustments ,
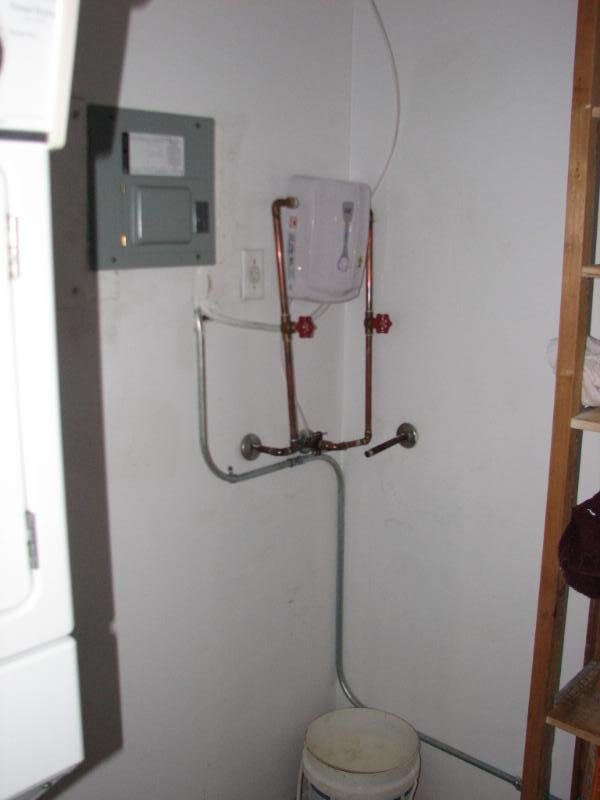
i have had an electrician come in and install a subpanel in my new place with 2 GFCI outlets on a dedicated fuse. the subpanel was also needed to power a tankless water heater. the tankless water heater is pretty cool, it saves space so my quasi fishroom plans can commence, it also saves some decent coin on the electric bill.
here is the heater and the new subpanel
built some invisible acrylic moonlight scaffolding and attached them to the new canopy.
the whole thread on that here: https://forums.saltwaterfish.com/t/335573/invisible-moonlight-scaffolding
ALSO
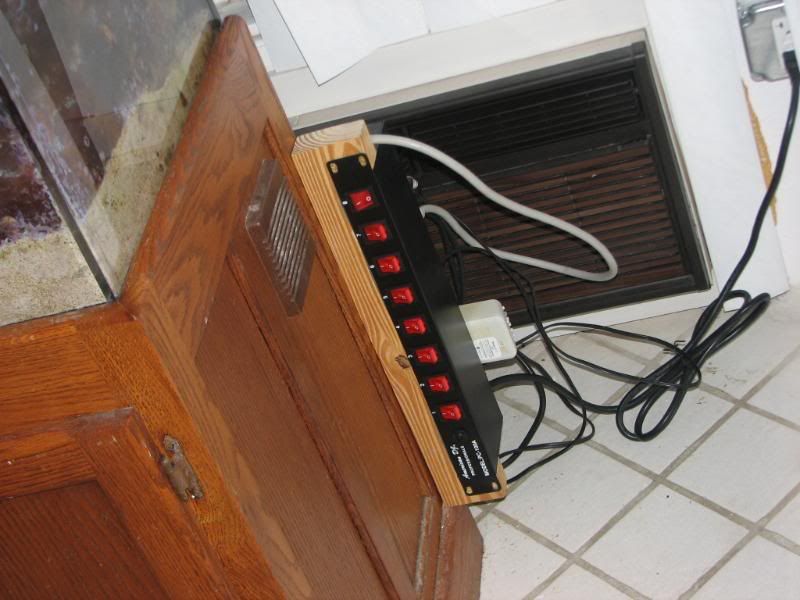
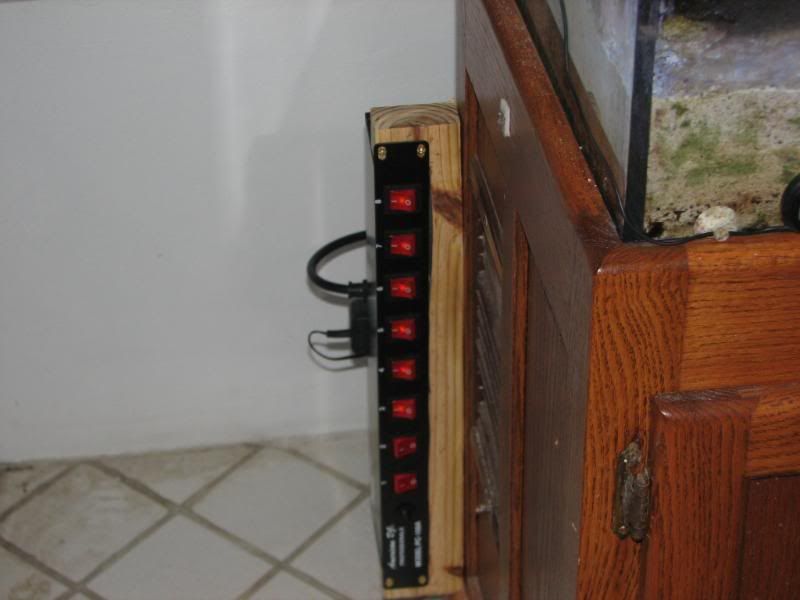
thanks to another reefer's thread here, i purchased individually lit-switched extension by american DJ (samash.com) installed them, making my life a LOT easier, also setting up remote pump control for fish room water tapping.
i have had an electrician come in and install a subpanel in my new place with 2 GFCI outlets on a dedicated fuse. the subpanel was also needed to power a tankless water heater. the tankless water heater is pretty cool, it saves space so my quasi fishroom plans can commence, it also saves some decent coin on the electric bill.
here is the heater and the new subpanel
built some invisible acrylic moonlight scaffolding and attached them to the new canopy.
the whole thread on that here: https://forums.saltwaterfish.com/t/335573/invisible-moonlight-scaffolding
ALSO
thanks to another reefer's thread here, i purchased individually lit-switched extension by american DJ (samash.com) installed them, making my life a LOT easier, also setting up remote pump control for fish room water tapping.
saltn00b
Active Member
well in the nature of fishtank projects, there is always something else i want to add...in the last few months i have been fighting with a red turf algae outbreak, which has finally dissappeared, but yielded a newer, as yet unnamed successor. i am making some tweaks and hopefully it is on the decline. here is a video of it.http://s48.photobucket.com/albums/f243/mikeg31781/Tank%20Upgrades%20Dec08/?action=view¤t=MVI_2962.flvthe new project
RO/ DI installation with large mixing station and auto top off, and semi auto SW feed
i will have to find a "before" picture, but i am converting the laundry room corner of the garage into a partial fishroom. this room is on the other side of the wall directly to the right of the tank.
there is limited space in the room, so here is the list of things that need to be done:
a) replace hot water heater tank with tankless hot water heater. this will save valuable square footage, and some money on the electric bill.
DONE
b) remove the existing wood shelving, and relocate contents. open up square footage.
not started. im lazy!
c) drill hole through wall to the tank (original exterior concrete). allowing for FW line, SW line, and possibly 2 electric cords (for tank-site on/ off) to pass through.
DONE
d) install nifty electric switching stations for water feed on/offs
DONE see last post!
e) Purchase RO / DI unit
DONE ocean reef + 1 from filterguys, being shipped now!
f)install RO/ DI
not started
g)Build wooden water can "tower". structure will hold support garbage can on top to hold RO water, and a second can beneath as a mixing can. this is very similar to what T316 has already built. i am working with him to hammer out some details.
pending, nearing completion!
h) Pumps, PVC and vinyl tubing assembly
not started
e) addtional: in another corner of the small room, place a utility sink. this will help with dirty tank water from water changes, and an overflow catch for the top RO can.
pending The sink has been purchased, but not yet plumbed.


saltn00b
Active Member
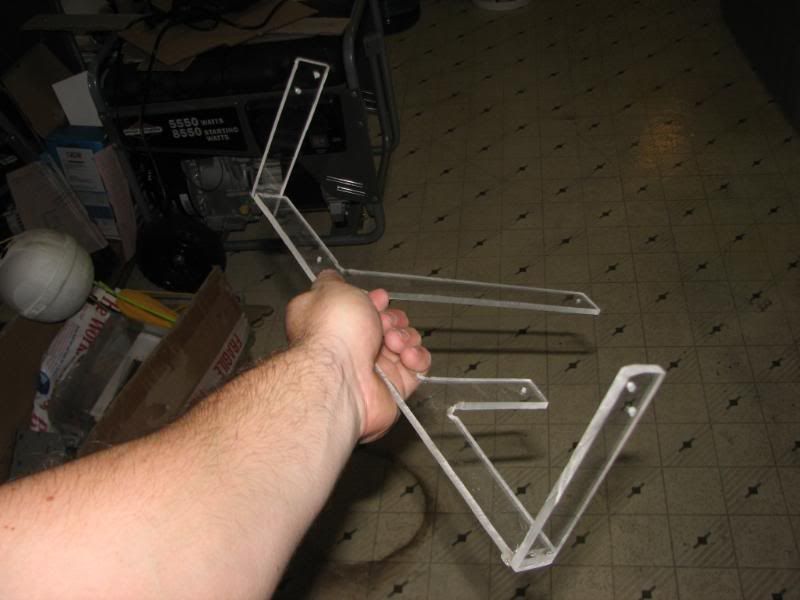
cool! my wood cuts were not perfect, as i found the table saw blade is on slight angle, so one of the corners was a little off. my neighbor came over with his deWalt impact drill and tightened up the whole thing, its very rigid now!
i need to draw up how it will work i think at this point.
i need to draw up how it will work i think at this point.
t316
Active Member
Originally Posted by saltn00b
http:///forum/post/2879540
ok here is the general schematic. any thoughts are welcome!
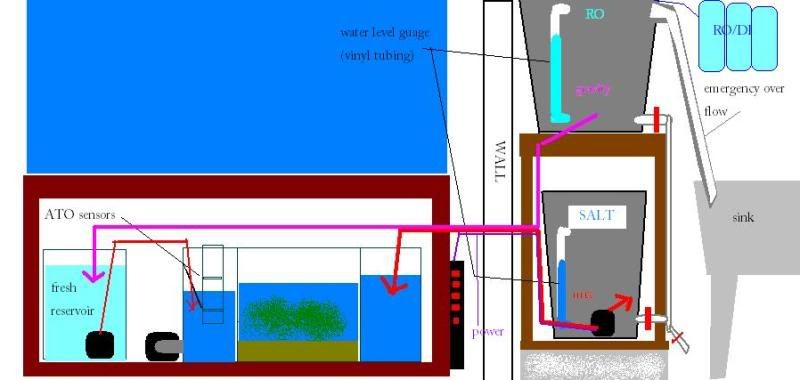
Sweet. This should solve the problem you were antipating about going horizontal right? I really like the "water level guage" idea. I have not seen this, nor did I think about it. That would definately keep me from having to open the lids and look in, especially having to climb up on the ladder each time for the top one...

I also like the emergency overflow. I wish I had a sink nearby to do that, but I don't.
Looks like you need one more ball valve on the purple line coming down from the fresh to the salt, just past the T. Otherwise, fresh would constantly be running straight into the salt bin.
http:///forum/post/2879540
ok here is the general schematic. any thoughts are welcome!
Sweet. This should solve the problem you were antipating about going horizontal right? I really like the "water level guage" idea. I have not seen this, nor did I think about it. That would definately keep me from having to open the lids and look in, especially having to climb up on the ladder each time for the top one...
I also like the emergency overflow. I wish I had a sink nearby to do that, but I don't.
Looks like you need one more ball valve on the purple line coming down from the fresh to the salt, just past the T. Otherwise, fresh would constantly be running straight into the salt bin.
aquaknight
Active Member
T, I don't think the purple line from the top RO actually goes to the salt can, just straight to the RO reservoir. He would just use the drain on the right edge of the stand. Just close the drain valve, and open both can valves.

t316
Active Member
Originally Posted by AquaKnight
http:///forum/post/2879588
T, I don't think the purple line from the top RO actually goes to the salt can, just straight to the RO reservoir. He would just use the drain on the right edge of the stand. Just close the drain valve, and open both can valves.
Yes, you are right. My eyes are getting old, but now I see that one is purple and the other is supposed to be red (but blending in with the purple), so they are seperate.
aquaknight
Active Member
I believe there actually is purple, a tiny power line for the salt pump. I did a double take as well.
Those water level guages on the cans are ingenious Salt! Only thing is that top can is going to be swiss cheese with 5 holes in it. That's going to be a ton of uniseals

Those water level guages on the cans are ingenious Salt! Only thing is that top can is going to be swiss cheese with 5 holes in it. That's going to be a ton of uniseals
saltn00b
Active Member
ok lets see...
1) i cant take credit for the water level guages, i saw another cat on here do it, but i really liked it.
2)the lines to the res or the fuge. thats the one thing i have not fully thought out or comitted to at this point. going through the wall at this point there are 2 water lines (red and pinkish) and one electric line (small purple) . i am thinking of maybe an "up and over" vinyl tubing for the salt, leading through the wall, and then into dual fresh / salt PVC rail across the back wall and into the proper place. sorry abolut the color choices, they were more visible when i was creating it. i will make a replacement image soon.
i dont really know how to get the RO through the wall. will gravity work? i think so, but not with a pump or an on/off switch, so maybe gravity to a ball valve PVC spigot over the reservoir? only problem with that is the pipe will have stagnant RO in between uses. does that make sense?
3) what are uniseals ? same thing as bulkheads? i am looking at getting a bunch as you can see, but only .5". a handful of small BHs in a 40-50 g can should be fine. ( i hope)