2Quills, 120G Re-build thread.

al&burke

Active Member
Quote:Originally Posted by 2Quills http:///forum/thread/378912/2quills-120g-re-build-thread/300#post_3348081
Quote:
Originally Posted by Al&Burke
http:///forum/thread/378912/2quills-120g-re-build-thread/300#post_3348060
Corey - I think the problem with any oil finish any saltwater that might splash on it, it might take it off if it is not wiped off right away. The poly wipe does not get dry really fast it gives you plenty of time to work it in. And you can get a real super shiny finish with fine sanding between coats, as Shawn said.
Yeah that's what I had always heard and figured with the saltwater...pluss the oil has to pretty much be re-applied every 6 months or so to keep it looking nice. My plans were to put 4 coats of poly on the stand for protection from the salwater and overal longevity. I also did the ******** of the stand and canpoy with 3 coats of the urethane paint (fine sanding between coats). I would have done 4 coats but I ran out of the paint and that stuff wasn't what I would call cheap so I didn't bother with the 4th.
I had just seen a co-worker refinish his teak benches with oil and it looks really nice. But I don't think oil would be best on an aquarium stand. I was currious for the possiblility of other projects if oil could or should be applied over stain.
I'll look into the wipe on poly. What would or did you guys use to apply it? Cotton or terry cloth?
BTW...I like the new anemone, Al. What kind is it?
 

2quills

Well-Known Member
Just an update: Got all moved into the new place. Been really busy cleaning and putting everything away. I did manage to get a small bit of work done today on the stand. I got the stand, tank and canopy stacked up again. I cut the remaining palisters for the side coners on the front. Dato cut them to be able to accept the dentil inserts. I still want to route them with a nice edge, then glue them in and finish sand. Also finished trimming out the canopy door and started work on shelf where the bottom front of the tank is. I do have some small boo boo's to fix after the move. Nothing major but it did take a few dings here and there from the movers. Arggg! Oh well, it was worth it not to have to move it myself. Darn thing is heavy. Time is getting closer for color and finish.


al&burke

Active Member
Corey I have to say that I am so use to seeing your dining room as a shop, I am shocked you now have a garage, I can just imagine what you are going to build now. LOL looking good man!!!!
 

2quills

Well-Known Member
Thanks, guys!
Meow: I've put myself on a pretty strict budget for a while as far as the build goes. Once the stand is done I have to make the new sump, then I can start picking up the equipment and get it going. The lights I think I'll do last. So realistically I'm shooting for early summer to be up and running.
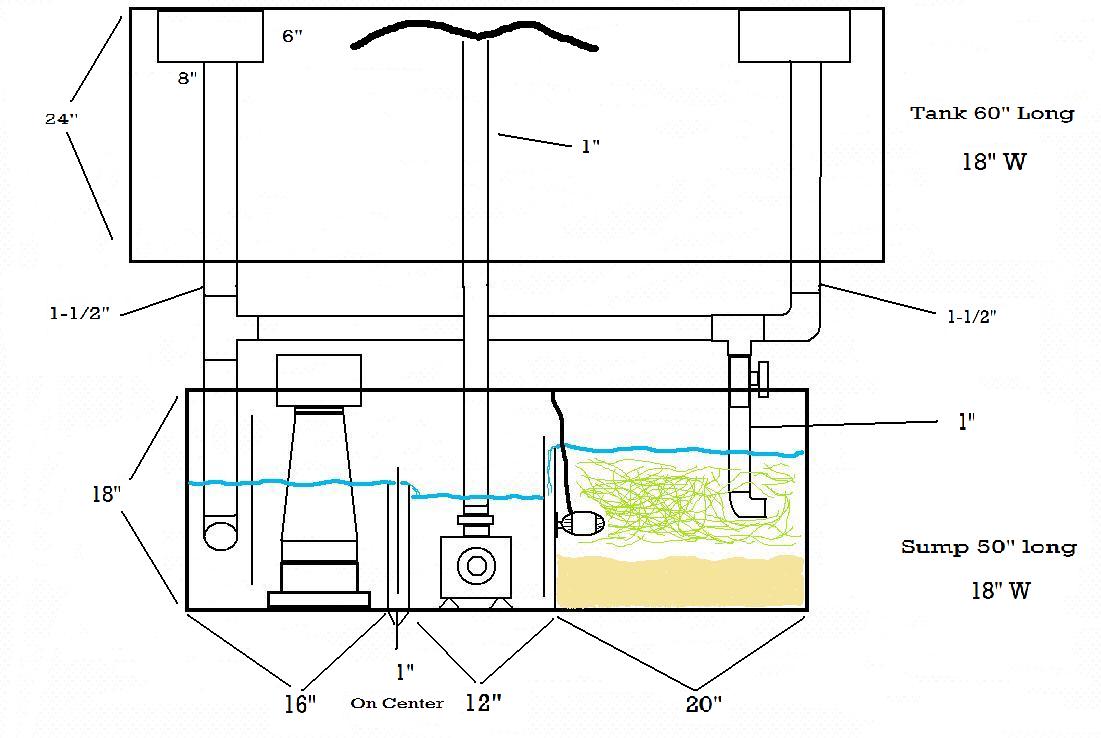
Hey, Al I was wondering if you could help me out with a nice drawing. I made one, myself outlining how the overall system will run but I would really like to have one of your professional drawings if you don't mind? When ever you have time ofcorse, no rush or anything. This is what I'm working with....
 

al&burke

Active Member
Quote:
Originally Posted by 2Quills http:///forum/thread/378912/2quills-120g-re-build-thread/320#post_3362914
Thanks, guys!
Meow: I've put myself on a pretty strict budget for a while as far as the build goes. Once the stand is done I have to make the new sump, then I can start picking up the equipment and get it going. The lights I think I'll do last. So realistically I'm shooting for early summer to be up and running.
Hey, Al I was wondering if you could help me out with a nice drawing. I made one, myself outlining how the overall system will run but I would really like to have one of your professional drawings if you don't mind? When ever you have time ofcorse, no rush or anything. This is what I'm working with....

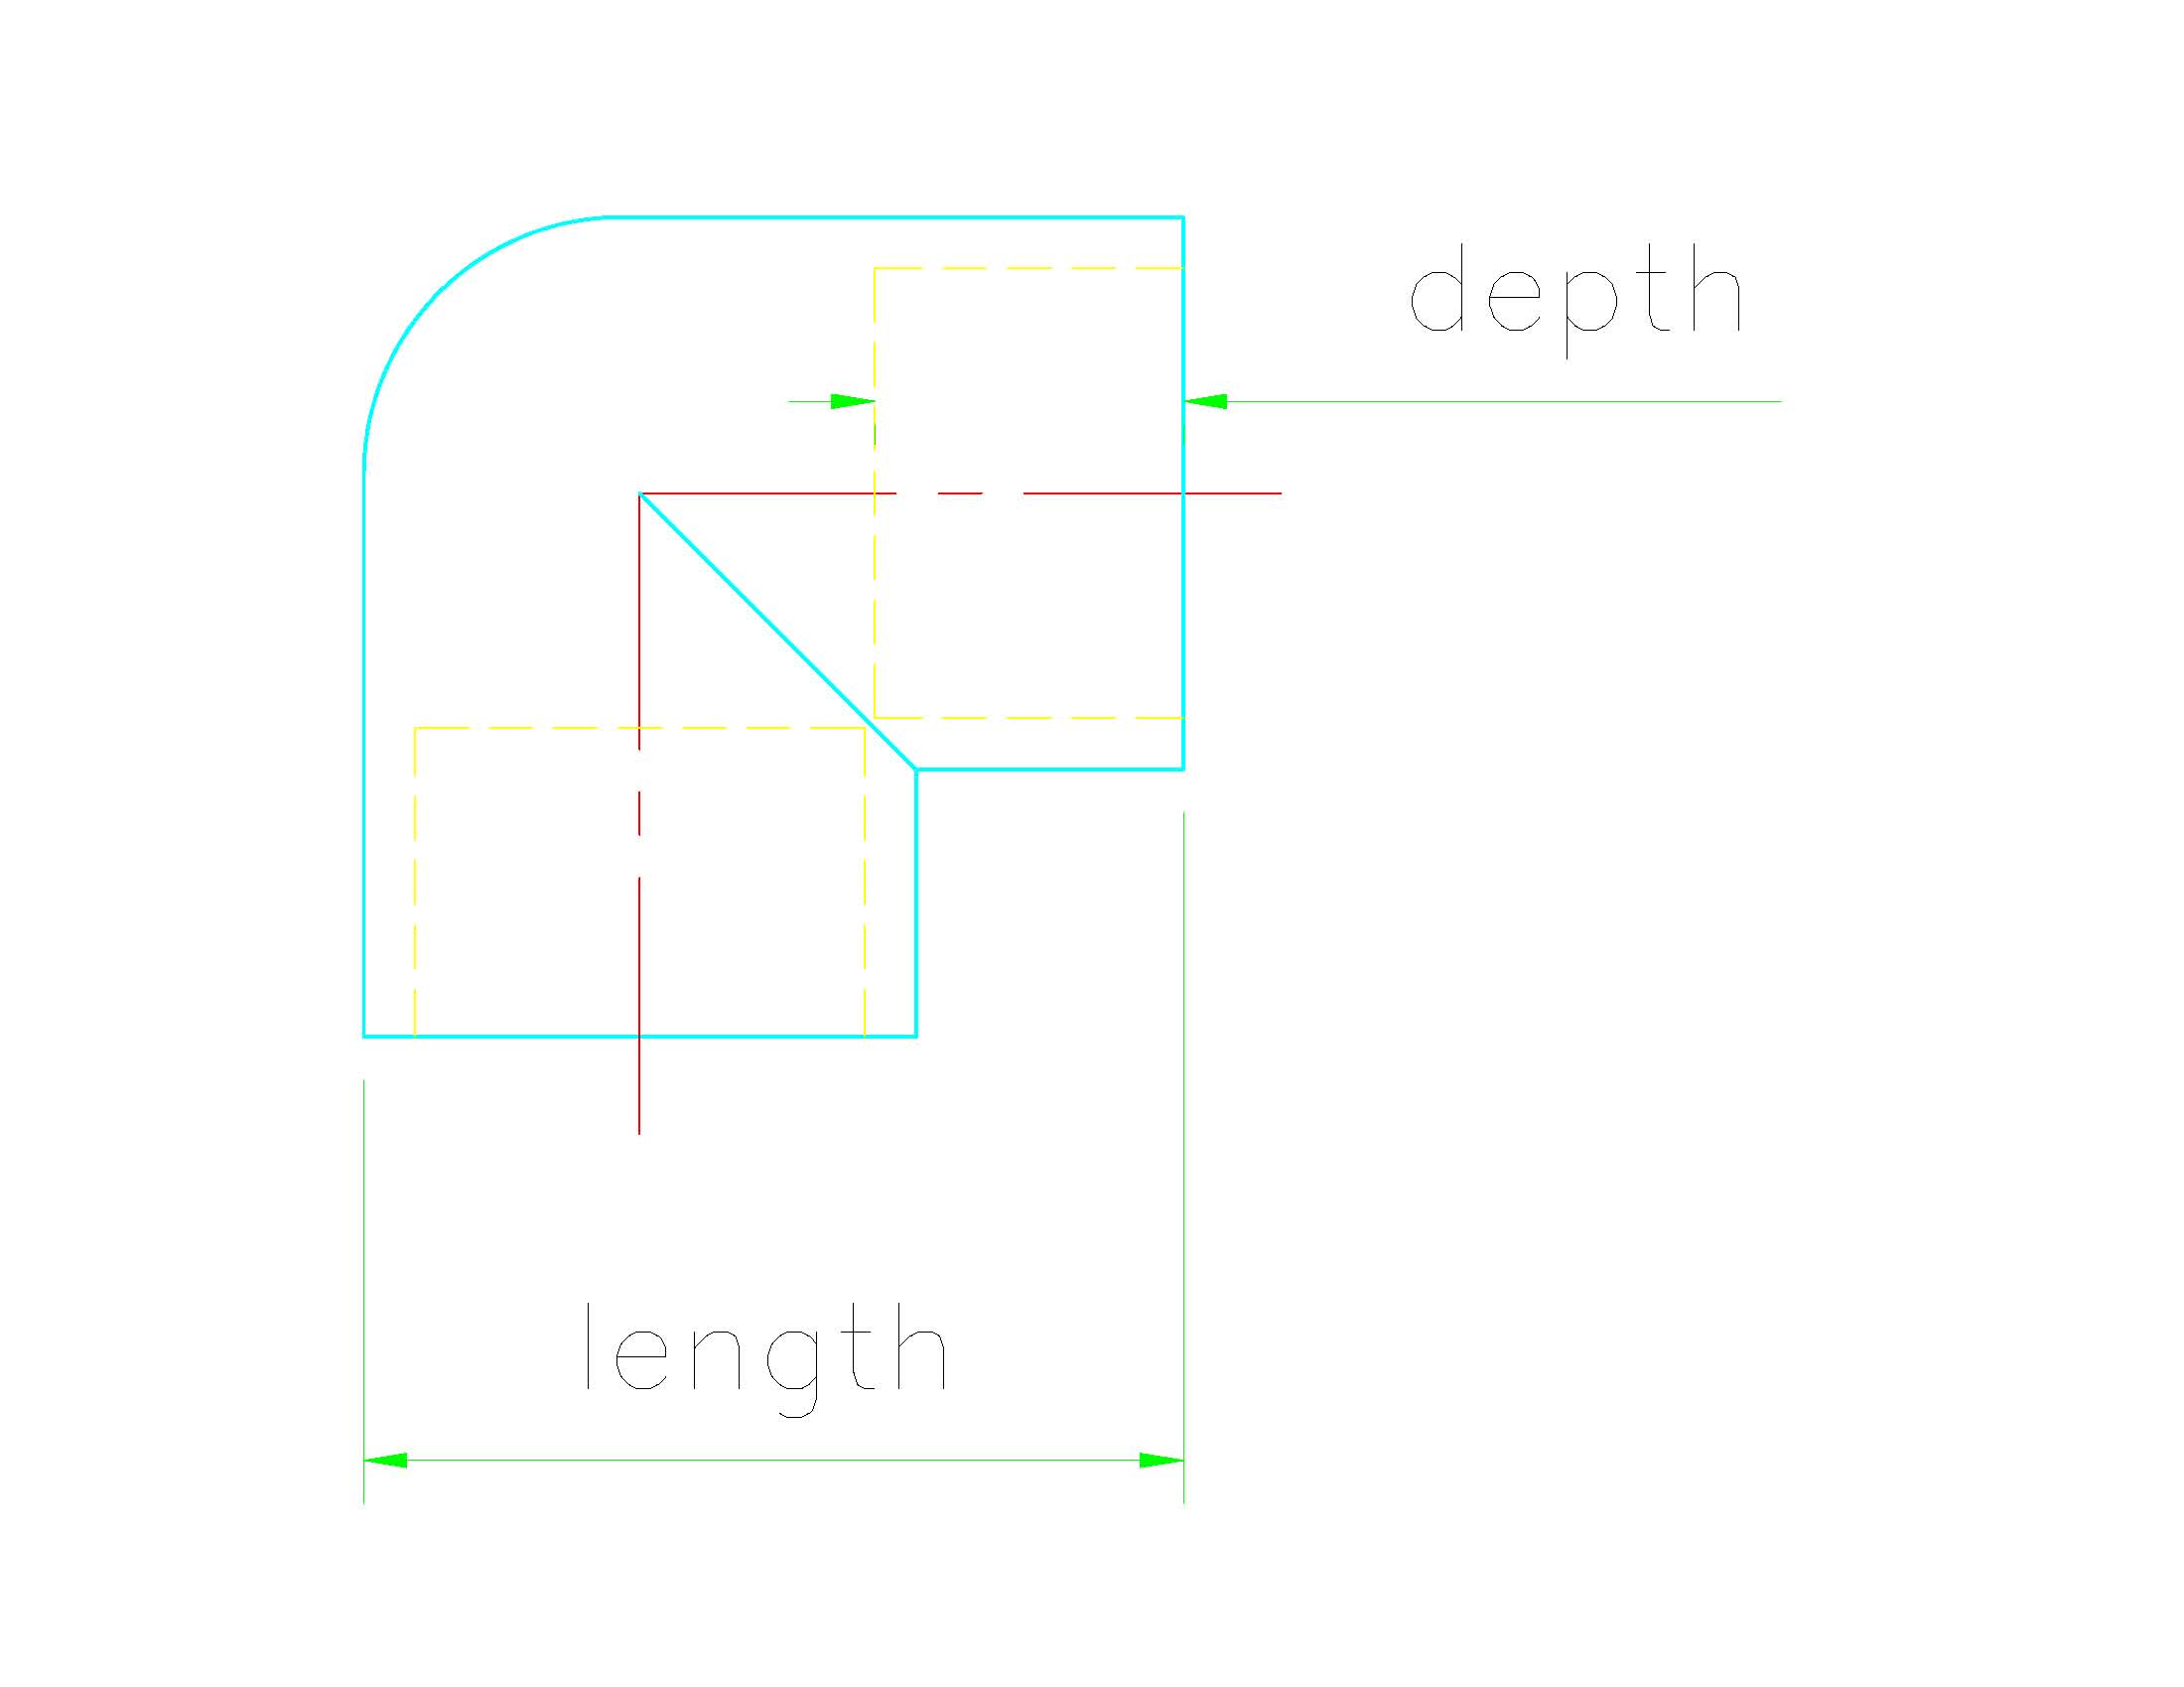
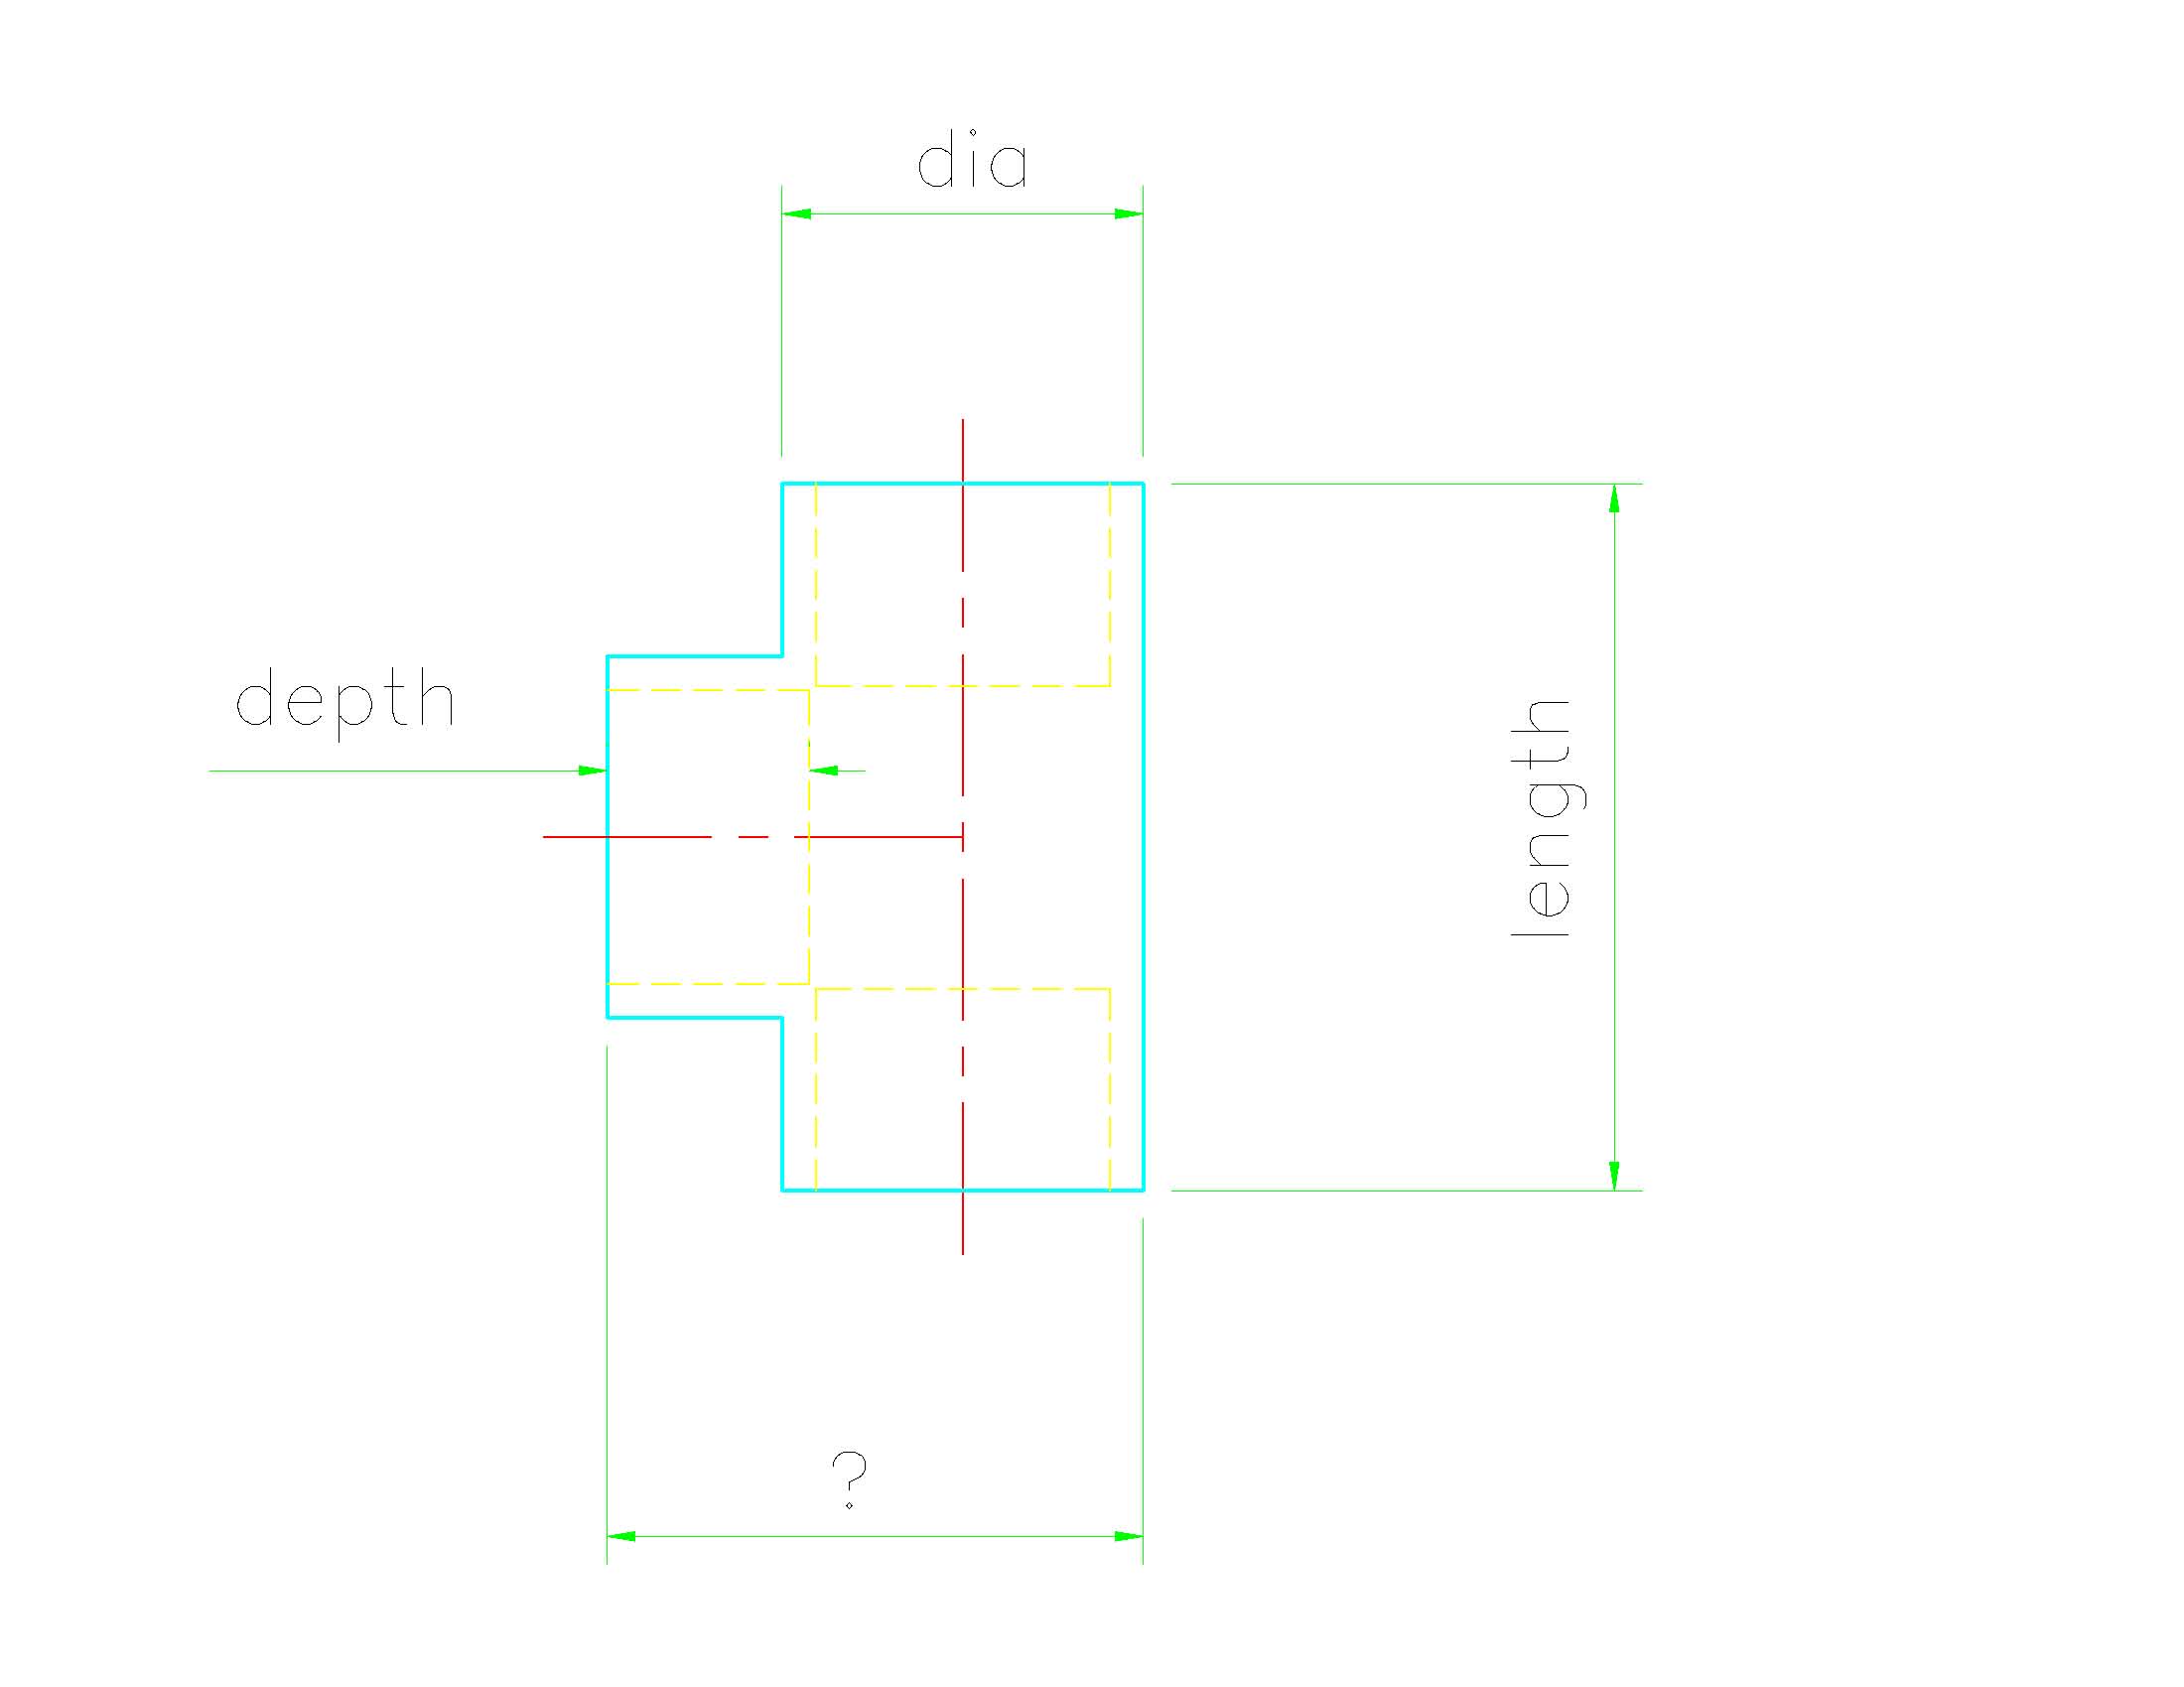
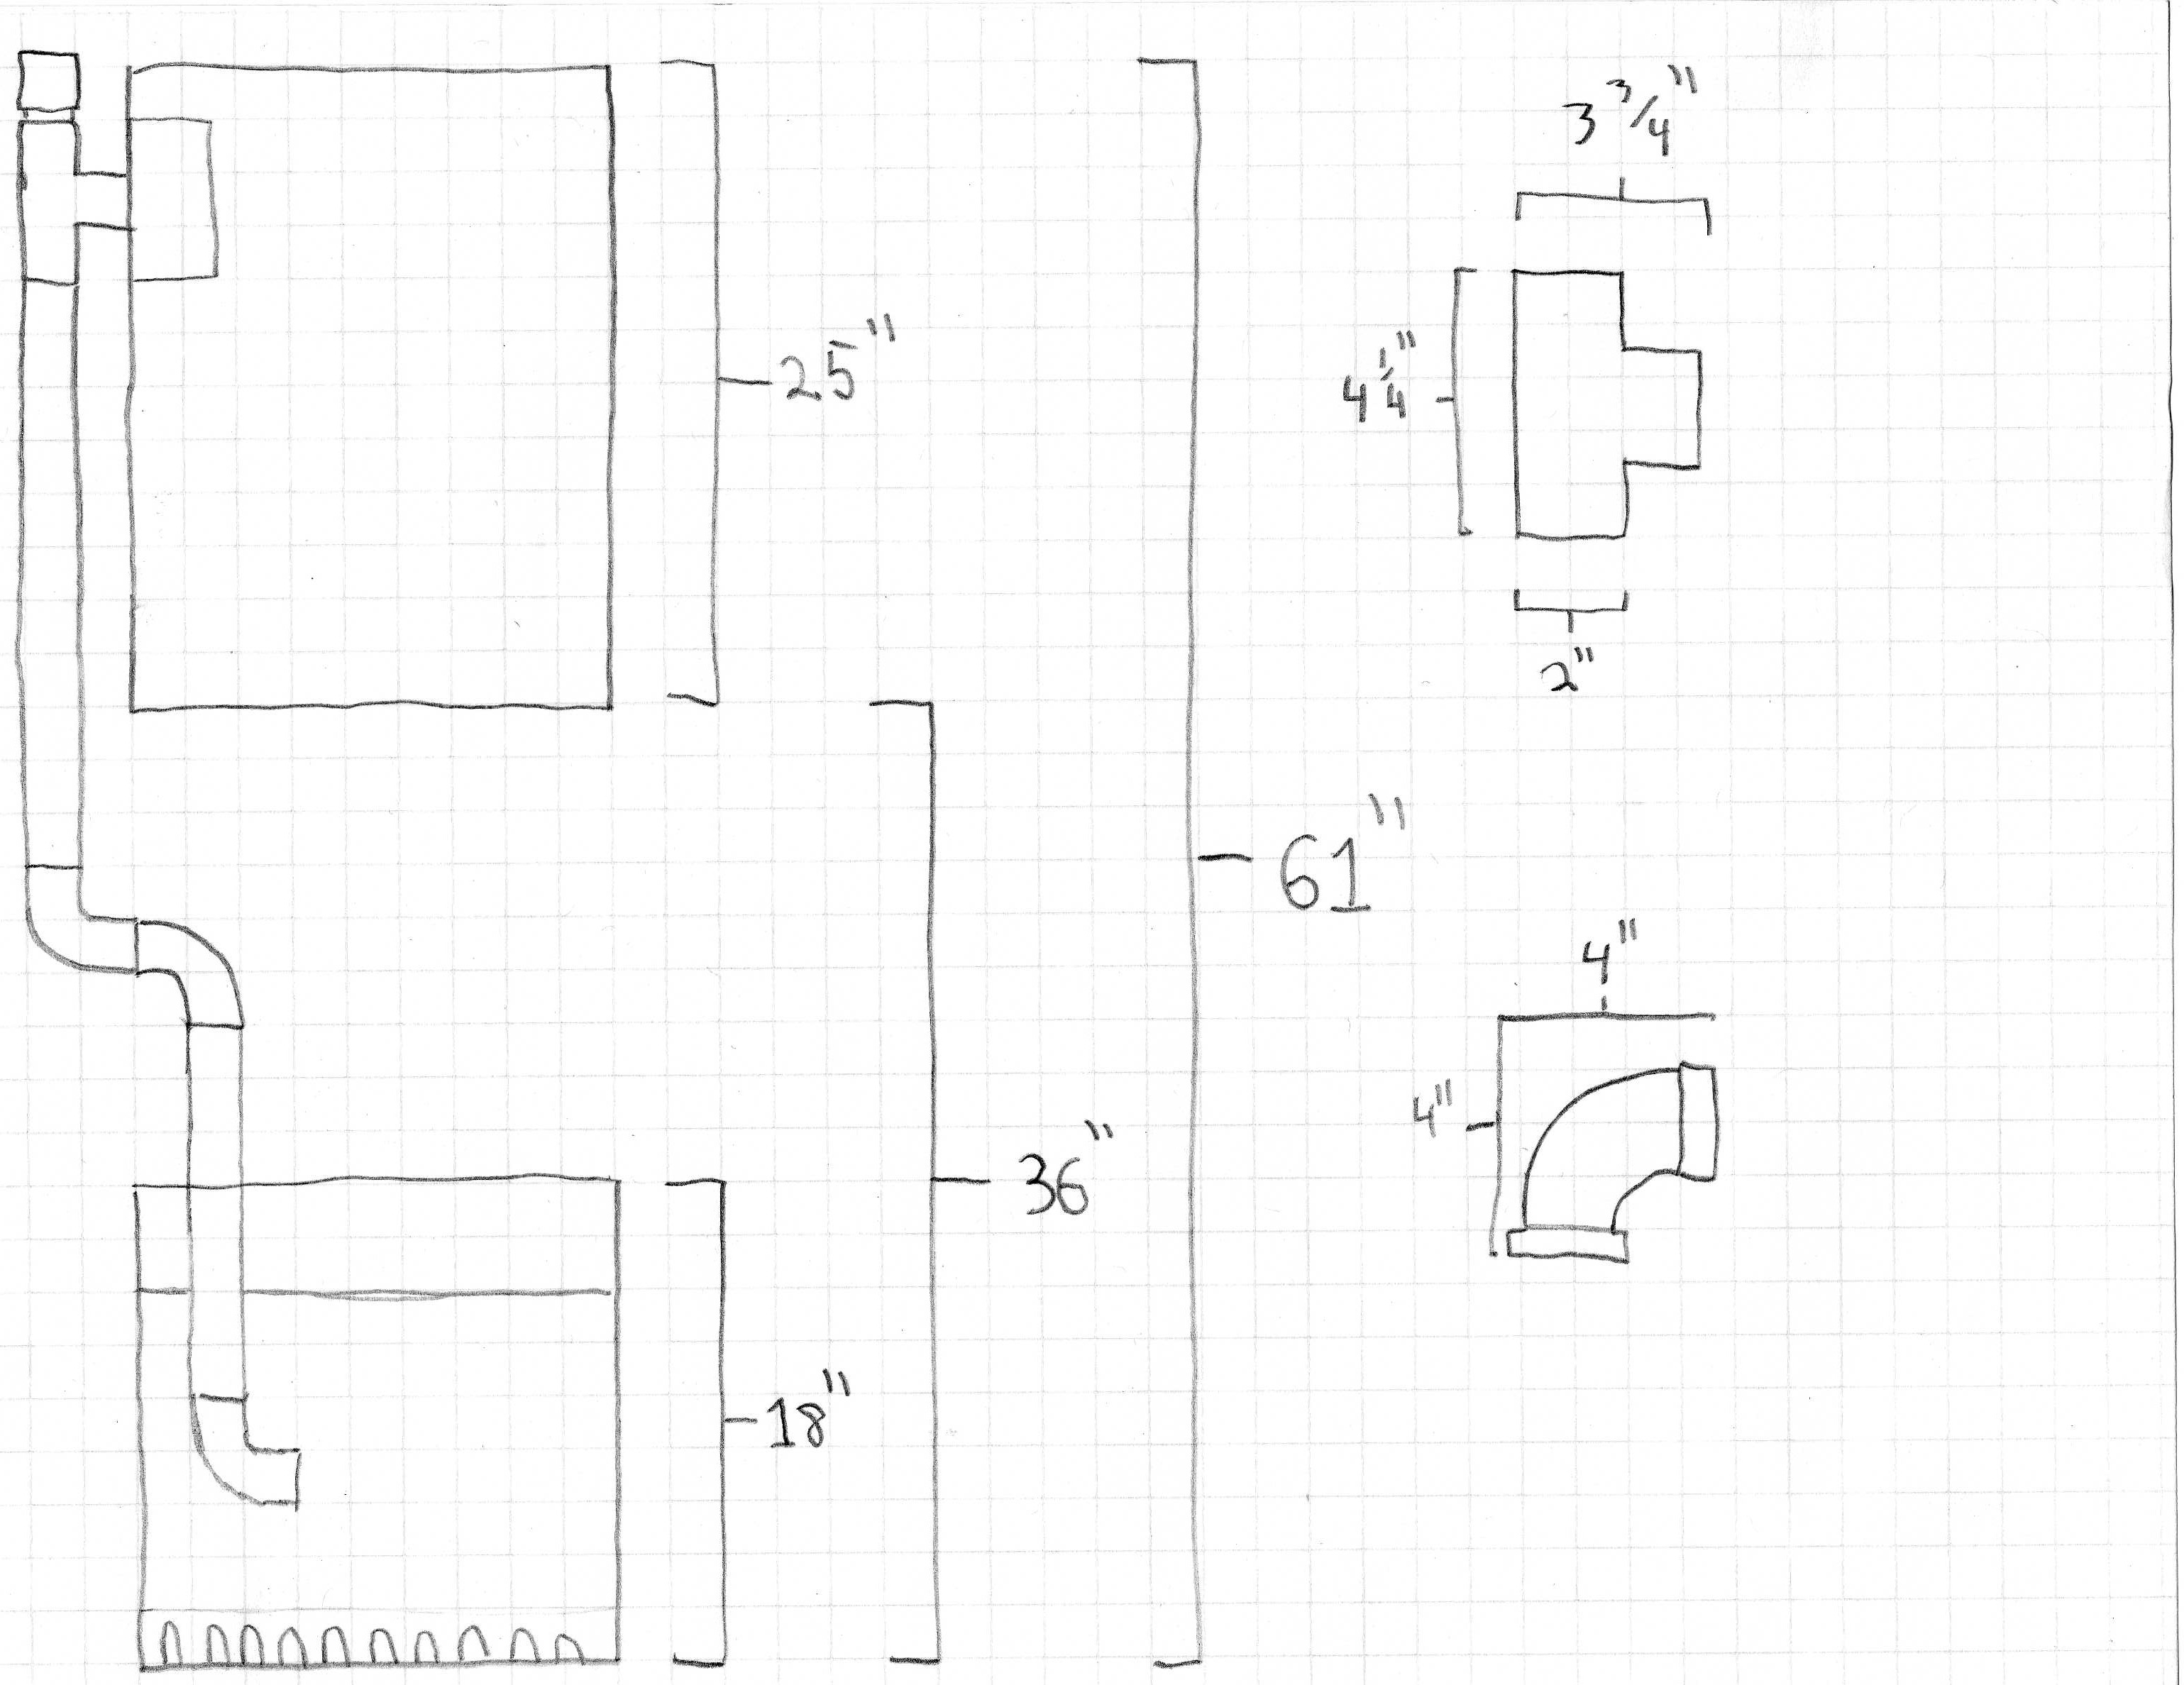
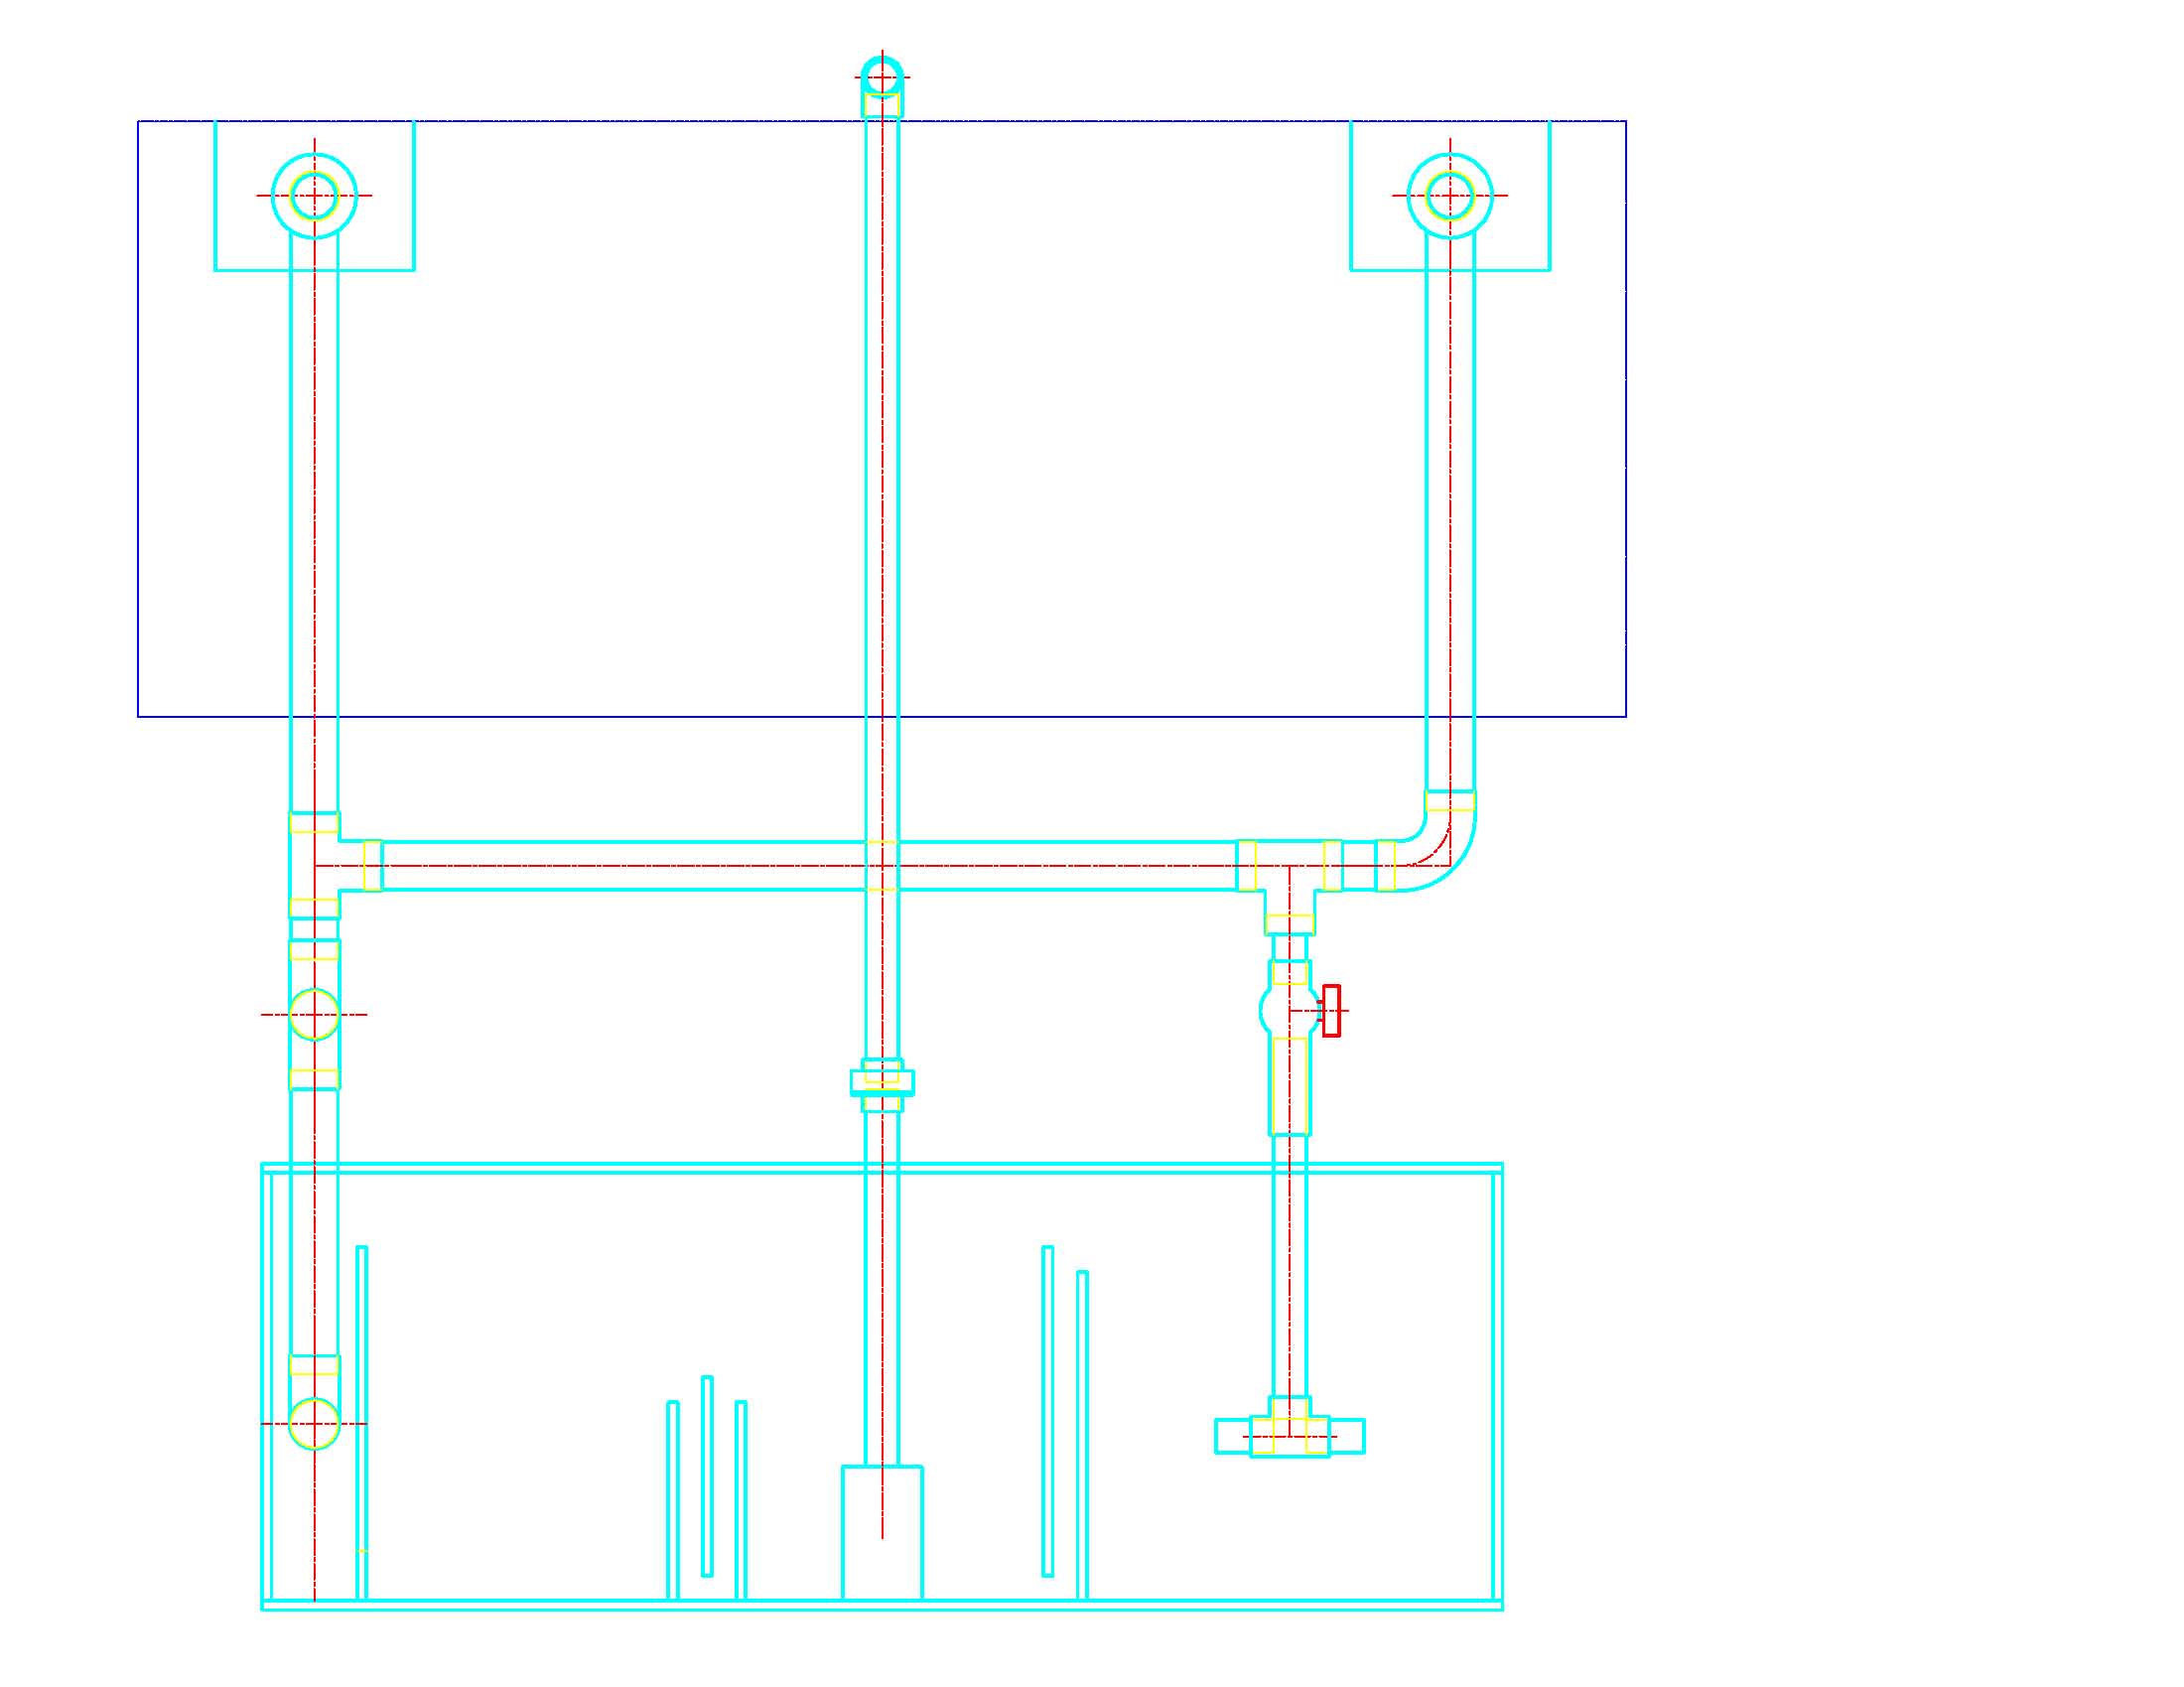
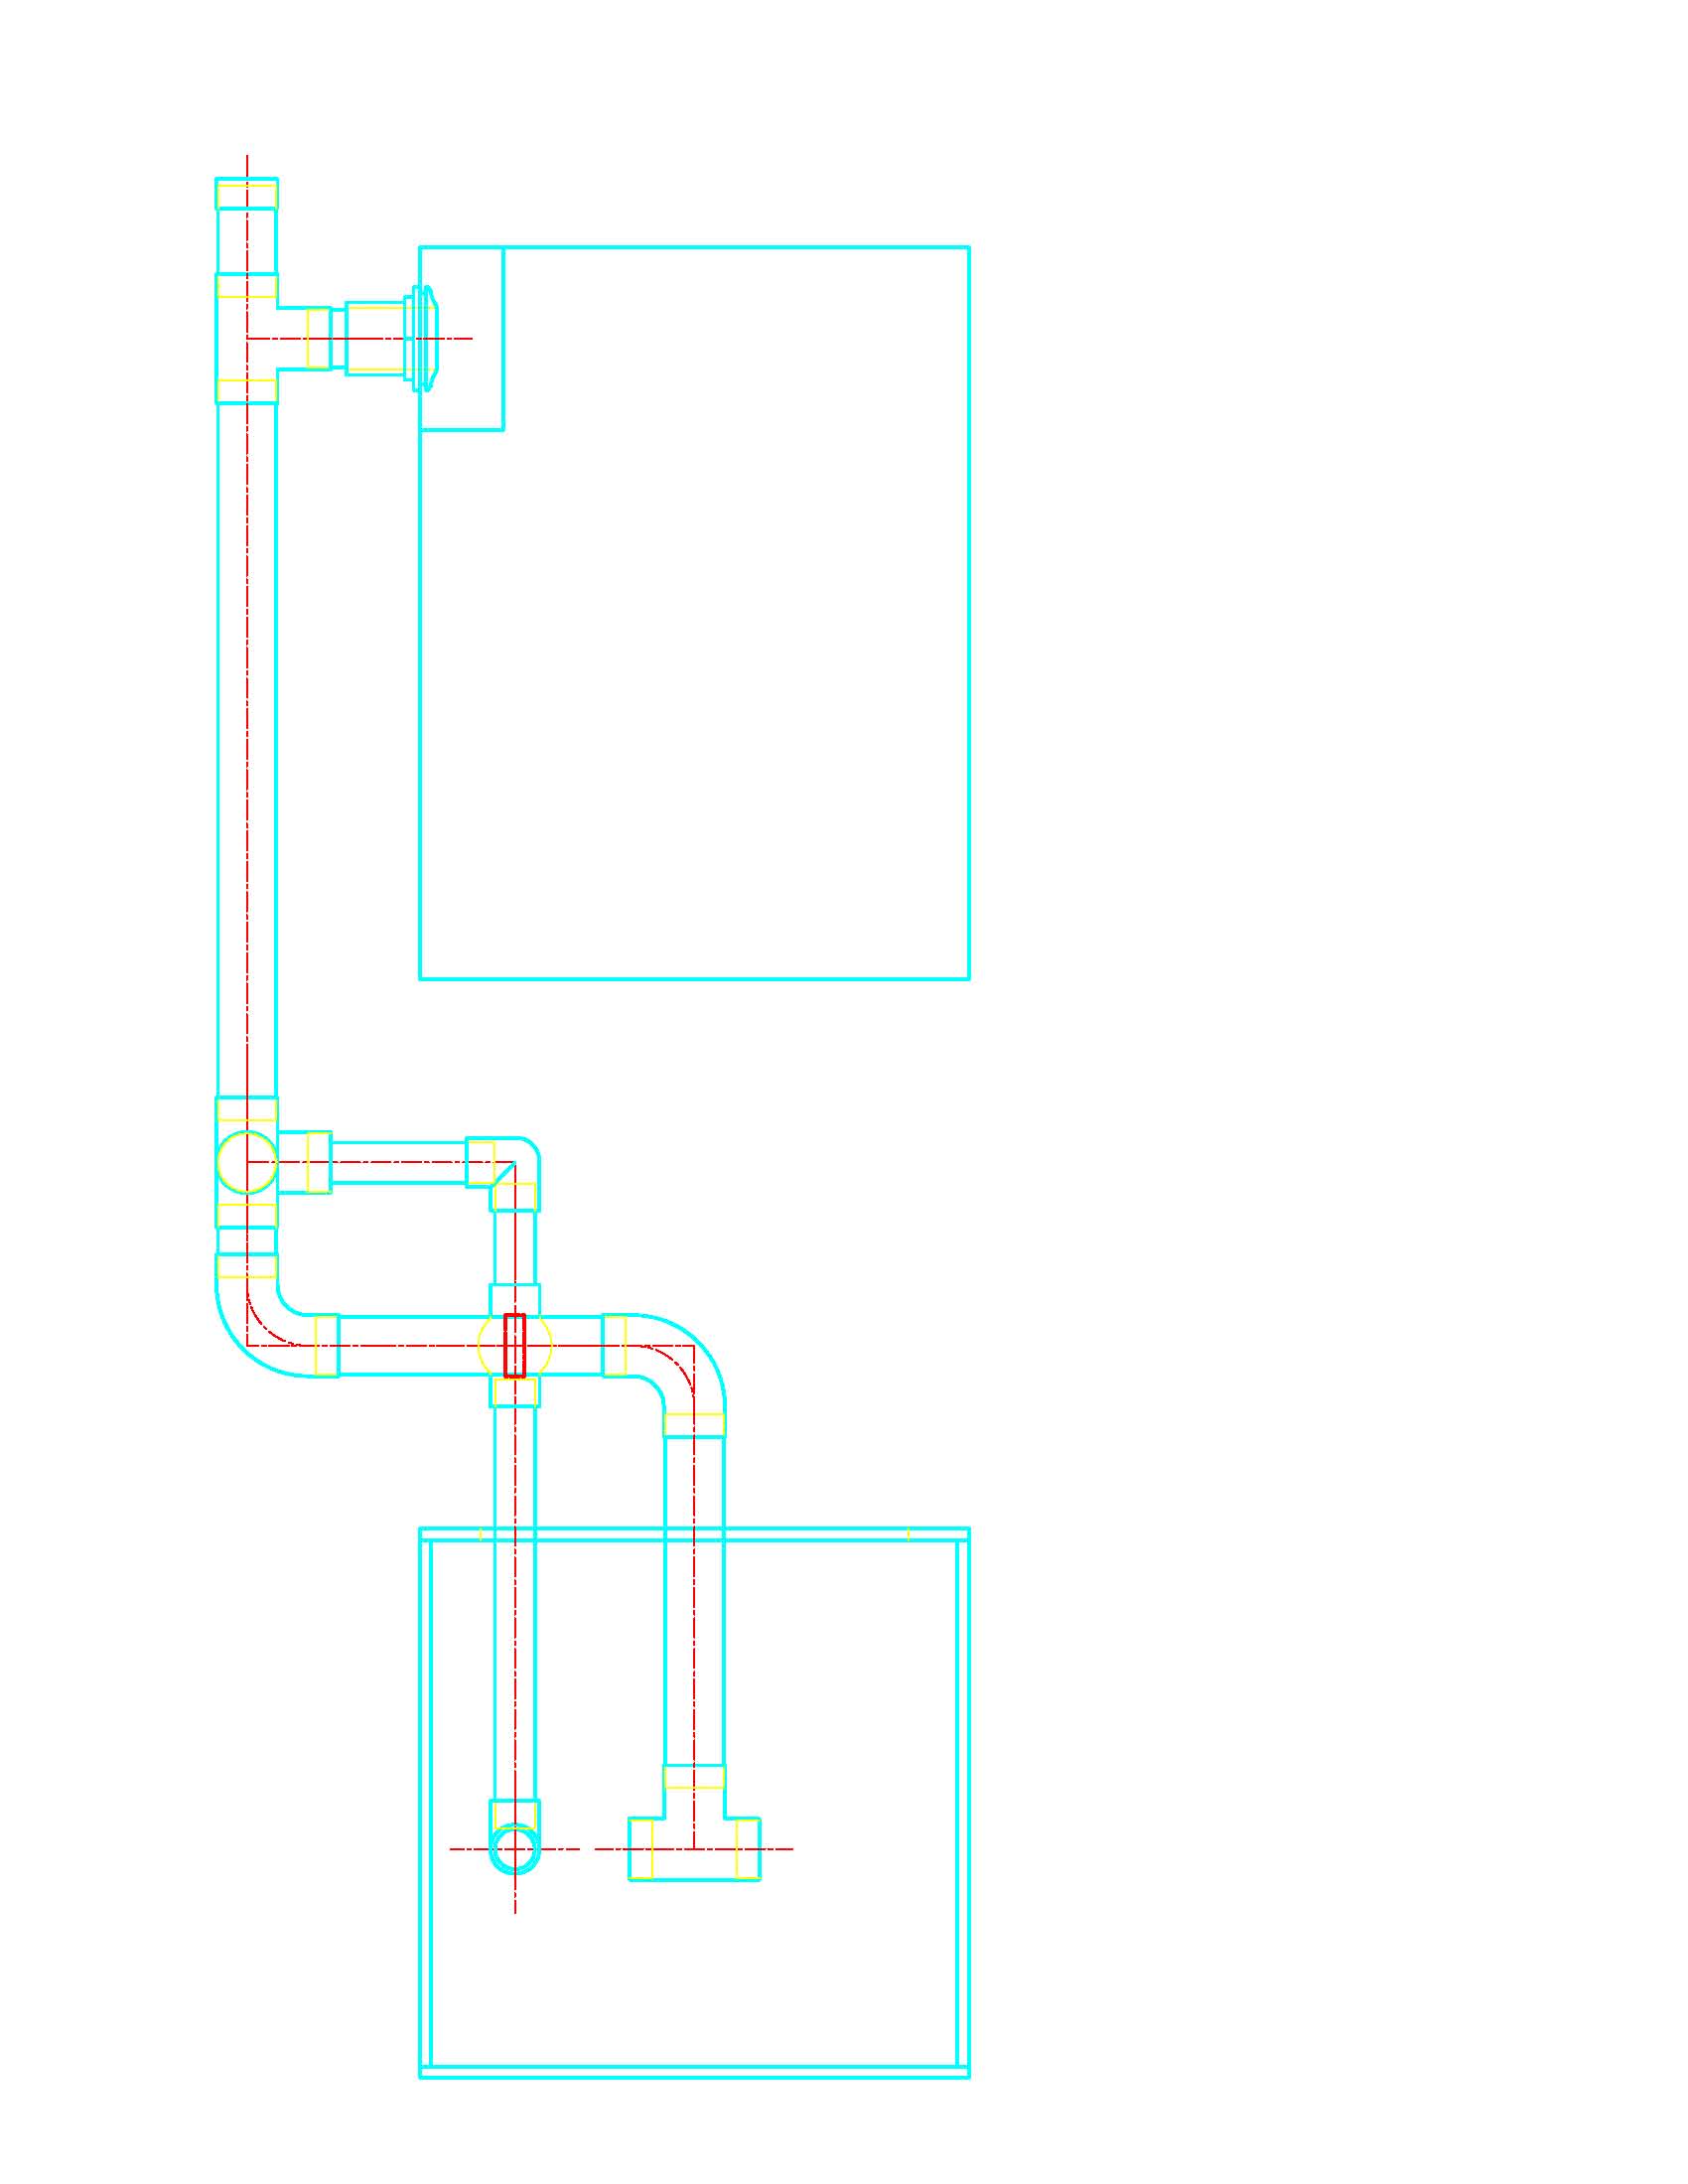
Corey - If you give me the elevations of your tanks I can draw the plumbing to scale then you can just cut your pipe with the dimensions, if you want - I just need to know the actual dimensions of your elbows and tees.
 

2quills

Well-Known Member
Excellent, thank you, Al! Let me know if you can't make sense of this. It's a side profile view of the two tanks with measurements of the actual distance that they will be apart from eachother. The distance for the top of the sump to the bottom of the display tank is 18". The top of the T behind the overflows will be like a durso. I will be using the long sweep 90's for elbows and not the regular 90 degree elbows.
 

al&burke

Active Member
No problem Corey - I love doing these kind of things - That is perfect Corey - can you measure the slip connections on your fittings -
 

2quills

Well-Known Member
The slip connections are 3/4" deep on the inside of the fittings. On my hand drawing up above I drew them to scale but I forgot to add in the T between the to bottom elbows for the drain from the other side to connect to that one. So essentially the lowest vertical pipe that drops into the sump will have to be extented another 4 inches which would land it somewhere in the middle of the fuge.
 

al&burke

Active Member
The only thing I am strugling a bit with is the drain from the fuge - the horizontal 1-1/2" we should make sure there will be enough control with the 1" to the fuge - i am afraid it might want to all go to the sump. Maybe we should separate it from the other return from the DT. Something to think about.
 

2quills

Well-Known Member
Quote:
Originally Posted by Al&Burke http:///forum/thread/378912/2quills-120g-re-build-thread/320#post_3363034
The only thing I am strugling a bit with is the drain from the fuge - the horizontal 1-1/2" we should make sure there will be enough control with the 1" to the fuge - i am afraid it might want to all go to the sump. Maybe we should separate it from the other return from the DT. Something to think about.
Yep I see what you're saying, It should be ok though, actually it's probably my fault for not drawing or explaning better on how it will go. In your drawing you're showing the 1" fuge drain coming off horizontal and then dropping down.
The way it will actually go is like this... The two 1.5" drains will come down behind the tank where they will both turn 90 degrees horizontal with the elbows. And then they will come in underneath the stand just a bit. And at that point the 1.5" drain on the right side with turn and be ran horizontal to where it connects with the other drain at a T which will be installed horizontal as well. So the 1" fuge drain will drop strait down. I should have plenty of control with it that way. I think in your drawing you have it showing as the 1.5" horizontal connects on the back side of the stand.
I picked up some pvc today. I'll do a dry fit tonight when I get home and take a picture so you can see what I mean. Always hard to explain something in three dimensions with words. I appreciate your help with this bud.
Thanks again.
 

2quills

Well-Known Member
Just some quick shots of the plumbing. Obviously not a finished product but should give ya the general idea.


2quills

Well-Known Member
A little more headway on the plumbing. Made a few changes that I think I like better. Still not a finished product by any means but I think it's going to work good. The only other thing that I might do is add a union/valve in the middle of the horizontal 1-1/2" drain pipe. Probably make some last minute adjustments when the sump goes in but ther then that I think it's a winner. The wood planks in the bottom of the stand are simulating where the sump chambers will be. Thoughts? Yays - Nays?


2quills

Well-Known Member
Sure thing. The drain bulkheads are both 9" from the sides of the tank in and 4 1/14" from the top on center. The return is dead center in the middle of the tank and 3 1/4" on center from the top of the tank. Overflow boxes are 6"x8". There is approximately a 4" gap between the sides of the boxes and the sides of the tank.
 
Top