2Quills, 120G Re-build thread.
- Thread starter 2quills
- Start date
2quills
Well-Known Member
Quote:
Originally Posted by Al&Burke http:///forum/thread/378912/2quills-120g-re-build-thread/360#post_3364876
I tried a 3/4" fitting the 1" pipe was a tighter fit.
That's what I was figuring, just currious. Thanks for the heads up, bud.
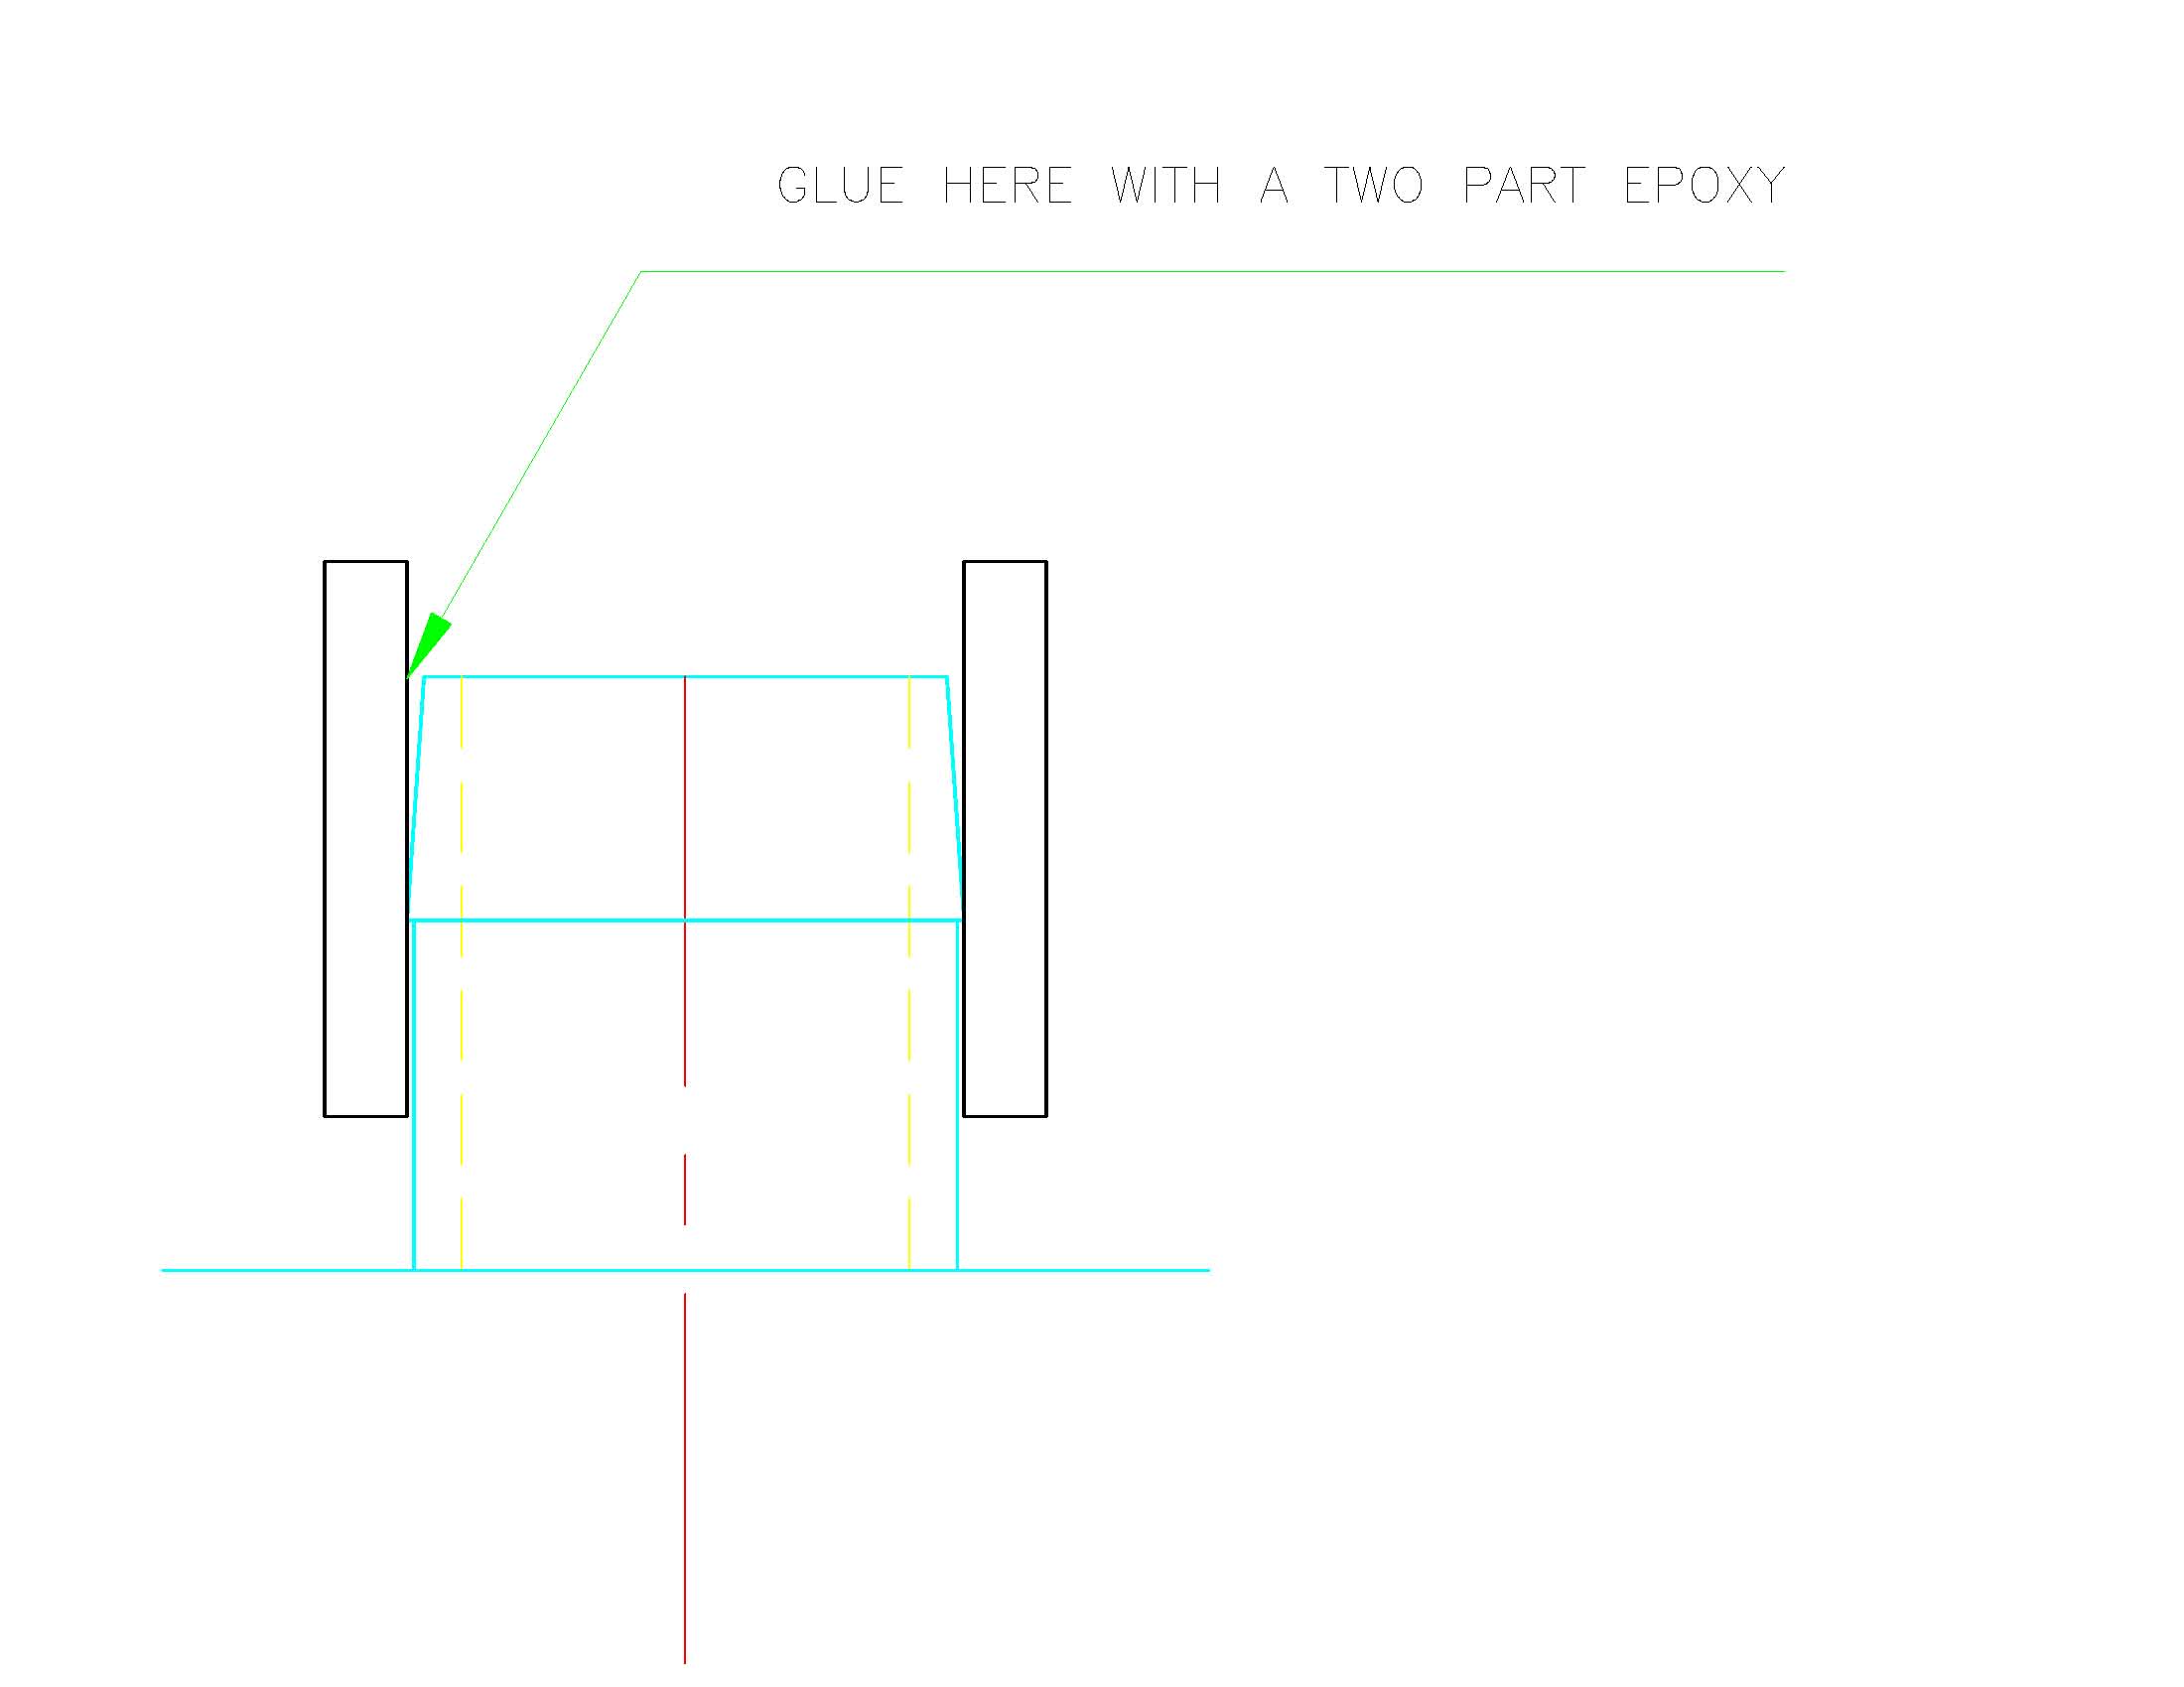
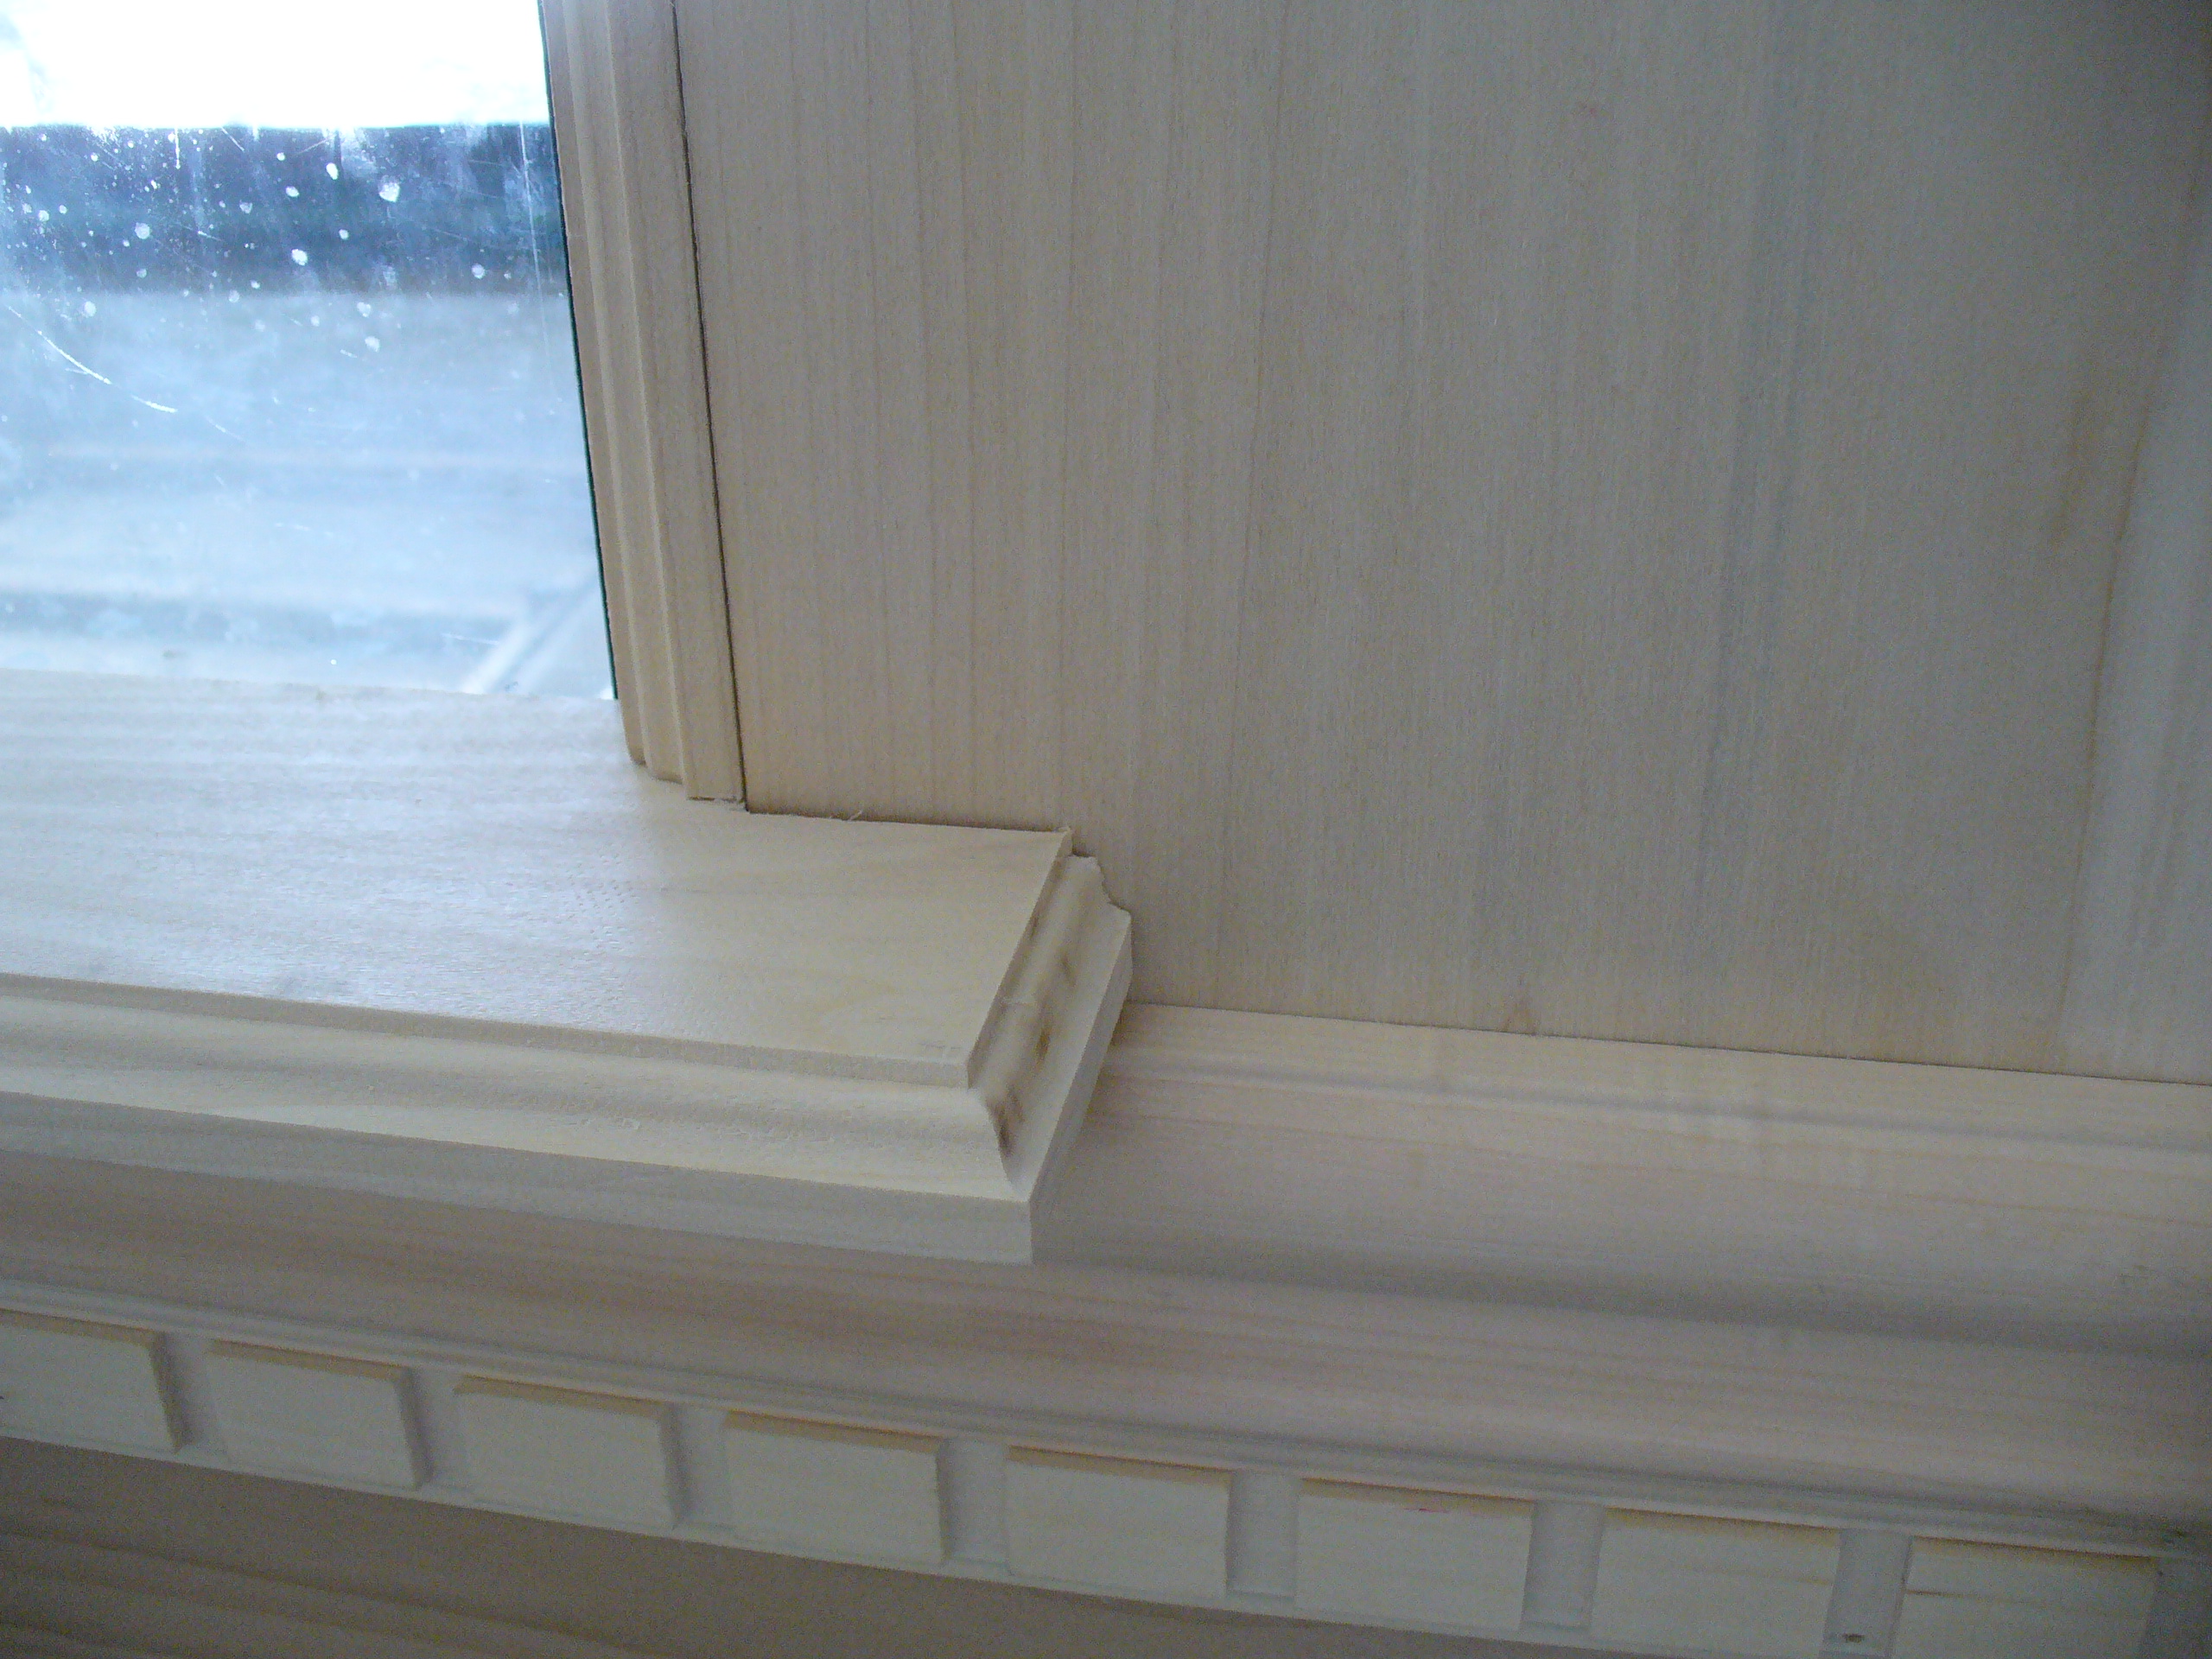
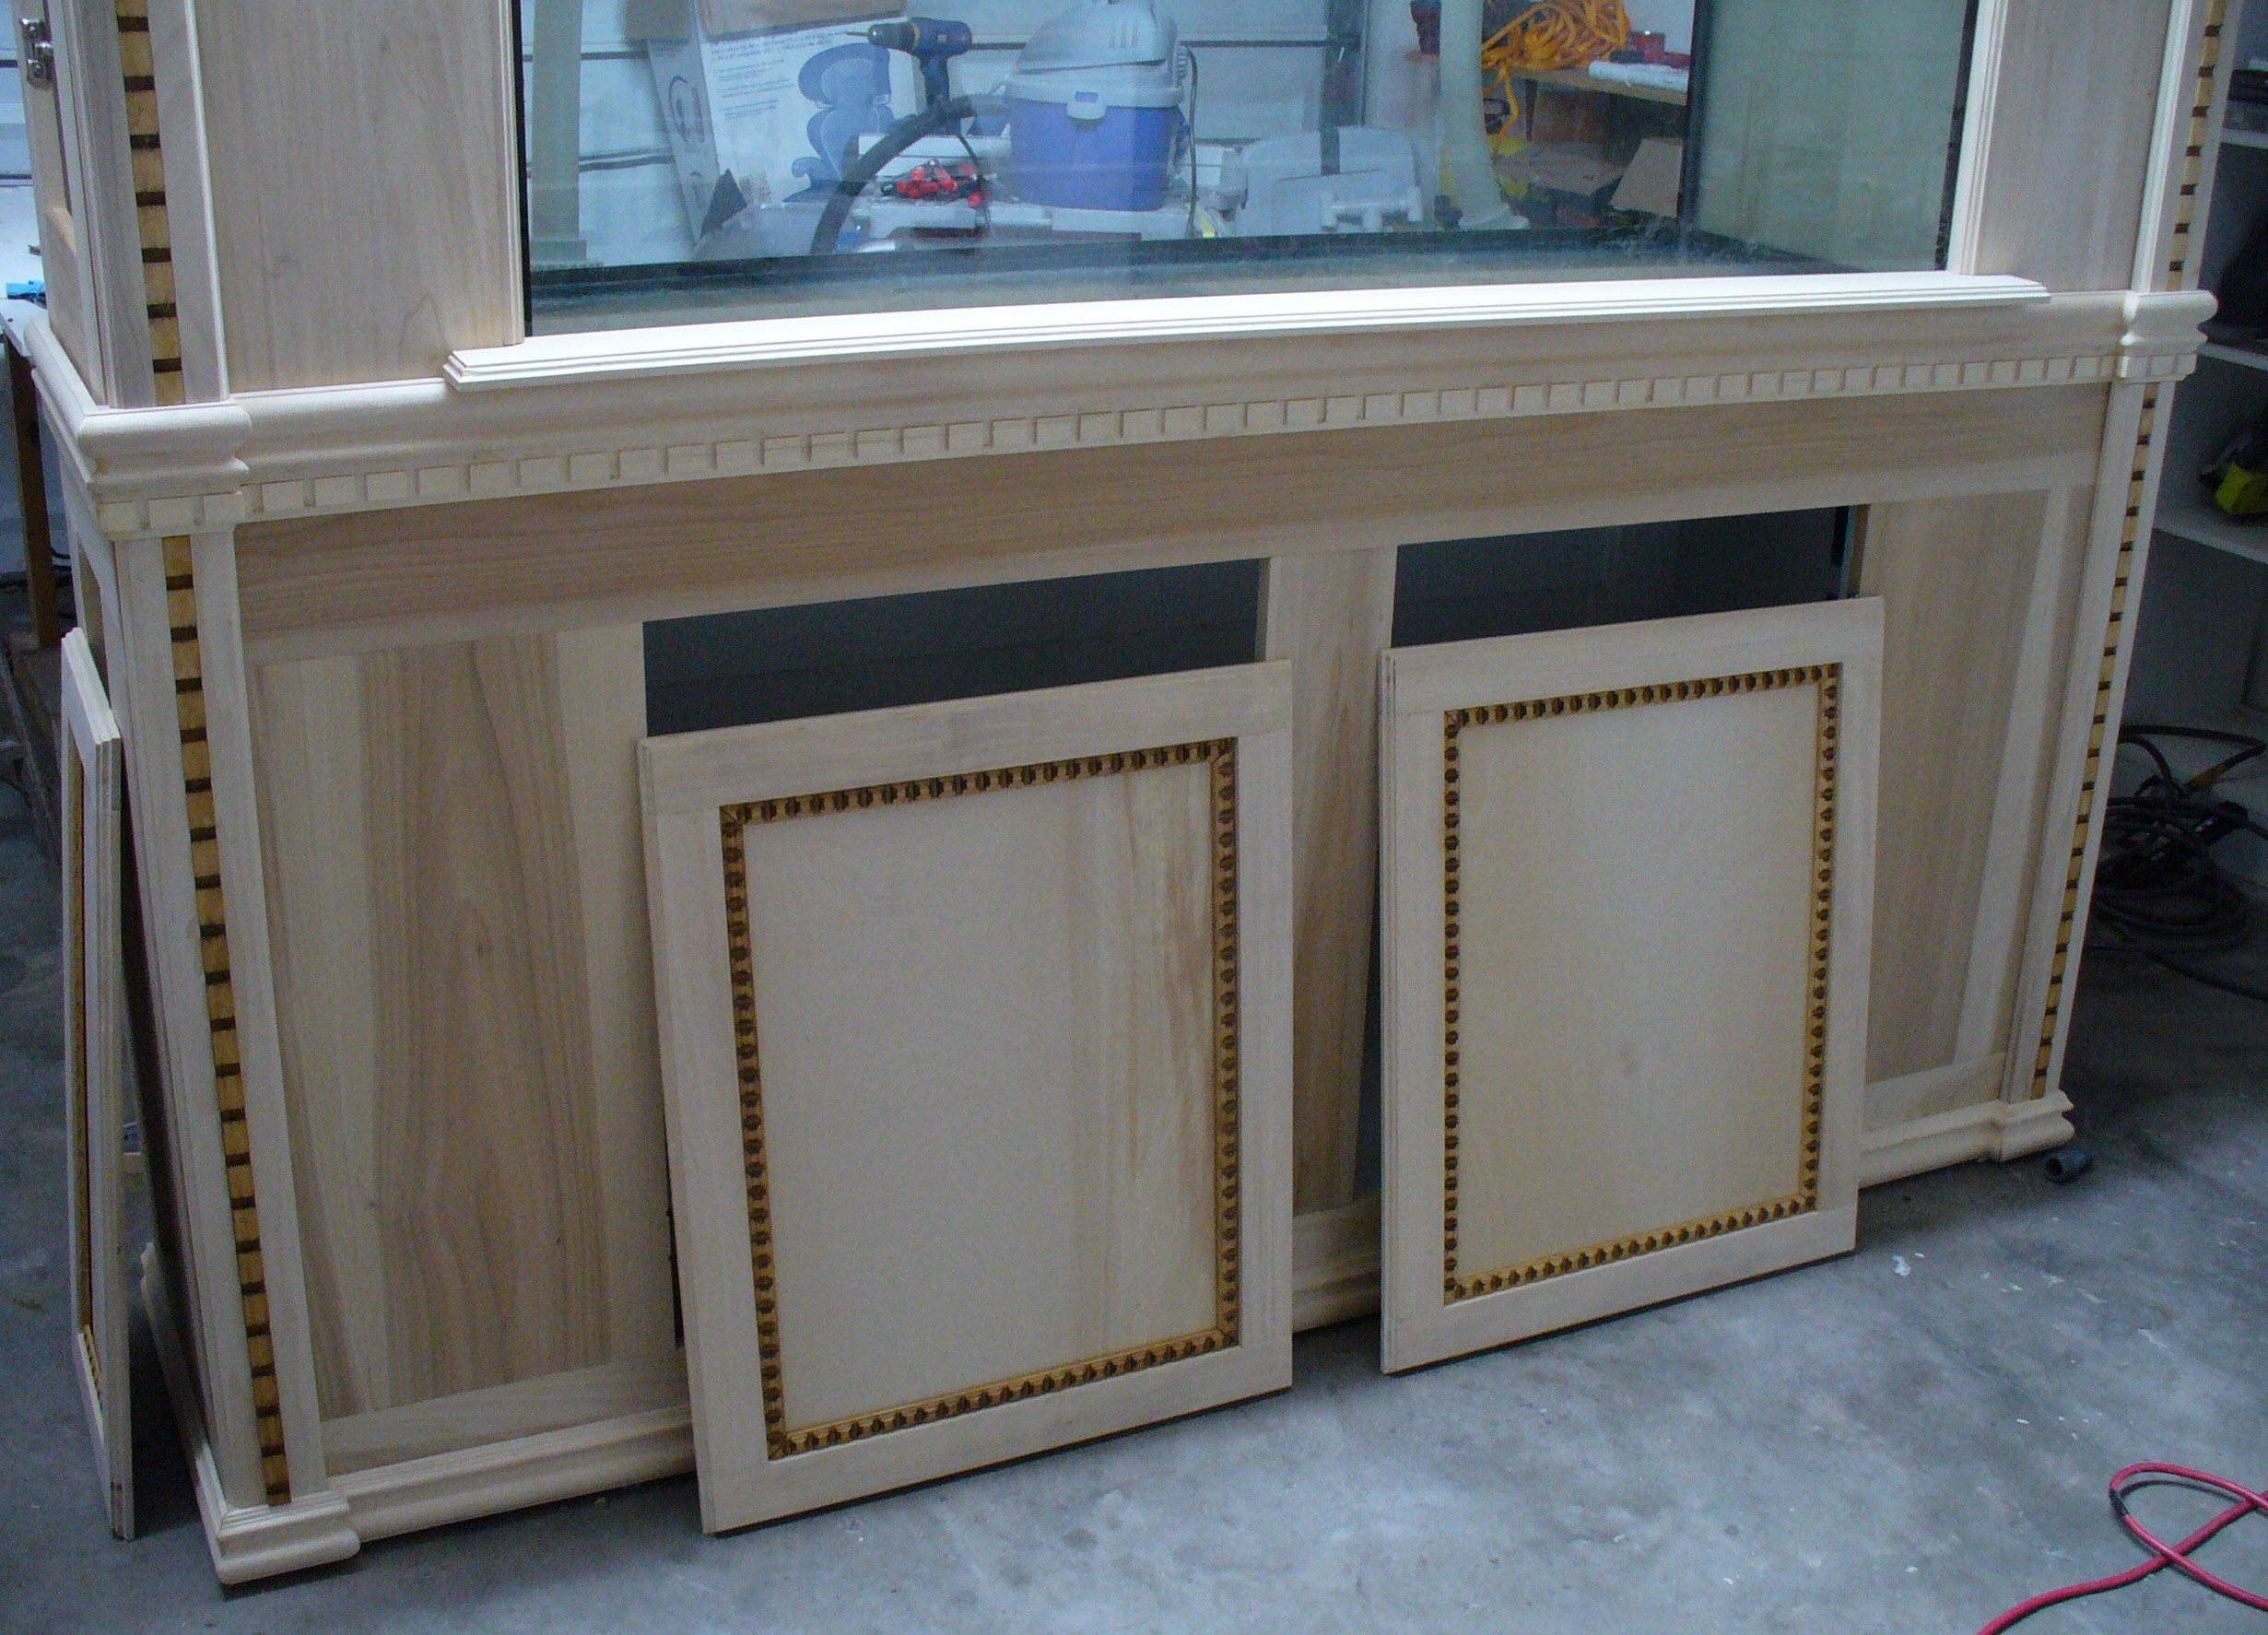
Did a little more work to the stand today ontop of replacing the fuel pump in my work truck. Finished trimming my last two doors, cut and routed some trim pieces for around the front of the tank. I also had cut the shelf and routed the edge for that as well...but I'm not very happy with how I cut it so now I need to make a new one. Bone Head, move! I cut the shelf too short when I should have extended it and cut the trim pieces on the sides to sit ontop of it. It doesn't look terrible but it bothers me and I don't like it.
Originally Posted by Al&Burke http:///forum/thread/378912/2quills-120g-re-build-thread/360#post_3364876
I tried a 3/4" fitting the 1" pipe was a tighter fit.
That's what I was figuring, just currious. Thanks for the heads up, bud.
Did a little more work to the stand today ontop of replacing the fuel pump in my work truck. Finished trimming my last two doors, cut and routed some trim pieces for around the front of the tank. I also had cut the shelf and routed the edge for that as well...but I'm not very happy with how I cut it so now I need to make a new one. Bone Head, move! I cut the shelf too short when I should have extended it and cut the trim pieces on the sides to sit ontop of it. It doesn't look terrible but it bothers me and I don't like it.
2quills
Well-Known Member
Quote:
Originally Posted by acrylic51 http:///forum/thread/378912/2quills-120g-re-build-thread/340#post_3364773
Busy.....finally bought a new truck, looking at buying a GSXR motorcycle, and just got a little time to work on more epoxy work....My supplier said they didn't have any in stock and I went by today and was able to scrape up a gallon to continue working........
Gonna have to throw that bike in the back of the truck and head on down to corpus this summer.
 Congrats on the truck!
Originally Posted by acrylic51 http:///forum/thread/378912/2quills-120g-re-build-thread/340#post_3364773
Busy.....finally bought a new truck, looking at buying a GSXR motorcycle, and just got a little time to work on more epoxy work....My supplier said they didn't have any in stock and I went by today and was able to scrape up a gallon to continue working........
Gonna have to throw that bike in the back of the truck and head on down to corpus this summer.
al&burke
Active Member
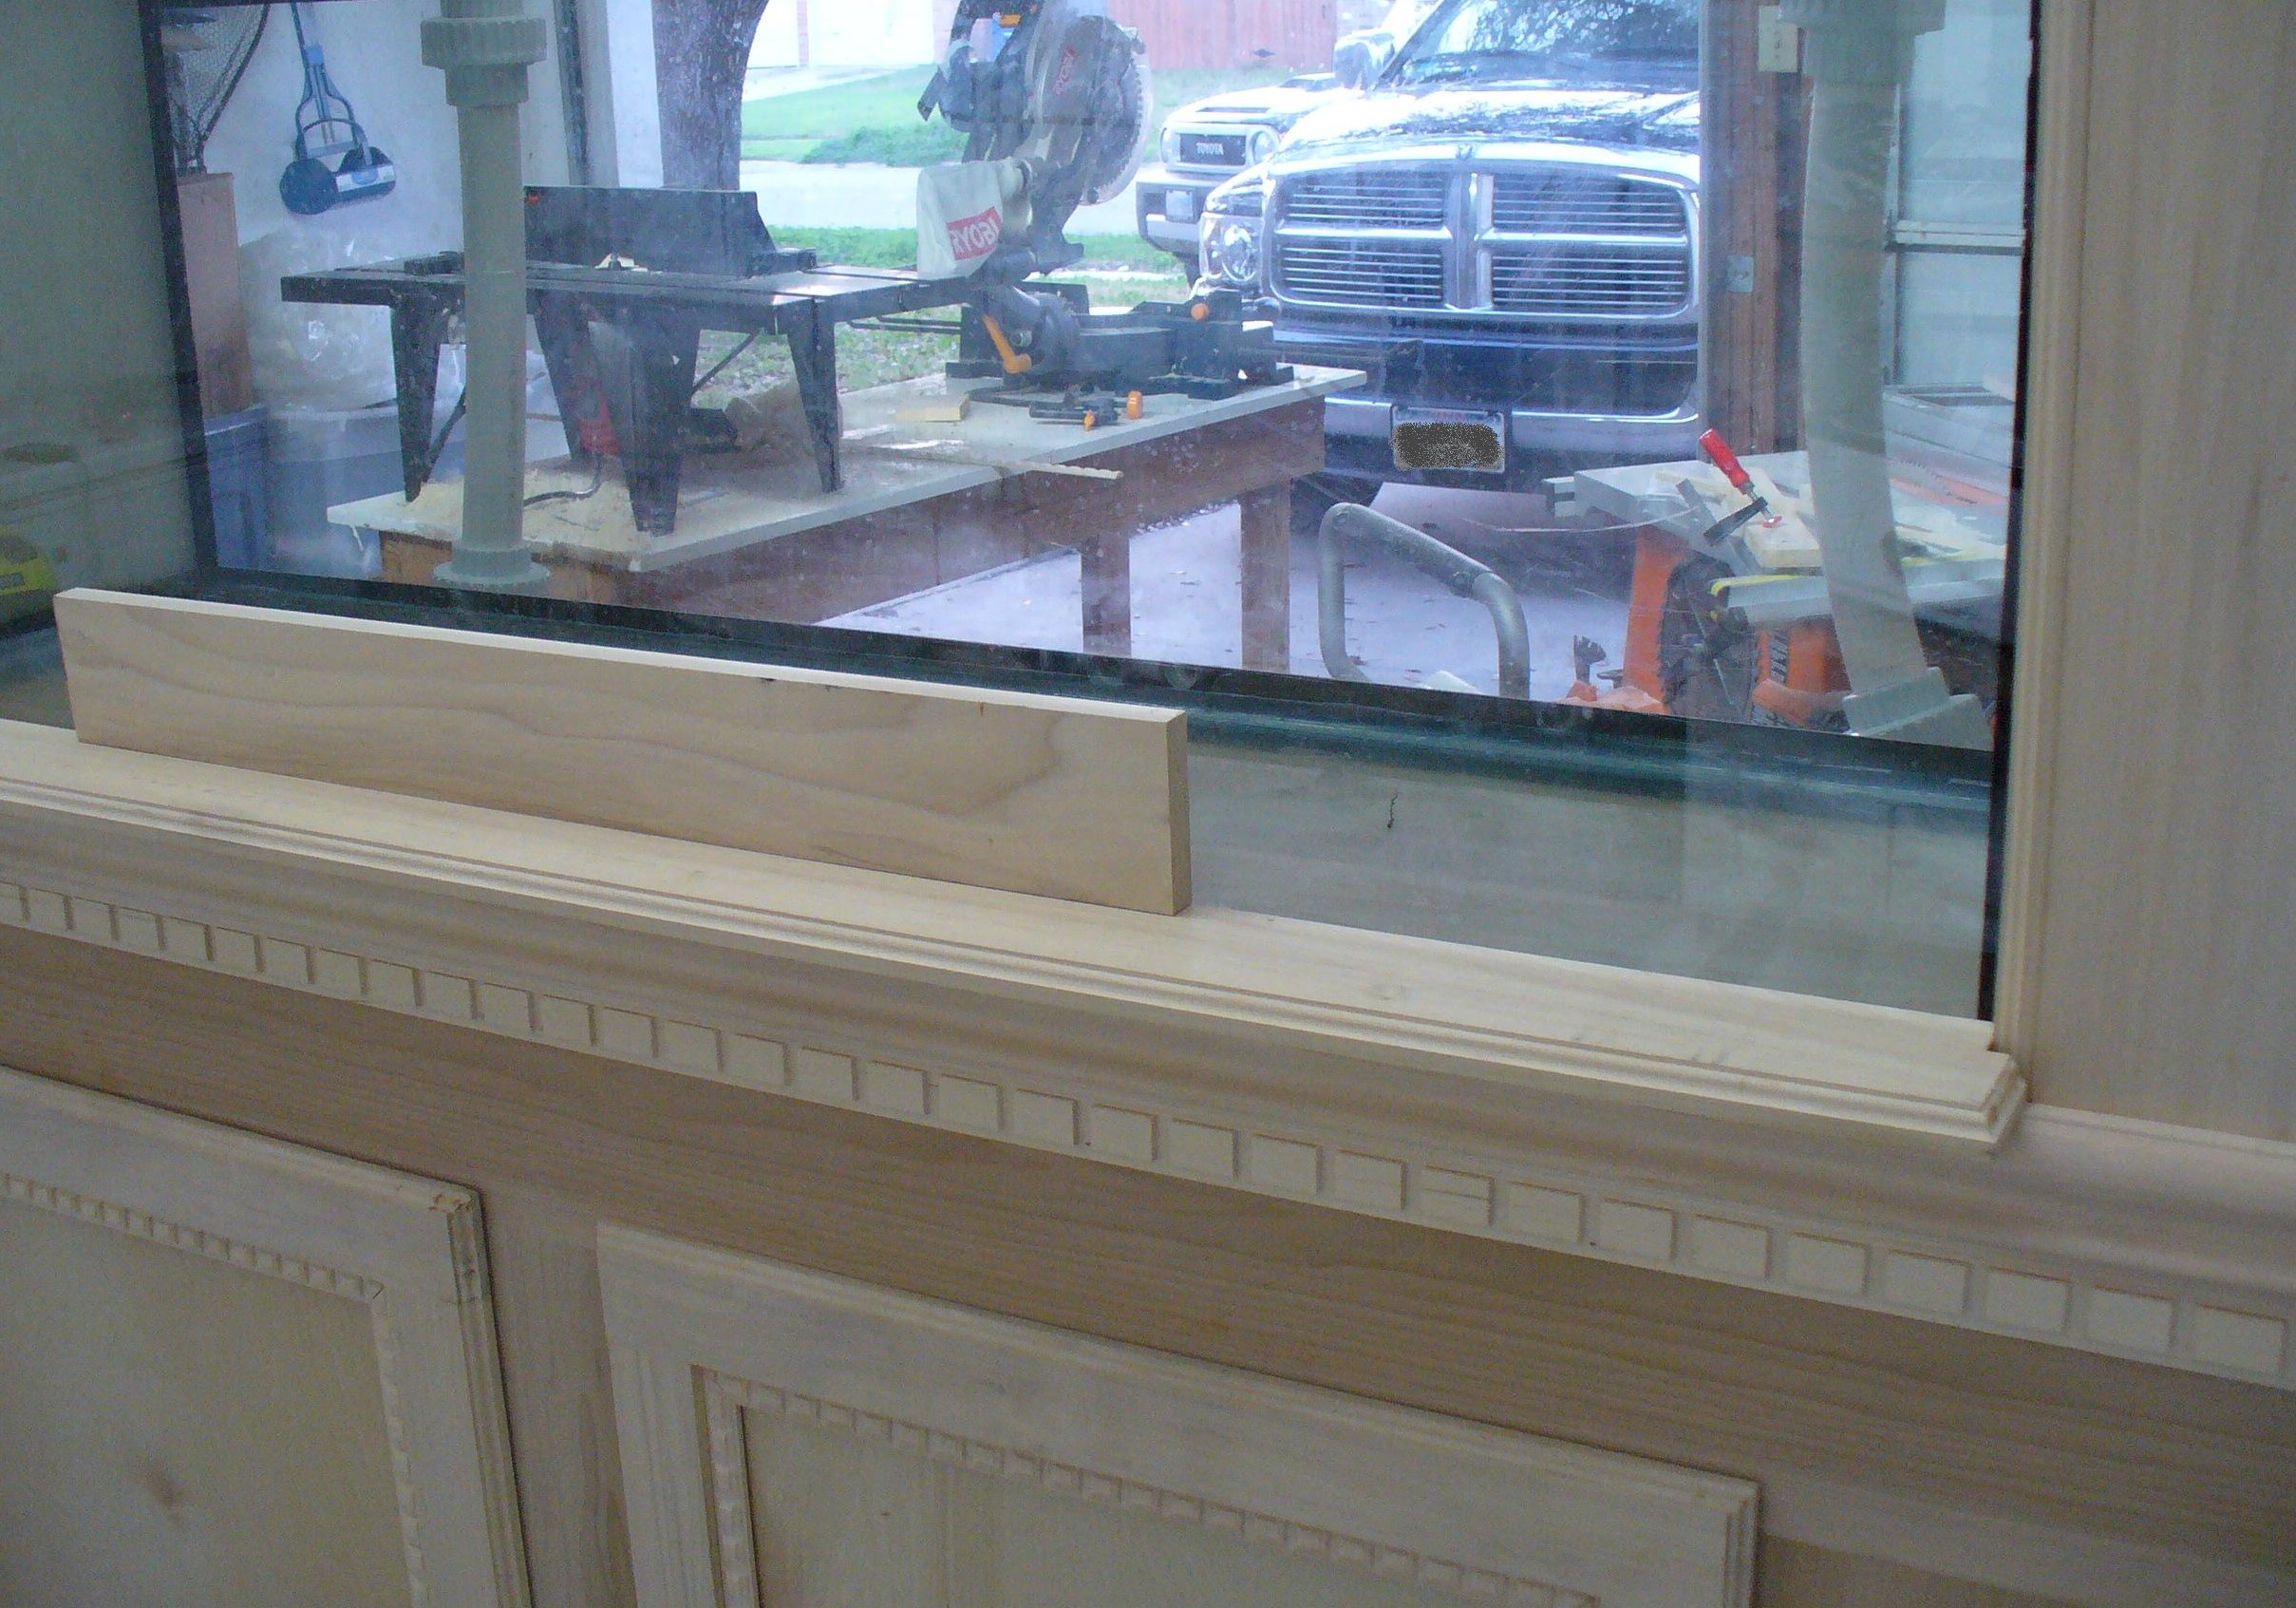
THis looks really nice the horizontal piece on the bottom of the tank might look really nice if you extended it another 2 or 3 inches - it kind of looks like a window sill. Looks good the way it is if this is your final piece, just a suggestion. Edit - i looked again and it looks beautiful as it is.
acrylic51
Active Member
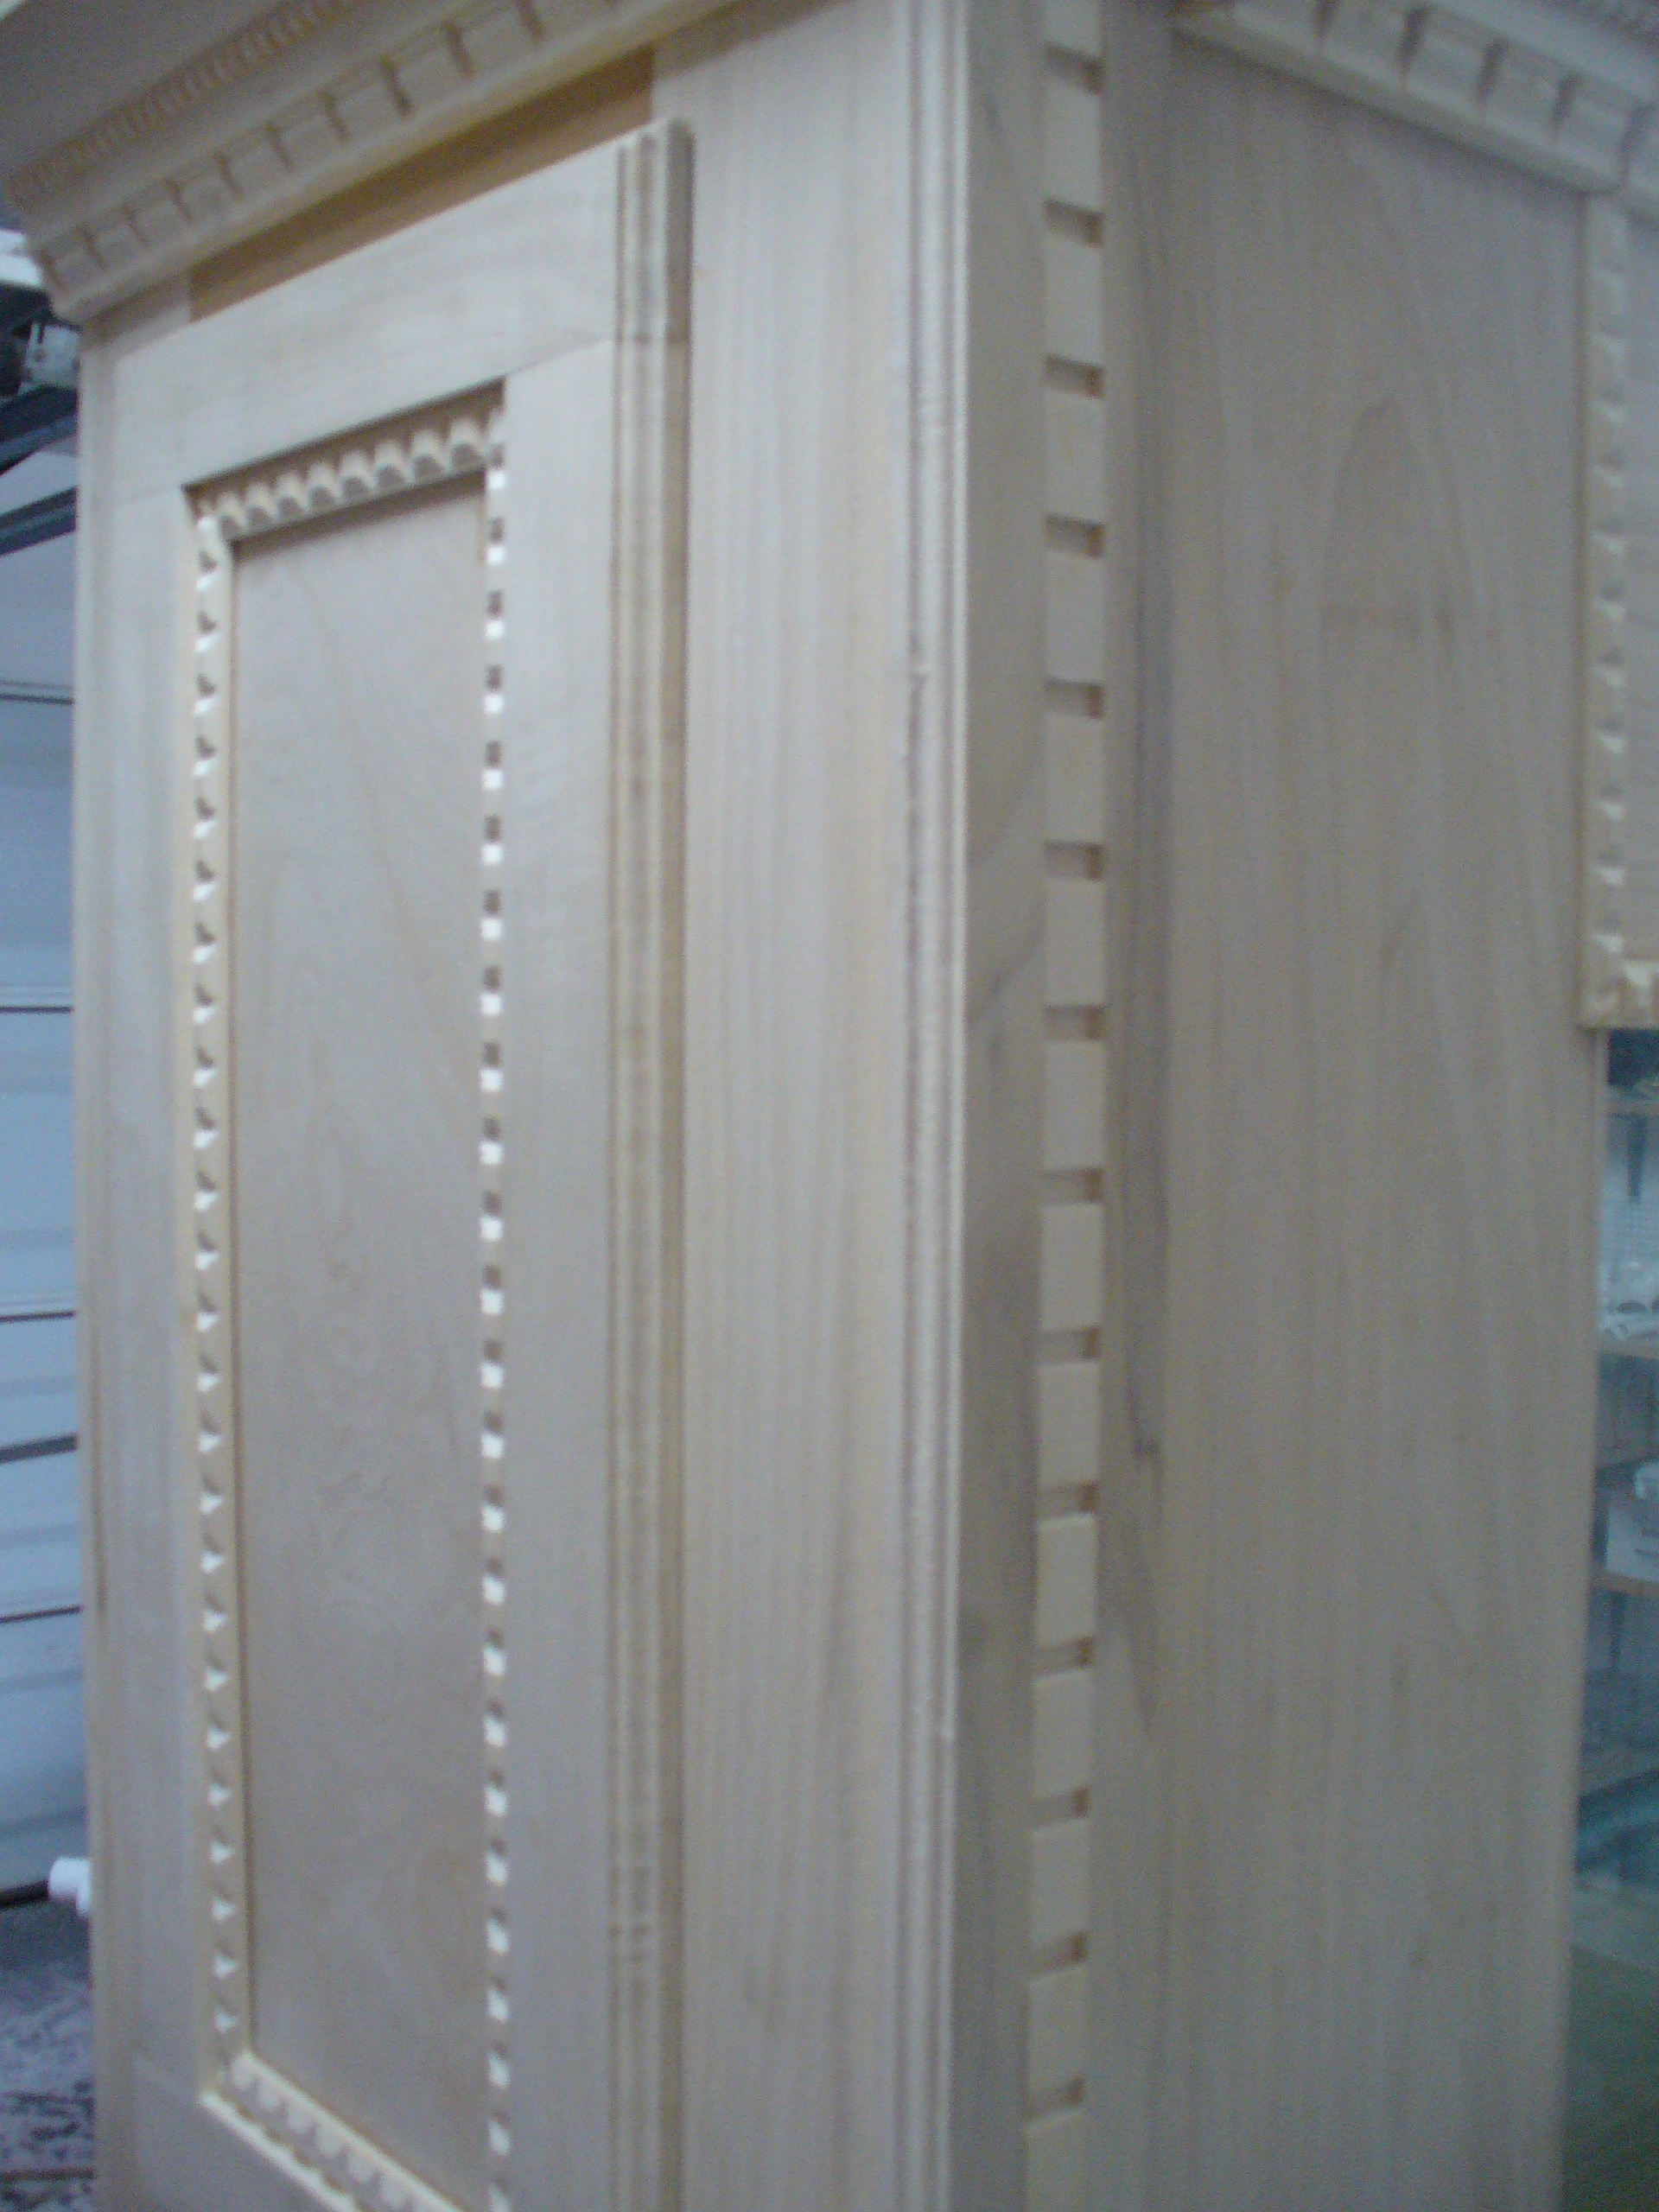
Agree!!!!! Looks very good. I know what you mean about making your cuts and then being pleased and then stepping back and realizing you got a bit ahead of yourself.....Bottom line it looks very sweet!!!!!! I love all the attention to detail and all the detailed trim work. Bad thing is when it comes time to start sanding.....That's the worse part, and you say to yourself "WHY"??????
2quills
Well-Known Member
Quote:
Originally Posted by Al&Burke http:///forum/thread/378912/2quills-120g-re-build-thread/360#post_3364896
THis looks really nice the horizontal piece on the bottom of the tank might look really nice if you extended it another 2 or 3 inches - it kind of looks like a window sill. Looks good the way it is if this is your final piece, just a suggestion. Edit - i looked again and it looks beautiful as it is.
Quote:
Originally Posted by acrylic51 http:///forum/thread/378912/2quills-120g-re-build-thread/360#post_3364970
Agree!!!!! Looks very good. I know what you mean about making your cuts and then being pleased and then stepping back and realizing you got a bit ahead of yourself.....Bottom line it looks very sweet!!!!!! I love all the attention to detail and all the detailed trim work. Bad thing is when it comes time to start sanding.....That's the worse part, and you say to yourself "WHY"??????
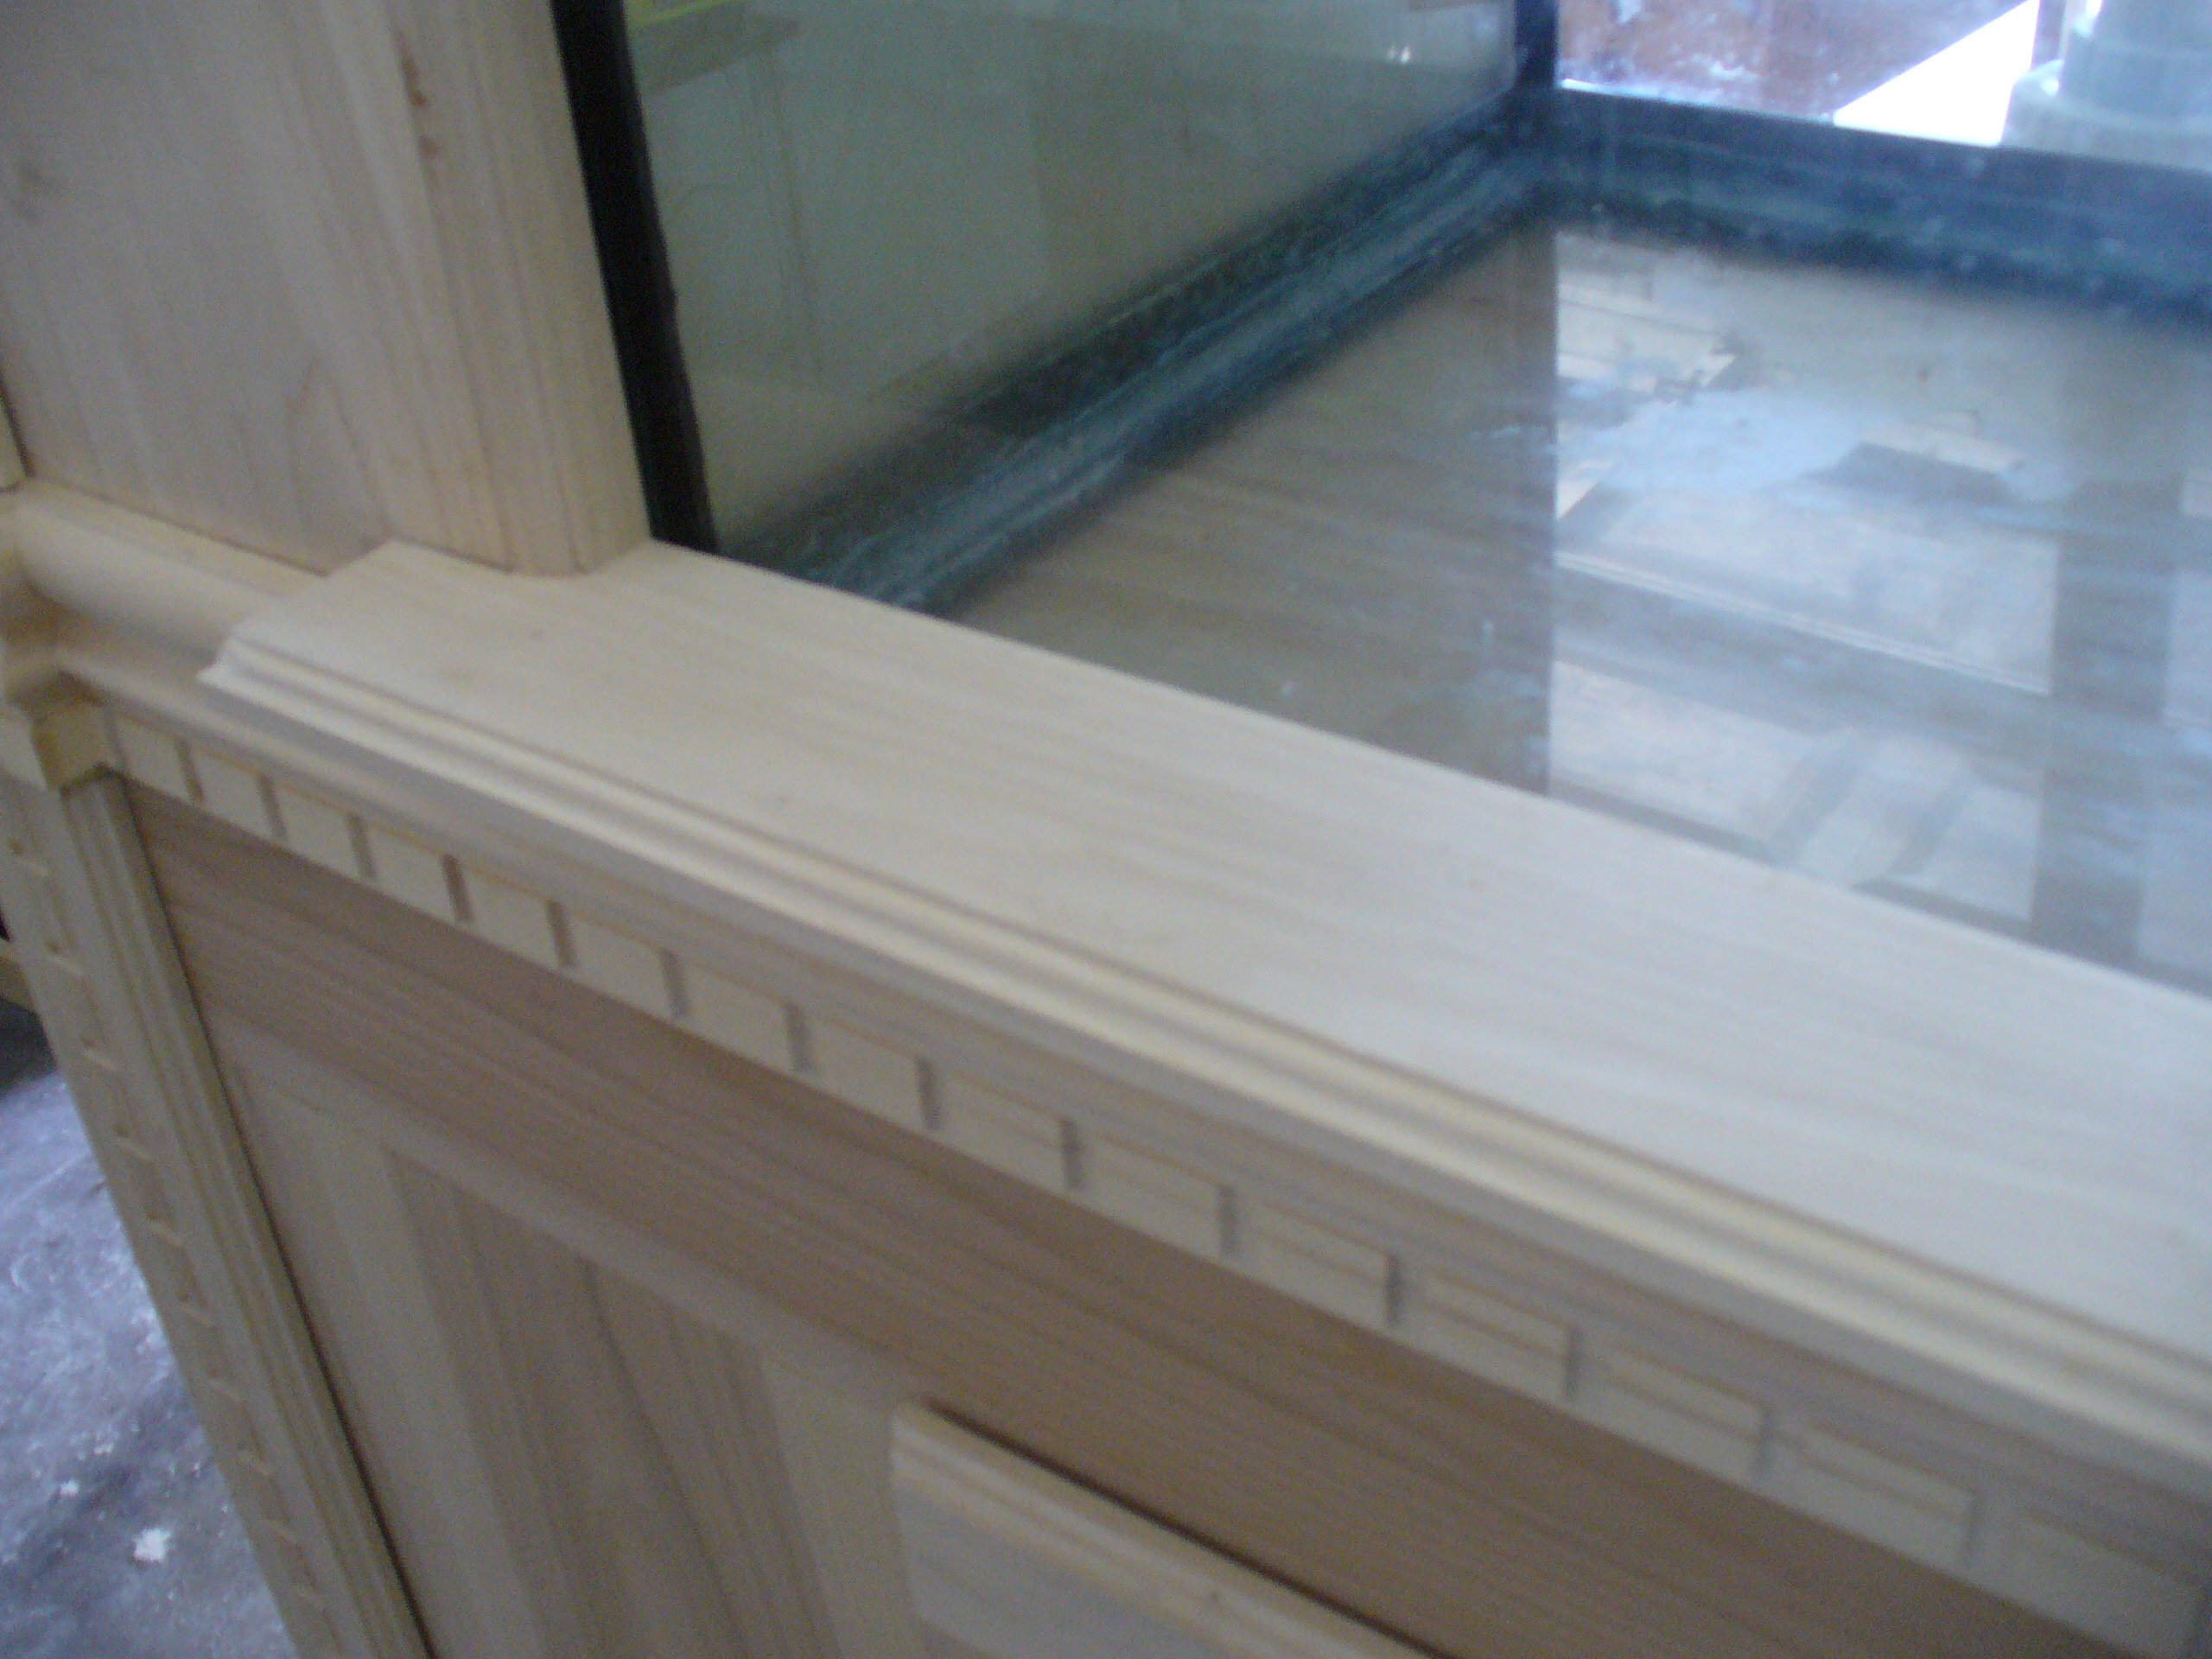
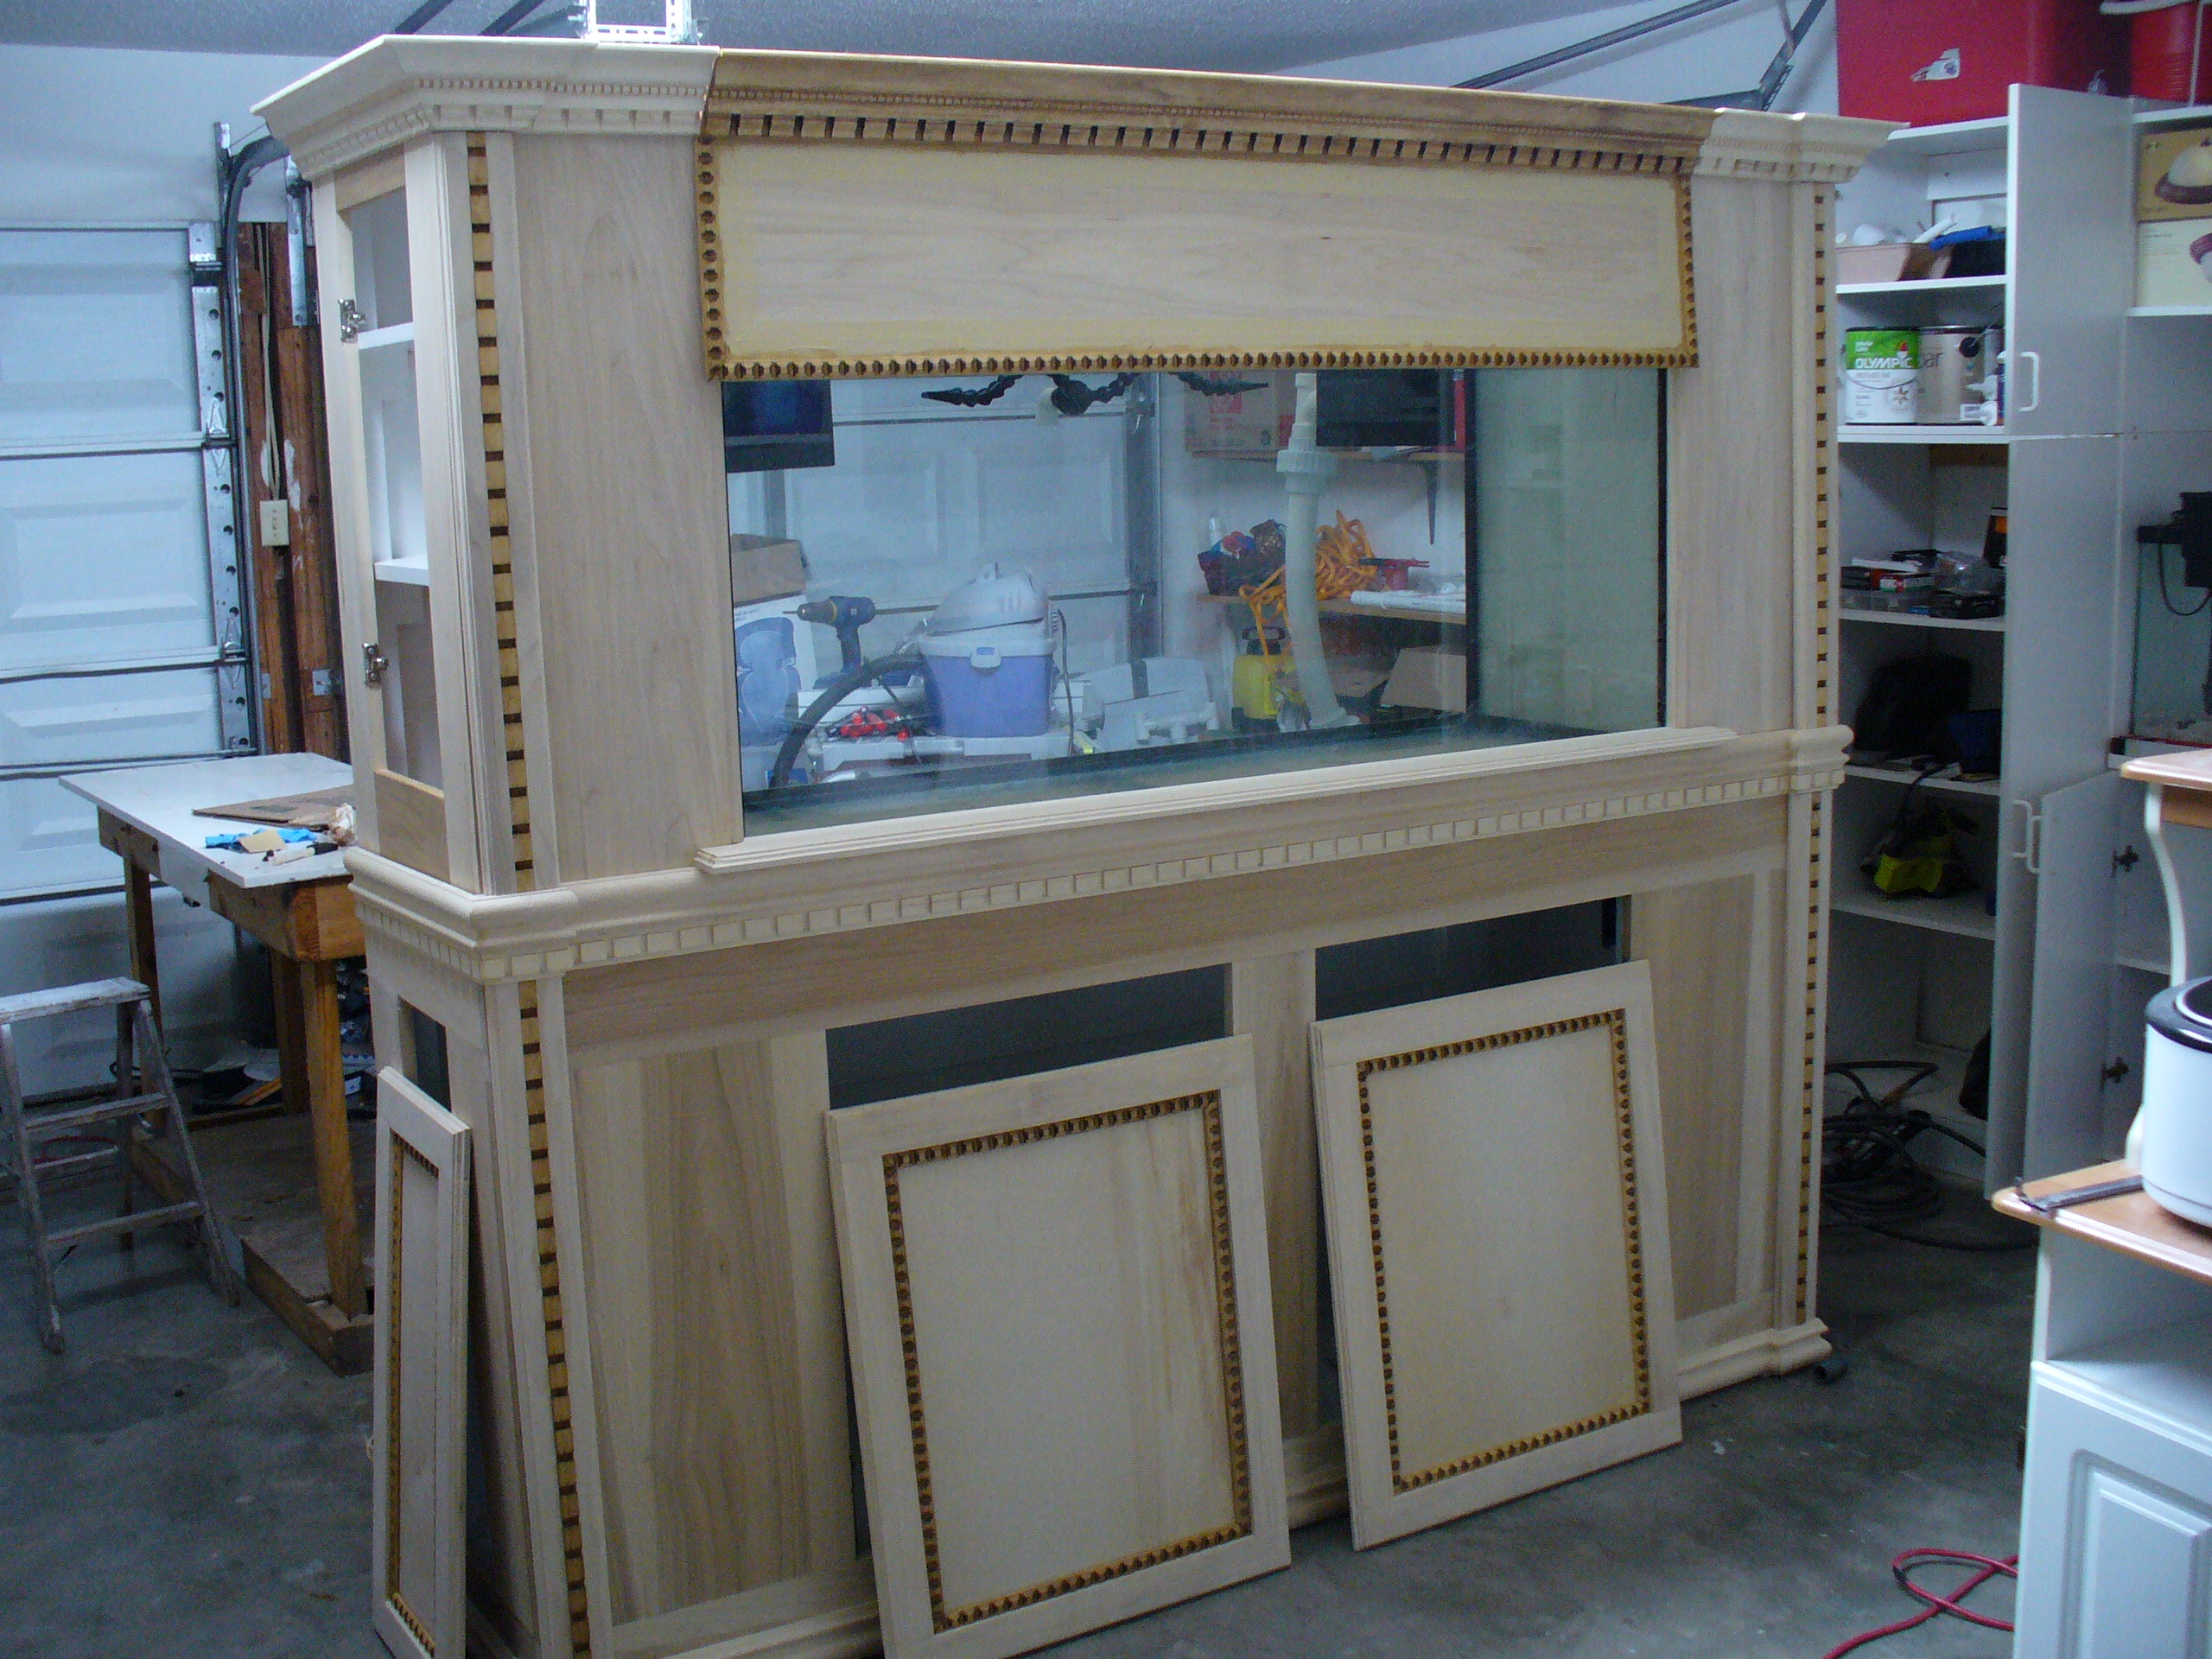
Thanks, Amigos'! But I couldn't stand it so I changed it. Cut a new piece to fit 2 inches longer on each side. Then shortened the trim pieces that run up the side of the tank to sit on top of the shelf. I think I killed 2 birds with one stone because I solved the issue of it looking just wrong but the side trim pieces actually hold it perfectly to where I don't need any fastners and it's removeable, but firm and sturdy. So much happier with it now. And you're right, Al...it does look like a window sill. And now the whole front of the tank looks like it is framed in, very cool.
Shawn, I've been sanding for hours already today and I still have lots to go. I'm finally almost ready for color, I'll probably start this week or next weekend, hopefully. I've been asking myself, why?...all afternoon lol. What a teadious enjoyment this shall be. I think I'm ready for it though.
Originally Posted by Al&Burke http:///forum/thread/378912/2quills-120g-re-build-thread/360#post_3364896
THis looks really nice the horizontal piece on the bottom of the tank might look really nice if you extended it another 2 or 3 inches - it kind of looks like a window sill. Looks good the way it is if this is your final piece, just a suggestion. Edit - i looked again and it looks beautiful as it is.
Quote:
Originally Posted by acrylic51 http:///forum/thread/378912/2quills-120g-re-build-thread/360#post_3364970
Agree!!!!! Looks very good. I know what you mean about making your cuts and then being pleased and then stepping back and realizing you got a bit ahead of yourself.....Bottom line it looks very sweet!!!!!! I love all the attention to detail and all the detailed trim work. Bad thing is when it comes time to start sanding.....That's the worse part, and you say to yourself "WHY"??????
Thanks, Amigos'! But I couldn't stand it so I changed it. Cut a new piece to fit 2 inches longer on each side. Then shortened the trim pieces that run up the side of the tank to sit on top of the shelf. I think I killed 2 birds with one stone because I solved the issue of it looking just wrong but the side trim pieces actually hold it perfectly to where I don't need any fastners and it's removeable, but firm and sturdy. So much happier with it now. And you're right, Al...it does look like a window sill. And now the whole front of the tank looks like it is framed in, very cool.
Shawn, I've been sanding for hours already today and I still have lots to go. I'm finally almost ready for color, I'll probably start this week or next weekend, hopefully. I've been asking myself, why?...all afternoon lol. What a teadious enjoyment this shall be. I think I'm ready for it though.
al&burke
Active Member
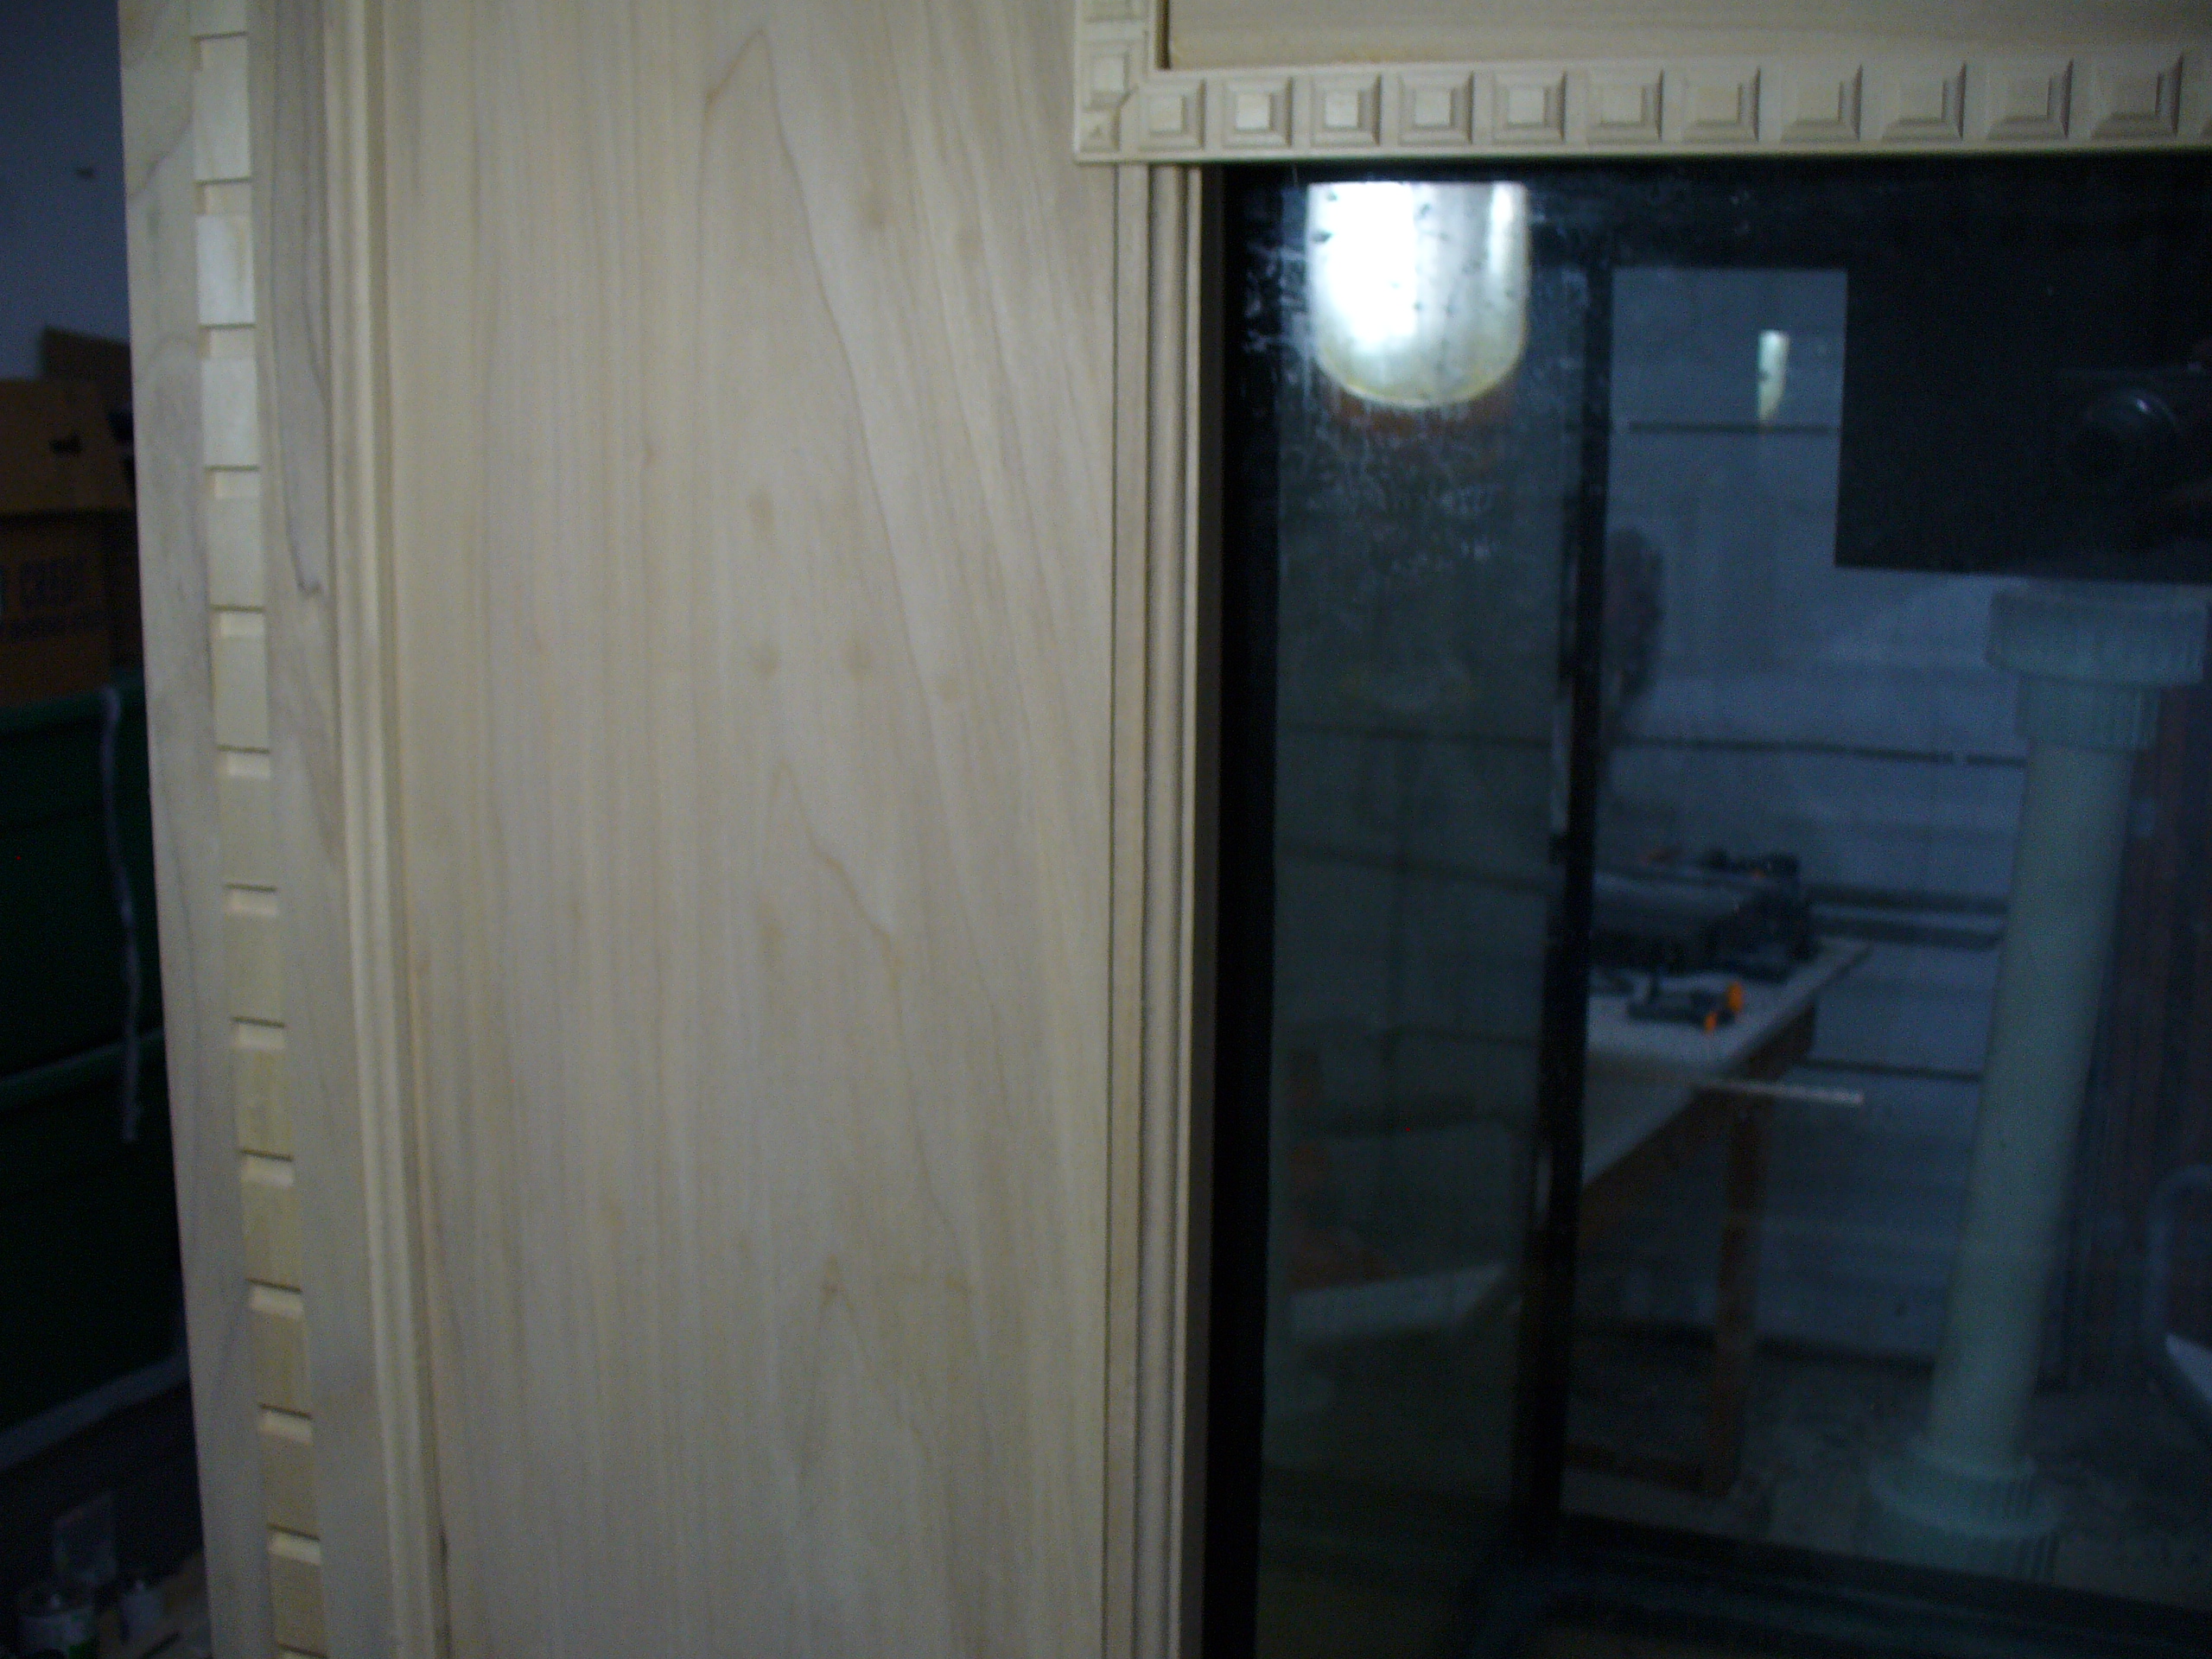
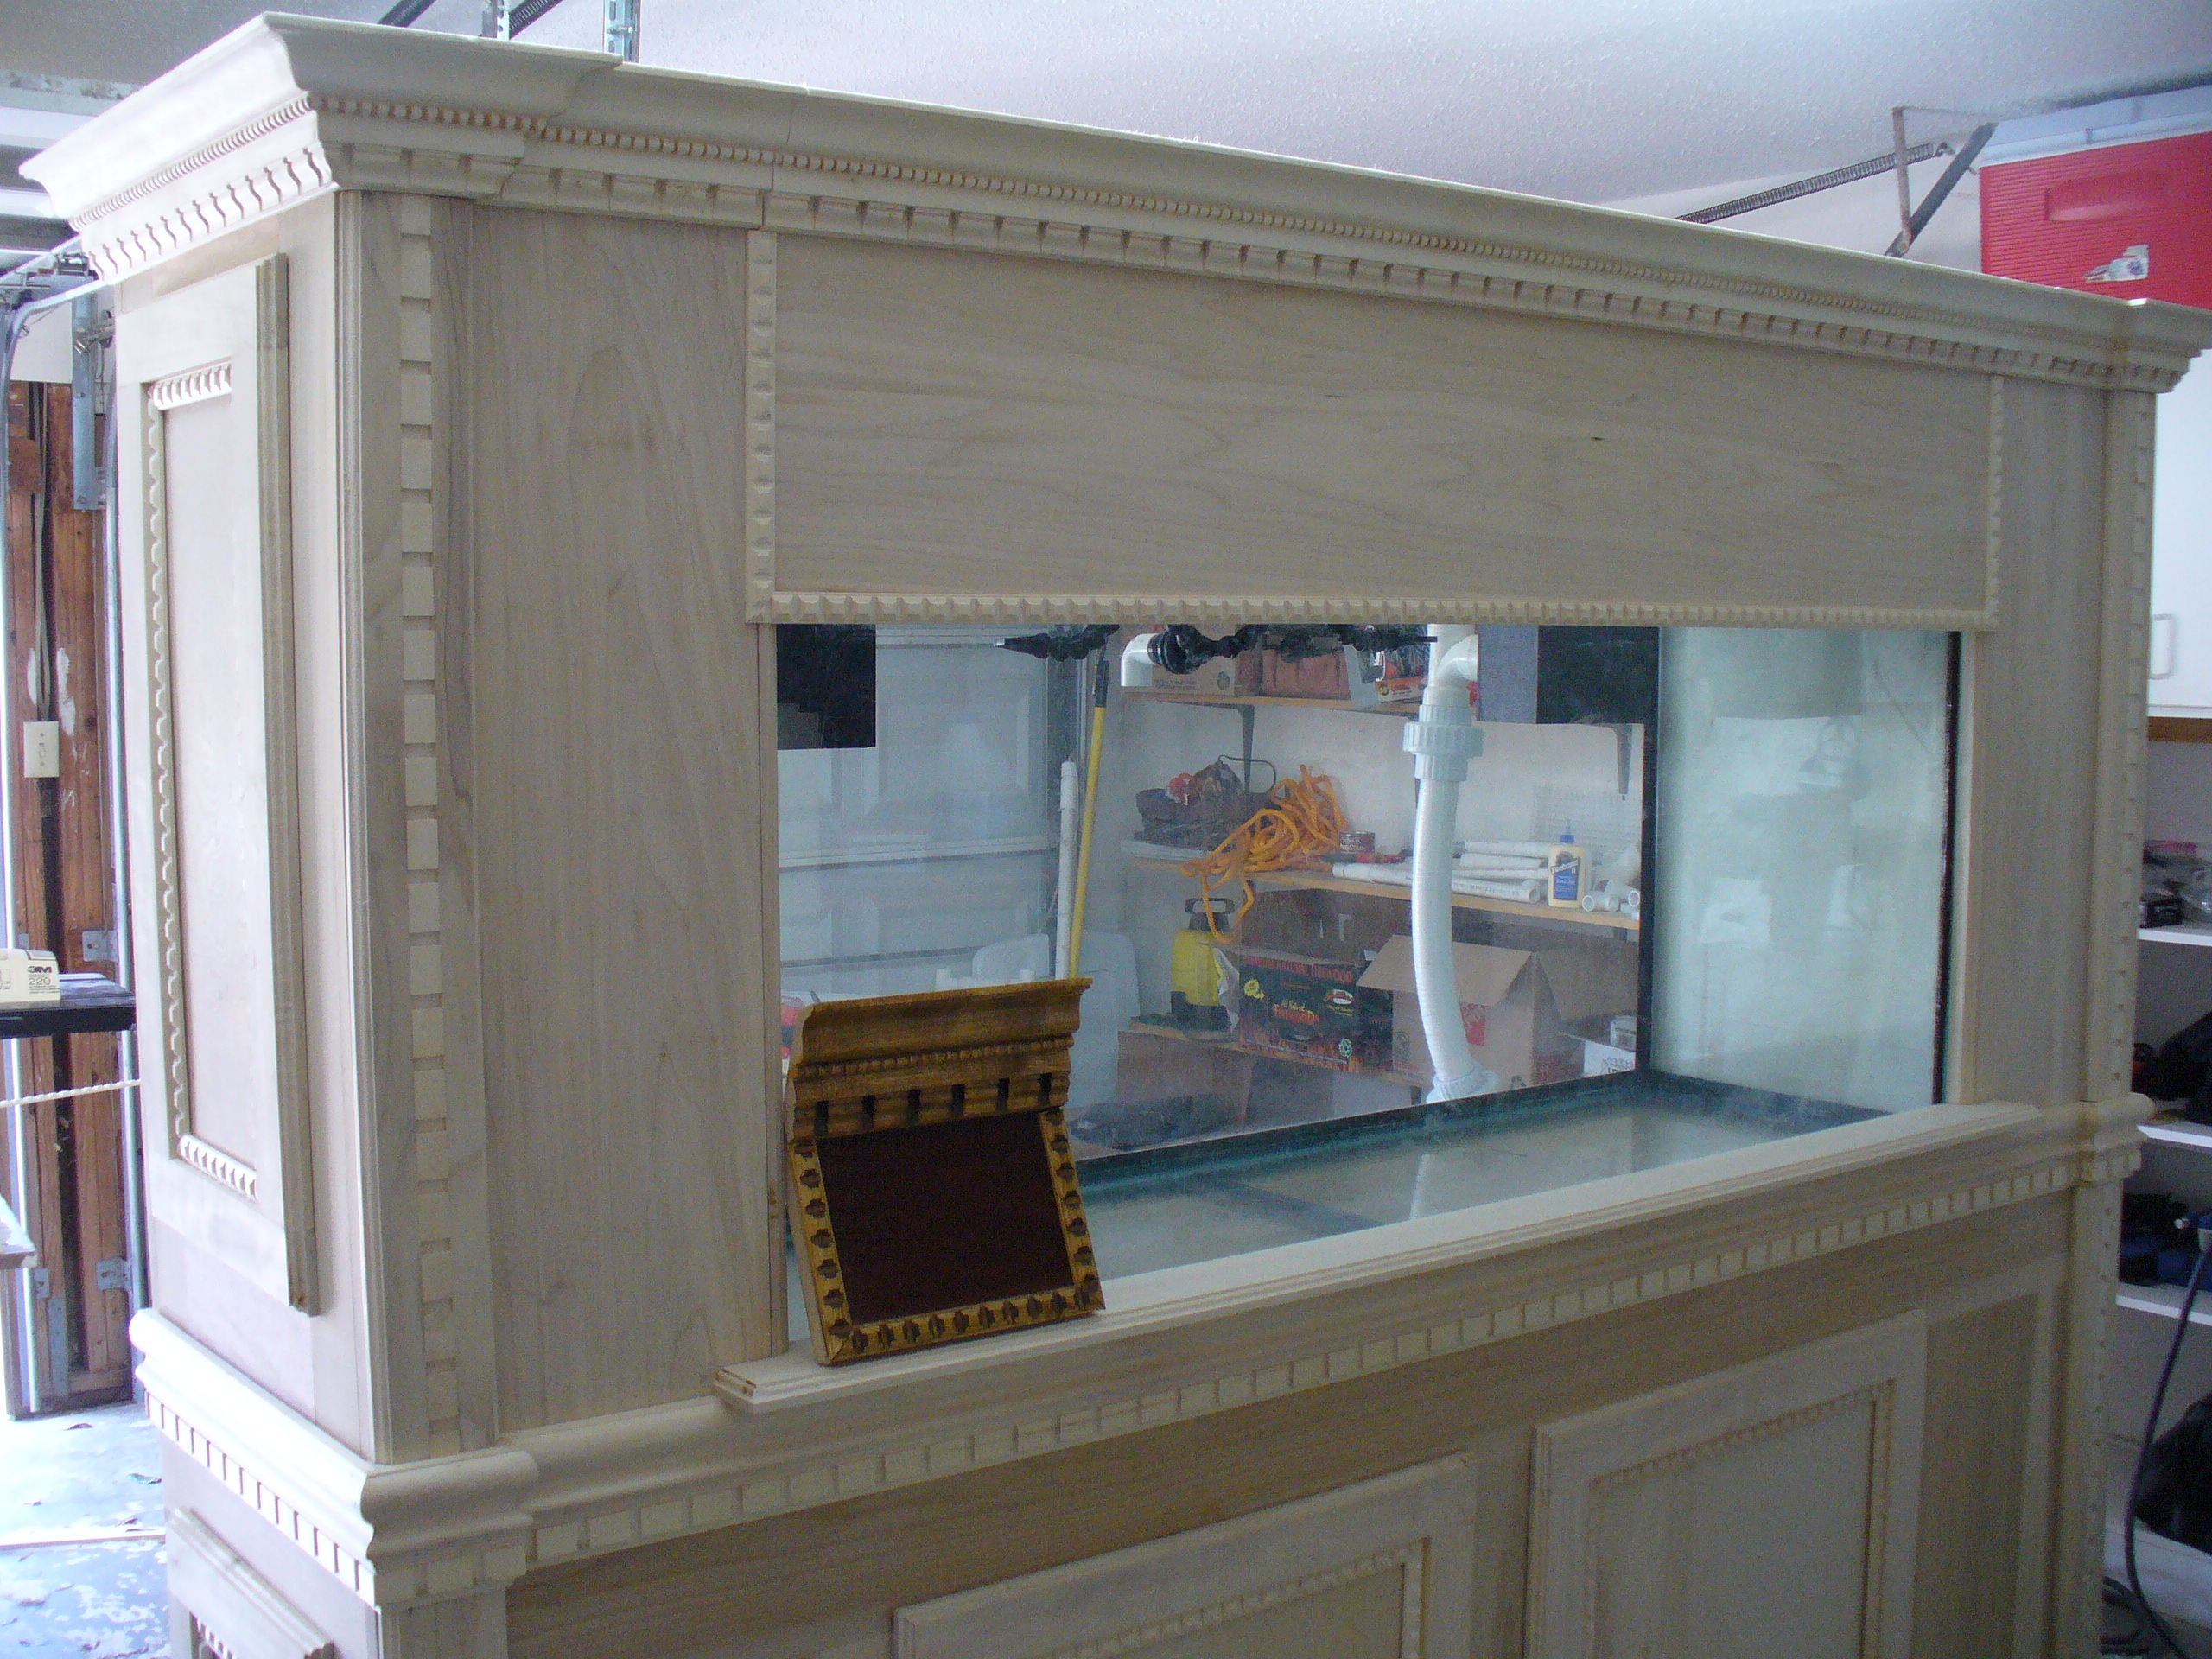
Corey - It is a piece of art - I hope you didn't mind me saying to extend it but it looks fantastic, not tooting my own horn. This stand is going to be phenomenal. Man you read my mind, I said to myself it would be great if it was removal for cleaning off the glass. Scary place this SWF, LOL
2quills
Well-Known Member
Quote:
Originally Posted by Al&Burke http:///forum/thread/378912/2quills-120g-re-build-thread/360#post_3365139
Corey - It is a piece of art - I hope you didn't mind me saying to extend it but it looks fantastic, not tooting my own horn. This stand is going to be phenomenal. Man you read my mind, I said to myself it would be great if it was removal for cleaning off the glass. Scary place this SWF, LOL
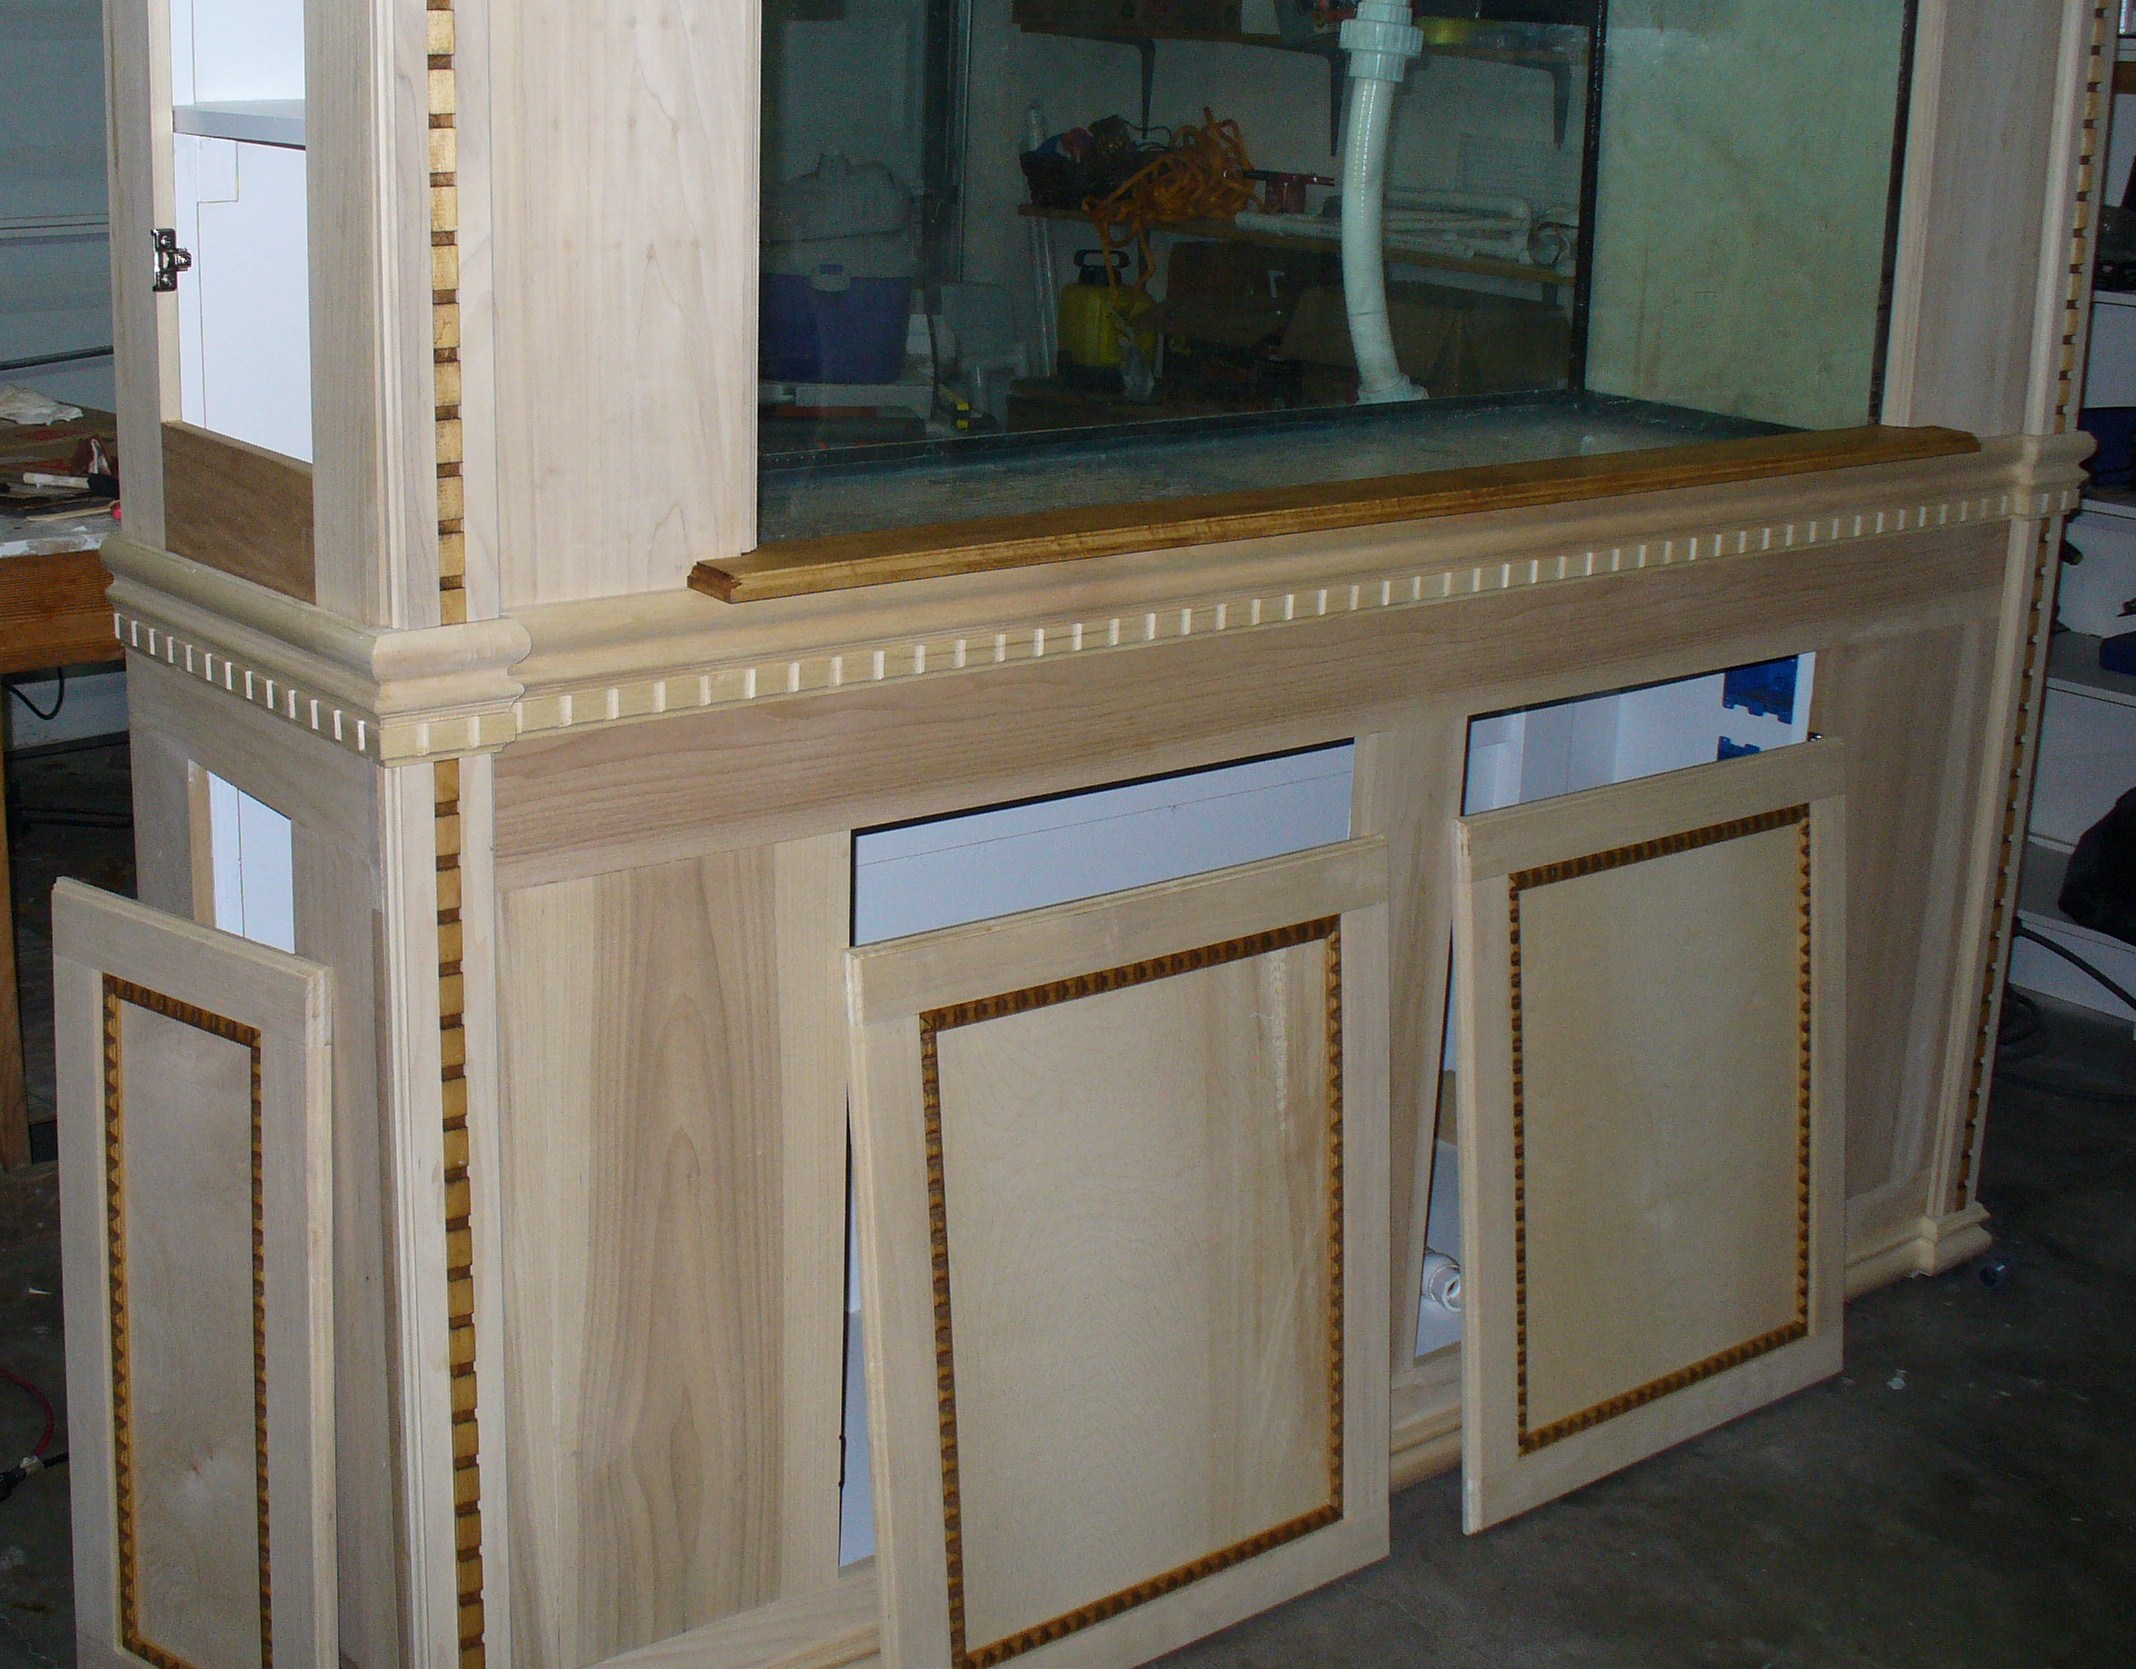
Indeed, Al. Actually you read my mind when you mentioned extending it because I was already thinking the same thing. At first I had picked up some magnets and was going to use those to hold it but yet keep it removeable. But now that I added the side trim pieces it works out perfect and there is need for them. Great minds, eh!
Originally Posted by Al&Burke http:///forum/thread/378912/2quills-120g-re-build-thread/360#post_3365139
Corey - It is a piece of art - I hope you didn't mind me saying to extend it but it looks fantastic, not tooting my own horn. This stand is going to be phenomenal. Man you read my mind, I said to myself it would be great if it was removal for cleaning off the glass. Scary place this SWF, LOL
Indeed, Al. Actually you read my mind when you mentioned extending it because I was already thinking the same thing. At first I had picked up some magnets and was going to use those to hold it but yet keep it removeable. But now that I added the side trim pieces it works out perfect and there is need for them. Great minds, eh!
2quills
Well-Known Member
Quote:
Originally Posted by meowzer http:///forum/thread/378912/2quills-120g-re-build-thread/360#post_3365145
WOW/.......looks great....how long before it's in the house???
At this point, Meow I'm really not trying to put a date on it because everytime that I get rolling on it, it seems like something else comes up to take my attention away. The finish is getting close though, I figure the staining process alone will be about a week. Then the finish will be at least another 3-4 days. Once that's done I'll order the material to make the sump. I think once the sump is done I'll bring it in the house and hook it all up. I'm going to bring two new dedicated circuits into the house to run it. Then I can start working on the equipment and stuff to go inside. Baby steps, baby steps.
2quills
Well-Known Member
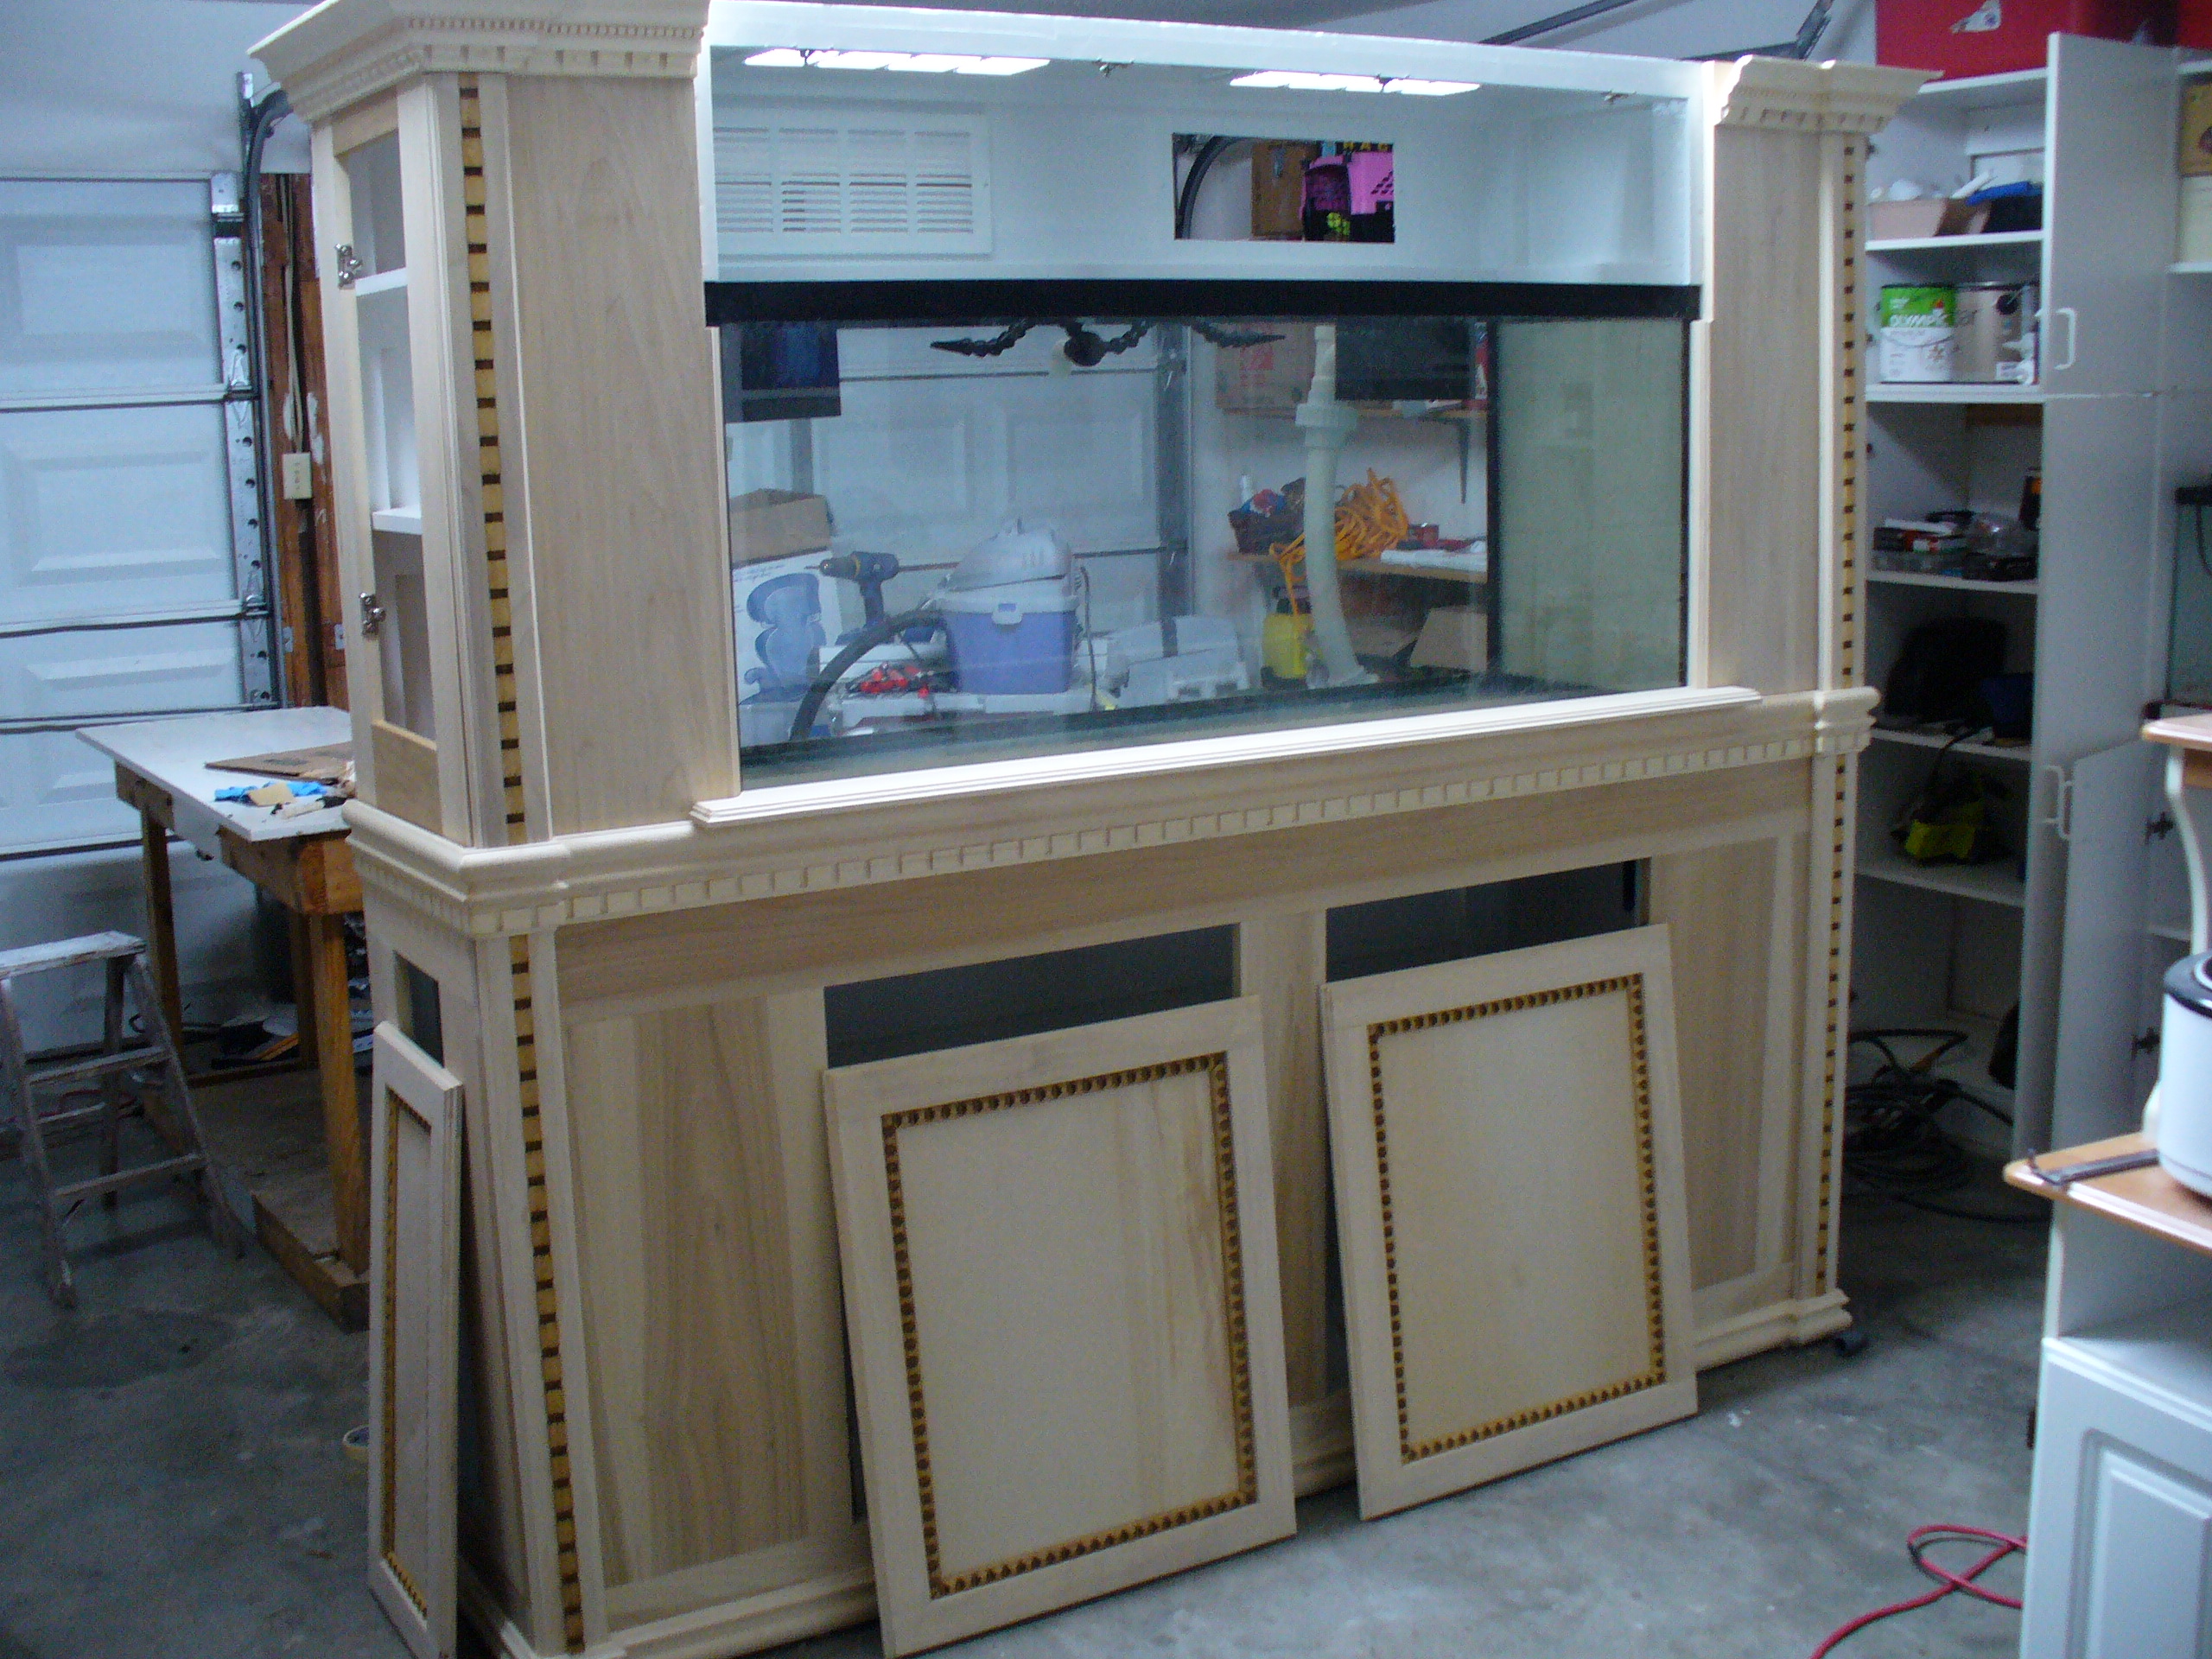
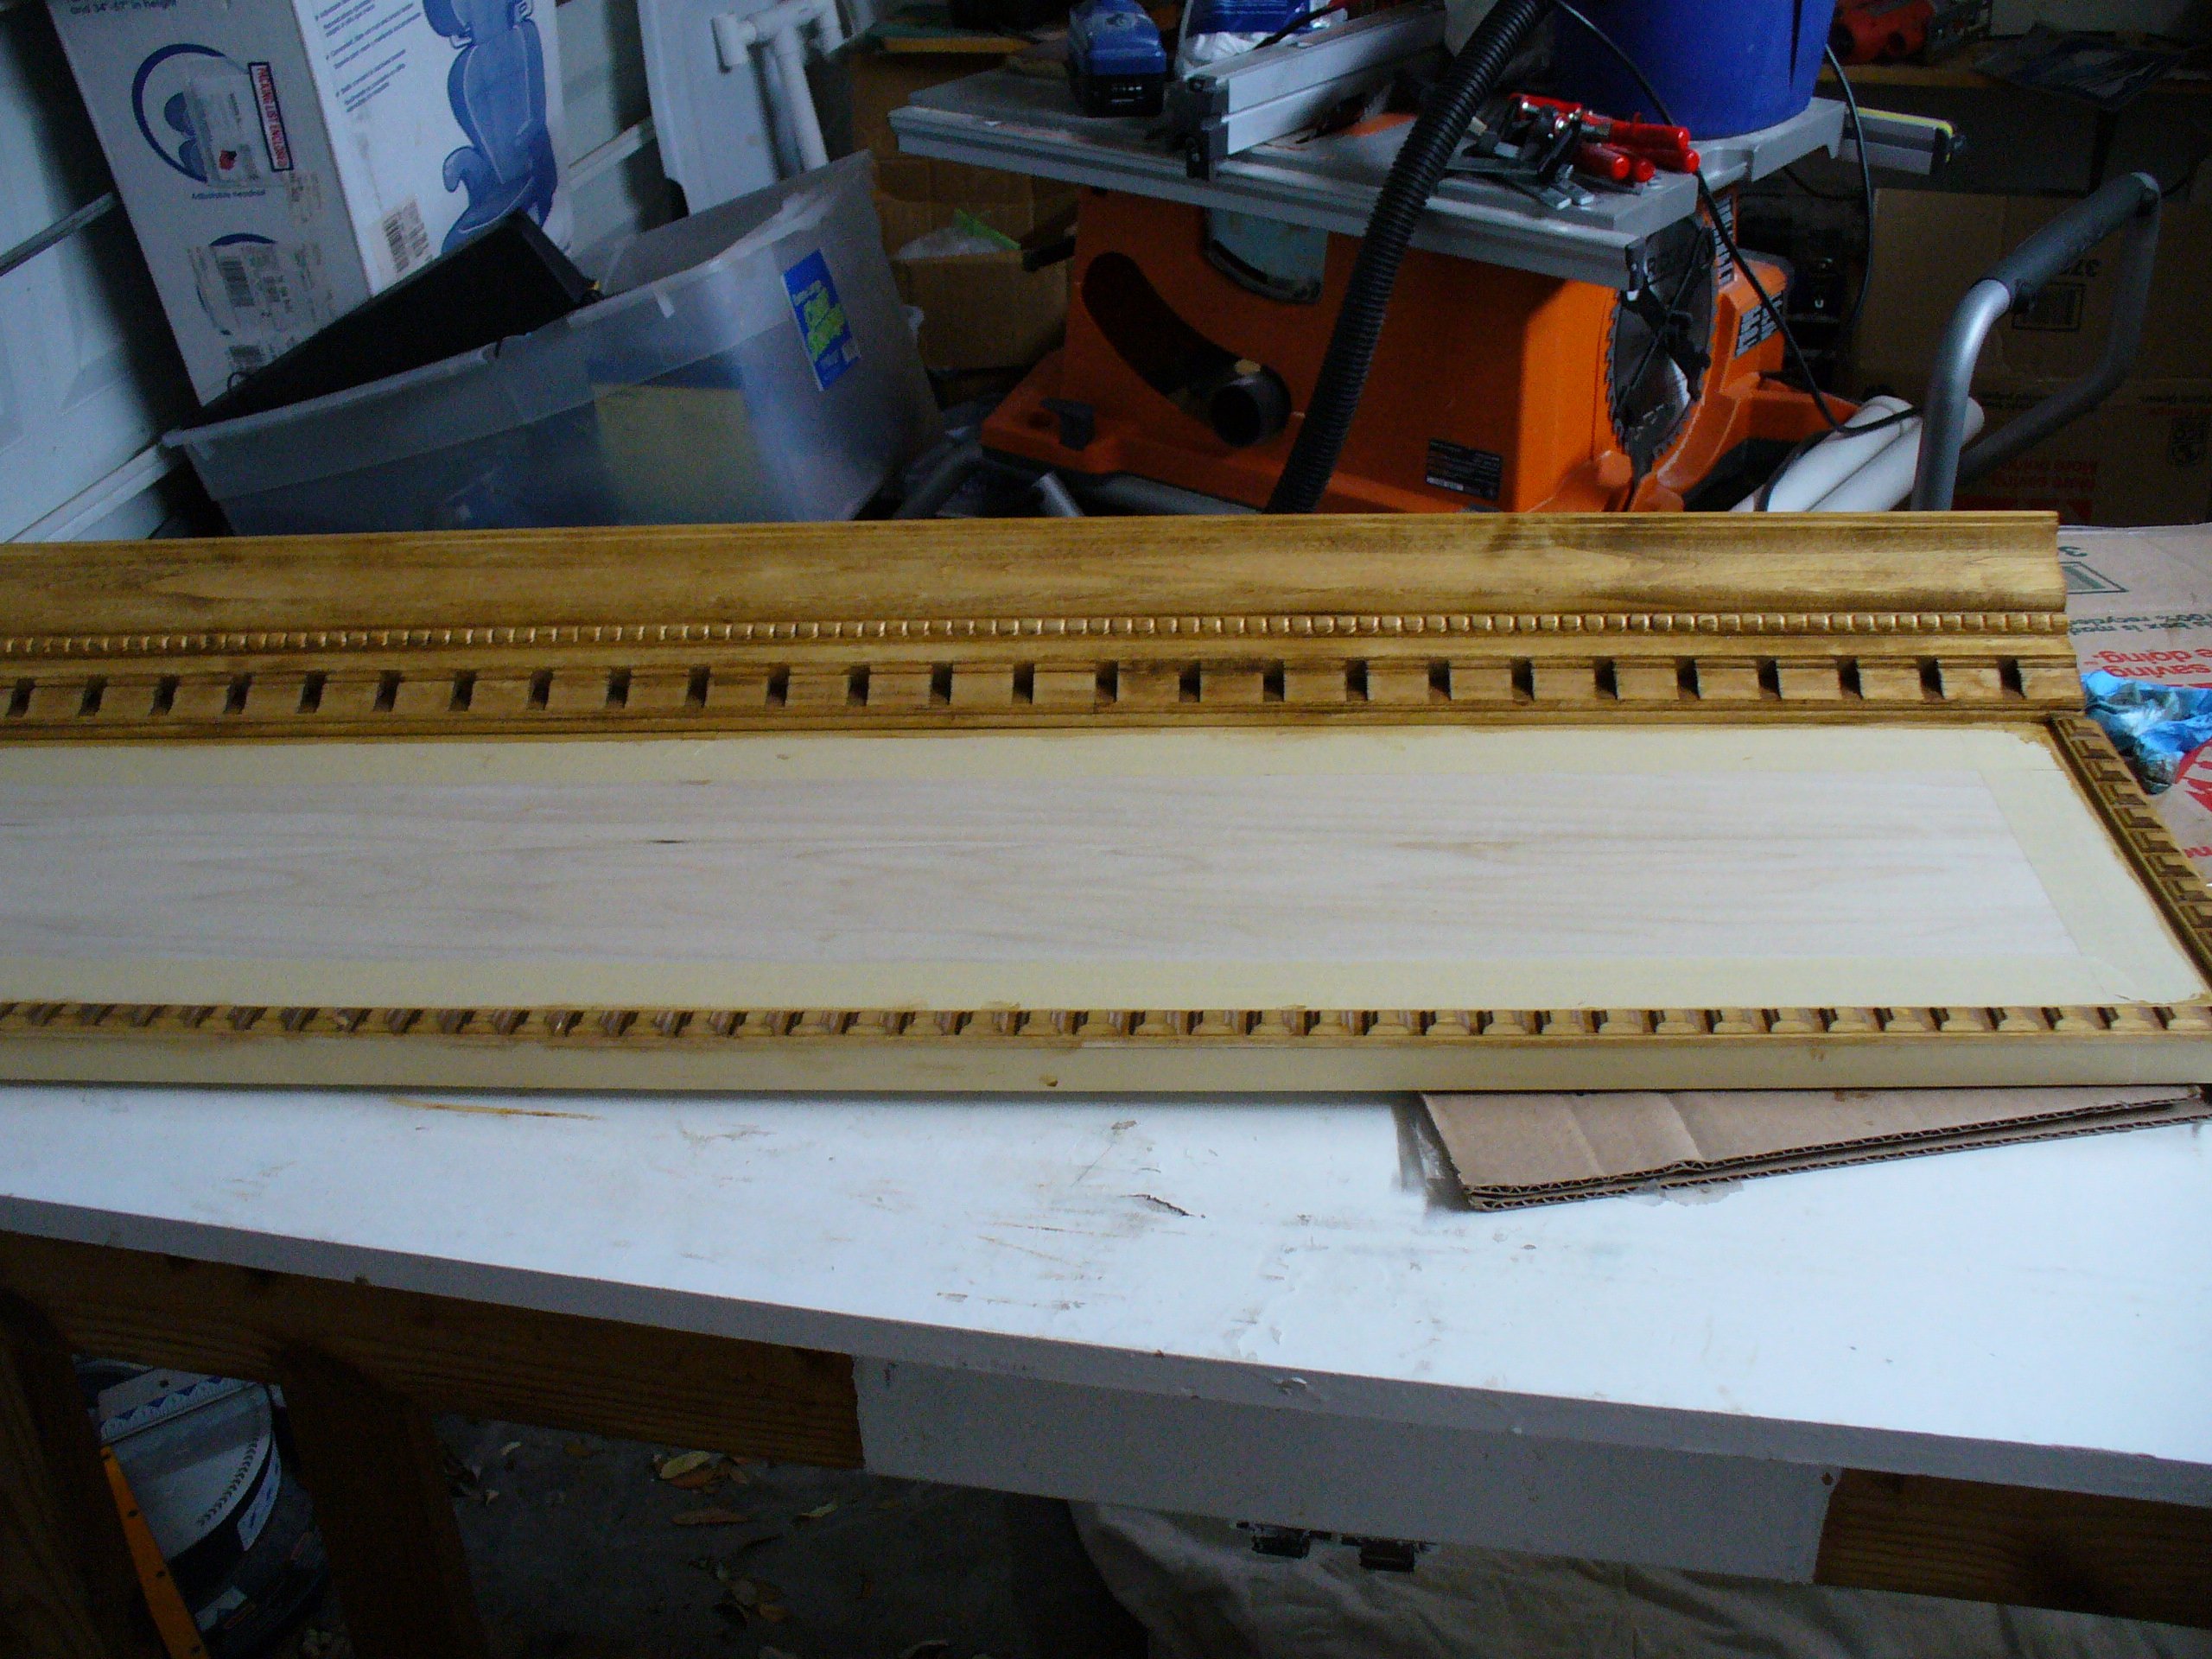
Small bit of progress today. Weather is starting to get pretty warm outside so I want to get the finish on this thing before the garage turns into a sauna. With temps already in the mid to high 80's down here in south texas that won't take long. It took me a good part of the day but I've managed to get one coat of stain on the trim for all of the doors and the shelf. I still have the the crown, middle and base molding left which I"m hoping to do tomorrow and then I'll give it all a second (lighter) coat before I start laying on the cherry sometime this coming week. I am liking how it is turning out, however the process so far is proving to be an exercise in patience.
2quills
Well-Known Member
Quote:
Originally Posted by meowzer http:///forum/thread/378912/2quills-120g-re-build-thread/360#post_3377380
WOW....Lookin good!!!!!
Quote:
Originally Posted by Al&Burke http:///forum/thread/378912/2quills-120g-re-build-thread/360#post_3377384
Gona look great - can't wait.
Thanks, guys. I'm trying to get my bearings together for another round of it today. I need to run up to the hardware store and get another can of the golden maple stain. It seems I underestimated how much it was going to take to do all of the little nooks and crannys on the trim. I am taking applications for helpers so you guys are more than welcome to come down here and join in on the fun.
