Flower's Sump/Fuge Build
- Thread starter acrylic51
- Start date
flower
Well-Known Member
Quote:
Originally Posted by acrylic51 http:///forum/thread/380517/flower-s-sump-fuge-build/680#post_3324643
Having computer difficulties at the moment but pics are coming!!!!

Shawn, the only happy spark in my day and your computer is acting up...so just give me a hint..what more has been completed?
Quote:
Originally Posted by 2Quills http:///forum/thread/380517/flower-s-sump-fuge-build/660#post_3324519

Flower, I'm going to be packing everything up tonight and I'll take it to the U.P.S. store on my lunch break tommorow. Question for ya...the adapter piece that will connect to the overflow, I may not connect it to the hose, I figure it will probably be better to leave it off so that you can cut the hose to the right length, is that ok with you? I'll give you some tips to make it easier to connect once you get it there. I just dont want to cut it too short or too long and then have you have to pull it apart and recut it again anyway.
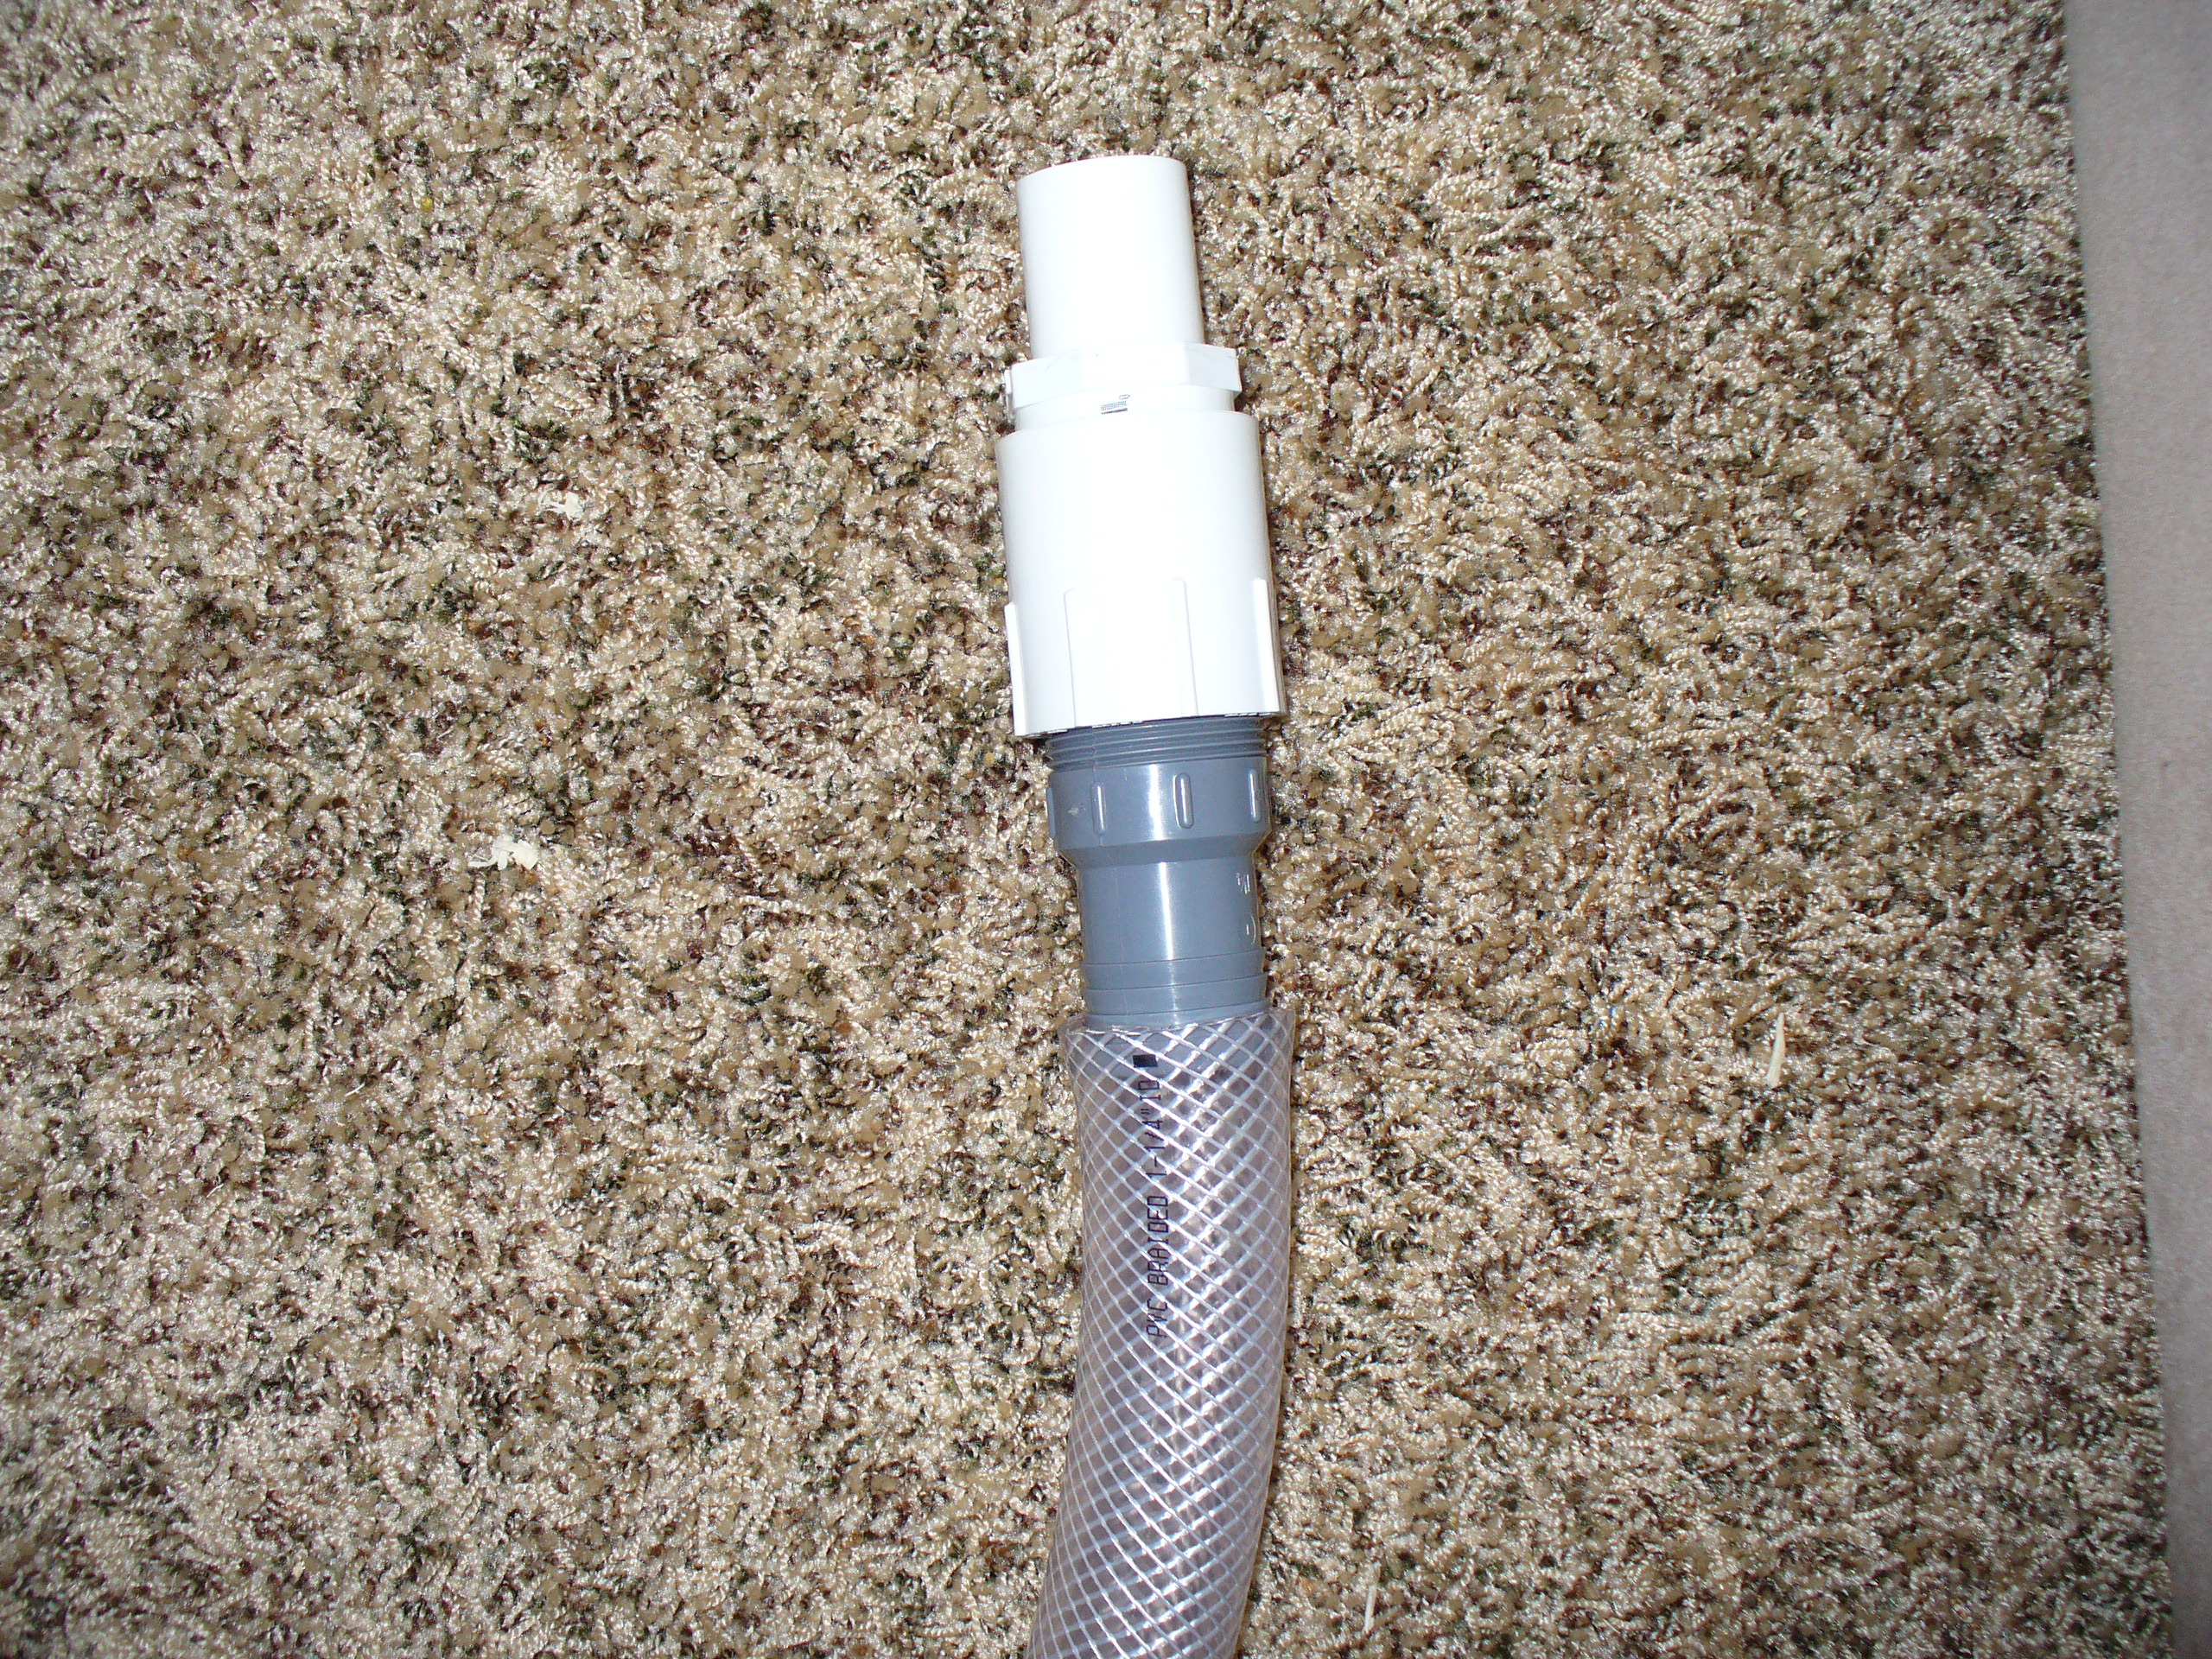

Corey, I just saw this post...of course it's okay.
Originally Posted by acrylic51 http:///forum/thread/380517/flower-s-sump-fuge-build/680#post_3324643
Having computer difficulties at the moment but pics are coming!!!!

Shawn, the only happy spark in my day and your computer is acting up...so just give me a hint..what more has been completed?
Quote:
Originally Posted by 2Quills http:///forum/thread/380517/flower-s-sump-fuge-build/660#post_3324519

Flower, I'm going to be packing everything up tonight and I'll take it to the U.P.S. store on my lunch break tommorow. Question for ya...the adapter piece that will connect to the overflow, I may not connect it to the hose, I figure it will probably be better to leave it off so that you can cut the hose to the right length, is that ok with you? I'll give you some tips to make it easier to connect once you get it there. I just dont want to cut it too short or too long and then have you have to pull it apart and recut it again anyway.

Corey, I just saw this post...of course it's okay.
acrylic51
Active Member
Good Morning Flower!!!! My thoughts and prayers are with you!!!!
Had to get an early rise this morning for another round of CDL testing today starting at 8:00am, but wanted to put a little spark and cheer in your day.... We all know the last mishap of the fuge, but here is some updated pics. I should be done around noon this afternoon provided the 5 individuals that I'm taking over for testing fly through....but anyways here's a little fix to brighten your day.
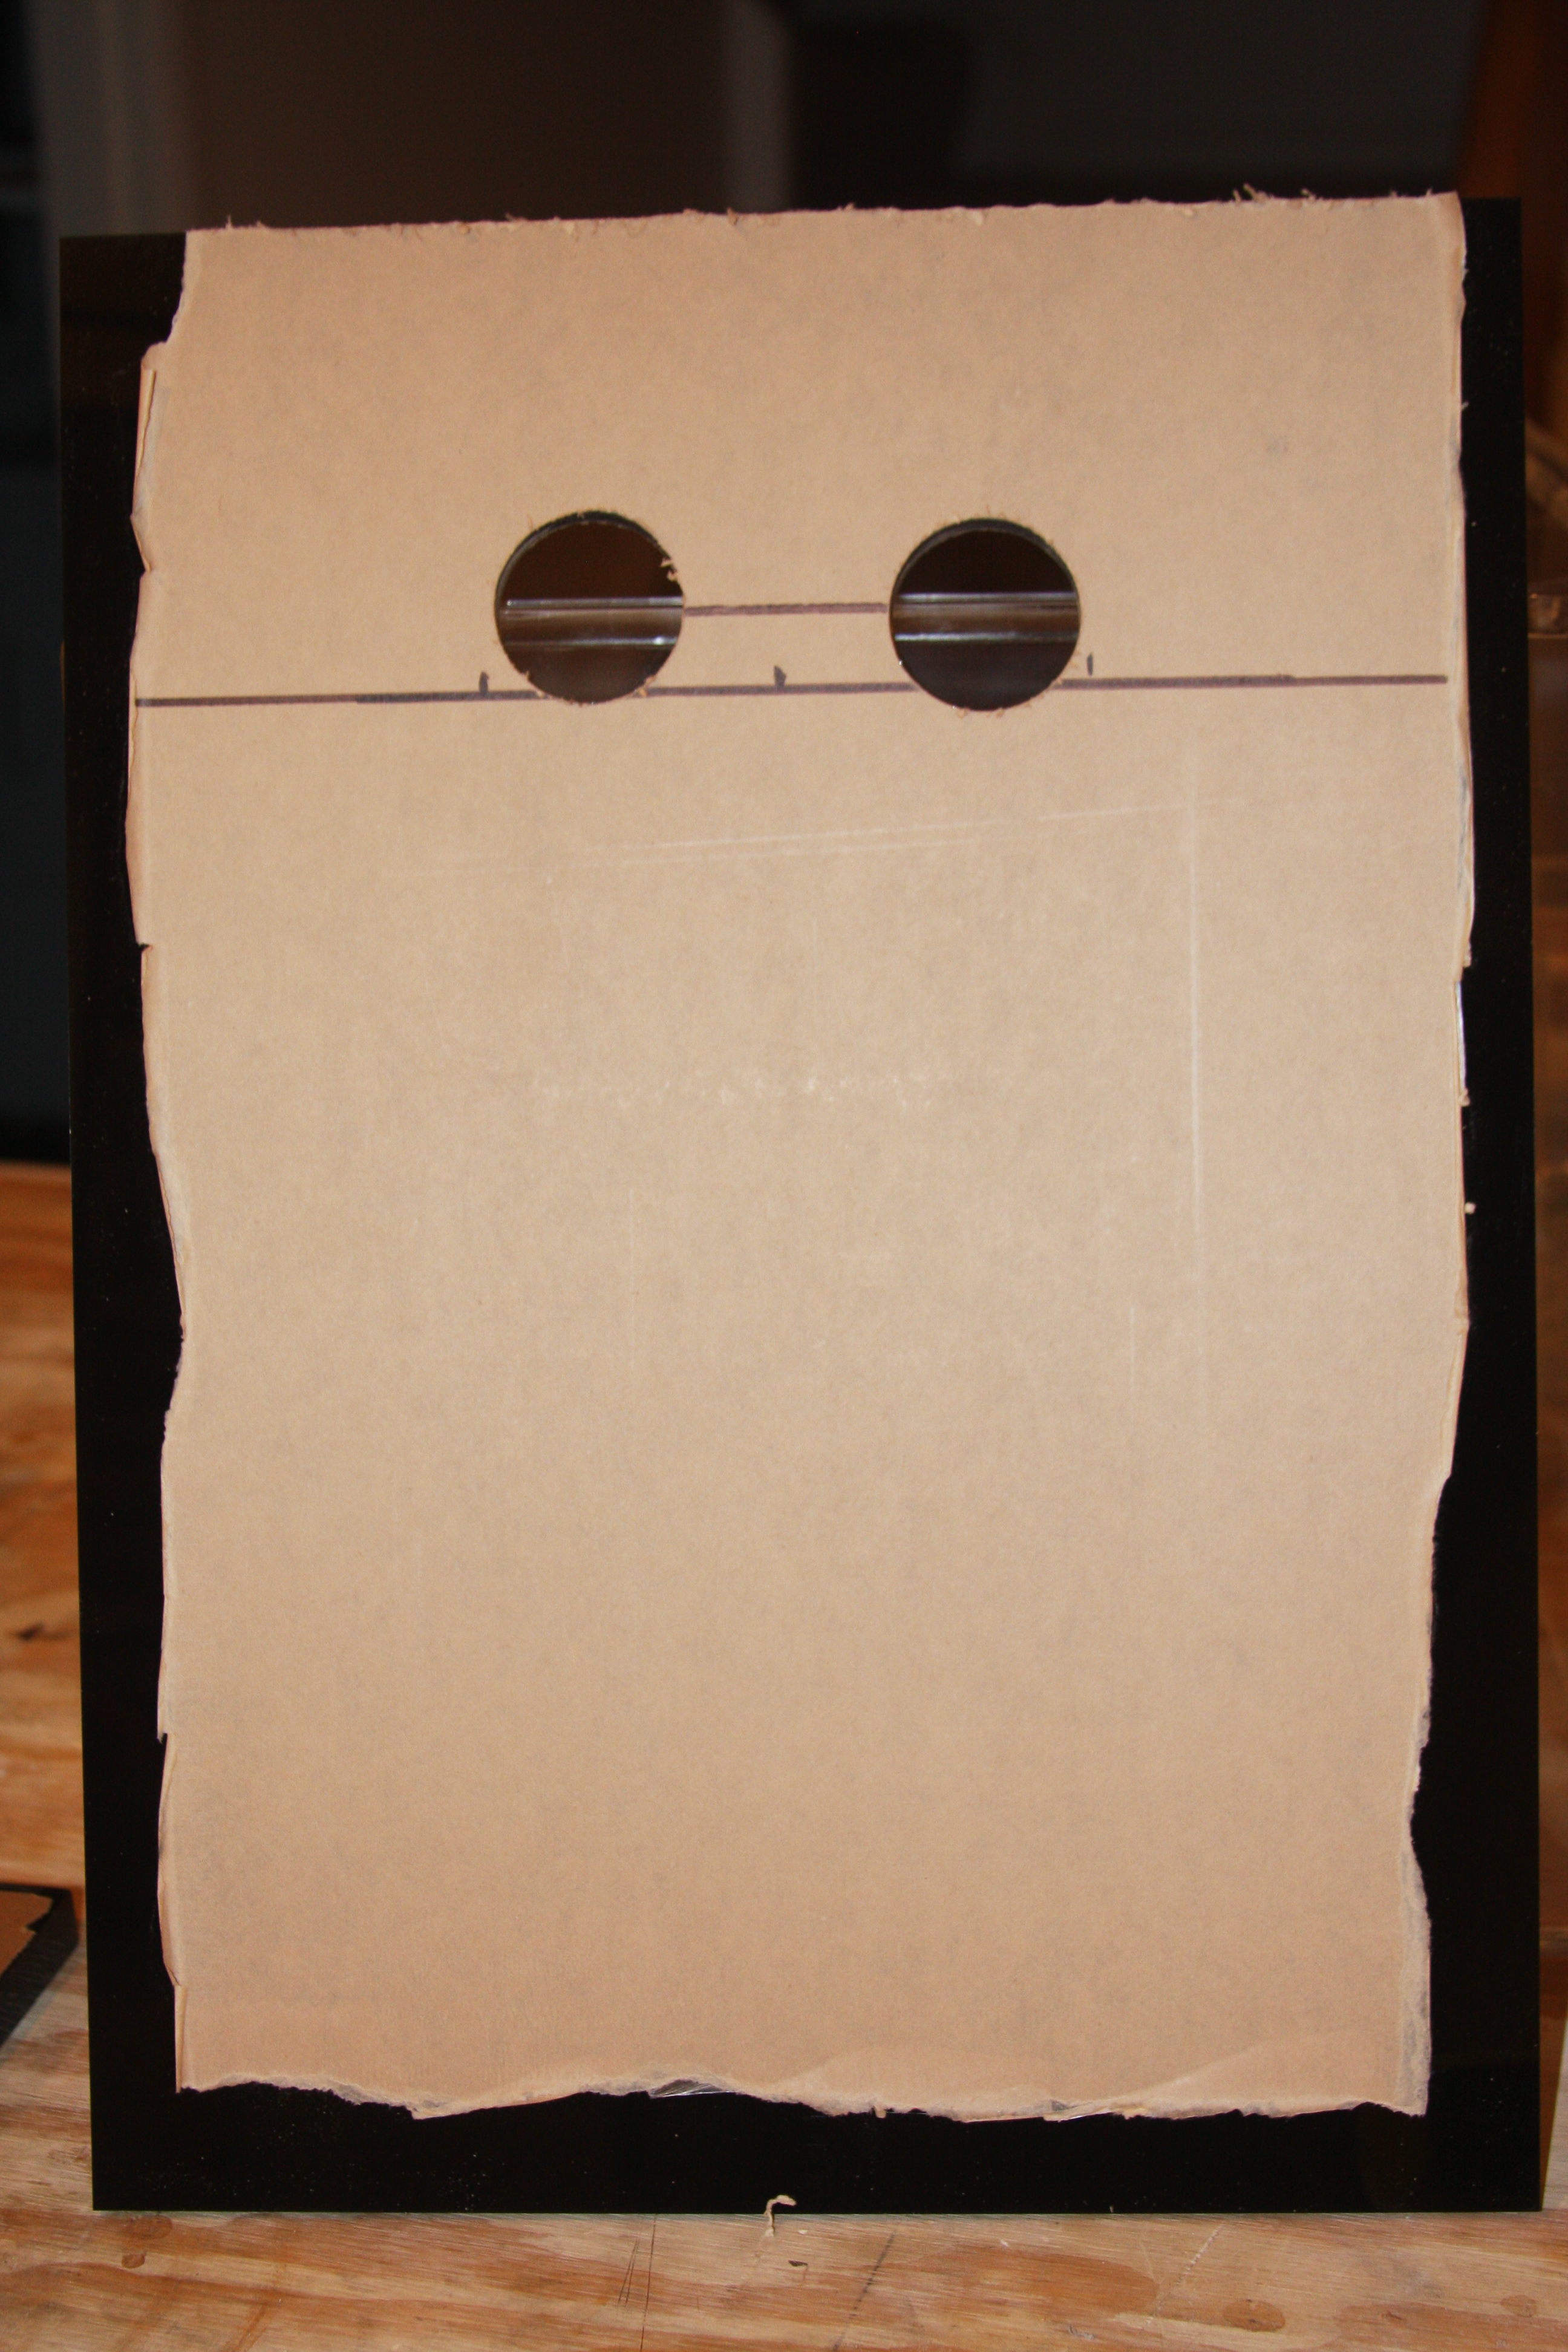
This is the panel that will be facing the end of the sump; return chamber area. I pre drilled the holes prior to any gluing, to reduce the risk of anything being broke...
 I did drill the bulkhead holes off just a tad. The 1 bulkhead is more than enough to handle the flow back to the sump, but the 2nd hole is just a hair higher incase the first would become blocked it would only rise a tad and start the flow from there.
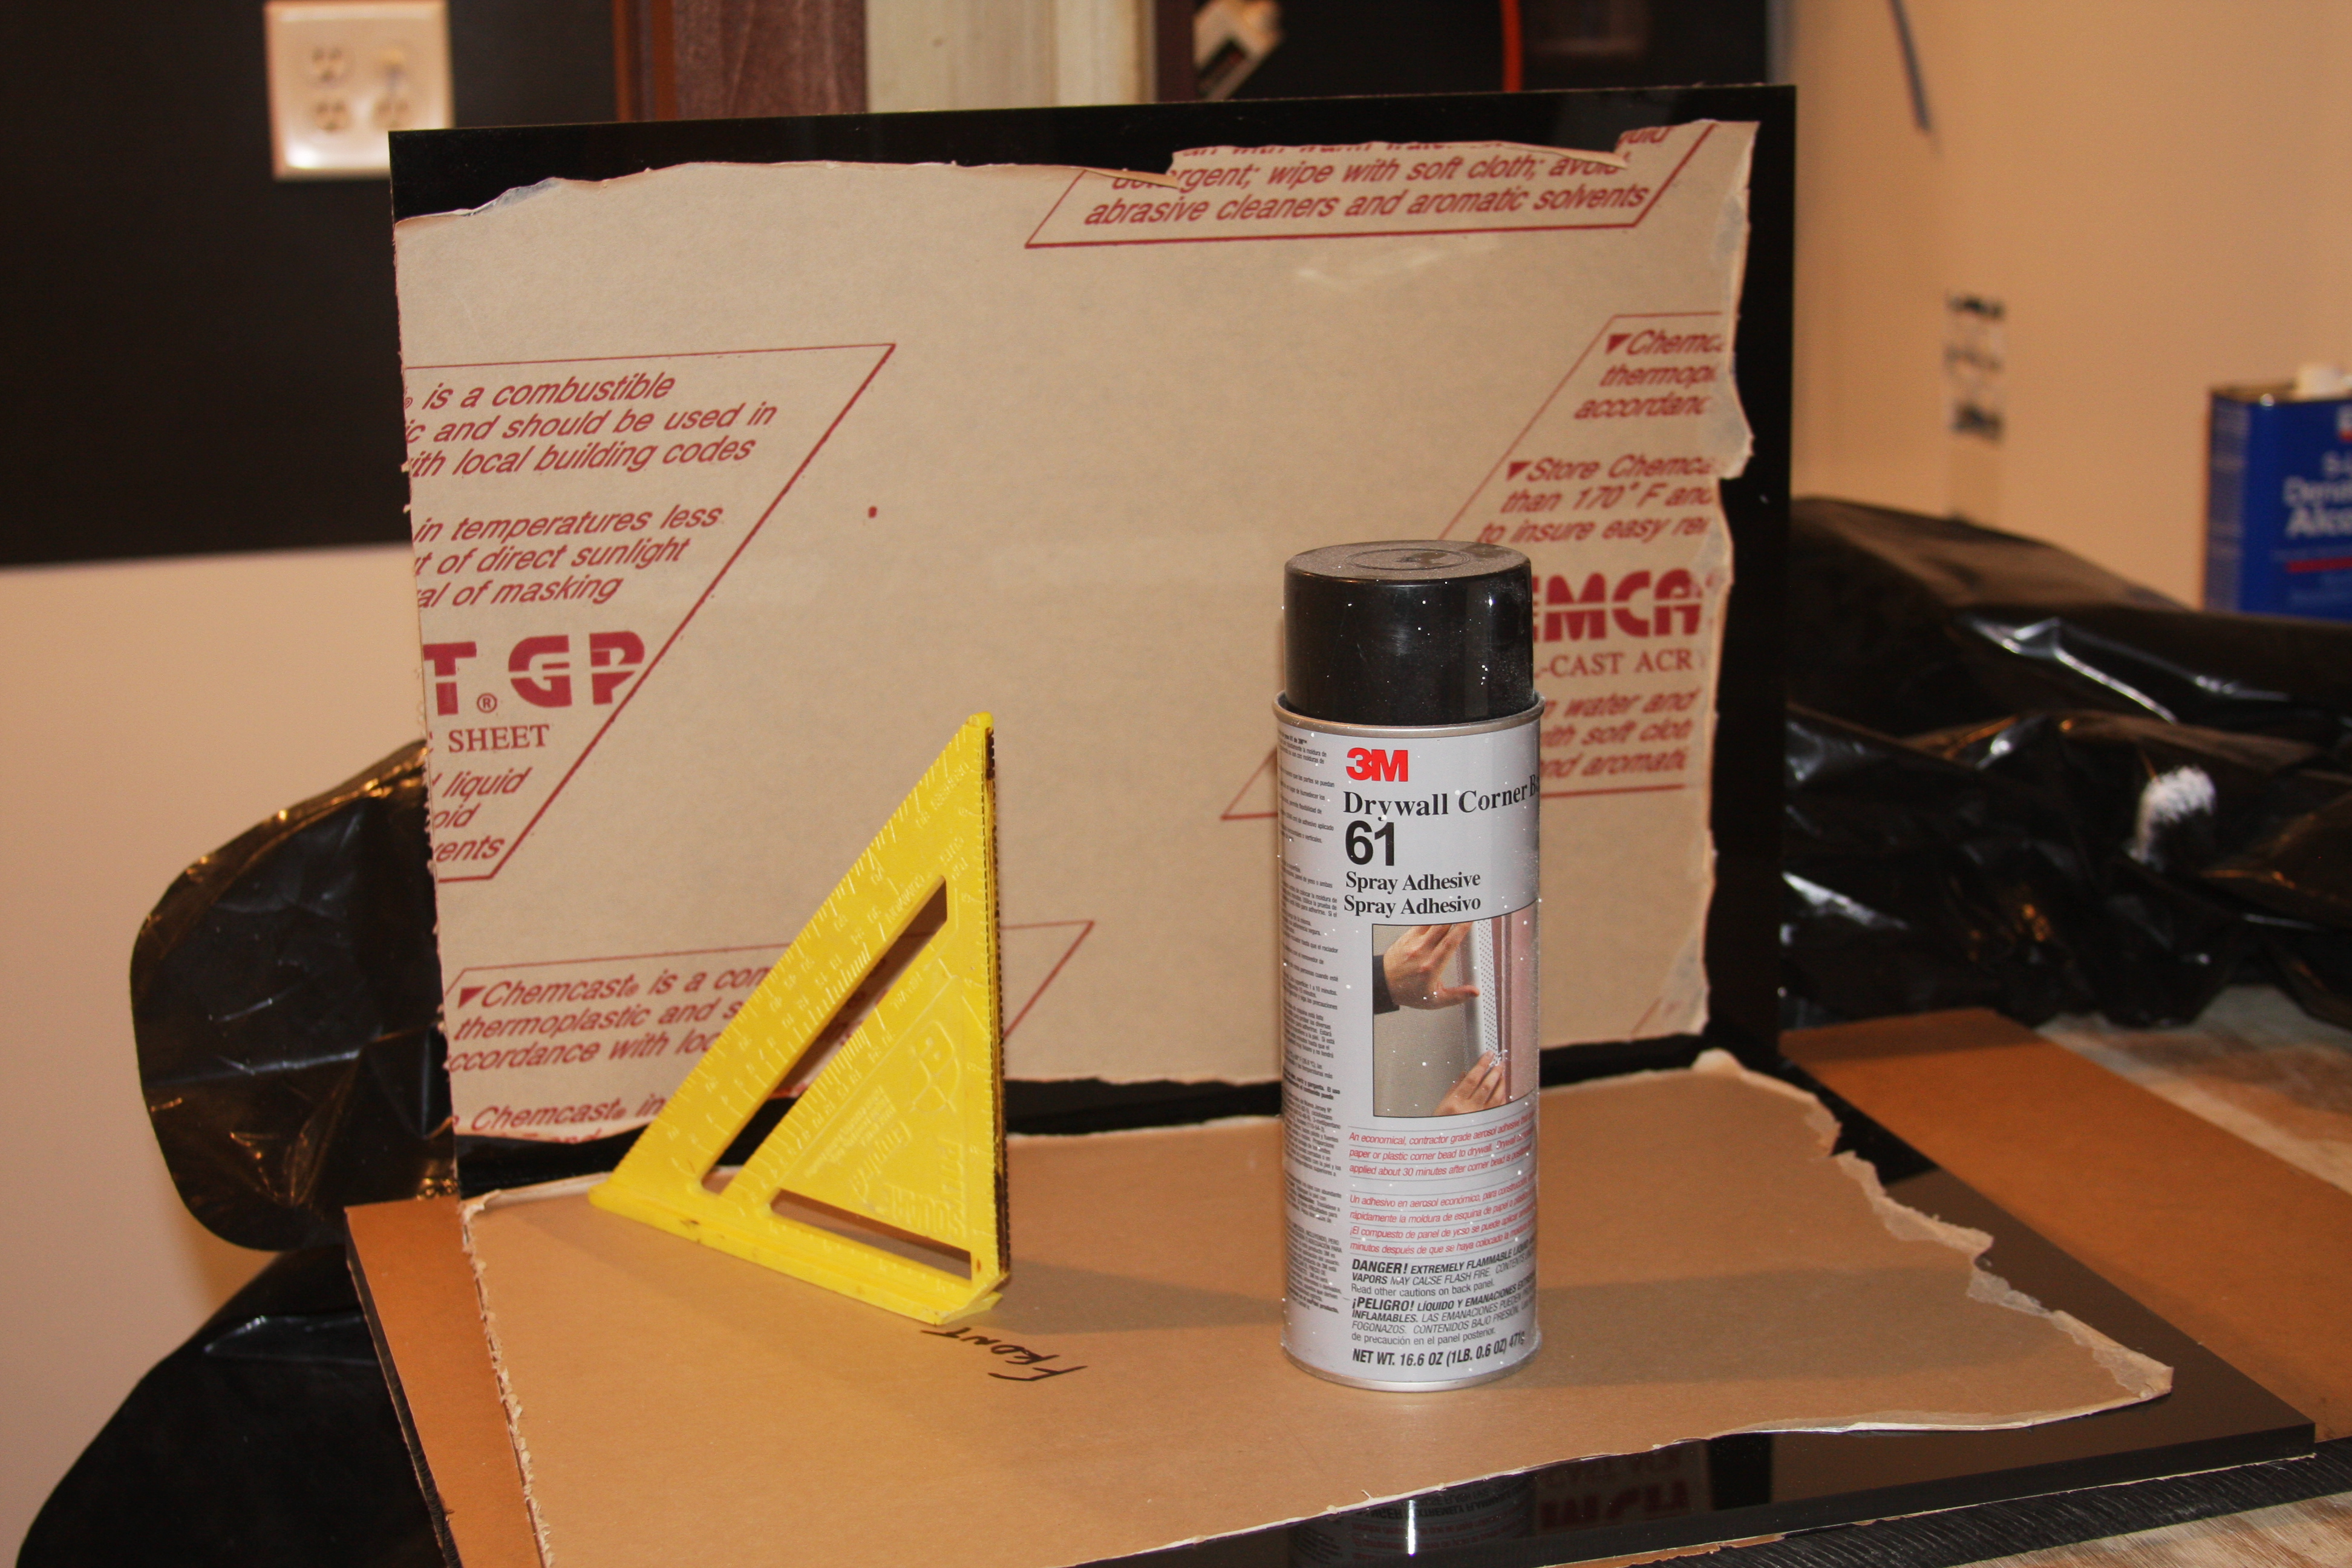
Again starting the prep work of removing the masking paper from the edges before gluing....I also went with the original plan of using black/smoked acrylic for all except for the viewing panel facing outward for Flower to peer into!!!!!
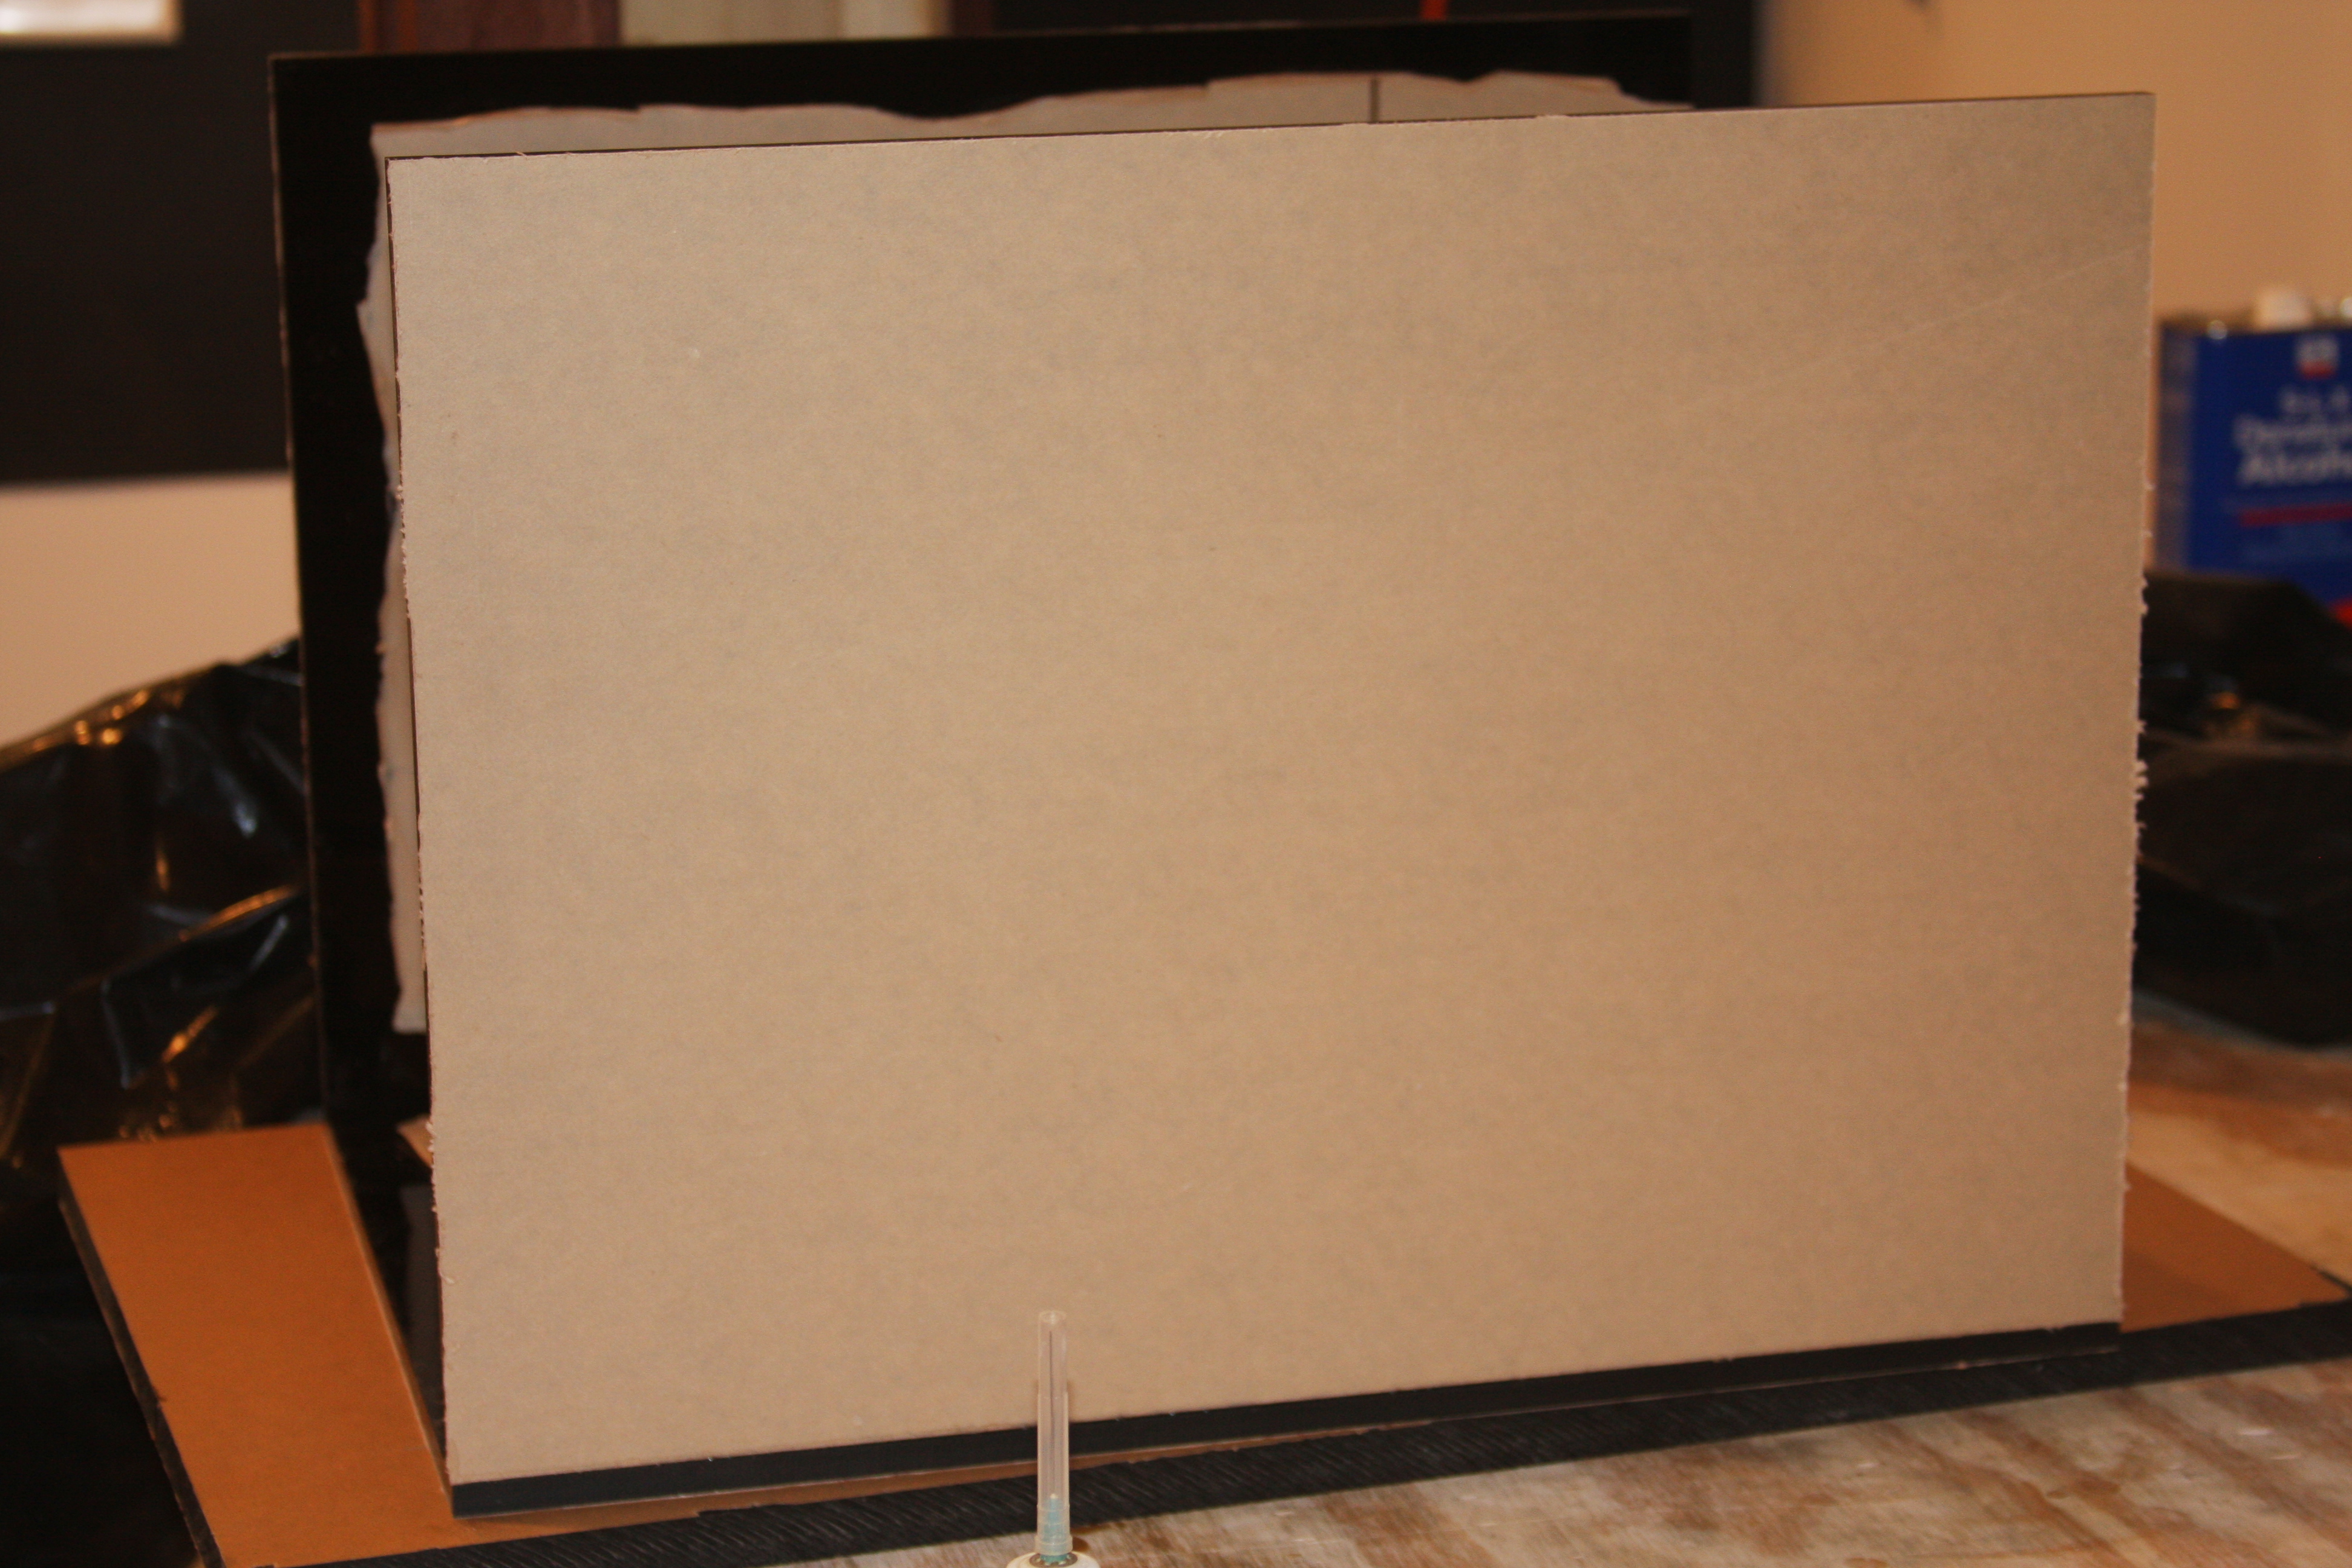
Here panels are starting to be glued up....notice I have another piece of acrylic underneath for a perfectly level work surface. I'm actually working on top of my stand, and I get a little sloppy with the epoxy, so I have droplets here and there that need sanded down, and didn't want to chance the glue up process being hindered with epoxy.
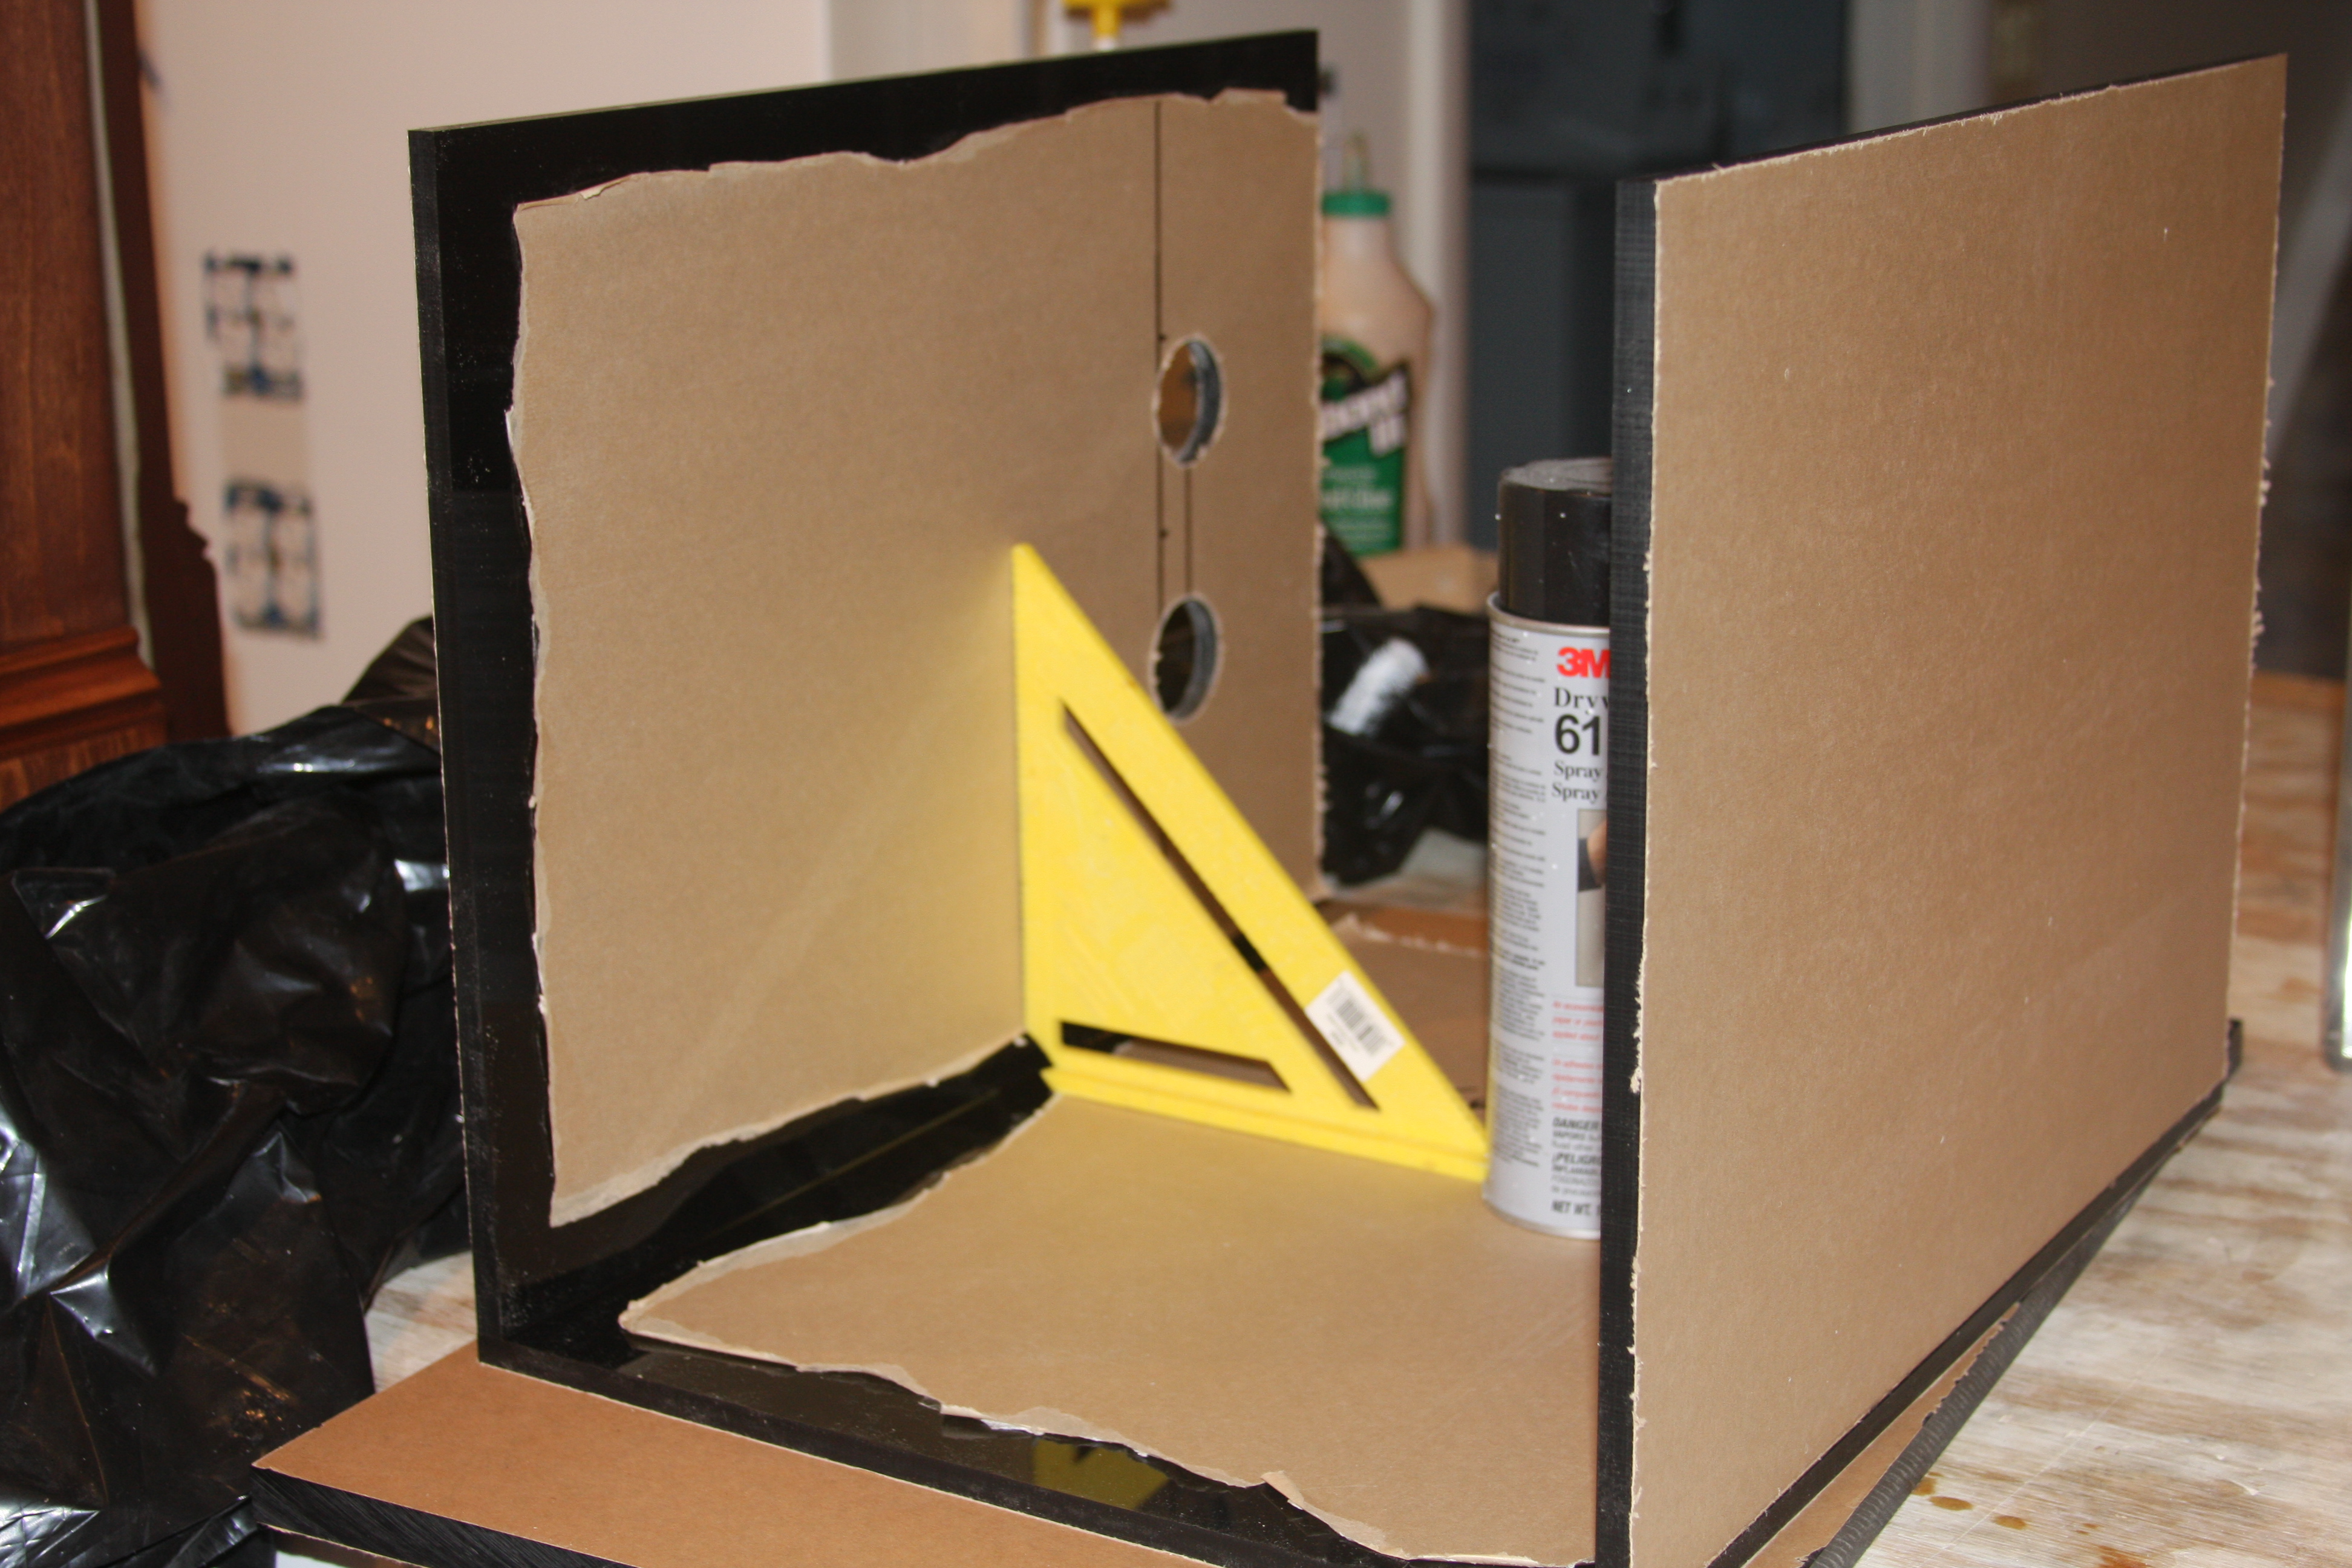
Here again you can see that both sides are glued into place, and the square keeping things square.
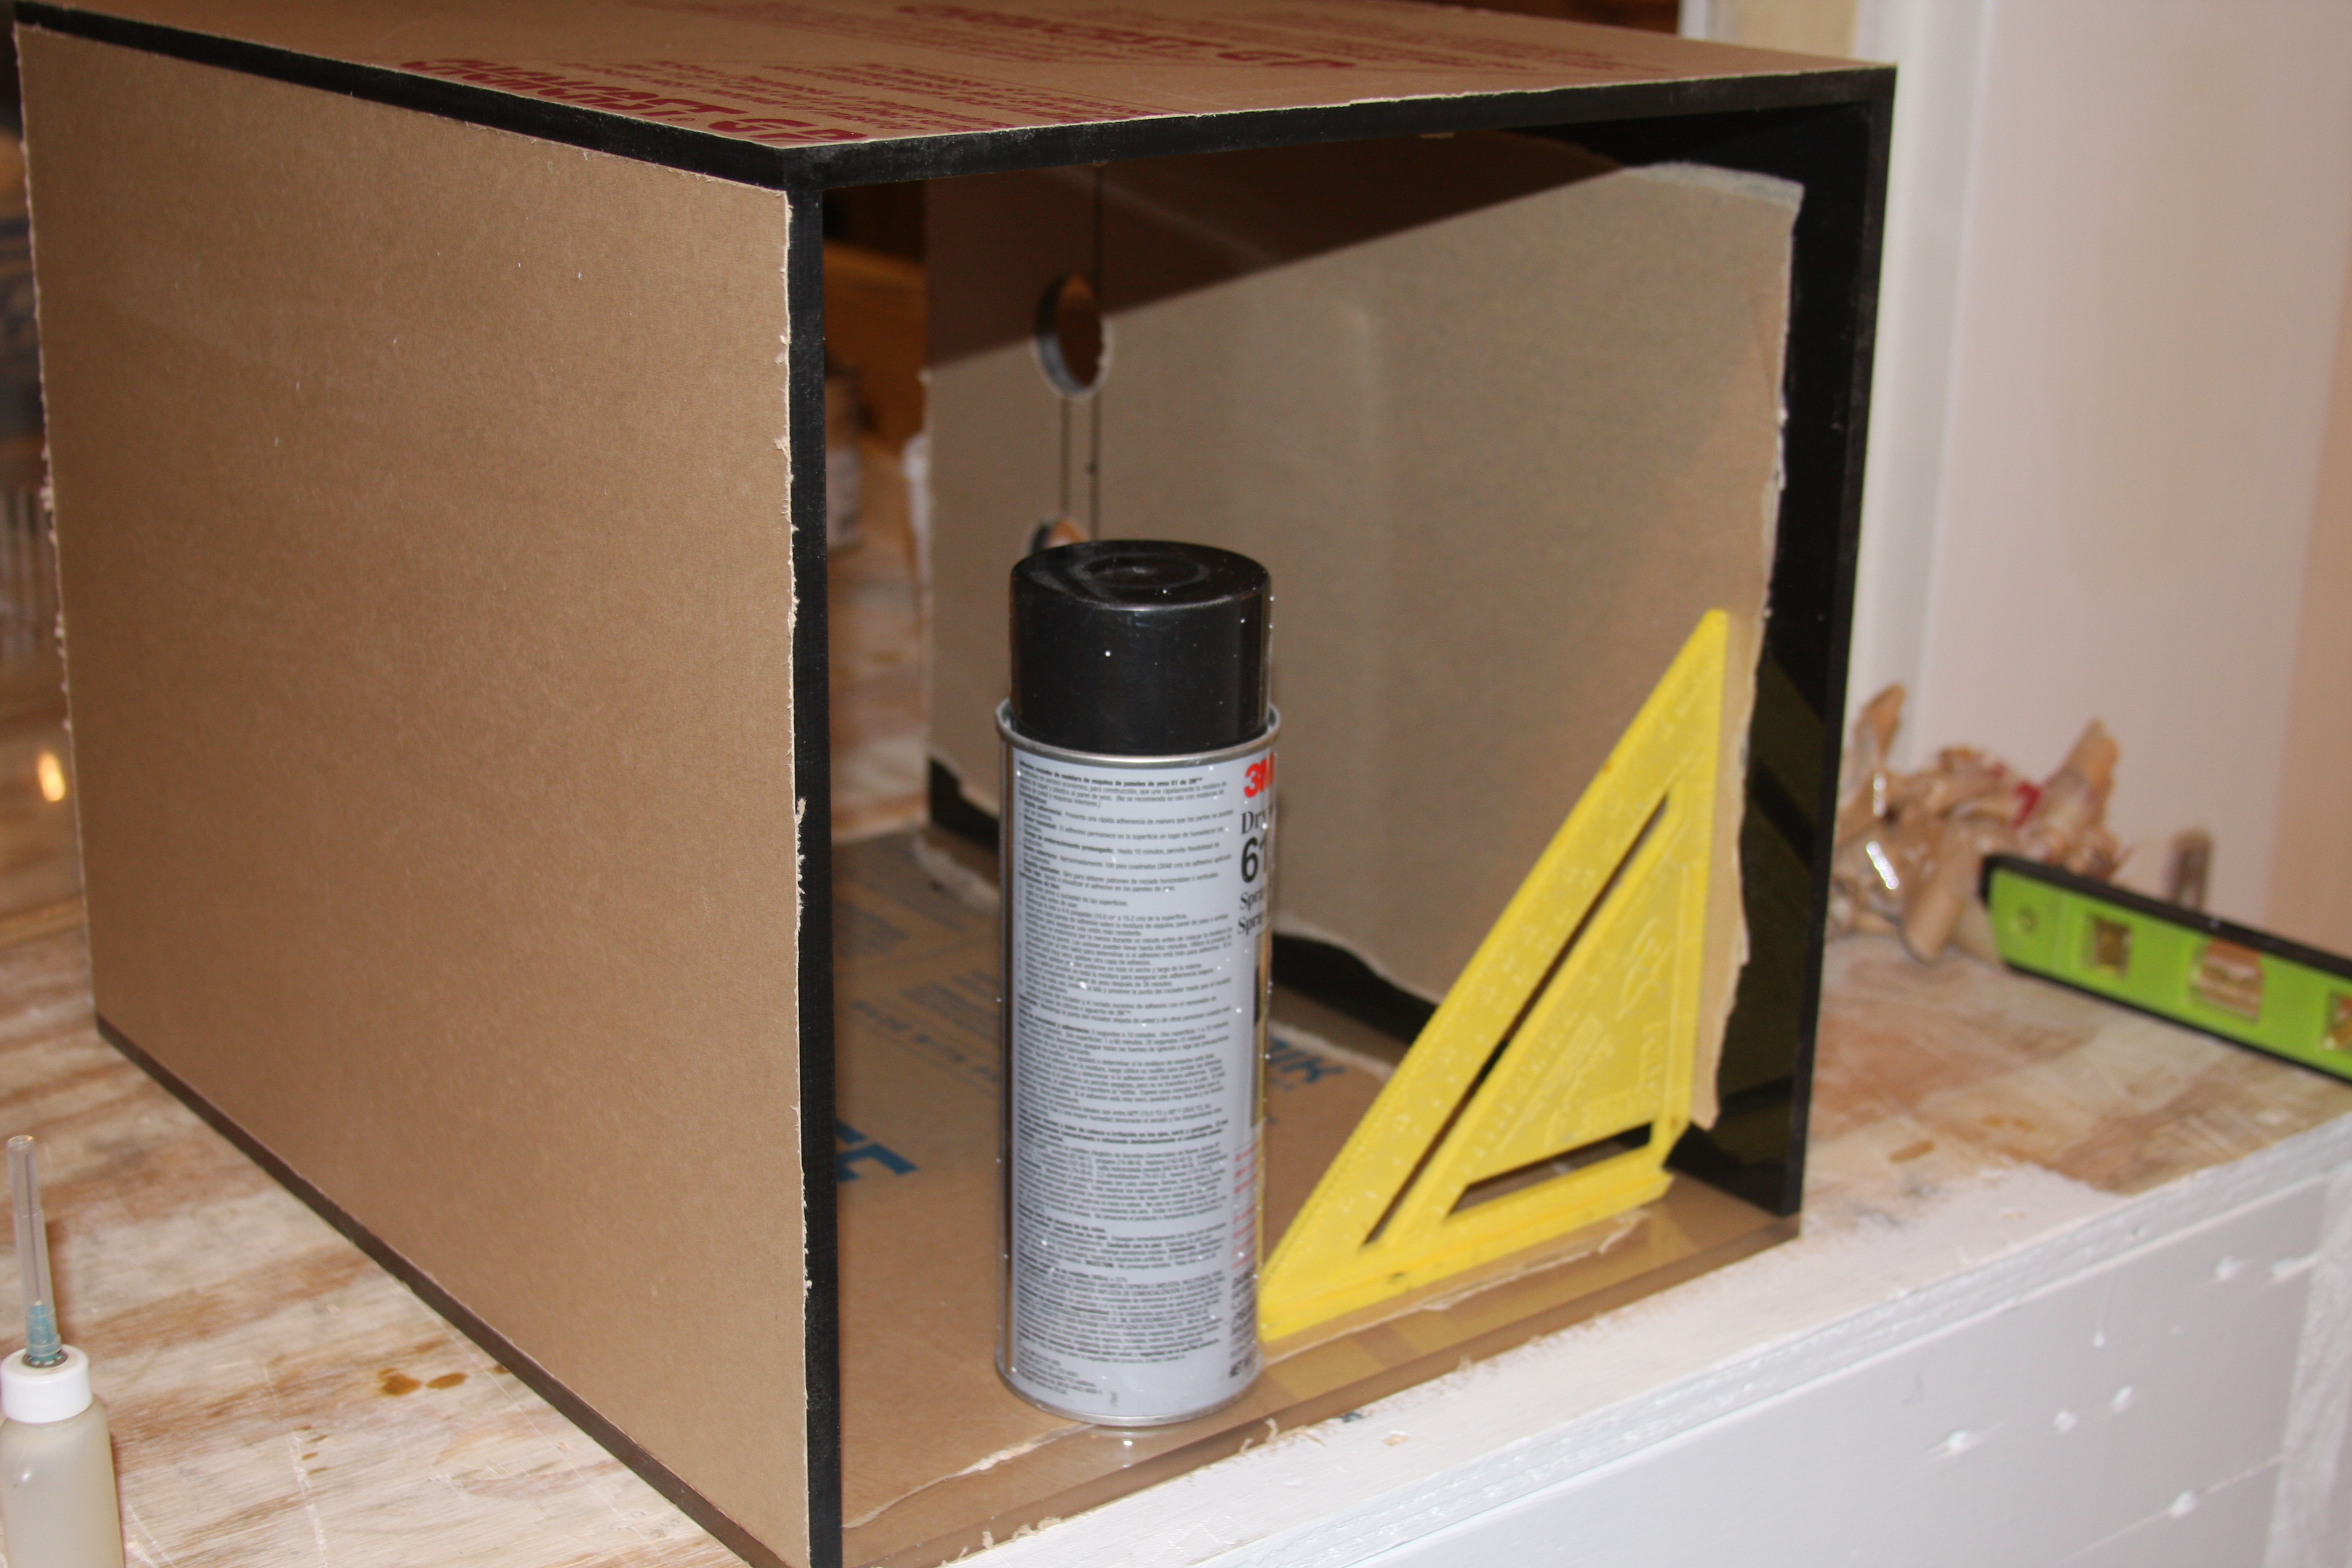
Pic of the other front(clear) viewing panel being glued into place.....Again keeping everything square.
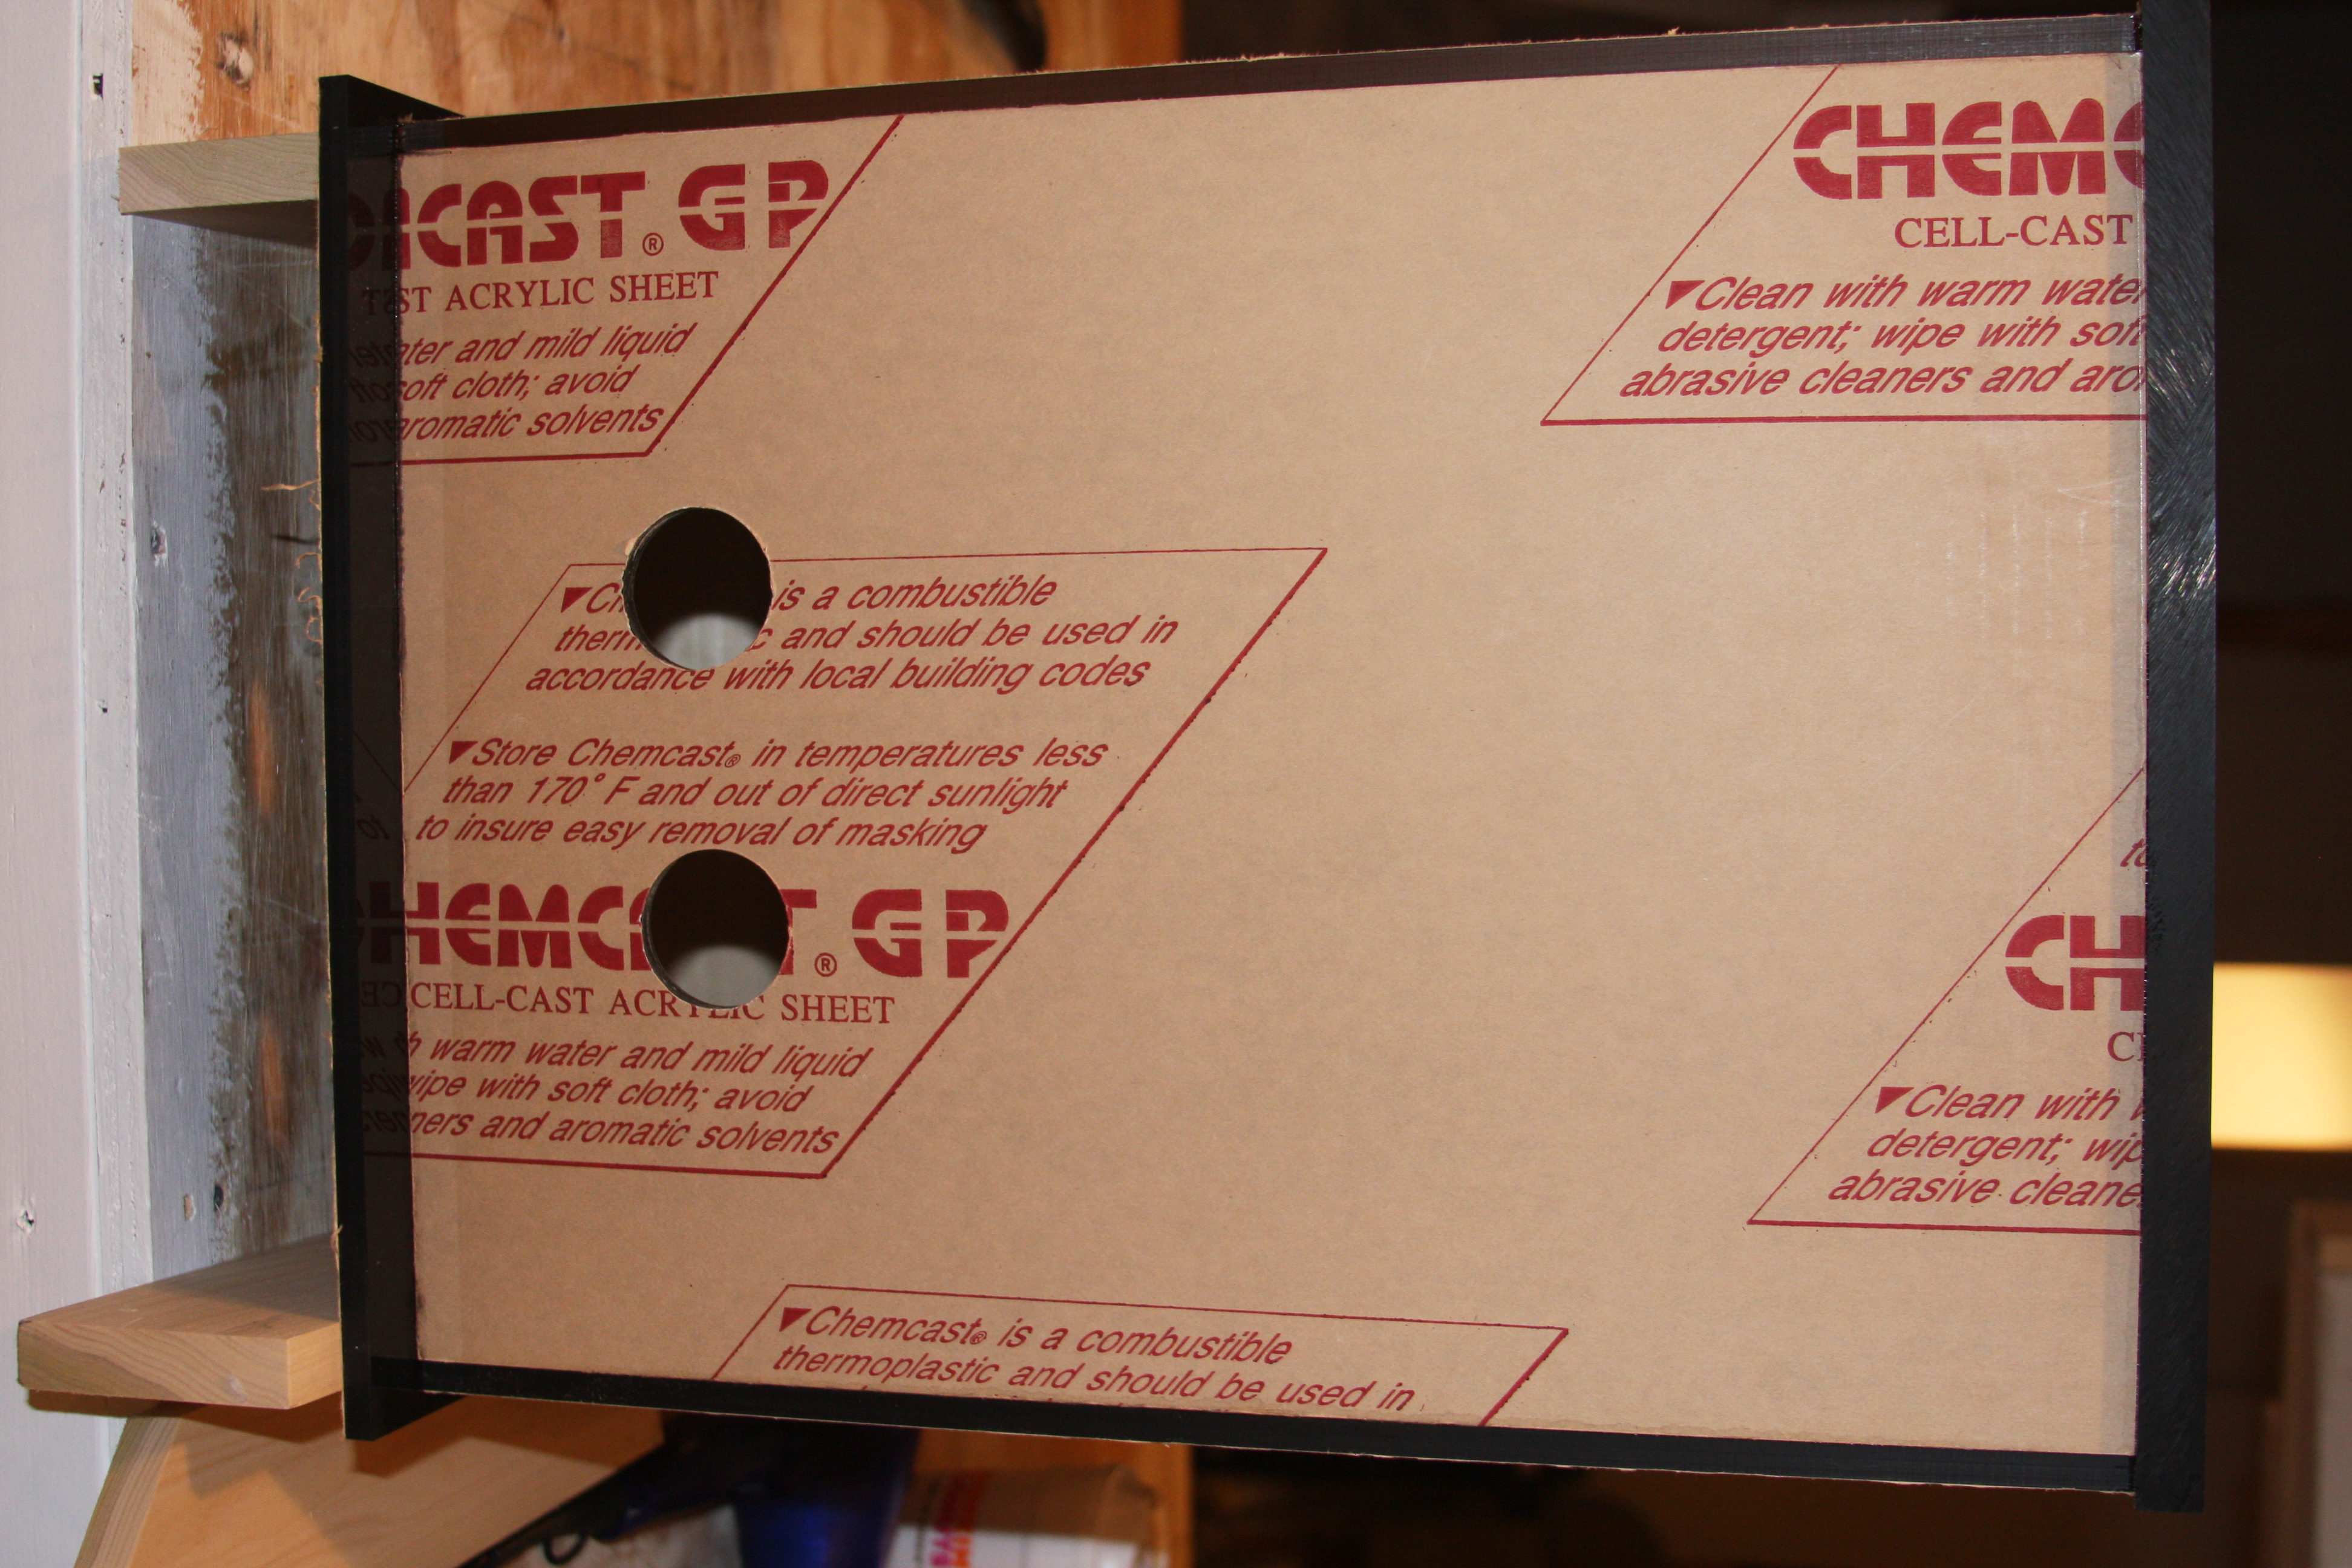
Sorry poor picture editor at 4:00 am.....In this pic the holes should actually be at the bottom of the pic, but it serves it's purpose the more I look at it maybe a little better.....The coffee is kicking in
 . As you can see the end on your right is the bottom. I used 1/2" black/smoked acrylic 1 because I seem to have a bunch of it, but 2 it gives us a little more height to clear the top of the sump. On the far left side of the pic you can see the top eurobracing is glued into place....Guess what? I cut the cutouts before gluing this time, and was fine!!!!!! So all major pieces are in place.
Next step this afternoon is to flush cut everything, and then change out bits and tighten and round over all the corner then polish......
Had to get an early rise this morning for another round of CDL testing today starting at 8:00am, but wanted to put a little spark and cheer in your day.... We all know the last mishap of the fuge, but here is some updated pics. I should be done around noon this afternoon provided the 5 individuals that I'm taking over for testing fly through....but anyways here's a little fix to brighten your day.
This is the panel that will be facing the end of the sump; return chamber area. I pre drilled the holes prior to any gluing, to reduce the risk of anything being broke...

Again starting the prep work of removing the masking paper from the edges before gluing....I also went with the original plan of using black/smoked acrylic for all except for the viewing panel facing outward for Flower to peer into!!!!!
Here panels are starting to be glued up....notice I have another piece of acrylic underneath for a perfectly level work surface. I'm actually working on top of my stand, and I get a little sloppy with the epoxy, so I have droplets here and there that need sanded down, and didn't want to chance the glue up process being hindered with epoxy.
Here again you can see that both sides are glued into place, and the square keeping things square.
Pic of the other front(clear) viewing panel being glued into place.....Again keeping everything square.
Sorry poor picture editor at 4:00 am.....In this pic the holes should actually be at the bottom of the pic, but it serves it's purpose the more I look at it maybe a little better.....The coffee is kicking in

Next step this afternoon is to flush cut everything, and then change out bits and tighten and round over all the corner then polish......
flower
Well-Known Member

Oh Shawn it looks great! You sound so, so busy, but I gotta tell you I'm glad to see that refugium ... I really want to see the stand, I can't imagine what it might look like, the sump and refugium I could invision becase they were box shaped.
I have everything just sitting here waitng on it. I always considered myself patient on stuff like this, but I find myself going to the garage and petting on stuff. LOL, any visitors have to first look at the thread ...all 34 pages, and then go to the gargage to see the stuff I purchased for the blessed event when the sump arrives..
So all my family and friends are just as anxious, but for different reasons...

My mom bless her heart is a bit forgetful and keeps reminding me I need to order the sand. I keep telling her I have to wait until the sump is here because it's live sand...like the fish it needs a home set up first.
flower
Well-Known Member
Quote:
Originally Posted by 2Quills http:///forum/thread/380517/flower-s-sump-fuge-build/680#post_3324848
Parts are on their way, Flower. You should get them by Monday. Tracking number is in your message box.


I answered your PM, a truly bright spot in my day. I really needed the good news. Shawn is nearly done with the sump, things are really coming together.
Originally Posted by 2Quills http:///forum/thread/380517/flower-s-sump-fuge-build/680#post_3324848
Parts are on their way, Flower. You should get them by Monday. Tracking number is in your message box.


I answered your PM, a truly bright spot in my day. I really needed the good news. Shawn is nearly done with the sump, things are really coming together.
2quills
Well-Known Member
Quote:
Originally Posted by Flower http:///forum/thread/380517/flower-s-sump-fuge-build/680#post_3324850

I answered your PM, a truly bright spot in my day. I really needed the good news. Shawn is nearly done with the sump, things are really coming together.
Well I figured you could use some cheering up That fuge is looking really good...I can't wait to see you get it all set up.
Originally Posted by Flower http:///forum/thread/380517/flower-s-sump-fuge-build/680#post_3324850

I answered your PM, a truly bright spot in my day. I really needed the good news. Shawn is nearly done with the sump, things are really coming together.
Well I figured you could use some cheering up
scott t
Active Member
Shawn/Corey You two guys should be commended for what you are doing for Ms. Flower. It is truly an inspiration to know that there are people in this world that are still willing to go out of there way to help another. That you expect no financial compensation for what you are doing that you are truly doing it out of the goodness of your heart. People like you two are few and far between these days. If there were more people like you in this world, that not only care about themselves, but others the world would be a much better place. I would personally myself like to say THANK YOU to you both for being the people that you are, makes me know that not all people in this world are only out for themselves. Corey also to you thank you for the much appreciated advice you have given to all my many questions about my own sump build for my tank.
SCOTT

SCOTT

2quills
Well-Known Member
Wow, Scott! What a great thing to say. You're not just tryin to suck up in hopes of getting your own sump/fuge out of the deal are ya?
 j/k Scott!!!
Nah...in all seriousness it's been an enjoyable experience for me and it's one that I would gladly do all over again if given the opportunity. My part has only been a small fraction of what everyone here has done. Shawn, Al, Moewzer, Monsinour, Posieden, Spanko, Mike, U Mike and anyone/everyone else who's offered their input on this thread all deserve a big round of applause for doing their parts as well. In all my days I've never seen such a group come together and stand as one in a united front in hopes to abolish the evil we know as nitrate for a fellow hobbyist.

I must say it has been something that I am proud to say that I've been a part of. Though the true battle has yet to begin. Time will tell if our efforts will be successful but I believe they will be. And Flower deserves it. She's fought hard to do good for her tank and it's inhabitants. It has been and will continue to be my pleasure.
Thanks for the great words, Scott! People like you who go out of there way to express such thoughts deserve to be commended as well! You're more than welcome to pick whatever brains I have left, anytime!

Nah...in all seriousness it's been an enjoyable experience for me and it's one that I would gladly do all over again if given the opportunity. My part has only been a small fraction of what everyone here has done. Shawn, Al, Moewzer, Monsinour, Posieden, Spanko, Mike, U Mike and anyone/everyone else who's offered their input on this thread all deserve a big round of applause for doing their parts as well. In all my days I've never seen such a group come together and stand as one in a united front in hopes to abolish the evil we know as nitrate for a fellow hobbyist.

I must say it has been something that I am proud to say that I've been a part of. Though the true battle has yet to begin. Time will tell if our efforts will be successful but I believe they will be. And Flower deserves it. She's fought hard to do good for her tank and it's inhabitants. It has been and will continue to be my pleasure.
Thanks for the great words, Scott! People like you who go out of there way to express such thoughts deserve to be commended as well! You're more than welcome to pick whatever brains I have left, anytime!
flower
Well-Known Member

Scott T...You should write for Hallmark. I have been struggling with the words to express how much I admire everyone who has worked so hard to help me, and find some way to thank them. You're sweet words were just perfect. I didn’t deserve anything…they saw me struggling and just reached out. No Corey wouldn't take payment, a rare find indeed are friends of such charactor.
acrylic51
Active Member
Thank You Scott T......I had told Flower, back when we started this little project, that this is what this place should be and what the hobby should involve more of....Helping are fellow reefers. Honestly if it wasn't for a lot of the other knowledgeable reefers around here, I wouldn't have progressed as far as I have to this point. Some are still here, and a lot have moved on from this site, but they know who they are, and they never turned a deaf ear on someone that needed a helping hand or direction....Bang with helping seed my sandbed back in the day on my 240!!!!!! Golfish & Kip who along with Bang pushed us to be better and strive for more.......My hats off to my mentors!!!!!!

Shawn/Corey You two guys should be commended for what you are doing for Ms. Flower. It is truly an inspiration to know that there are people in this world that are still willing to go out of there way to help another. That you expect no financial compensation for what you are doing that you are truly doing it out of the goodness of your heart. People like you two are few and far between these days. If there were more people like you in this world, that not only care about themselves, but others the world would be a much better place. I would personally myself like to say THANK YOU to you both for being the people that you are, makes me know that not all people in this world are only out for themselves. Corey also to you thank you for the much appreciated advice you have given to all my many questions about my own sump build for my tank.
SCOTT

Quote:
Originally Posted by Flower http:///forum/thread/380517/flower-s-sump-fuge-build/680#post_3324850

I answered your PM, a truly bright spot in my day. I really needed the good news. Shawn is nearly done with the sump, things are really coming together.
 Well said Corey!!!!! Again my main purpose and goal was to try to get everyone involved, and do something off the wall and super, for a super nice lady.....The experience has been fantastic, and the input, and ideas from everyone is tremendous. Always pushing ourselves to the limit, to take it 1 step further....The ideas, plans were run through some impressive minds and tweakers as you pointed out Corey.....As I've mentioned many times my garage is always open to my reefers here.....Never a project or idea that we can't solve when we all get down to it.......Again thanks guys for the SUPER SUPPORT!!!!!!!
Quote:
Originally Posted by 2Quills ote.gif" style="border: 0px solid;" />
Wow, Scott! What a great thing to say. You're not just tryin to suck up in hopes of getting your own sump/fuge out of the deal are ya?
 j/k Scott!!!
Nah...in all seriousness it's been an enjoyable experience for me and it's one that I would gladly do all over again if given the opportunity. My part has only been a small fraction of what everyone here has done. Shawn, Al, Moewzer, Monsinour, Posieden, Spanko, Mike, U Mike and anyone/everyone else who's offered their input on this thread all deserve a big round of applause for doing their parts as well. In all my days I've never seen such a group come together and stand as one in a united front in hopes to abolish the evil we know as nitrate for a fellow hobbyist.

I must say it has been something that I am proud to say that I've been a part of. Though the true battle has yet to begin. Time will tell if our efforts will be successful but I believe they will be. And Flower deserves it. She's fought hard to do good for her tank and it's inhabitants. It has been and will continue to be my pleasure.
Thanks for the great words, Scott! People like you who go out of there way to express such thoughts deserve to be commended as well! You're more than welcome to pick whatever brains I have left, anytime!

Shawn/Corey You two guys should be commended for what you are doing for Ms. Flower. It is truly an inspiration to know that there are people in this world that are still willing to go out of there way to help another. That you expect no financial compensation for what you are doing that you are truly doing it out of the goodness of your heart. People like you two are few and far between these days. If there were more people like you in this world, that not only care about themselves, but others the world would be a much better place. I would personally myself like to say THANK YOU to you both for being the people that you are, makes me know that not all people in this world are only out for themselves. Corey also to you thank you for the much appreciated advice you have given to all my many questions about my own sump build for my tank.
SCOTT

Quote:
Originally Posted by Flower http:///forum/thread/380517/flower-s-sump-fuge-build/680#post_3324850

I answered your PM, a truly bright spot in my day. I really needed the good news. Shawn is nearly done with the sump, things are really coming together.

Quote:
Originally Posted by 2Quills ote.gif" style="border: 0px solid;" />
Wow, Scott! What a great thing to say. You're not just tryin to suck up in hopes of getting your own sump/fuge out of the deal are ya?

Nah...in all seriousness it's been an enjoyable experience for me and it's one that I would gladly do all over again if given the opportunity. My part has only been a small fraction of what everyone here has done. Shawn, Al, Moewzer, Monsinour, Posieden, Spanko, Mike, U Mike and anyone/everyone else who's offered their input on this thread all deserve a big round of applause for doing their parts as well. In all my days I've never seen such a group come together and stand as one in a united front in hopes to abolish the evil we know as nitrate for a fellow hobbyist.

I must say it has been something that I am proud to say that I've been a part of. Though the true battle has yet to begin. Time will tell if our efforts will be successful but I believe they will be. And Flower deserves it. She's fought hard to do good for her tank and it's inhabitants. It has been and will continue to be my pleasure.
Thanks for the great words, Scott! People like you who go out of there way to express such thoughts deserve to be commended as well! You're more than welcome to pick whatever brains I have left, anytime!
acrylic51
Active Member
Sorry about the long delay today Flower.....I know you needed your fix before work, but I still had some tweaking I had to do on a couple ideas, and as you know I always love to push the limits......I had mentioned earlier in the build thread, that when we got the skimmer in house and got all the specs, that a skimmer stand would need to be built to get the skimmer at the recommended water depth. I didn't want to make anything permanently attached to the sump, because as we all know how parts change and efficiency of equipment it could need a deeper depth down the road with a different skimmer. I'm by no way a photographer, and will have to hit Cranberry up shortly to give us a very good run down on the photography end of things......but anyways lets get the pictures rolling!!!!!

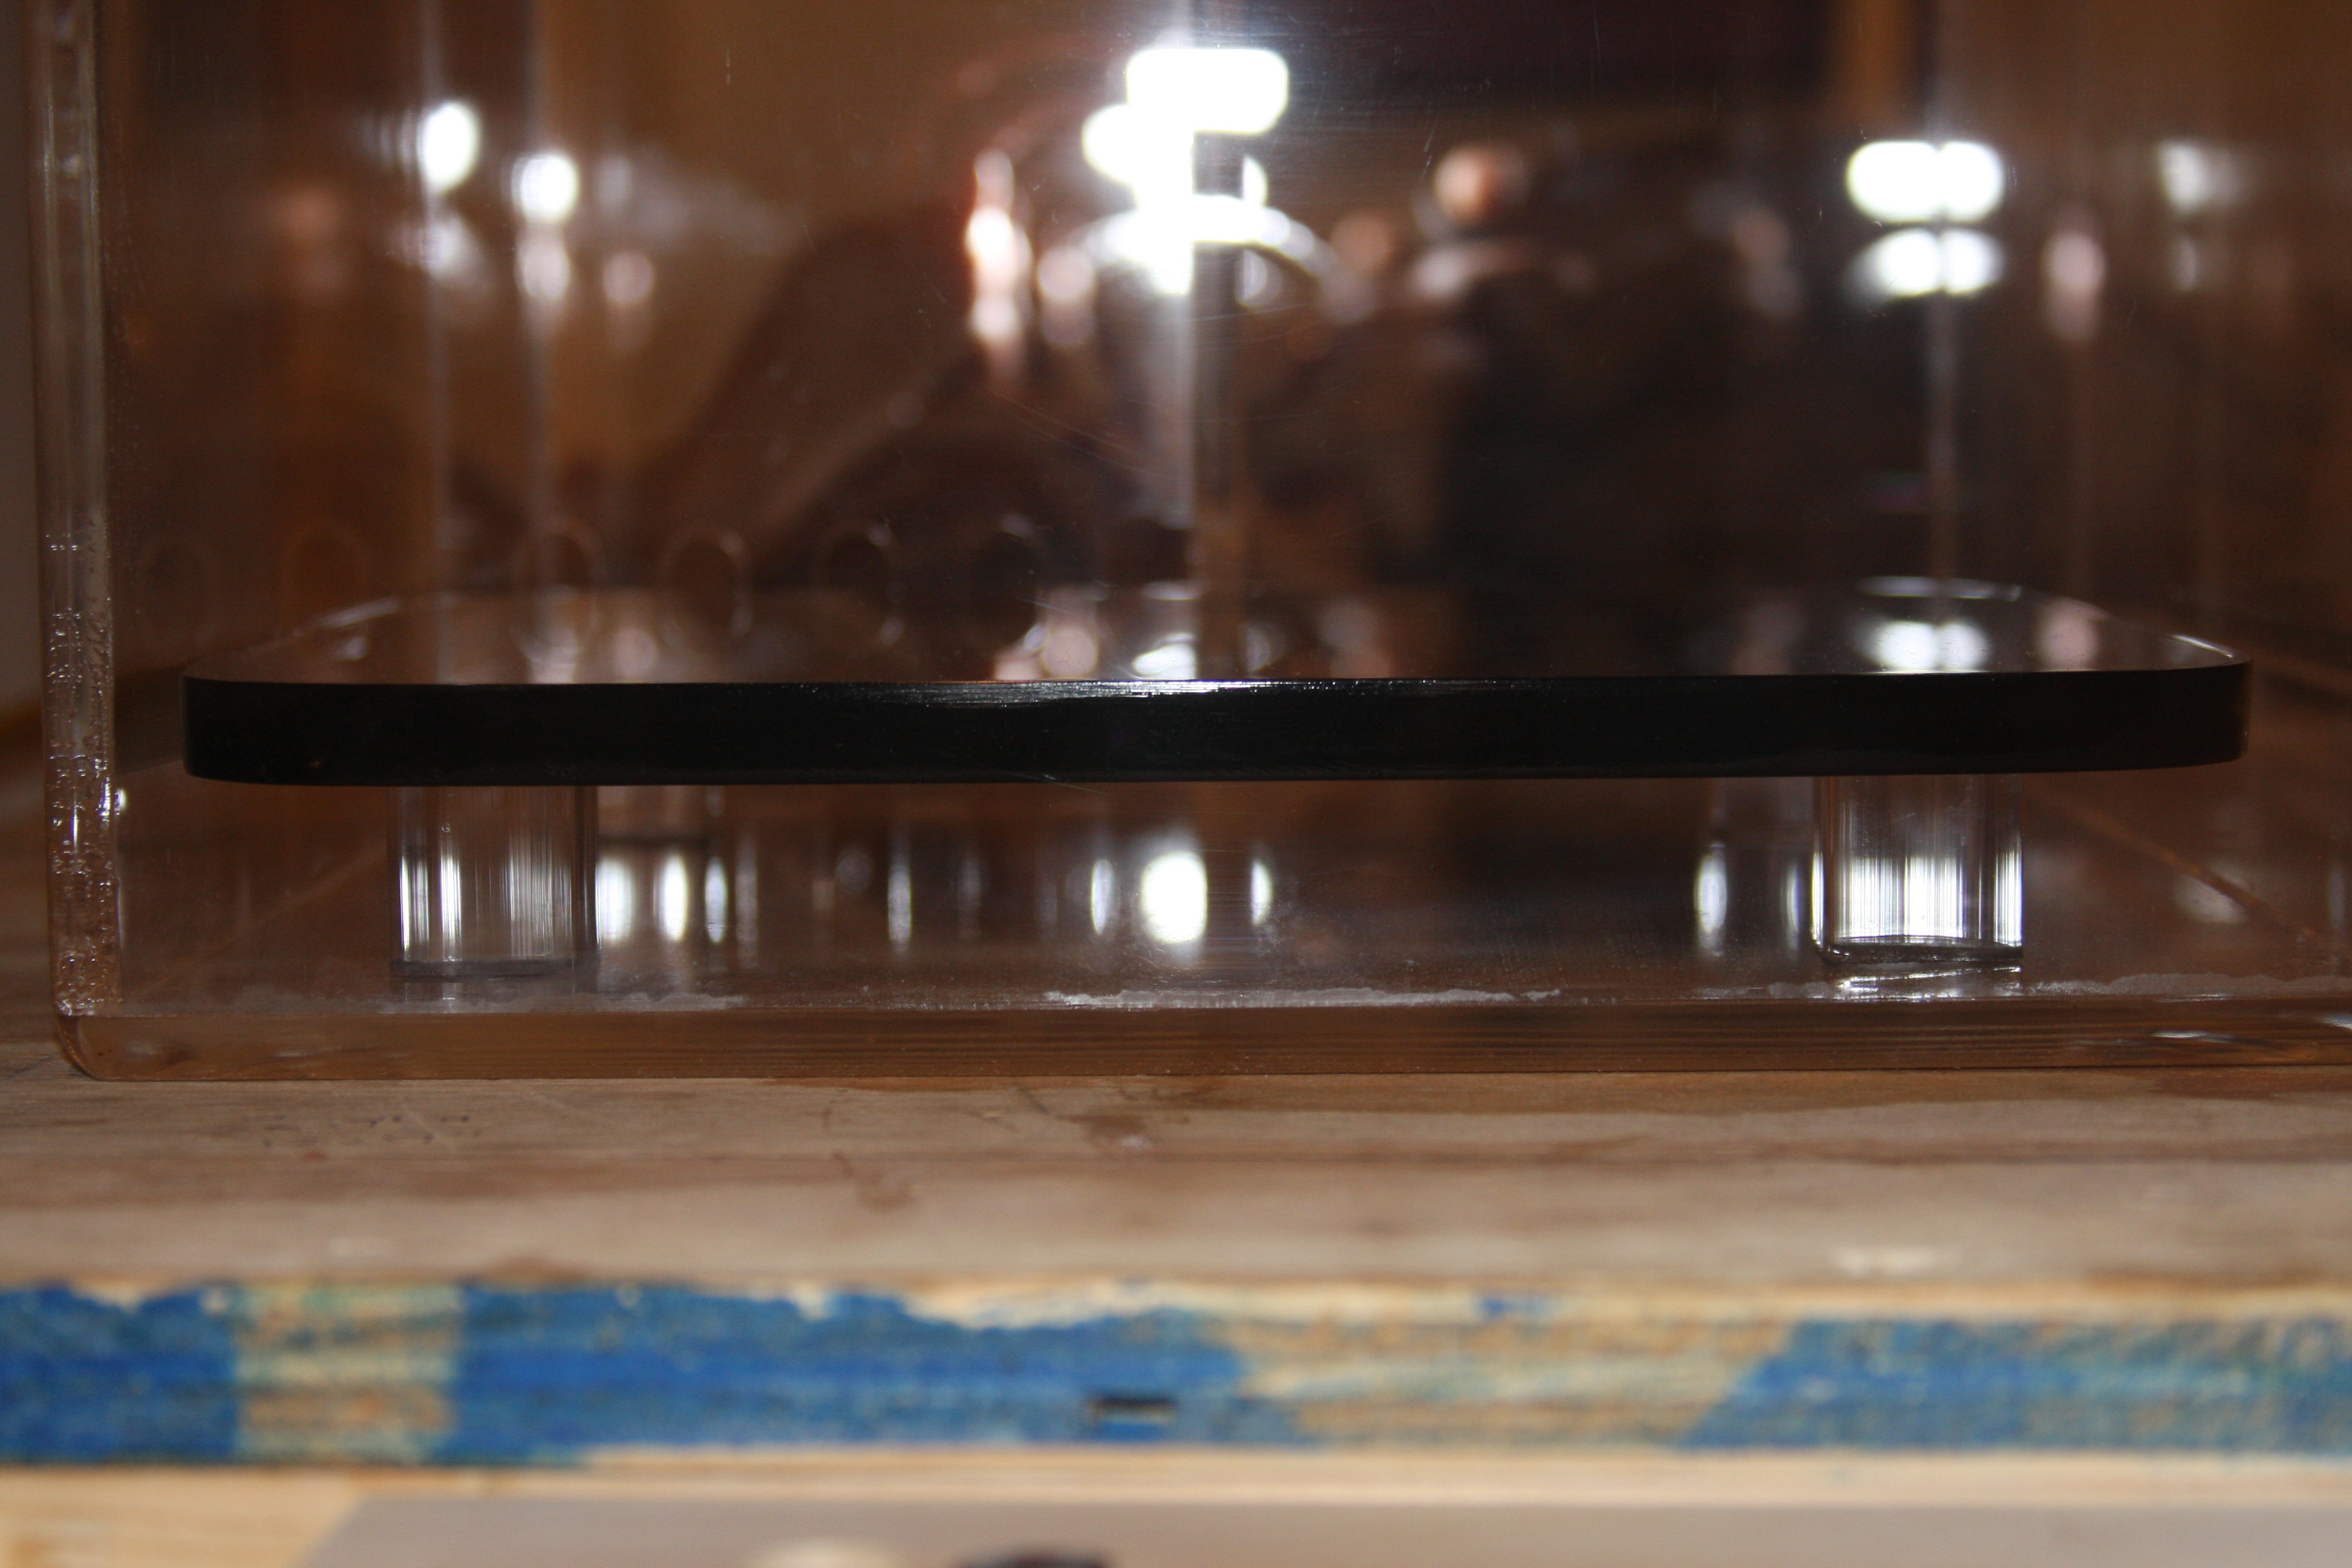
This is the skimmer stand sitting inside the sump/skimmer area.....The skimmer stand is exactly 1 1/2" high which should get Flower in the correct range for water depth for the skimmer...
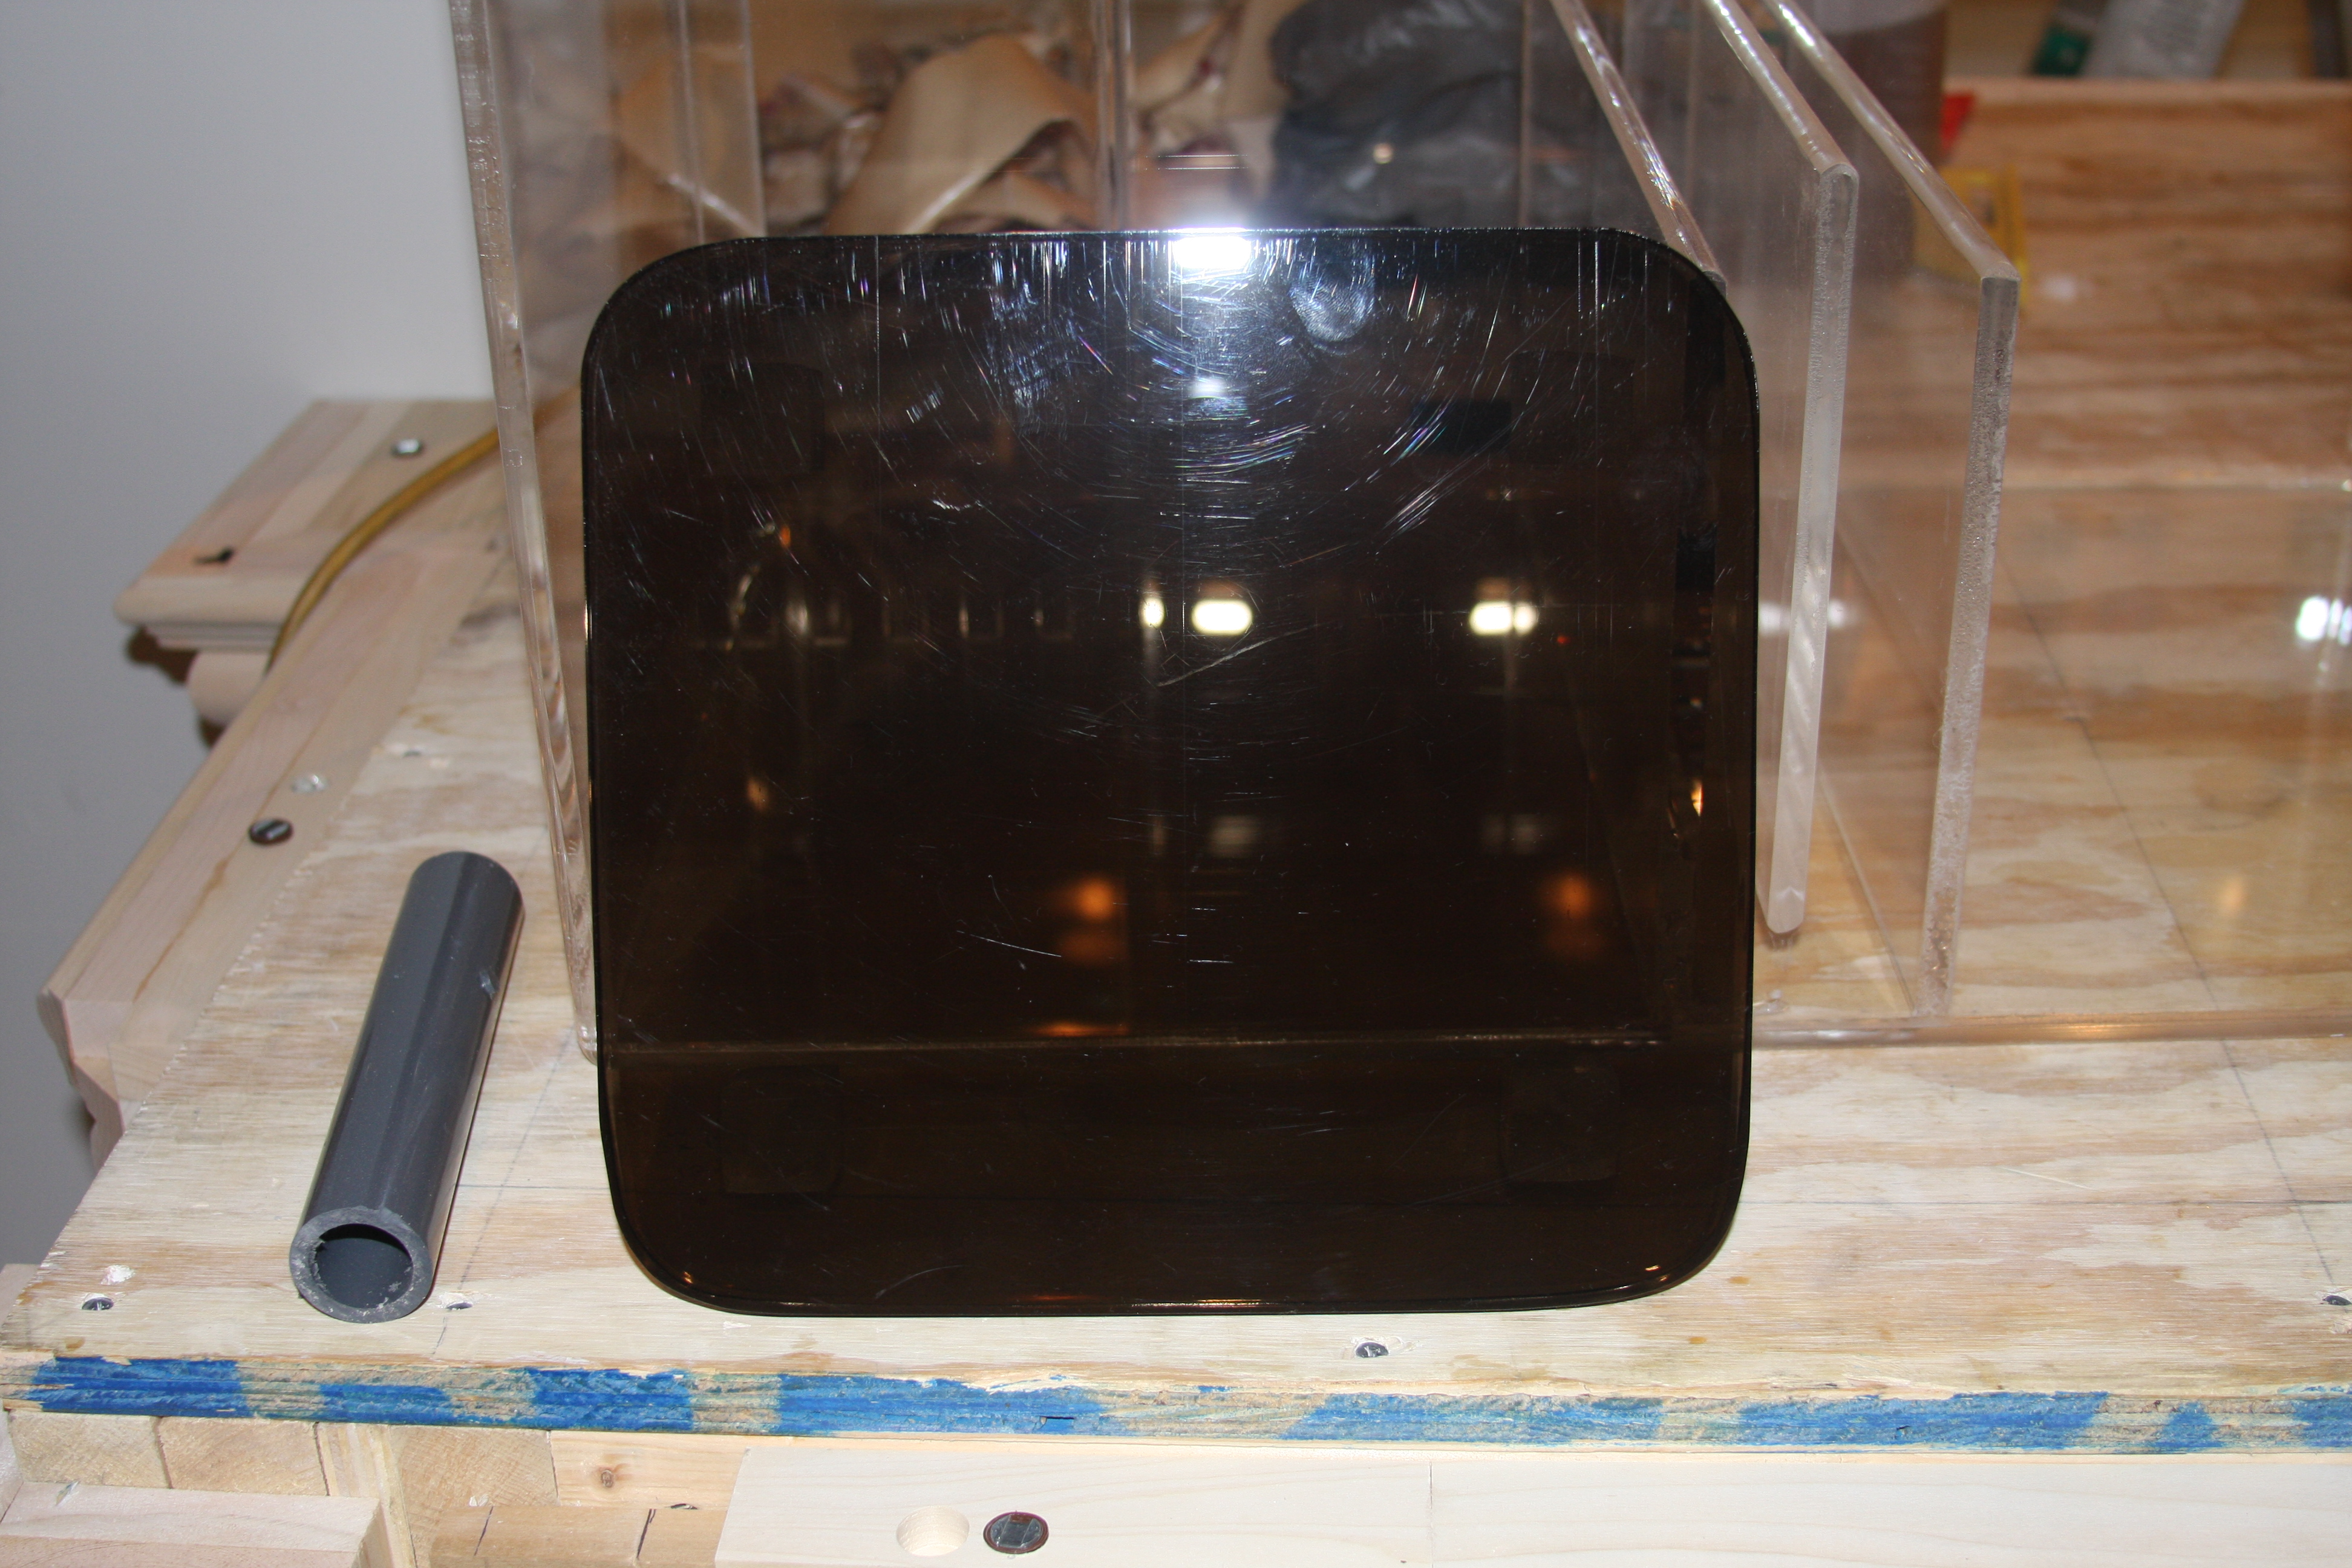
Sorry again about the poor pics.....Haven't had a chance to buff and polish the skimmer stand yet, but decided to use 1/2" smoked acrylic I had sitting around that I was going to make a small tank for the grandbaby's beta "Beep".....As you can see nothing super fancy, but I did round off the the corners, to give it a little better fit inside the sump IMO.....
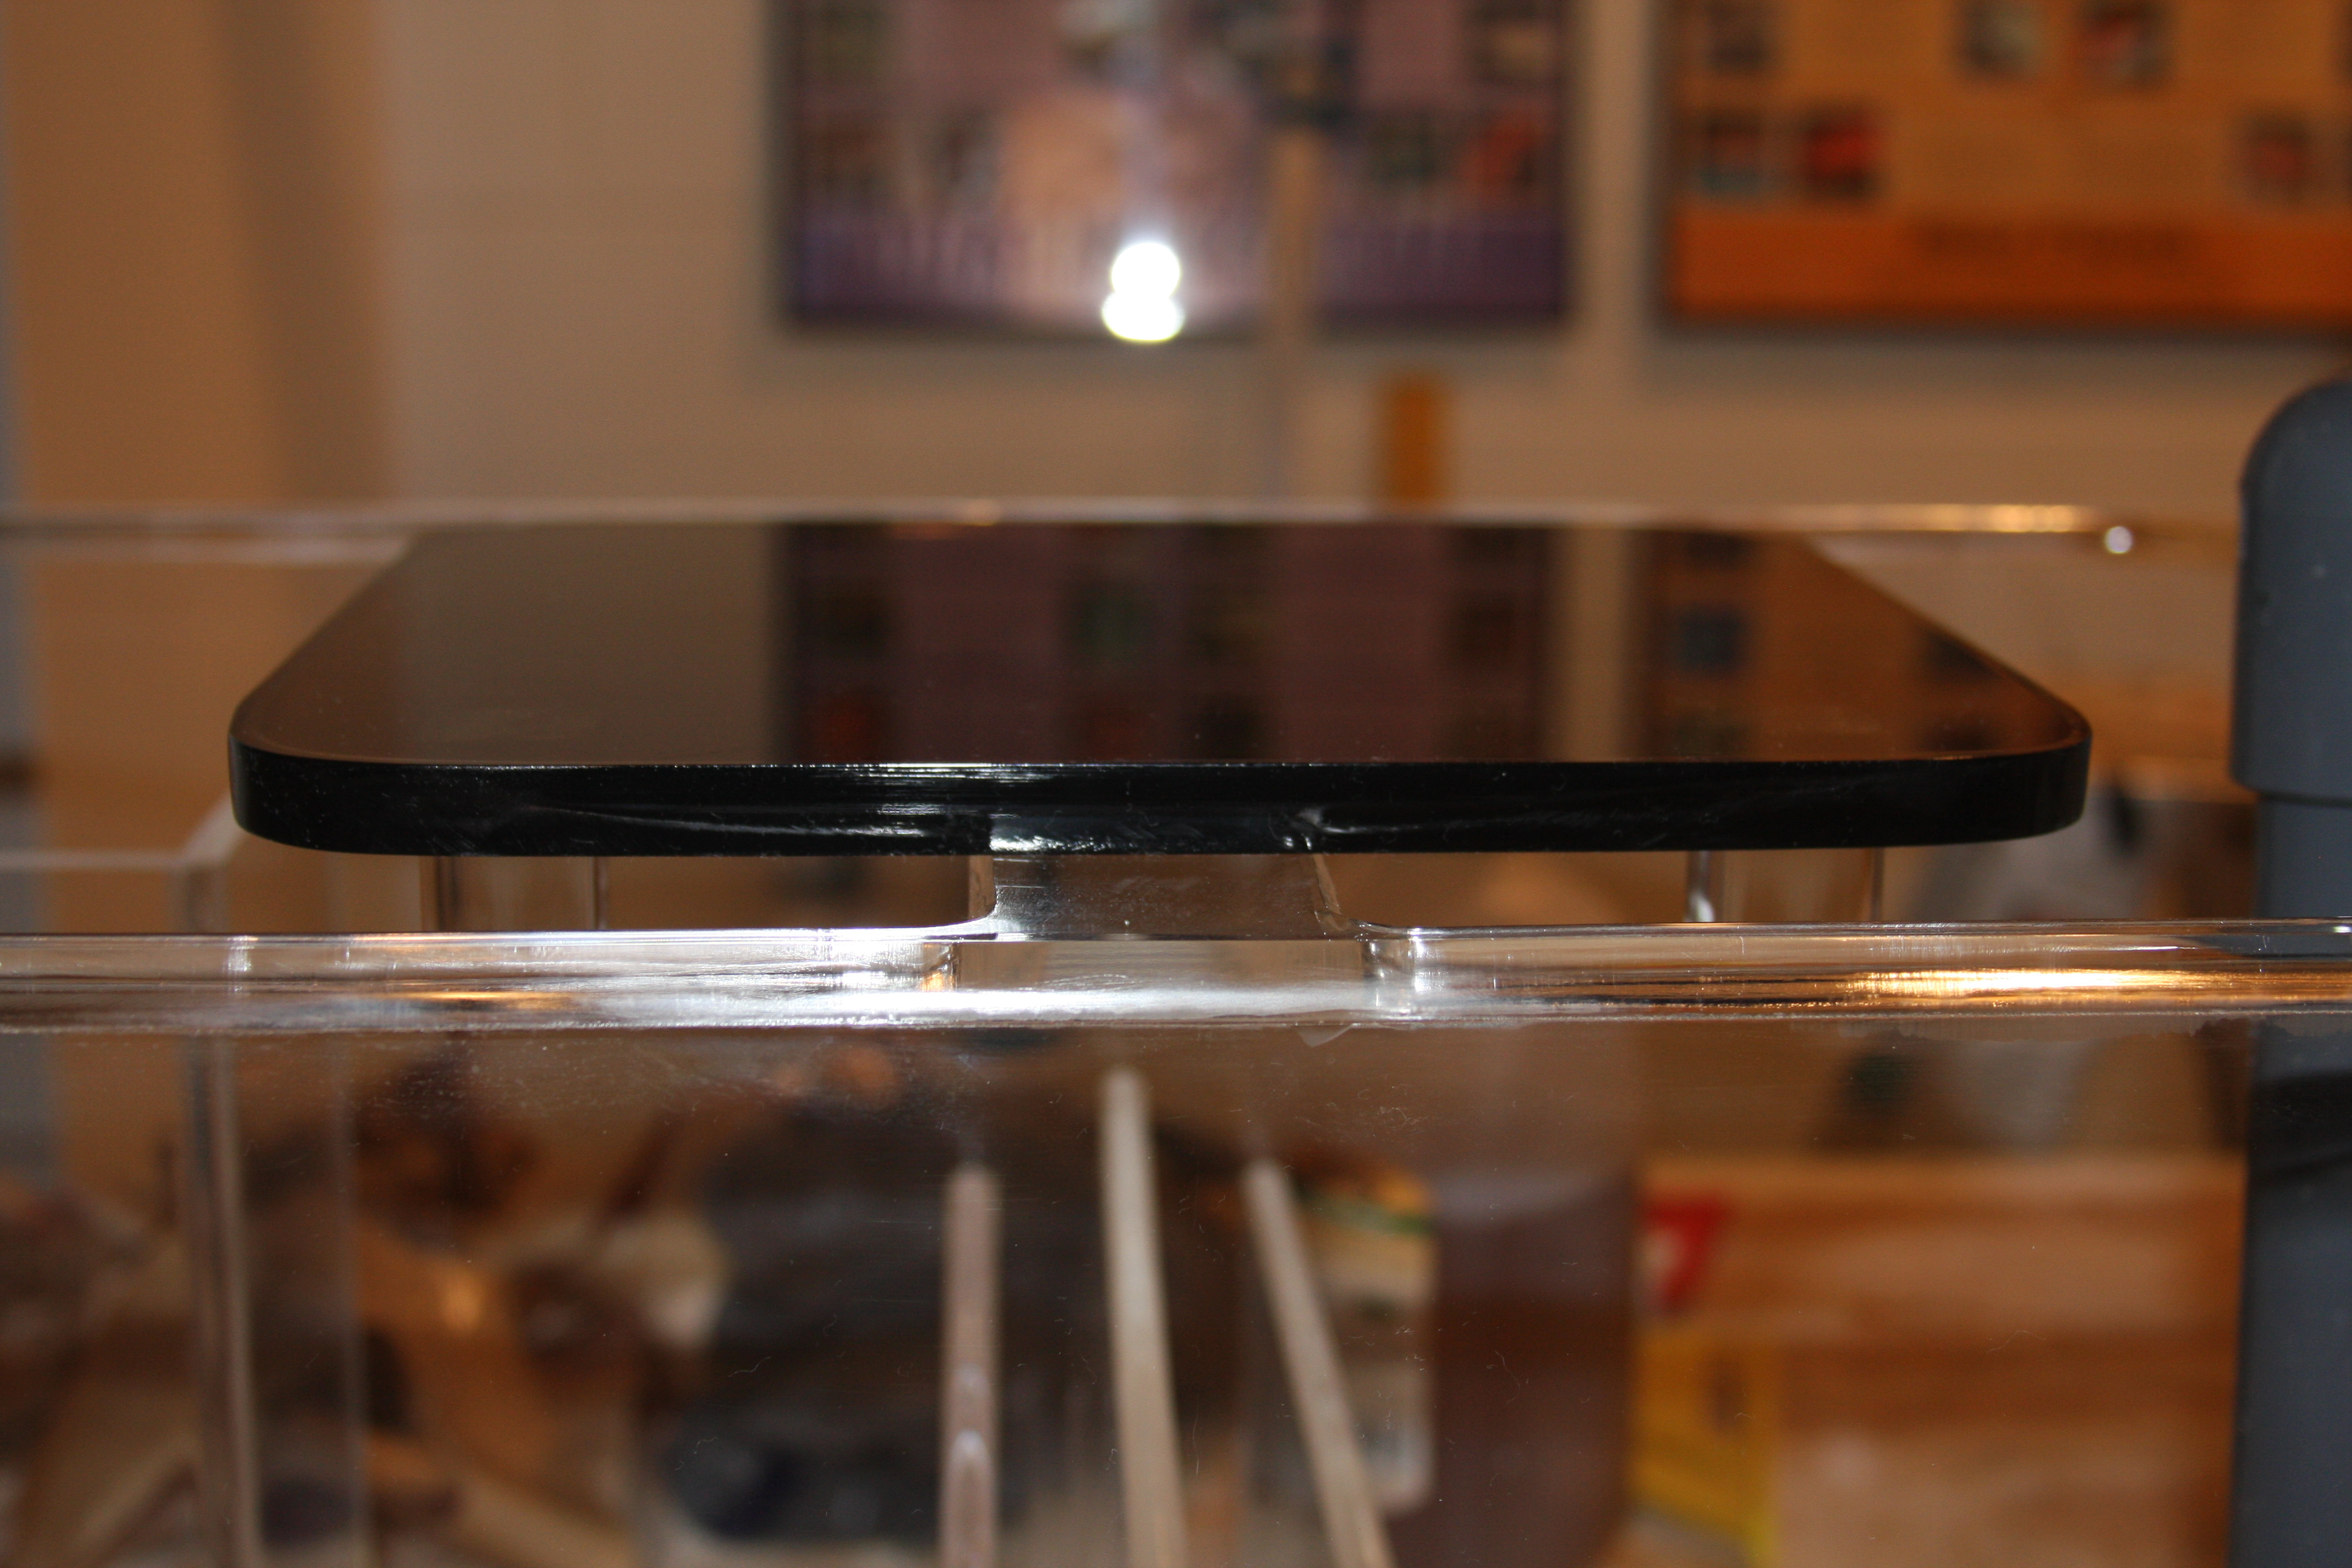
Again sorry for the poor pics, but this is the skimmer stand sitting on top the sump.....As you can see for the legs, I had to hit my buddy Matt up for some 1"x1" square stock for the legs....Actually I was going to use the stock for my light rack center brace, so it wouldn't block light, and happened to be working on the skimmer stand, and my eyes lit up and this is what I decided to use it for...Can always get more from Matt.....You can also see that I've started polishing the edges on the skimmer stand to a mirror finish.....Sorry Flower, just anal about details!!!!
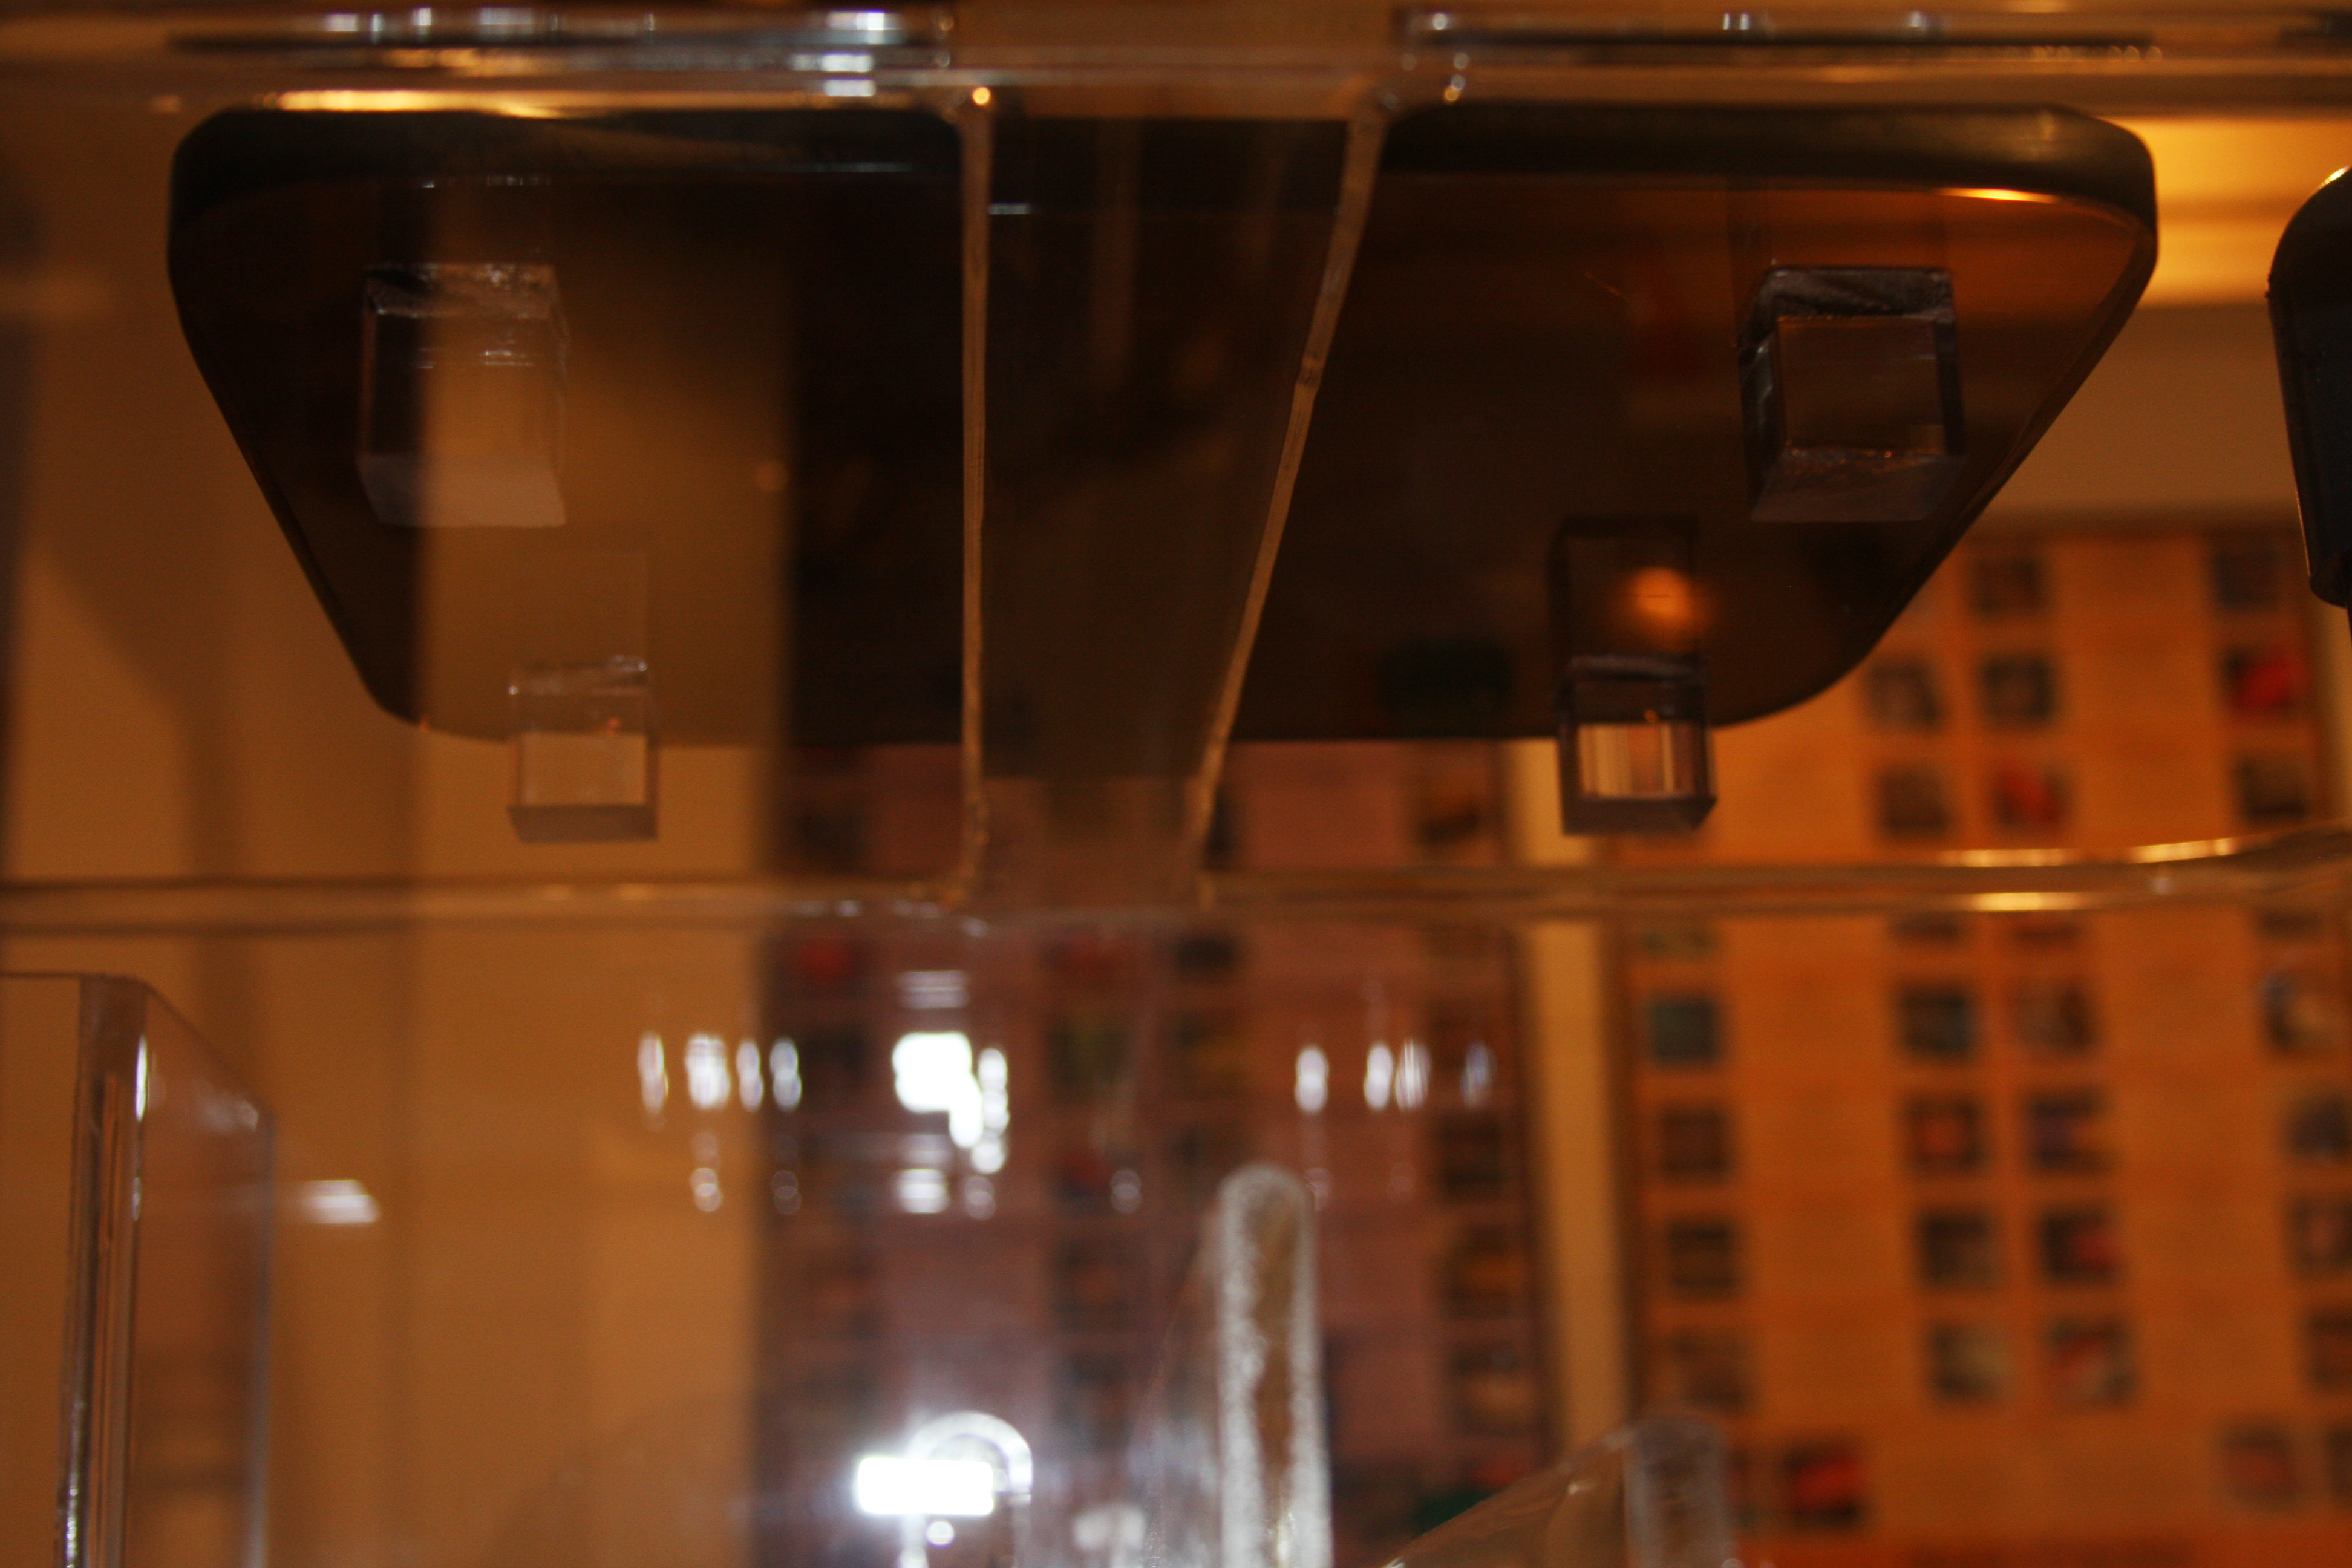
Sorry a really bad pic, but this shows the legs off a little better in this pic.....Flower I have to admit, this thing has a little meat to it....Trust me doesn't feel like those flimsy sump/fuge you'd buy at the LFS off the shelf......
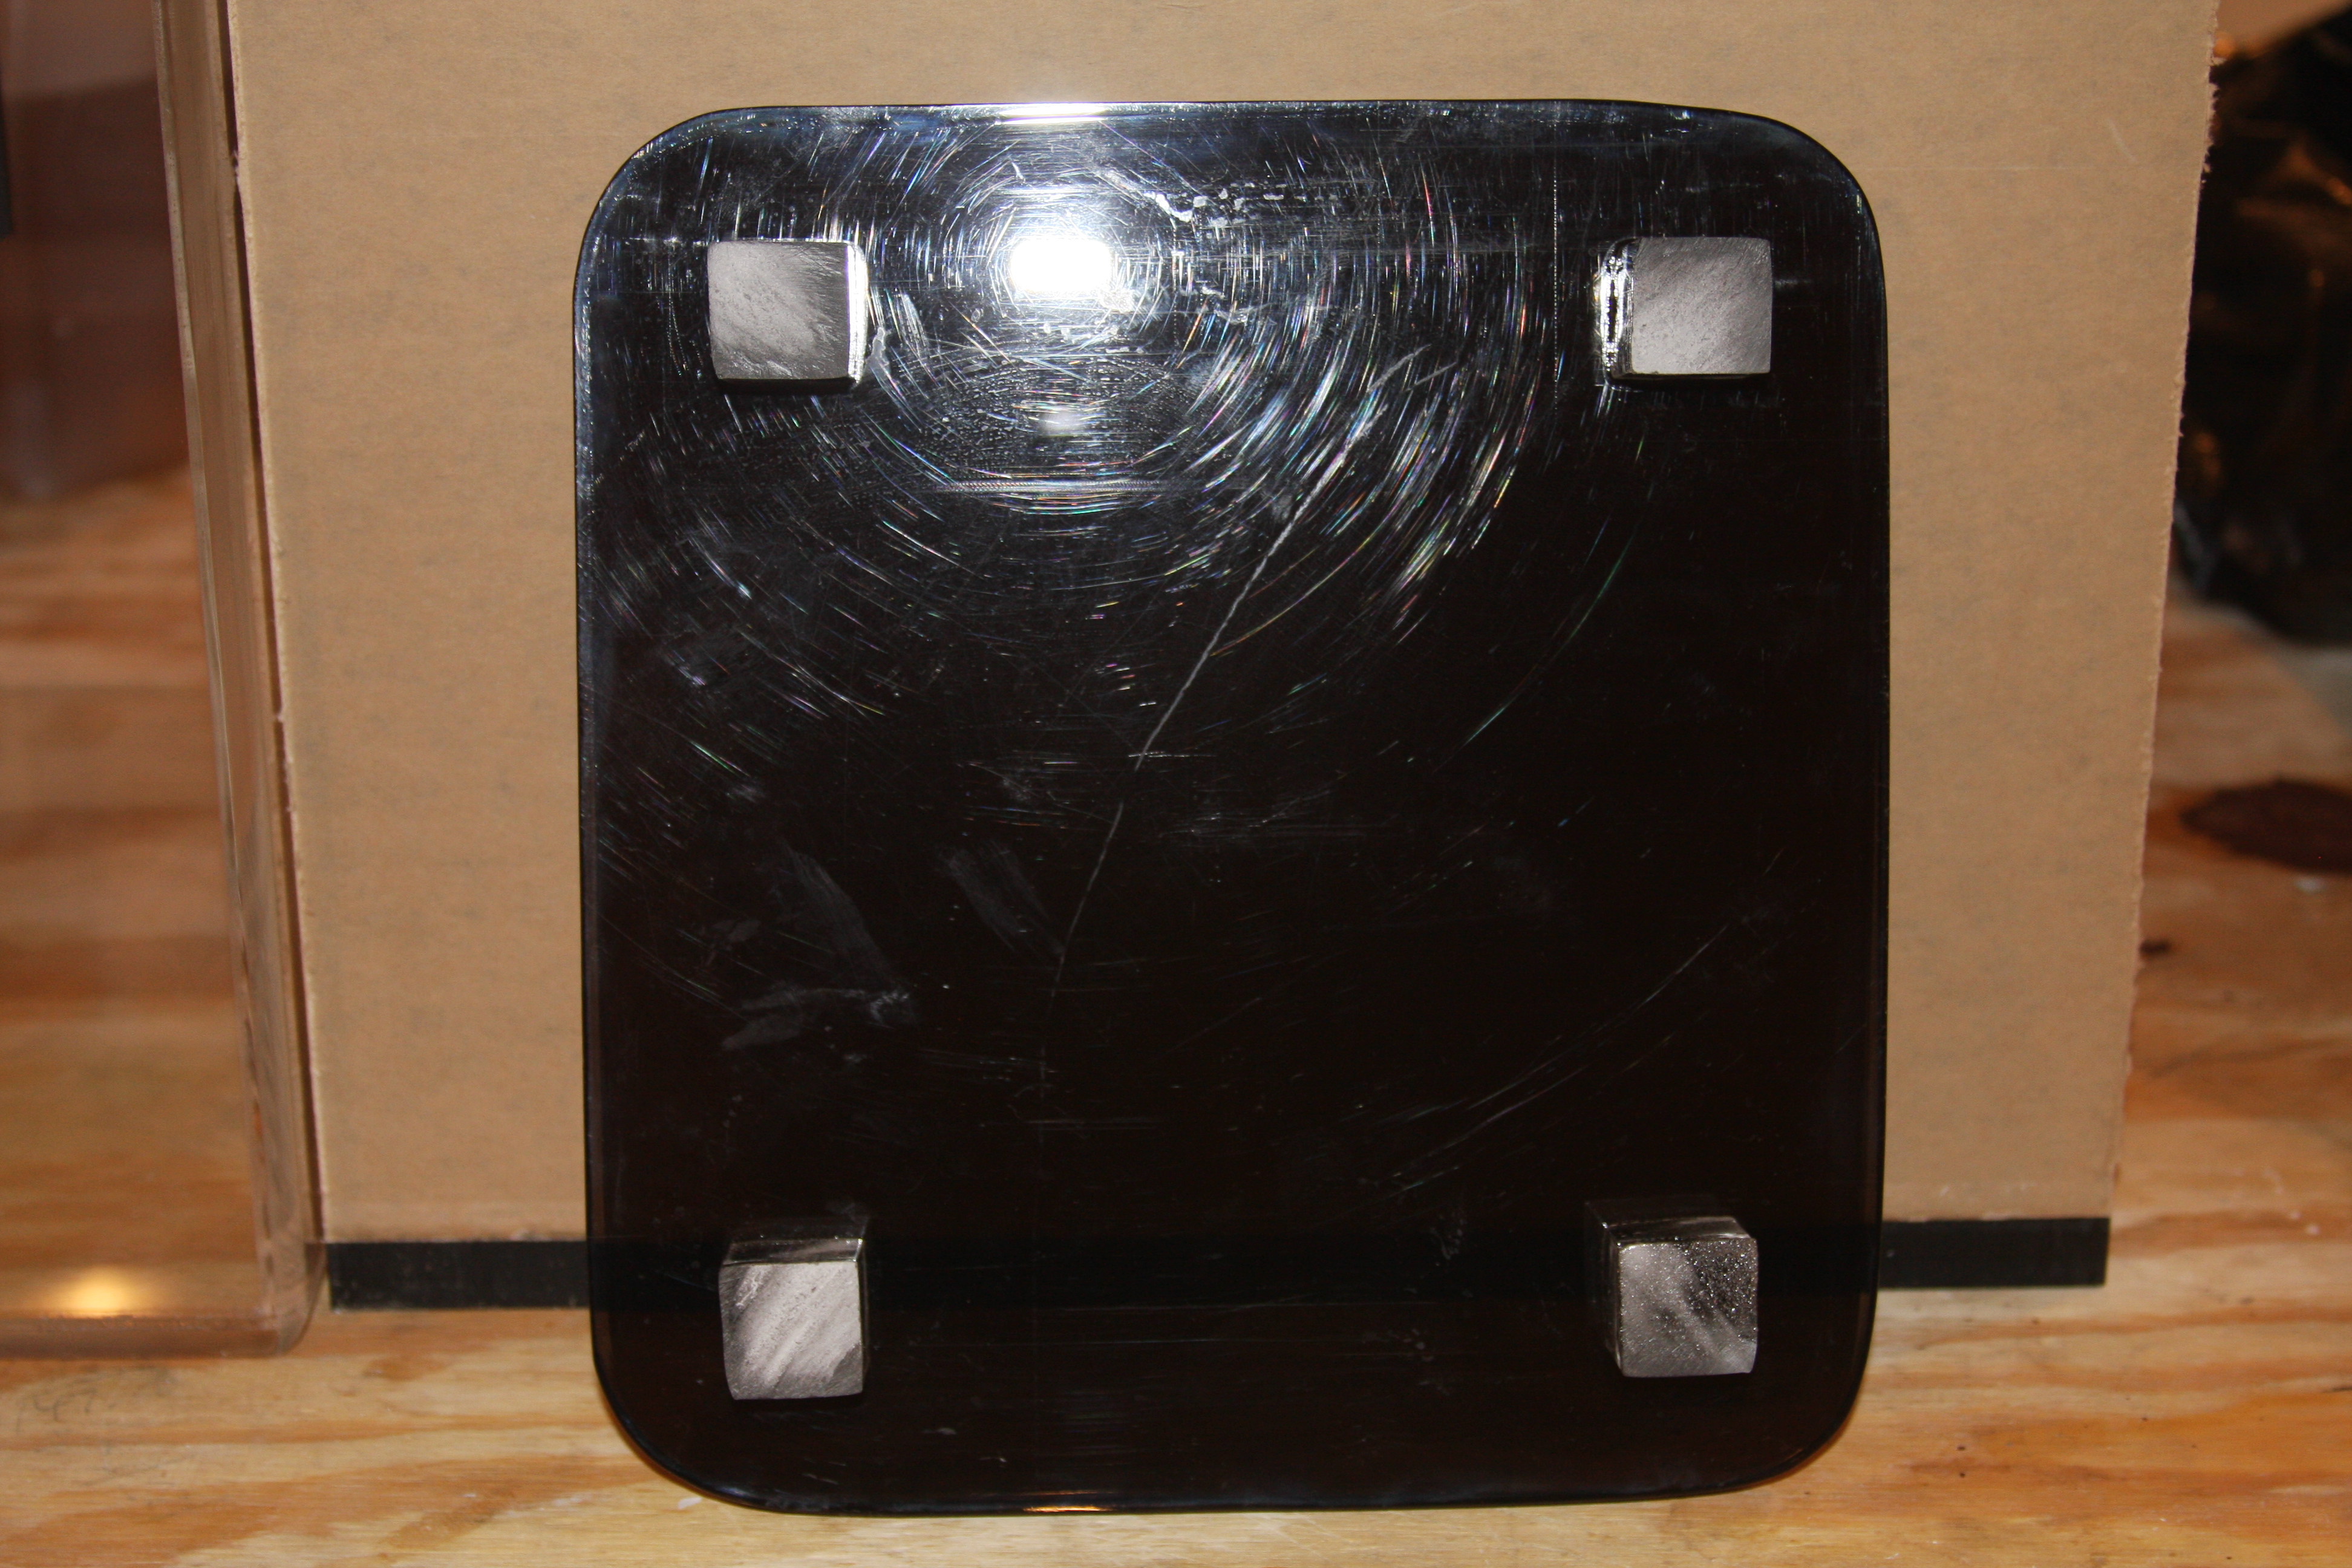
As you can see, I have some buffing work left ahead of me and polishing, but you can see the legs in this pic.....

This is the skimmer stand sitting inside the sump/skimmer area.....The skimmer stand is exactly 1 1/2" high which should get Flower in the correct range for water depth for the skimmer...
Sorry again about the poor pics.....Haven't had a chance to buff and polish the skimmer stand yet, but decided to use 1/2" smoked acrylic I had sitting around that I was going to make a small tank for the grandbaby's beta "Beep".....As you can see nothing super fancy, but I did round off the the corners, to give it a little better fit inside the sump IMO.....
Again sorry for the poor pics, but this is the skimmer stand sitting on top the sump.....As you can see for the legs, I had to hit my buddy Matt up for some 1"x1" square stock for the legs....Actually I was going to use the stock for my light rack center brace, so it wouldn't block light, and happened to be working on the skimmer stand, and my eyes lit up and this is what I decided to use it for...Can always get more from Matt.....You can also see that I've started polishing the edges on the skimmer stand to a mirror finish.....Sorry Flower, just anal about details!!!!
Sorry a really bad pic, but this shows the legs off a little better in this pic.....Flower I have to admit, this thing has a little meat to it....Trust me doesn't feel like those flimsy sump/fuge you'd buy at the LFS off the shelf......
As you can see, I have some buffing work left ahead of me and polishing, but you can see the legs in this pic.....
acrylic51
Active Member
You thought that was all you were getting for today!!!!! I had a super day, all my guys I've been working with over the past couple months, finally paid off....everyone passed, so know I should be really able to get cooking here......
I was sitting around thinking about the bulkheads in the fuge.....Not really knowing what Flower might put down there at some point, I started toying with ideas on how to grate them up a bit, so I headed to the garage and started tweaking and then headed to Lowes to spend a little cash......This is what I came up with......
I found myself back in the plumbing area, and picked up these 2" drain grates made of ABS.....I know.....your thinking 2" drains on the fuge???
 No, I just wanted the insides out of the cover.
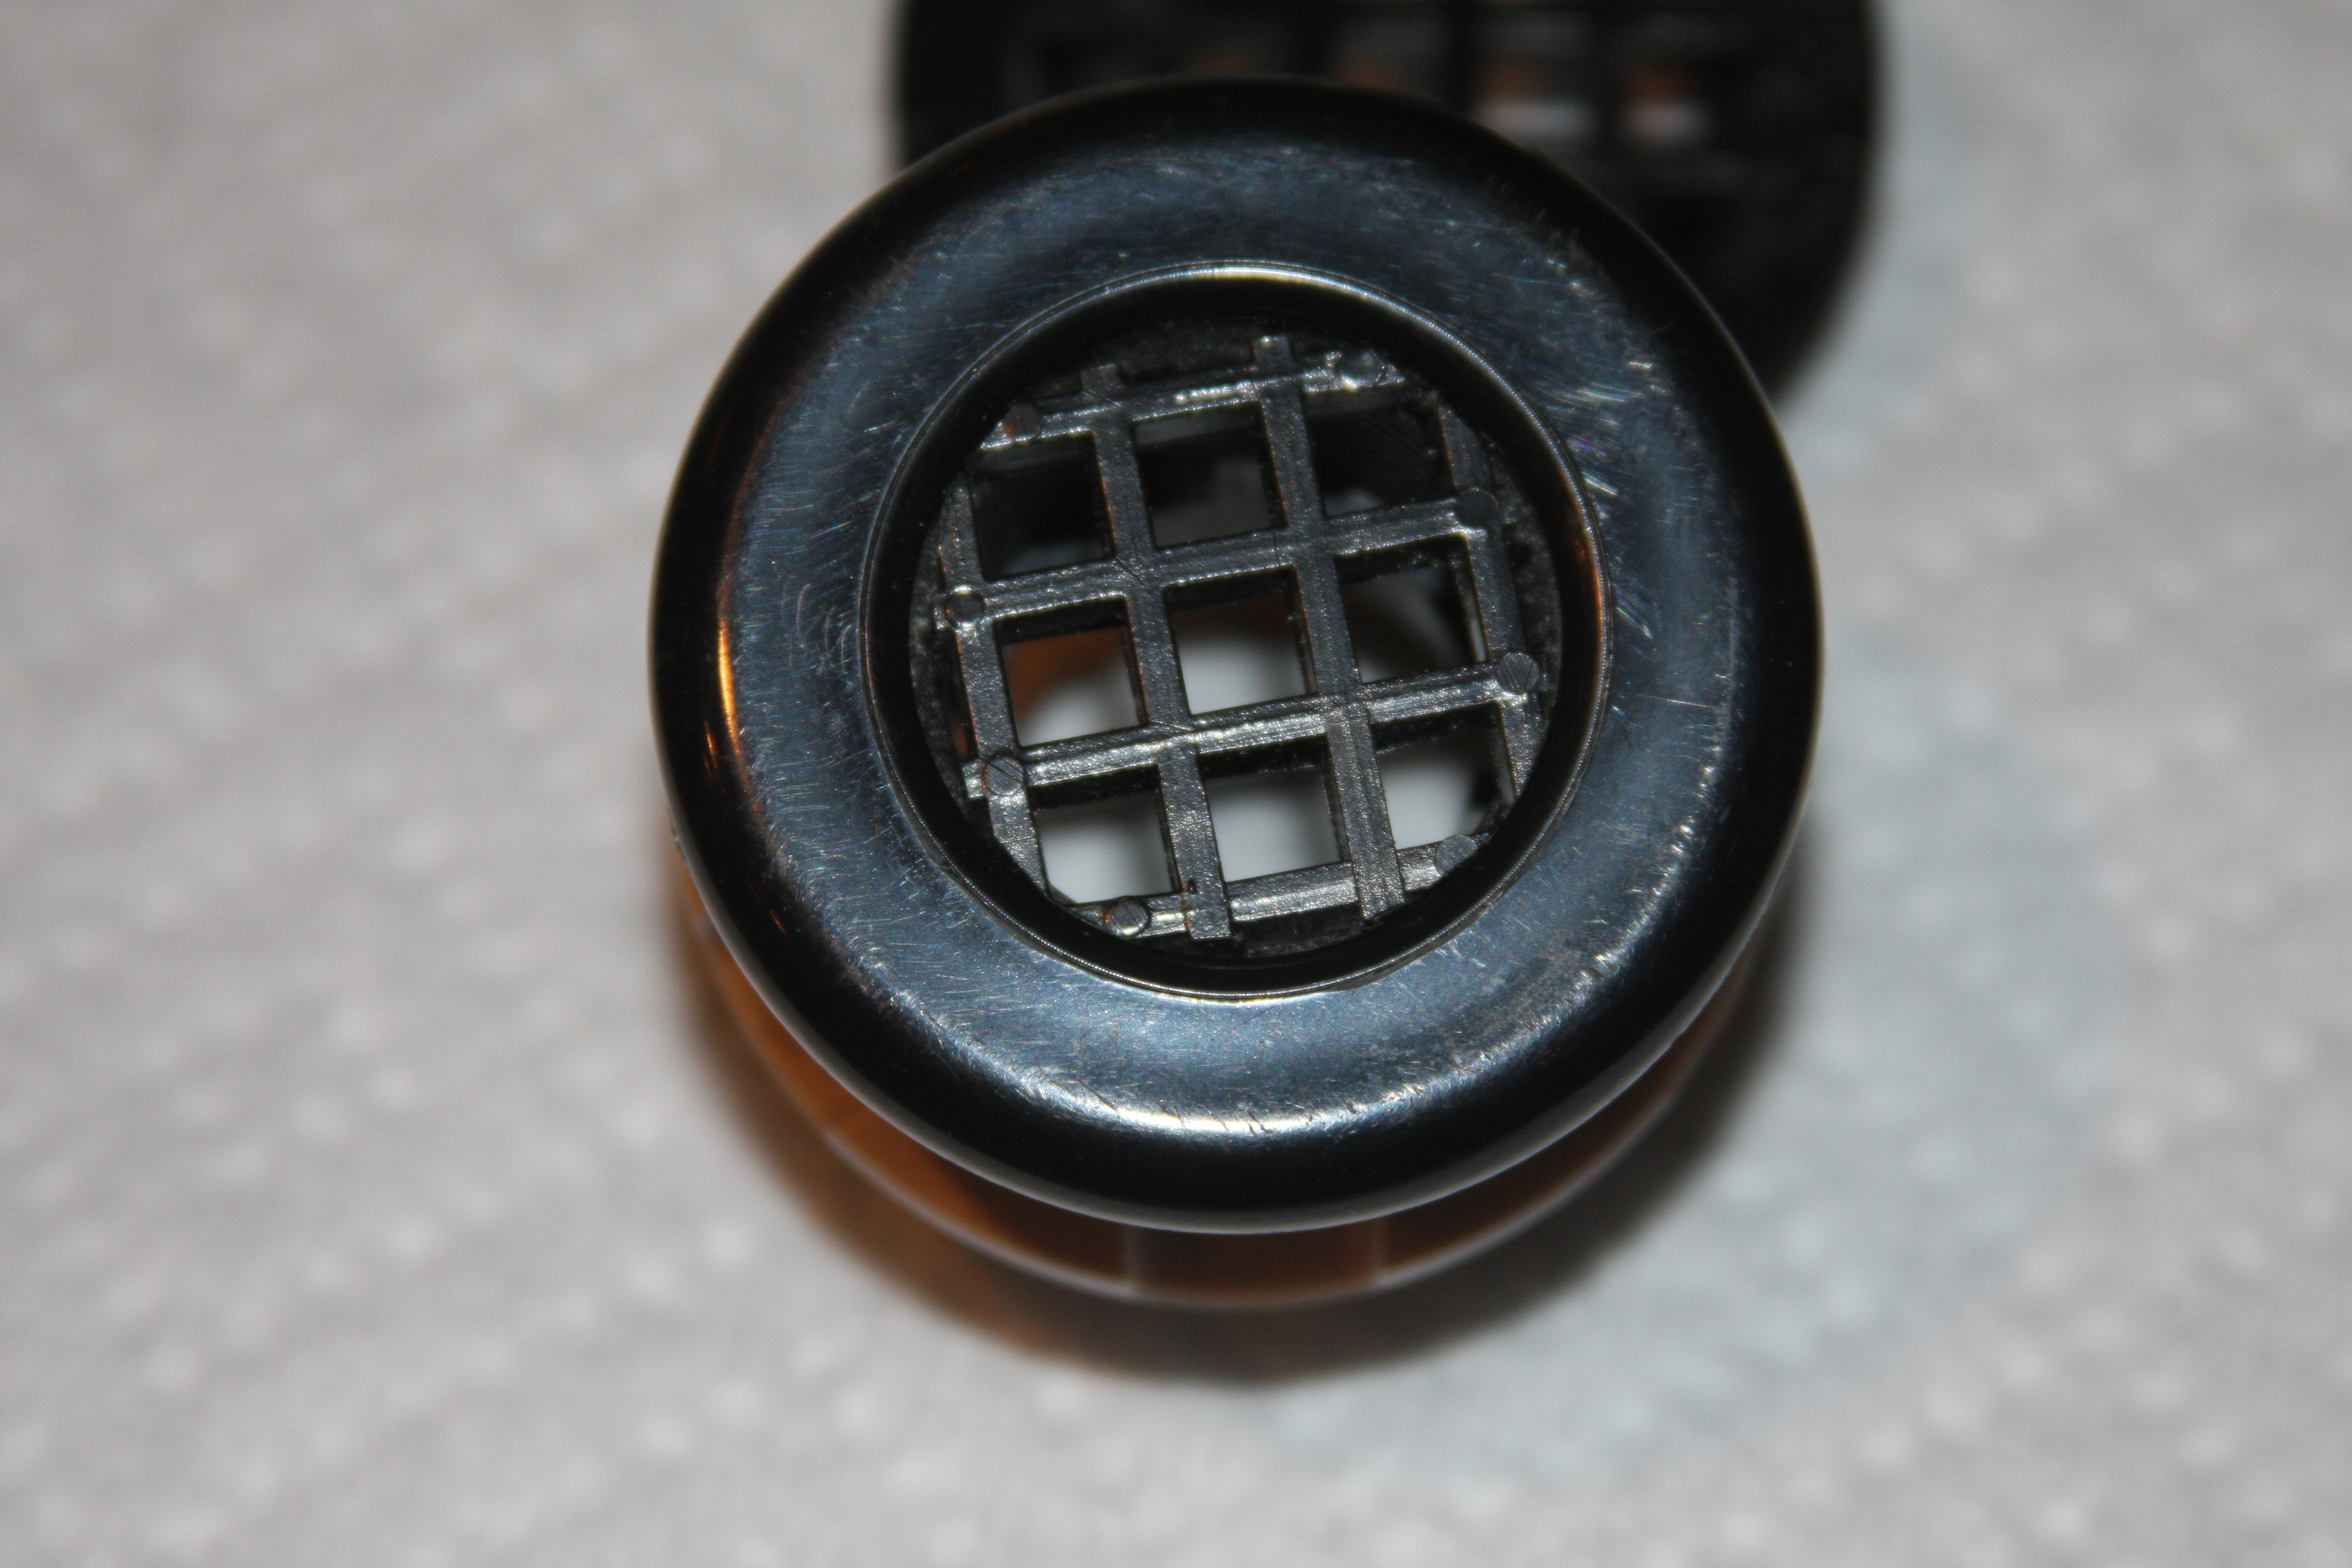
I hacked the inside grating out of the drain piece and then took it over to the bench sander and started rounding it off, to where with a simple press the piece fits snuggly into the bulkhead. I honestly think the next time I have to fab these up I'll wear my gloves while sanding these small parts.....I didn't realize I ran my knuckle into the sander.....But we put blood and tears into are tanks.....Well worth it for ya Flower!!!!!!
I was sitting around thinking about the bulkheads in the fuge.....Not really knowing what Flower might put down there at some point, I started toying with ideas on how to grate them up a bit, so I headed to the garage and started tweaking and then headed to Lowes to spend a little cash......This is what I came up with......
I found myself back in the plumbing area, and picked up these 2" drain grates made of ABS.....I know.....your thinking 2" drains on the fuge???

I hacked the inside grating out of the drain piece and then took it over to the bench sander and started rounding it off, to where with a simple press the piece fits snuggly into the bulkhead. I honestly think the next time I have to fab these up I'll wear my gloves while sanding these small parts.....I didn't realize I ran my knuckle into the sander.....But we put blood and tears into are tanks.....Well worth it for ya Flower!!!!!!
acrylic51
Active Member
Flower I know your waiting for the "crowning" moment and the time is getting near.....The inside of the fuge has a lot of vapor that when I stick my head inside it will almost drop you to your knees, and I can't afford to loose anymore brain cells today.....The finally rounding of the corners and polishing will take place tomorrow, and already have the plumbing in house and you'll see shortly where were at, and any installation on your part will be minimum.
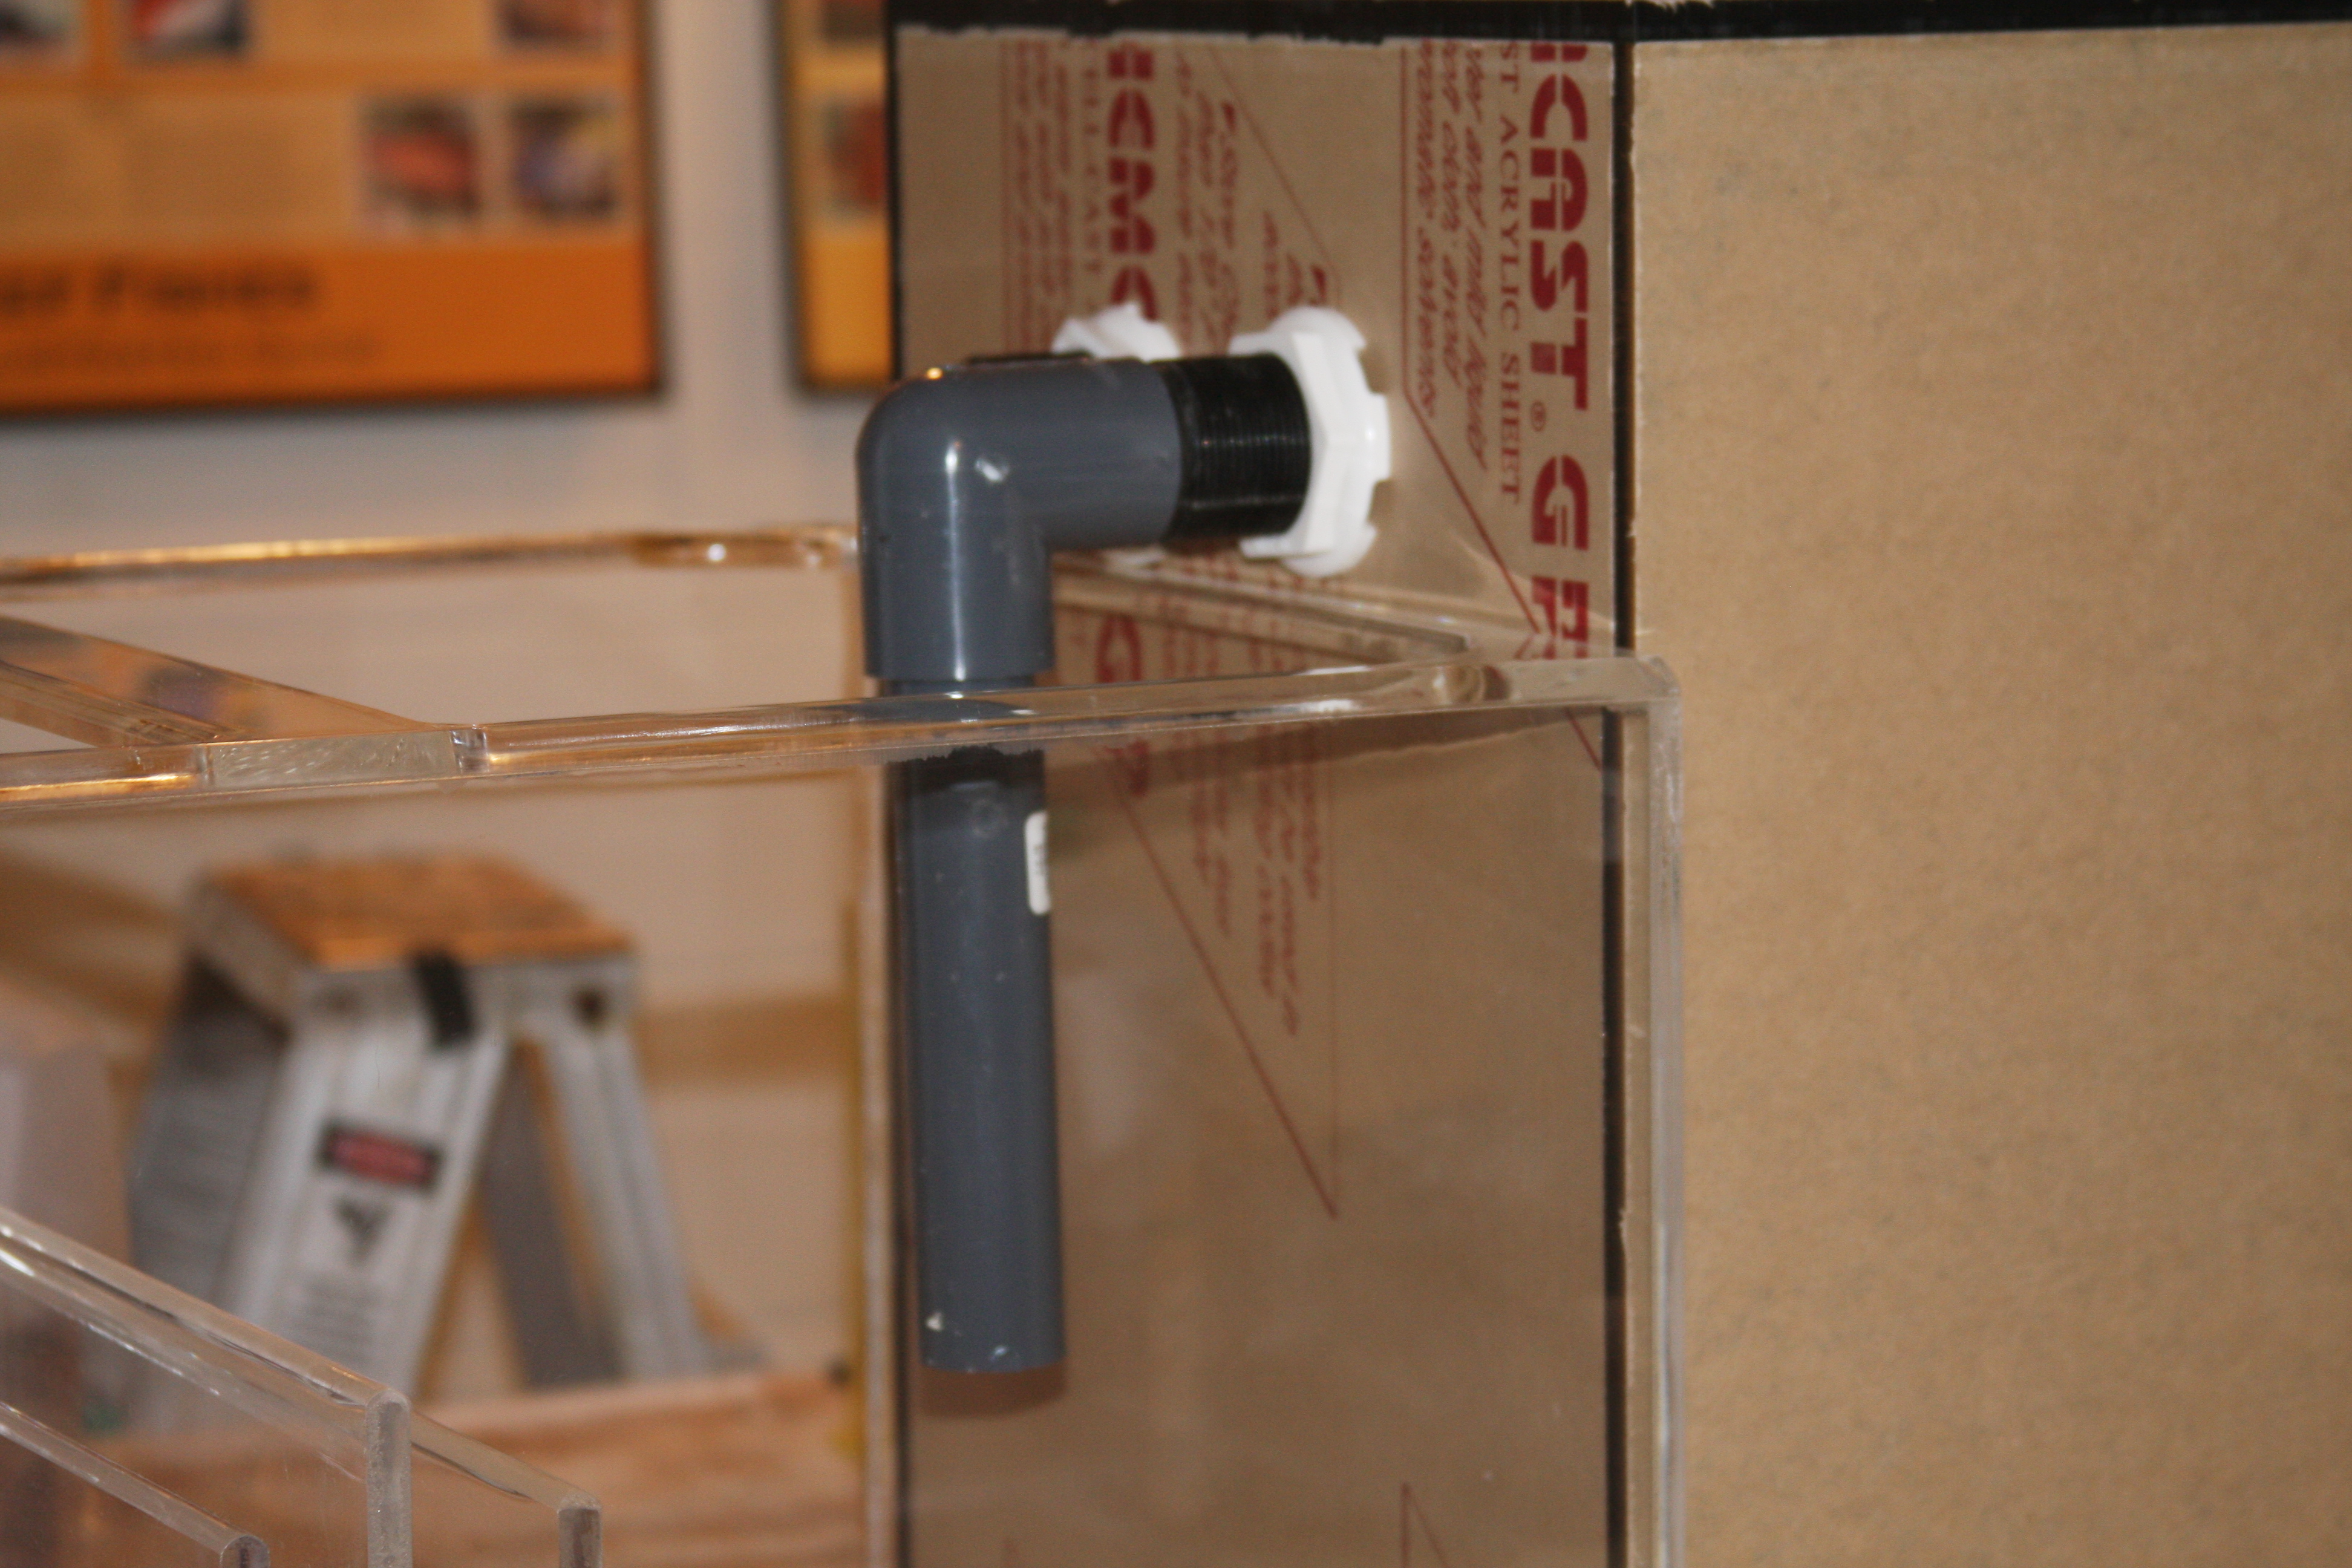
As you can see Flower I'm teasing you.....still haven't given you a good look at the fuge, yet, but will tell you it's looking GOOD!!!!!! The bulkheads I thought I had were 3/4", but rummaging through my trusty parts/bulkhead bin all I had were 1 1/2", so know way a snail or fish or what not should be able to clog, and bog down dual 1 1/2" bulkheads.....Again because I'm anal about appearance of equipment I chose to use schedule 80 pipe....not that it's needed it's more for appearance....Nothing is glued into place, because if I glue the extension piece that fits into the back of the bulkhead to the elbow, Flower would never be able to remove the bulkhead without cutting it out, so this is the only area you will need to glue anything on my end of the project per say.....I do have to make a trip and get more schedule 80 pipe, because I don't care for the long drop. Again bulkheads are slightly off in height; that way if 1 would clog, it would raise about 1/8" and the other 1 would kick in right away......
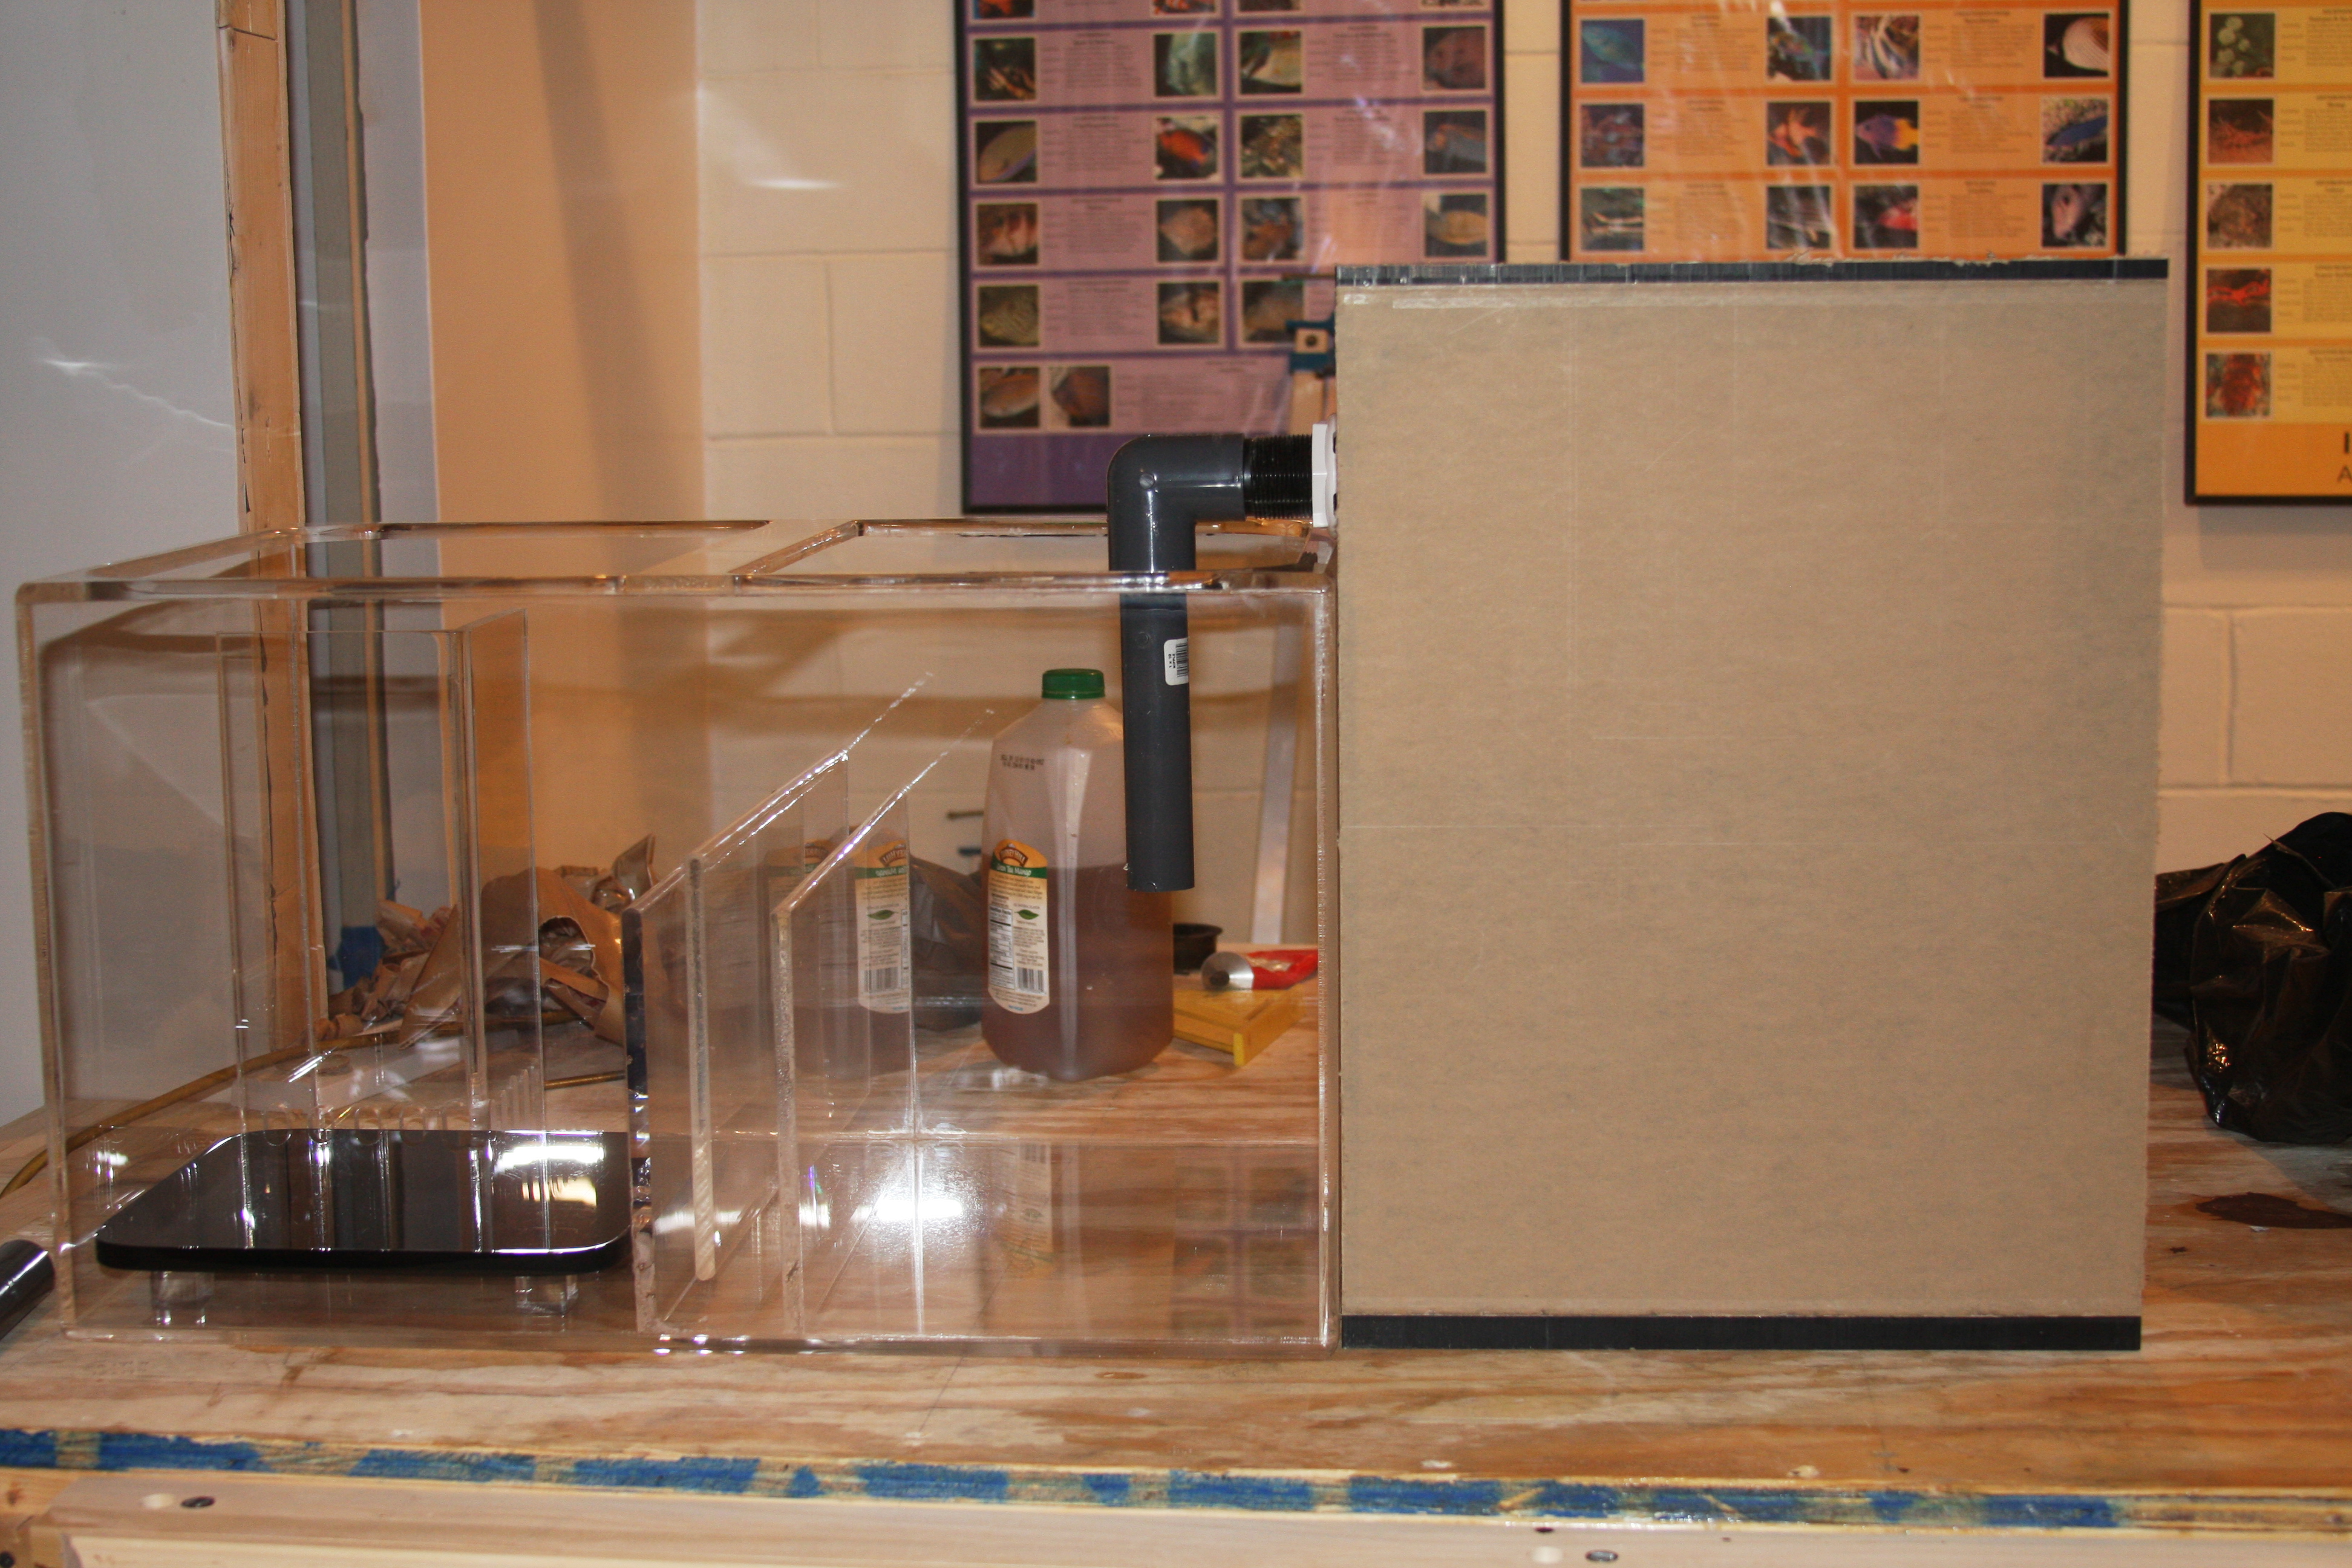
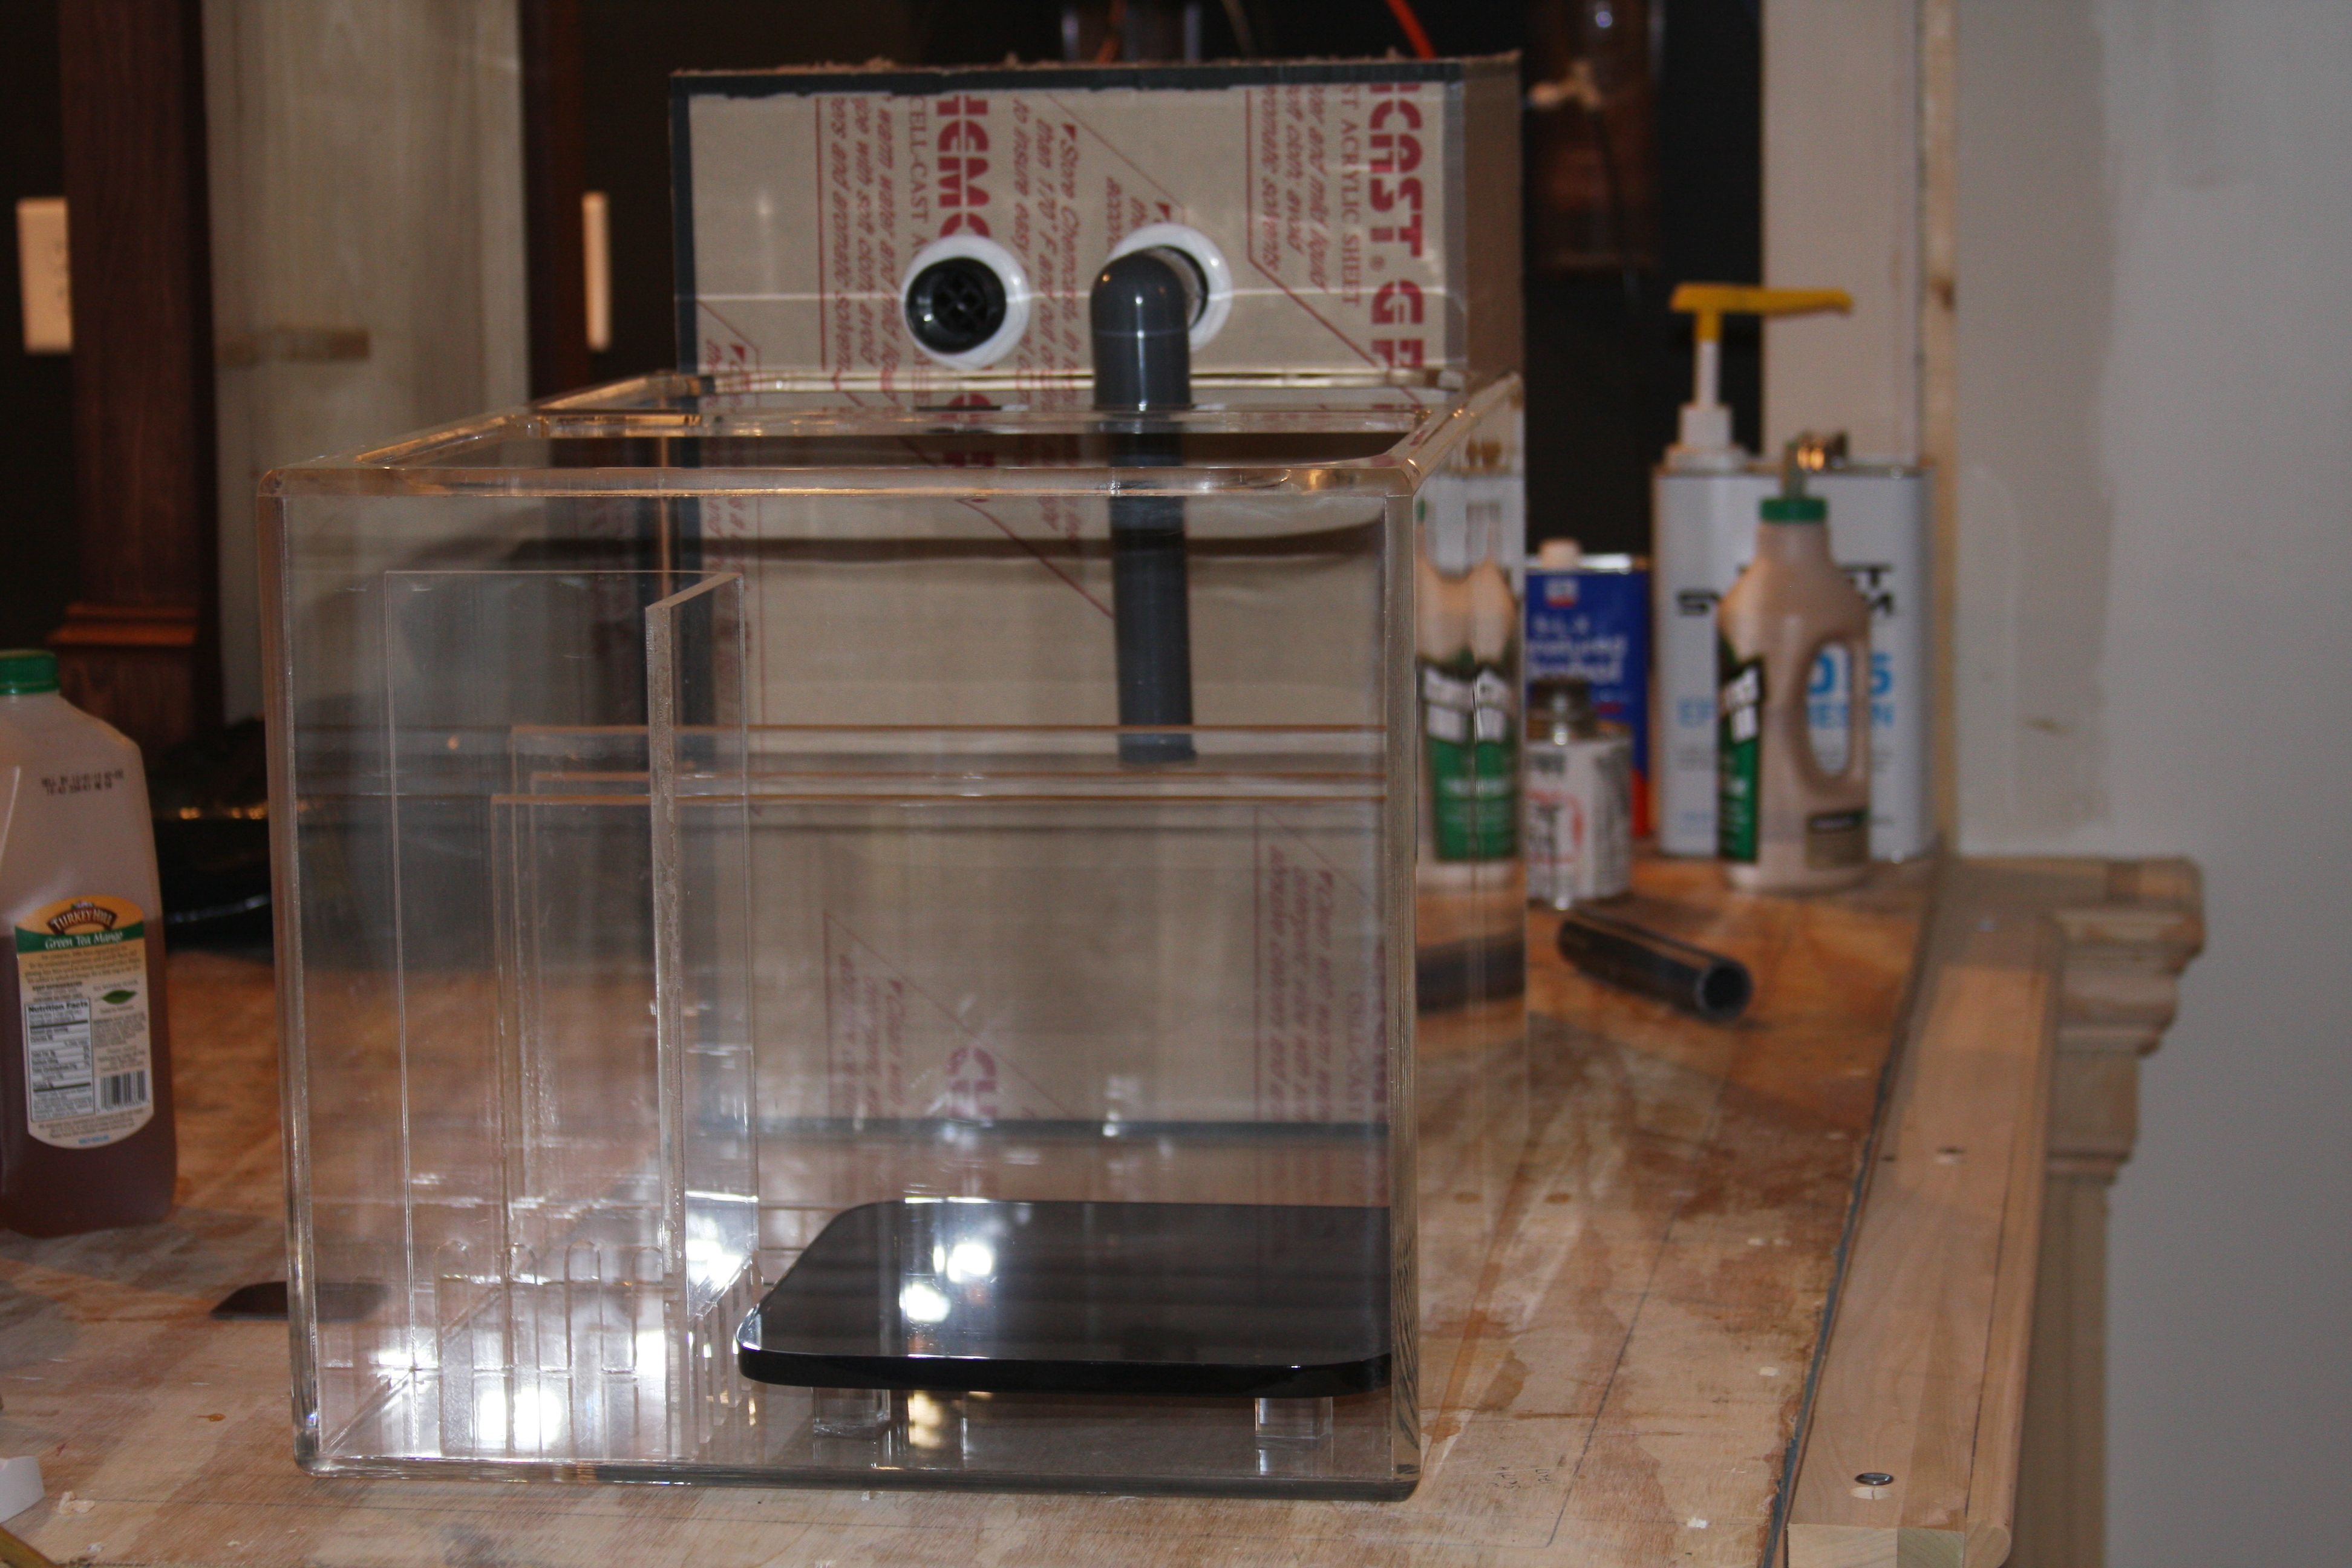
Excuse the mess behind the scenes, but you have to have the essentials to work.....ICE TEA.......As you can get a pretty good look from this pic the skimmer stand is in place and you can see the location of the plumbing....Again I point out the height the water would be dropping into the return area, and to minimize any chance of micro bubbles I'm going to lengthen the drain pipes from the fuge.....Also in the pic you'll notice the bottom of the fuge is thicker than other material used?!?!? I used 3/4" material to give us a little more height for the water returns.....The panel facing us in the pic on the fuge is the clear panel, the rest are smoked black.
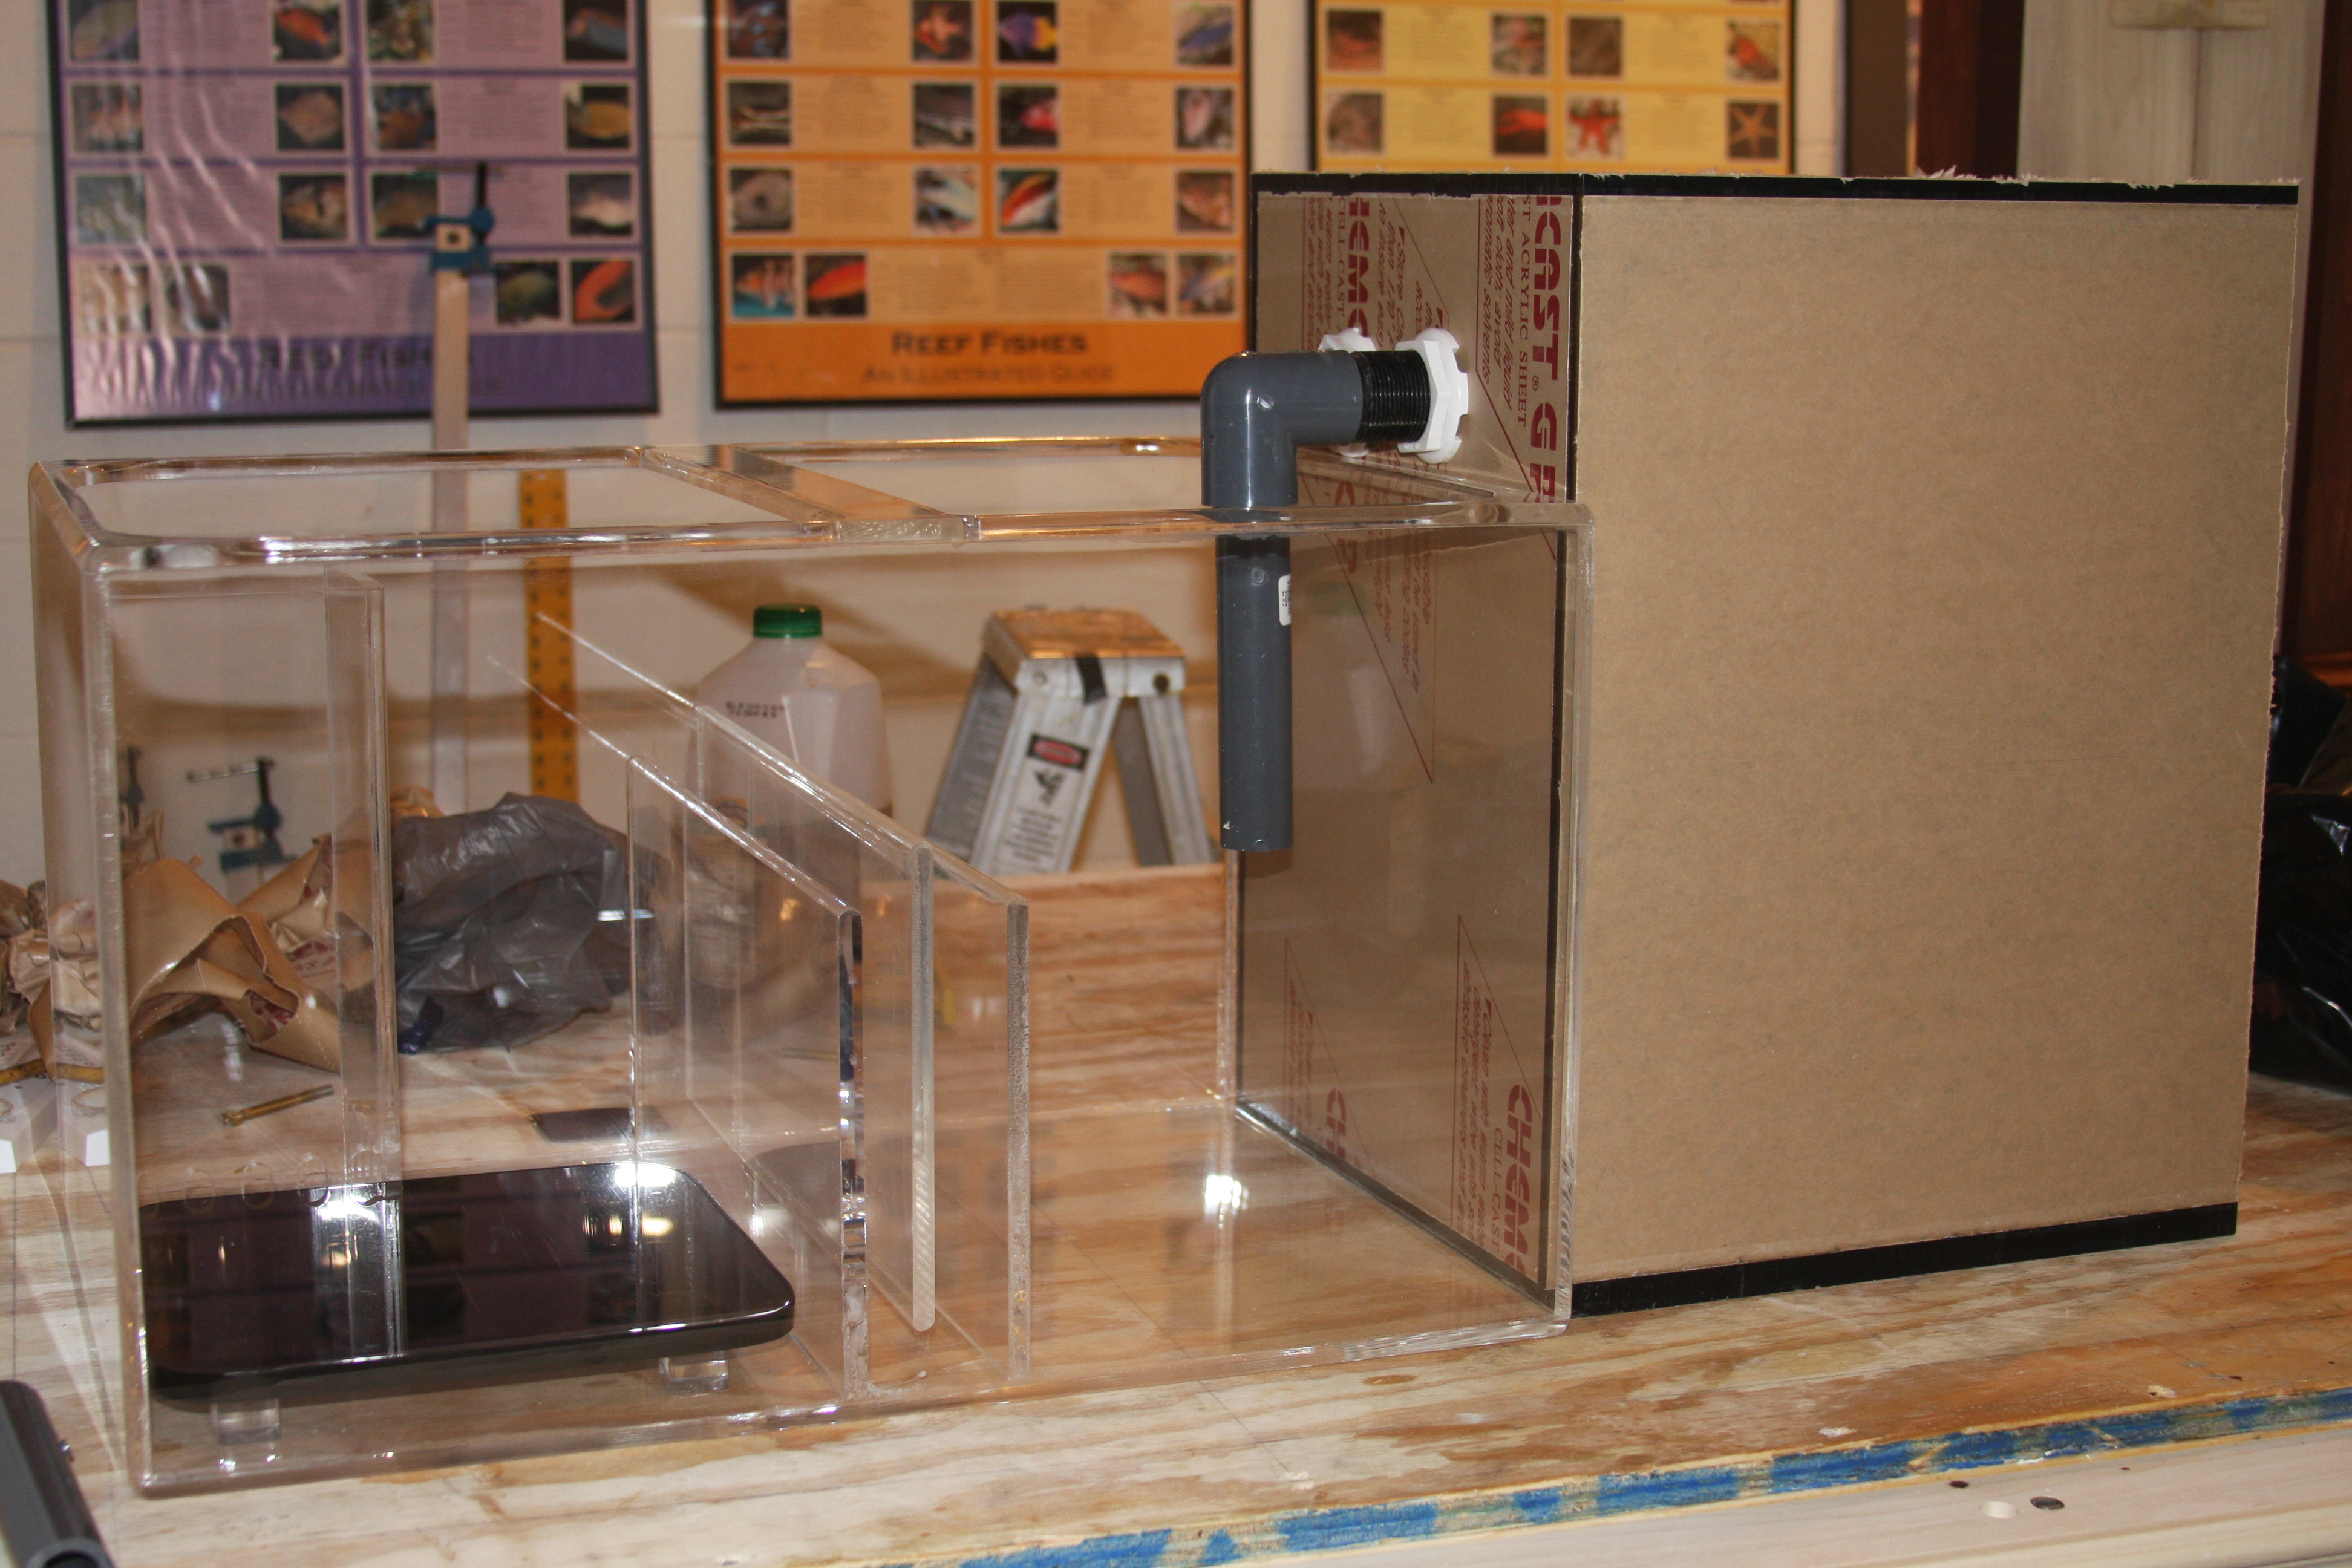
Just another shot for Flower to show off to friends and family......And Flower we better get some pics or video of you unwrapping your new toys so we can see the excitement and joy on your face!!!!!

Again just another shot for Flower from the end.....By the way Flower the rubble rock that I used for the test run of the sump, will be making the journey as well, to ease the setup hassle.......You can also get another good look at the skimmer stand in place....I was thinking about drilling a couple holes into the bottom plate of the skimmer stand....Anybody have any thoughts, theories on that? My thought is to allow the water to rise more easily, quicker to the skimmer????

Alright guys......Still a bit of work left before we get this all wrapped up and boxed and shipped to Flower. I need a couple input thoughts ideas.....First is the idea/issue of drilling the bottom plate of the skimmer stand to allow water more easily to circulate in that area up and around the skimmer???? Any thoughts???? Next, do you think it is needed or advisable to drill siphon break holes in the water return lines from the fuge going back to the return area of the sump? I'm questioning this, because if the return pipes from the fuge or submerged, and the power were to go out wouldn't it create a siphon? I'm assuming it would, but only to the bottom of the bulkhead till it would loose it's siphon......What's everyone's thoughts?????

As you can see Flower I'm teasing you.....still haven't given you a good look at the fuge, yet, but will tell you it's looking GOOD!!!!!! The bulkheads I thought I had were 3/4", but rummaging through my trusty parts/bulkhead bin all I had were 1 1/2", so know way a snail or fish or what not should be able to clog, and bog down dual 1 1/2" bulkheads.....Again because I'm anal about appearance of equipment I chose to use schedule 80 pipe....not that it's needed it's more for appearance....Nothing is glued into place, because if I glue the extension piece that fits into the back of the bulkhead to the elbow, Flower would never be able to remove the bulkhead without cutting it out, so this is the only area you will need to glue anything on my end of the project per say.....I do have to make a trip and get more schedule 80 pipe, because I don't care for the long drop. Again bulkheads are slightly off in height; that way if 1 would clog, it would raise about 1/8" and the other 1 would kick in right away......
Excuse the mess behind the scenes, but you have to have the essentials to work.....ICE TEA.......As you can get a pretty good look from this pic the skimmer stand is in place and you can see the location of the plumbing....Again I point out the height the water would be dropping into the return area, and to minimize any chance of micro bubbles I'm going to lengthen the drain pipes from the fuge.....Also in the pic you'll notice the bottom of the fuge is thicker than other material used?!?!? I used 3/4" material to give us a little more height for the water returns.....The panel facing us in the pic on the fuge is the clear panel, the rest are smoked black.
Just another shot for Flower to show off to friends and family......And Flower we better get some pics or video of you unwrapping your new toys so we can see the excitement and joy on your face!!!!!

Again just another shot for Flower from the end.....By the way Flower the rubble rock that I used for the test run of the sump, will be making the journey as well, to ease the setup hassle.......You can also get another good look at the skimmer stand in place....I was thinking about drilling a couple holes into the bottom plate of the skimmer stand....Anybody have any thoughts, theories on that? My thought is to allow the water to rise more easily, quicker to the skimmer????

Alright guys......Still a bit of work left before we get this all wrapped up and boxed and shipped to Flower. I need a couple input thoughts ideas.....First is the idea/issue of drilling the bottom plate of the skimmer stand to allow water more easily to circulate in that area up and around the skimmer???? Any thoughts???? Next, do you think it is needed or advisable to drill siphon break holes in the water return lines from the fuge going back to the return area of the sump? I'm questioning this, because if the return pipes from the fuge or submerged, and the power were to go out wouldn't it create a siphon? I'm assuming it would, but only to the bottom of the bulkhead till it would loose it's siphon......What's everyone's thoughts?????

acrylic51
Active Member
I do have to Thank a couple people real quick.....First is Flower, for letting, and entrusting me to undertake the project.......
 Corey.....thanks.....always specing, the ideas, and always just seeming to know what's going through my crazy head.....As I said before scary, but super cool!!!!!!!

 And lastly my wife, and kids....Even though they never come into the forums, my wife never complains about the time spent on here, and the projectssssssss, and the messy garage, and late crazy hours I keep....
 Again thanks to everyone that has helped, followed or whatever capacity you've played.....it's been super and hopefully it has helped someone in some area think outside the box, and start "tearing it up" Someone's gonna have to come up with the next project after this one......


monsinour
Active Member
Quote:
Originally Posted by acrylic51 http:///forum/thread/380517/flower-s-sump-fuge-build/680#post_3324997
I honestly think the next time I have to fab these up I'll wear my gloves while sanding these small parts.....I didn't realize I ran my knuckle into the sander.....But we put blood and tears into are tanks.....Well worth it for ya Flower!!!!!!
Heh, way back in shop class for me, well over 25 years ago, I sanded off a fingernail on a hand. Didnt realize it until I smelled it. I am sure I would have noticed the glove fraying before I lost my fingernail. But this is just one of many examples as to why i cant do this kind of work. The most complicated thing I did for my tank was to add 2 pieces of wood spaced out just right on the canopy to hold the lighting kit over the middle of the tank. It was 4 screws and some wood glue. I am envious of those who can make things with their hands. My daughter has asked for a bird house, well asked to help me make a bird house for so long. I know if I try it, the birds will come and laff at it and move along.
The construction is amazing Acrylic, the tubing work is awesome 2Q, and those autocad drawings were cool Al&B. The most I did in this thread was pad my post count, LOL.
edit: from the pics it looks like the water will be entering at the same level as the top of the skimmer stand. 1 of 2 things will happen:
1. it will work just fine and nothing will need to be done
2. it will create a vortex like thing and the skimmer will be sucking air at some point trying to get the water that is only coming in around the stand
Only one real way to see for sure, fill er up! I would imagine the extra holes would help in the water getting into the skimmer. The extra holes will create more area for bacteria to grow on as well, right? some one check my geometry on that one.
As far as a syphon, I dont think it will happen at all really. The system wont be enclosed completely and if the top of the drains were covered in water in the fuge, it wont take long before air is introduced into the system really. HOWEVER, better safe than sorry really and drilling 2 holes will take just how long? 10 seconds? 15 at the most?
2quills
Well-Known Member
Fantastic, Shawn! Scary, but true! You could be my brother from another mother than I never knew I had lol.
It wouldnt hurt to make a few holes or slots in the stand for circulation IMO. I really don't see siphon being an issue on the fuge drain pipes...there will always be some manor of air in them. I would imagine that it would create one for a brief moment but not enough to cause a problem. Well I'm off to work, I'll have to come back and re-read everything again in depth. But it looks great!
It wouldnt hurt to make a few holes or slots in the stand for circulation IMO. I really don't see siphon being an issue on the fuge drain pipes...there will always be some manor of air in them. I would imagine that it would create one for a brief moment but not enough to cause a problem. Well I'm off to work, I'll have to come back and re-read everything again in depth. But it looks great!
