Flower's Sump/Fuge Build

2quills

Well-Known Member
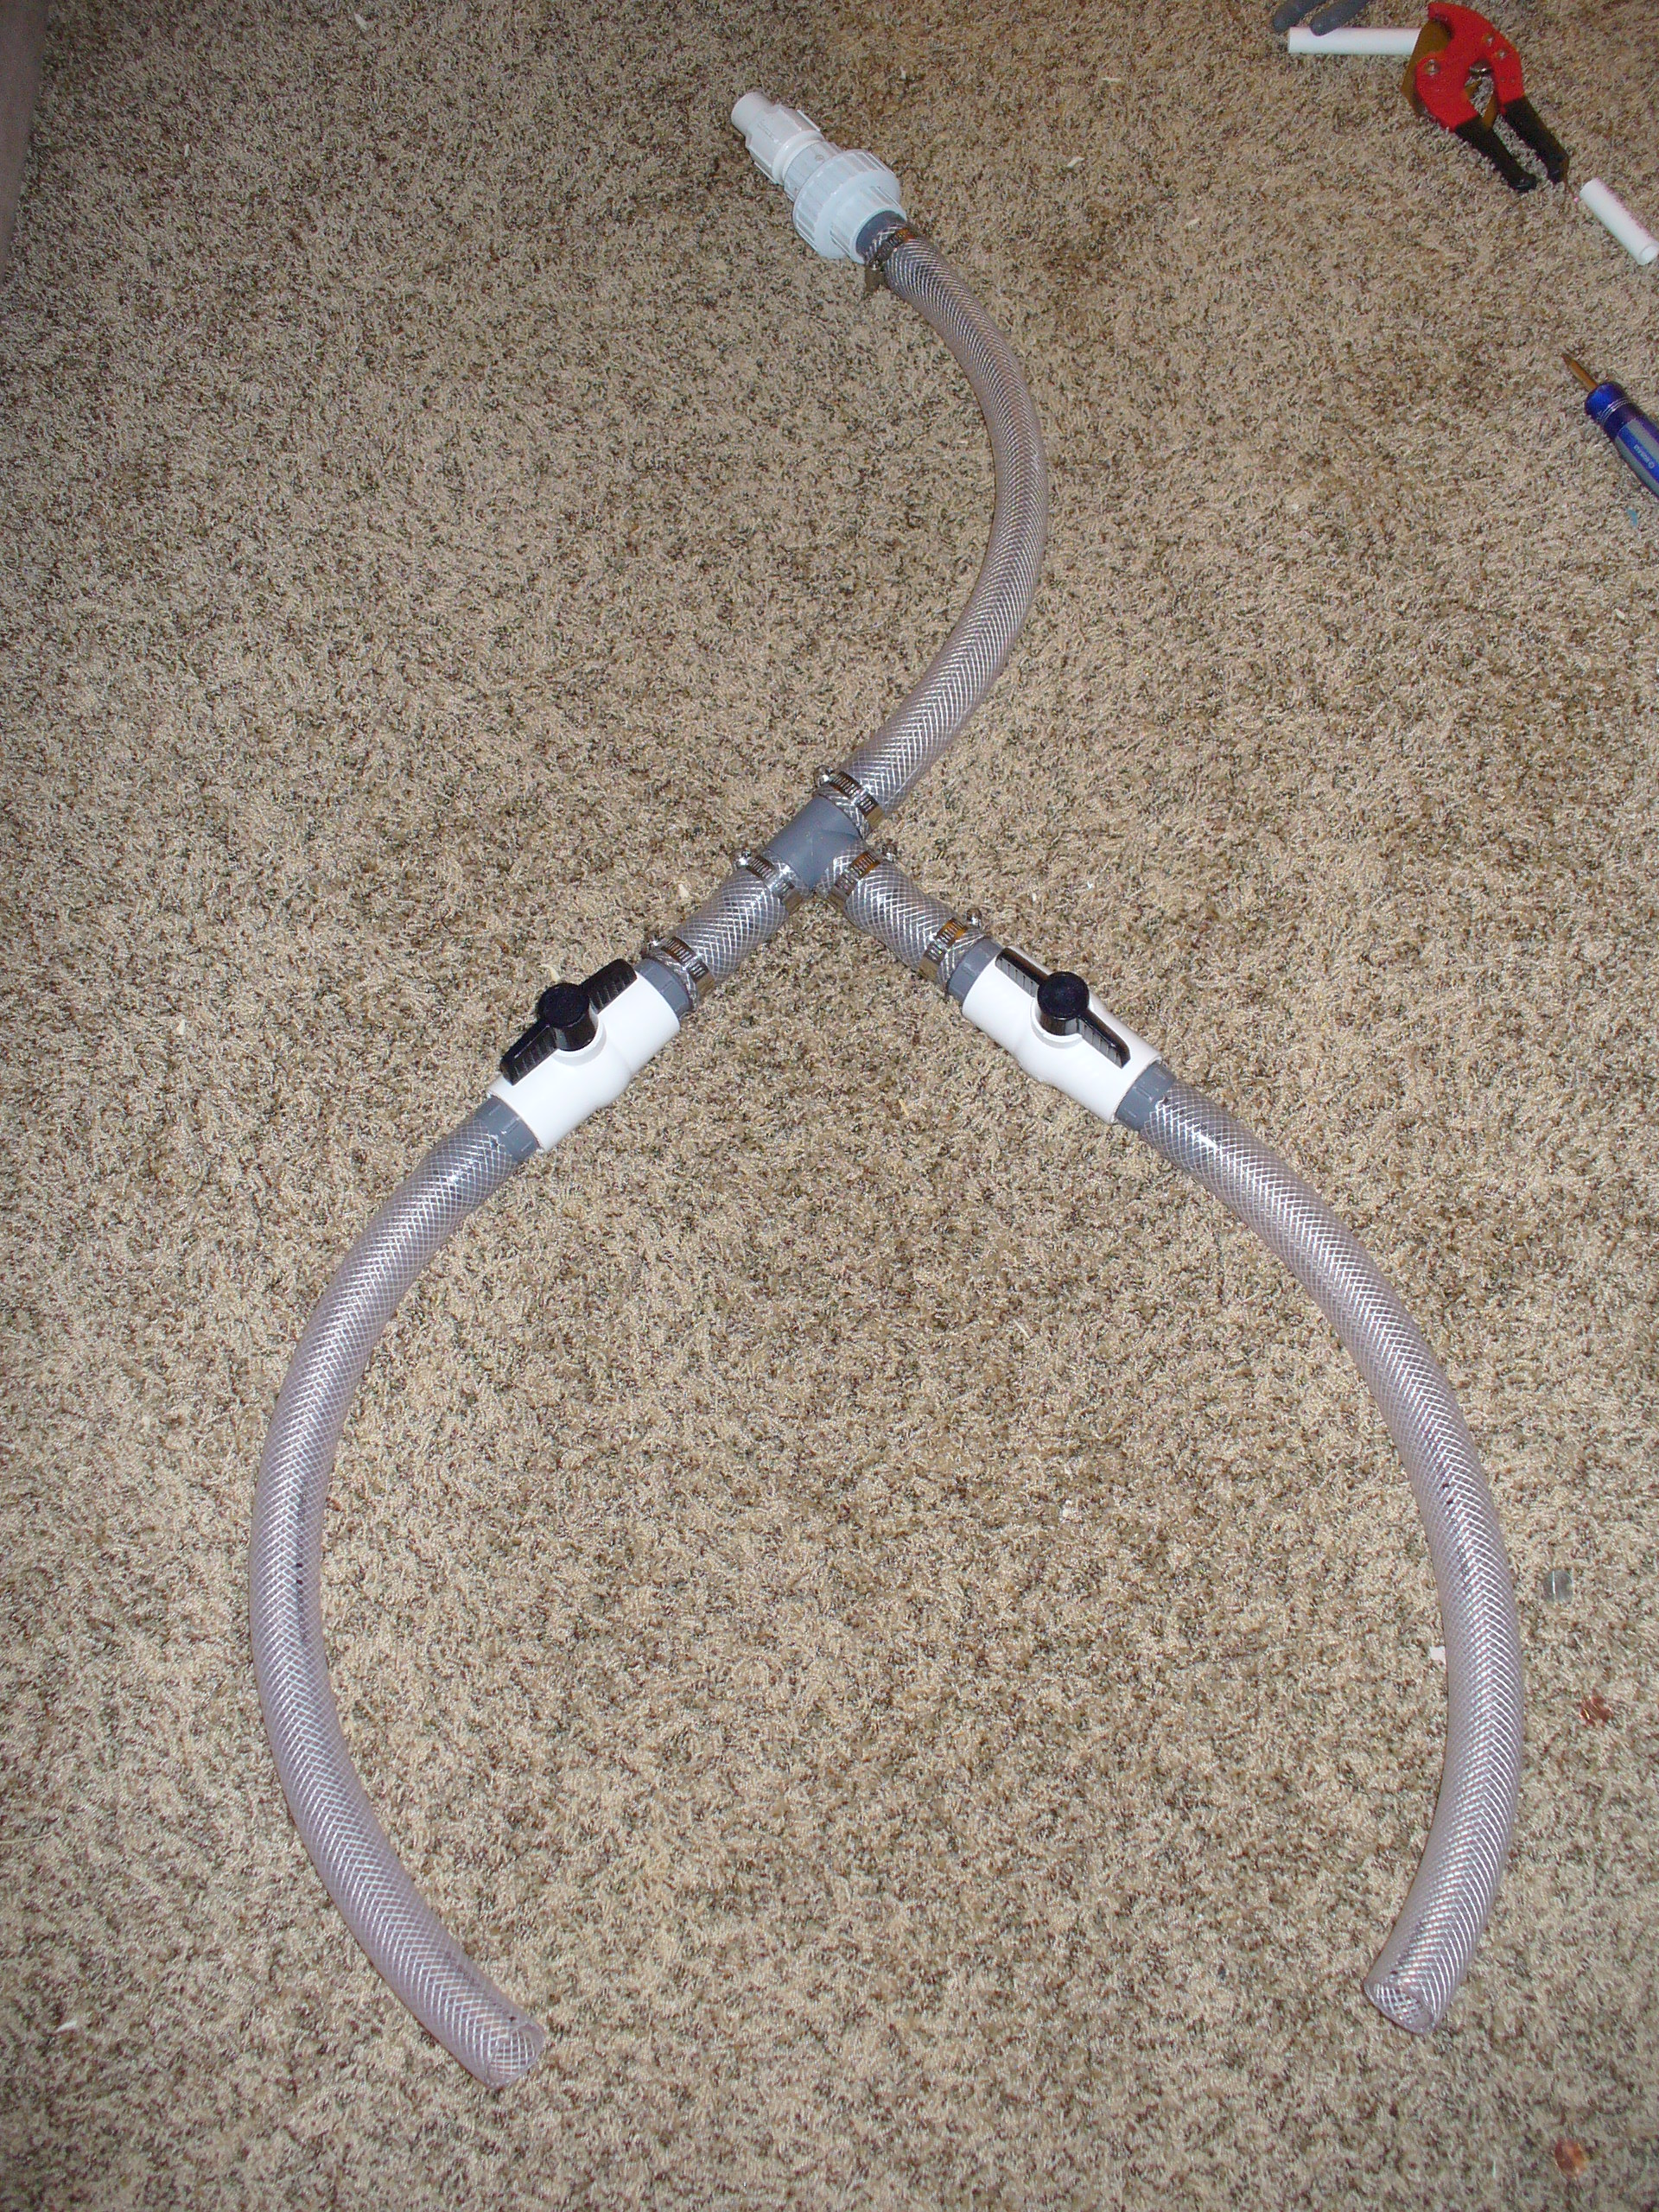
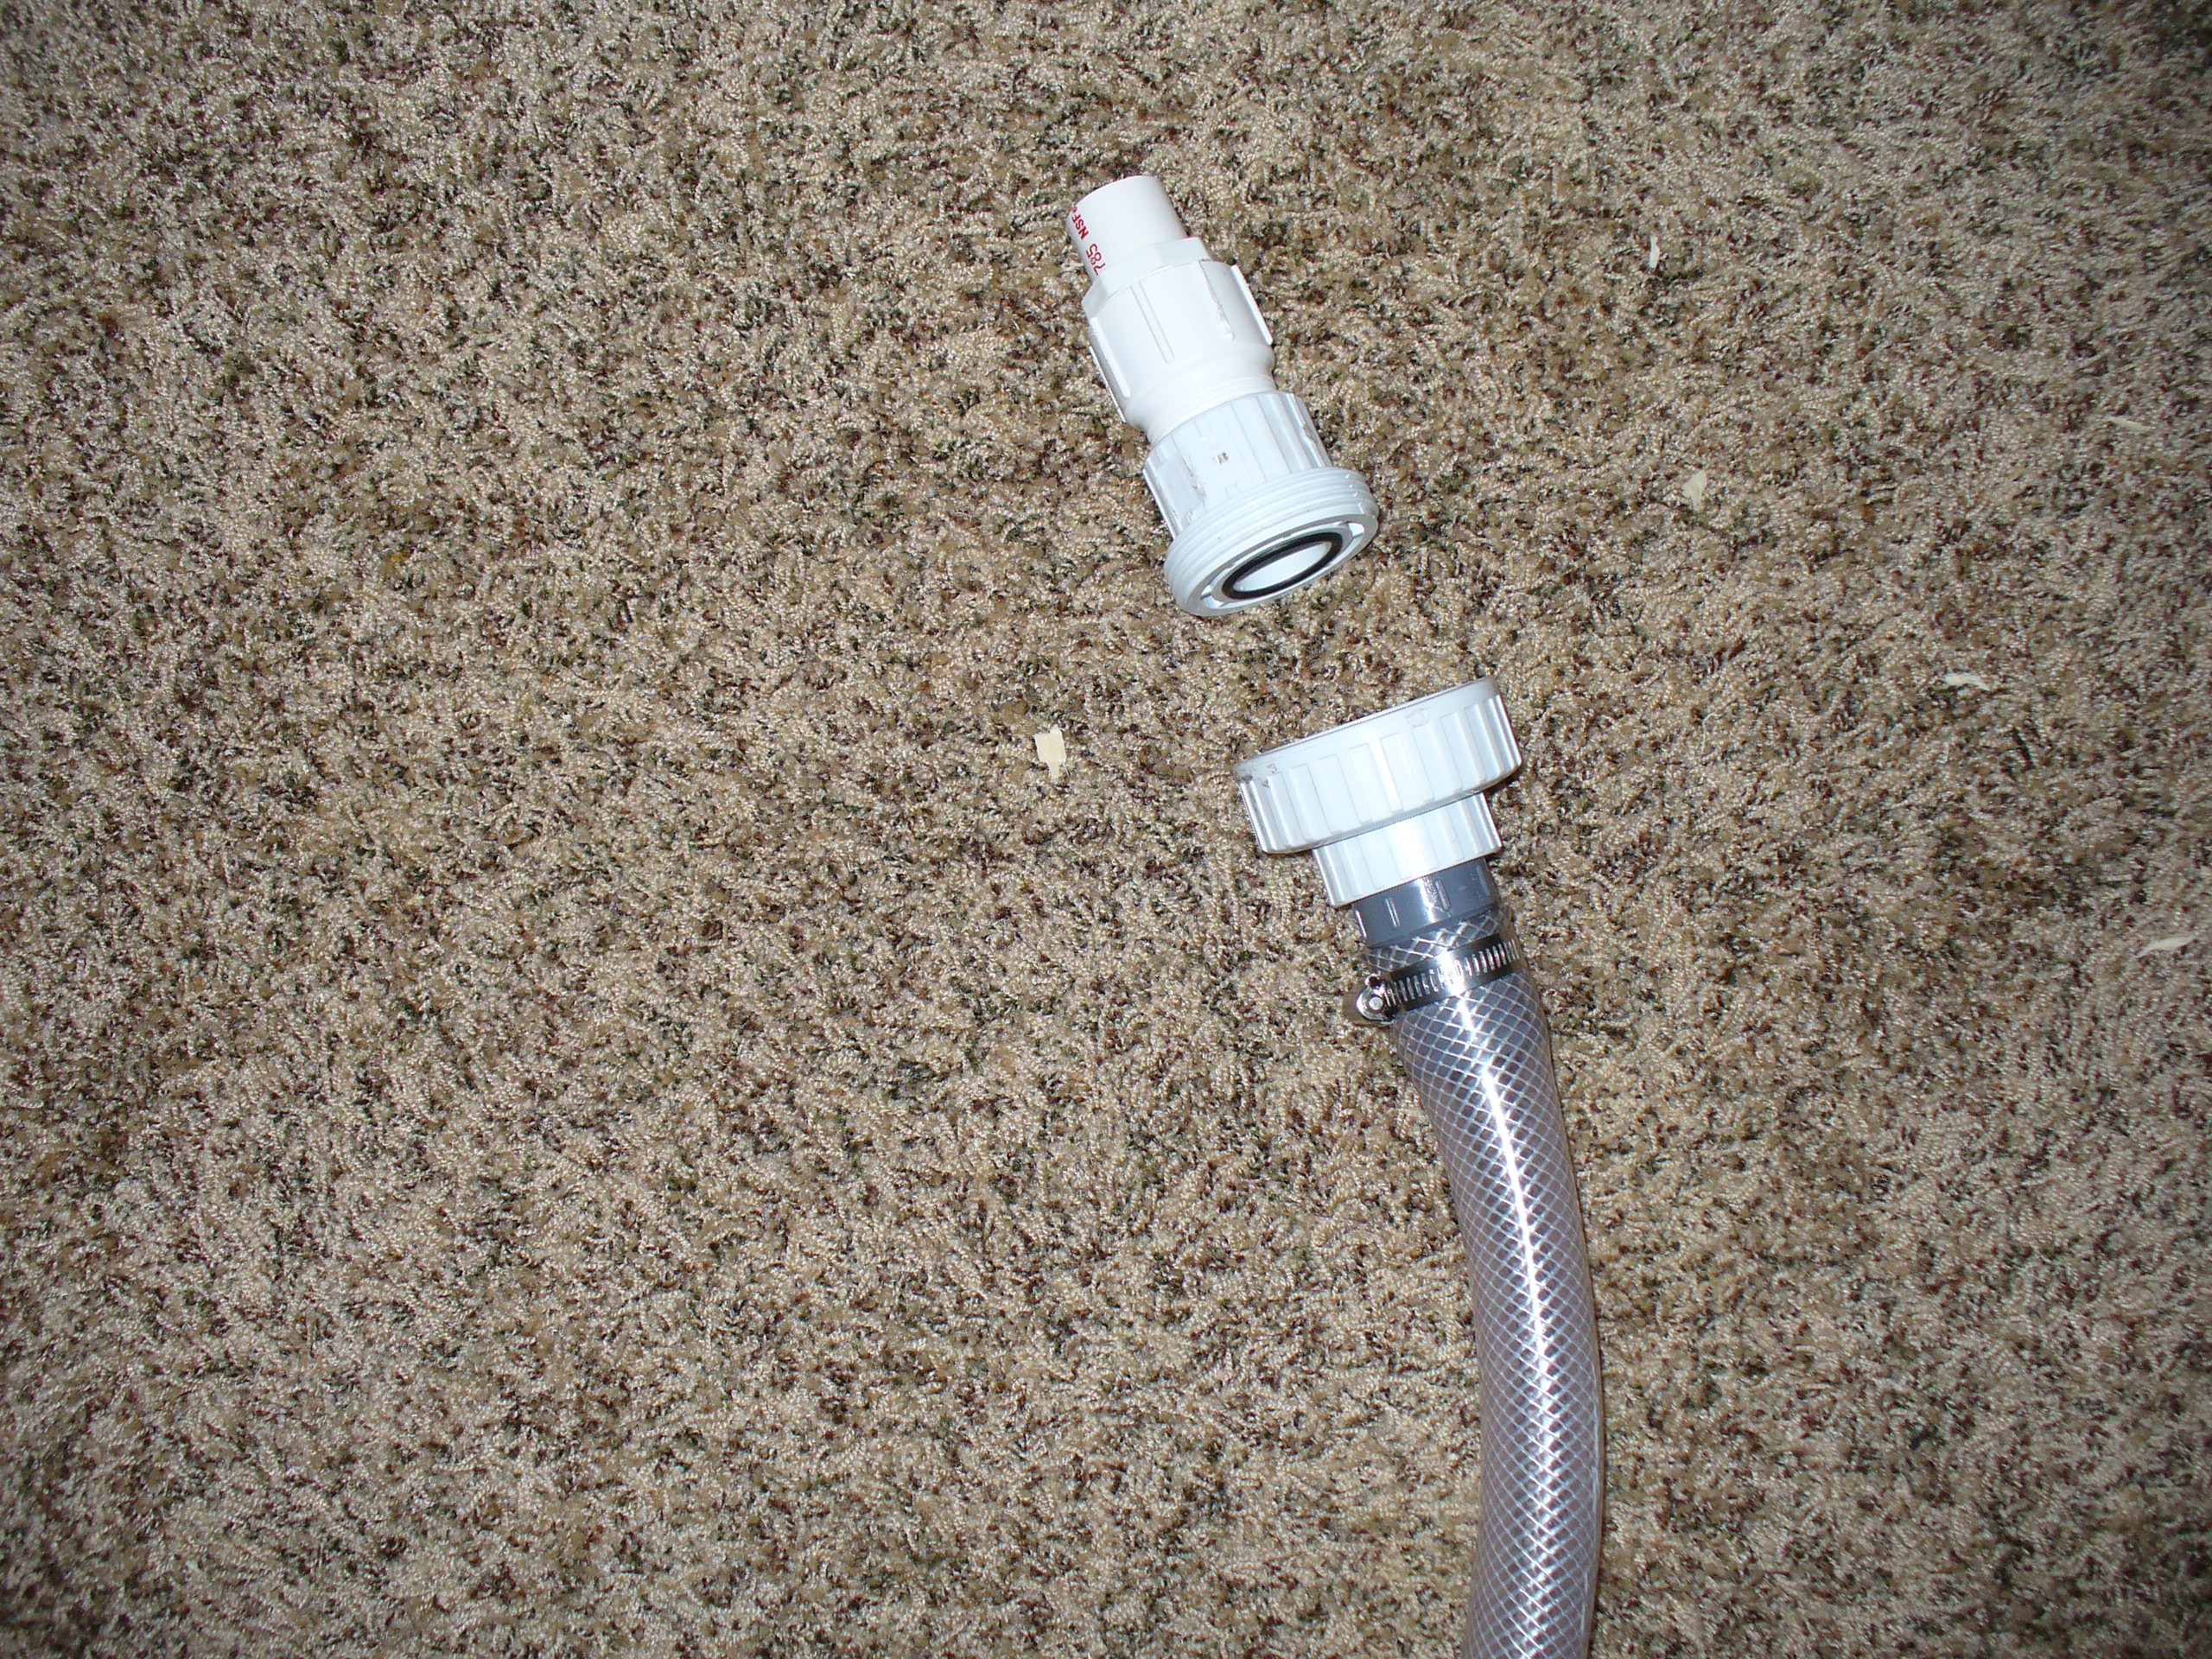
Oh...that reminds me, I almost forgot to show you the pictures of the final changes to the plumbing. Nothing major, I just decided to move the union piece to where the adapter is right under the bulkhead. Since you have the room behind your stand it should be easy to access and disconnect the overflow from the plumbing for future maintenance or in the event that you ever have to move the tank in the future. I measured and re-measured a dozen times...going back through Al's drawing and dimension. I did attach everything for you already and I think it's going to work without you having to cut the hose between the overflow and the valves. Should only have to trim the two bottom hoses (fingers crossed).
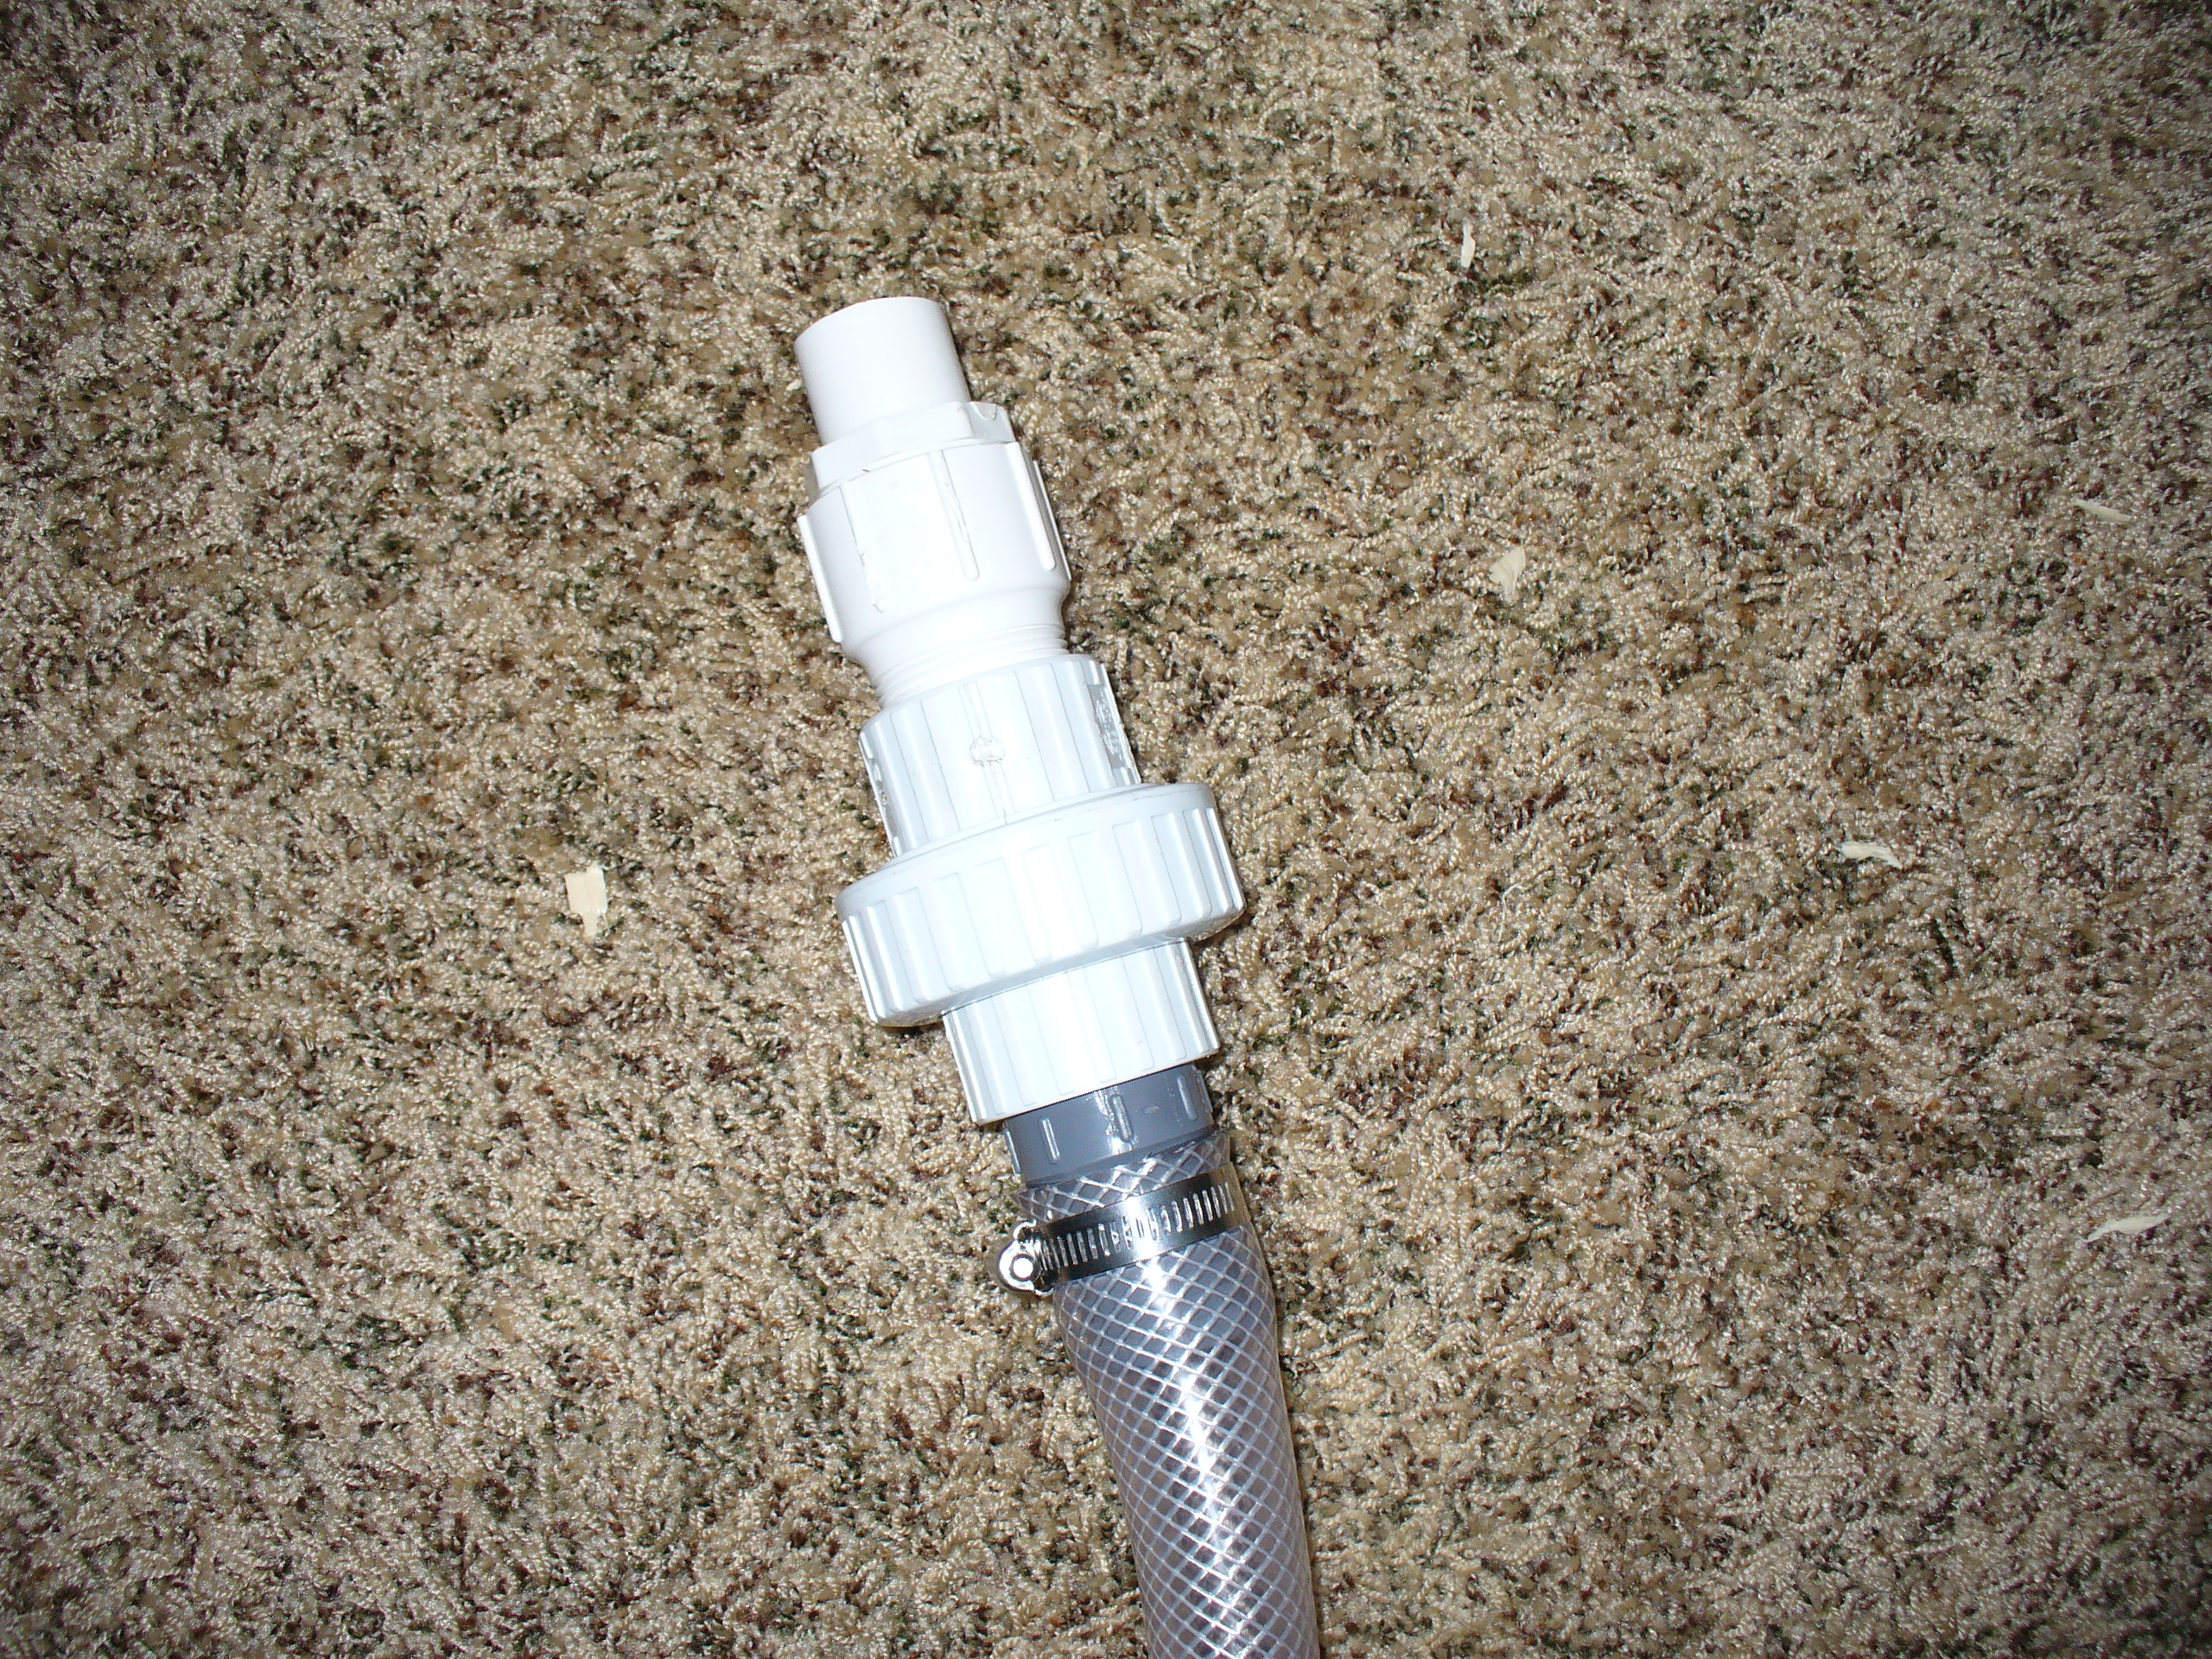
The "Union" unscrews and screws pretty easily. You don't have to tighten it down very hard to get a good seal. I already grease the "O" ring for longer lasting protection.
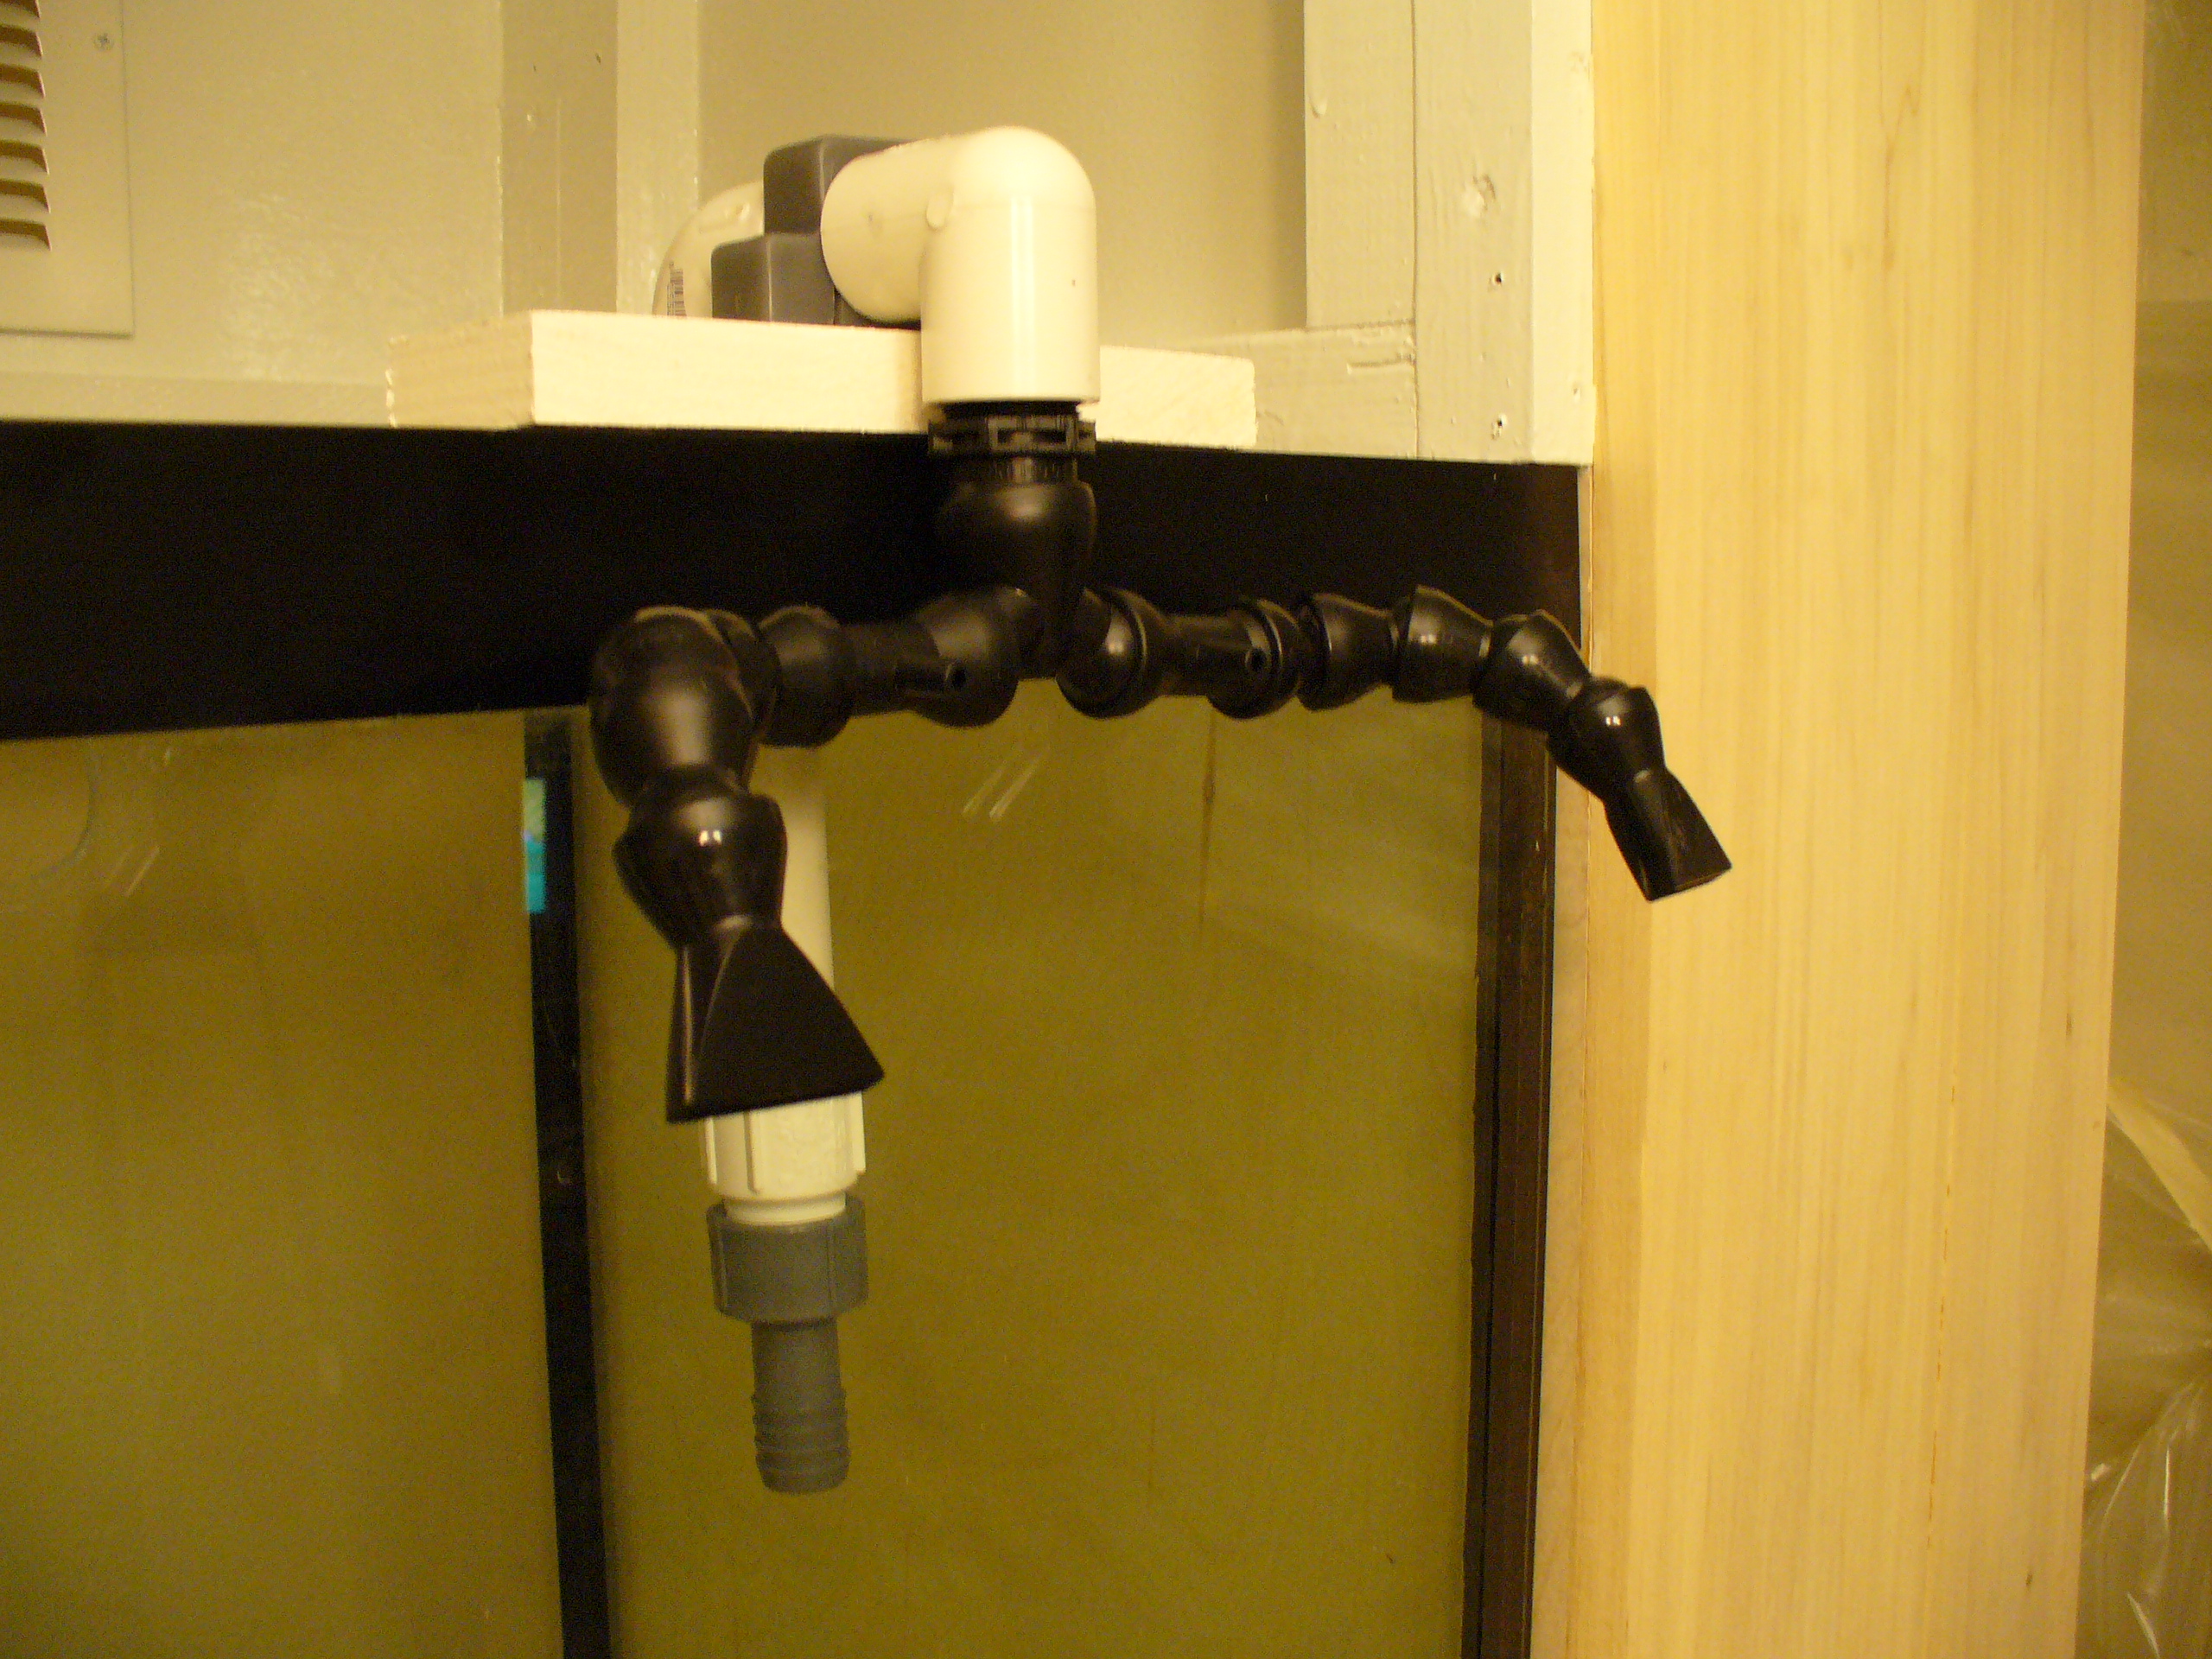
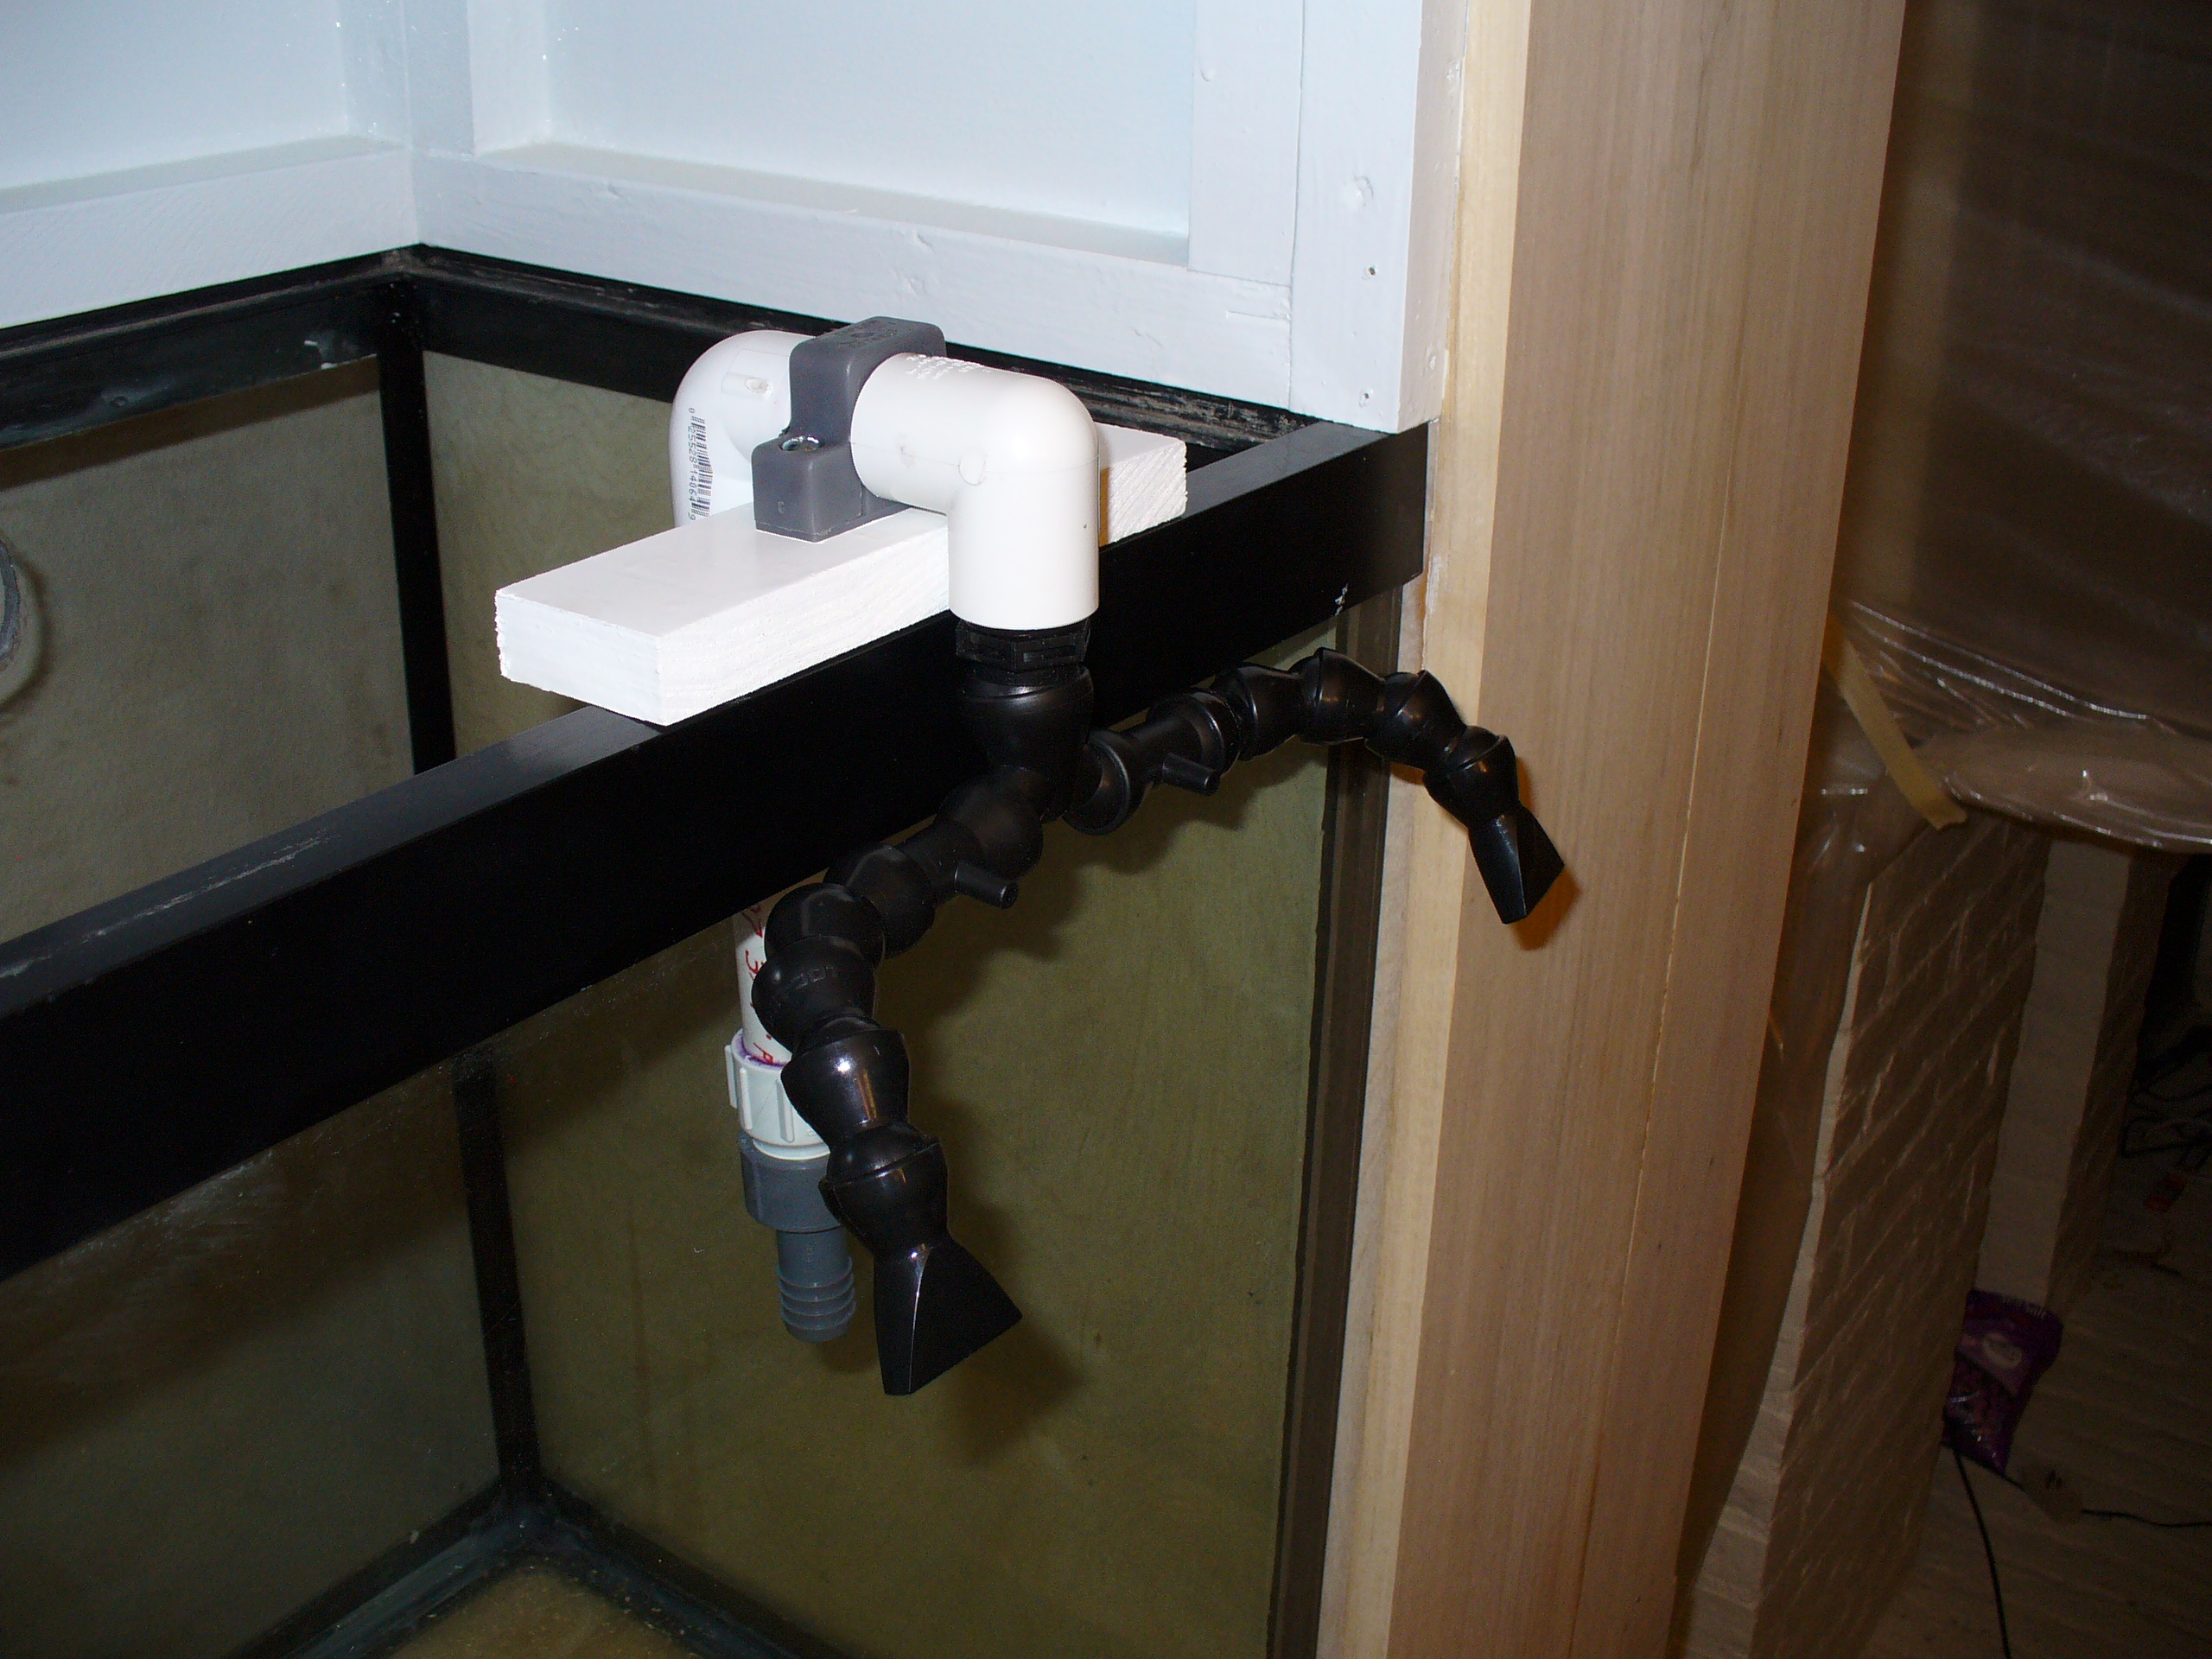
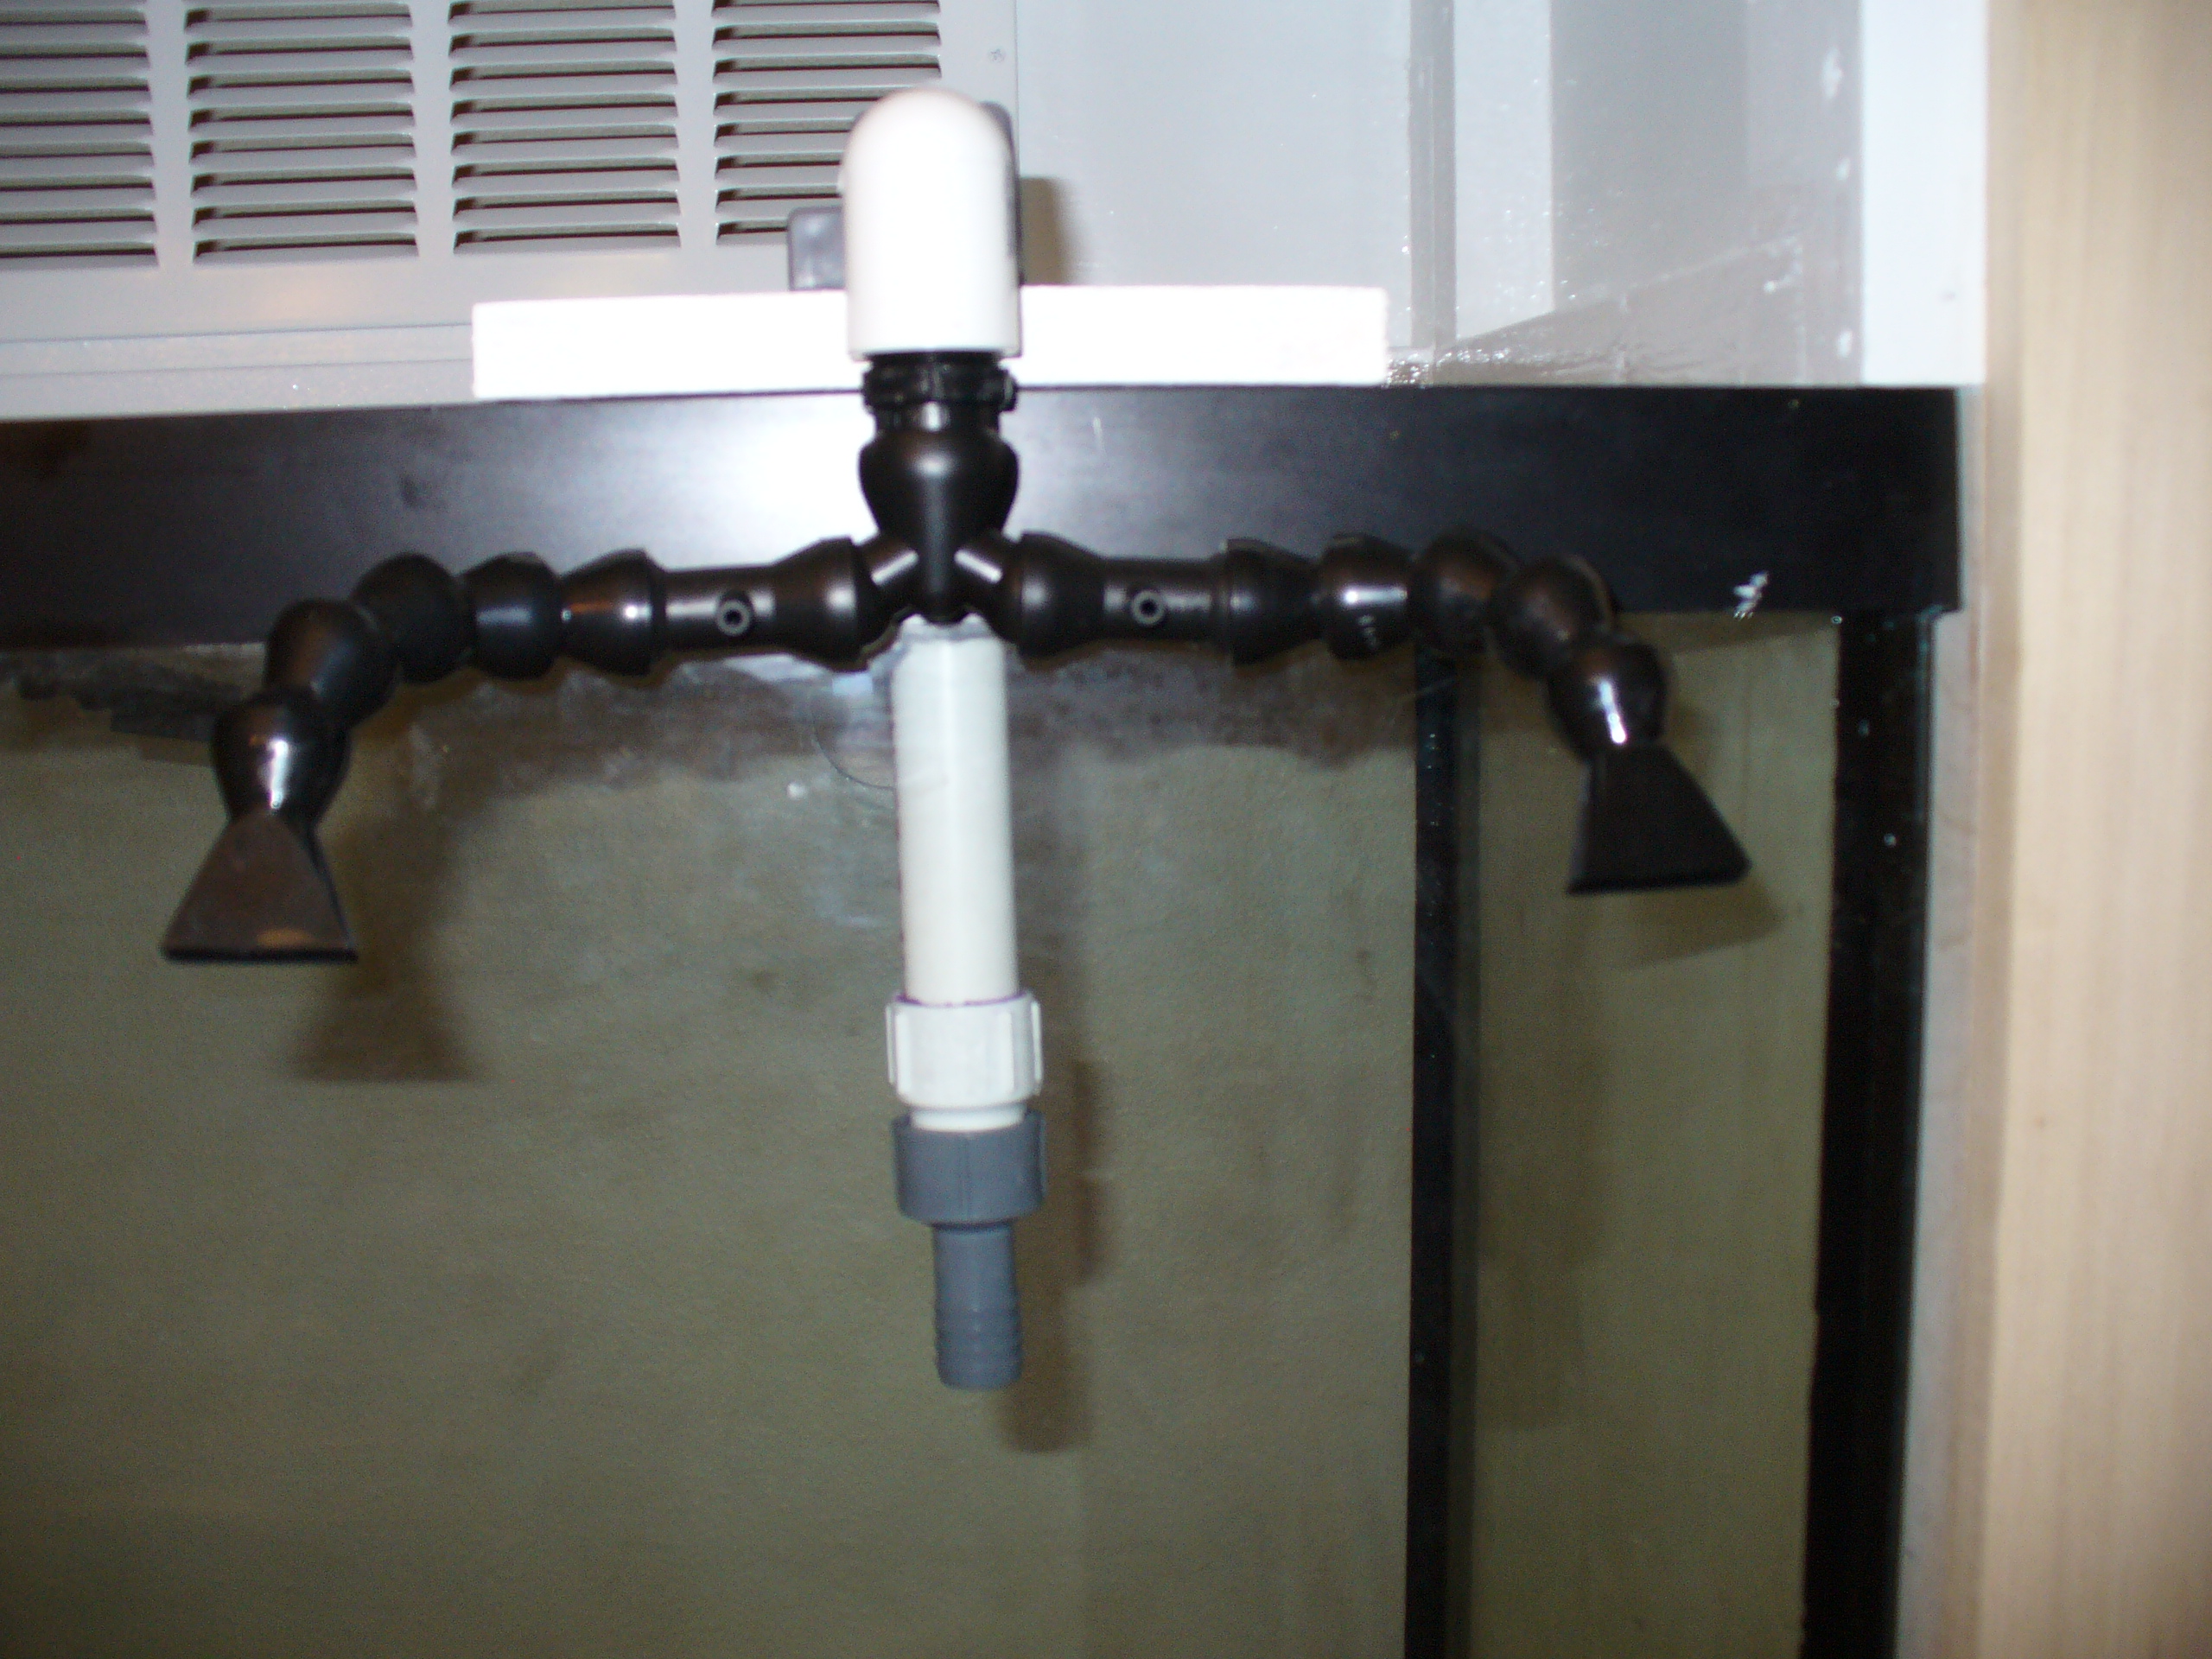
And a few shots of the fantastic corey gizmo all finished with its own support bracket. Going by the measurement you gave me earlier on in the thread I figure the plastic trim on your tank is pretty much the same as mine so I made it to work for that size. They siphon break holes line up just a hair above the bottom of the trim. You could always raise it up a touch if you have to once you get it if you don't like it. Or you don't have to use the bracket if you don't want to...I think it will work pretty good though.
 

monsinour

Active Member
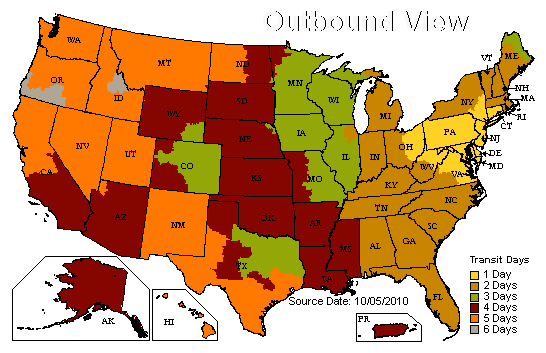
OK flower, just to make you geek out more I went ahead and made your wait a calculated wait. Since I know where exactly acrylic is I went to ups to pull up a map of how long in transit your stuff will be shipped ups ground. Depending on where you are in illinois, its 2 or 3 days:

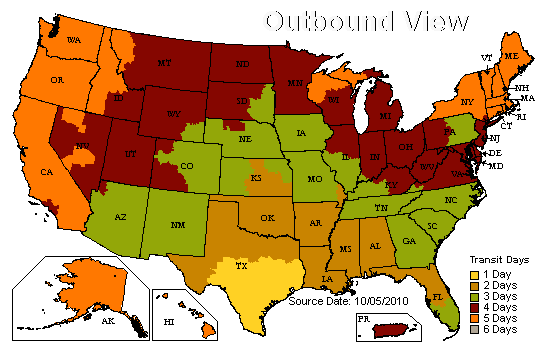
After further research, I got where 2Q is and did the same with that info. For this one, pending on where in illinois you are, its 3 or 4 days. Looks like if both ship out monday, you will have everything by friday.
 

flower

Well-Known Member

You are a sweetie for the effort.. Corey shipped my plumbing Nov 2nd and today is the 5th ..day 3 it still hasn't arrived. ...maybe tomorrow..day 4..
He did some changes, and even put a bracket on the Fantastic Corey Gizmo!
But Shawn needs some parts he is having trouble getting before he can ship, so I doubt it will be ready to go on Monday.
 

monsinour

Active Member
Quote:
Originally Posted by Flower http:///forum/thread/380517/flower-s-sump-fuge-build/740#post_3325879

You are a sweetie for the effort.. Corey shipped my plumbing Nov 2nd and today is the 5th ..day 3 it still hasn't arrived. ...maybe tomorrow..day 4..
He did some changes, and even put a bracket on the Fantastic Corey Gizmo!
But Shawn needs some parts he is having trouble getting before he can ship, so I doubt it will be ready to go on Monday.
Well, UPS doesnt work on a saturday unless you pay the extra for it. Have a tracking number or anything for the stuff from texas?
 

2quills

Well-Known Member
Looks like it left Hodgkins, IL this evening just after 8 p.m. Odds are you'll get in Monday, Flower which is what they had told me initially.
 

flower

Well-Known Member
Quote:
Originally Posted by 2Quills http:///forum/thread/380517/flower-s-sump-fuge-build/740#post_3325884
Looks like it left Hodgkins, IL this evening just after 8 p.m. Odds are you'll get in Monday, Flower which is what they had told me initially.

With everything that has been going on here trying to get this funeral together...I actually forgot it was Saturday. I know it's Shabbat, I spent all day cleaning and preparing the house, I went to service and yet somehow my mind didn't register it's Saturday until just this moment when I read this post.
I feel perfectly normal and then I do or say something and suddenly realize I'm in a mental fog.
You told me Monday and gave me the tacking number...its in my PM messages...brain fart... how did I forget that.
 

acrylic51

Active Member
Flower there won't be any delay with making Monday's ship date. I was just hoping to find what I wanted at Home Depot since it's a 2 minute drive from work. I know Lowes has what I want and need. Will get there this afternoon after work.
You are correct UPS doesn't really work Saturday unless you've paid for it, and you probably won't get it ahead of what they quoted Corey or will quote me on arrival time!!!!
 

al&burke

Active Member
Hi everyone, Corey great job on the plumbing and Shawn the sump and fuge looks great. I can't wait to see pictures of it under Flower's tank. Just excellent.
 

flower

Well-Known Member
Quote:
Originally Posted by acrylic51 http:///forum/thread/380517/flower-s-sump-fuge-build/740#post_3325920
Flower there won't be any delay with making Monday's ship date. I was just hoping to find what I wanted at Home Depot since it's a 2 minute drive from work. I know Lowes has what I want and need. Will get there this afternoon after work.
You are correct UPS doesn't really work Saturday unless you've paid for it, and you probably won't get it ahead of what they quoted Corey or will quote me on arrival time!!!!

Oh, I thought you couldn't find a part you needed. So it is still expected to ship out like you said!
Will you still have time to test run it and make sure it can handle under pressure?
Okay..another question. How much saltwater should I mix up to be able to run the sump? I would like to do a nice 30% water change at that time too. So I need to mix up 30g + what?
 

2quills

Well-Known Member
If I remember correctly I believe I had it calculated that the sump and fuge would add approximately 28 extra gallons of water to the system. So 30 sounds like a good place to start.
 

monsinour

Active Member
This is going to get real good come thursday. Since I am unemployed, love the economy, I will be here all day to assist Flower.
 

flower

Well-Known Member

I need help on the areas I put in bold print.
I am a planner, nothing is ever just jump in with my fish tank..Life decisions maybe, but never the tank. I have to synchronize everything so I can do it all at once.
I have to have at least 60g of water mixed up and ready, so I will start those tubs going right away.
I have to find a home for the goby. LFS will take him.
I have to redo the rock..LOL..Because catching said goby means I have to remove all the rock to get to him.
I have to have the new live sand here from SWF.com and ready to transfer but not too soon so there will be no cycle.
I have to remove the old sand to put in the new refugium with the tiny sand critters I have chilling out the in-tank refugium until their new home is ready, and then put the new live sand in the DT
Do I still need to swap the sand if I get rid of the goby? I’m thinking now that without the goby I might just be able to seed the old sand with my critters and some of the new sand…I need your input/opinions on this..
The earliest I think I will be able to do it is going to be Saturday night after Sabbath next week. I will have that evening and most of Sunday to work on the tank. This is an all day job I’m sure.
I work all week and I have Friday and Saturdays off. Friday during the day is the day of preparation for Sabbath which begins Friday night, and I can’t do all that work on Sabbath so I have to wait until sundown when it is over.
I can catch the Goby tonight and keep him in a bucket overnight to take him to his new home in the morning…opinions needed…do you think he will be alright in a bucket? The little in-tank refugium contents could be released once the goby is removed, then I can use that empty container . It will hold him but he may jump in such a confined area. That would put him right at the surface and he is pretty big.
Oh important question…If I only need sand for the new refugium how much sand do I need to order? I need some opinions on how deep to make the sand as well. So we need to hash this out…
 

2quills

Well-Known Member
Quote:
Originally Posted by Flower http:///forum/thread/380517/flower-s-sump-fuge-build/740#post_3326001

I need help on the areas I put in bold print.
I am a planner, nothing is ever just jump in with my fish tank..Life decisions maybe, but never the tank. I have to synchronize everything so I can do it all at once.
I have to have at least 60g of water mixed up and ready, so I will start those tubs going right away.
I have to find a home for the goby. LFS will take him.
I have to redo the rock..LOL..Because catching said goby means I have to remove all the rock to get to him.
I have to have the new live sand here from SWF.com and ready to transfer but not too soon so there will be no cycle.
I have to remove the old sand to put in the new refugium with the tiny sand critters I have chilling out the in-tank refugium until their new home is ready, and then put the new live sand in the DT
Do I still need to swap the sand if I get rid of the goby? I’m thinking now that without the goby I might just be able to seed the old sand with my critters and some of the new sand…I need your input/opinions on this..I'm thinking that if I were in your shoes I would do a little bit of both. Maybe mix 3/4 of the new sand in the fuge and the other half in the tank. And take a little bit of the old sand in the tank and put it in the fuge. I'm not 100% sure but I would speculate that you could get the sand in the tank seeded a little bit faster perhaps.
The earliest I think I will be able to do it is going to be Saturday night after Sabbath next week. I will have that evening and most of Sunday to work on the tank. This is an all day job I’m sure.
I work all week and I have Friday and Saturdays off. Friday during the day is the day of preparation for Sabbath which begins Friday night, and I can’t do all that work on Sabbath so I have to wait until sundown when it is over.
I can catch the Goby tonight and keep him in a bucket overnight to take him to his new home in the morning…opinions needed…do you think he will be alright in a bucket? The little in-tank refugium contents could be released once the goby is removed, then I can use that empty container . It will hold him but he may jump in such a confined area. That would put him right at the surface and he is pretty big. They are pretty hardy I think he'll be ok. Maybe pump a little bit of air in there for him
.
Oh important question…If I only need sand for the new refugium how much sand do I need to order? I need some opinions on how deep to make the sand as well. So we need to hash this out…DSB or SSB are personal prefference. But how deep you decide to go could mean the difference between 1 or 2 bags. If you go with a deeper 6" sandbed I'd say get 2 bags to be safe. DSB's have there pros and cons just like SSB's do. Myself, I plan to do about a 4" sandbed in my fuge.
 

flower

Well-Known Member

I don't know how to determine the size of the new refugium. Each bag is 20 pounds...for 4 inches, how many bags would I need? I plan to mix the sand from the DT and take a bit from each like you said.
 

acrylic51

Active Member
Not laughing that your unemployed, just makes me think about when I had my back surgeries, and couldn't walk and missed work for over a year.....
Quote:
Originally Posted by Monsinour http:///forum/thread/380517/flower-s-sump-fuge-build/740#post_3325968
This is going to get real good come thursday. Since I am unemployed, love the economy, I will be here all day to assist Flower.
Not an issue with parts....Just the joke of the store, that is right outside my work....It's so close when I sit at the 1 end of the yard, I can read license plate numbers on the cars sitting in the Home Depot parking lot, and figured I'd run there at lunch time since it's that close.....

Quote:
Originally Posted by Flower
http:///forum/thread/380517/flower-s-sump-fuge-build/740#post_3325932

Oh, I thought you couldn't find a part you needed. So it is still expected to ship out like you said!
Will you still have time to test run it and make sure it can handle under pressure?
Okay..another question. How much saltwater should I mix up to be able to run the sump? I would like to do a nice 30% water change at that time too. So I need to mix up 30g + what?
 

acrylic51

Active Member
I'm pretty much in agreement with what Corey has stated......I'd pull a bit out of the DT and move to the fuge, and add a couple cups to the DT and the rest to the fuge.....I myself agree with personal preference on depth of the sand bed. I would say 4", but wouldn't go deeper than 6" JMHO.....I'm not and never have been a fan or firm believer that you had to go that deep for a sand bed to be affective.....I think the little guy will be fine over night in a container till you can get him to the LFS.....
Quote:
Originally Posted by 2Quills http:///forum/thread/380517/flower-s-sump-fuge-build/740#post_3326102
 

acrylic51

Active Member
Well a little bit of an update....We are on schedule Flower!!!!!
Actually could be ahead, but you always run into a kink, but that's life as it goes.....I ran to Lowes, down the road from work after work this afternoon, and this particular Lowes doesn't carry schedule 80, and it appears just the Lowes by my house does, so I made the trip to that Lowes.....I couldn't find the exact parts I needed to just to be able to come home and just install and glue up the way I wanted.....I did find what I was looking for and had to do alittle modification to a couple parts to get us to were we need to be.....Here's a couple pics of what I have going on here....I did mention a little glitch. I went to glue the fittings, and my PVC glue was junk, so looks like I'll head out early am 7am to pick up a can of glue; the primer was perfectly fine. I had thought about picking up glue when I was at Lowes this afternoon, but thought man I have all but a full can downstairs......


So a quick recap....On previous pics of the plumbing we had discussed about making the install without having to glue anything....So the change came about and I couldn't find the 1" slip fitting I needed to use the other existing stuff I had previously purchased, so I bought this fitting, and of course it wouldn't fit into the back of the bulkhead like I had hoped, but never fear.....

I wanted that slip fitting shown above to just be able to slide into the back side of the bulkhead (side facing up) and glue into place......Well!!!!!!


Then of course I had to get new elbows, since the other elbows were slip both ends, and I wanted threaded on 1 end. Again poor selection, I had to drop down in size from 1" plumbing to 3/4", which isn't a real big deal, just I like big......

Ok.....here is my dilema.....the threaded bushing doesn't fit into the back of the bulkhead like I had originally planned and thought out in my head while at Lowes.....But again not a big deal came up with a simple solution to the problem.

As you can see in the pic I took the bushing to the table sander and started "shaving" the diameter of the bushing down. I figured thinning the outside wall of the bushing was no big deal. Under normally plumbing installation I would never do this, but figured since it isn't under any pressure, there isn't a real concern......

After a little modification sanding on the sander you can see the bushing fits nicely inside the back of the bulkhead where I will glue this into place....When I pick up a new bottle of PVC glue in the morning.....


As you can see all fits very nicely. With the bushing being threaded Flower can remove the elbow anytime she might need, and even with the bushing glued into the back side of the bulkhead the nut on the bulkhead can still be removed, so the thought of not being able to replace/remove the bulkhead doesn't exist anymore for you Flower. For the threads on the bushing I will wrap them with teflon tape to help seal the elbow, but really shouldn't be a problem with leakage, and the elbow will be over in the return section of the sump anyways, but again looking for no leaks at all. As an added piece of mind I'll see if I have an extra roll of teflon tape laying around and send that along, that way if needed you can re wrap the threads on the bushing, and you won't have to drive around town hunting teflon tape.....It'll be there for you!!!!!!!
As far as additional water.....I know it took roughly 12-13 gallons to bring the water level in the fuge up to just below the bulkheads......I would probably make 40-50 gallons of water....It will give you some for a water change, and should be plenty to get the system up and running. I will also make you up some labels to place on the sump, so when you get the sump, you can get your water level set correctly, and once you have the right water level you can place the label at the correct water height on the outside of the sump and that way with a quick glance you can tell where your water level is, and when topping off you know where you have to take it to without guessing.......
 

flower

Well-Known Member
Quote:
Originally Posted by acrylic51 http:///forum/thread/380517/flower-s-sump-fuge-build/740#post_3326149
As you can see all fits very nicely. With the bushing being threaded Flower can remove the elbow anytime she might need, and even with the bushing glued into the back side of the bulkhead the nut on the bulkhead can still be removed, so the thought of not being able to replace/remove the bulkhead doesn't exist anymore for you Flower. For the threads on the bushing I will wrap them with teflon tape to help seal the elbow, but really shouldn't be a problem with leakage, and the elbow will be over in the return section of the sump anyways, but again looking for no leaks at all. As an added piece of mind I'll see if I have an extra roll of teflon tape laying around and send that along, that way if needed you can re wrap the threads on the bushing, and you won't have to drive around town hunting teflon tape.....It'll be there for you!!!!!!!

I'm sorry, I know you think you explained things but I'm an idiot on stuff like this. I marked in red the words I don't understand. I think teflon tape is some white stuff....I was told it only seals if you wrap it in a certain direction (what direcrtion?)...I have no idea what a bushing is.
I'm happy we are on schedule and very relieved you will be there for me.
 

acrylic51

Active Member
Flower I'm usually not the best at explaining what I mean at times, usually Corey, my thinking 1/2 steps in.....where you at brother Corey????
No seriously your fine......I will try to explain the easiest way possible so your clear, and that I don't confuse myself.....

When I refer to bushing, I am referring to this part right here....

When I mentioned the "bushing" being glued into the back end of the bulkhead, this is how it will look glued into the bulkhead exactly as it's shown in this pic.
Teflon tape is used to seal the joint between threaded parts...in the very first pic I showed the "bushing". The 1 end I "shaved" it down, and on the other end you can see the threads. The threads will have a white or pink depending which roll I find, wrapped; covering the threads on the "bushing". This "bushing" since it has threads on the end and the elbow where now using has threads on the 1 end on the inside that you can't see from the pics, it will make a good seal between the 2 parts eliminating any leakage of water......

Again in this pic you can see the bulkhead on the very bottom.....on top of the bulkhead you will see the 1st gray fitting which is the "bushing", that I shaved down to be glued inside the back of the bulkhead. When the 1st gray fitting is glued into place you will still be able to remove the entire bulkhead from the fuge if ever needed.....You can also see the threads on the "bushing" that screws into the elbow. Since these are threaded parts, we will apply "wrap" the threads with teflon tape. The actual direction I can't comment on, just that when you start screwing your other threaded fitting into place and the tape starts to unravel, then you applied the tape in the wrong direction, but I will figure that out before it is boxed up, and will advise you which way to wrap if needed.....The other end of the elbow has no threads on the inside, and the straight PVC pipe will slide into there without any glue at all so it can also be removed when/if needed, and that straight PVC pipe will extend down into the water in the return section.
Hopefully this made a little sense......I promise I will shoot a video for you!!!!!
 
Top