Flower's Sump/Fuge Build

flower

Well-Known Member

I would be telling stories if I told you I understand now...It isn't you it's me. This stuff is so out of my element, I have no idea how it even works.
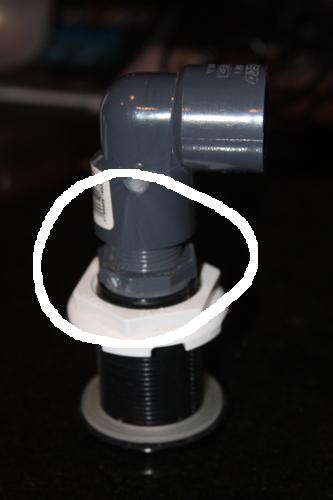
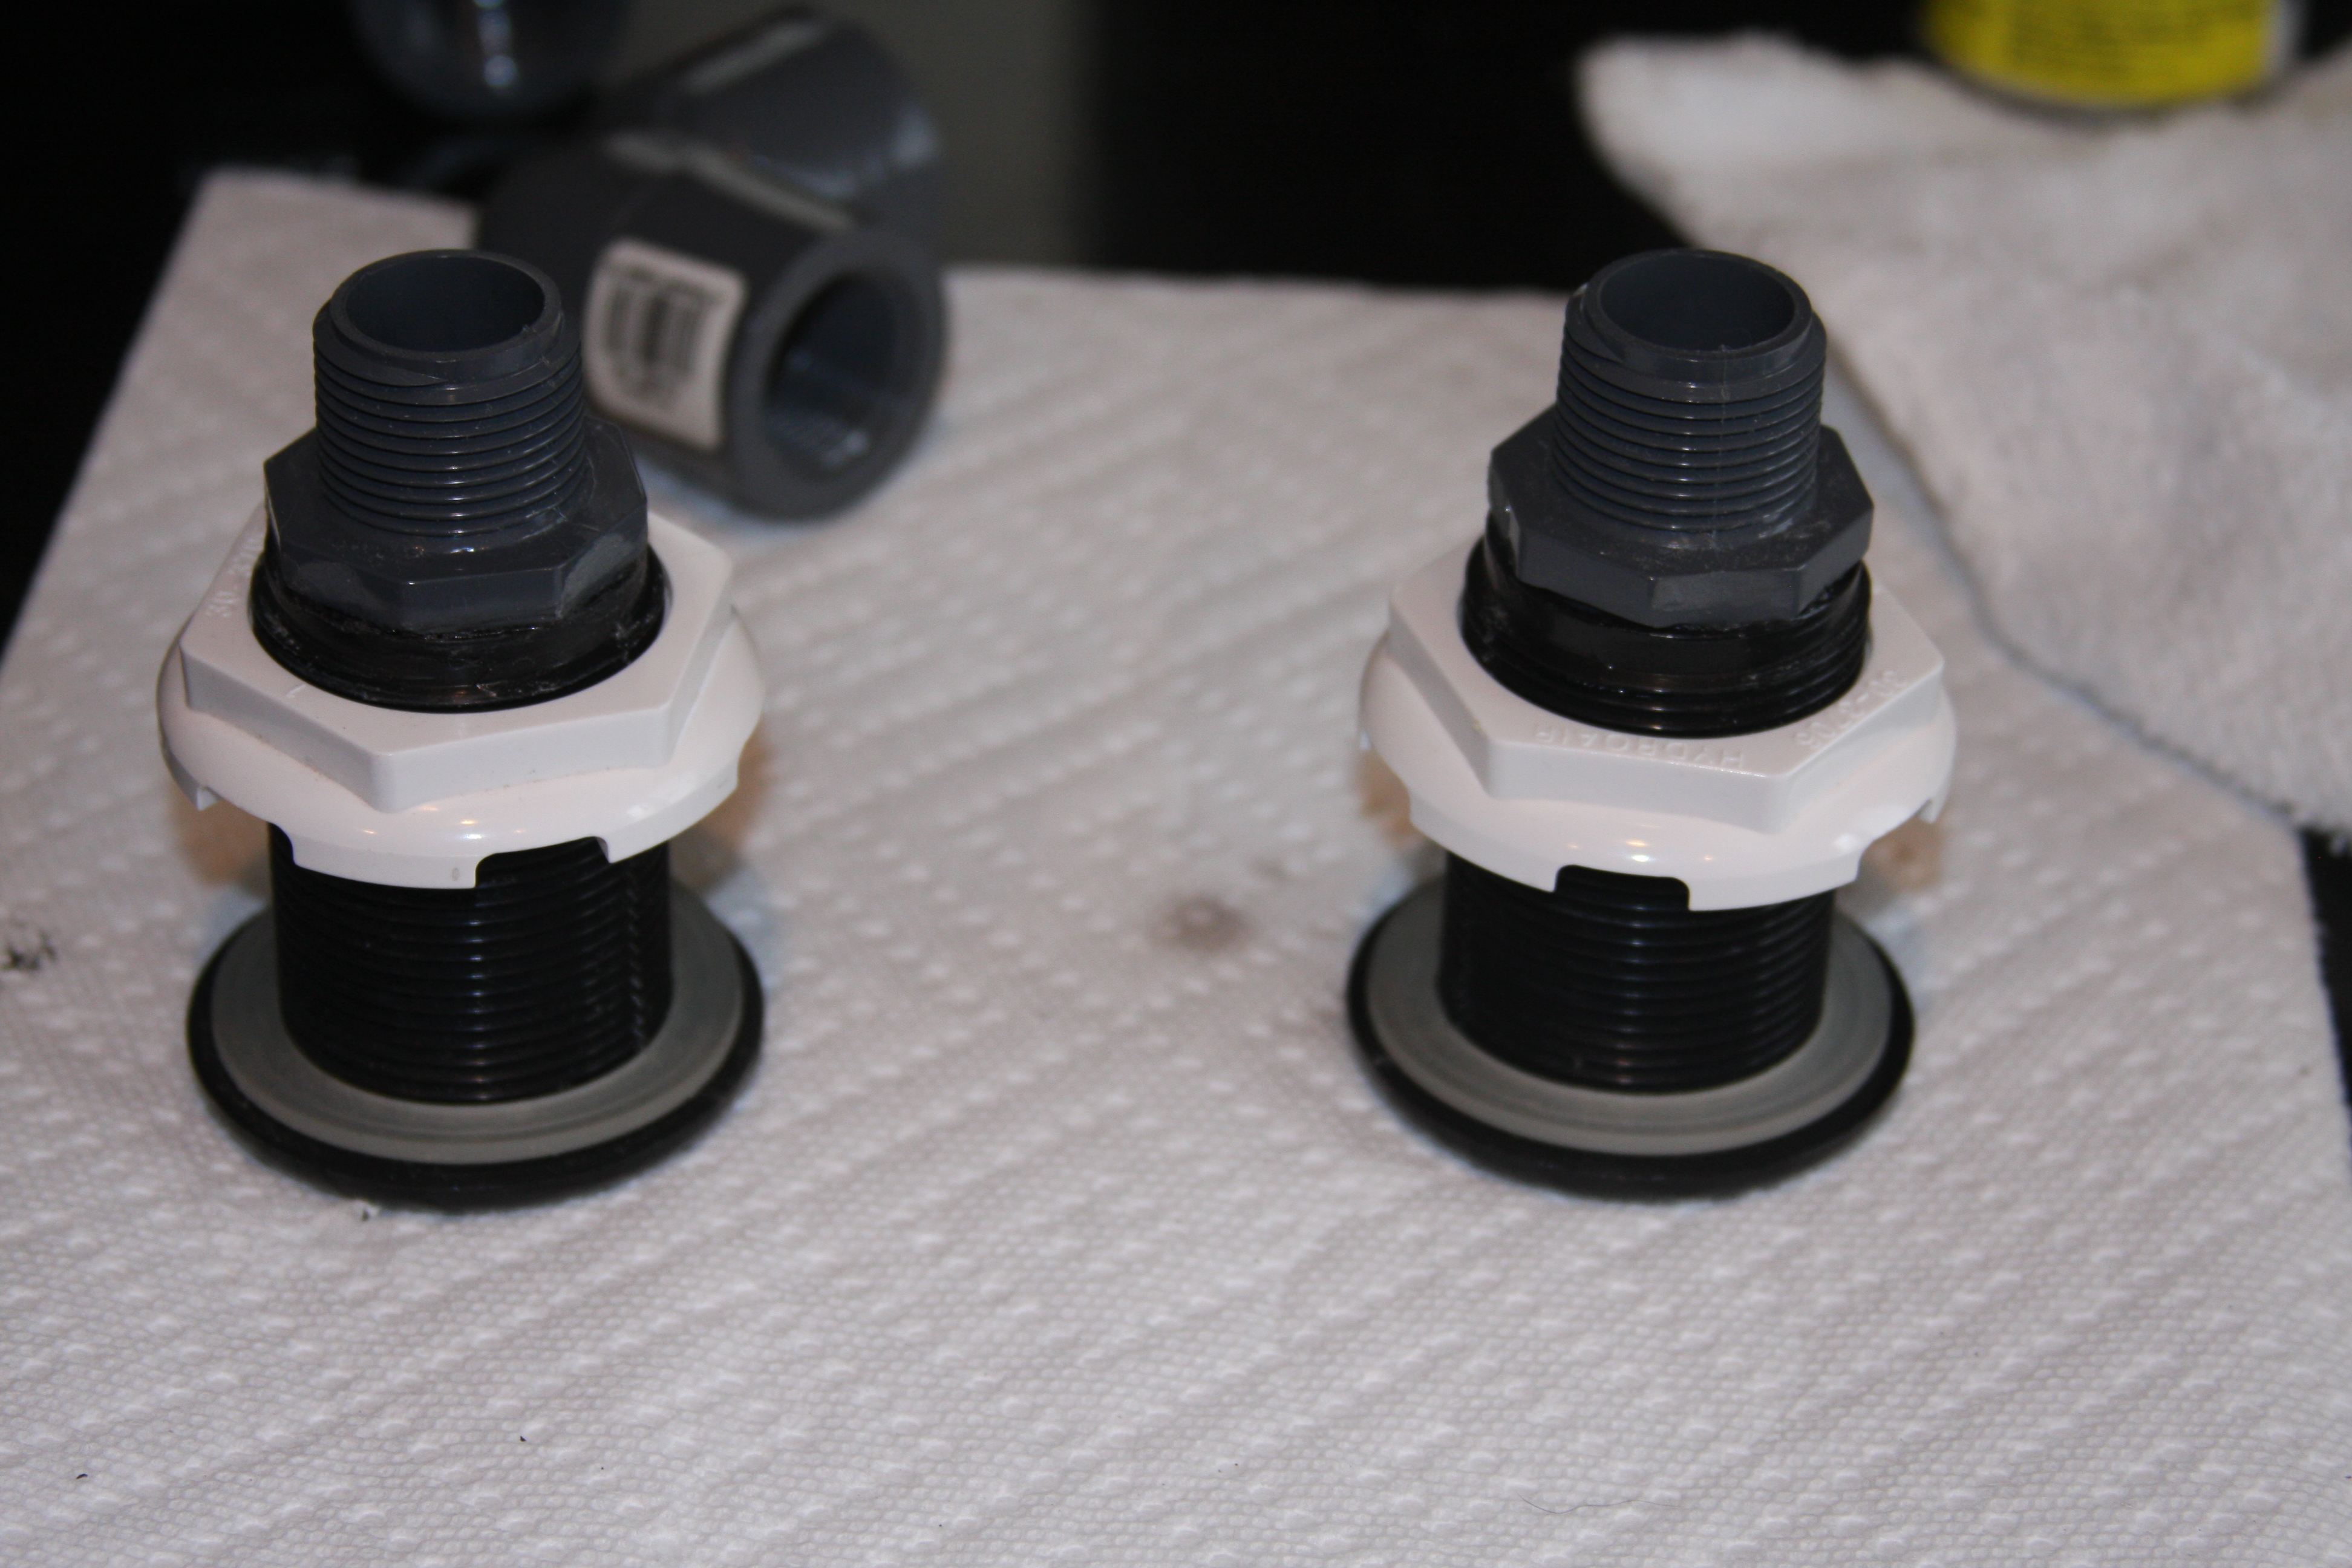
I THINK,...I understand you glued together this part:

I remember seeing the white part on the refuigium, but the threaded area circled below looks way too long to fit in the hole and tighten it to what, that looks like a washer? I thought it was like a big hollow nut and bolt until now.

So when you make the video you promised... be sure to show me how this part fits in that hole.
 

acrylic51

Active Member

Ok guys....The gray bushings that I shaved down, are now glued into the back of the bulkheads.....
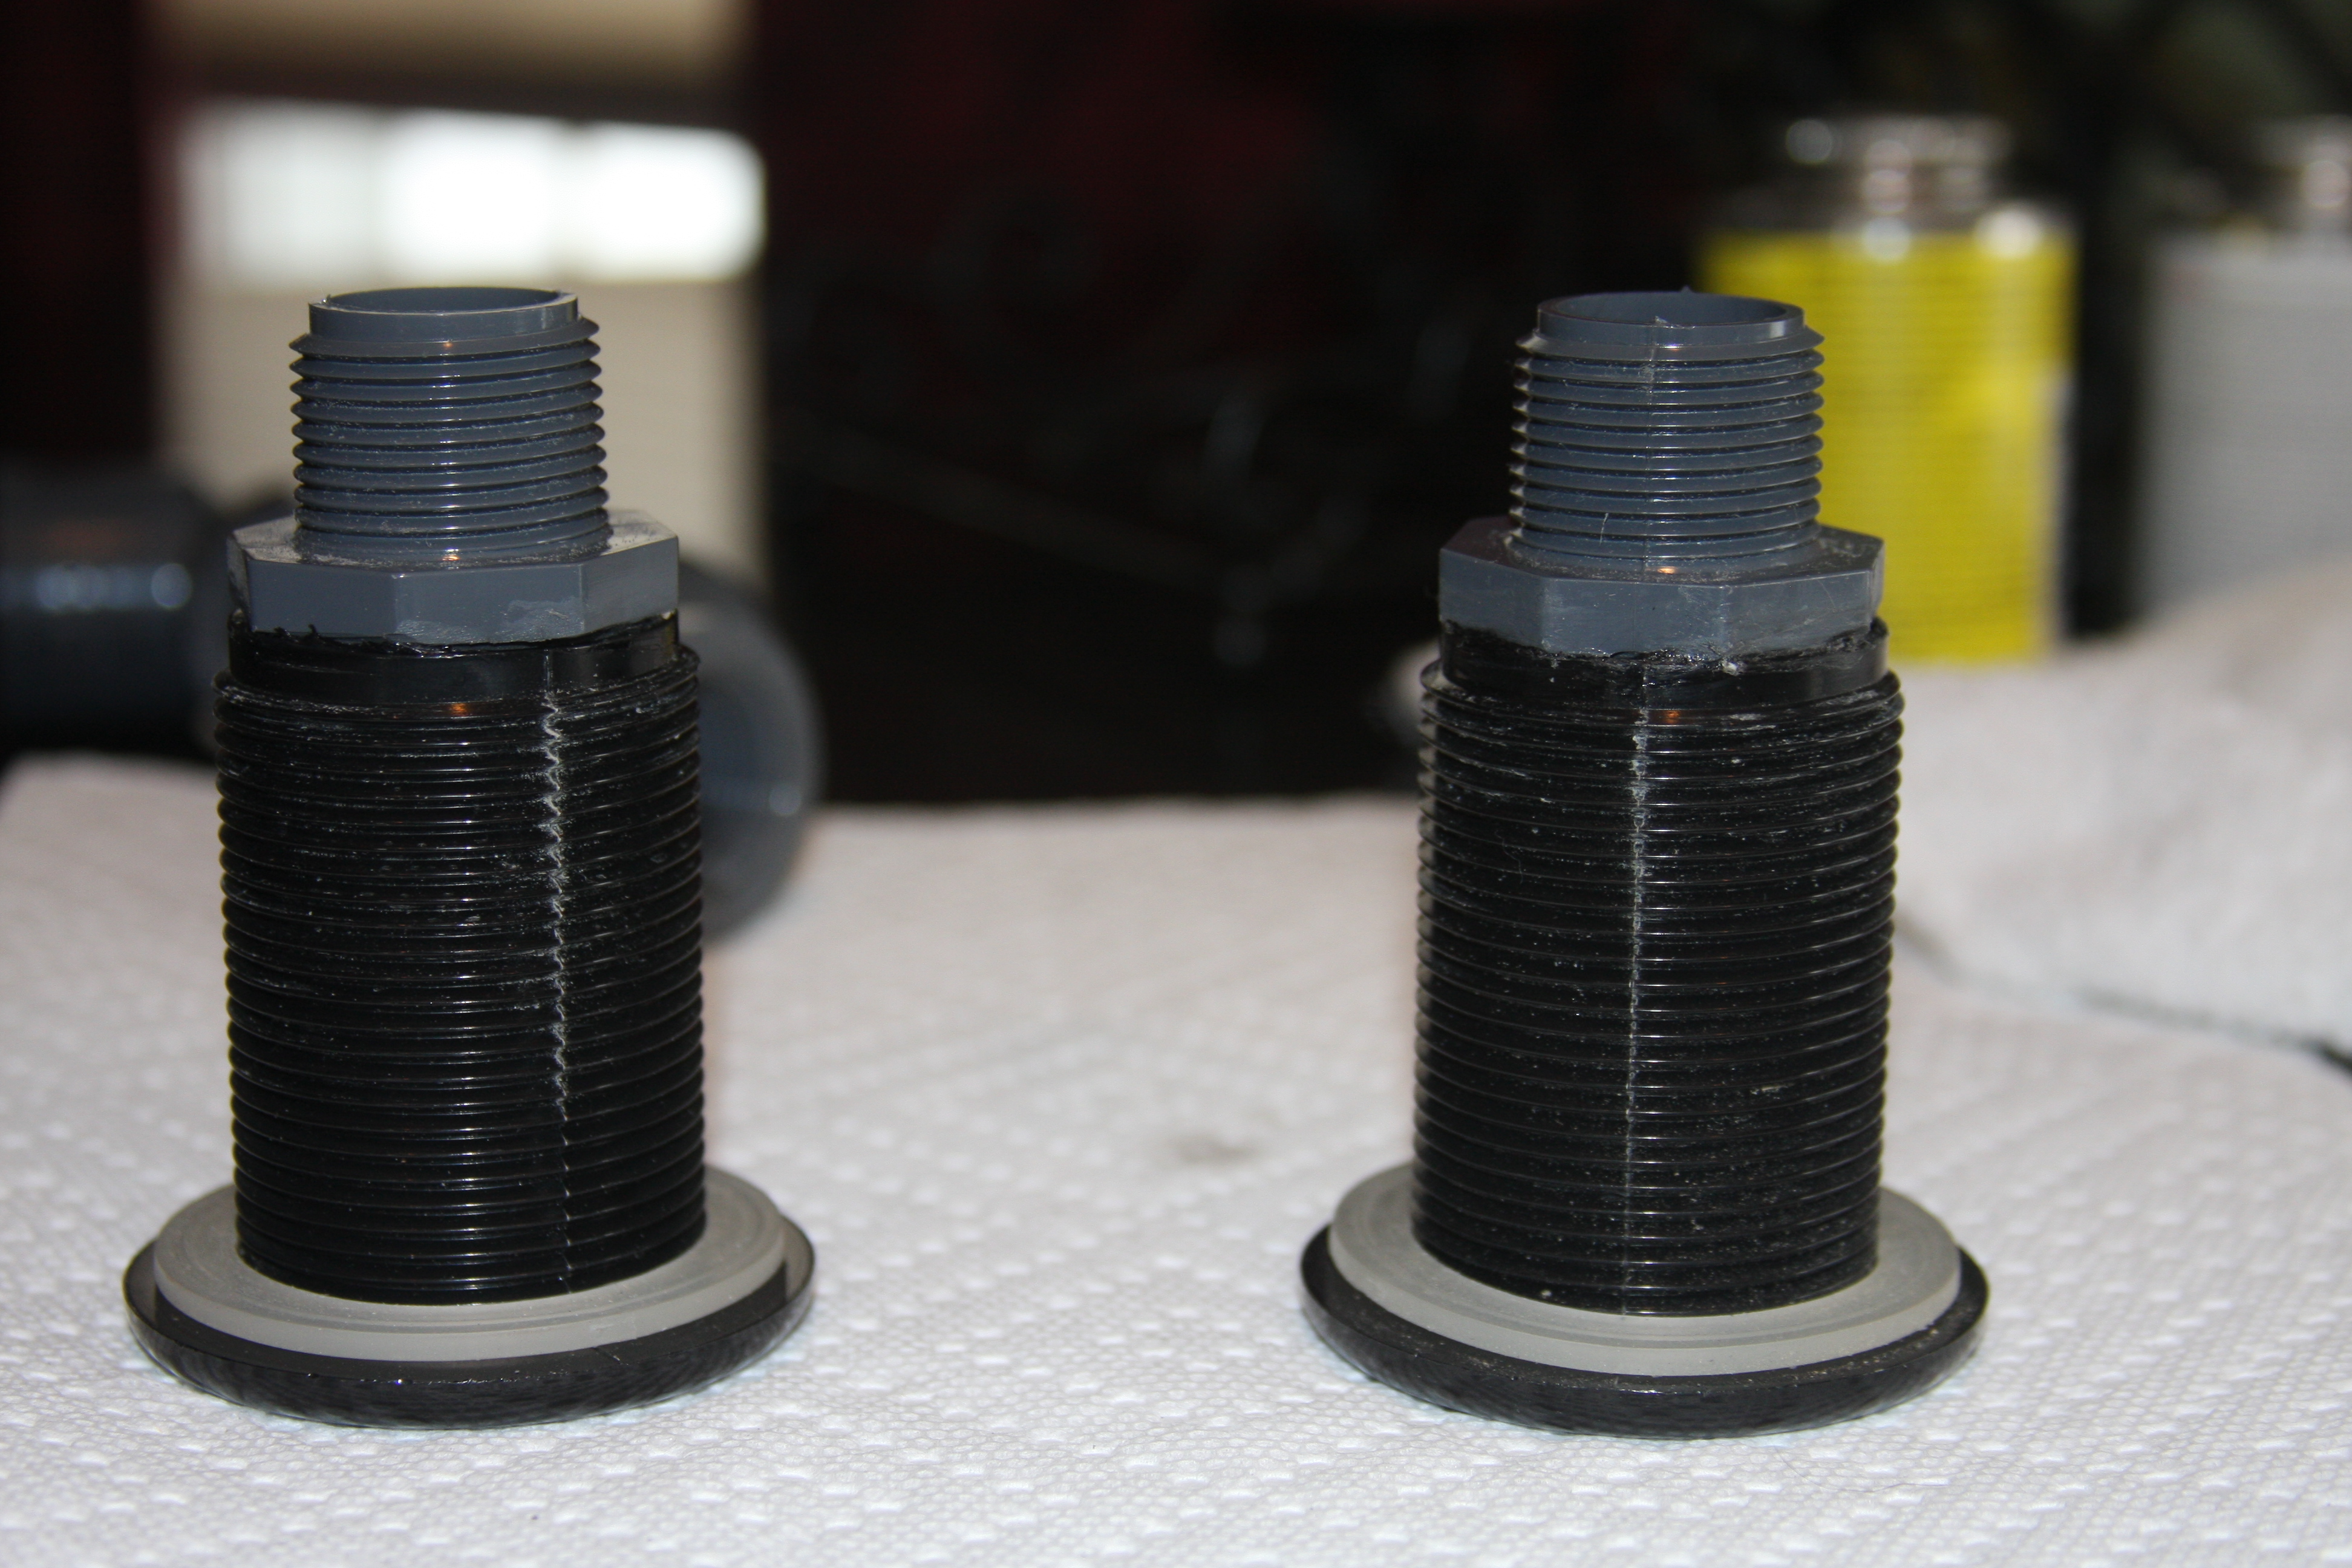
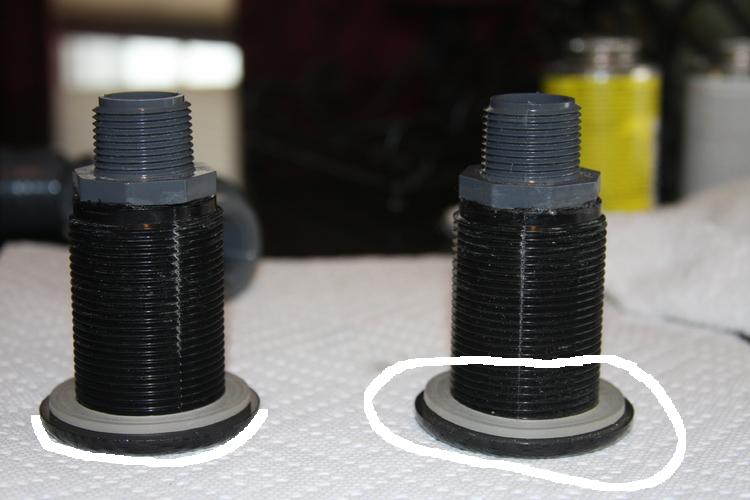
Here is another shot of the bulkheads with the bushings glued into place....Flower as you can see from this pic the "white" nuts can be removed easily with the bushings glued into place. You can also see at the very bottom of the pic the gasket (gray) piece on the bulkhead....That gasket should be on the inside of the fuge where the water will be. You always want the gasket on the wet side of the piece.
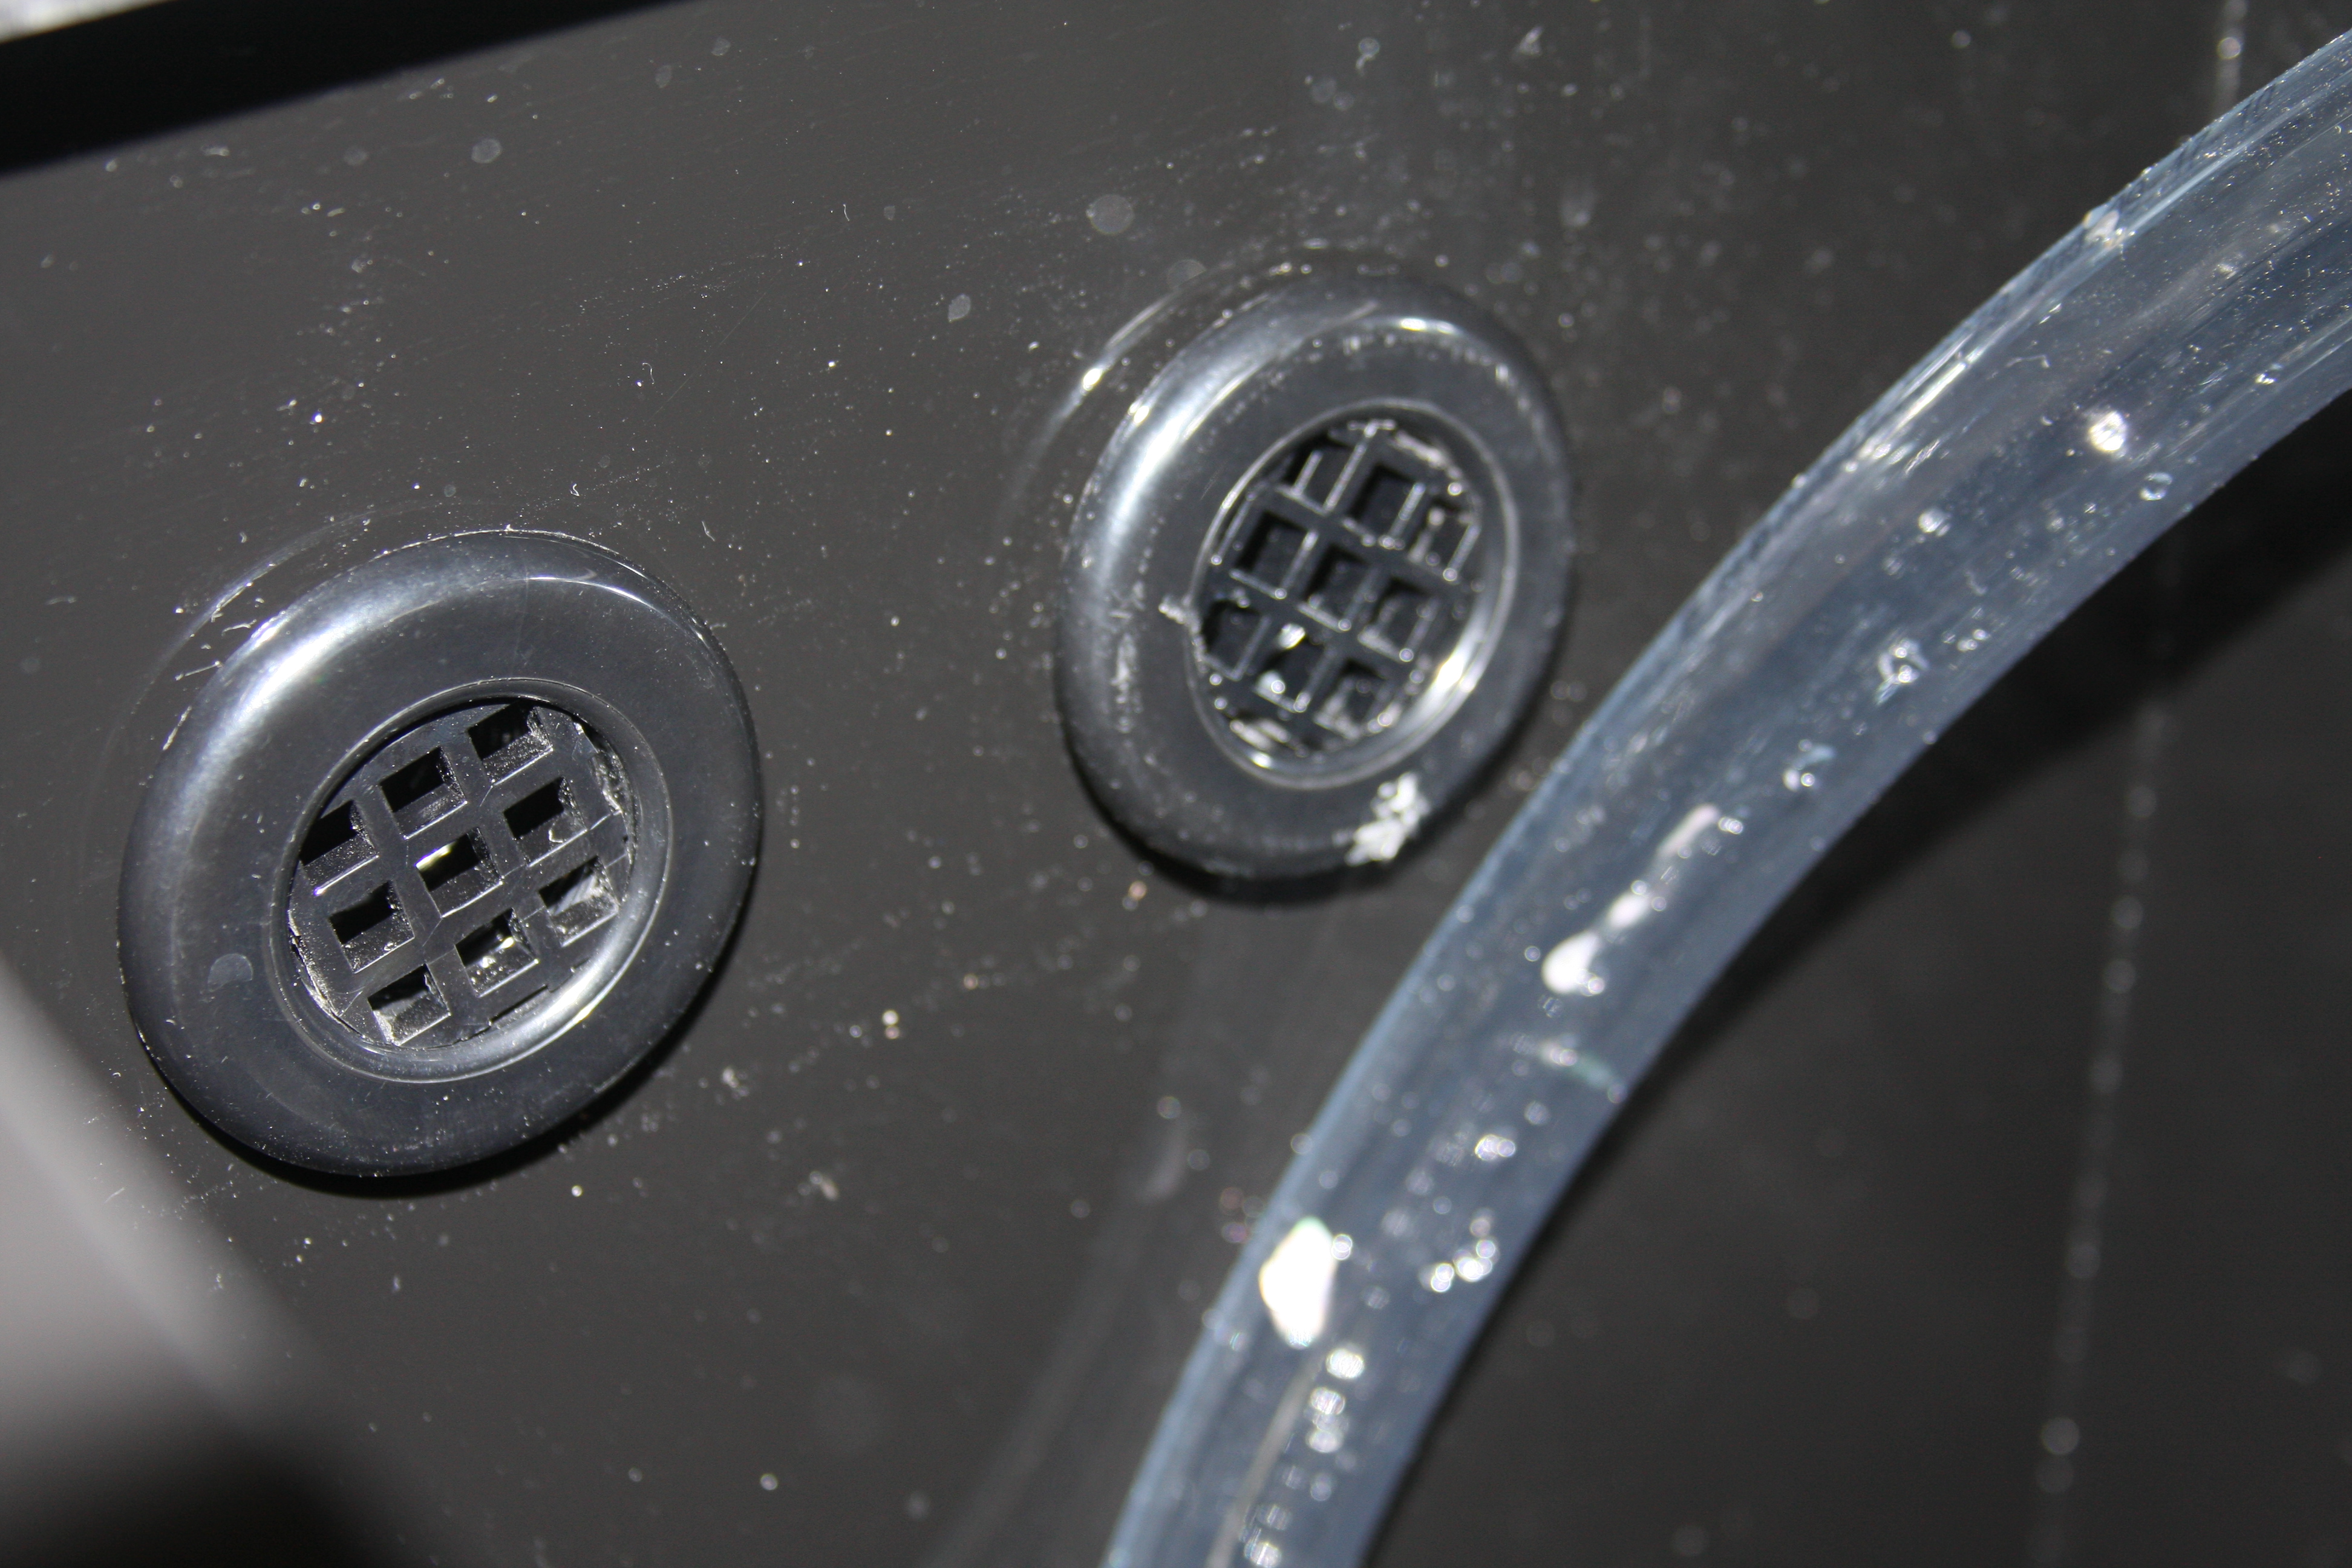
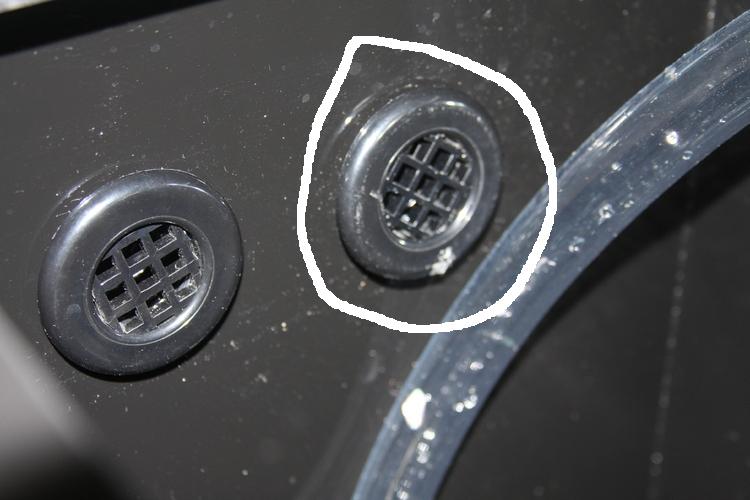
Here is a quick pic of the bulkheads in place in the fuge.....Flower again this grated side of the bulkhead will be on the inside of the fuge. That gray gasket I explained in the above pic is just behind the head of the bulkhead.
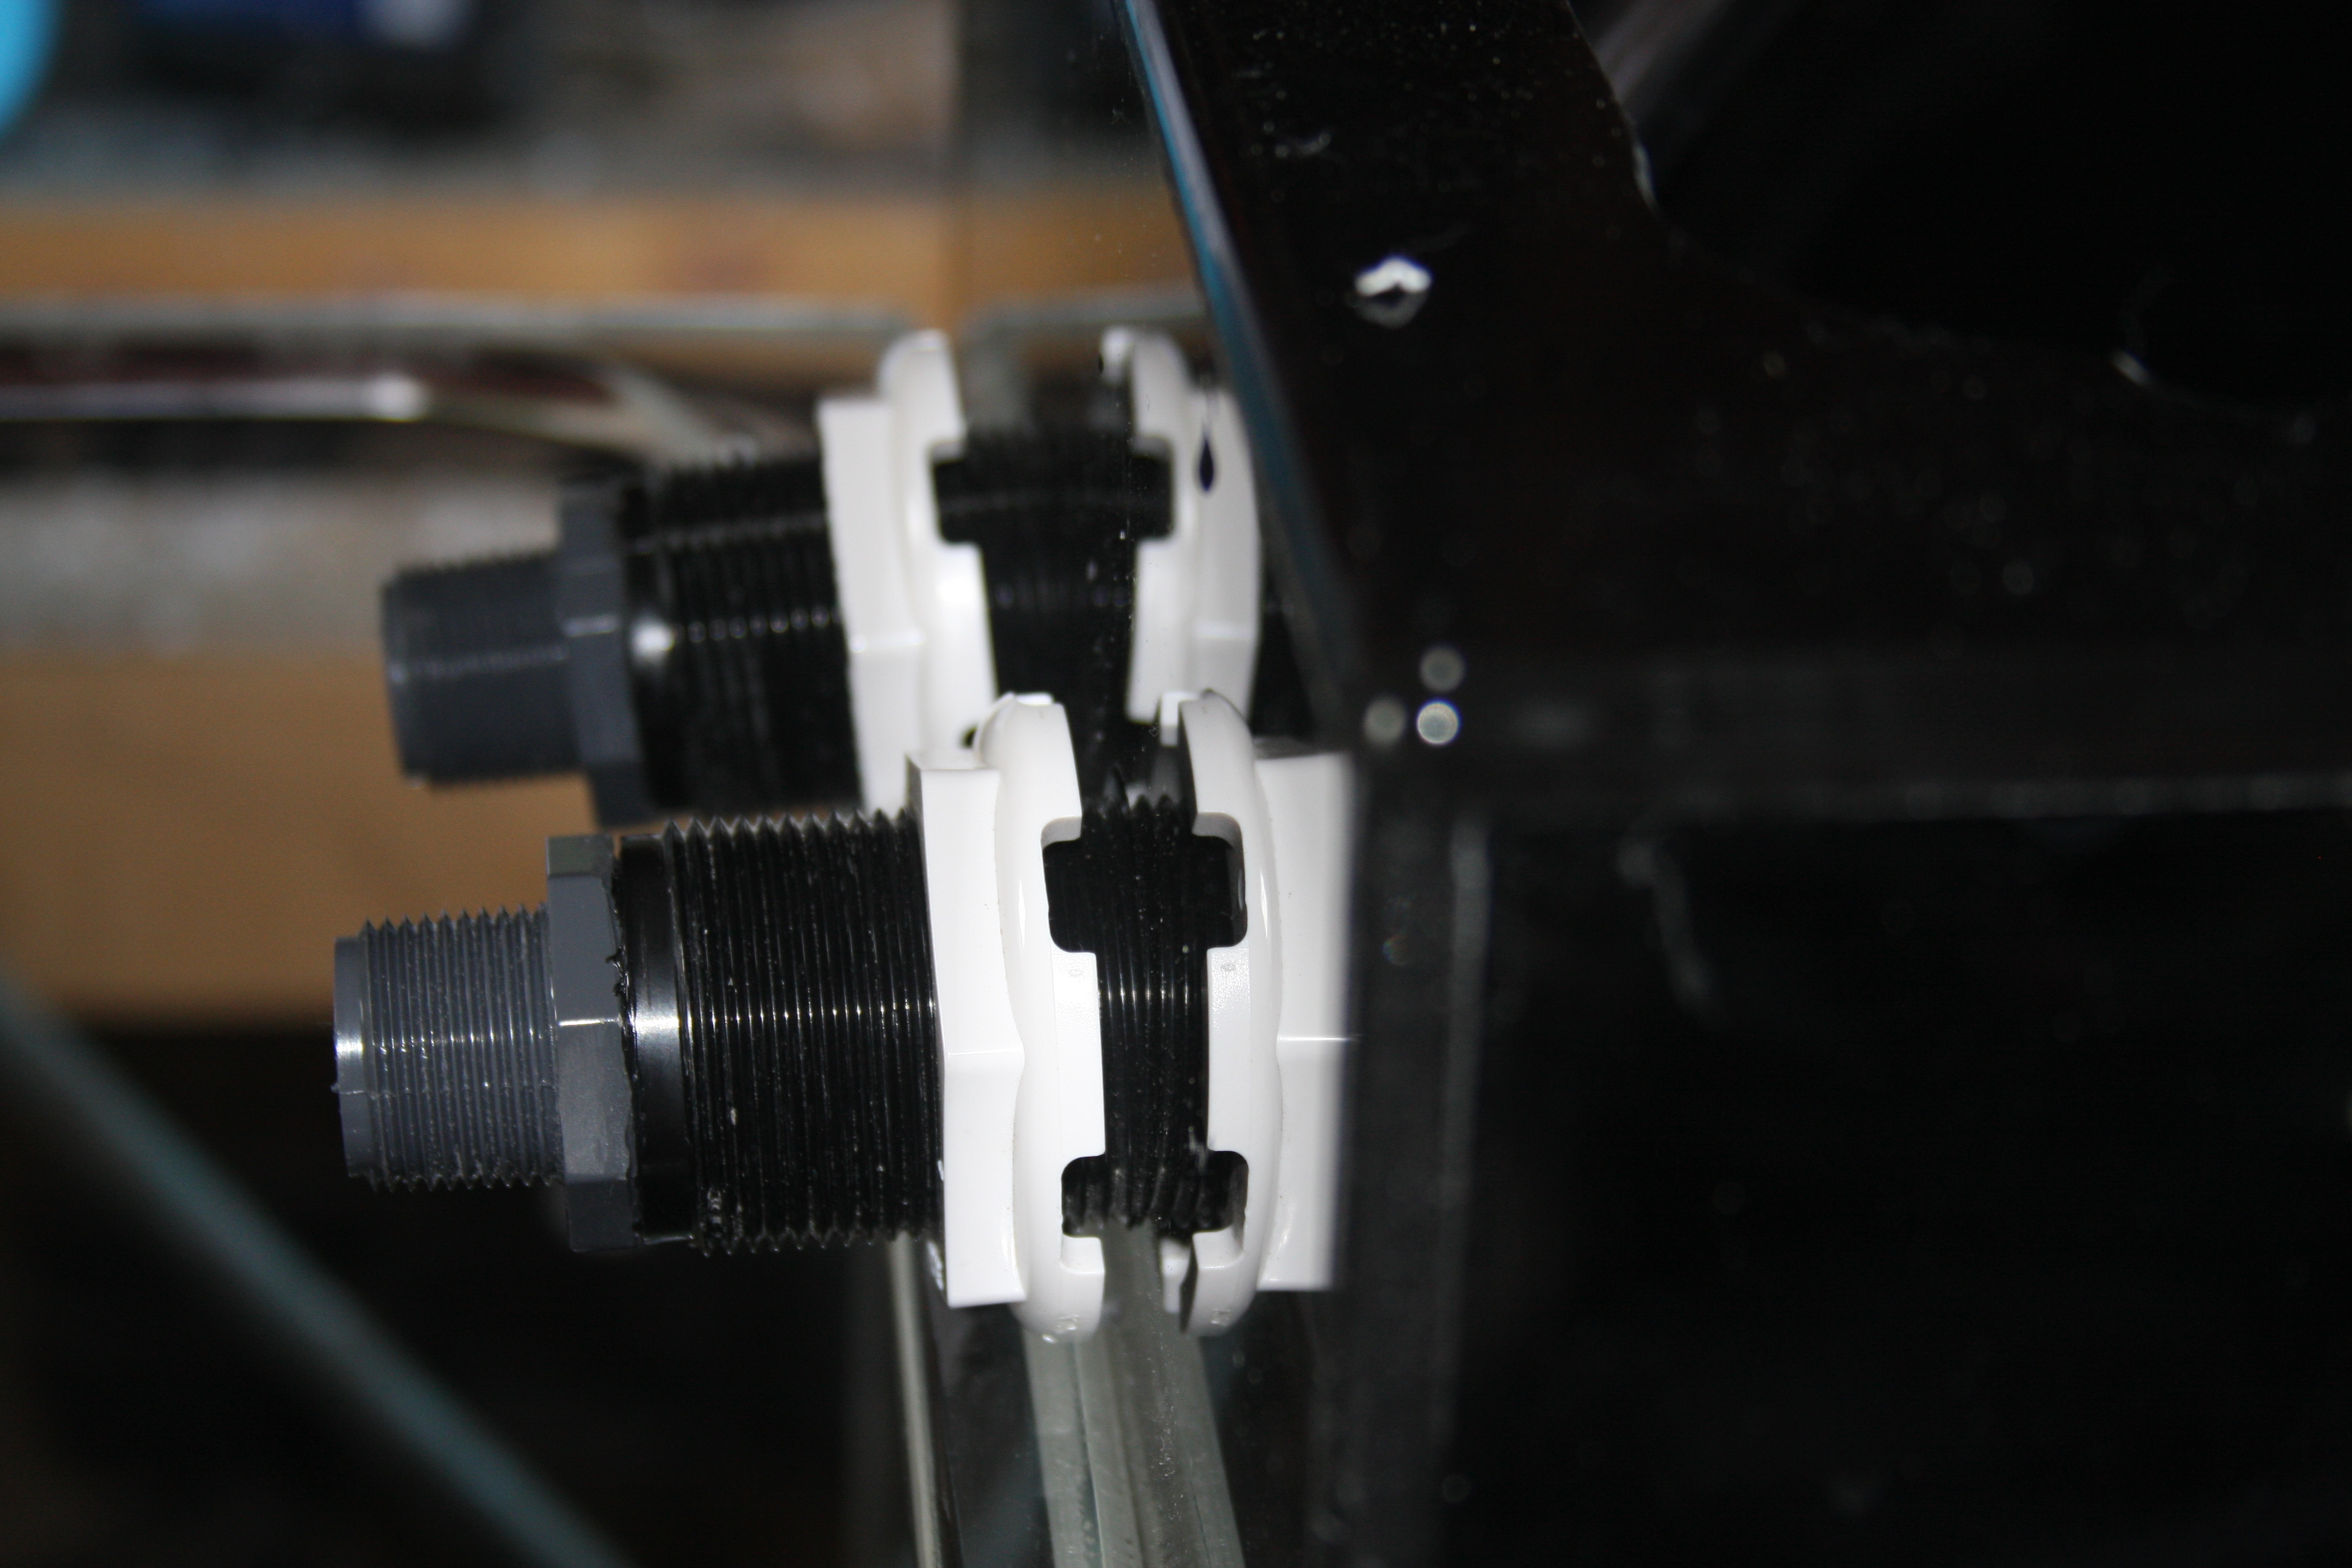
As you can see in this pic this is how the bulkheads go for the installation. I purposely left the nuts loose for a reason, and it will be explained a bit later in the pics......
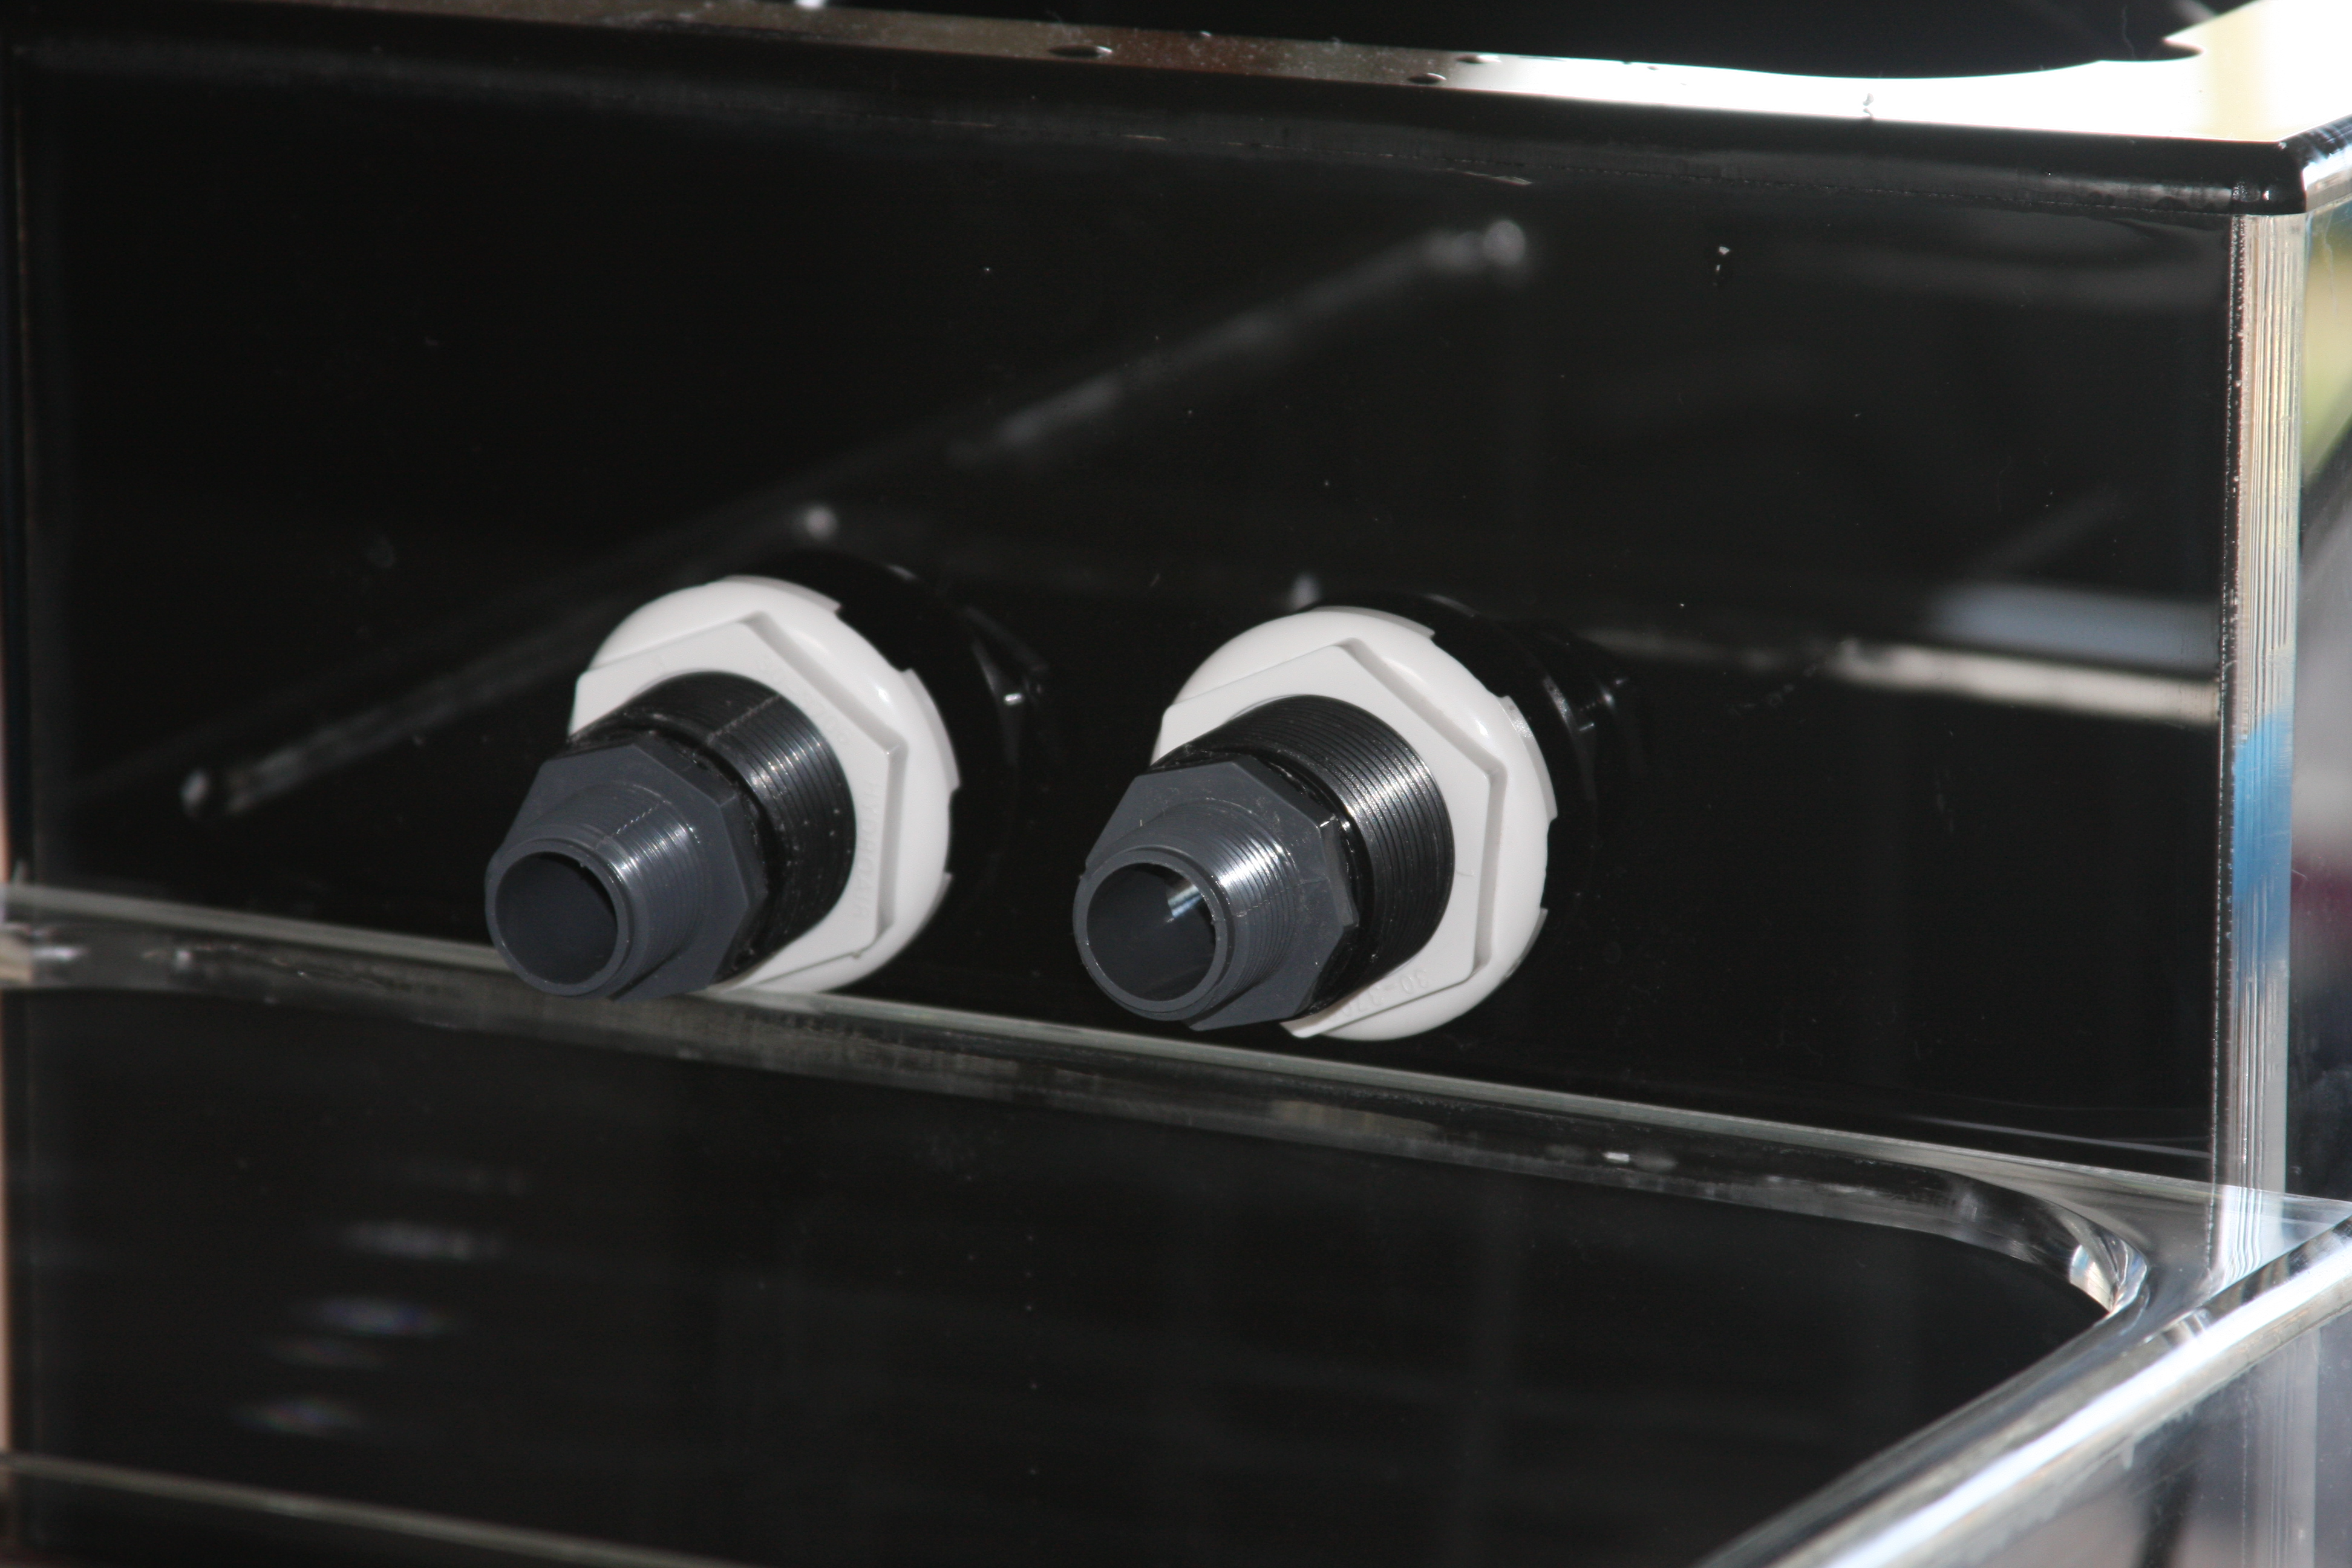
Again just another pic of what the bulkheads should look like as Flower installs them and prepares the new sump/fuge for install.....
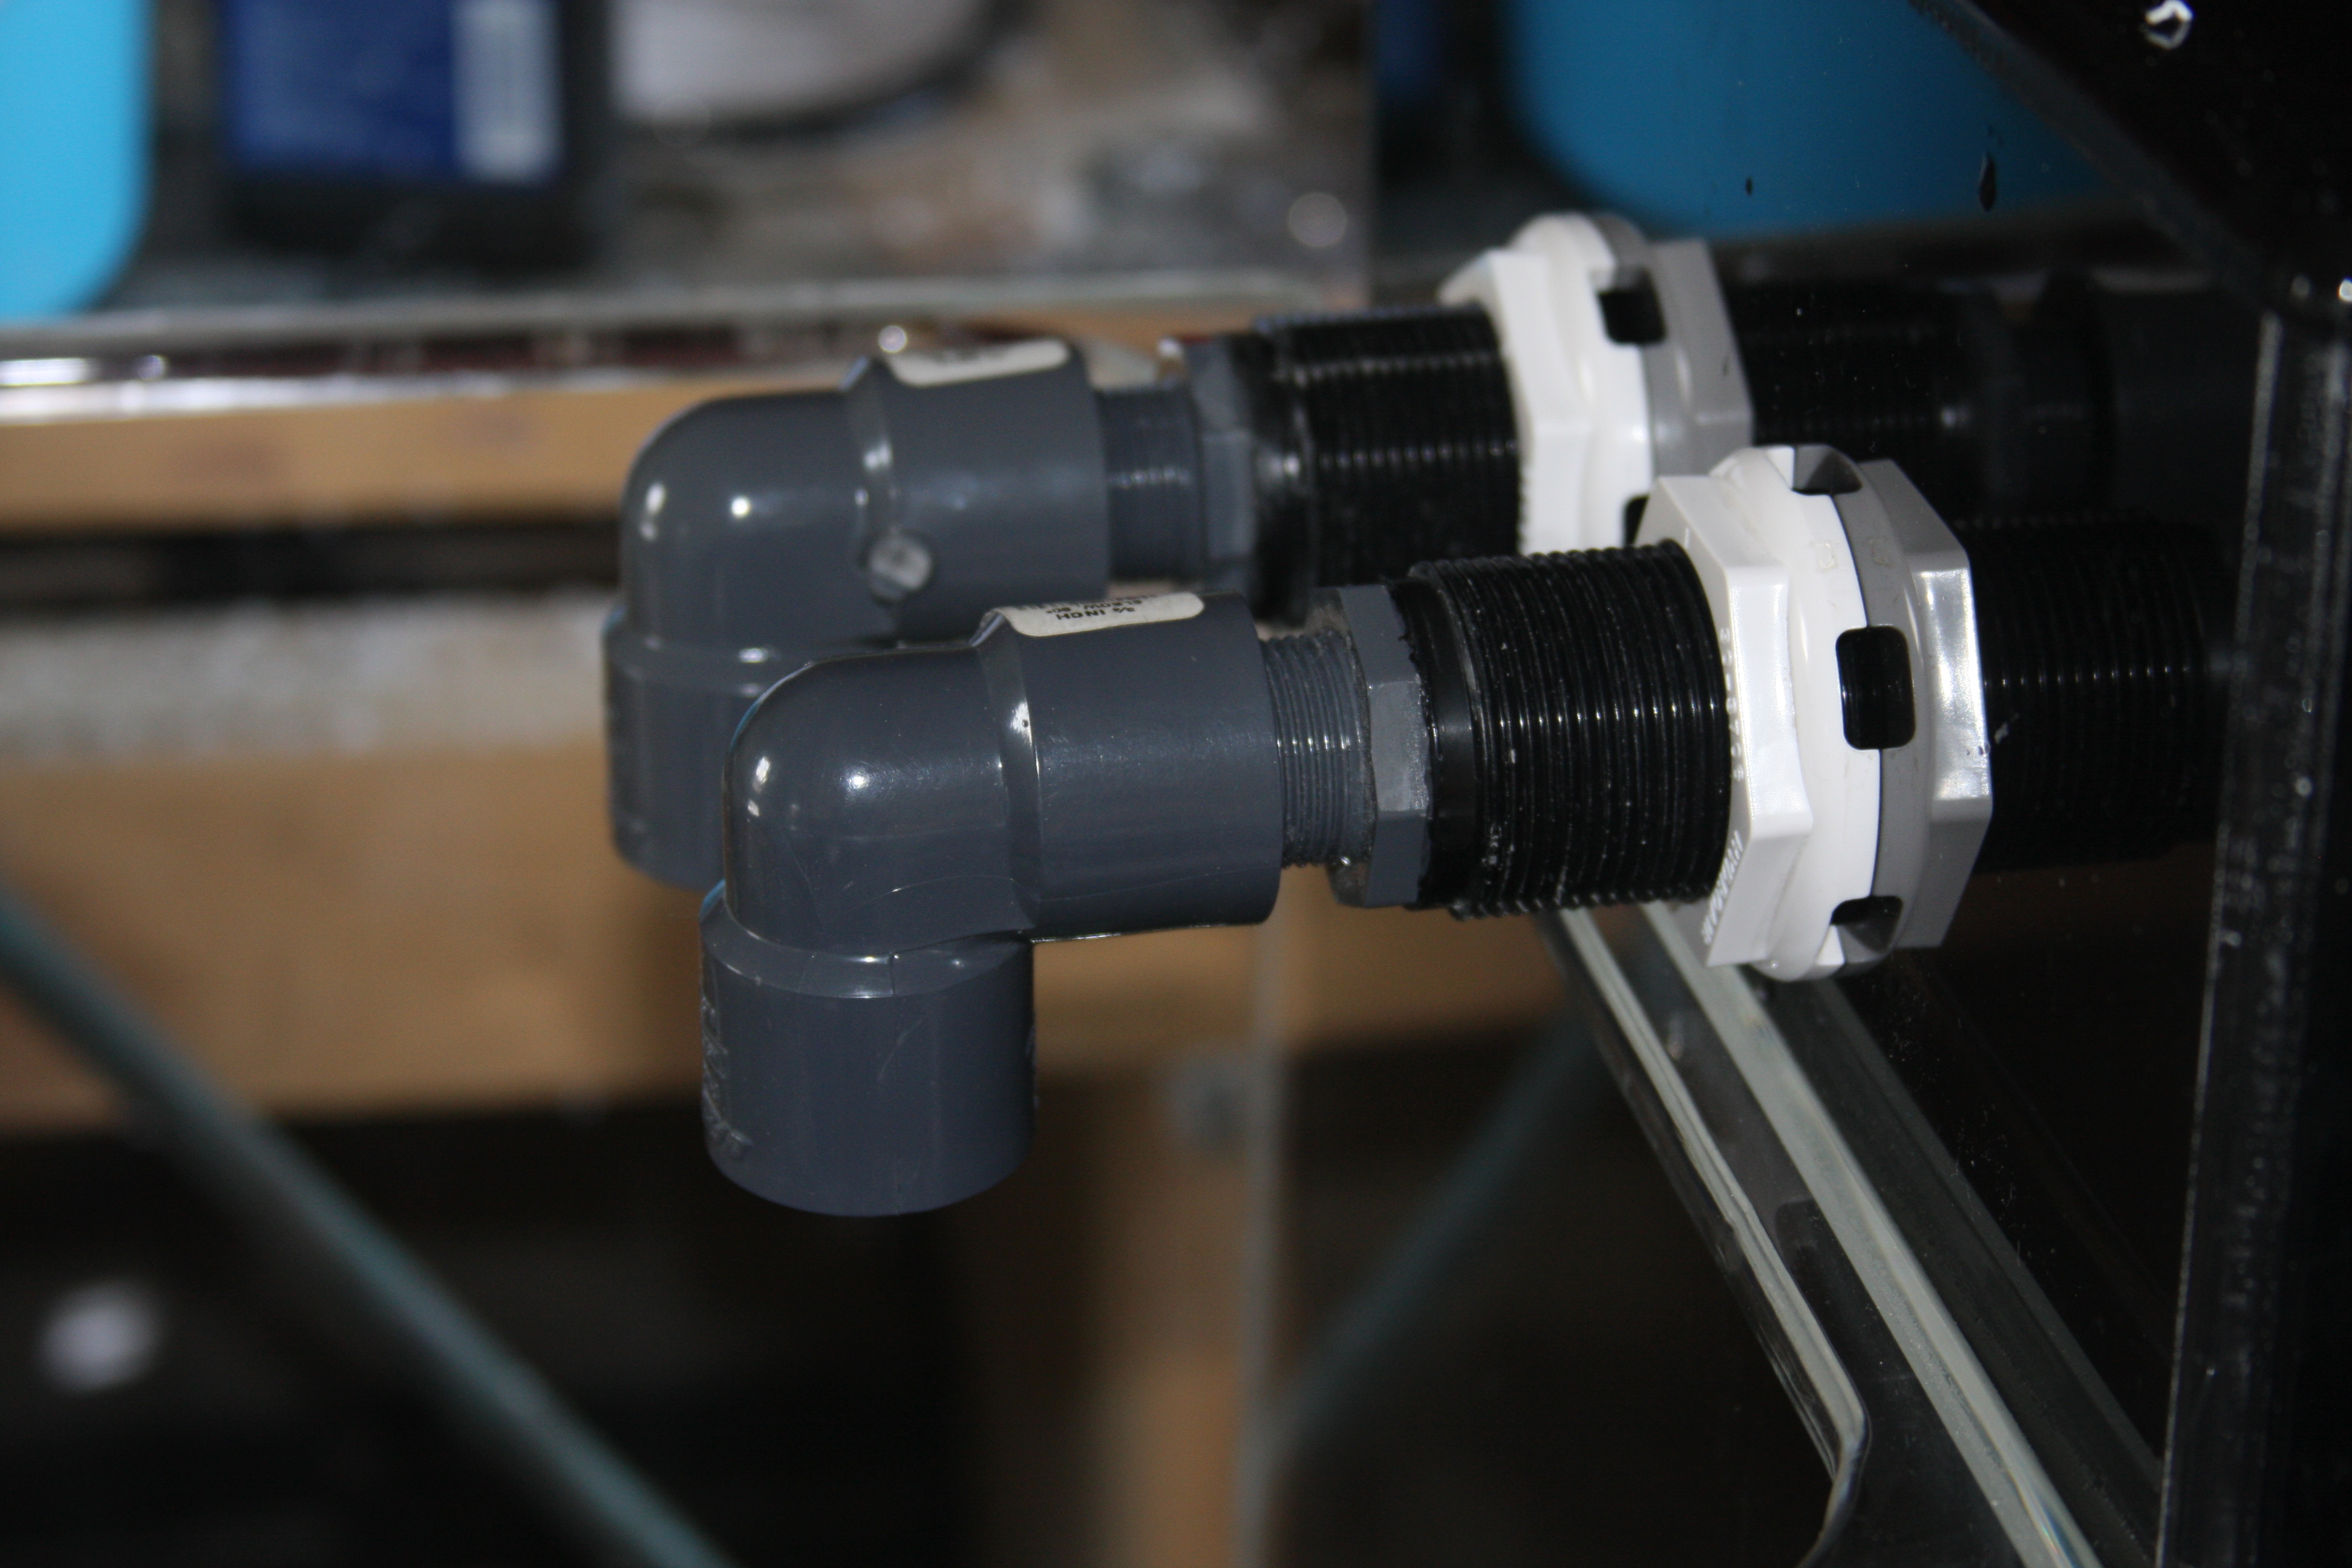
In this pic you can see that I installed the elbows onto the threaded bushings. In an earlier pic I had said about leaving the nuts (white ring) on the bulkheads a little loose. At this stage tighten the elbows on the threaded bushings to were their snug. For this part I didn't teflon the threads on the bushing. When the elbows are hand tight (snug), align the bulkheads so the elbows are pointing straight down as shown in the pic. At this point you can tighten the nuts on the bulkheads. I just go hand tight, and then snug. Just using my fingers.....
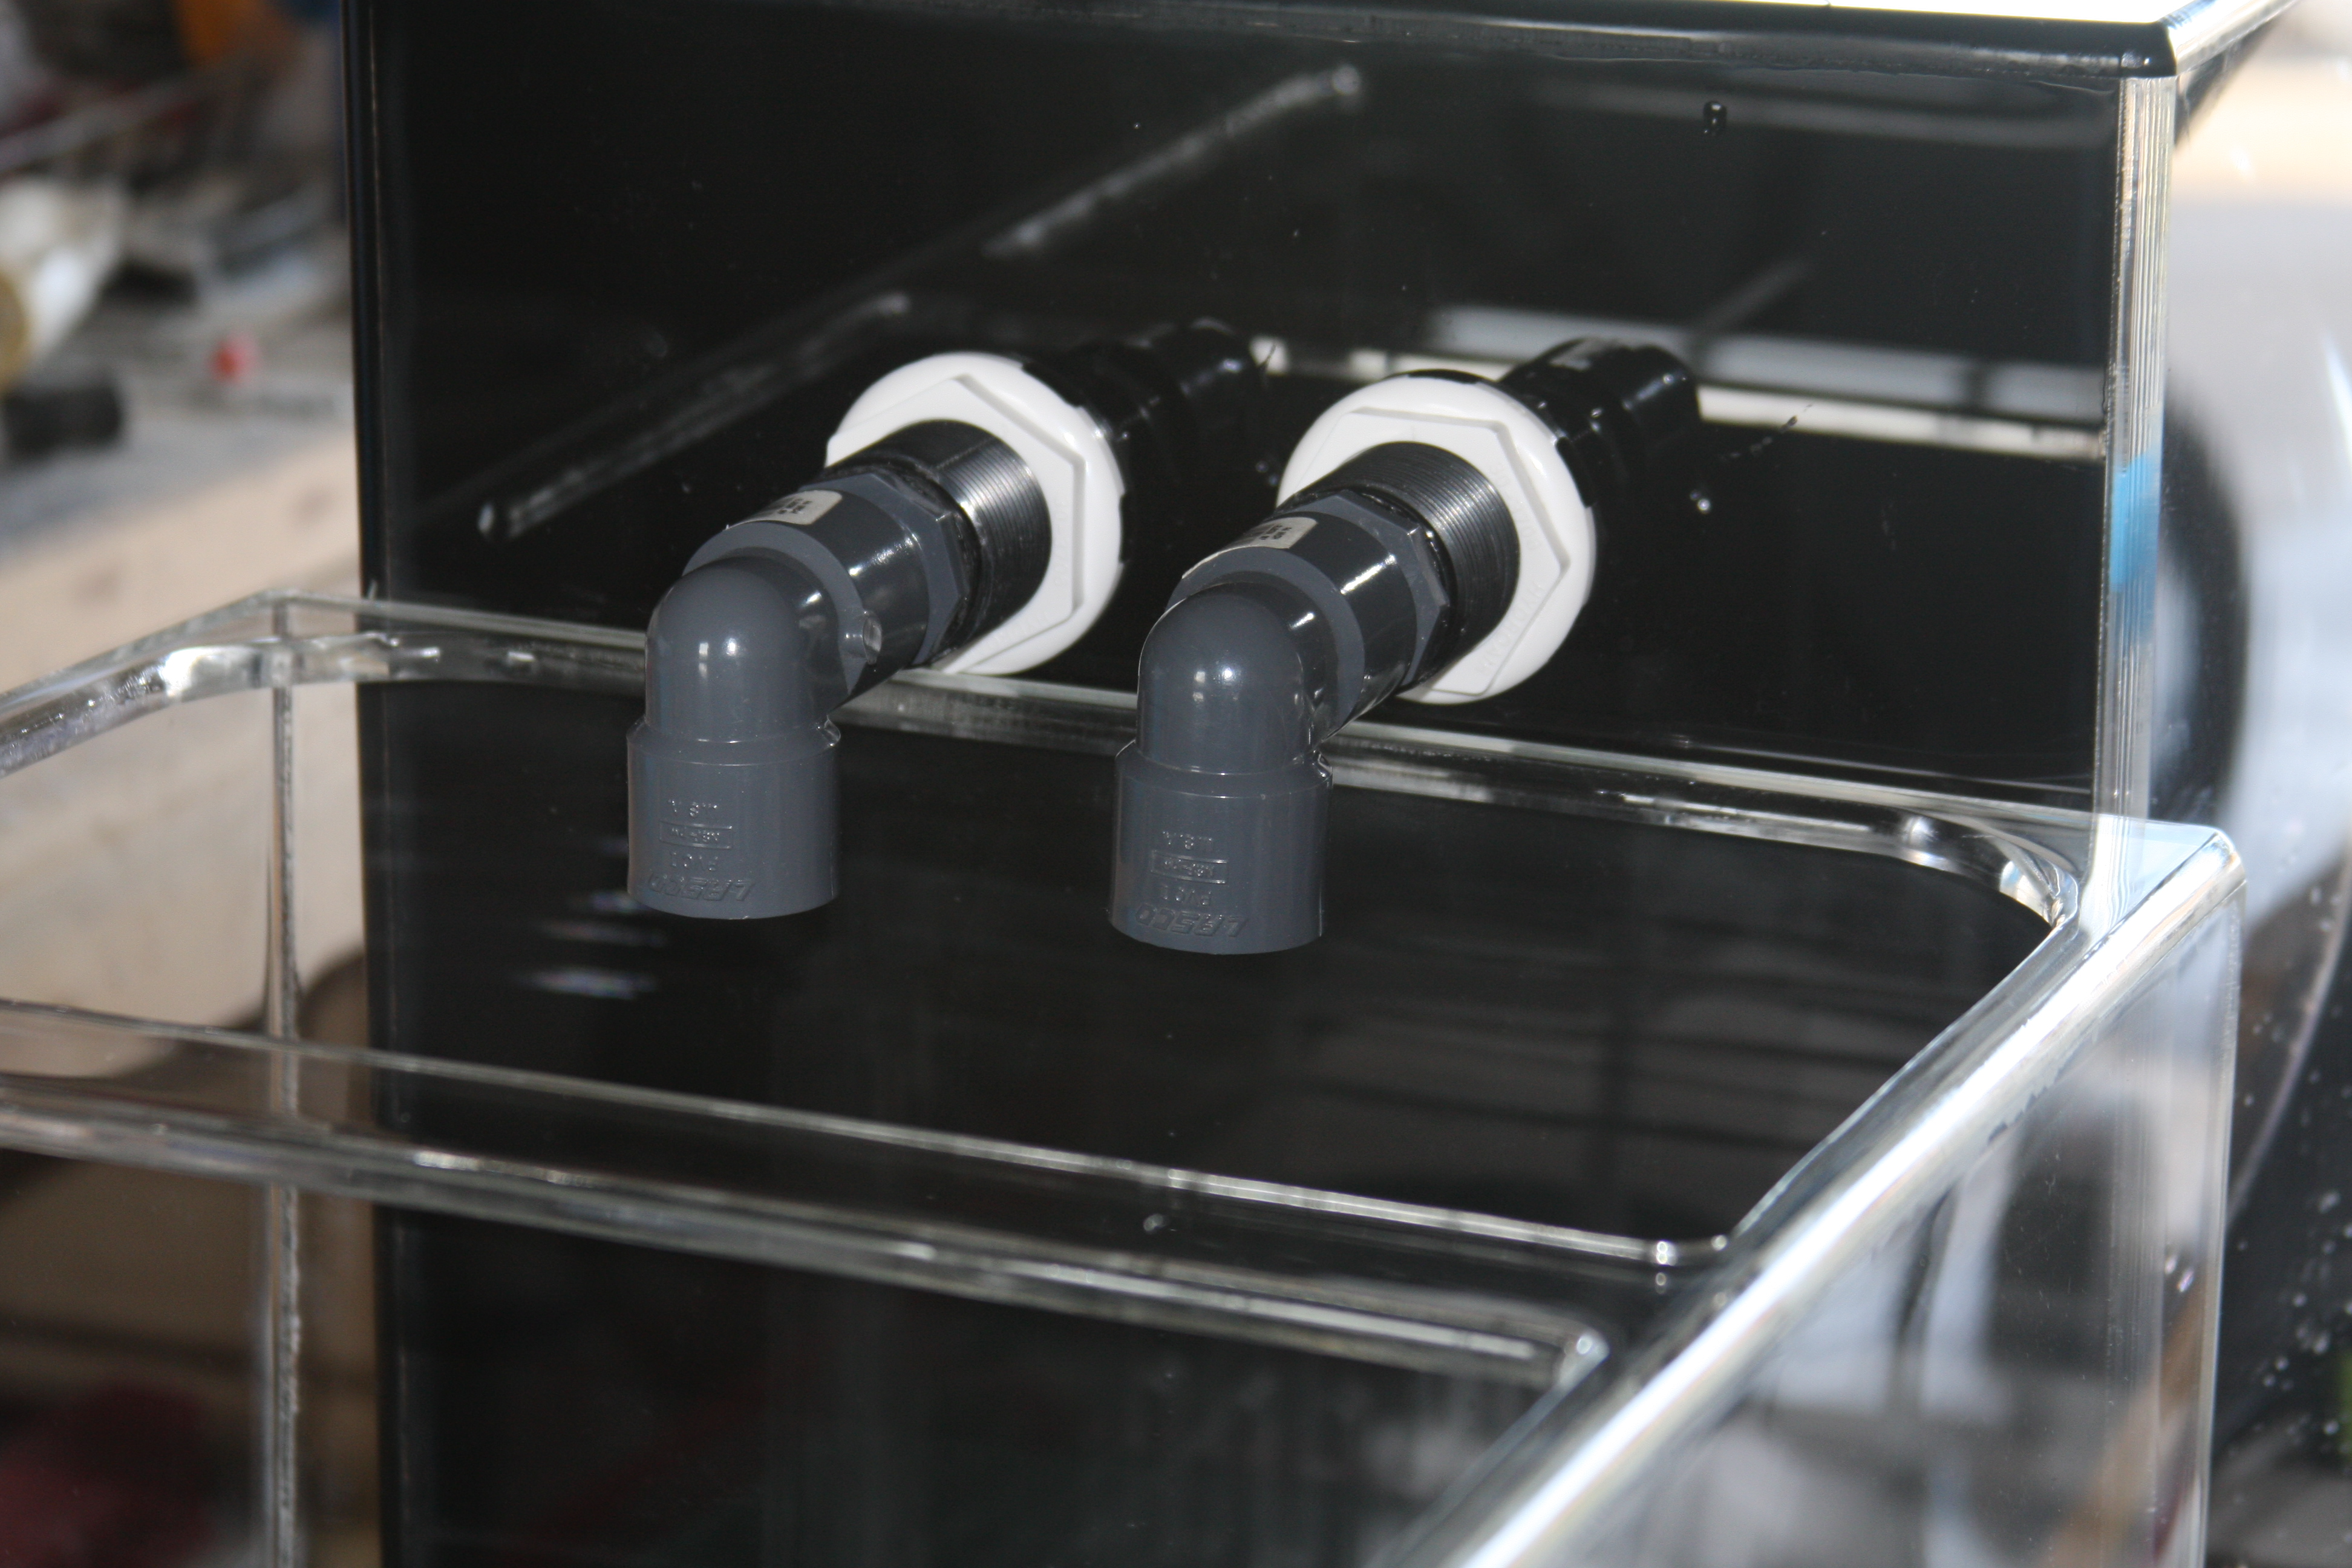
Here you can see everything is snugged up and ready.......Flower also in this pic you can see that the bulkhead and all other components easily extend into the return section of the sump, so even if there was any drips or leak it would be over the return section of the sump.....
rc="https://forums.saltwaterfish.com/data/a/a2/a27466d4_IMG_0012.JPG
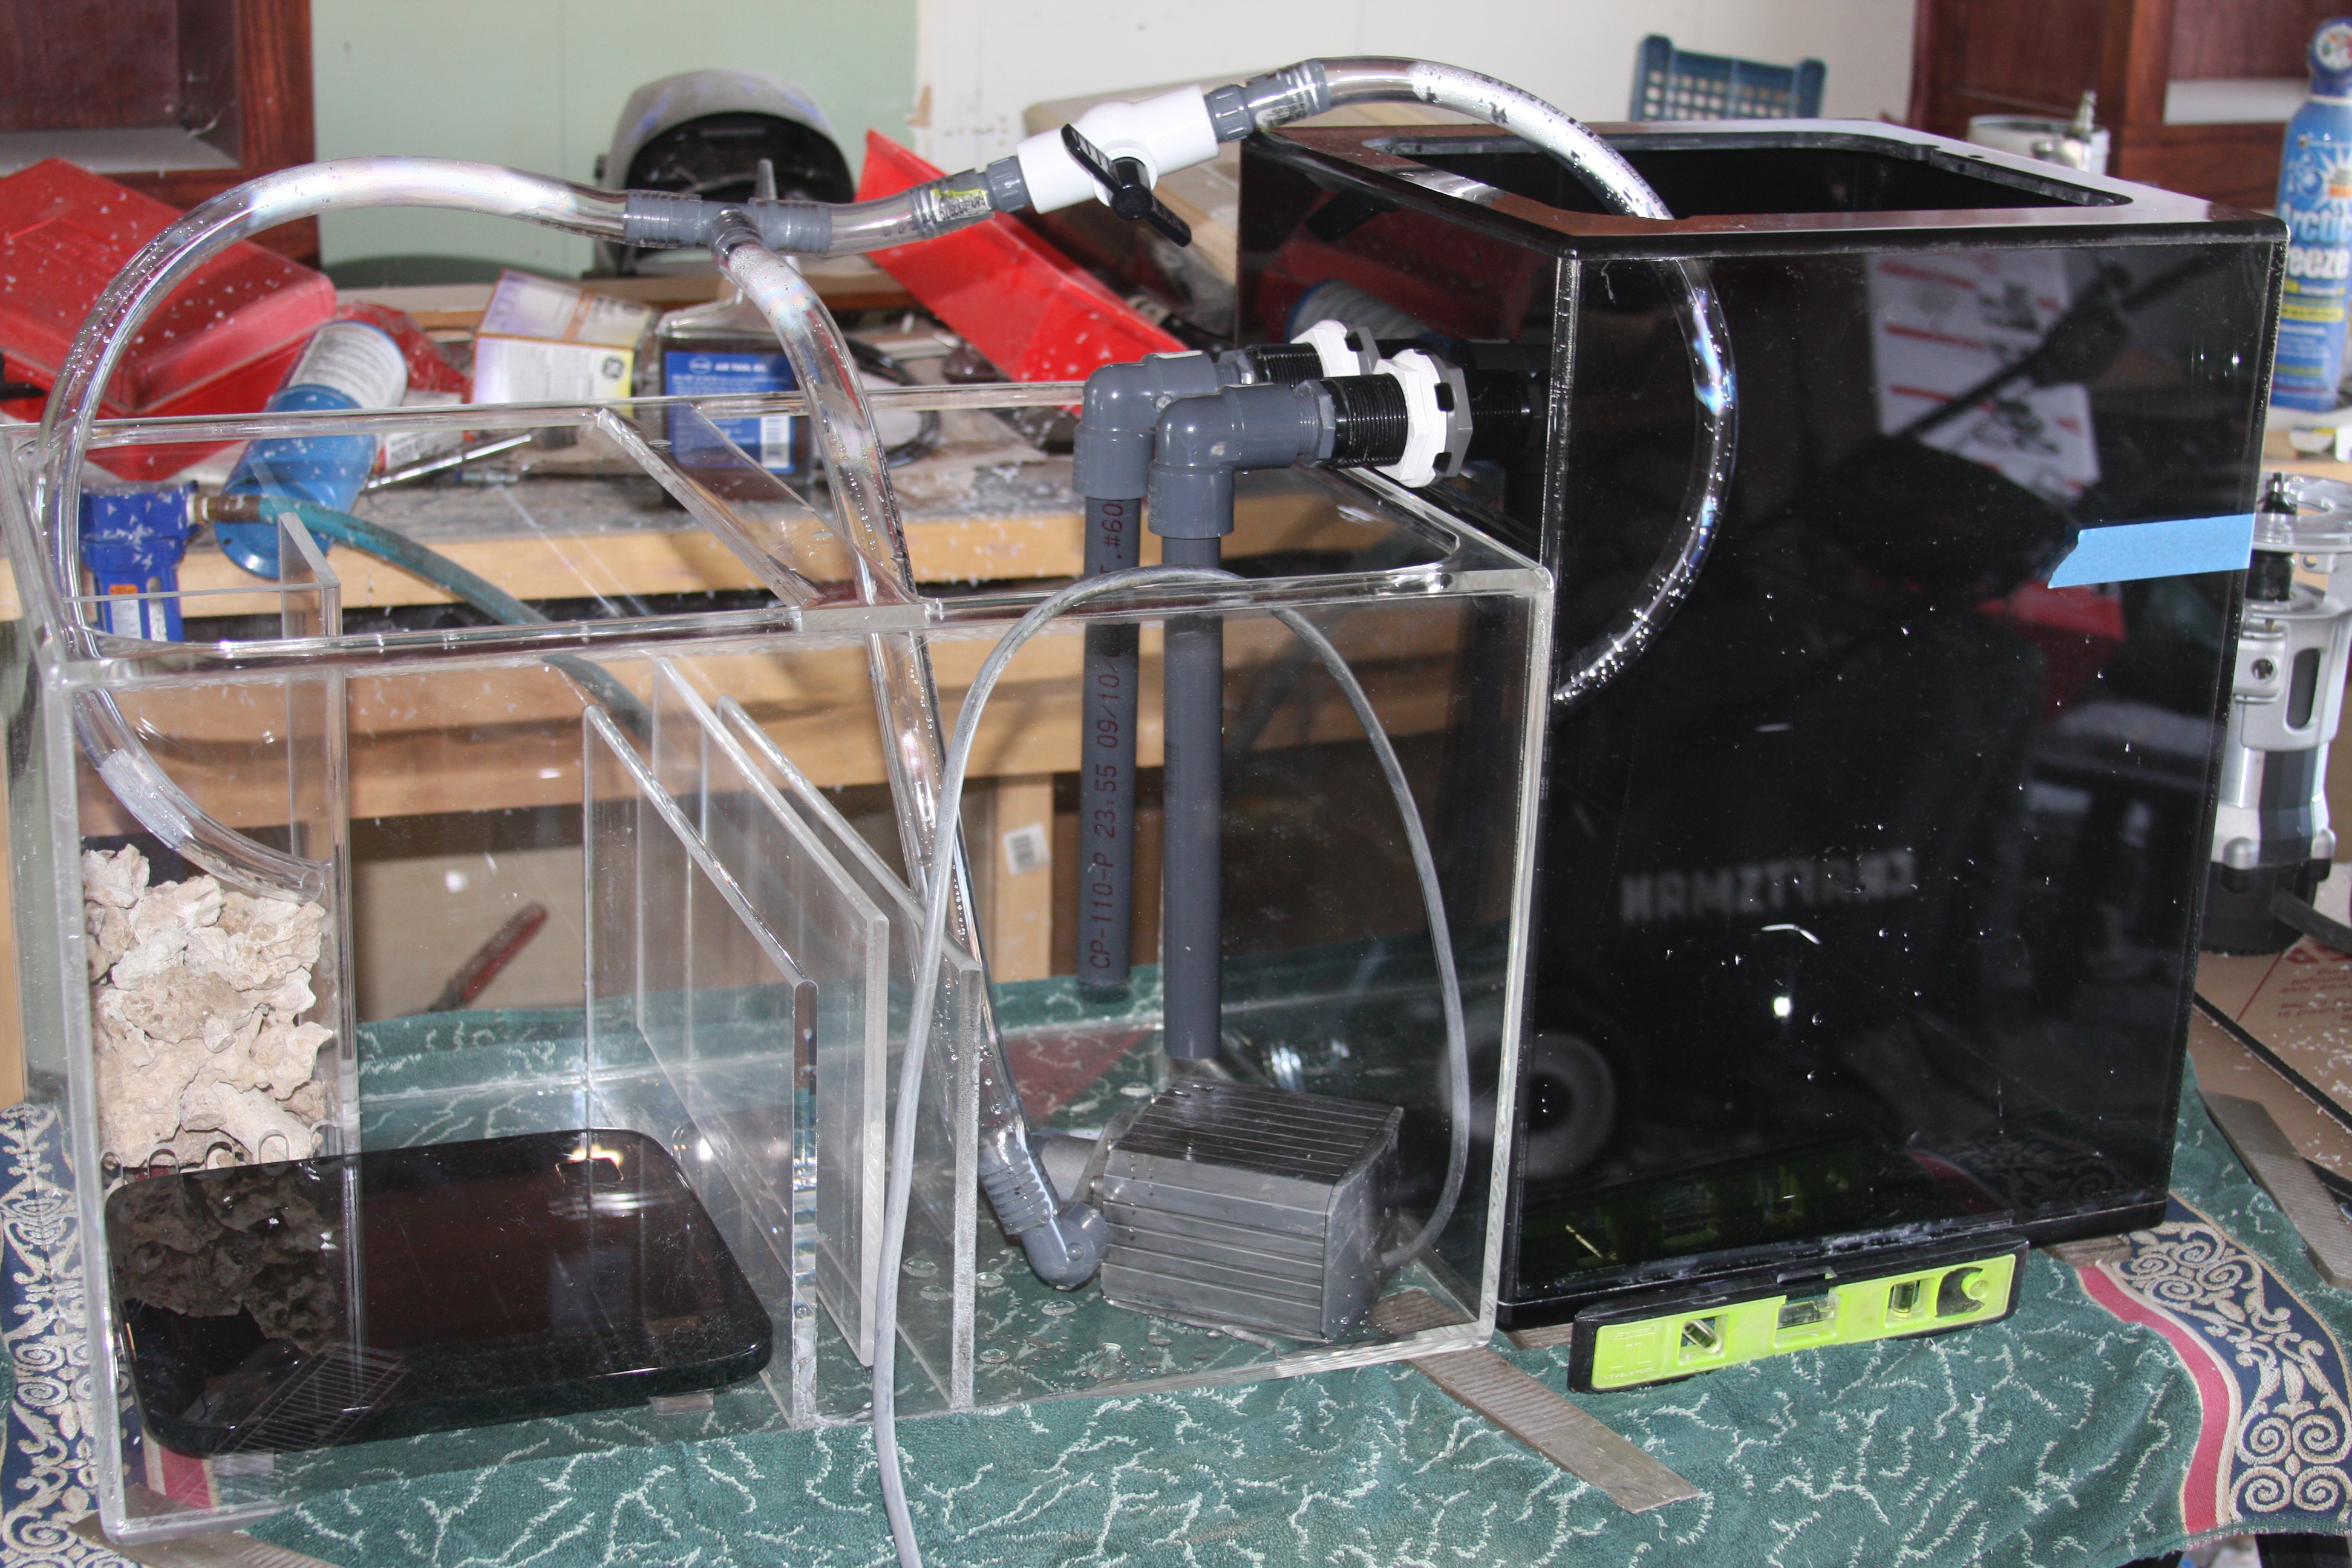
Just another shot of the pieces together, and in this pic you can also see the down pipes installed in the elbows.....This will prevent any splashing from the water being returned back to the sump from the fuge.....Also Flower this pic will confirm, that all joints from the bulkheads actually are over the return section of the sump.......

Currently the sump/fuge setup is in the garage being run.....I have to get some pics taken and a video shoot for you guys, but I stole a Mag 12 and running it for roughly 4 hours now....I've run the Mag 12 just straight through the sump and slowly brought the fuge section on line.....I don't have tons of flow going through the sump, but the video will better illustrate how it performs......Again were on schedule.....
 

flower

Well-Known Member

I'm so happy..I could pop!
Okay a few quick questions....
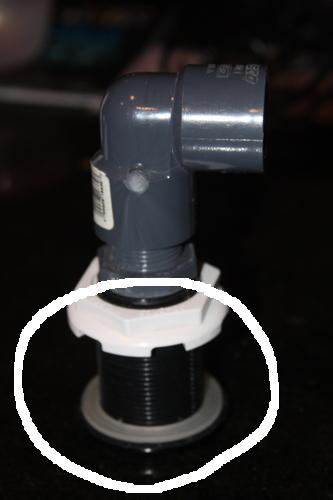
IS THIS THE BOTTOM VIEW OF......next picture...

THIS?

Please verify: if I understnd correctly, I feed the threaded part from the INSIDE of the refugium and the grey rubber part fits against the hole... so that when I tighten the white nuts together the grey rubber washers make a seal so it won't leak.
I screw in the elbow BEFORE I tighten the white nuts so the elbows are pointed down in the proper position..I then tighten the white nuts to lock everything in place and then put the straight pipe on the elbows.
And I didn't get an answer back...do I need the pink rigid board on the bottom of the stand for this to sit on?
 

2quills

Well-Known Member
While Shawn is working on the video I think I can answere those questions...
The first pic is how the bulkheads will look inside of the fuge, and yes the rubber gasket goes on the inside as well so that when you tighten the white nut down it will create a water tight seal...you are correct!
I would say to put the bulkheads on the fuge...tighten the white nut down but not real tight...then screw the elbows on as snug as you can get them. Once you have the elbows on there good and snug then you can rotate the bulkheads so that the elbows point downward into the return section. Then you can go ahead and tighten the white nuts on the bulkheads down all the way which will squeez them tight to the gray rubber gasket.
I don't see much of a need for the pink stuff unless you think the bottom of your stand is uneven in some way. But it wouldn't hurt if you wanted to do so just in-case.
 

flower

Well-Known Member
Quote:
Originally Posted by 2Quills http:///forum/thread/380517/flower-s-sump-fuge-build/760#post_3326579
While Shawn is working on the video I think I can answere those questions...
The first pic is how the bulkheads will look inside of the fuge, and yes the rubber gasket goes on the inside as well so that when you tighten the white nut down it will create a water tight seal...you are correct!
I would say to put the bulkheads on the fuge...tighten the white nut down but not real tight...then screw the elbows on as snug as you can get them. Once you have the elbows on there good and snug then you can rotate the bulkheads so that the elbows point downward into the return section. Then you can go ahead and tighten the white nuts on the bulkheads down all the way which will squeez them tight to the gray rubber gasket.
I don't see much of a need for the pink stuff unless you think the bottom of your stand is uneven in some way. But it wouldn't hurt if you wanted to do so just in-case.

Okay thanks...
MONDAY..MONDAY

I hope I can see the video before I go to work at 9:15 tonight..Fingers crossed.
 

acrylic51

Active Member
Meowzer your presence is requested her for your input........
forums.saltwaterfish.com/forum/thread/381590/setting-up-sump-fuge#post_3326331
 

acrylic51

Active Member
Hopefully Flower got to see the video before she took off for work.....Corey, I did try running the sump alone with just the Mag12, and did pick up micro bubbles in the return section. Not alot, but not exactly sure how it would turn out in the DT though.....So are other conversation on the other thread is questionable. I think with a bubble trap he could get away with running it at 600gph pretty easy.....I would have to say this sump here could take 1000-1100gph if the bubble tower was filled with rubble rock....I think having the drain line submerged helps quite a bit as well, but my feeling is that this sump/fuge could easily take it......
 

acrylic51

Active Member
Sorry Meowzer....Over in the Reef section btwk12 has a thread and was looking for your opinion on the Octopus skimmer.....
 
Top