SCSInet's 180g Reef Build!

scsinet

Active Member
Yeah I'm working on some installation and live rock photos. I've got family in town right now so progress slowed up a bit, but I'm getting back on track.
 

trigger11

Member
I cant believe I just found this thread now. Excellent work SCSI. I sure wish I had your patience. Having had the tank since back in December and just getting to a point where it is all up and running. Again, Awesome job and I cant wait to see the pics for when you are up and running.
As a side note. I see you have the 3 phosban reactors there. What is the specific brand name of those? And could I run a separate pump through them? I have been looking at trying to find out how these things work. Havent found a good thread yet. Or a good website that explains it though.
~Russ
 

scsinet

Active Member
The Phosban reactors are made by Two Little Fishies.
Most people set them up with a separate pump. I just went about it differently.
I plan to only use one for Phosban media... the other two are there for just miscellaneous media chambers. Carbon can be run in them, hell, you can even jam a polyfilter in there if you need to.
 

trigger11

Member
Originally Posted by SCSInet
http:///forum/post/2498432
The Phosban reactors are made by Two Little Fishies.
Most people set them up with a separate pump. I just went about it differently.
I plan to only use one for Phosban media... the other two are there for just miscellaneous media chambers. Carbon can be run in them, hell, you can even jam a polyfilter in there if you need to.
I picked one up today. I got it going with a maxijet 1200 pump although I turned the ball valve over pretty good so the pump didnt blast it. I am planning on getting two more of them. Do you think the mj1200 pump would be sufficient to power all 3 when they were linked together? Or do you still need to go with less flow? The only reason I used the 1200 today was because oddly enough no stores had a smaller one in stock where I live. I ended up going over the bio limit in my tank. Have had trace amts of ammonia and hair algae is taking over. Water changes not keeping up with it so wanted to get an ammonia media reactor going. Eventually I will get some kind of protein skimmer I guess but I am really resisting that one. LOL
 

scsinet

Active Member
You're going to go through a lot of money in ammonia media.
Why not just remove a fish or two?
A protein skimmer will help a whole lot with your ammonia problem. It doesn't remove ammonia, but it does remove the stuff that breaks down to ammonia.
 

scsinet

Active Member
Moving Day and Room Preparation
In order to prepare the room for the new tank, I had to get the old one out of there. There was previously a ~80g FOWLR tank in there. I relocated this tank to the basement along with it's inhabitants. This was a pretty hectic deal, so unfortunately I forgot to take any pictures of it!

Anyhoo, I got the tank moved downstairs.
The next thing I did was run a pair of 15 amp circuits from the breaker panel. I wanted to run a single 20A, but I didn't have any 12 gauge wire lying around, but I had plenty of 14 gauge, so I figured (2) 15 amp circuits would be even better.
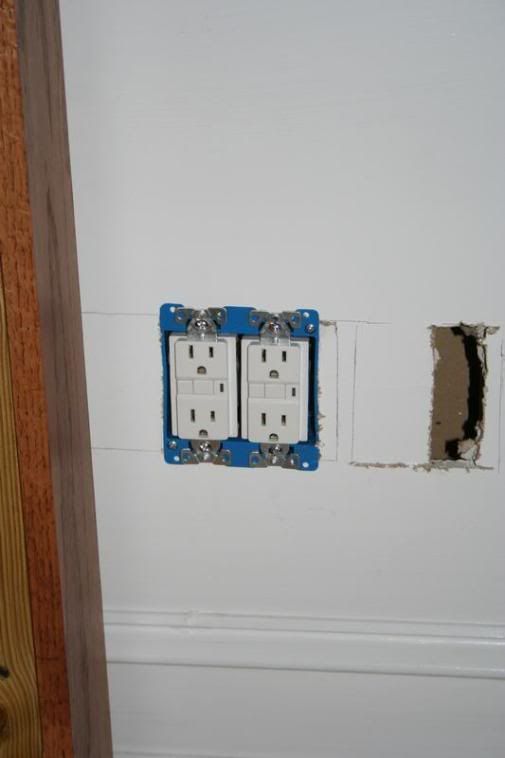
I located the box right next to where the tank was going to go. I didn't want salt to accumulate on the GFI outlets, and figured they'd be easier to get to should I ever need to reset them.
I located all of the studs and started to cut out for the box, but managed to hit a gas pipe behind the sheetrock. Obviously I wasn't about to move that, so I moved the outlet's location to the left just a tad.
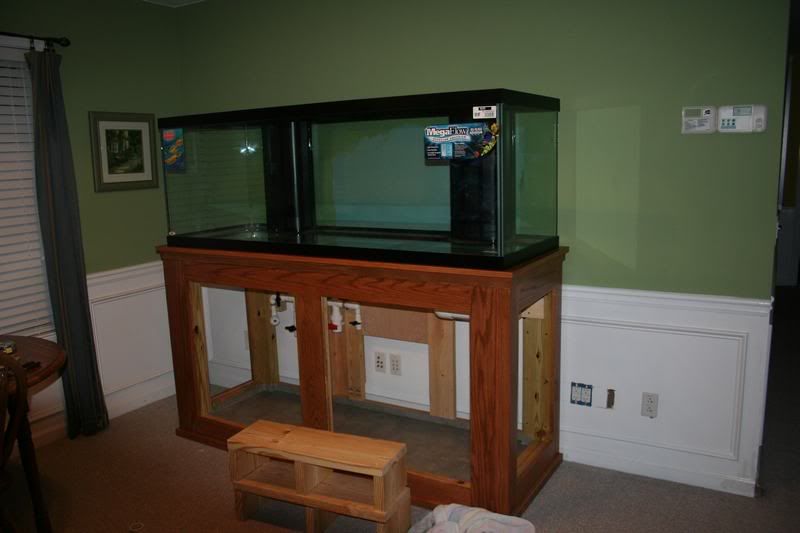
The really astute might notice that you can see the tank stand next to it. I actually took this picture AFTER the stand was moved in, but I wanted to talk about the outlet first.

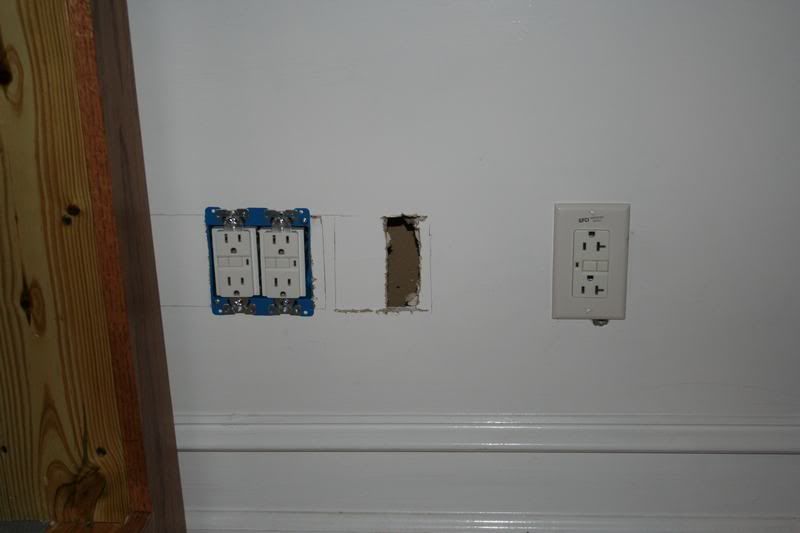
Here you can see the original GFI that served the room. One day when it tripped, I found out that the circuit in this room (dining room) is shared with the fridge and some of the outlets in the kitchen, which by code you really aren't supposed to do. I guess I have whoever built the house to thank for that.
Anyway I didn't want the tank to share a circuit with anything having to do with the kitchen, so that's why I elected to run dedicated circuits.

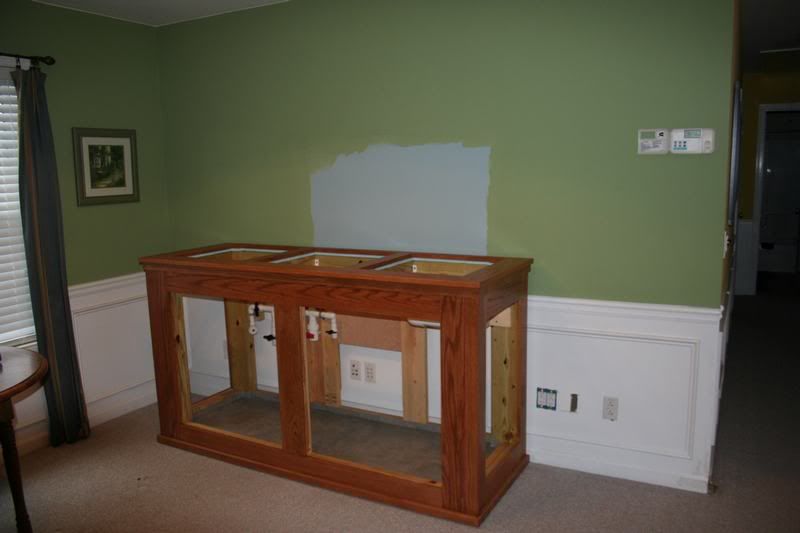
The stand was muscled in first. I haven't built the doors yet. I had family in town that I could conscript to help with the move, so I skipped the doors in order to get things started.

The spot behind is where we painted around the original tank. The new one covered it up just fine, so I said the hell to painting.

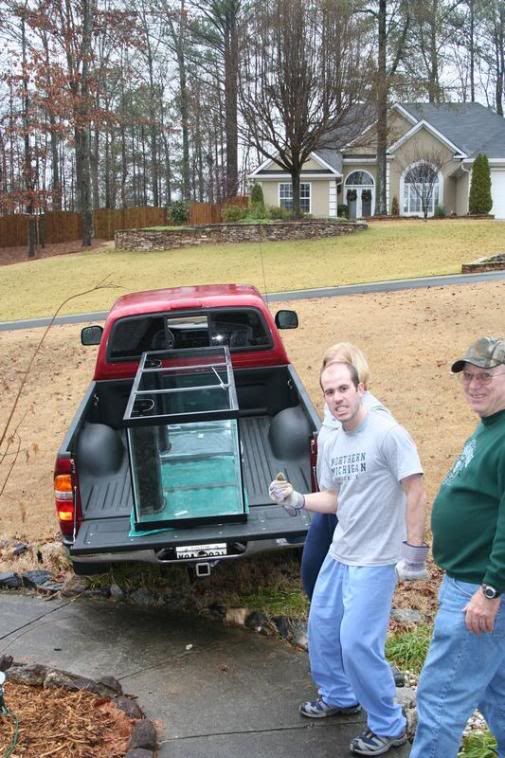
Rather than carry the tank by hand from the shop all the way around to the front door, we loaded the tank on the back of our truck and just backed the truck down the lawn to the front door. An act of sheer brilliance if I do say so myself.

Everyone ready to go. My father and brother in law to be, and fiance. I'm behind the camera, making them wait while I document this for you guys. You're welcome.


scsinet

Active Member
What came next is a horrible combination of sweat, fear, and near death as we muscled 360lbs of glass into the house. The stand is 42" high, and dead arm-lifting the tank to get it up there, and not scrach the stand was very difficult.
While I am sure some of you are hitting your quick reply buttons to say "HAHAH you should buy acrylic lol !!!!1111" I'll say ahead of time that I'm dead-set on glass.... at least till one leaks on me.

Leveling...
The tank turned out to be dead level from side to side, and leaning forward about 1/8" That's about as good as one can hope for, so I counted my blessings.

That's it for now. I'm working on resizing and uploading the pics of getting the final plumbing setup done, so I should have those very soon. I mean seriously very soon... not like usual when I say "soon" and that becomes a month. Don't worry. I promise!
 

hefner413

Active Member
I figure your canopy will cover the black plastic on the upper edge of the tank. Are you going to do anything to cover the lower edge of black plastic?
Also, what are you going to use for a background?
 

ameno

Active Member
humm; from the pictures it just doesn't really look that heavy

We had to carry in a 200 gal. a few weeks ago just from the outside to a room inside and it was a major job, just thinking about carring one that size up the stairs makes my back hurt. Glad you got it in in one piece. can't wait to see this up and running, this is a real first class setup
 

scsinet

Active Member
Originally Posted by Hefner413
http:///forum/post/2504466
I figure your canopy will cover the black plastic on the upper edge of the tank. Are you going to do anything to cover the lower edge of black plastic?
Also, what are you going to use for a background?
A while back, I saw a picture of a beautiful aquarium stand. It was made to look like the tank was sitting on a table. I fell in love with that look, so I started designing stands to replicate it.
So no, I'm not doing anything with it. I wanted it to look like a piece of furniture with a tank sitting on it, not really a "tank stand" per se.
The canopy however does cover the top edge. I wanted to get the same look, but I was too worried about the canopy getting bumped and knocked into the water, so I needed it to "lock" onto the tank.
Obviously a tank with 2000lbs of water in it won't get knocked about too easily, so I can get away with it on the bottom.
I just use the plastic backgrounds that LFSs sell. I thought about painting the back. Shortly after that, I thought... "nah."
 

stdreb27

Active Member
Originally Posted by SCSInet
http:///forum/post/2505223
I just use the plastic backgrounds that LFSs sell. I thought about painting the back. Shortly after that, I thought... "nah."
I went to the frabric store found some clearanced out cloth at a 1 dollar a yard, hung it up. I love it because if I ever spill water, I just pull it off and toss it in the wash. Then hang it back up. And I especially love that I only spend 2 dollars for 2 square yards of the stuff.
 

will16

New Member
Amazing build and amazing thread. I thank you for sharing.
I have a question if you don't mind. I am in the process of a build for a 90gal. The spot where it will go is on hardwood flooring and it is not perfectly level. I have the same 1/8" drop away from the wall as you got (over 2 feet). The tank is pretty level length wise but what concerns me most is that i have a few high/low spots going length wise. There are a few spots under the frame where there is some space. I can slip a piece of paper under the frame in 2 spots. Would you recommend using wood shims to fill these spots? You were not concerned with the 1/8 drop and left it? Would it be bad idea to shim every where to get perfect level?
Thanks,
Will
 
Top