SCSInet's 180g Reef Build!

stdreb27

Active Member
Originally Posted by SCSInet
First of all... woodworking is always "on topic" for me.

No... my aresenal of large power tools is a table saw, miter saw, bandsaw, drill press and dust collector.
I'm torn between a jointer, planer, and [better] drill press as my next investment. I've not ever even tried turning myself... I'm afraid to. If I try it and like it, that's a whole other tool I have to buy

I used my grandpa's lathe to make a baseball bat, when I was in little league, it was really sad when it finally broke about 2 years later.
 

scsinet

Active Member
I got it off that famous site where you bid on stuff.
The seller's store name is ChillerExpert.
I was worried about it at first, being an "unknown player" in the market.
However, I found three things that sold me. First, it was R22 and had Schrader valves already installed in the refrigerant lines. It's not an environmentally friendly refrigerant, but I have the equipment to work on R22 systems, so that made it possible for me to do lots of repair work myself (knock on wood).
Second, the company who makes it allows it to be placed outside without voiding the warranty.
Third, it has a universal temperature controller on it, which will make it easy for me to integrate into my controller system down the road.
 

t316

Active Member
Found it, thanks. You may have mentioned this prior, but without scrolling all the way back thru, how many degrees are you anticipating having to come down. This seems like a big unit. Or is there another reason you are going with this size unit? I used their calculator (I'm only needing to drop about 5 deg). Am I doing this wrong, or do I need a much smaller unit than 1/2 hp?
 

scsinet

Active Member
I don't know what size tank you have, but I could easily have done this with a 1/3, or maybe even a 1/4, but I wanted at least a 20-30 degree pulldown, so I am protected should the house AC fail.
I also wanted to upsize the unit so that I would be ready for a future upgrade. I would expect to upgrade to my dream tank one day within the lifespan of the chiller, so I bought it now. I wanted to go all the way to 1hp, but I couldn't meet the minimum flow requirements, so I couldn't go that big.
 

hefner413

Active Member
found these units on the

[hr]
site also - funny how they say that use is for aquariums and also for swimming pools. Why would you want to chill a swimming pool? haha.
anyway, I'm with Grouper - awaiting pics! :eek:)
 

stdreb27

Active Member
Originally Posted by Hefner413
found these units on the

[hr]
site also - funny how they say that use is for aquariums and also for swimming pools. Why would you want to chill a swimming pool? haha.
anyway, I'm with Grouper - awaiting pics! :eek:)
In texas during the summer it gets hot, and pool water can easily get into the 90's. Let me tell you it sucks getting into a pool and it be as warm as bath water.
 

t316

Active Member
I have a 270 gal, but now I understand your thought process, so you just saved me a little $. I don't see where this particular brand has less than a 1/2.
Hef...I was thinking the same thing...there's a big difference between an aquarium & a swimming pool

But looks like this co. sells sizes that would cover from one end of the spectrum to the other.
 

scsinet

Active Member
Sorry I had something come up last night and wasn't home for most of the night, but I'll post pics tonight.
 

threed240

Member
Originally Posted by SCSInet
Sorry I had something come up last night and wasn't home for most of the night, but I'll post pics tonight.
How far north of Atlanta are you?
 

threed240

Member
Originally Posted by SCSInet
Cumming.
I am a drafter for a construction company in north GA. I just finished a set of plans for a new CVS in Cumming, GA.
 

scsinet

Active Member
Originally Posted by Threed240
I am a drafter for a construction company in north GA. I just finished a set of plans for a new CVS in Cumming, GA.

Neat!
 

scsinet

Active Member
Plumbing
To fit the bulkheads to the tank, I wanted extra protection from leaks. On a past tank, a slow leak jammed the union below it up with so much salt that I had to cut the plumbing out with a reciprocating saw. I didn't want that to happen this time.
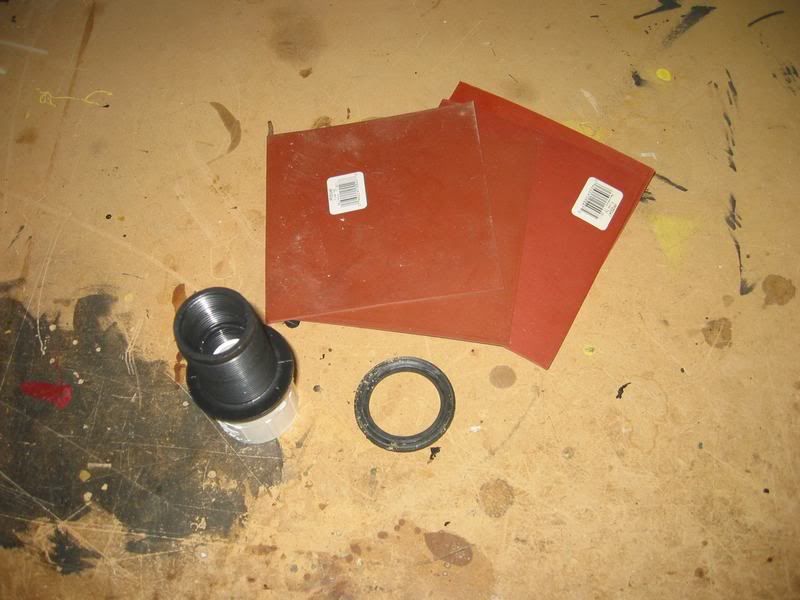
So what I did was cut some gasket material to fit on the other side of the bulkhead (on the "nut side"), and wrapped the bulkhead threads in teflon tape for an extra good seal.
Note however that this arrangement is not visible in these pictures because the addition of the extra gasket was an afterthought that I didn't document.

When I built the stand, I used doubled up lumber for the tank's support, but I did not do so in the back, instead using a larger piece of wood, so that I'd have room for my pipes and connections.
Unfortunately, it was closer than I thought. What I wanted was absolute maximum flow, the pipes to be as close to the tank as possible, and for the pipes to be easily removable.
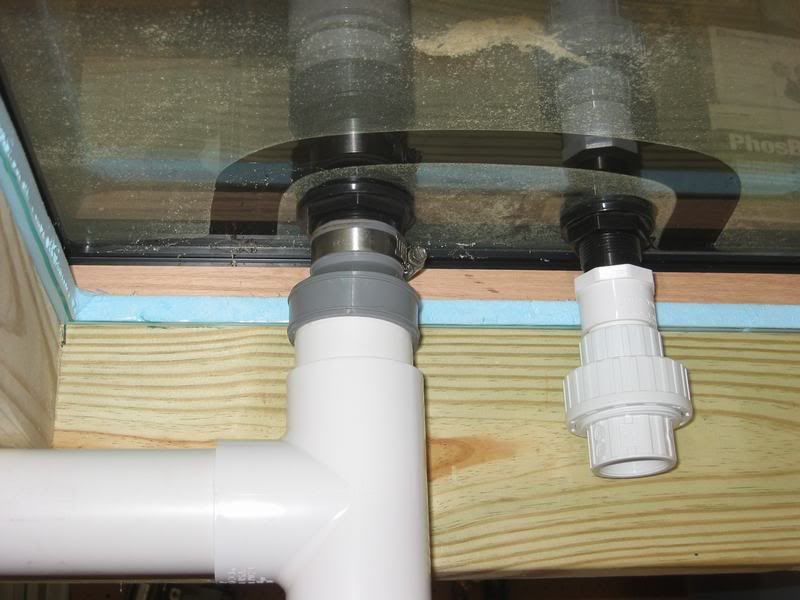
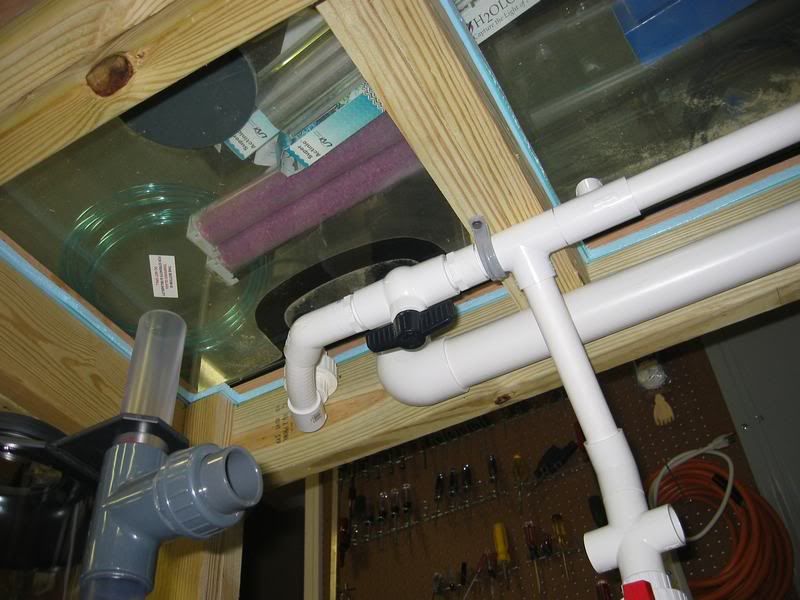
For the drains, I couldn't put any elbows on the bottom, threaded or otherwise, because the clearance wasn't sufficient to install them. What I did instead was use these rubber reducing fittings to fit over the outside of the bulkhead.
This allowed me to forego even the small reduction in diameter with the pipe being inserted into the bulkhead. Also, it allowed a flexible connection to the tank, reducing stress on the glass should the plumbing shift or be jarred, and allowing a bit of play in the tank's placement.


While the seals around the outside of the bulkheads probably isn't good enough to prevent leaks should water back up into the pipes, with it being a drain line, the water should only be flowing down and out, so there isn't much risk of a leak. I had to heat the rubber with a blowtorch to enlarge it slightly to accomodate the bulkheads.
In the end, I had the least possible amount of constriction I could get away with, and nice big 2" tubing for a drain, and the whole thing could be easily removed.
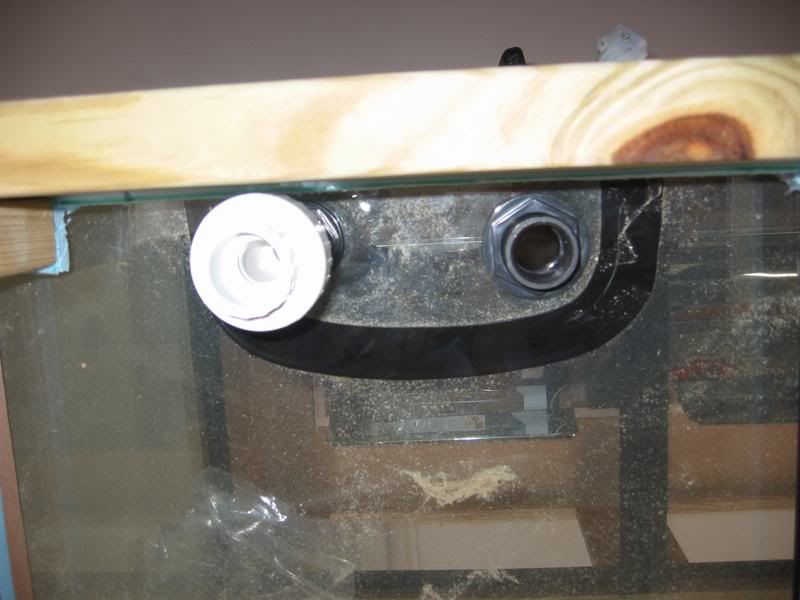
Next, I started to concentrate on the returns. Again, I wanted the least constriction possible. This time, I was able to fit a union in directly under the bulkhead and clear the stand.
Just Barley!


The bulkheads are 3/4, with a 3/4" to 1" reducing fitting on the union, and a 3/4" nip-ple connecting them together. From the union back, it's all 1" pipe. Notice the piece of 1" spa-flex on each return. That's again to form a flexible connection to the tank to reduce stress on the glass, and allow a big of play when the tank was placed.

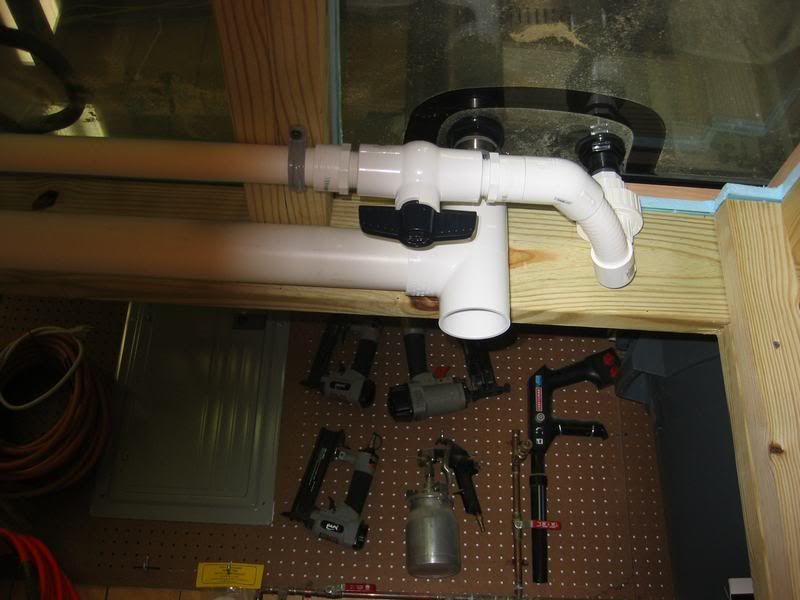
You can see an extra "T" up at the top. That's a loop for a UV unit.

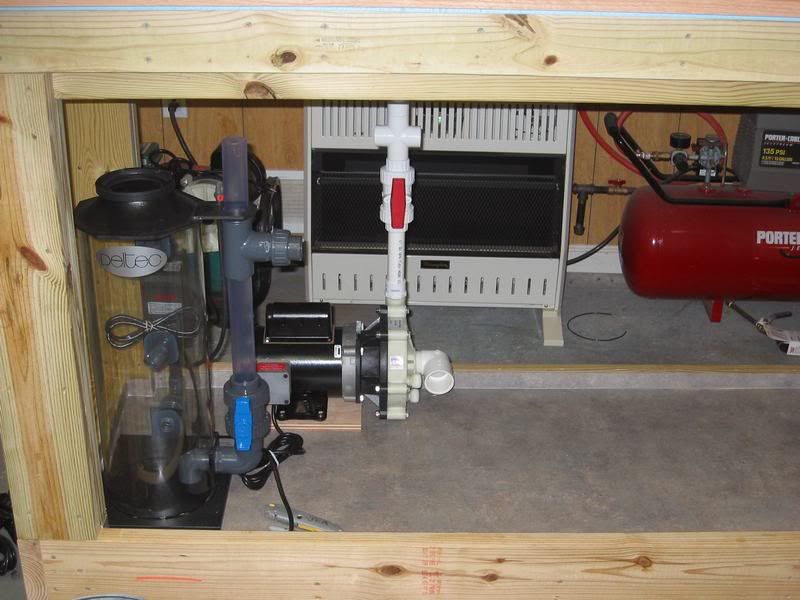
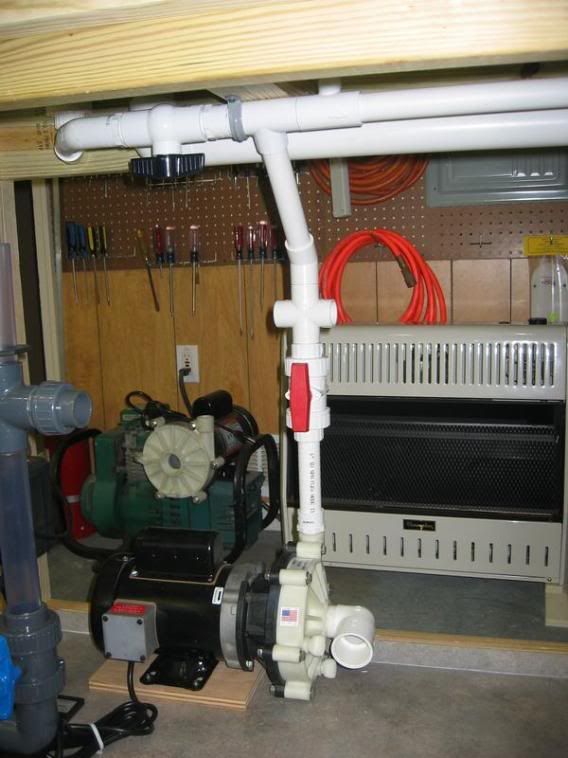
/>I worked my way back to the pump, adding a manifold for powering my various devices.

My Sequence Marlin... getting ready to rock!

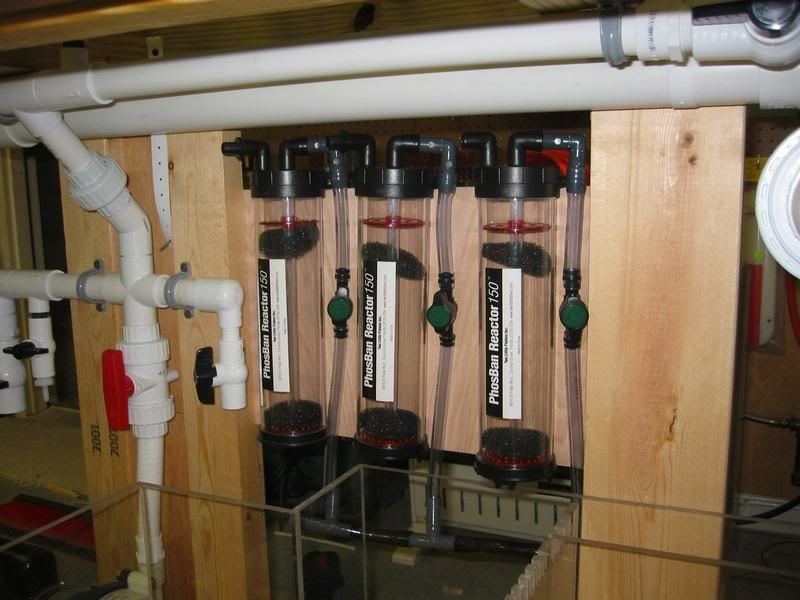
You can see the 3 phosban reactors ready to go. Only one is intended for Phosban... the others are for carbon and one "extra" for whatever I might need it for. They are also powered off the main pump, and return back to the sump.
Don't worry, I'll get to the sump that you are no doubt noticing in this picture.
 

scsinet

Active Member
Originally Posted by stdreb27
Your plumbing is very neat
What is that black thing around your two bulkheads?
That's the overflow inside the aquarium. It's installed with black sealant.
 

hefner413

Active Member
Too bad you couldn't leave the back of the tank fully open like it was before that last picture. It would make for easy working later on... but of course the tank could end up on the ground. Yeah, I guess it's needed.
Hey SCSInet. What did you use in the inside of the hood? the white? is it a paint?
 
Top