415 Gallon Plywood Tank Build
- Thread starter acrylic51
- Start date
posiden
Active Member
Quote:
Originally Posted by 2Quills http:///forum/thread/376802/415-gallon-plywood-tank-build/540#post_3338079
Nice find, Posieden.
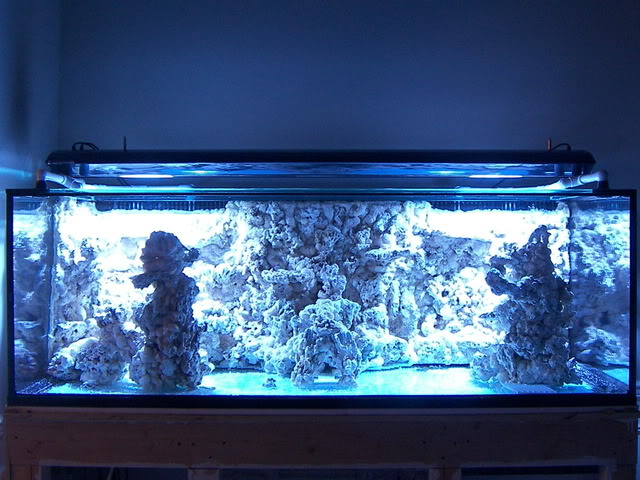
I thought this was a pretty nice looking wall. These are from another site...hopefully the wont get too upset for me borrowing his pix.
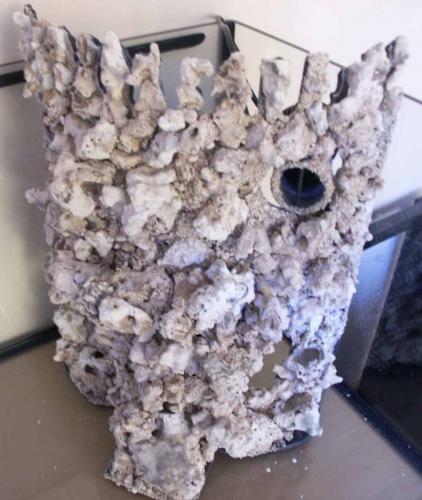
The overflow for it...you can see the hole for the powerhead on the right...
Yea, this is one of my favorites. IIRC he doesn't live too far from me.
Originally Posted by 2Quills http:///forum/thread/376802/415-gallon-plywood-tank-build/540#post_3338079
Nice find, Posieden.
I thought this was a pretty nice looking wall. These are from another site...hopefully the wont get too upset for me borrowing his pix.

The overflow for it...you can see the hole for the powerhead on the right...

Yea, this is one of my favorites. IIRC he doesn't live too far from me.
2quills
Well-Known Member
Seen this one earlier too...http://www.nano-reef.com/diy/?project=1
acrylic51
Active Member
That is a nice little tutorial there....Did anyone post this link in Flower's thread?
Quote:
Originally Posted by 2Quills http:///forum/thread/376802/415-gallon-plywood-tank-build/560#post_3338108
Seen this one earlier too...http://www.nano-reef.com/diy/?project=1
Quote:
Originally Posted by 2Quills http:///forum/thread/376802/415-gallon-plywood-tank-build/560#post_3338108
Seen this one earlier too...http://www.nano-reef.com/diy/?project=1
acrylic51
Active Member
Sorry guys for being slow about updating the thread, but super busy getting ready for the holidays, and getting the house back in order, so my wife and the rest of the family can enjoy the family room for a change. Trying to get a good start on the epoxy on the tank, I have been burning the midnight oil, between work, pouring, and sleep......Here's a bit of an update...
My wife has been bugging me constantly about what I wanted for Christmas, and being that I buy whatever I need all year long, not a super big deal to me, but she had suggested epoxy for the tank......
 How could I argue with a woman that is putting up with all the mess and crazy ideas I have.....So epoxy it was....Got some of it a little early....3 gallons anyways.
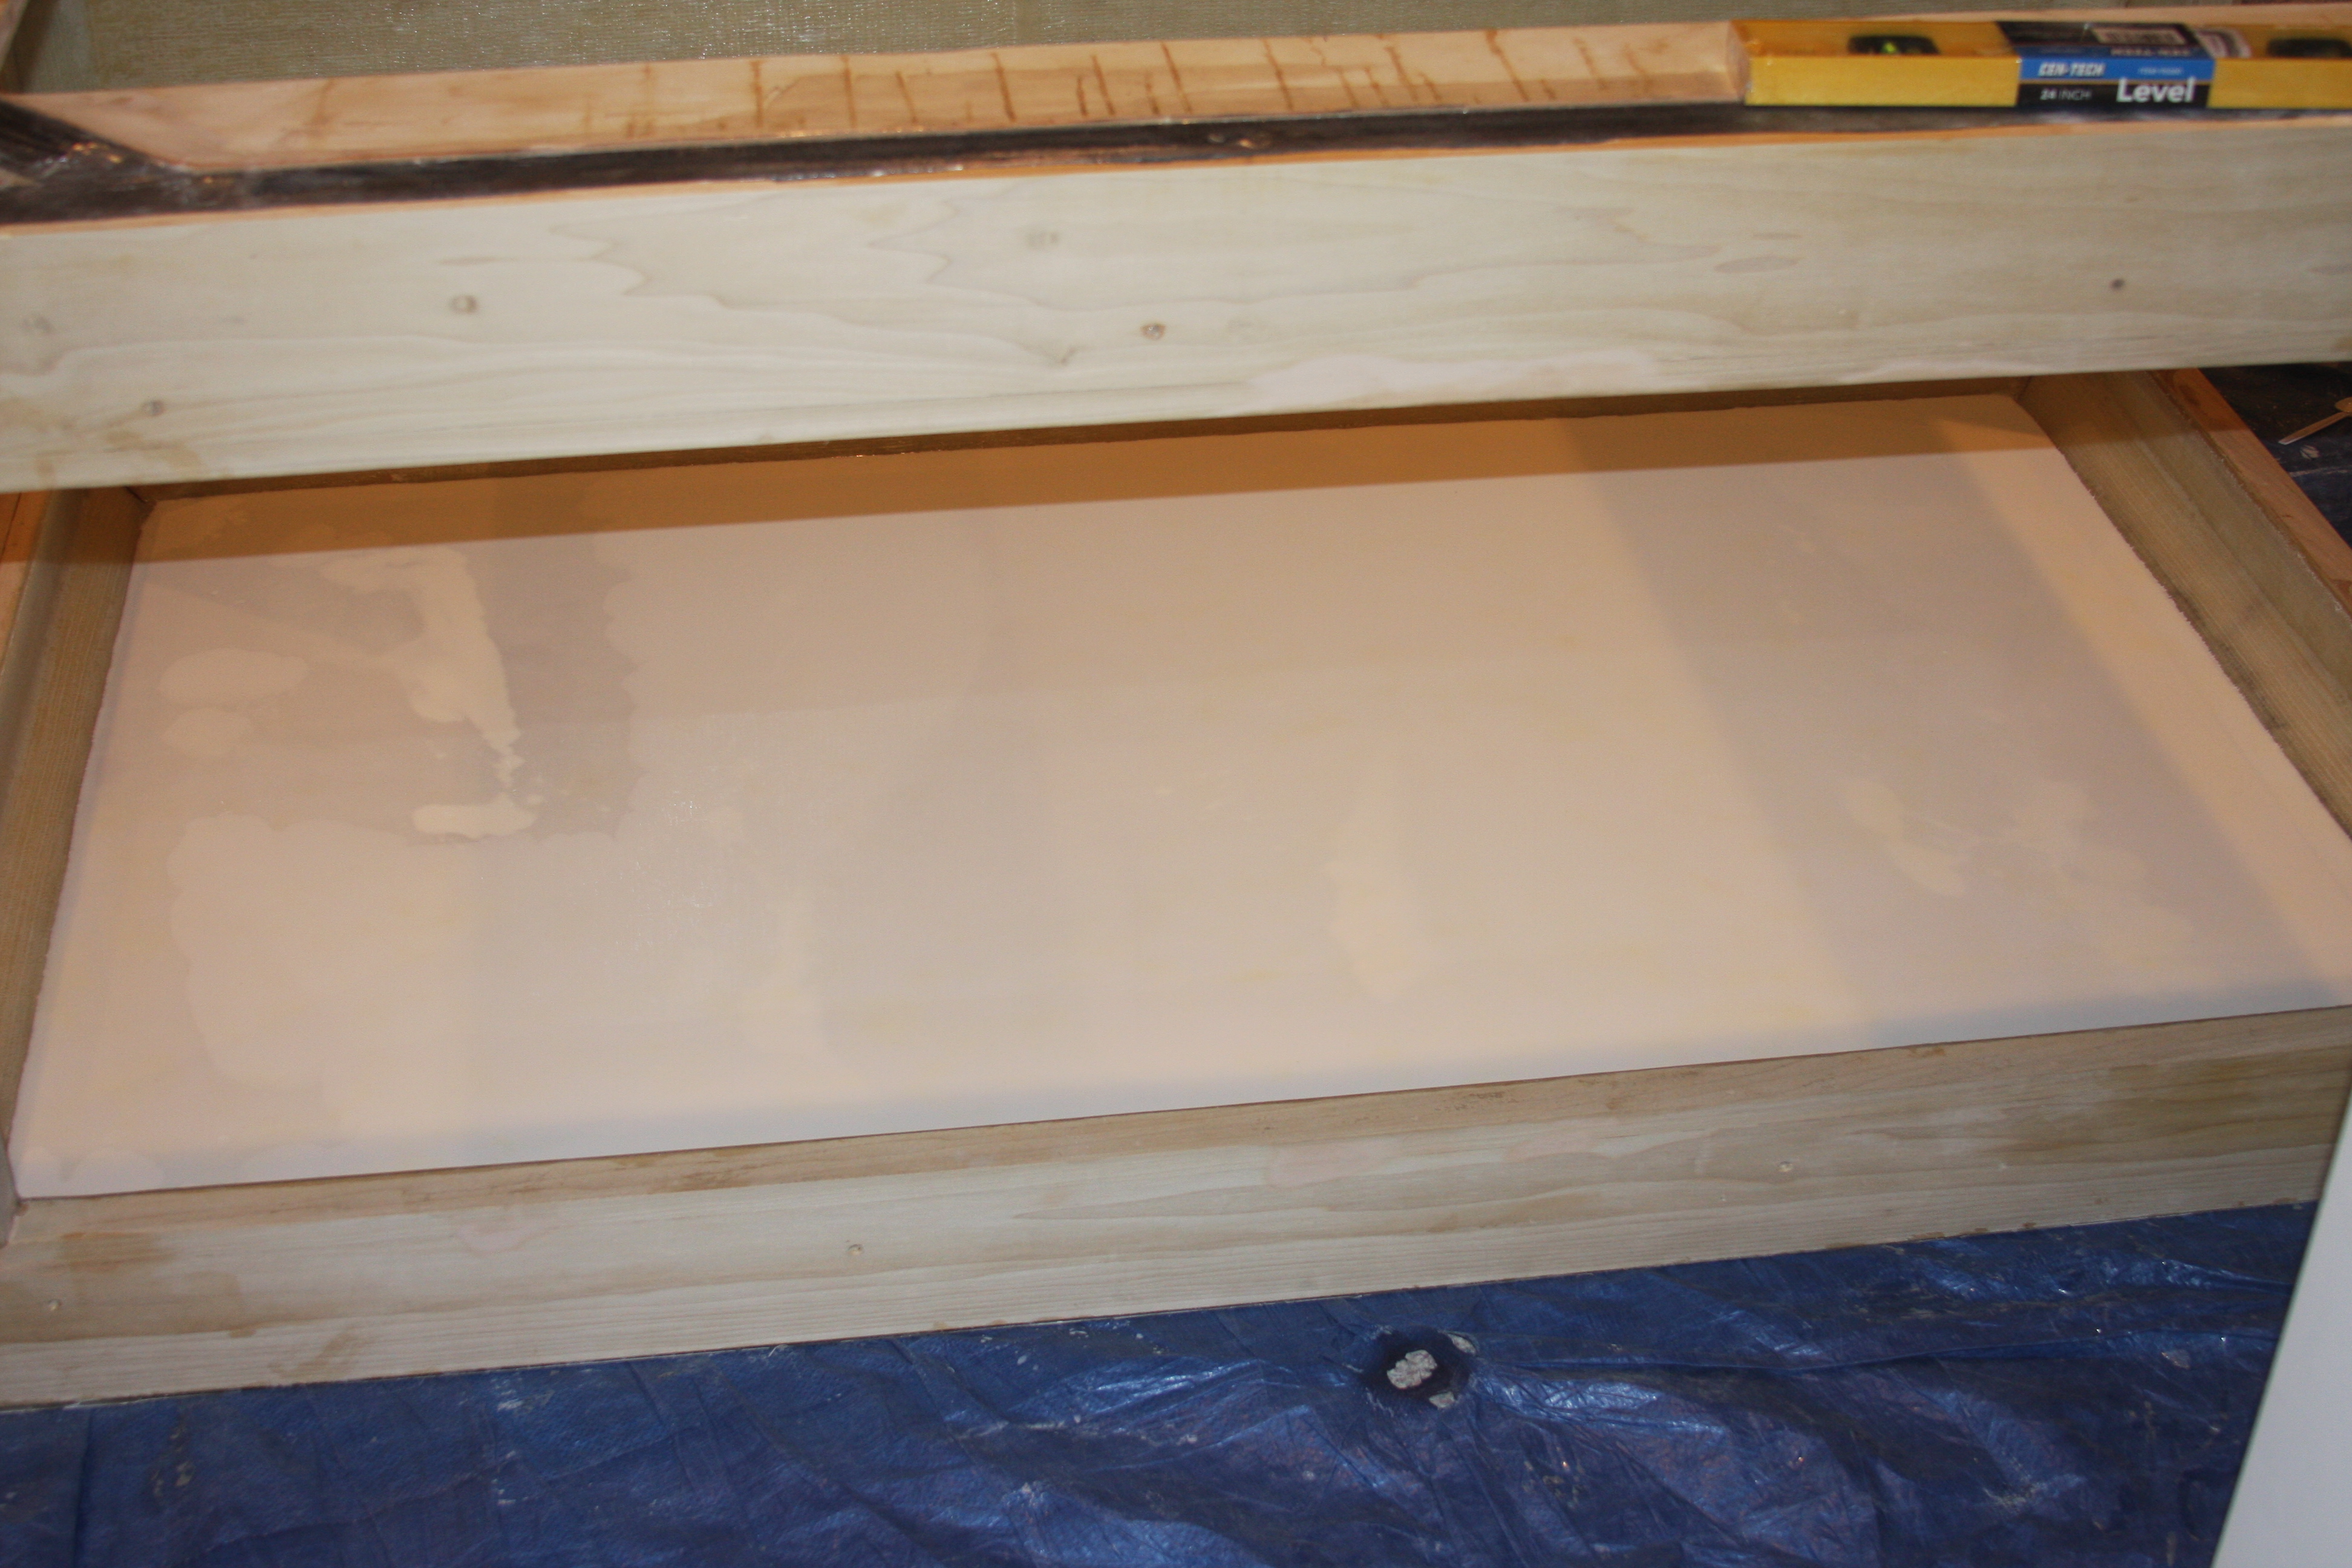
The first section I poured was the very bottom. I did it in small section, because mixing a large batch of epoxy like that could be bad if you don't get it out fast enough it will harden up on you with a quickness, and I'm using the slow hardner.....
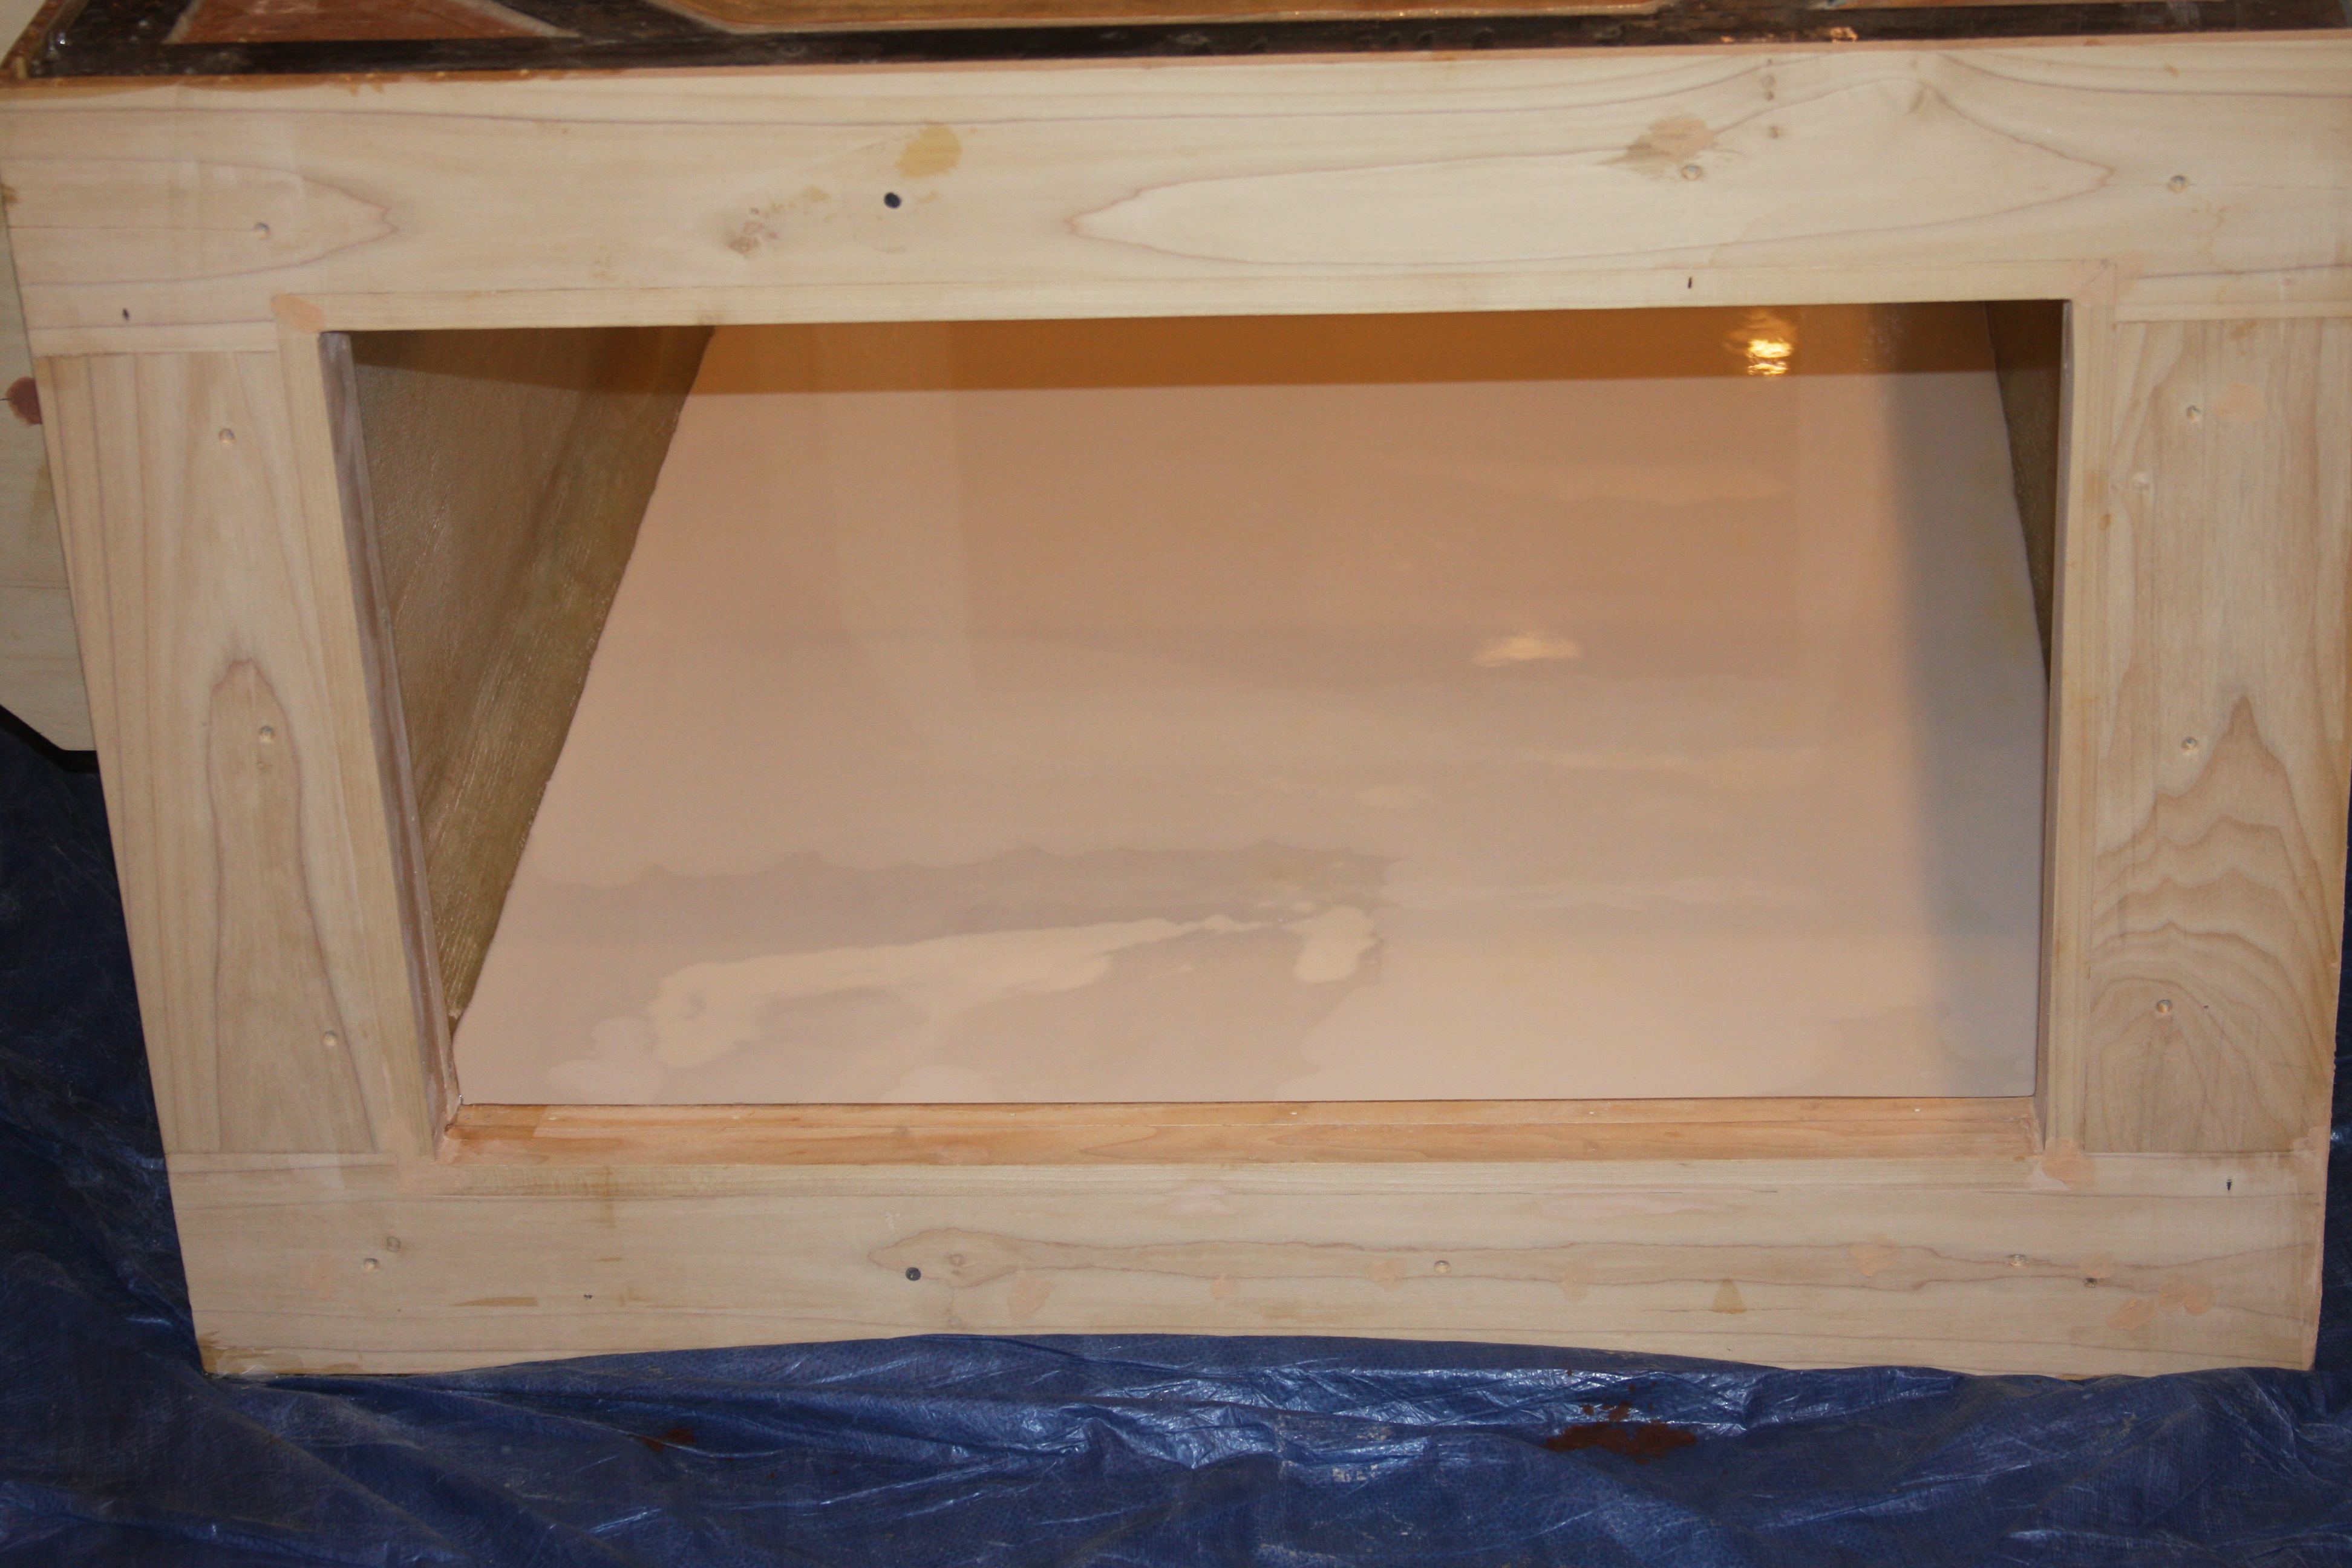
Just another shot of the bottom poured, and you can see the very first bit I poured I was a little off in the amount of tint, but the next batch I mixed I found the perfect amount of tint, and the issue was solved. No big deal really since it will get another coat. In the above pic you can see a sort of burn mark on the tarp in front of the tank. That is how much heat is generated in the mixing container. I had finished my pour, and set the container down on the tarp, and when I went to lift it up, that is when I noted how much heat transferred to the tarp.......

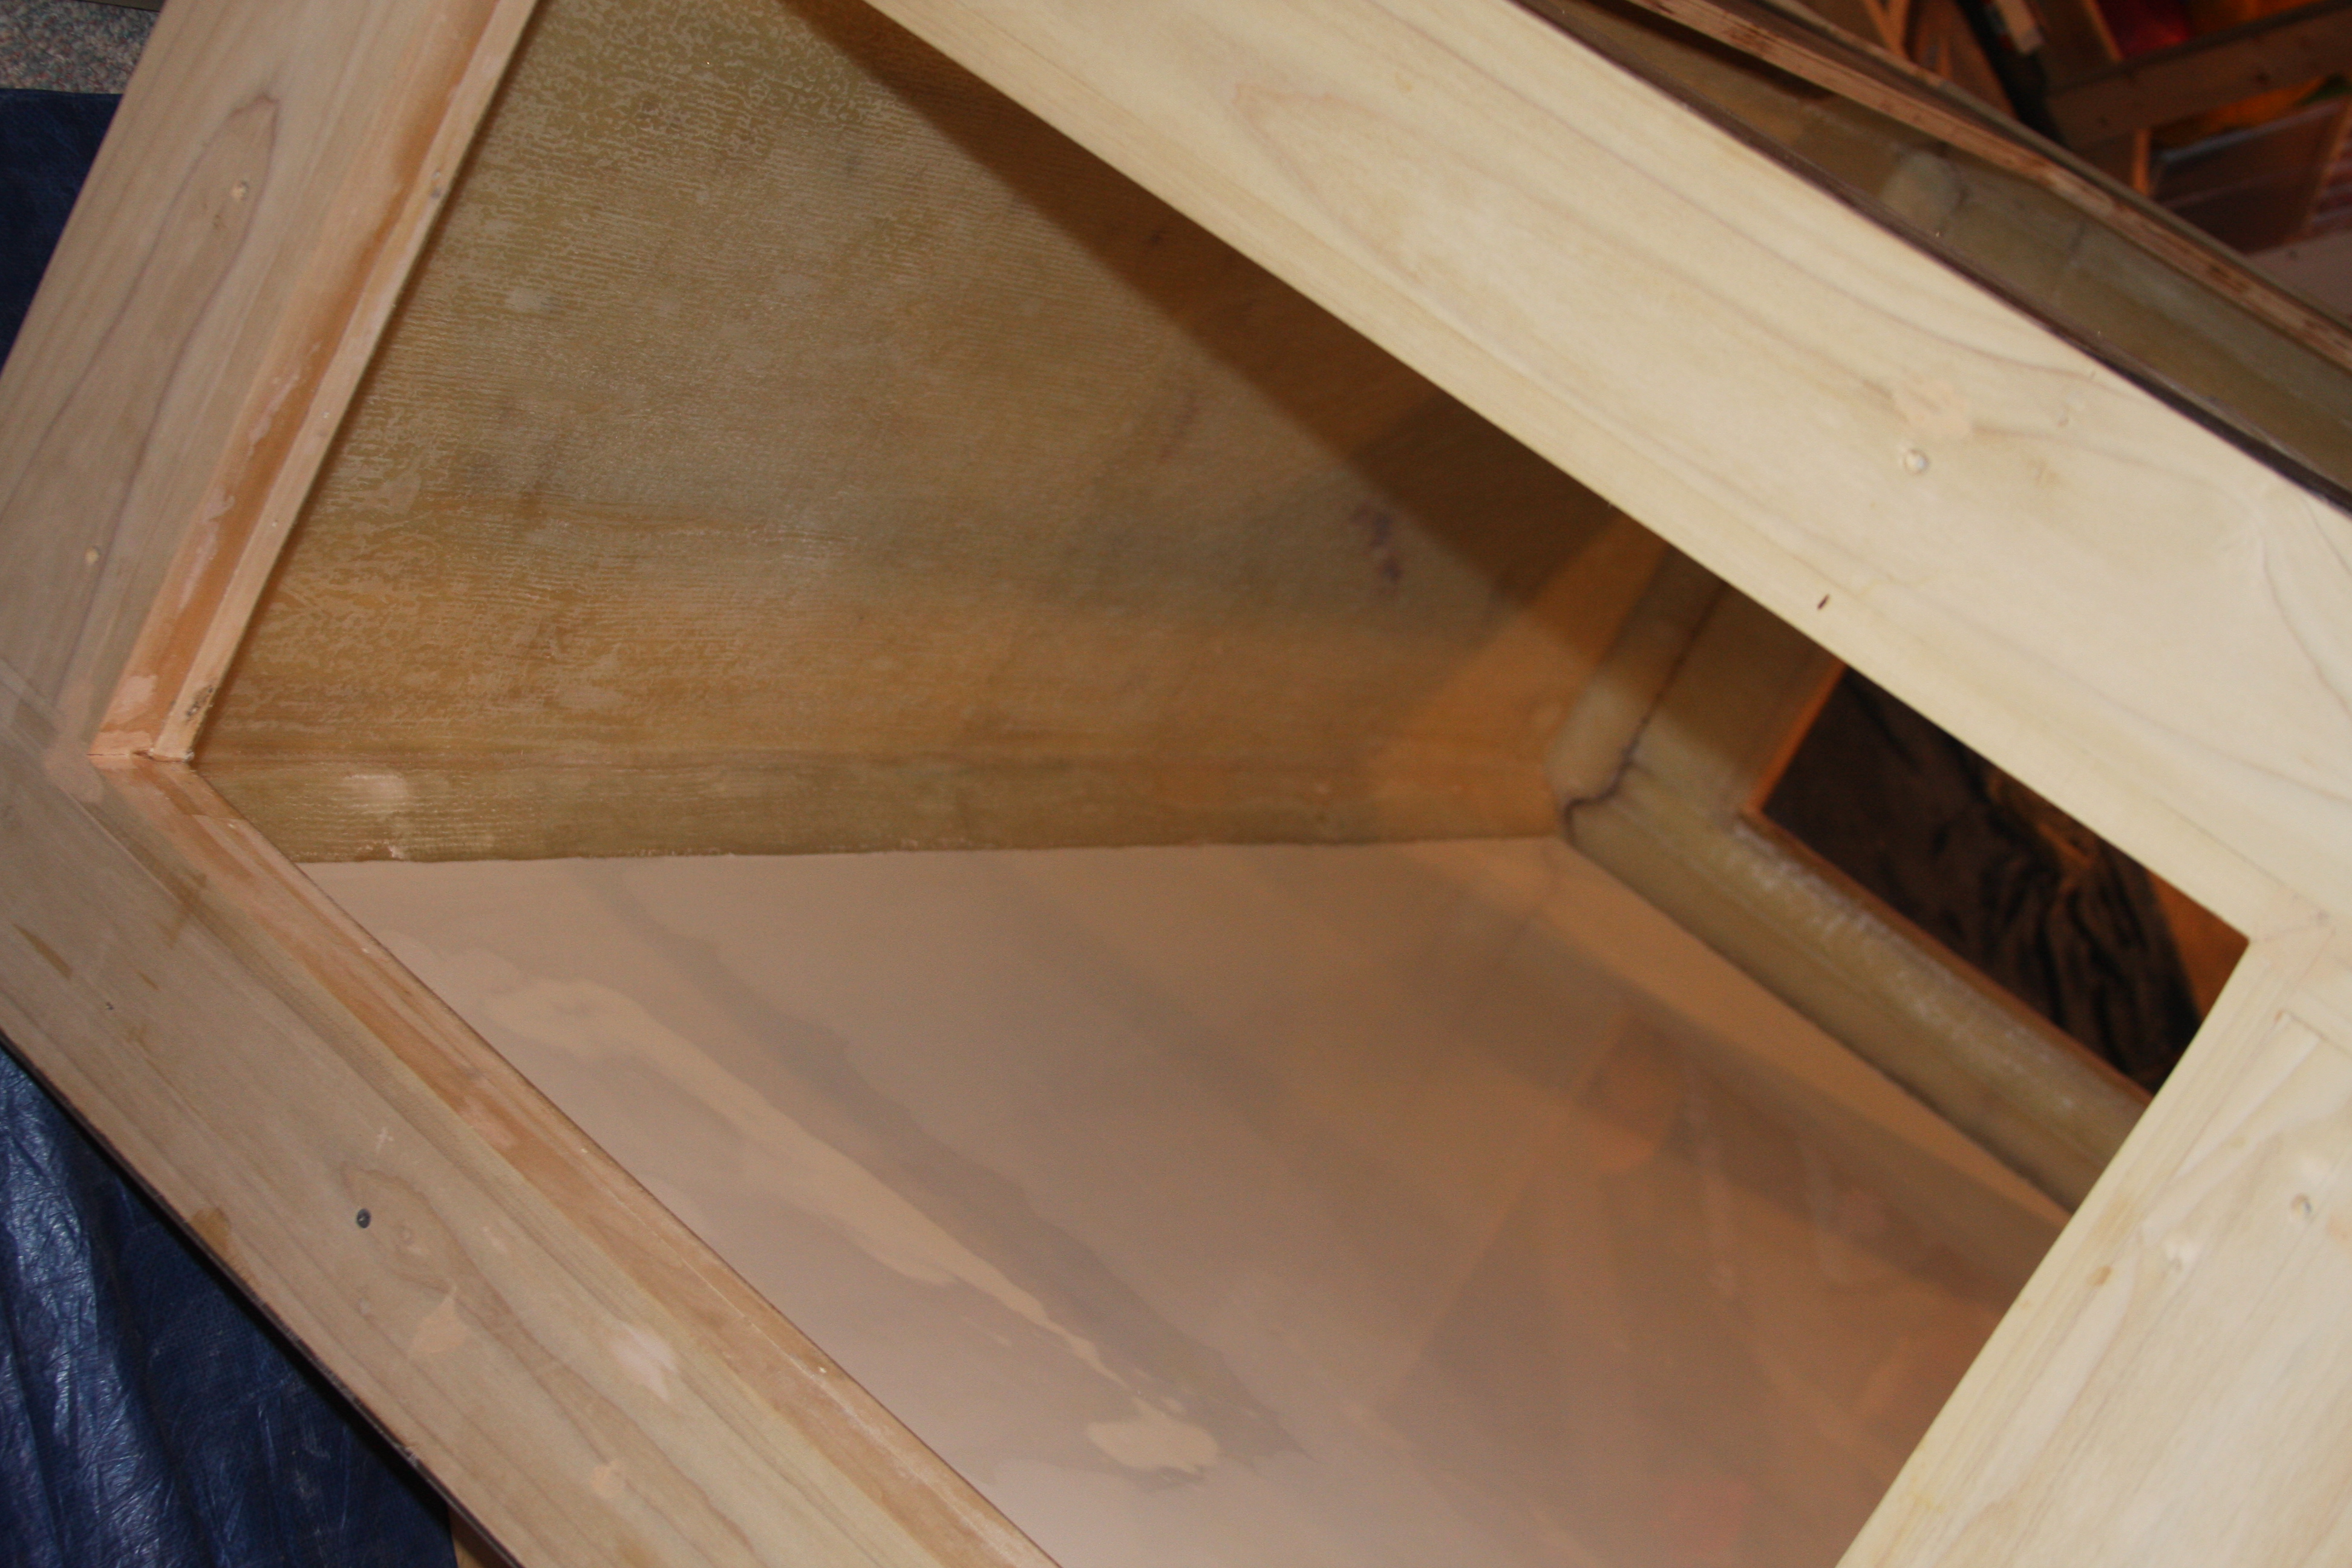
Again here you can see that I poured the bottom, and it's baby butt smooth and no air bubbles. Took me a while to figure out how close and how fast to move the torch, but second nature now. In the pic you see I have the tank up at a 45 degree angle. This is how I pour my corners. This way I make sure the epoxy gets into the very depths of the corners......
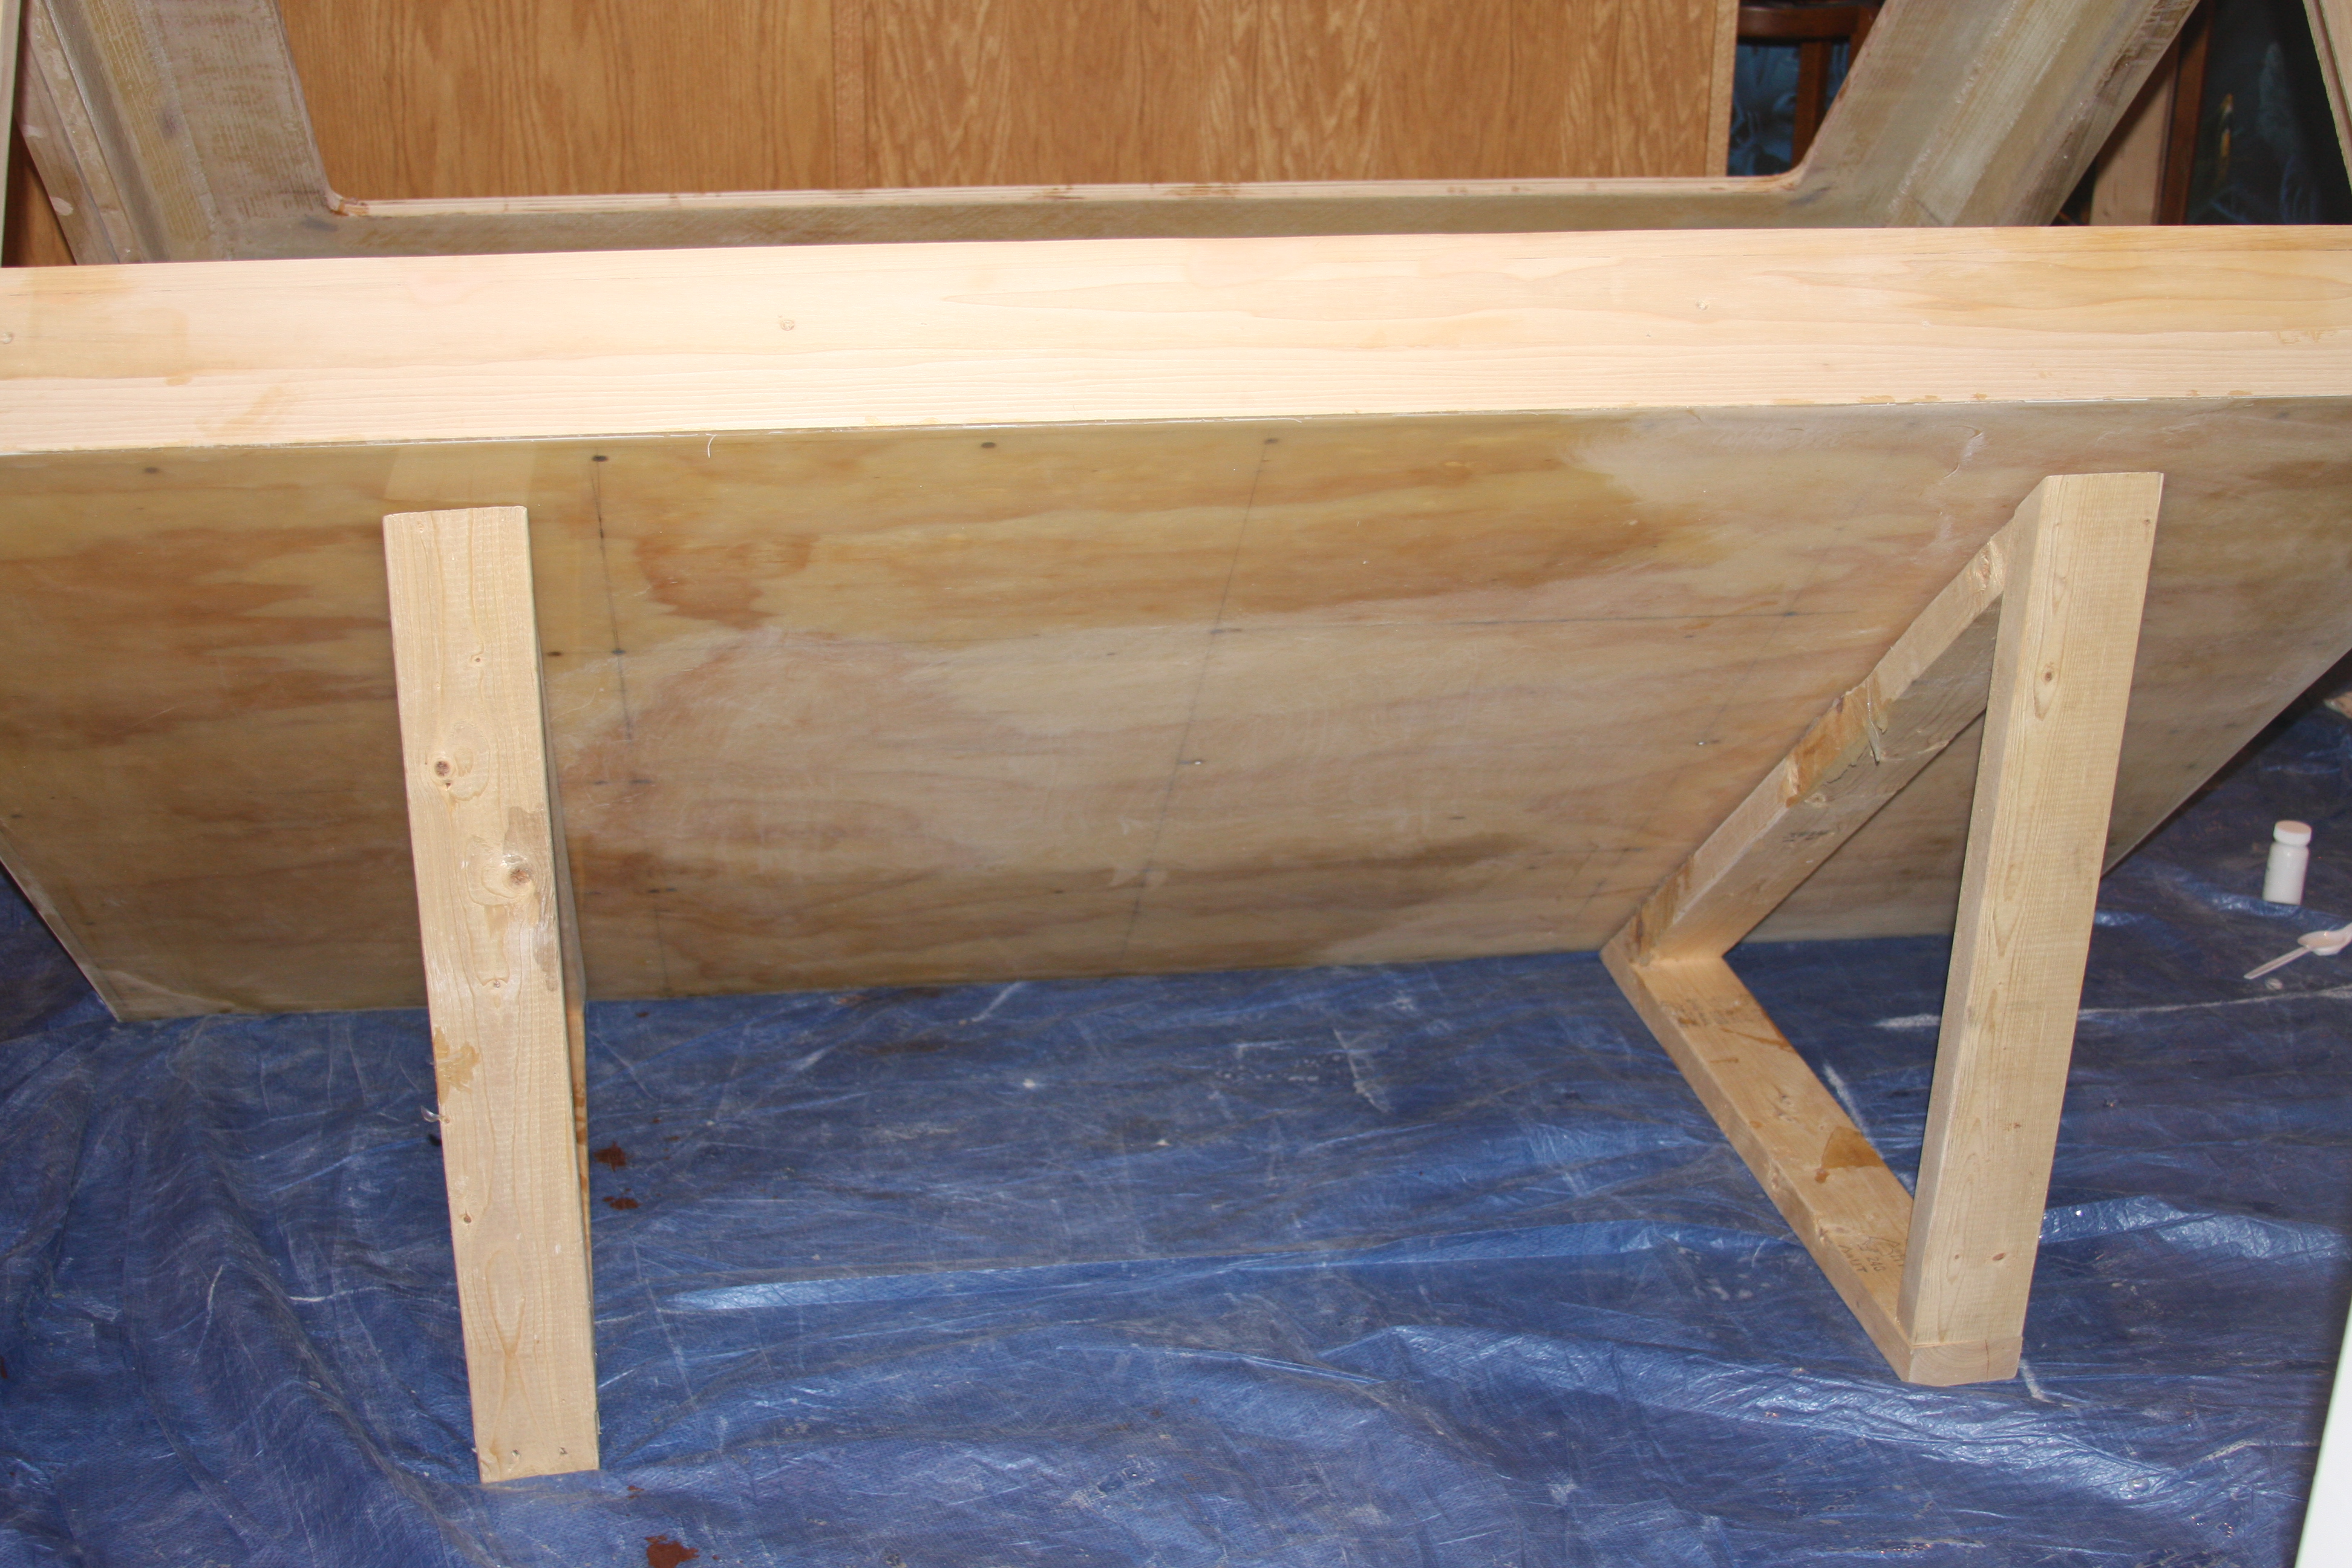
Since I'm working and building everything in my finished family room I had to improvise a way to get the tank perfectly on a 45. I utilize these handy jigs to keep the tank in position while I pour and the epoxy sets up.
My wife has been bugging me constantly about what I wanted for Christmas, and being that I buy whatever I need all year long, not a super big deal to me, but she had suggested epoxy for the tank......

The first section I poured was the very bottom. I did it in small section, because mixing a large batch of epoxy like that could be bad if you don't get it out fast enough it will harden up on you with a quickness, and I'm using the slow hardner.....
Just another shot of the bottom poured, and you can see the very first bit I poured I was a little off in the amount of tint, but the next batch I mixed I found the perfect amount of tint, and the issue was solved. No big deal really since it will get another coat. In the above pic you can see a sort of burn mark on the tarp in front of the tank. That is how much heat is generated in the mixing container. I had finished my pour, and set the container down on the tarp, and when I went to lift it up, that is when I noted how much heat transferred to the tarp.......

Again here you can see that I poured the bottom, and it's baby butt smooth and no air bubbles. Took me a while to figure out how close and how fast to move the torch, but second nature now. In the pic you see I have the tank up at a 45 degree angle. This is how I pour my corners. This way I make sure the epoxy gets into the very depths of the corners......
Since I'm working and building everything in my finished family room I had to improvise a way to get the tank perfectly on a 45. I utilize these handy jigs to keep the tank in position while I pour and the epoxy sets up.
acrylic51
Active Member
I did have a little better luck than Flower with shipping....Today I did finally get my background I had ordered from PetBlvd, and I have to say, that will be the last time I will order anything from that company.....I ordered last monday, and just got it today. The bad thing is they are only a 3 hour drive from the house. The background in the box was a little rough the first 1' and the customer service or lack of from this company was horrible. Never sent tracking information or anything as promised. When I did call they were clueless what or where my order was other than they charged my credit card......
acrylic51
Active Member
Thanks.....If I could just bring myself to spend the $60 on the long hose and nozzle for the propane bottle, so I could leave the bottle sit on the floor, and just have the wand in my hand as I work out any bubbles, would make things super sweet. I thought about doing a video, and usually there isn't anyone home to shoot the video on my phone, but I think over the holiday weekend I'm going to get my daughter to shoot it while I pour. I'll have to do it in steps showing the process to give everyone a good idea what's involved. Just sucks right now...was on a roll, and had to actually clean everything up till after all the festive holiday parties at the house....
I'm either getting older or the tank is getting heavier, but I use to be able to man handle the tank, but now it's taking this 160lb body a bit to get it moving when I flip the tank. I'll have to get some good closeup pics of the epoxy thickness around the openings....I'm getting excited. I still have to decide on background or rock wall, and between glass or acrylic viewing panels........
I'm either getting older or the tank is getting heavier, but I use to be able to man handle the tank, but now it's taking this 160lb body a bit to get it moving when I flip the tank. I'll have to get some good closeup pics of the epoxy thickness around the openings....I'm getting excited. I still have to decide on background or rock wall, and between glass or acrylic viewing panels........
meowzer
Moderator
Quote:
Originally Posted by acrylic51 http:///forum/thread/376802/415-gallon-plywood-tank-build/560#post_3340890
Meowzer.....See I got your name right this time....
 A gallon of epoxy/hardner is $155.00 and that doesn't include shipping.....She offered to buy the epoxy....
 WOW....OK...I see your point LOL
Originally Posted by acrylic51 http:///forum/thread/376802/415-gallon-plywood-tank-build/560#post_3340890
Meowzer.....See I got your name right this time....


meowzer
Moderator
Quote:
Originally Posted by acrylic51 http:///forum/thread/376802/415-gallon-plywood-tank-build/560#post_3340895
They even charge you a hazmat fee to ship it. It's more expensive if I buy it locally 10 minutes from the boat place by my house. I think she's getting anxious to see it with water as well.
LOL...Or maybe she wants her rooms back

Of course she is anxious....we all are...LOL
Originally Posted by acrylic51 http:///forum/thread/376802/415-gallon-plywood-tank-build/560#post_3340895
They even charge you a hazmat fee to ship it. It's more expensive if I buy it locally 10 minutes from the boat place by my house. I think she's getting anxious to see it with water as well.
LOL...Or maybe she wants her rooms back

Of course she is anxious....we all are...LOL
acrylic51
Active Member
OK.....more work honestly was done in preparation for the holidays......Most of you guys have seen all the tools and junk always laying around....Not the most organized worker, but I manage to get it done somehow. I'd hate to actually get organized....I'd be dangerous.
This past Sunday I employed a couple friends to help me get the beast back onto the stand.....Actually it wasn't that bad. I had constructed a crude stand with moving dollies screwed to the 2x4 stand I constructed and my 95lb daughter literally pulled it off the stand onto the cart before we started any epoxy work, so it shows it was light.....We lifted the tank onto the cart and rolled it over in front of the stand and slid it into place. Needless to say I didn't have a lot of wiggle room, which I was shooting for as far as height between the tank and canopy. It did take some work maneuvering it around once on the stand though.
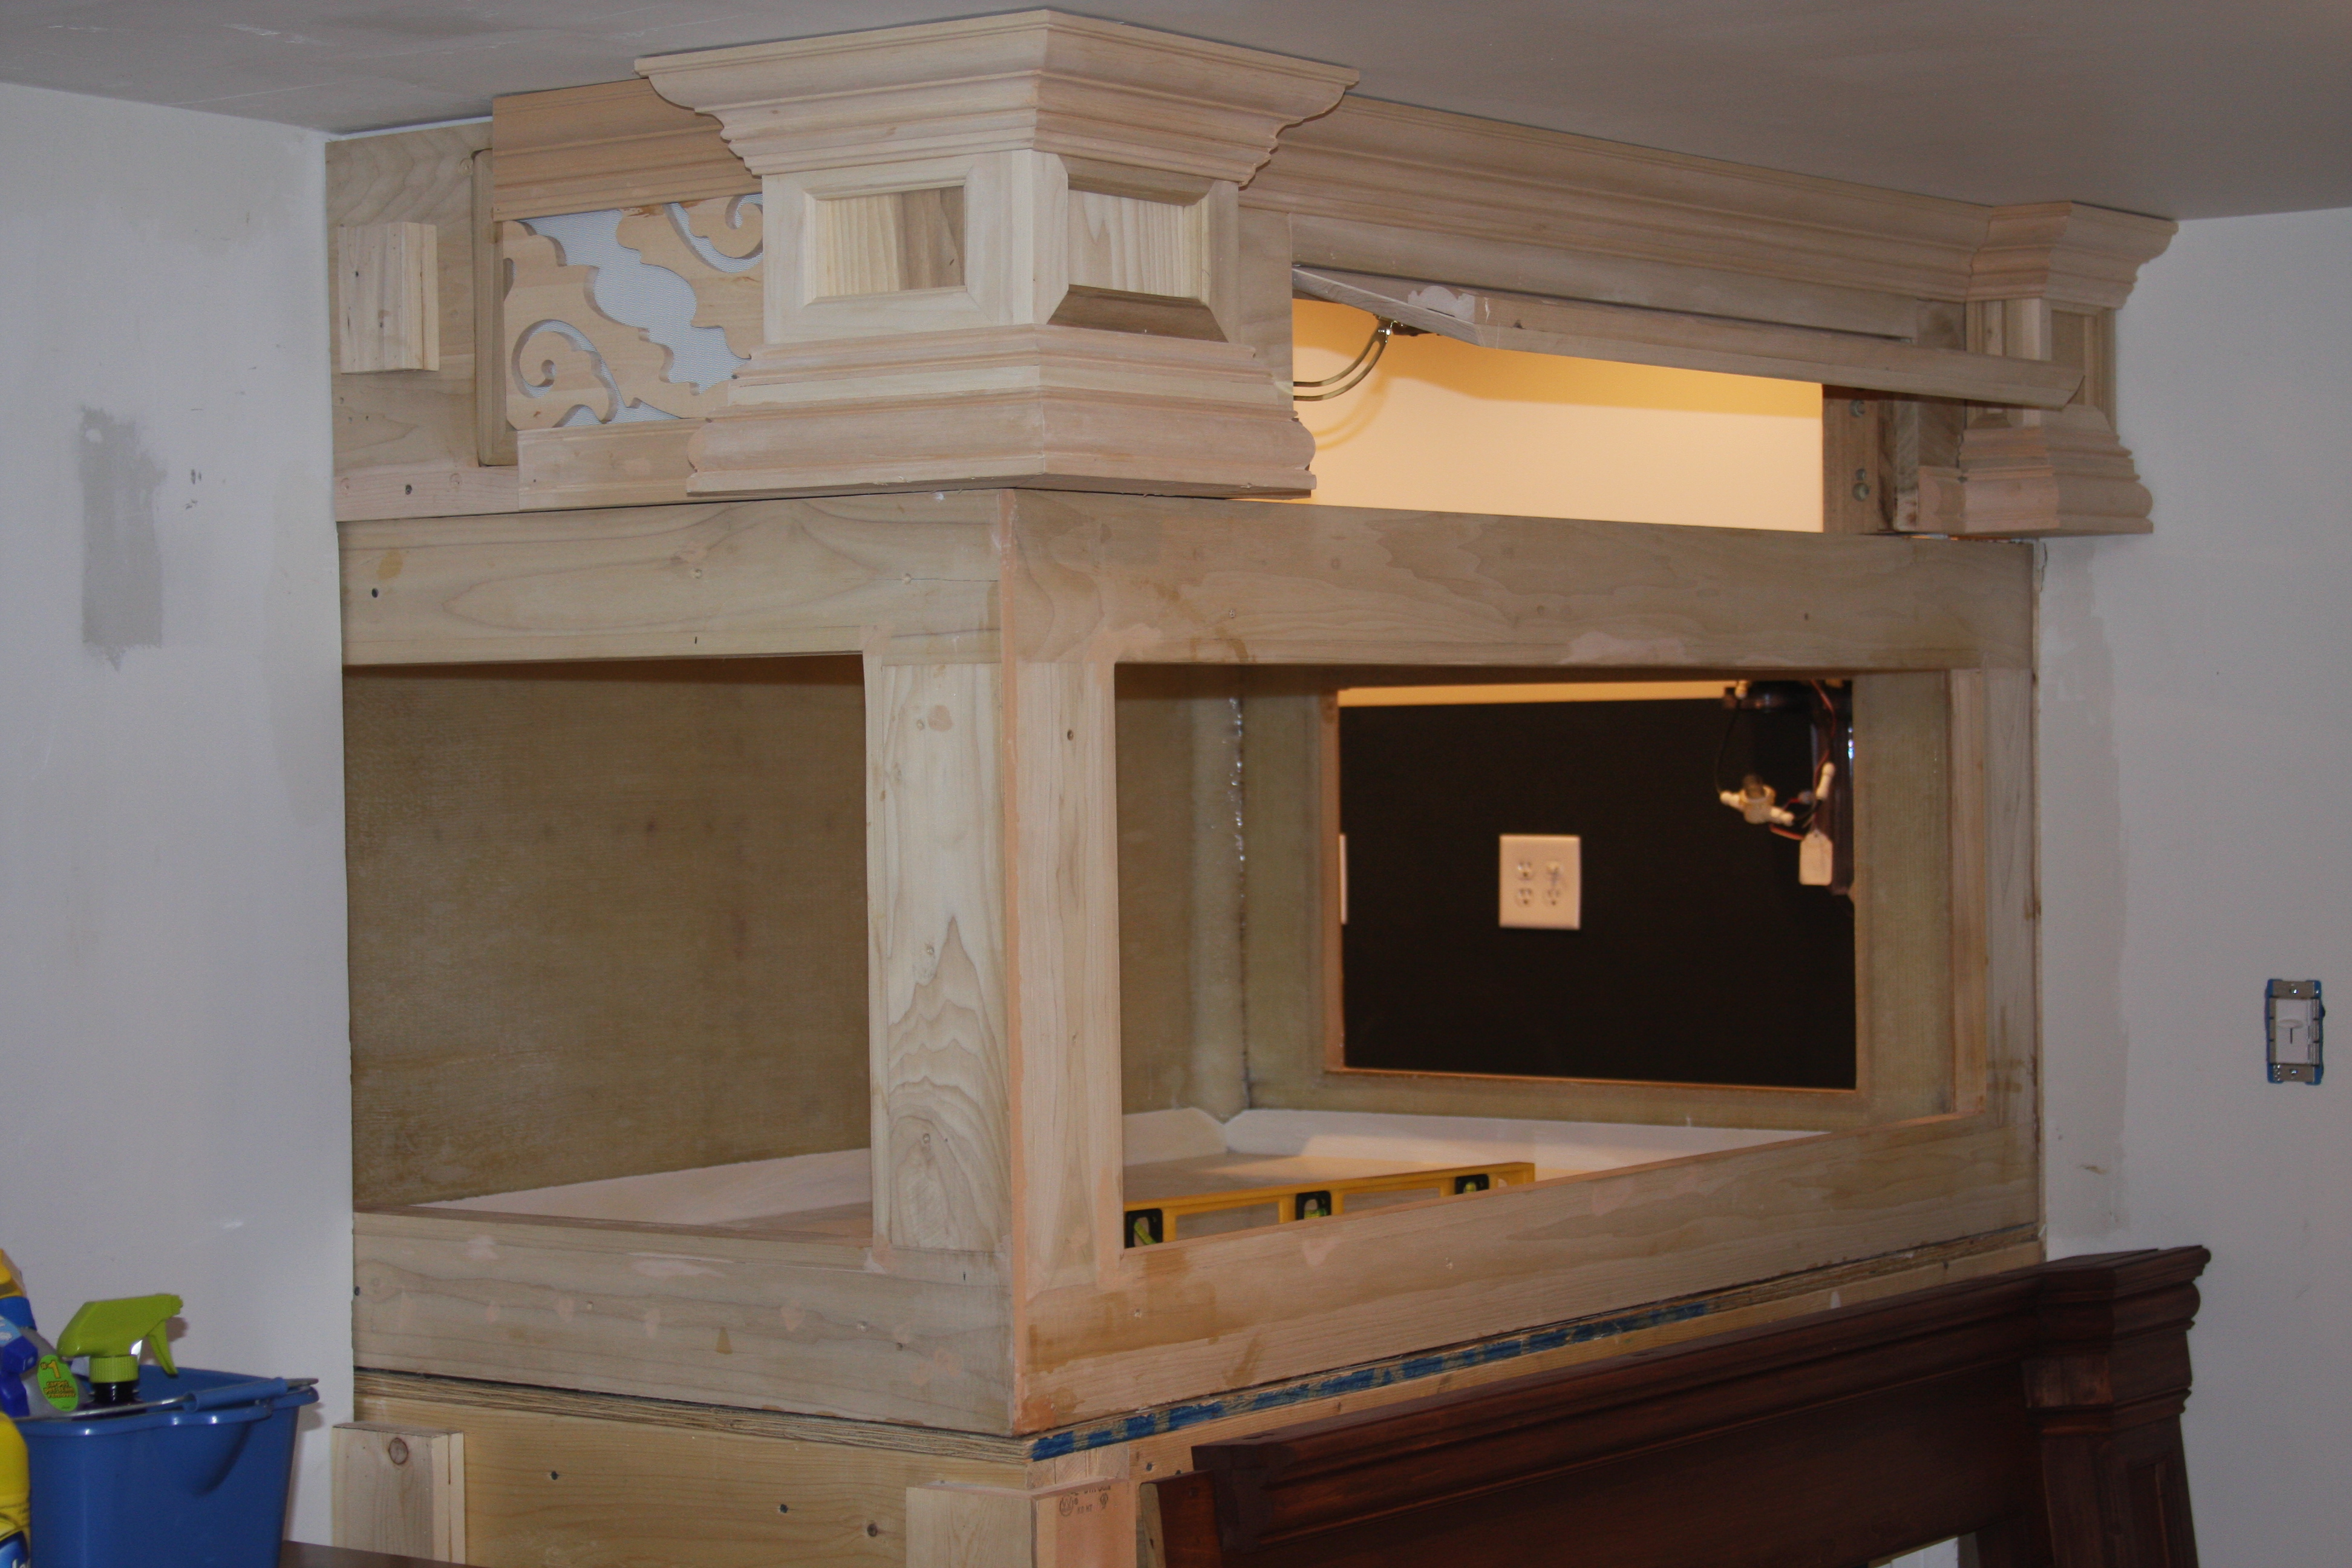
Here's a shot from the family room showing the tank on the stand.....As I had mentioned earlier that there isn't much wiggle room, and that is due to me doing a pour coat on the bottom of the tank to make it perfectly level with the stand. The level is in the stand, and I'll have to shoot a pic to show just how level it is.....I'm going to do a little sanding on the top of the tank to give me a tad more clearance, but a perspective of the tank in place.
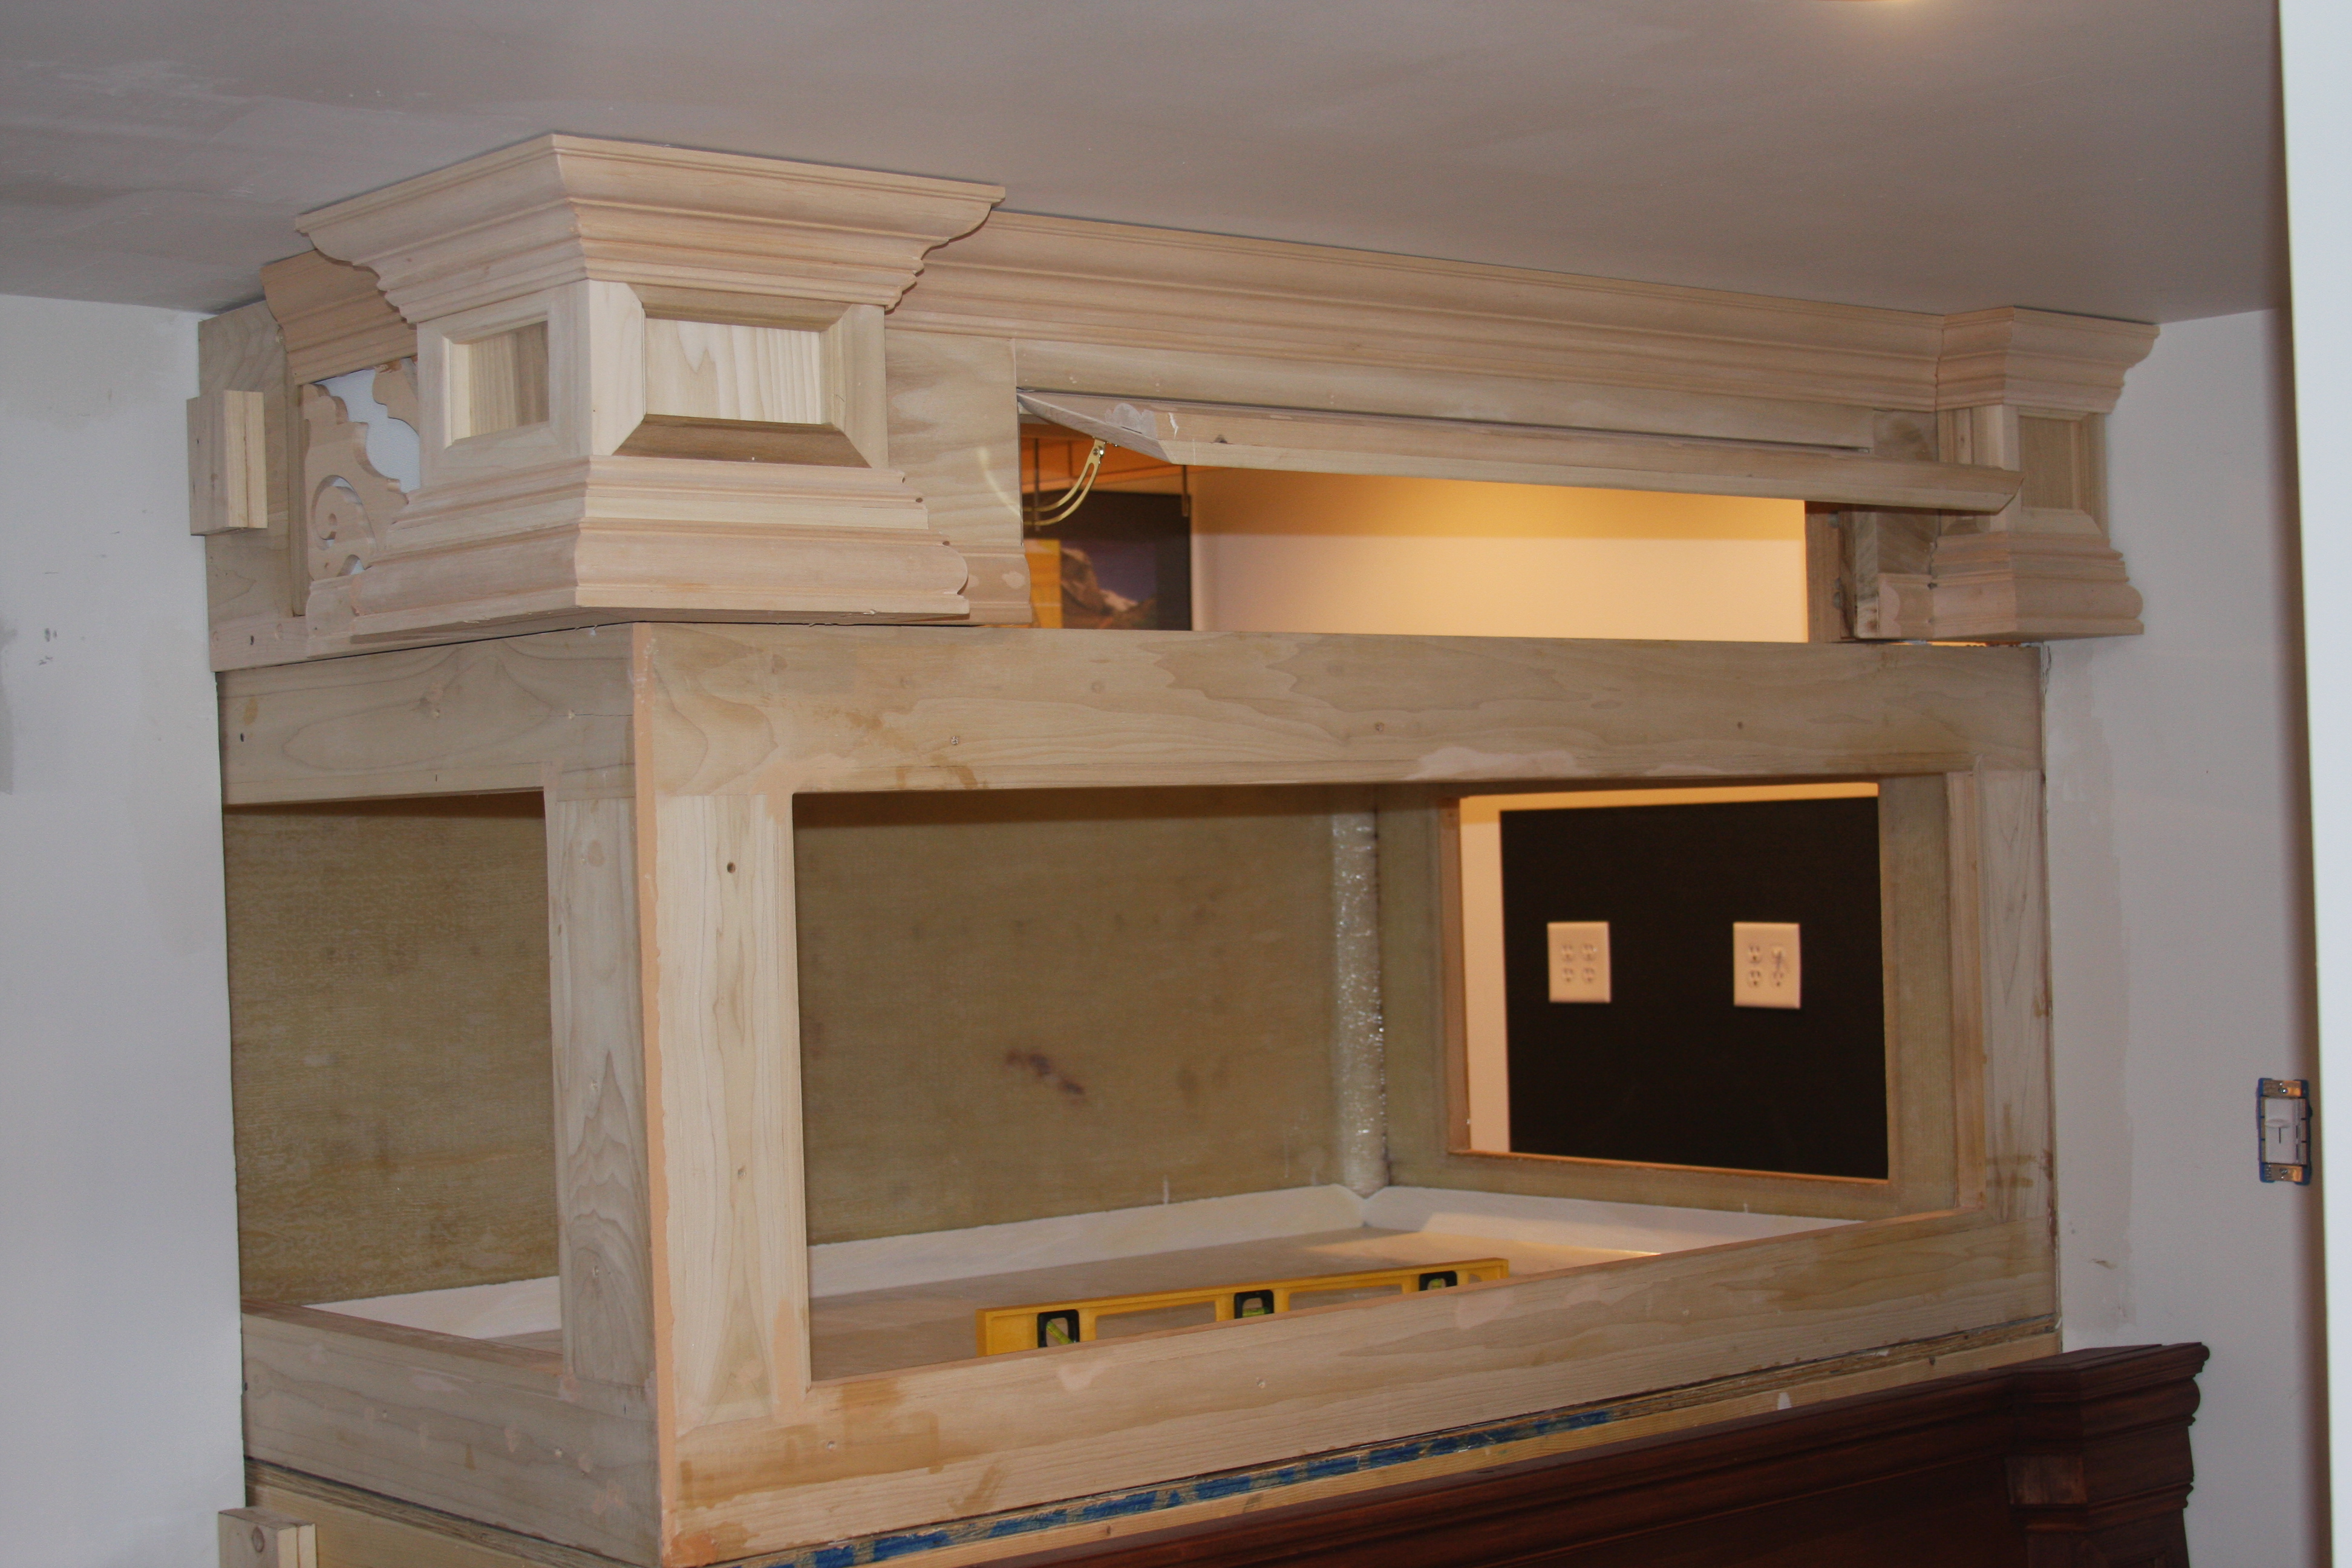
Just another shot of the tank on the stand. You can see the front skin of the stand already stained, but no top coat as of yet just sitting there. This was 1 reason I wanted everything removable, so that it would make getting the tank into place without damaging any woodwork.
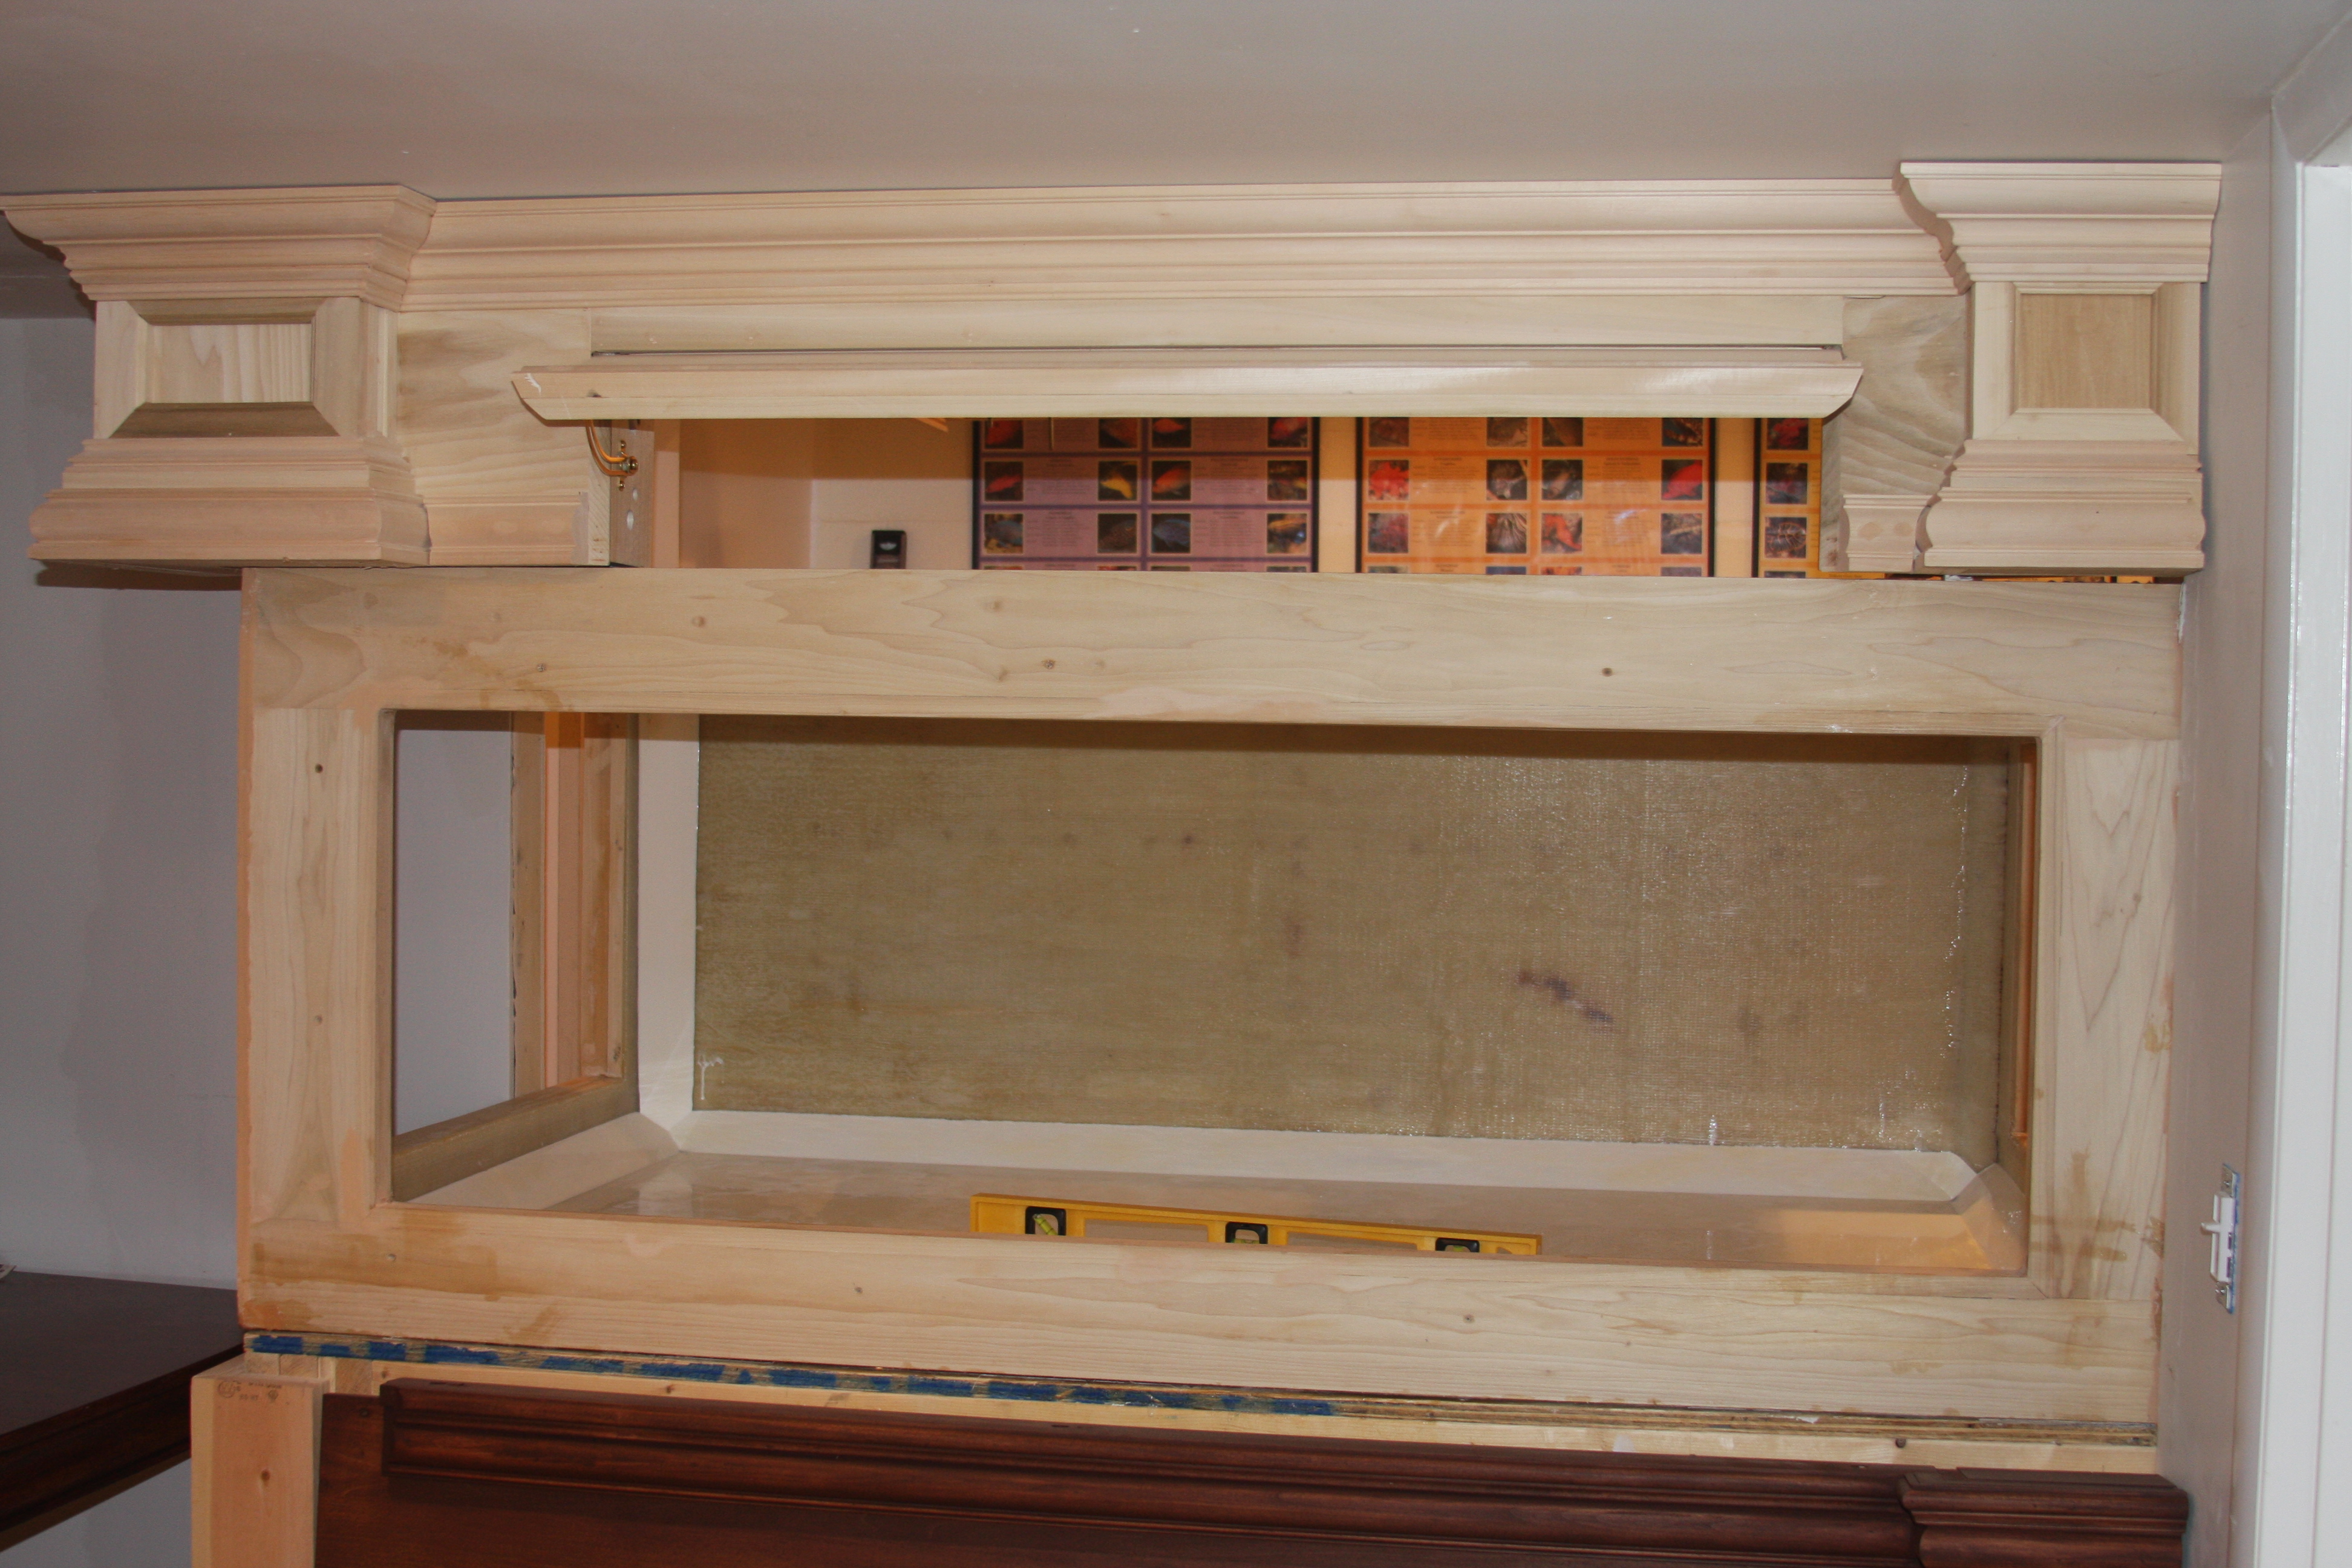
A shot from the front......Hard to get a real good shot from the front due to the stairs behind me....Again another shot of the skin for the stand.
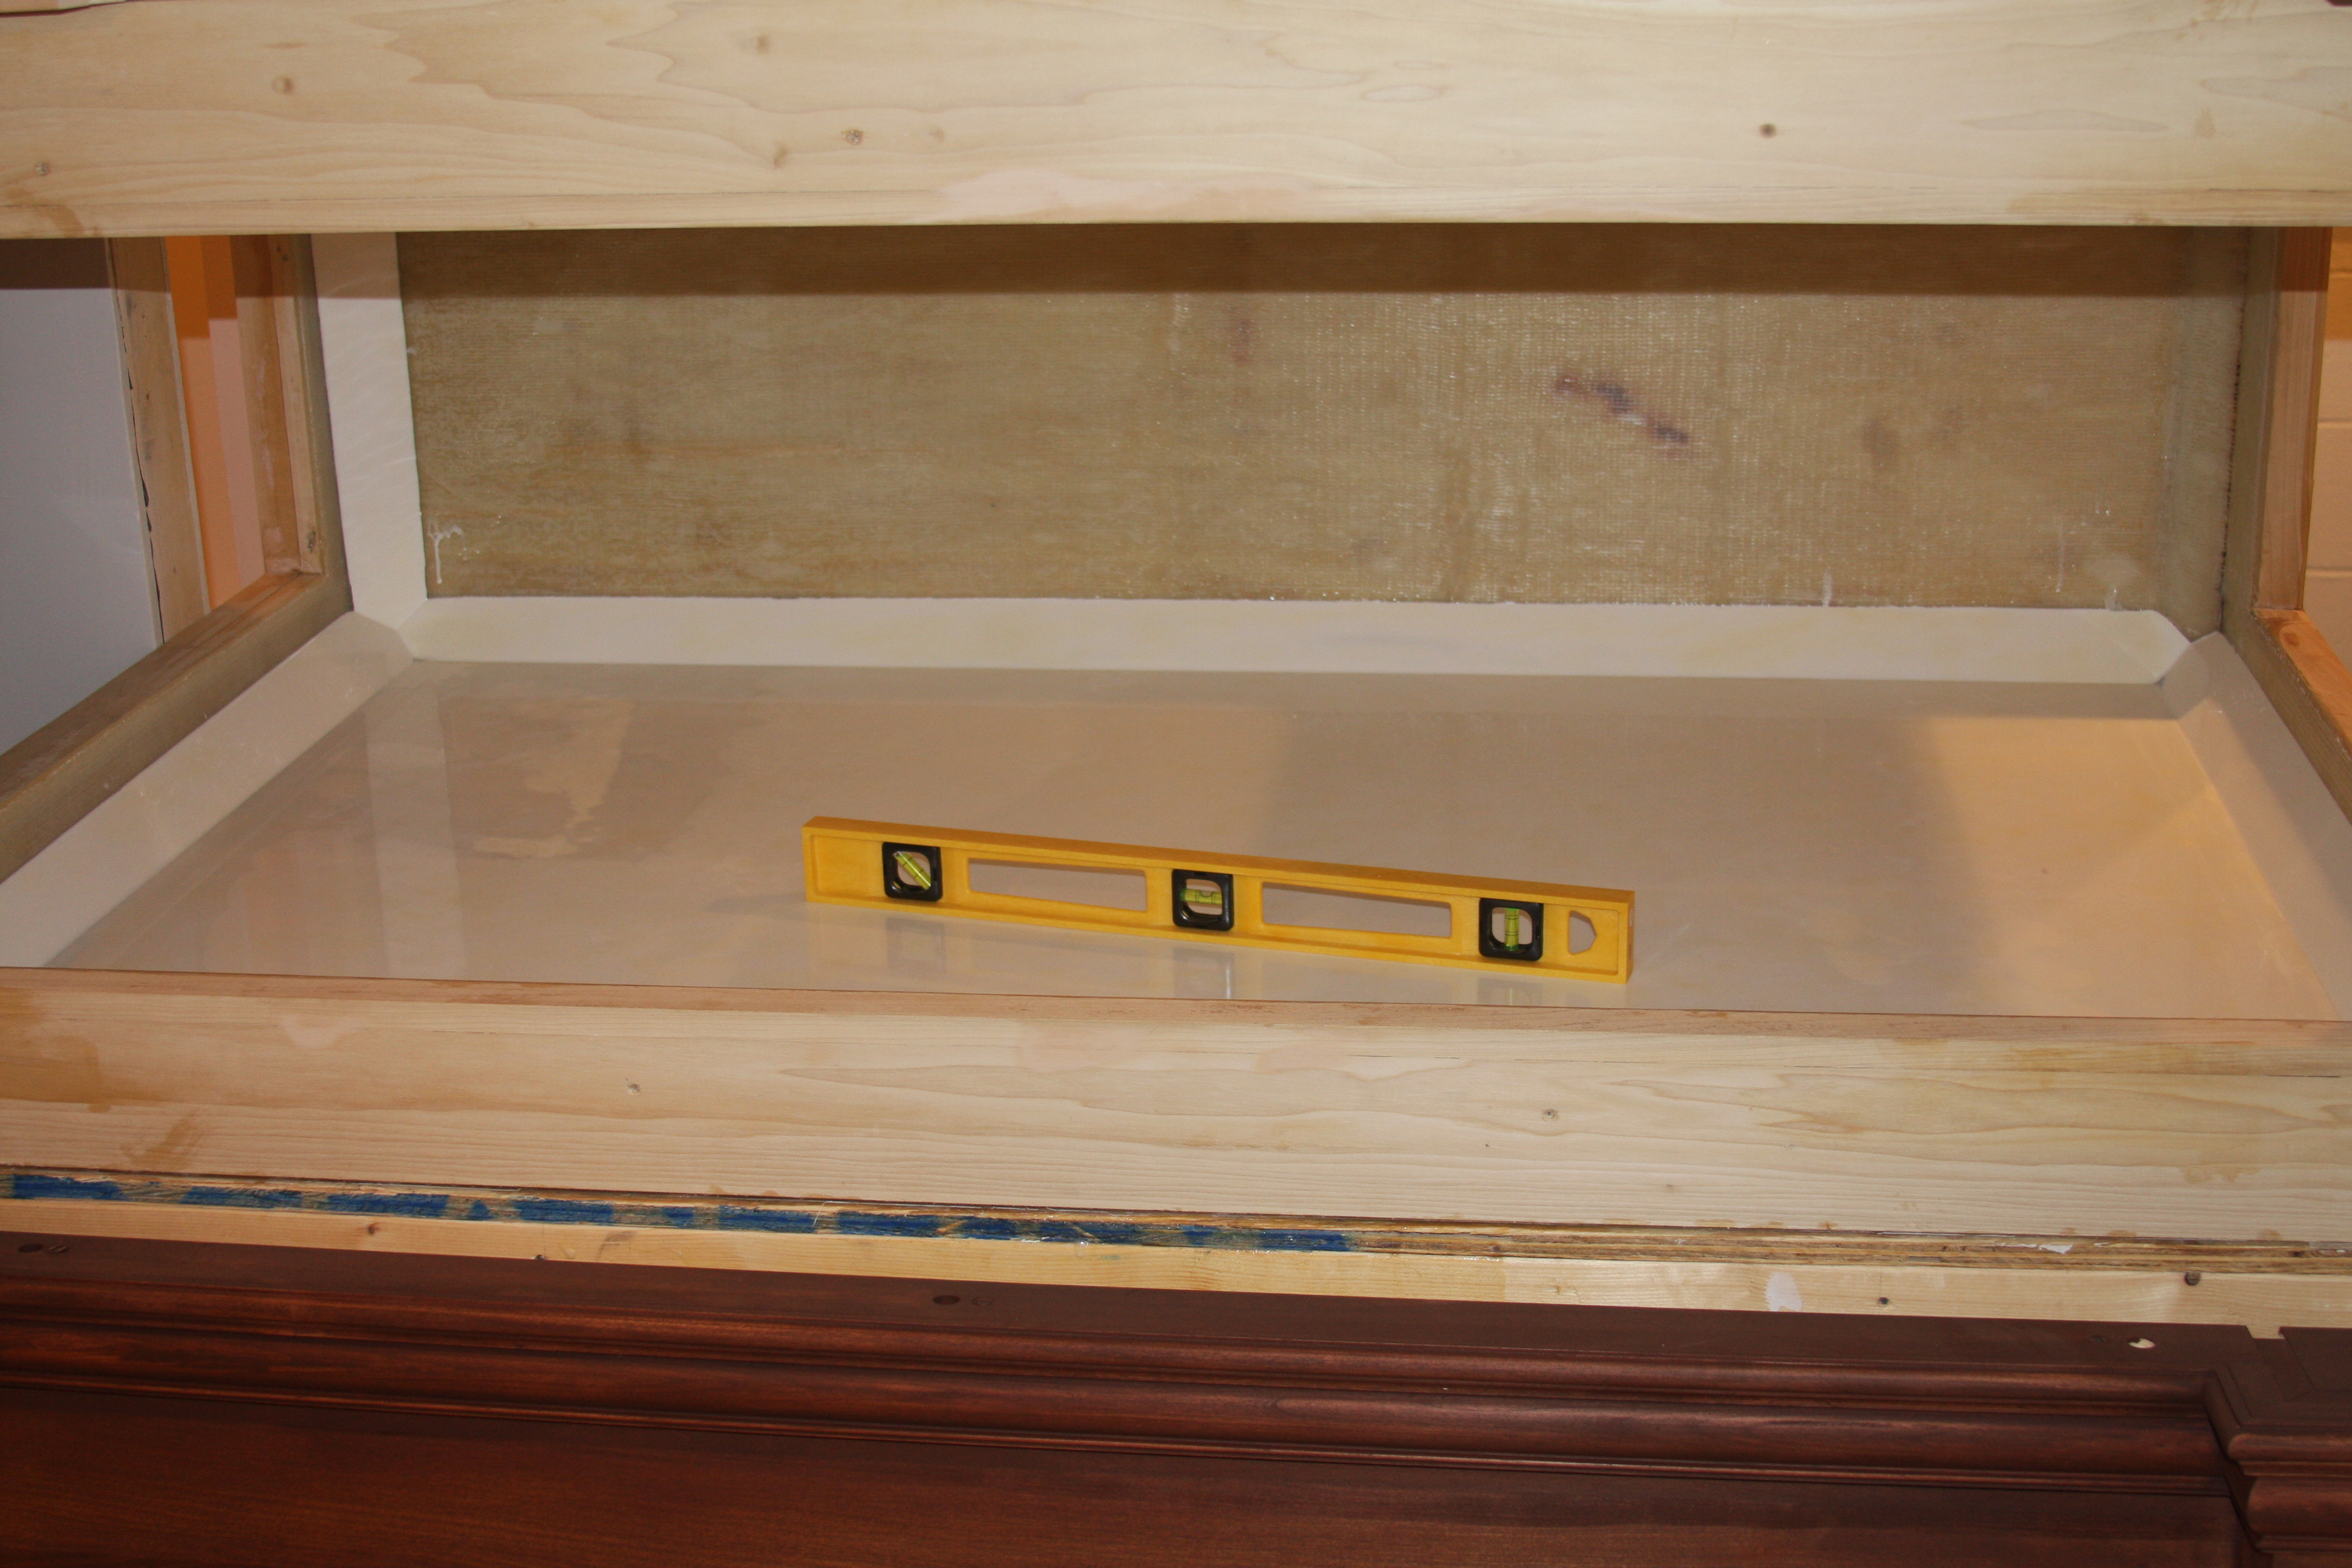
Again another shot of the epoxy work already done to the bottom of the inside of the tank. Corey what do you think about the white now? Again I'm considering embedding sand in epoxy, so it would have a sandy look to the bottom??? Also you can see that the bottom 45's are also epoxied, and started the upright vertical pieces as well.
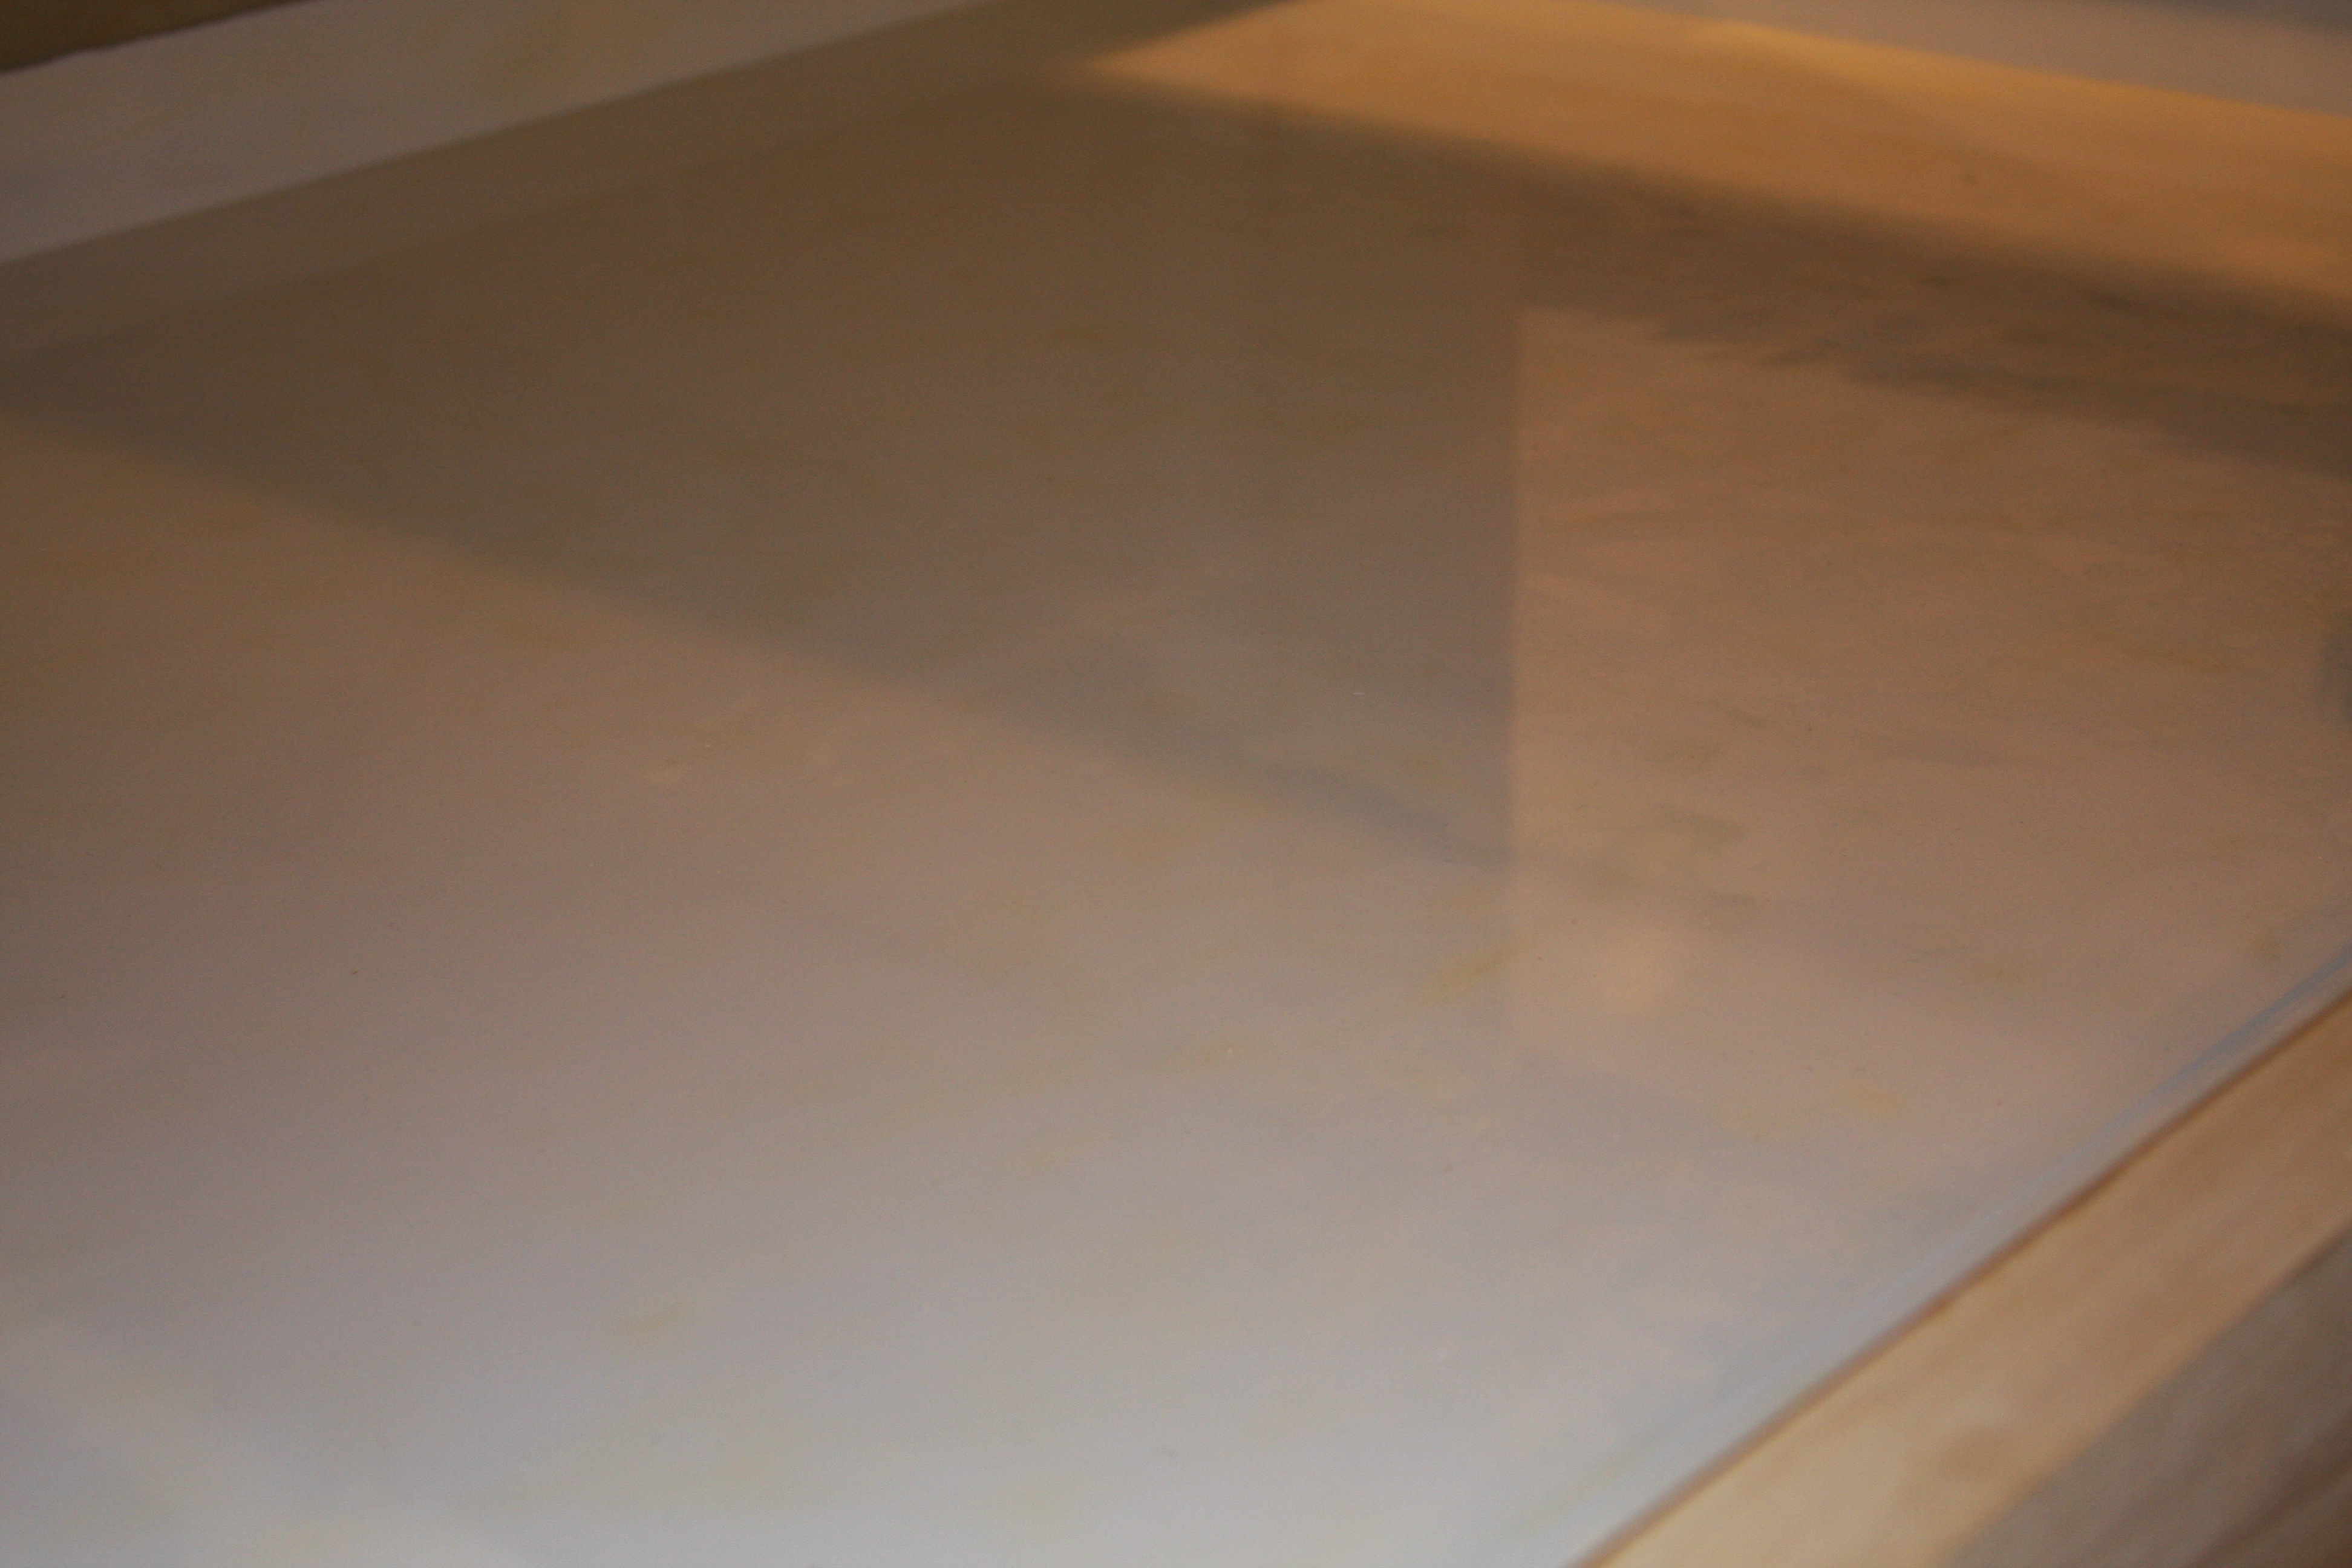
Just another shot as to the time and prep work that goes into an epoxy build/pour to get a super smooth finish......
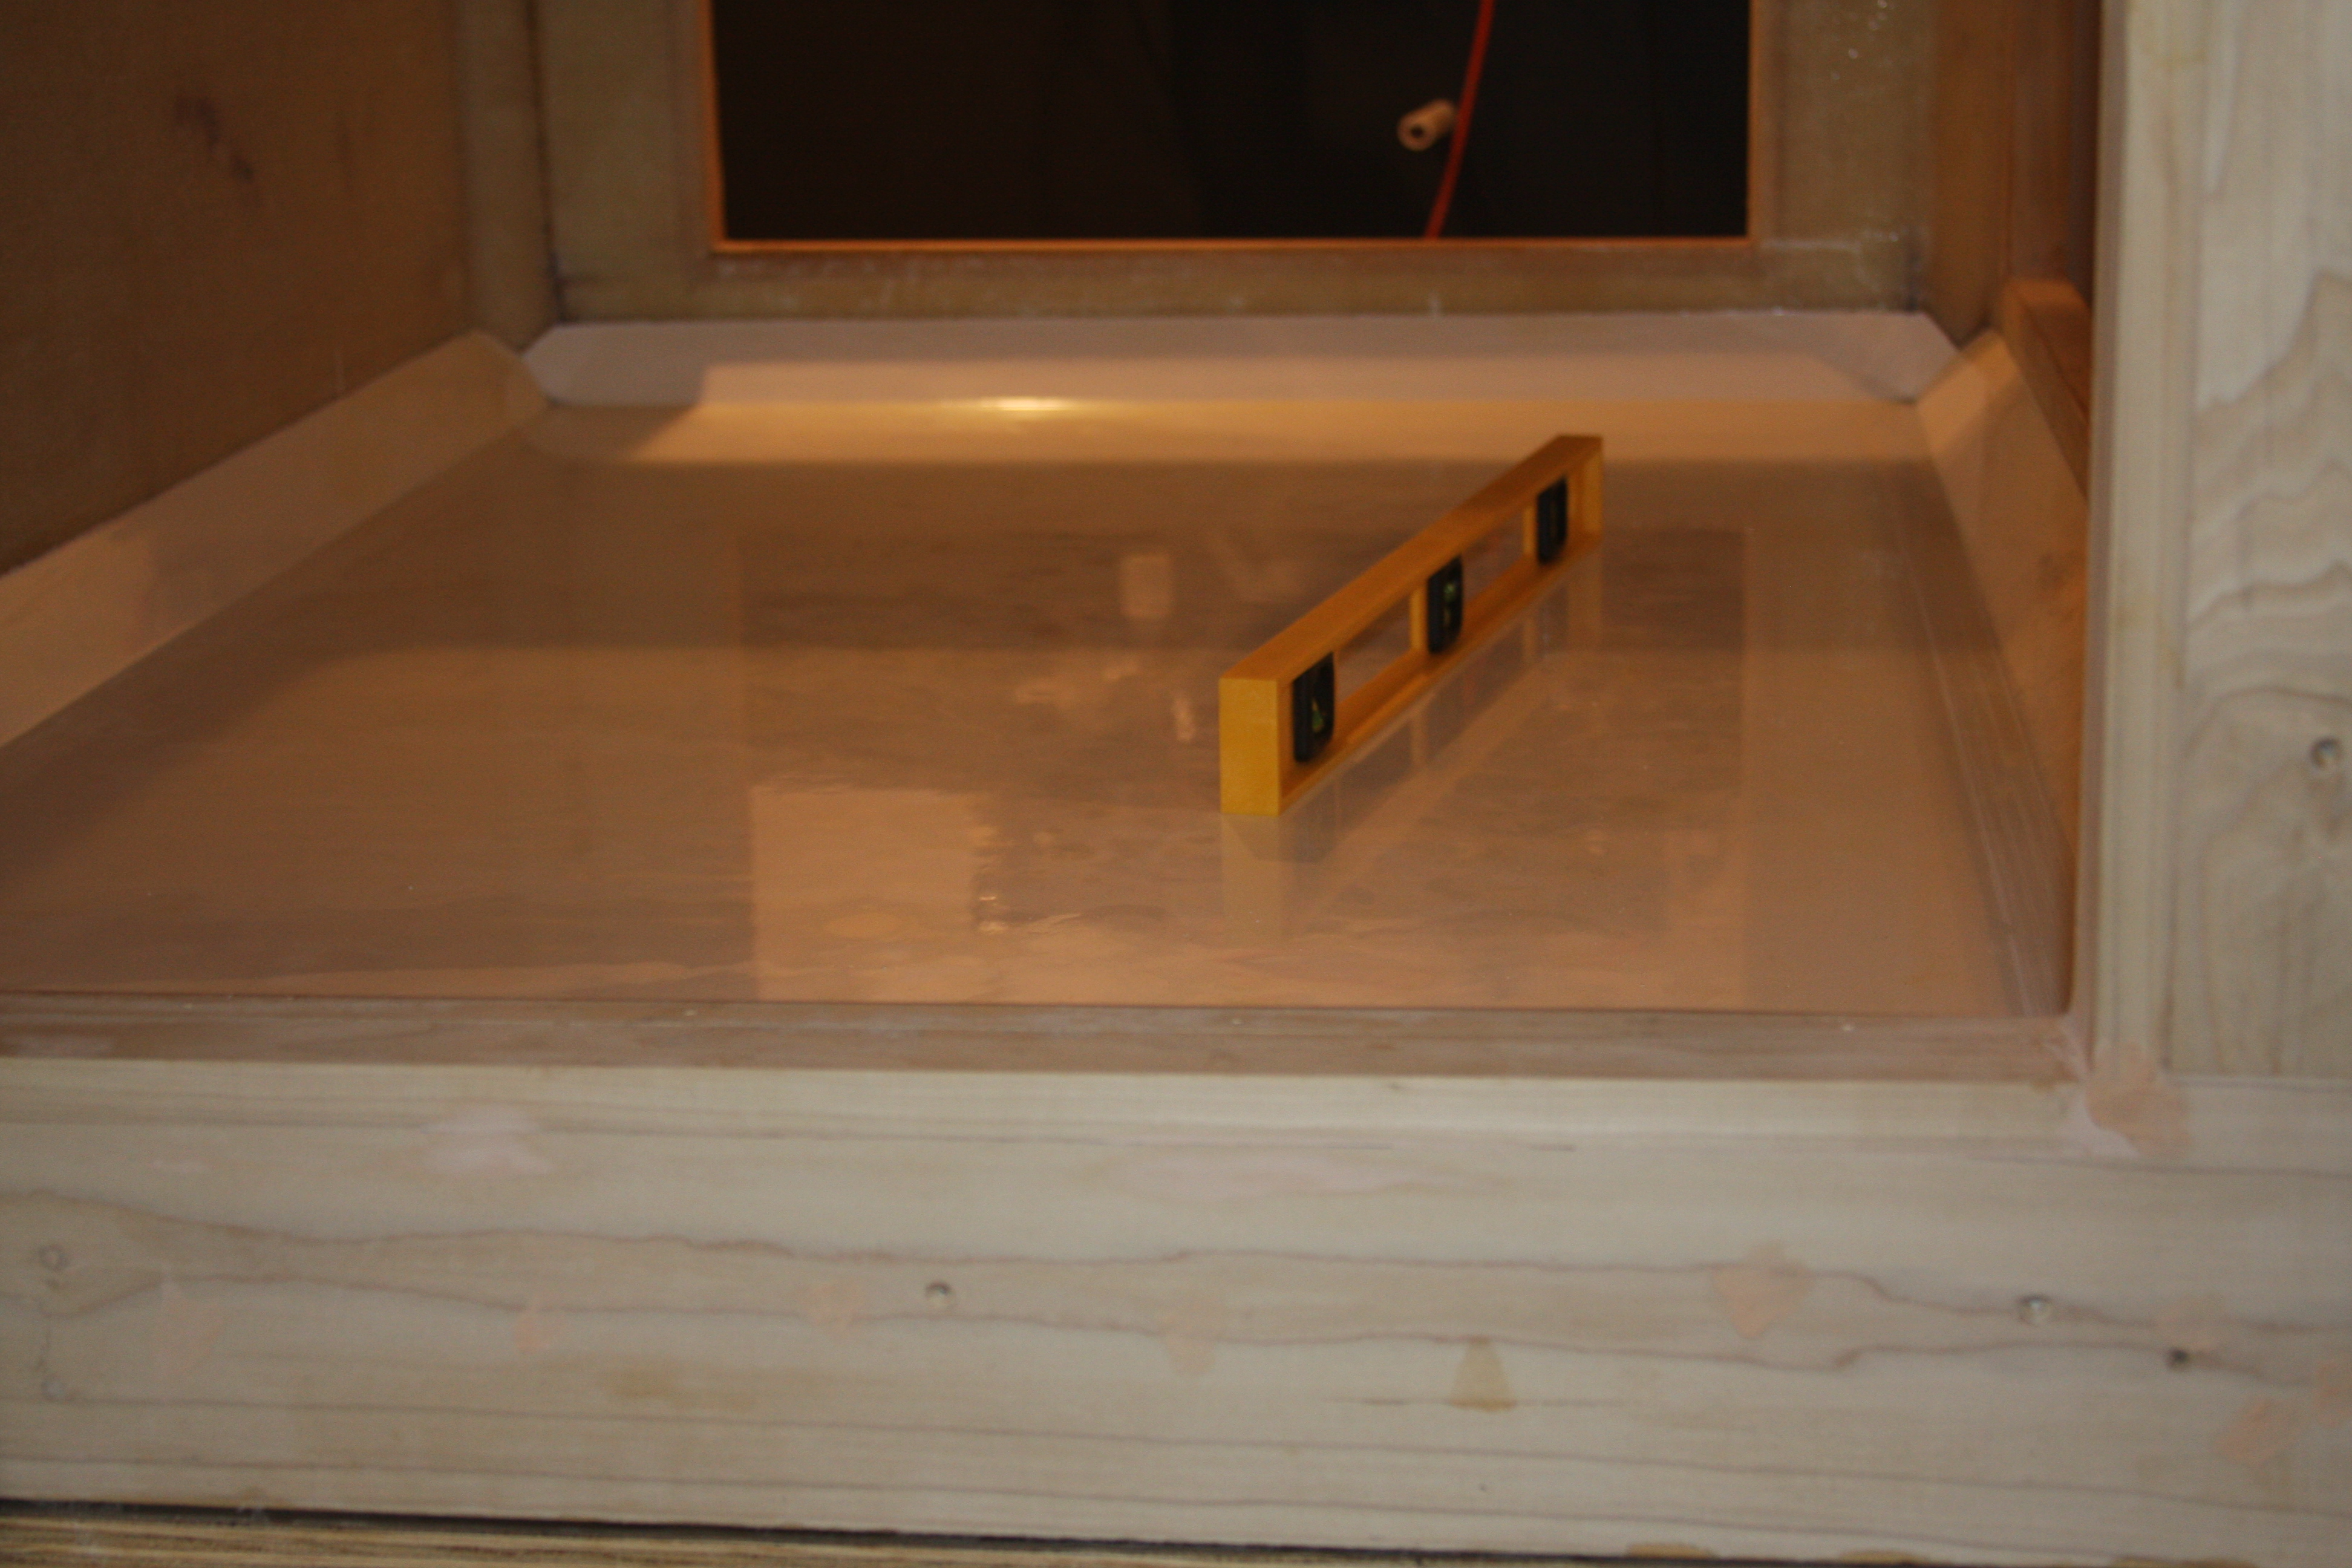
Another shot, but from the end viewing panel......
This past Sunday I employed a couple friends to help me get the beast back onto the stand.....Actually it wasn't that bad. I had constructed a crude stand with moving dollies screwed to the 2x4 stand I constructed and my 95lb daughter literally pulled it off the stand onto the cart before we started any epoxy work, so it shows it was light.....We lifted the tank onto the cart and rolled it over in front of the stand and slid it into place. Needless to say I didn't have a lot of wiggle room, which I was shooting for as far as height between the tank and canopy. It did take some work maneuvering it around once on the stand though.
Here's a shot from the family room showing the tank on the stand.....As I had mentioned earlier that there isn't much wiggle room, and that is due to me doing a pour coat on the bottom of the tank to make it perfectly level with the stand. The level is in the stand, and I'll have to shoot a pic to show just how level it is.....I'm going to do a little sanding on the top of the tank to give me a tad more clearance, but a perspective of the tank in place.
Just another shot of the tank on the stand. You can see the front skin of the stand already stained, but no top coat as of yet just sitting there. This was 1 reason I wanted everything removable, so that it would make getting the tank into place without damaging any woodwork.
A shot from the front......Hard to get a real good shot from the front due to the stairs behind me....Again another shot of the skin for the stand.
Again another shot of the epoxy work already done to the bottom of the inside of the tank. Corey what do you think about the white now? Again I'm considering embedding sand in epoxy, so it would have a sandy look to the bottom??? Also you can see that the bottom 45's are also epoxied, and started the upright vertical pieces as well.
Just another shot as to the time and prep work that goes into an epoxy build/pour to get a super smooth finish......
Another shot, but from the end viewing panel......
acrylic51
Active Member
More pics.......
.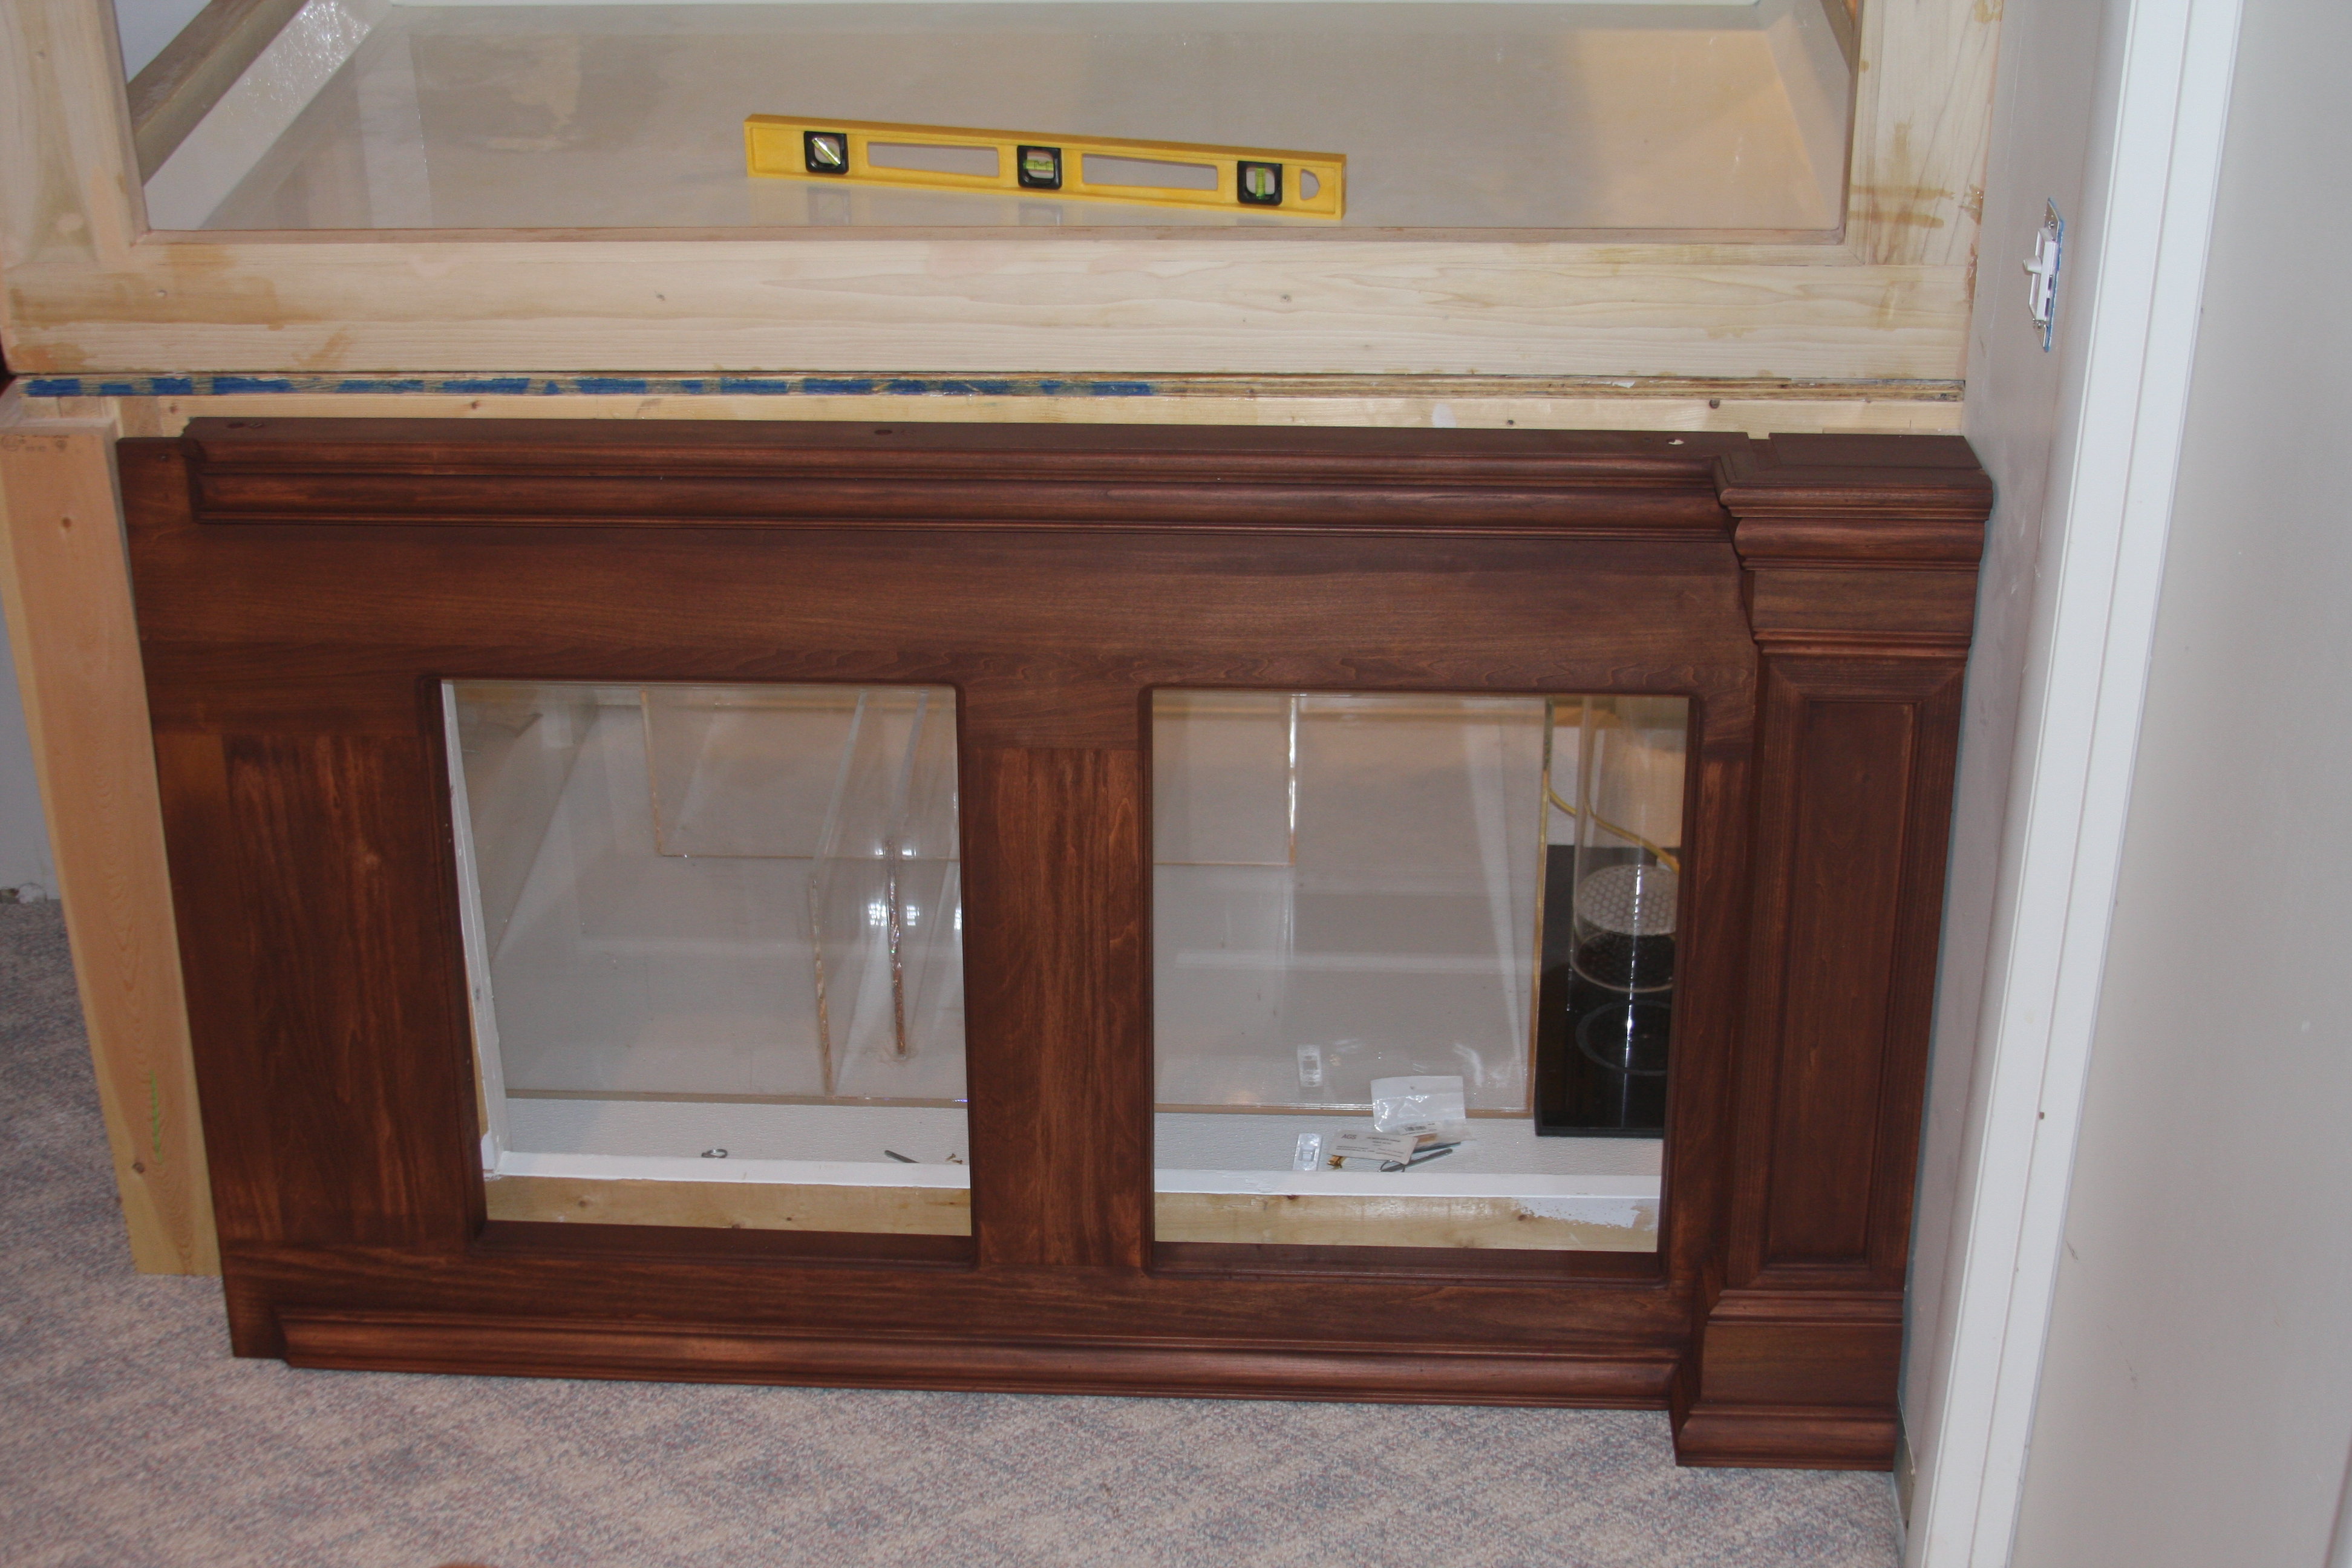
A pic of the front skin of the stand. No clear finish applied yet, and still have to do a little add on of trim on the far right side. In the background you can see the sump already in place and on the far right hand side of the sump you can see the start of my DIY dual chamber calcium reactor.....
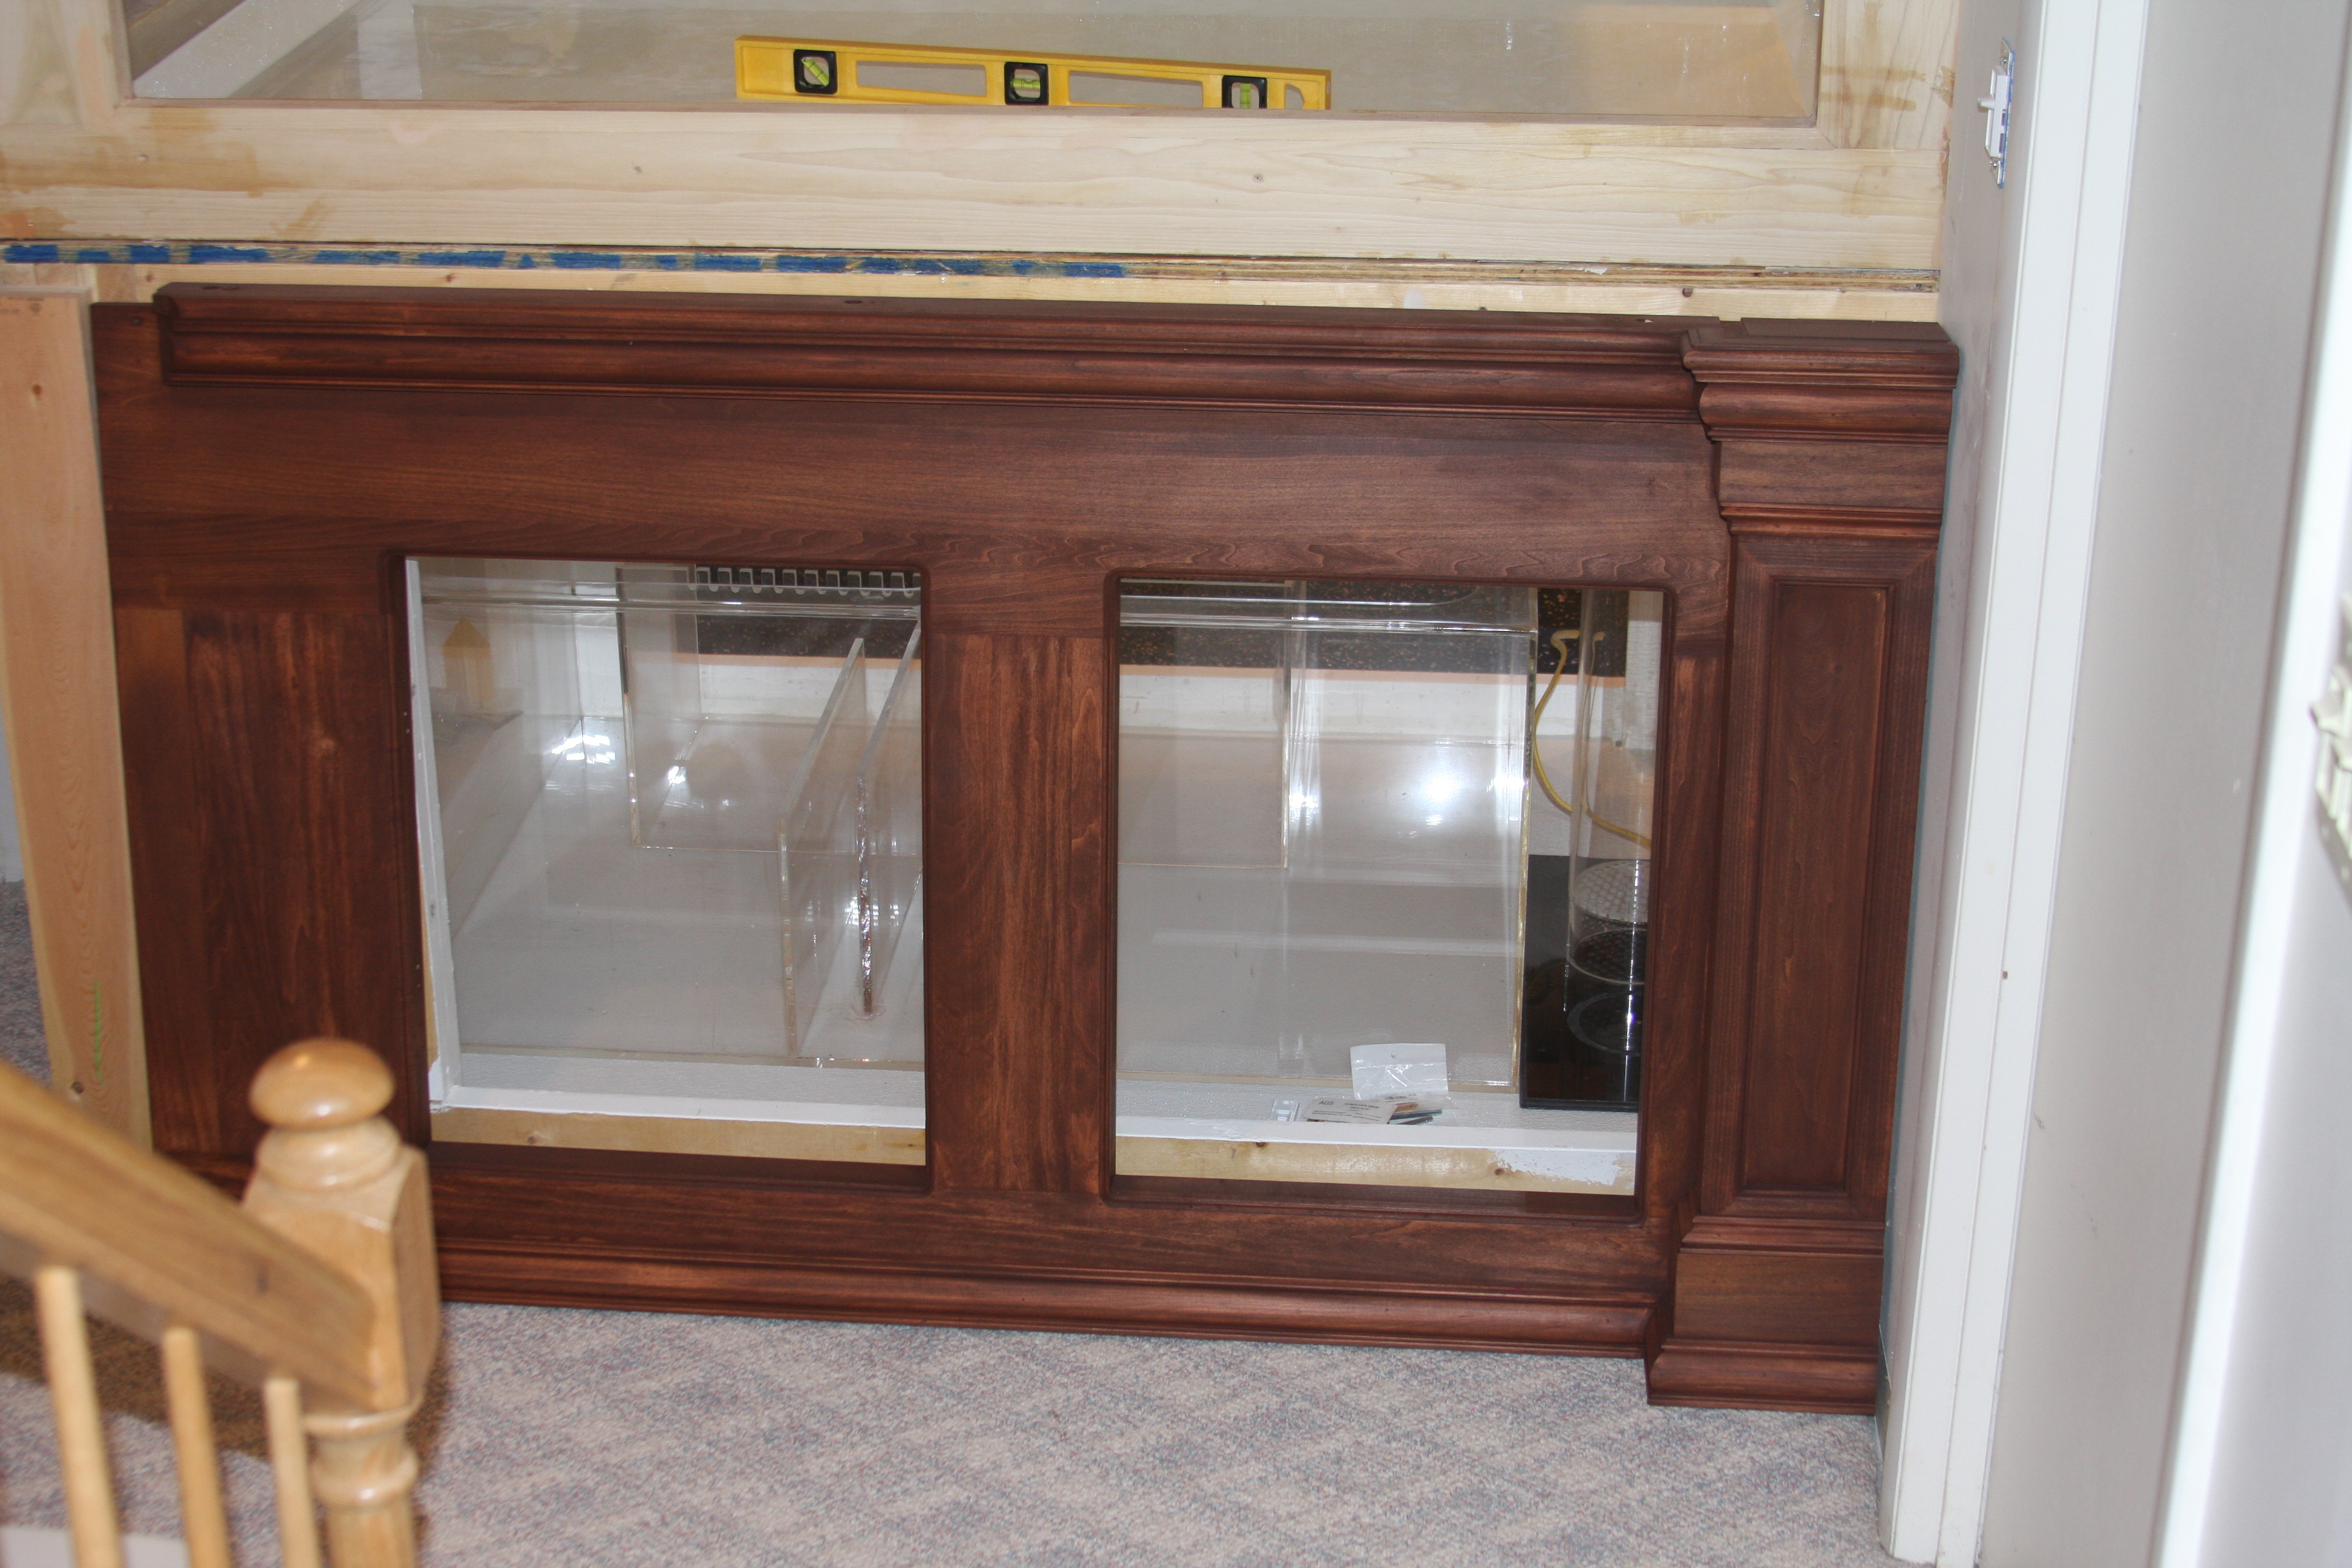
Another shot of the skin from the coming down the stairs in the family room....
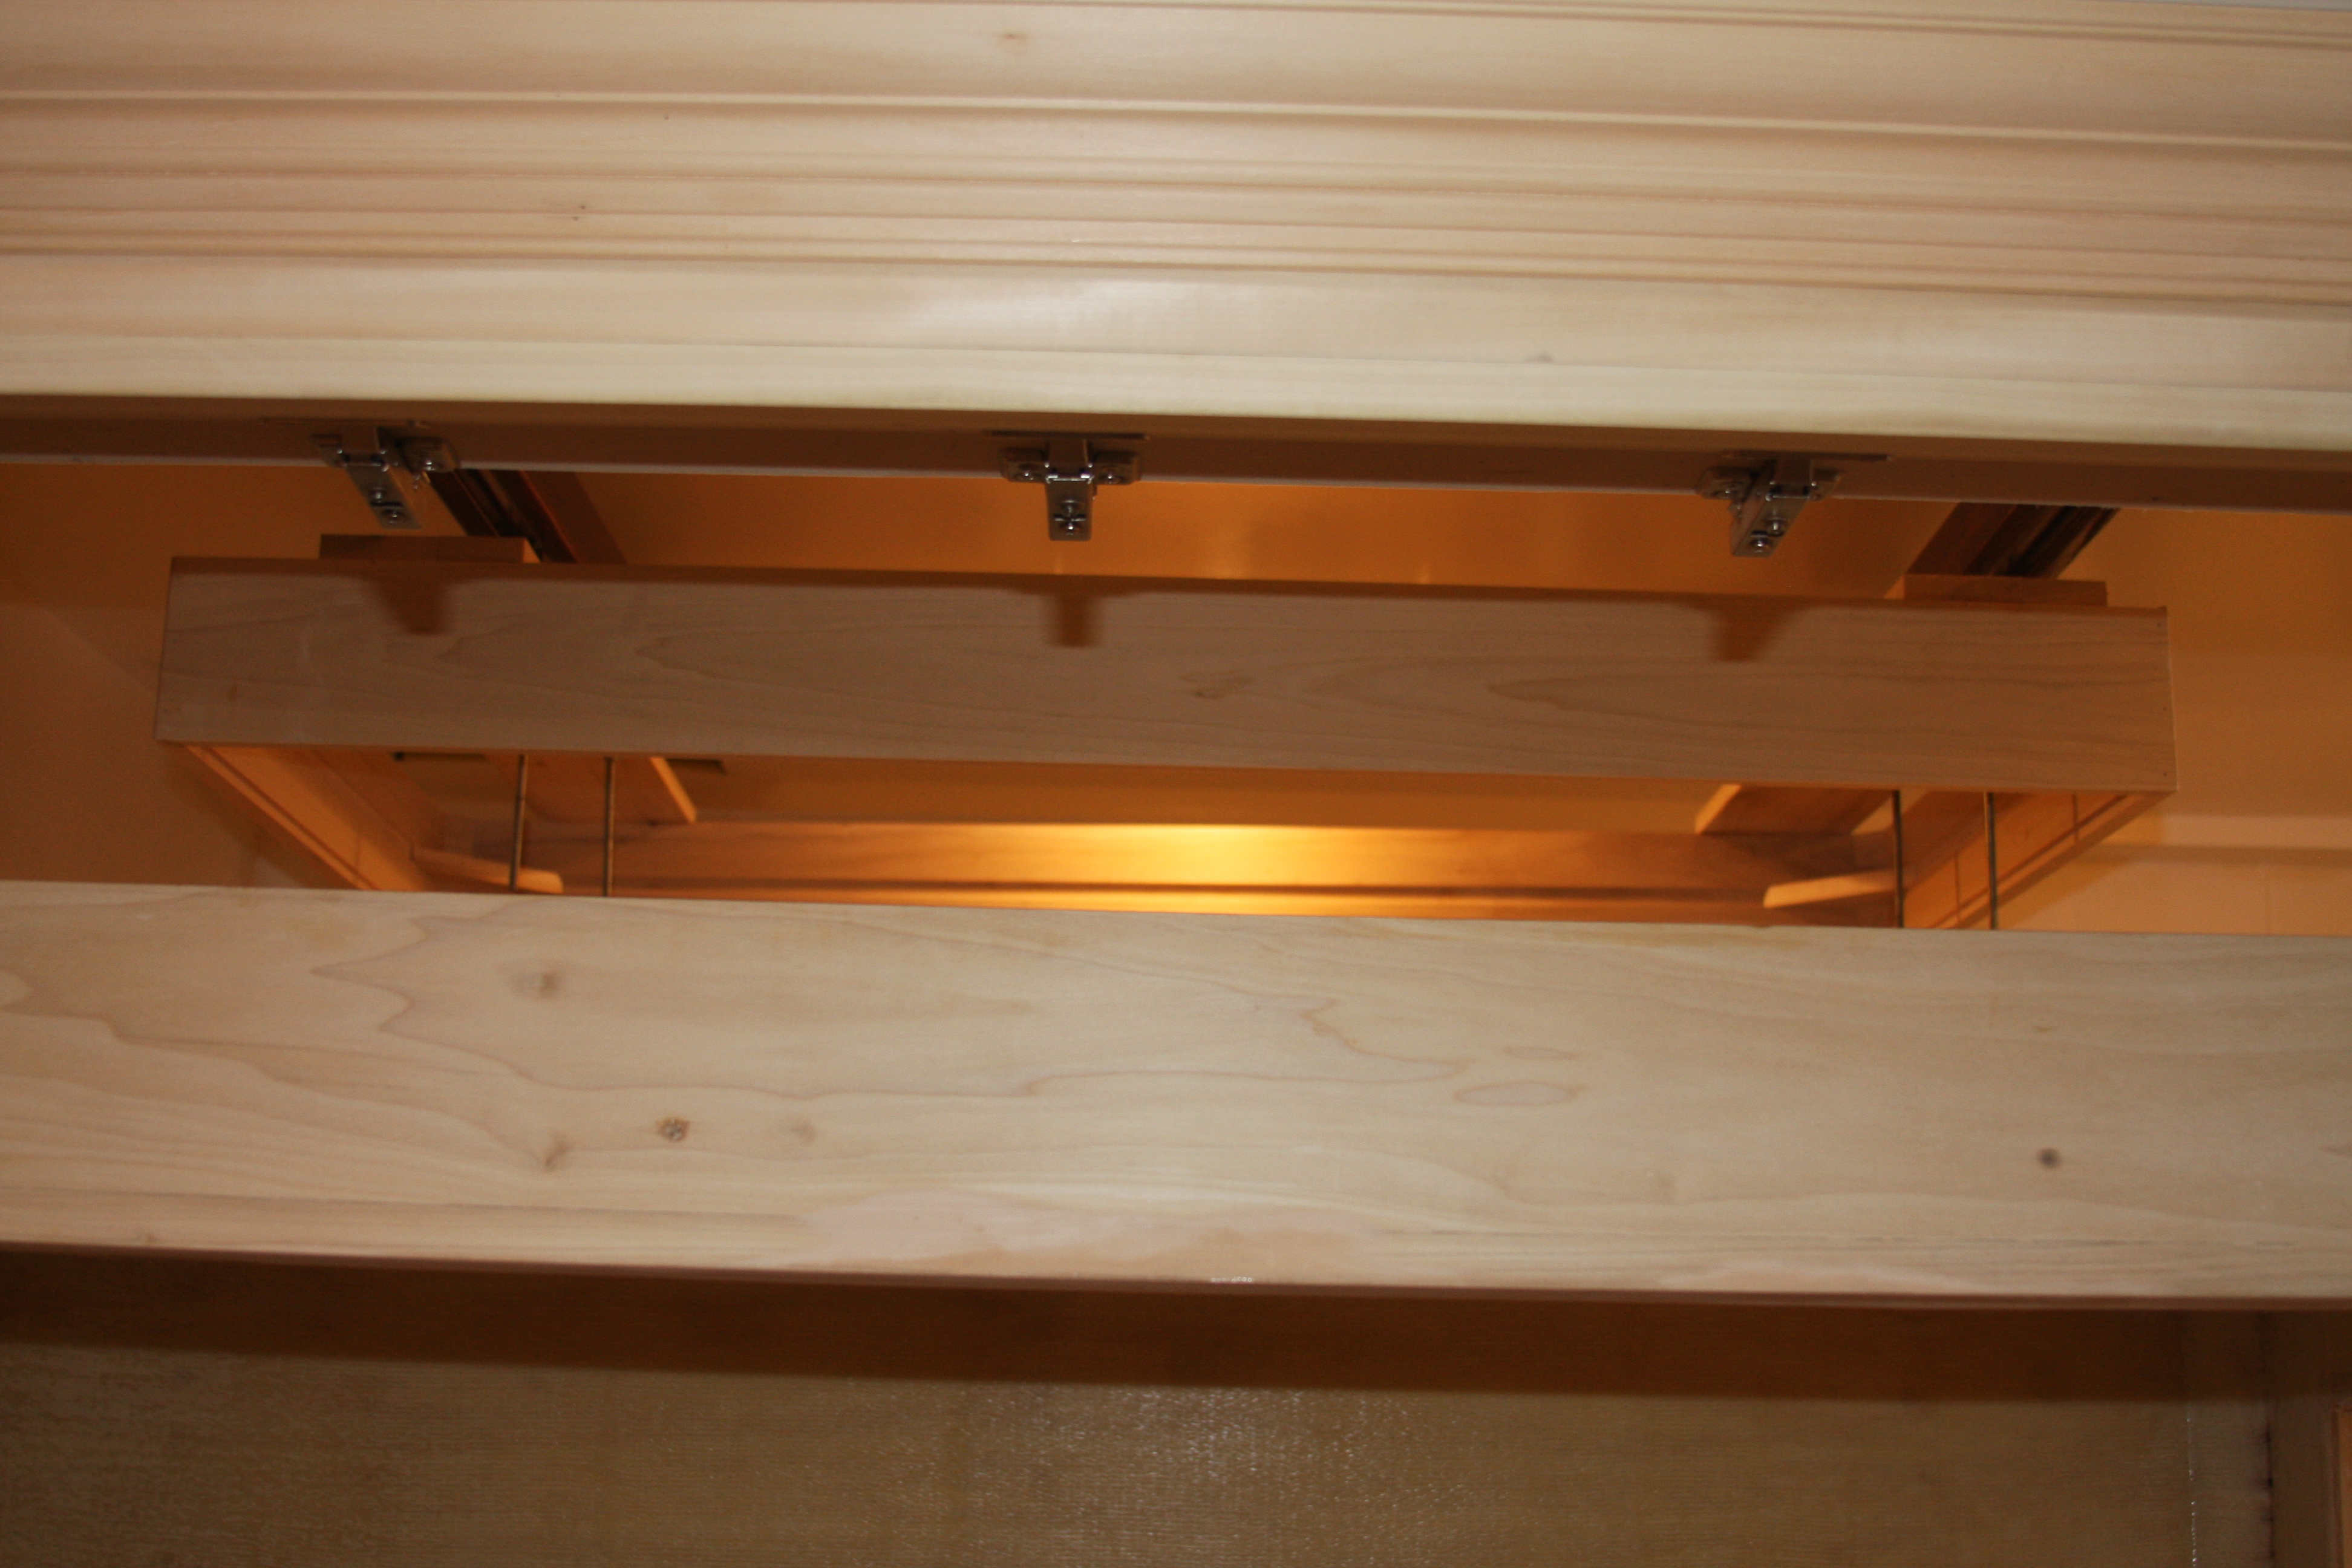
In this pic you can catch of a glimpse of the movable light rack......I will probably have to shoot a video to give a good true perspective of everything....
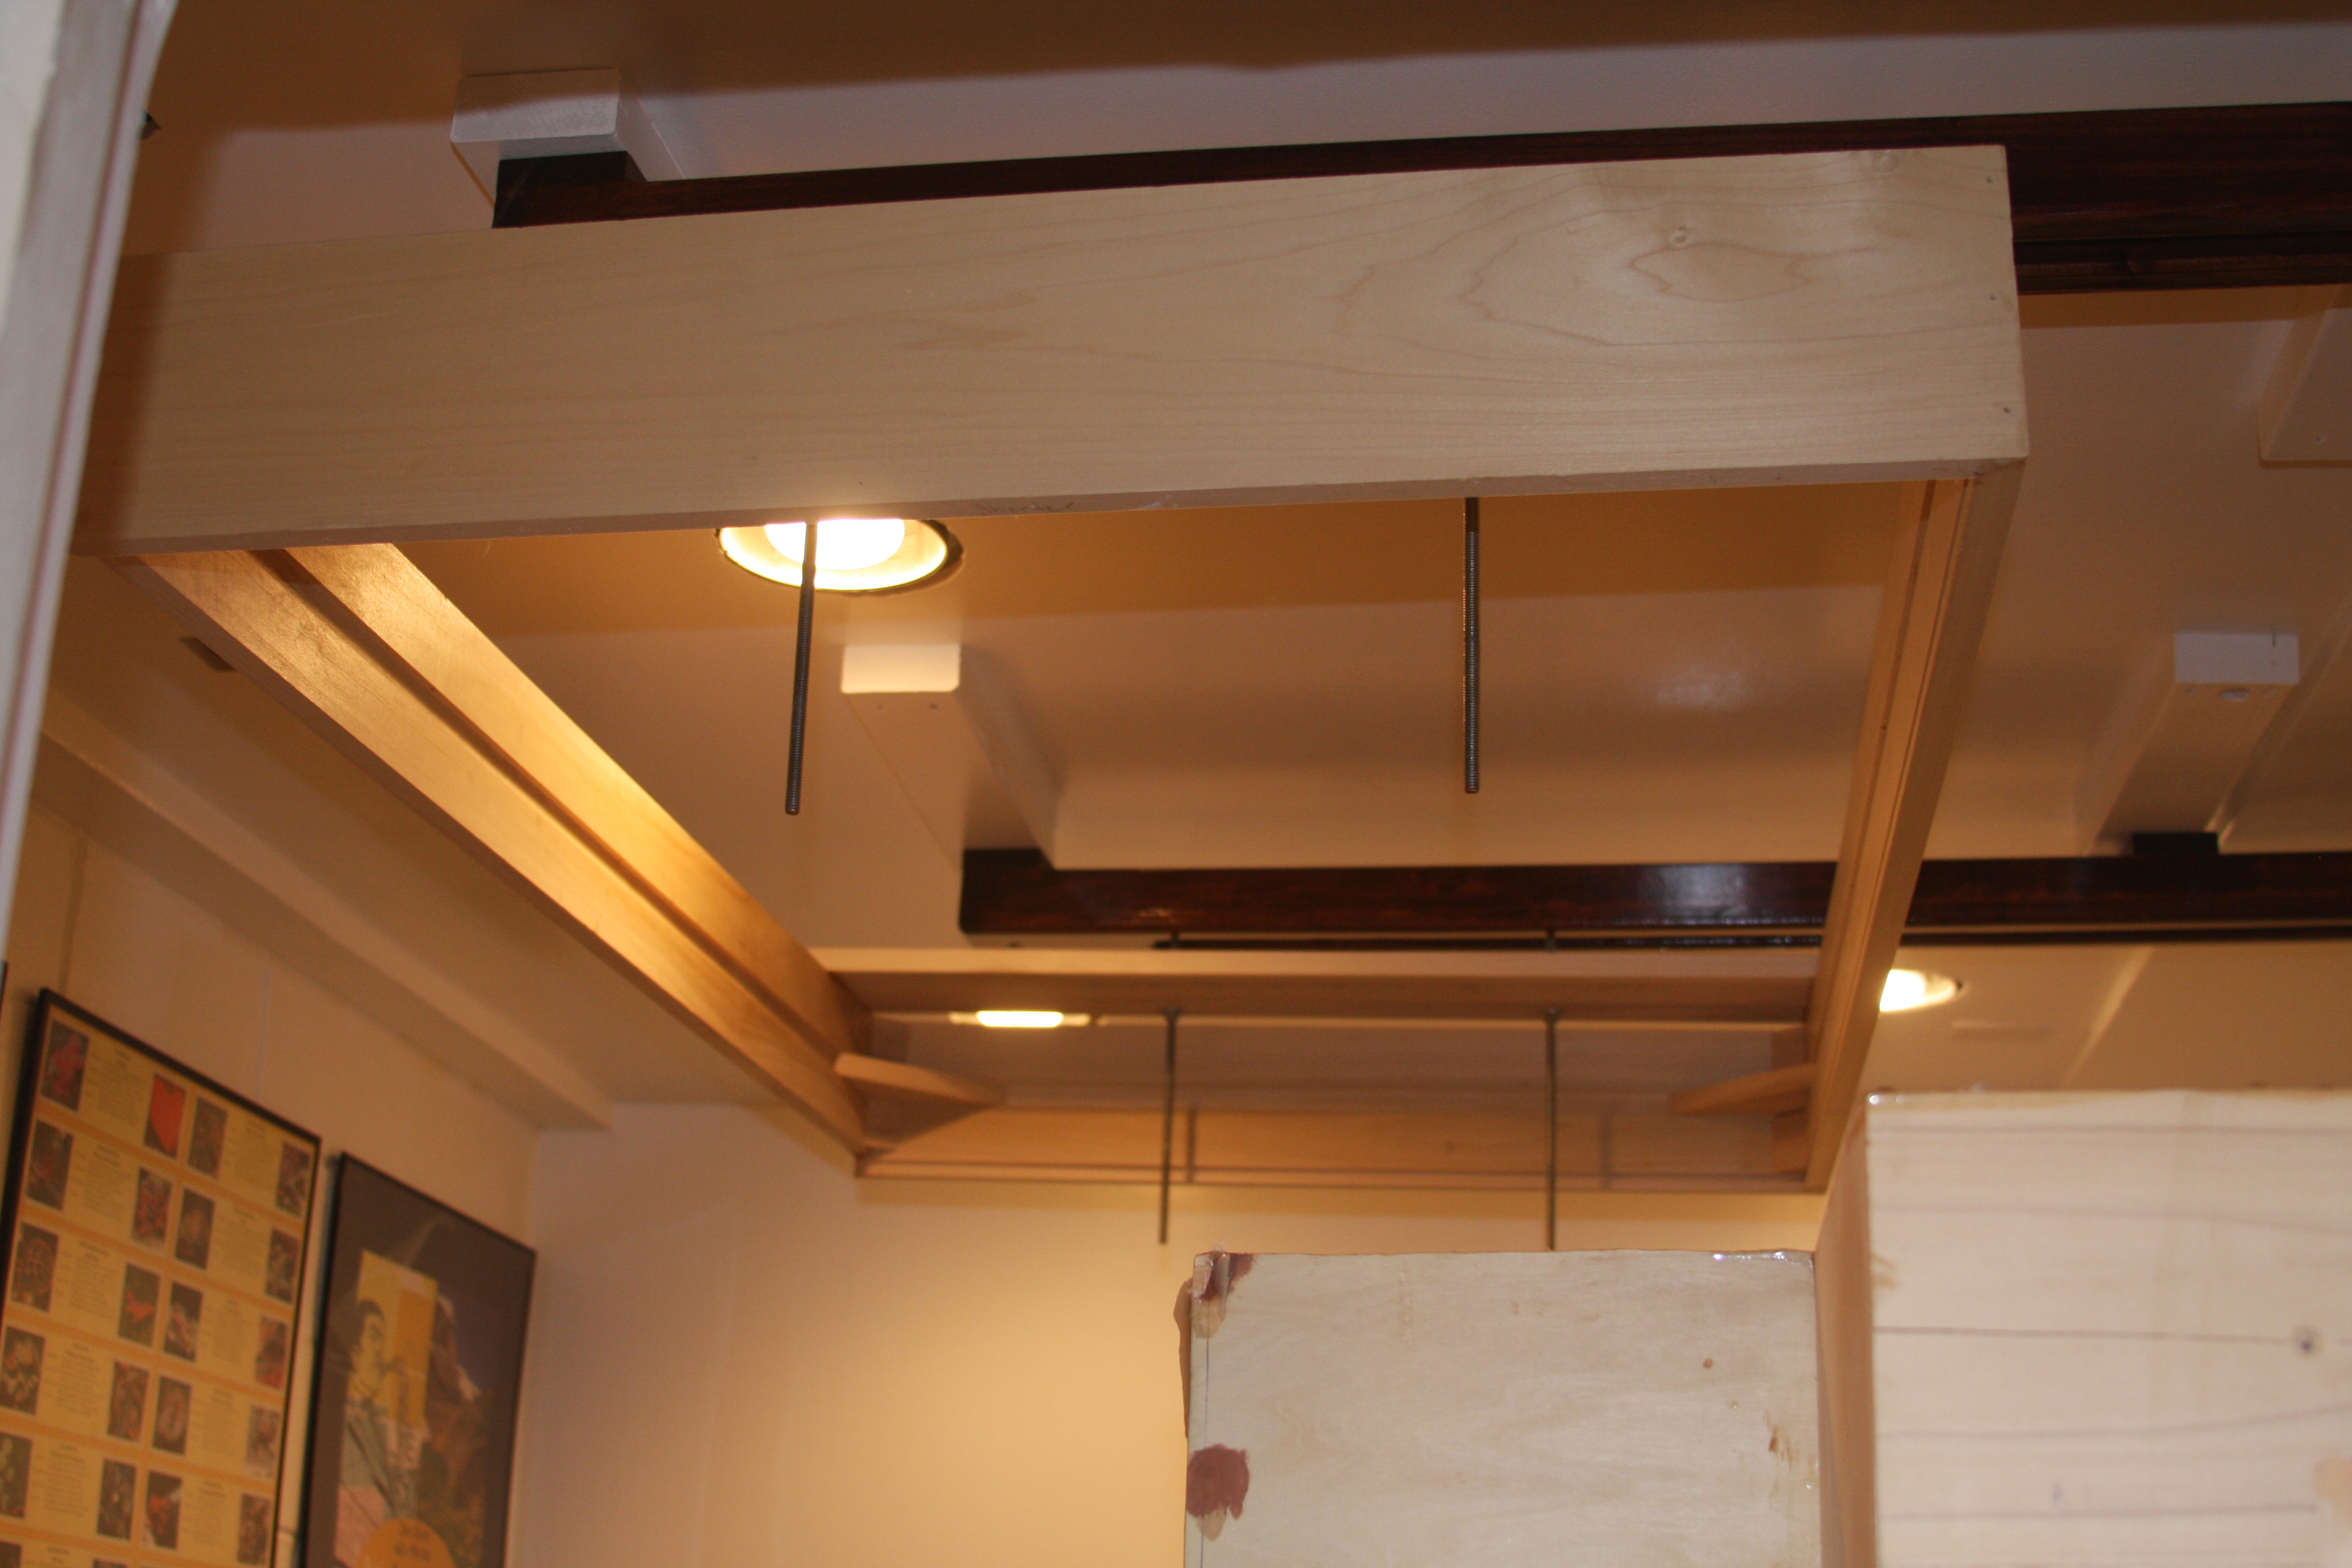
Another shot of the light rack from the fishroom side of things....Sorry about the ugly overflow....still haven't cleaned up the screw holes. Wasn't necessary to fill the screw holes, but I don't want to see any holes once the finish is applied to the tank. I still have to trim down the threaded rods on the light rack as well.
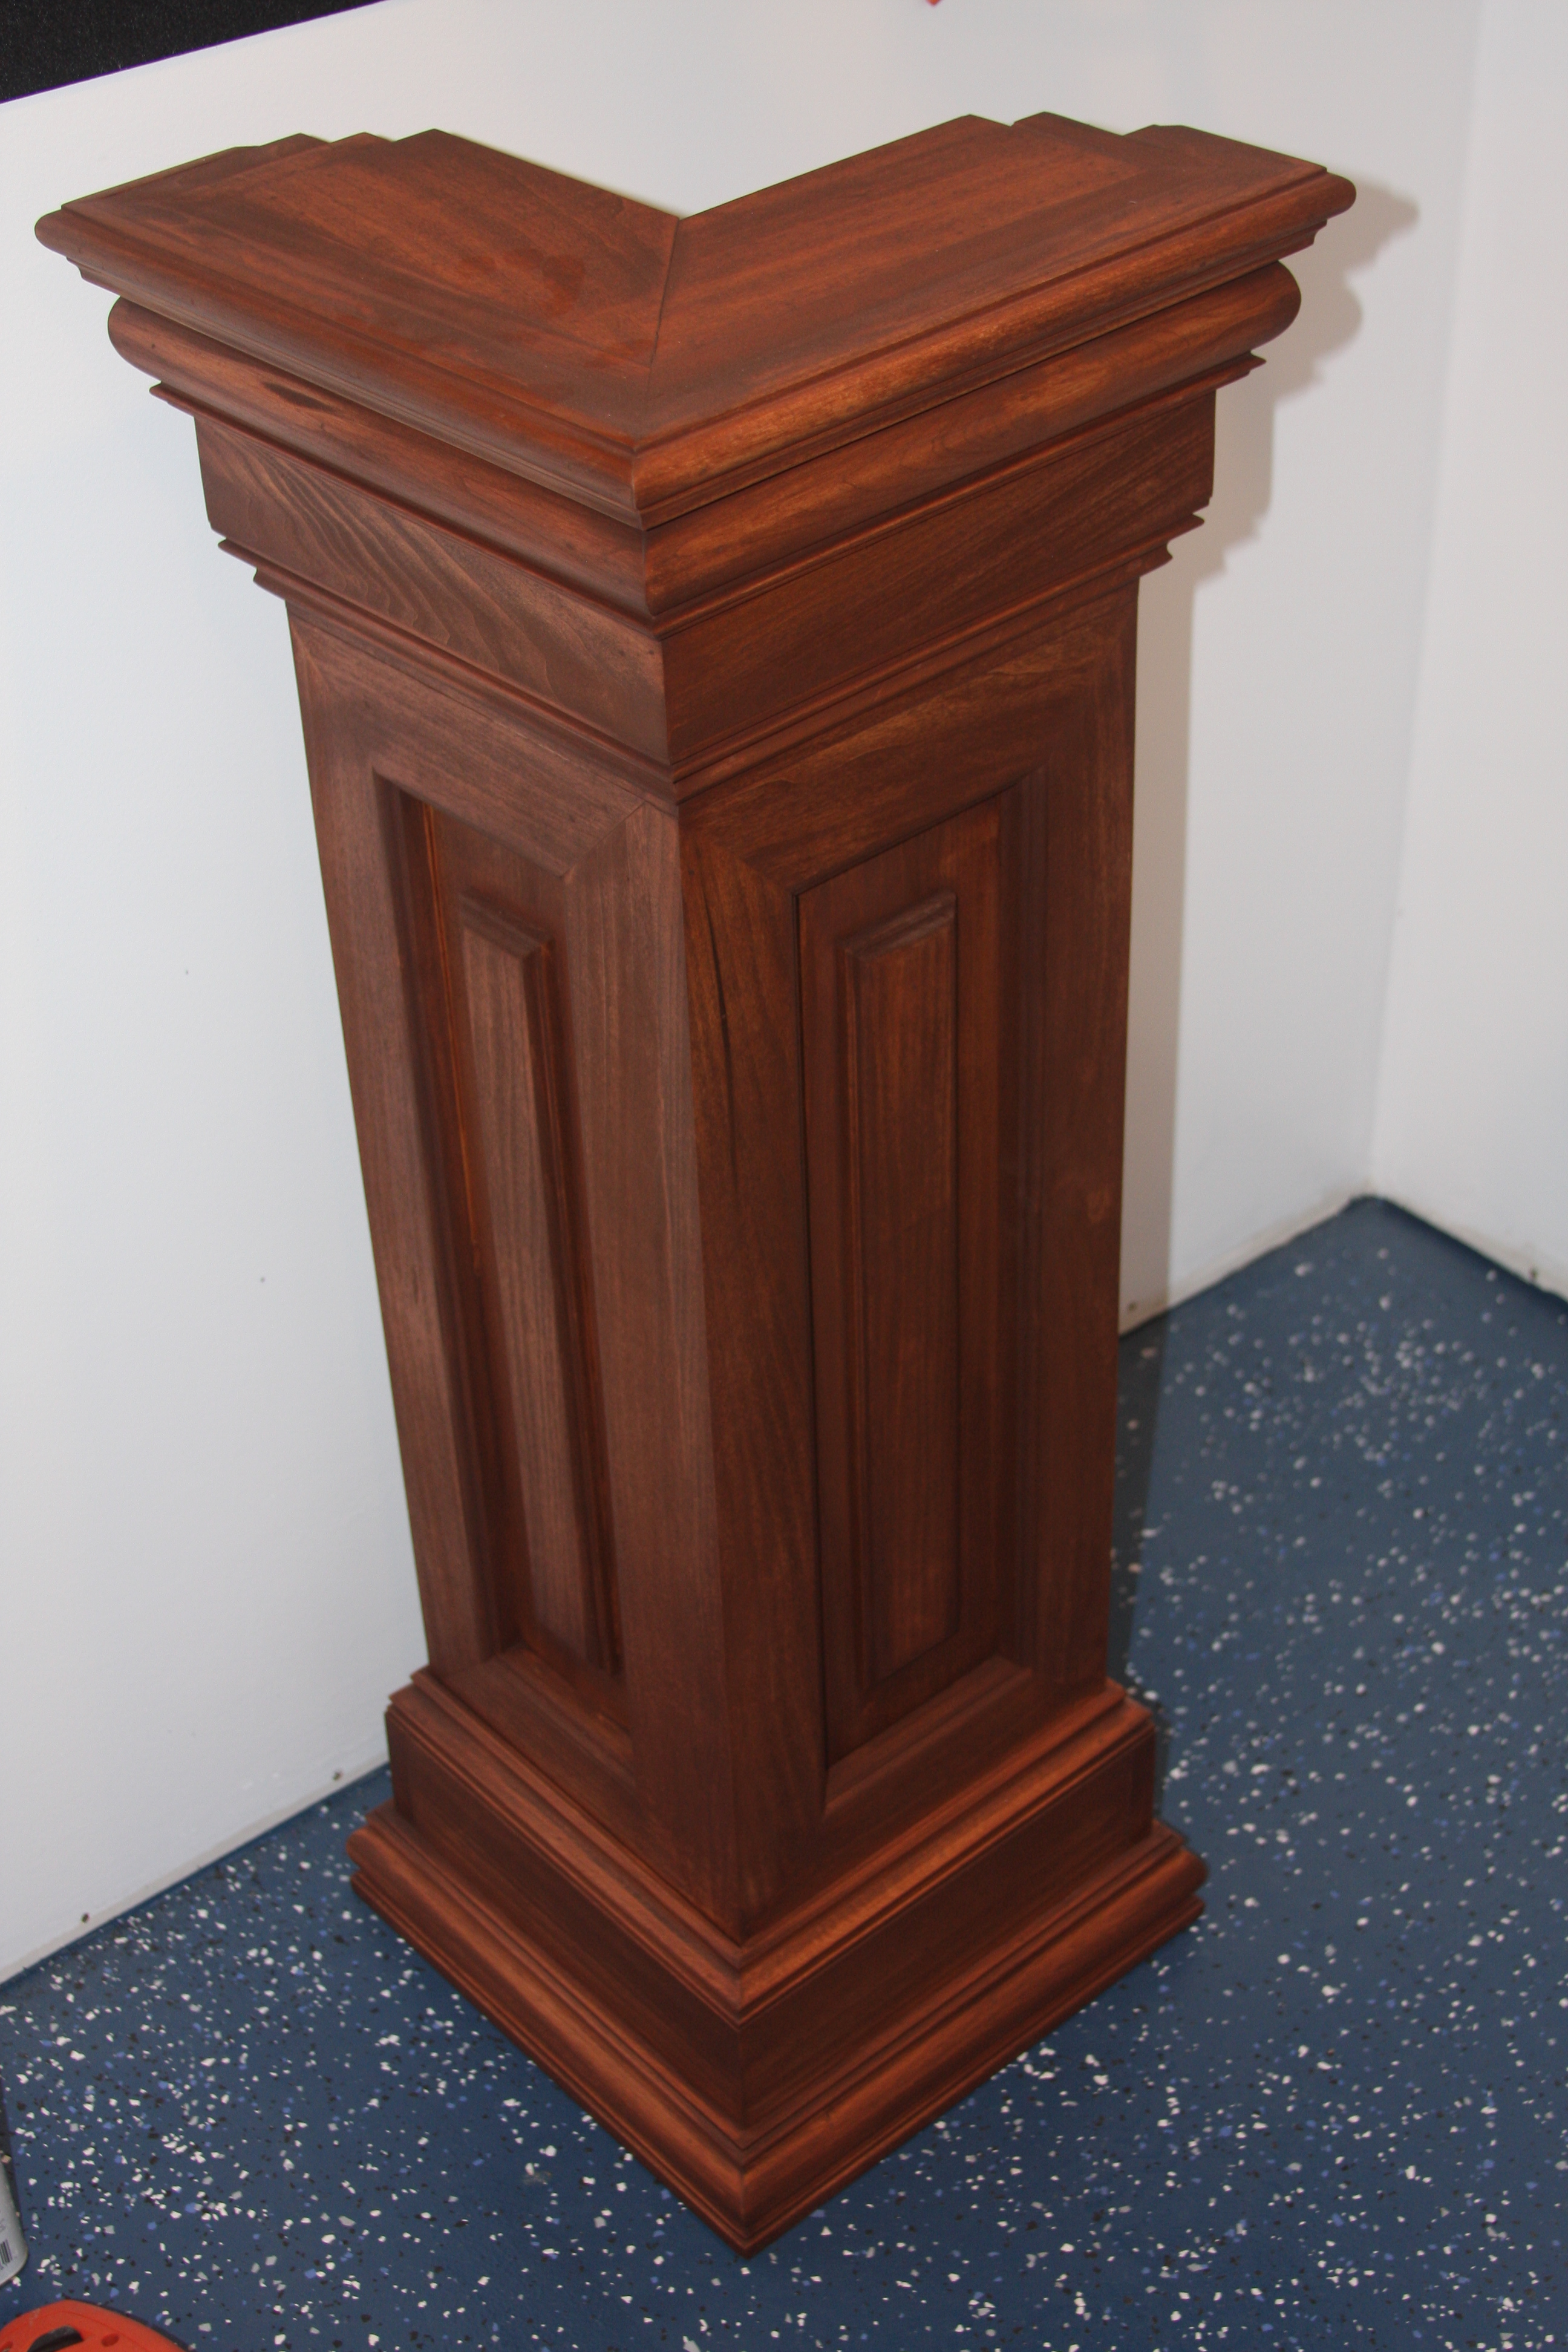
Just a pic of the stand corner stand off. No clear finish applied to this piece as of yet as well.
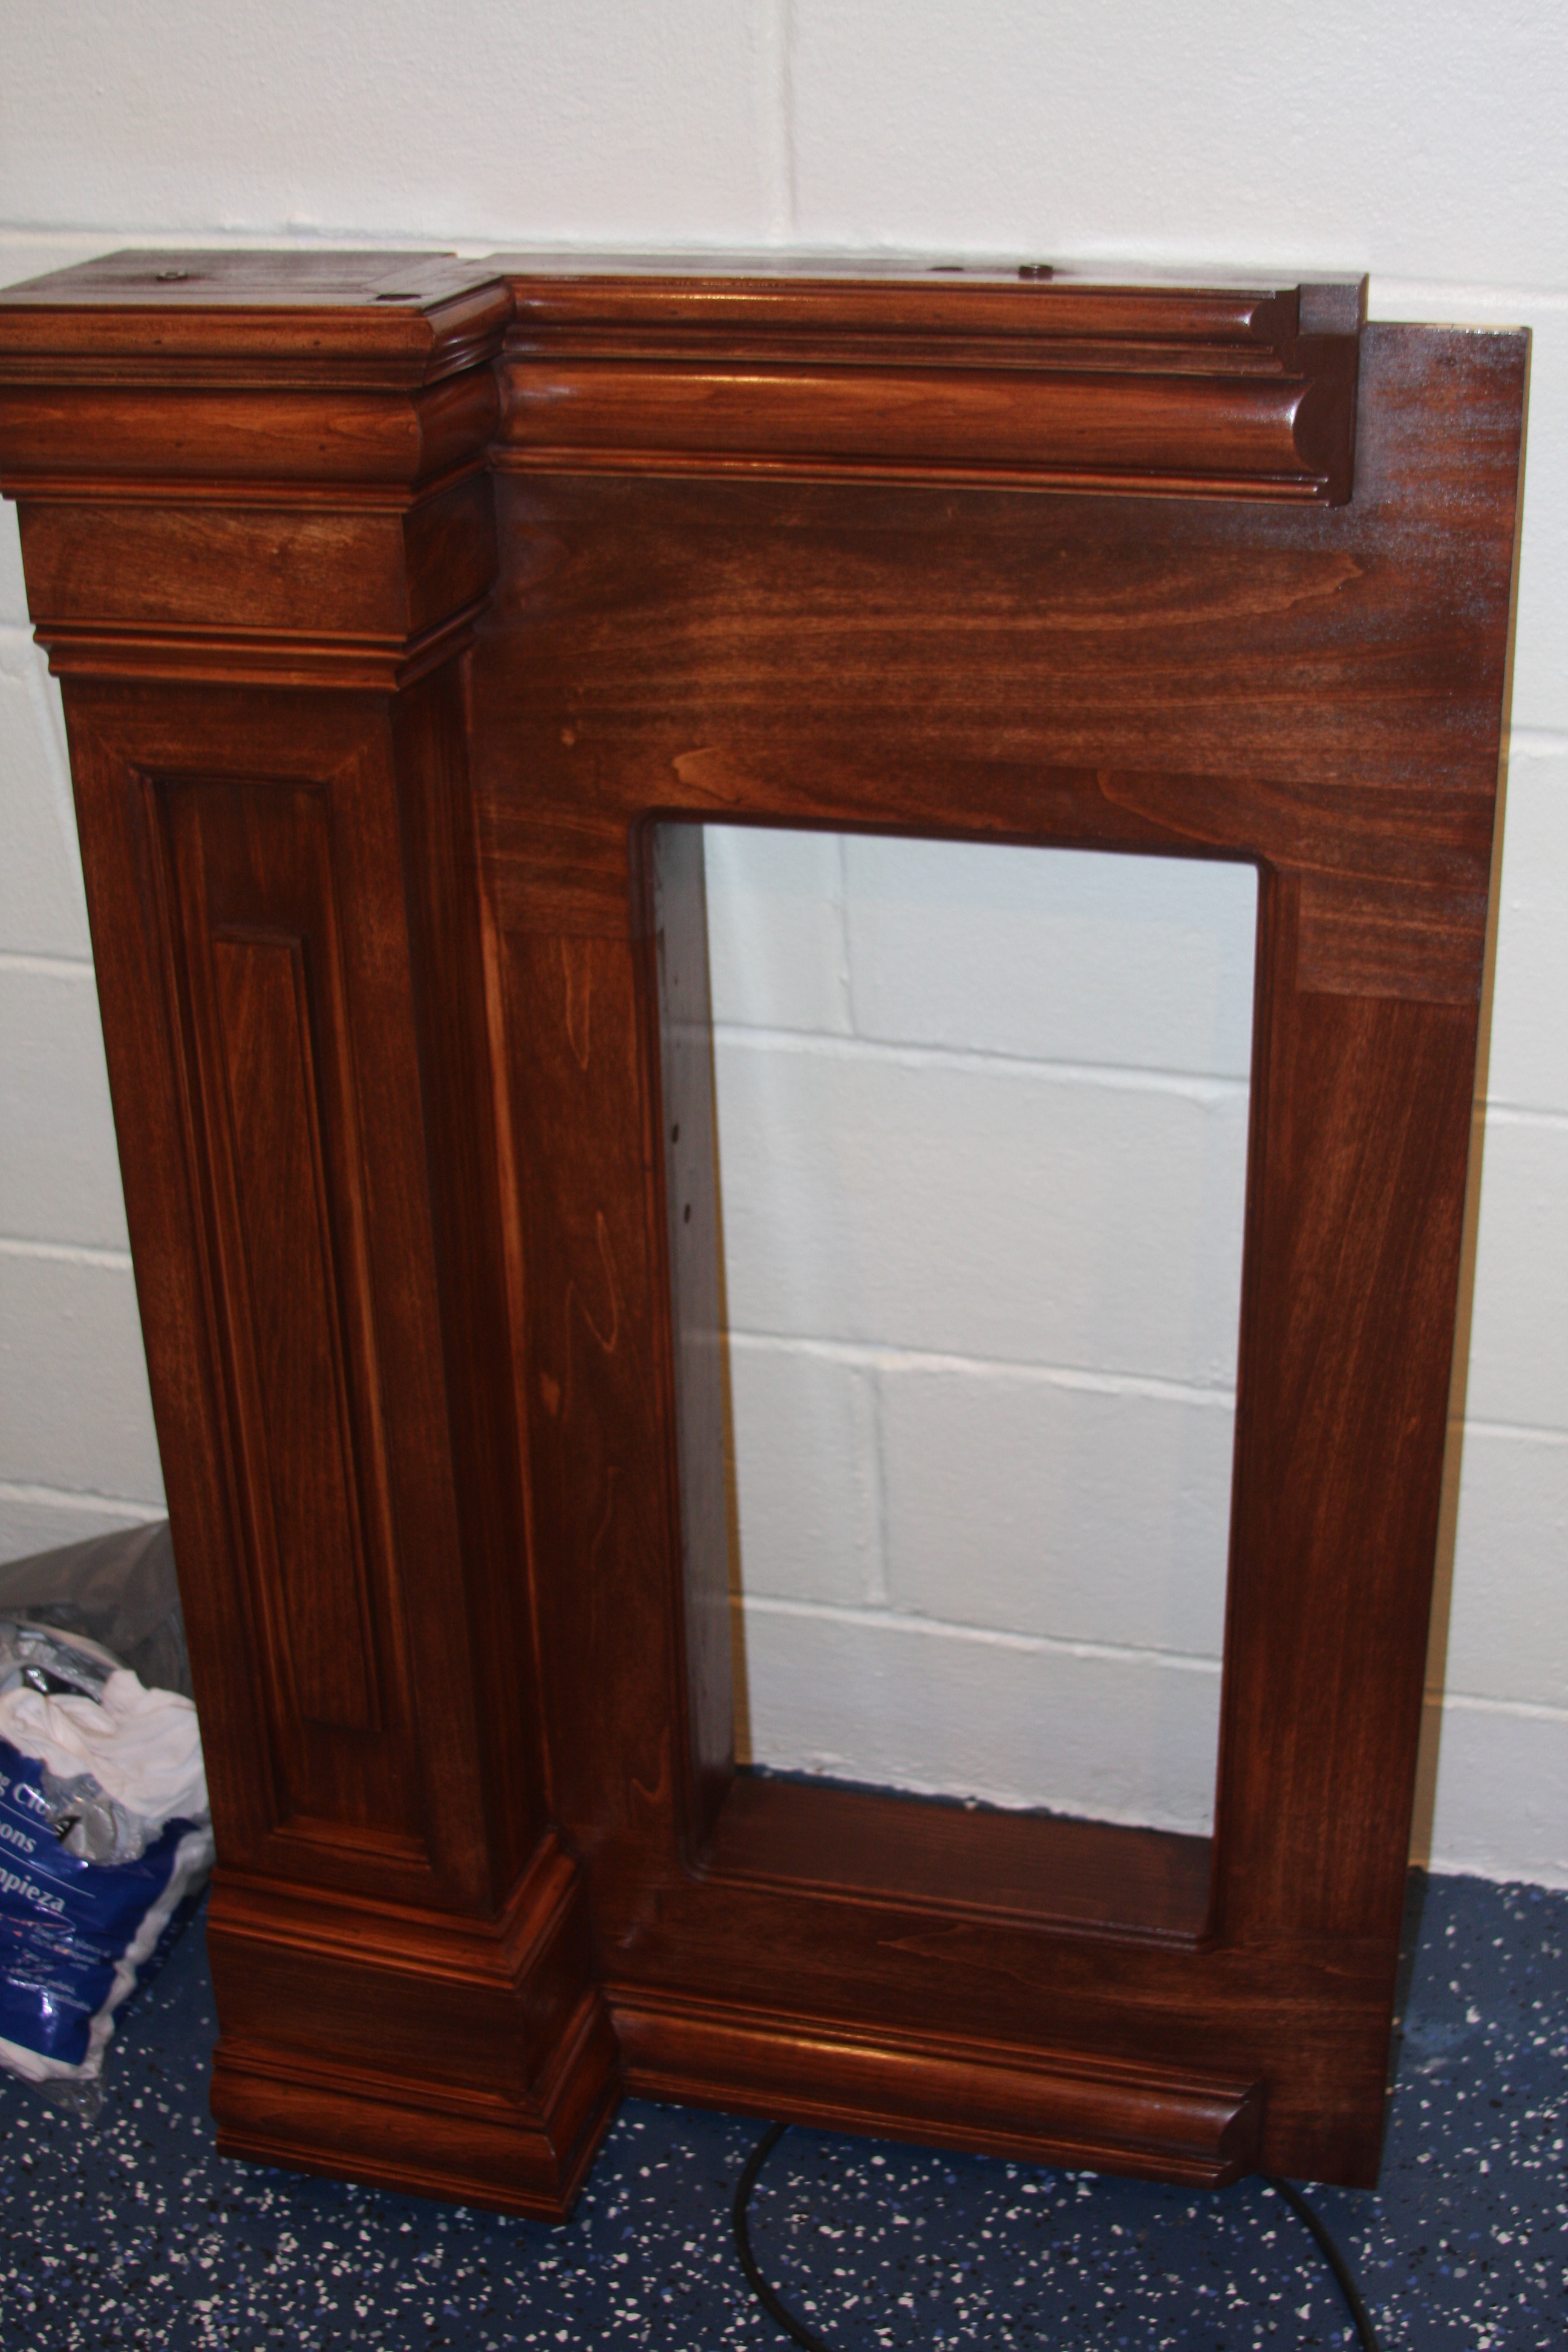
Here is the side skin of the stand. This I have started applying the finish clear coat too. I've been using the rub on poly. Takes a lot longer to do, but you don't worry about run marks, and the finish is ultra smooth, and you can shave in it when it's finished. This is only 1 coat, and needs to be rubbed down with steel wool before the next coat is applied. Between every coat I like to rub it down to get rid of any high spots in the coat with steel wool to keep the finish coat nice and even.
.
A pic of the front skin of the stand. No clear finish applied yet, and still have to do a little add on of trim on the far right side. In the background you can see the sump already in place and on the far right hand side of the sump you can see the start of my DIY dual chamber calcium reactor.....
Another shot of the skin from the coming down the stairs in the family room....
In this pic you can catch of a glimpse of the movable light rack......I will probably have to shoot a video to give a good true perspective of everything....
Another shot of the light rack from the fishroom side of things....Sorry about the ugly overflow....still haven't cleaned up the screw holes. Wasn't necessary to fill the screw holes, but I don't want to see any holes once the finish is applied to the tank. I still have to trim down the threaded rods on the light rack as well.
Just a pic of the stand corner stand off. No clear finish applied to this piece as of yet as well.
Here is the side skin of the stand. This I have started applying the finish clear coat too. I've been using the rub on poly. Takes a lot longer to do, but you don't worry about run marks, and the finish is ultra smooth, and you can shave in it when it's finished. This is only 1 coat, and needs to be rubbed down with steel wool before the next coat is applied. Between every coat I like to rub it down to get rid of any high spots in the coat with steel wool to keep the finish coat nice and even.

