415 Gallon Plywood Tank Build

1snapple

Active Member
I would do 7/8" over 1" allowing less water into the sump in case of a powerouttage. As far as flow goes, can you route the return pump through some flexhose and into the rockwork, into the back of the tank, the caves, and the places where flow may be lacking. Also I would do tidal flow, it looks like it would help the SPS more with an increase in flow, and help the LPS more with less flow the lower in the tank you go. I am also happy to say my cube has cycled and has an INSANE amount of Copepods, so man in fact, they cloud up the water, they cloud up the glass, and float in the water column
 

acrylic51

Active Member
Quote:
Originally Posted by 2Quills http:///t/376802/415-gallon-plywood-tank-build/1040#post_3411259
Did you decide on teeth/groove size? I'm leaning towards 1" as giving you a little more of a margin for error.
I've been tinkering with the covers, and got 1 where it fits really good.......I started laying out the teeth 1/2" wide, with 1/2" spacing between them and can get 12 teeth in the cover.....That is allowing me roughly 3/8" or a hair more on each side of the first and last tooth to give support to the cover.....I might try laying it out with using 3/4" teeth, with 1/2" between the teeth.....Not sure if it will work out or not.....Will advise later tonight what I find out.......I do want to be able to crank the pump as wide as I can.....Running the pump as Snapper at 4' head I'd get roughly 1900gph.....at 7' head roughly 1500gph......
Quote:
Originally Posted by 1Snapple
http:///t/376802/415-gallon-plywood-tank-build/1040#post_3411260
I would do 7/8" over 1" allowing less water into the sump in case of a powerouttage. As far as flow goes, can you route the return pump through some flexhose and into the rockwork, into the back of the tank, the caves, and the places where flow may be lacking. Also I would do tidal flow, it looks like it would help the SPS more with an increase in flow, and help the LPS more with less flow the lower in the tank you go. I am also happy to say my cube has cycled and has an INSANE amount of Copepods, so man in fact, they cloud up the water, they cloud up the glass, and float in the water column
Excellent on the tank......Any pics??? 7/8" doesn't look bad when you look at it on the tape measure, but when you cut the practice teeth, and start to wonder, would I be able to crank out the full 1900gph or 1500gph without having it loom around the eurobracing???? I know I tried running a HammerHead on my 240, with sort of the same teeth design, and with the pump wide open I could overpower the the overflow and get the eurobracing submerged rather quickly and the 240 has dual 1.5" drains.....Granted the HammerHead is huge, but I'm looking to push at least 1500gph through the sump if not a bit more.....I've never been of the school of thought or thinking of 3x-5x flow through the sump. If the sump is designed correctly can handle more, but you have to consider your skimmer as well, but the skimmer is processing all the water anyways passing in front/by it anyways.......
 

acrylic51

Active Member
Quote:
Originally Posted by 1Snapple http:///t/376802/415-gallon-plywood-tank-build/1040#post_3411260
I would do 7/8" over 1" allowing less water into the sump in case of a powerouttage. As far as flow goes, can you route the return pump through some flexhose and into the rockwork, into the back of the tank, the caves, and the places where flow may be lacking. Also I would do tidal flow, it looks like it would help the SPS more with an increase in flow, and help the LPS more with less flow the lower in the tank you go. I am also happy to say my cube has cycled and has an INSANE amount of Copepods, so man in fact, they cloud up the water, they cloud up the glass, and float in the water column
Both could work in conjunction at the same time alternating....What I want or trying to accomplish is what happens in nature.....We don't just have 1 type of flow in the ocean. You'd almost have to read the article and he really explains his thinking there.....
 

2quills

Well-Known Member
Quote:
Originally Posted by 1Snapple http:///t/376802/415-gallon-plywood-tank-build/1040#post_3411260
I would do 7/8" over 1" allowing less water into the sump in case of a powerouttage.
I think you would get the same water rise from the overflow using either of those heights. Therefor you'd have the same amount of water draining to the sump after the power is cut. The water level itself would just be a little higher when the pump is running as well when the pump is off.
 

acrylic51

Active Member
Ok guys still fabricating the overflow covers!!!! Not going to bad at this point. I did a bit of figuring on teeth spacing and gap between teeth. Using 1/2" bit with 1/4" space between teeth I can get 16 teeth, with a 1/2" solid section on each end to support the overflow cover in the rabbet cut slot.
If I use a 3/4" bit to cut the teeth with a 1/4" space between the teeth, I can squeeze 12 teeth, with a 1/2" space on each end to support the cover again.
I'm leaning towards 1/2" teeth with 1/4" spacing between teeth. The 3/4" teeth seem to big and out of place. What's everyone's thoughts???
 

acrylic51

Active Member
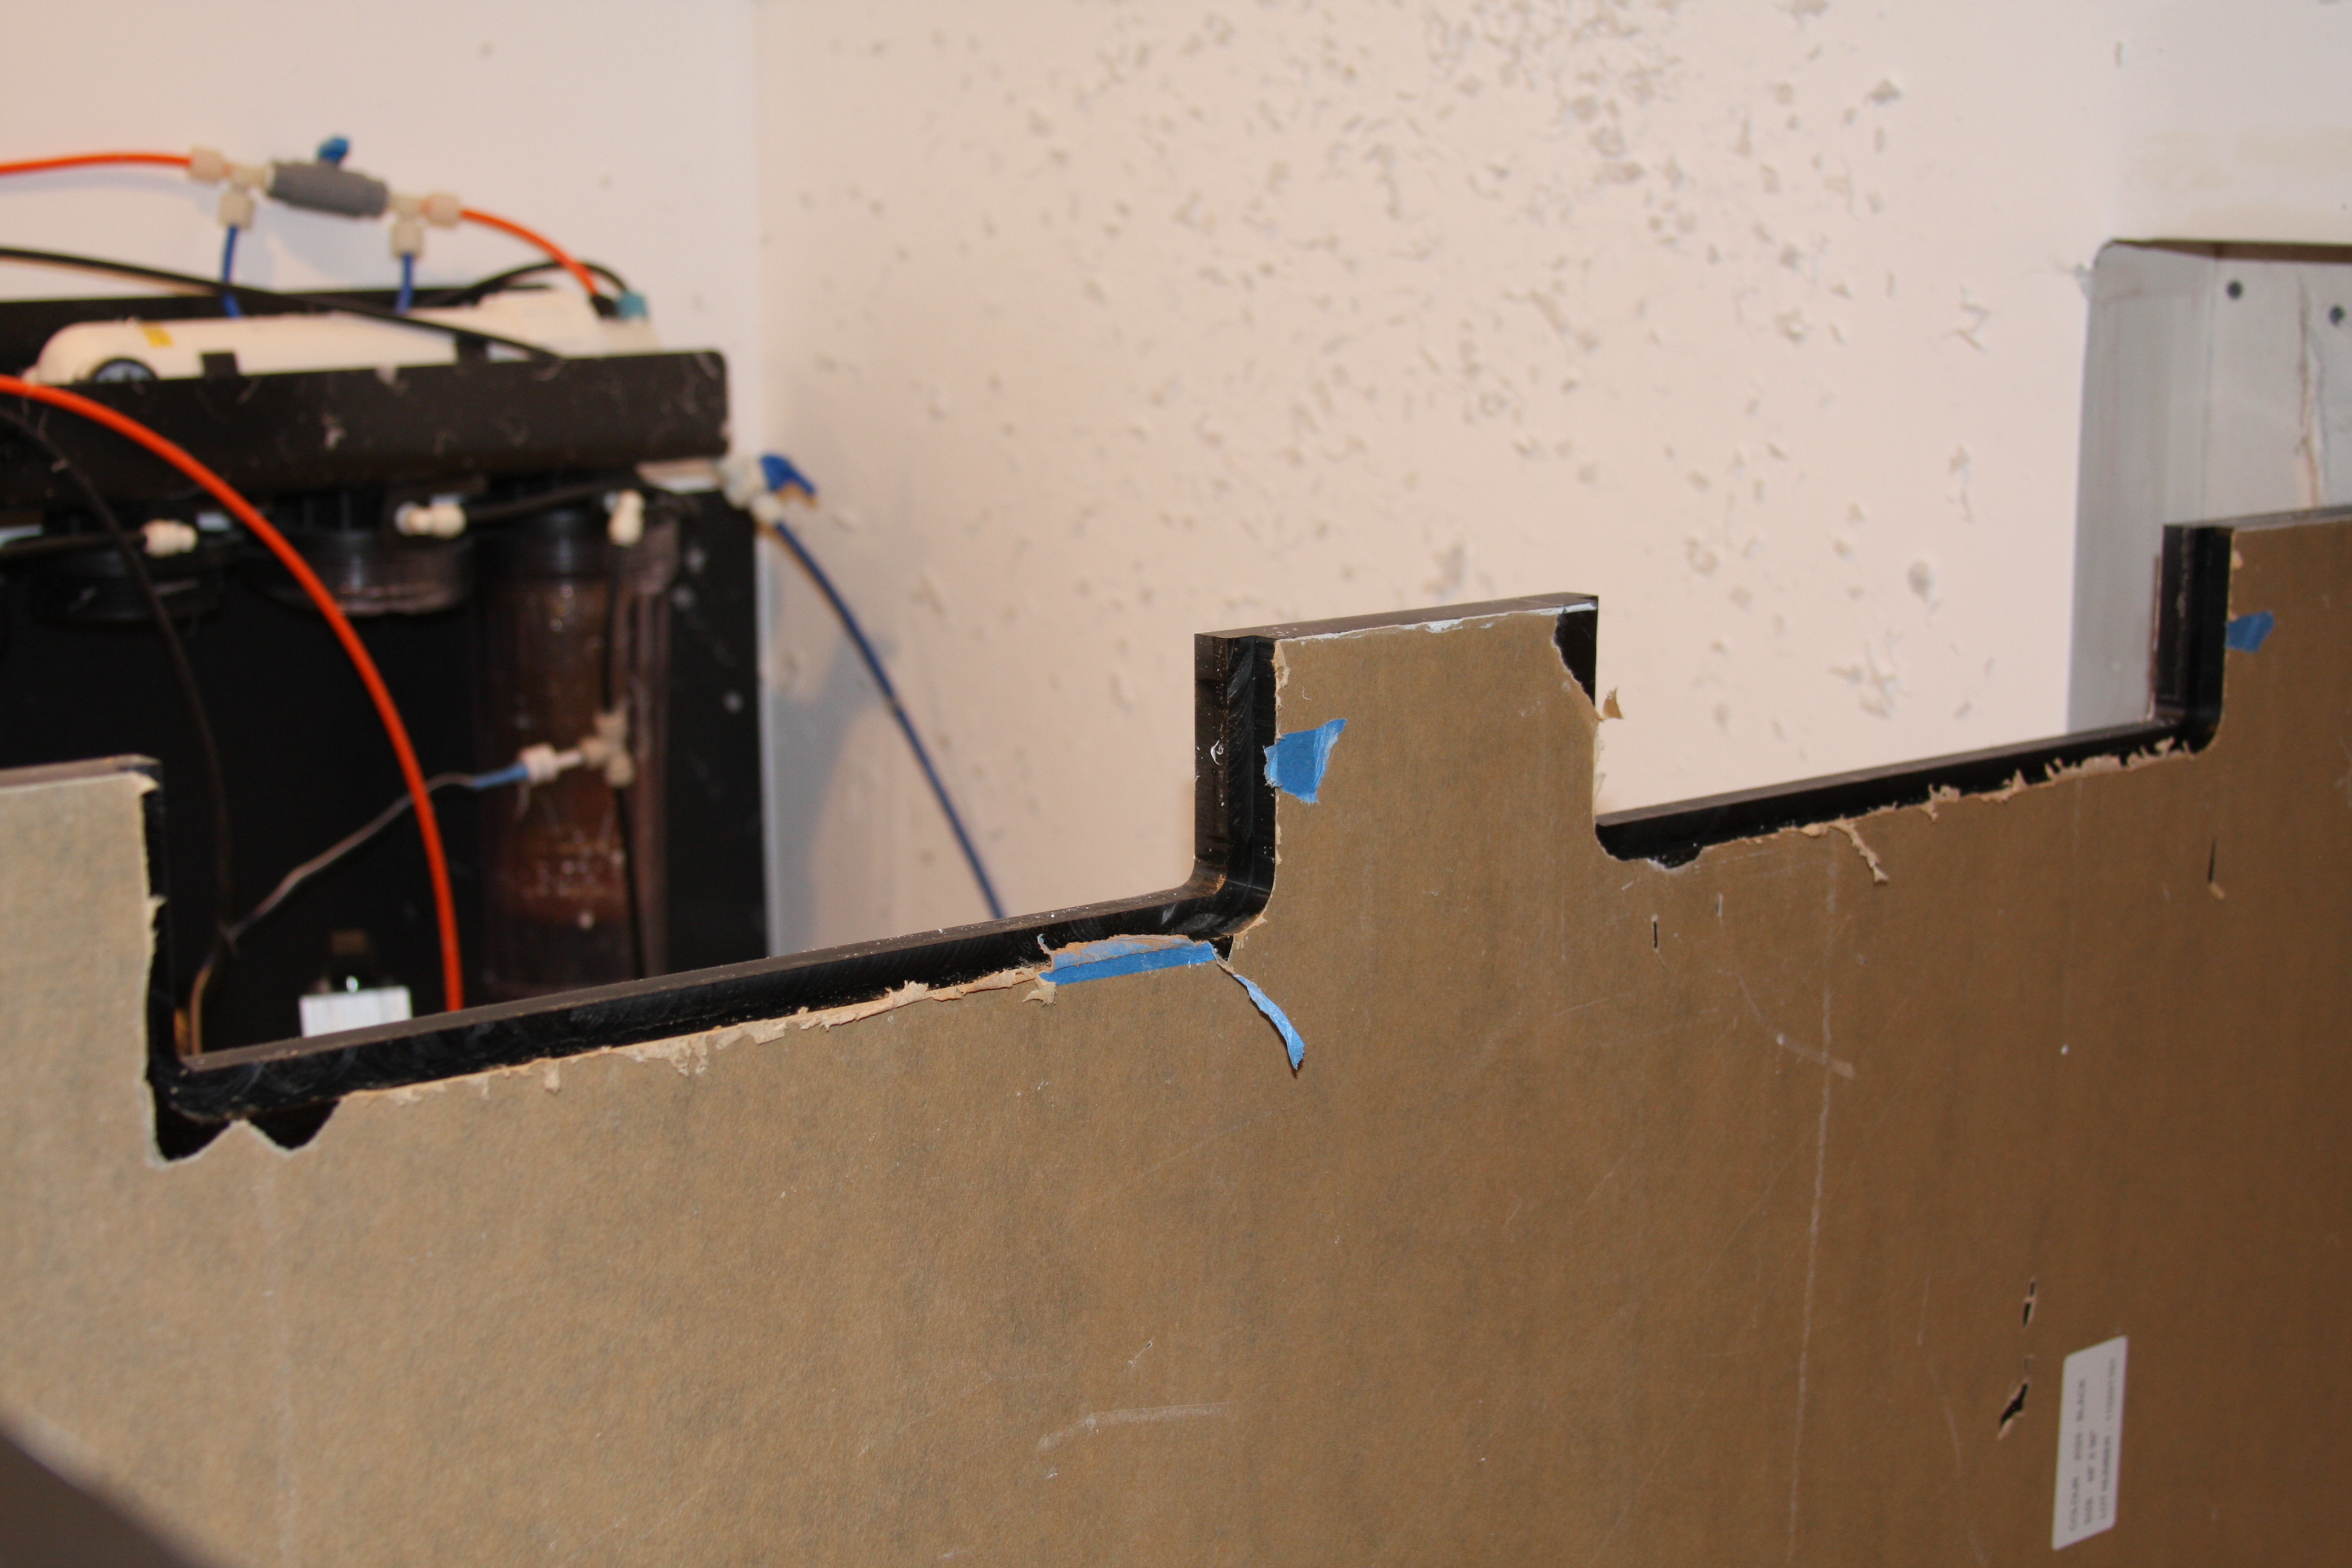
Some progress on the tank this past week/weekend.......As everyone knows the tank overflow was changed a bit, from using the slots, to cutting it more square and fabricating overflow covers/grills, that can be removed if needed for whatever reason......To make sure that the cuts were perfectly square and level across the side panel I fabbed up a jig out of MDF to make the cuts. Here's the jig that I fabbed to make the cuts.
This is the jig I threw together to make the cuts shown on the bottom pic. I used just 1/2" MDF I had laying around. Cuts super easy and I used 1x2 stock on the back side; which is more ridig and a nice surface for the bearing of the router bit to ride on....
The bottom cutout was made to fabricate a practice piece to work with to fabicate the overflow cover itself....I went a little brain dead at first and at times you can over think an issue.....I knew how wide the slot in the tank panel was, but couldn't transfer it to the jig....After some thinking it dawned on me that I'd need to make the jig pattern an 1" longer due to the cutting diameter of the router bit.......

This is the final result of using the jig to cut the tank panel......On the inside of the panel I used a rabbeting bit to create a recess in the panel; which I'm hoping to fabricate covers to fit flush into those slots........HOPING!!!!!!!
 

acrylic51

Active Member
Here is the piece I cut from MDF again and used it as a template to work with to get a good fit on the overflow covers......After the initial "brain lock" things progressed pretty quickly....The nice thing about using MDF for patterns is that it takes very little effort to knock a bit of material to get the fitting process started......
This is the pattern I used to start the fabrication process for the overflow covers.....You can see the major issue with getting the covers to fit is the curves in the bottom of the templates....I made 2 templates....1 for each overflow cutout......That way if I messed 1 up I still had another as a backup.....It's super easy to take to much off of the MDF, and I was only using 220 grit sandpaper to make adjustments to the patterns.
 

acrylic51

Active Member

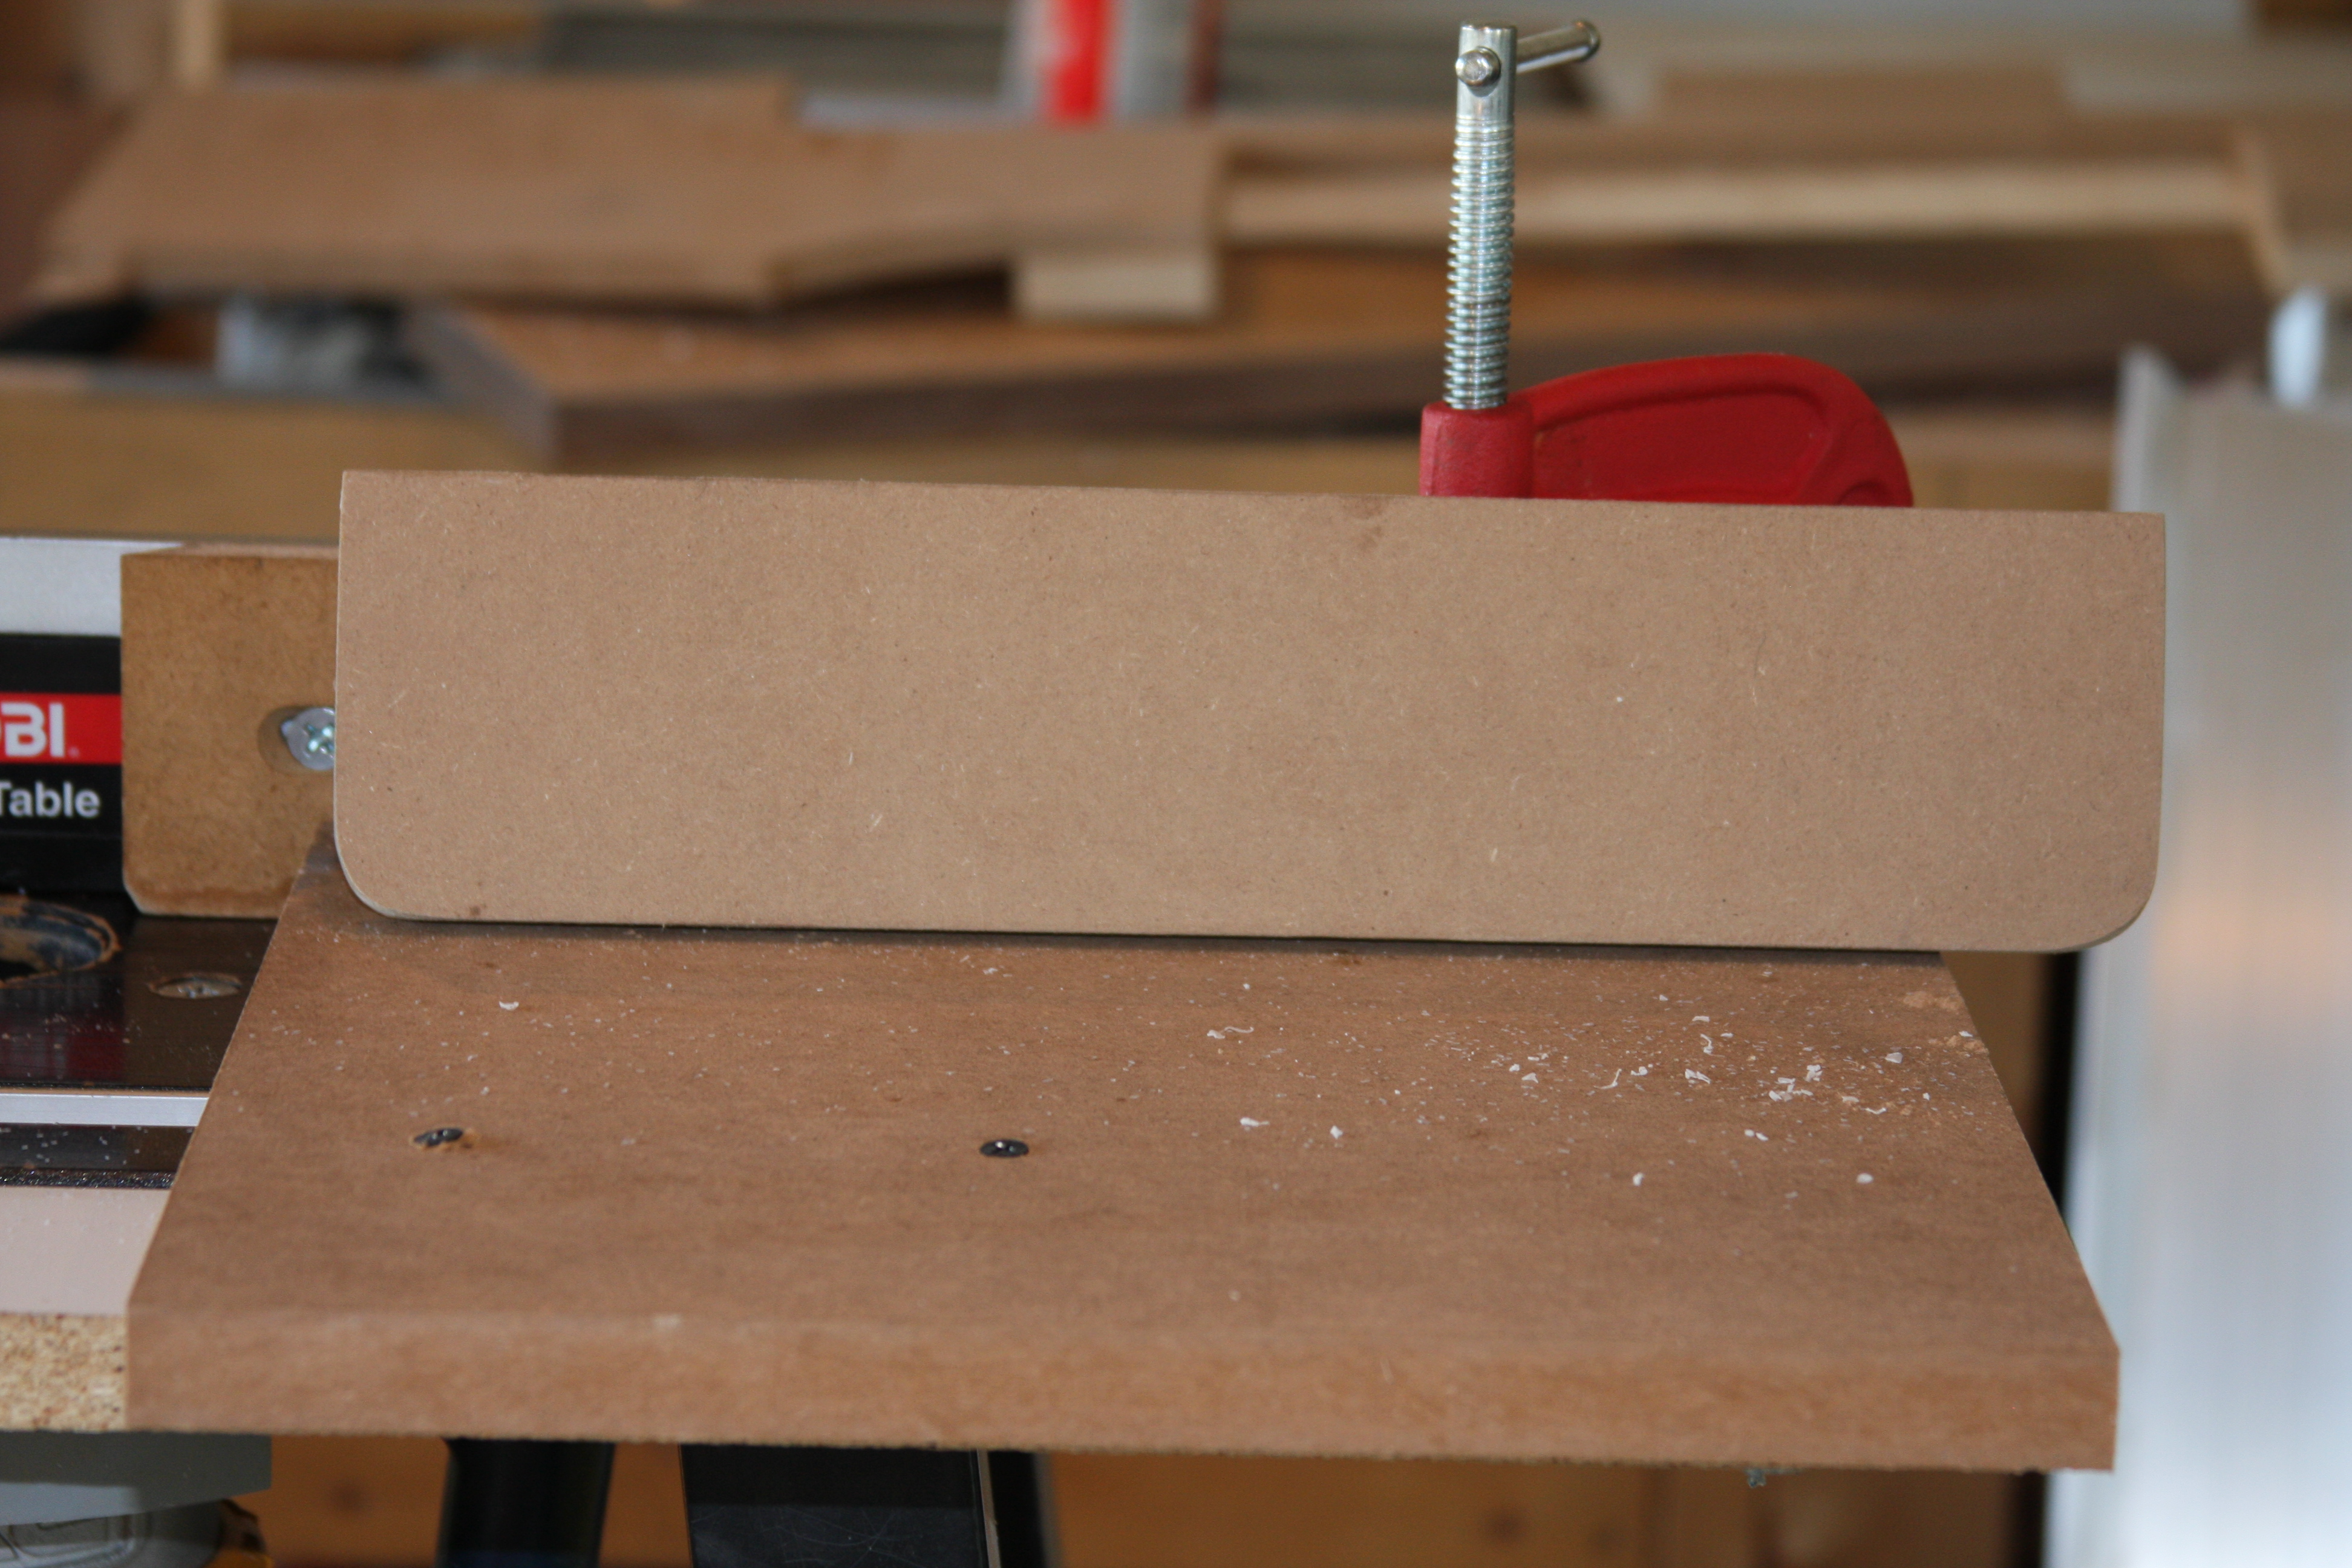
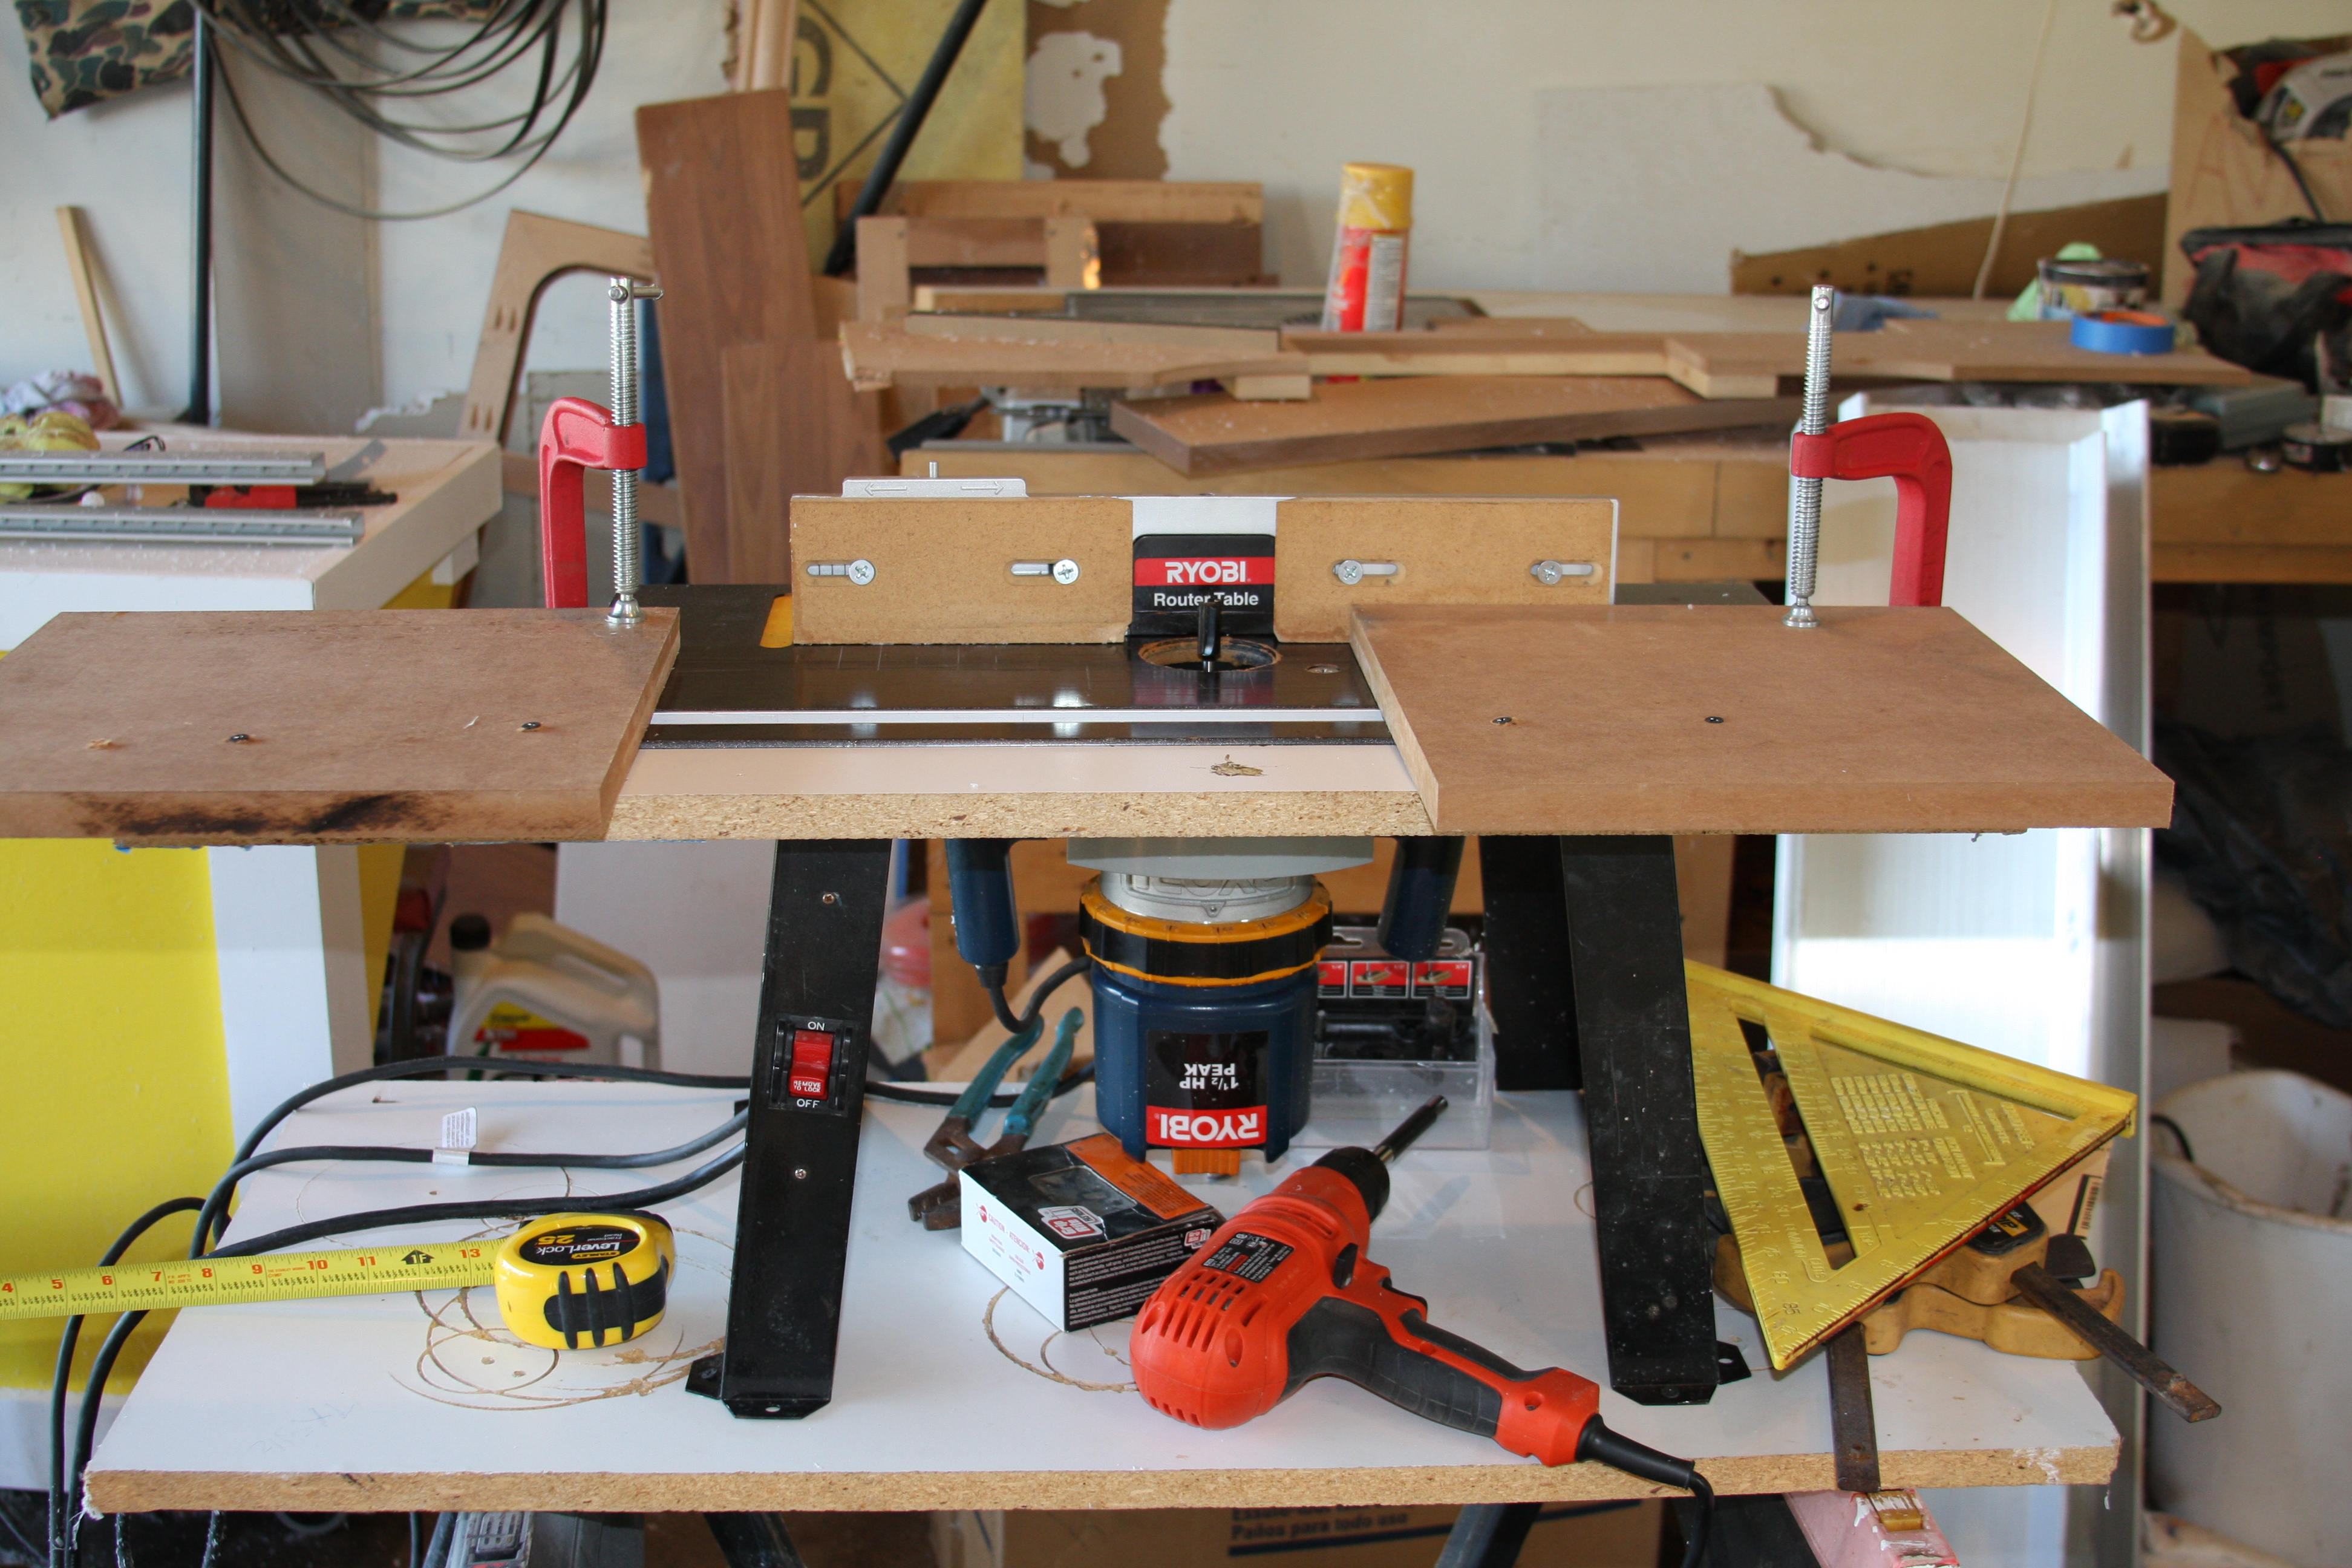
Again to be able to cut the teeth straight and consistently at the same depth, I used my old trusty, beat up router table.......You can see in the pic the crude jig I fabricated as well to keep the piece from wanting to slide side to side while cutting material......If any of you have ever tried to do it free hand you know exactly the purpose of having supports on both sides of the work piece....You don't want your guides so tight that the piece binds up, but snug enough that it doesn't wiggle side to side......Again cheap MDF used for the jig and clamp......I marked the layout on each panel, and the jig, can be slid to line the cut mark with the bit.....I think Corey has something similar made for his handheld router?????
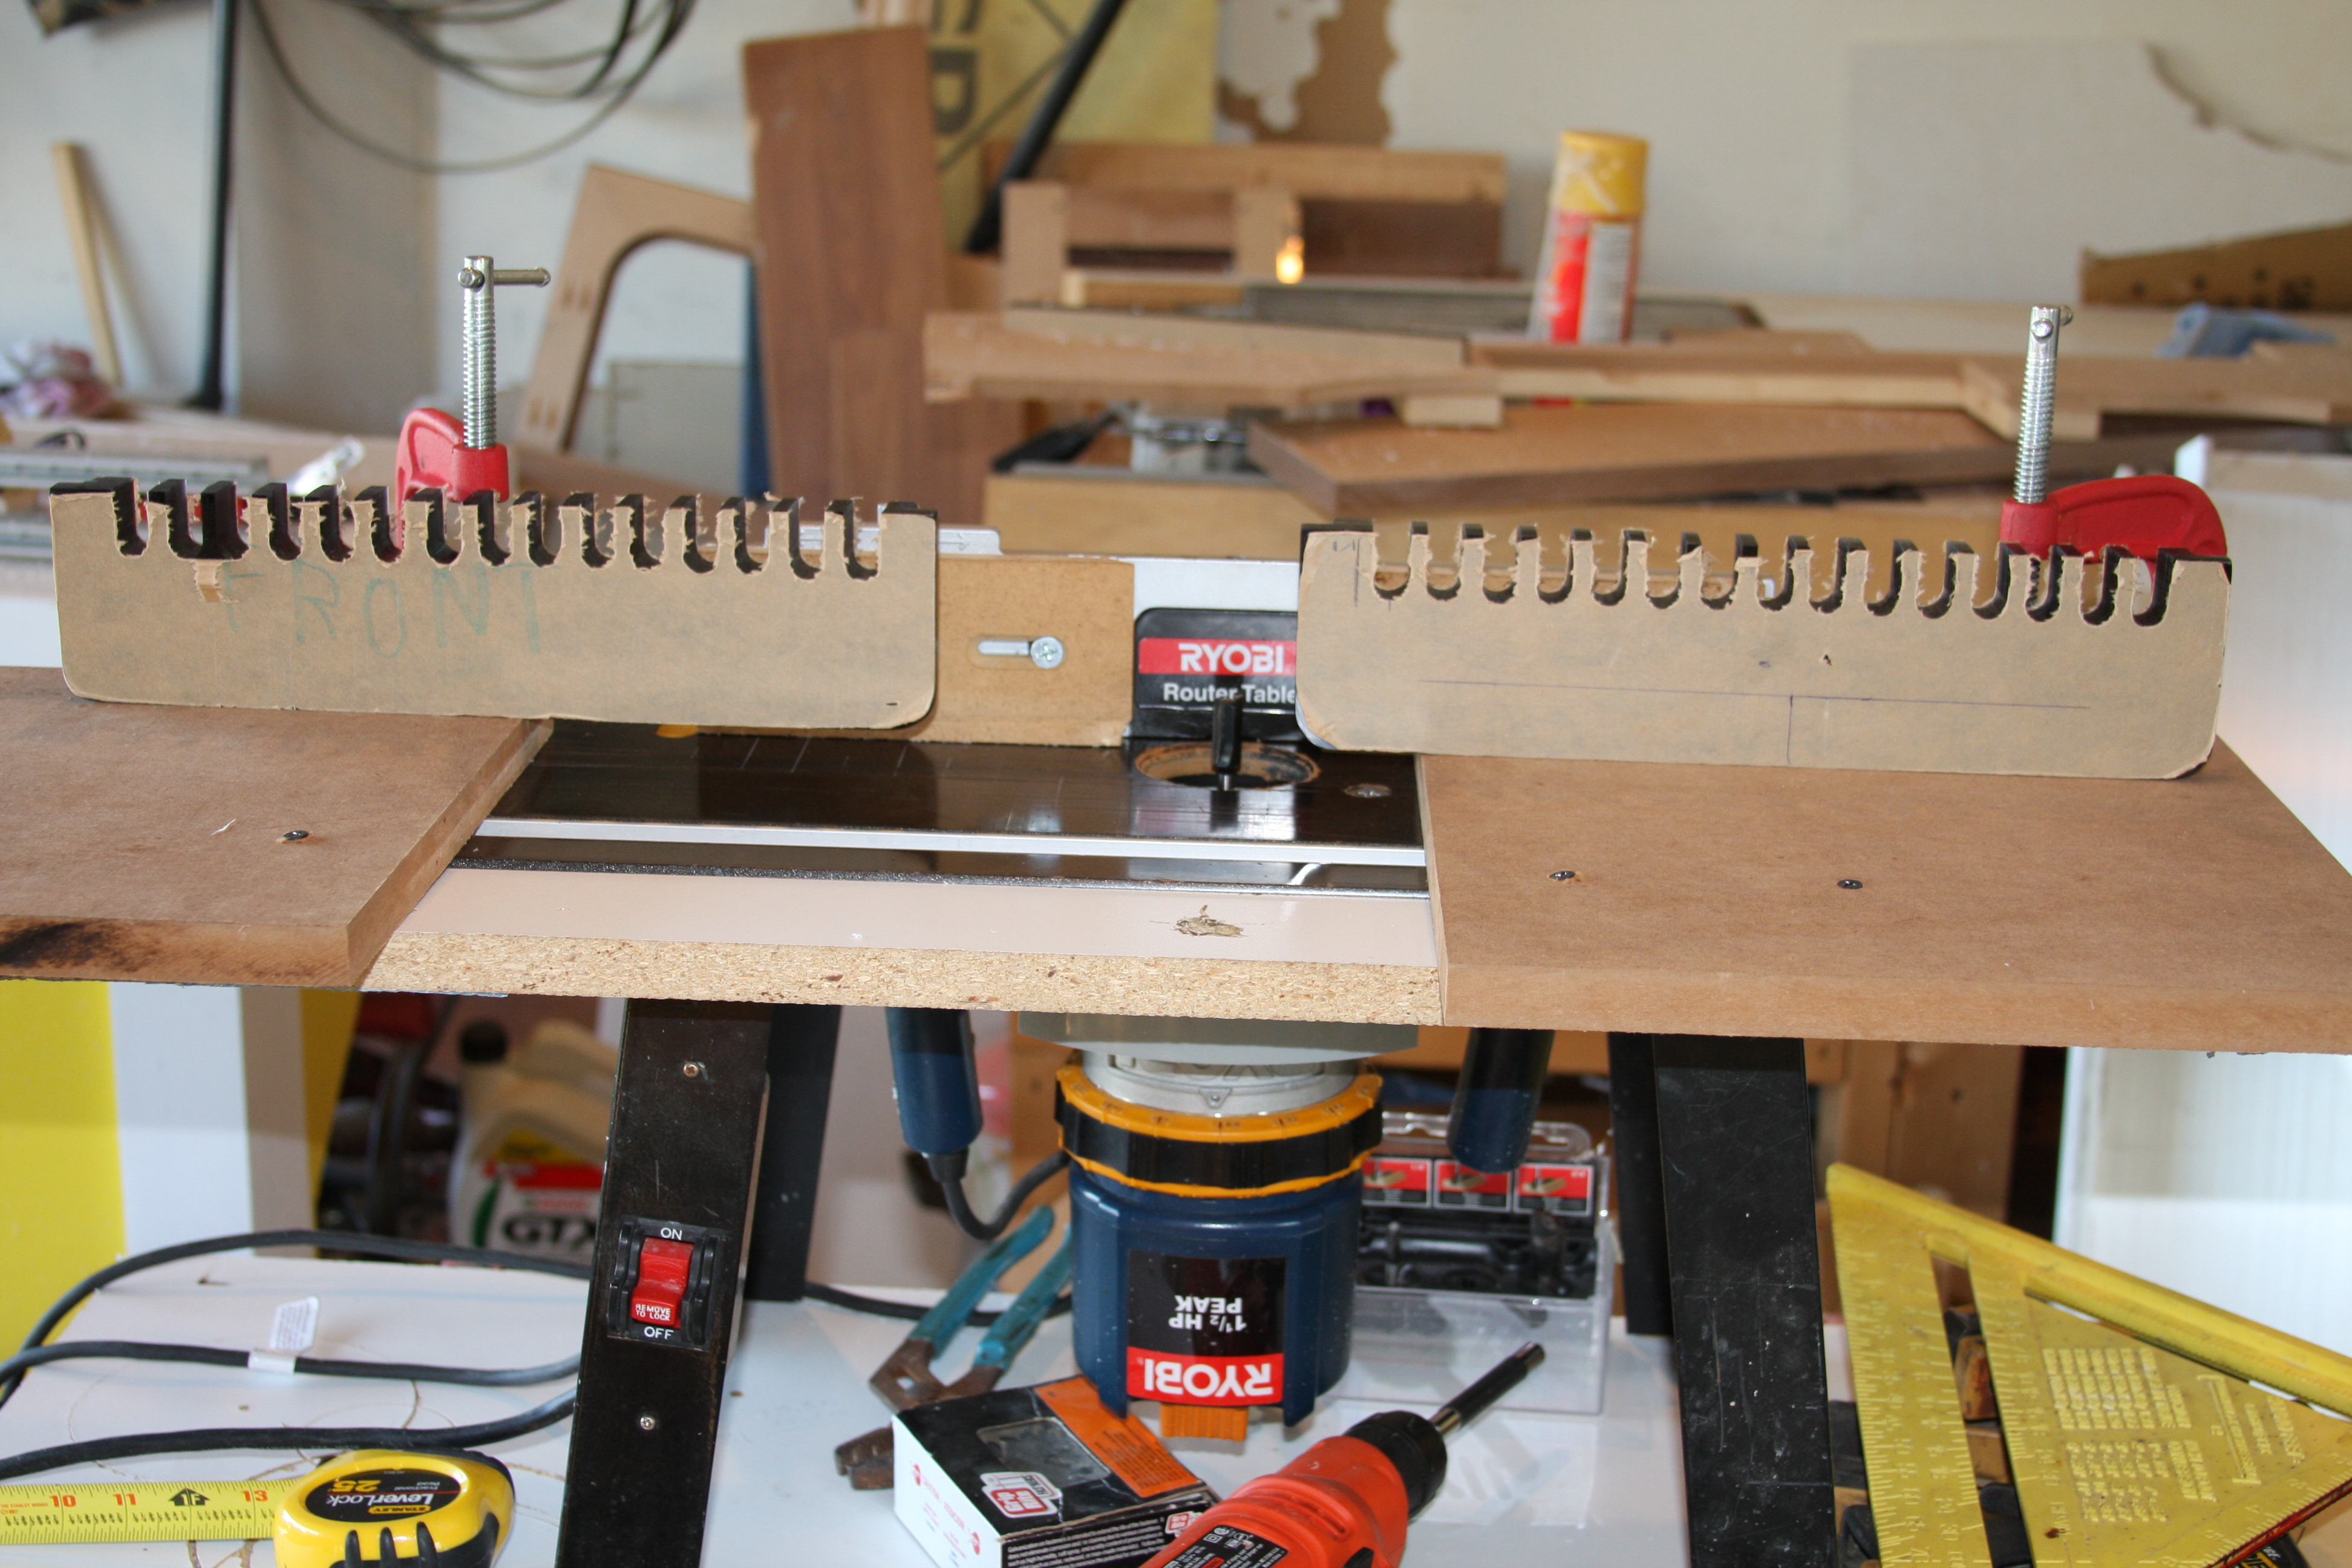
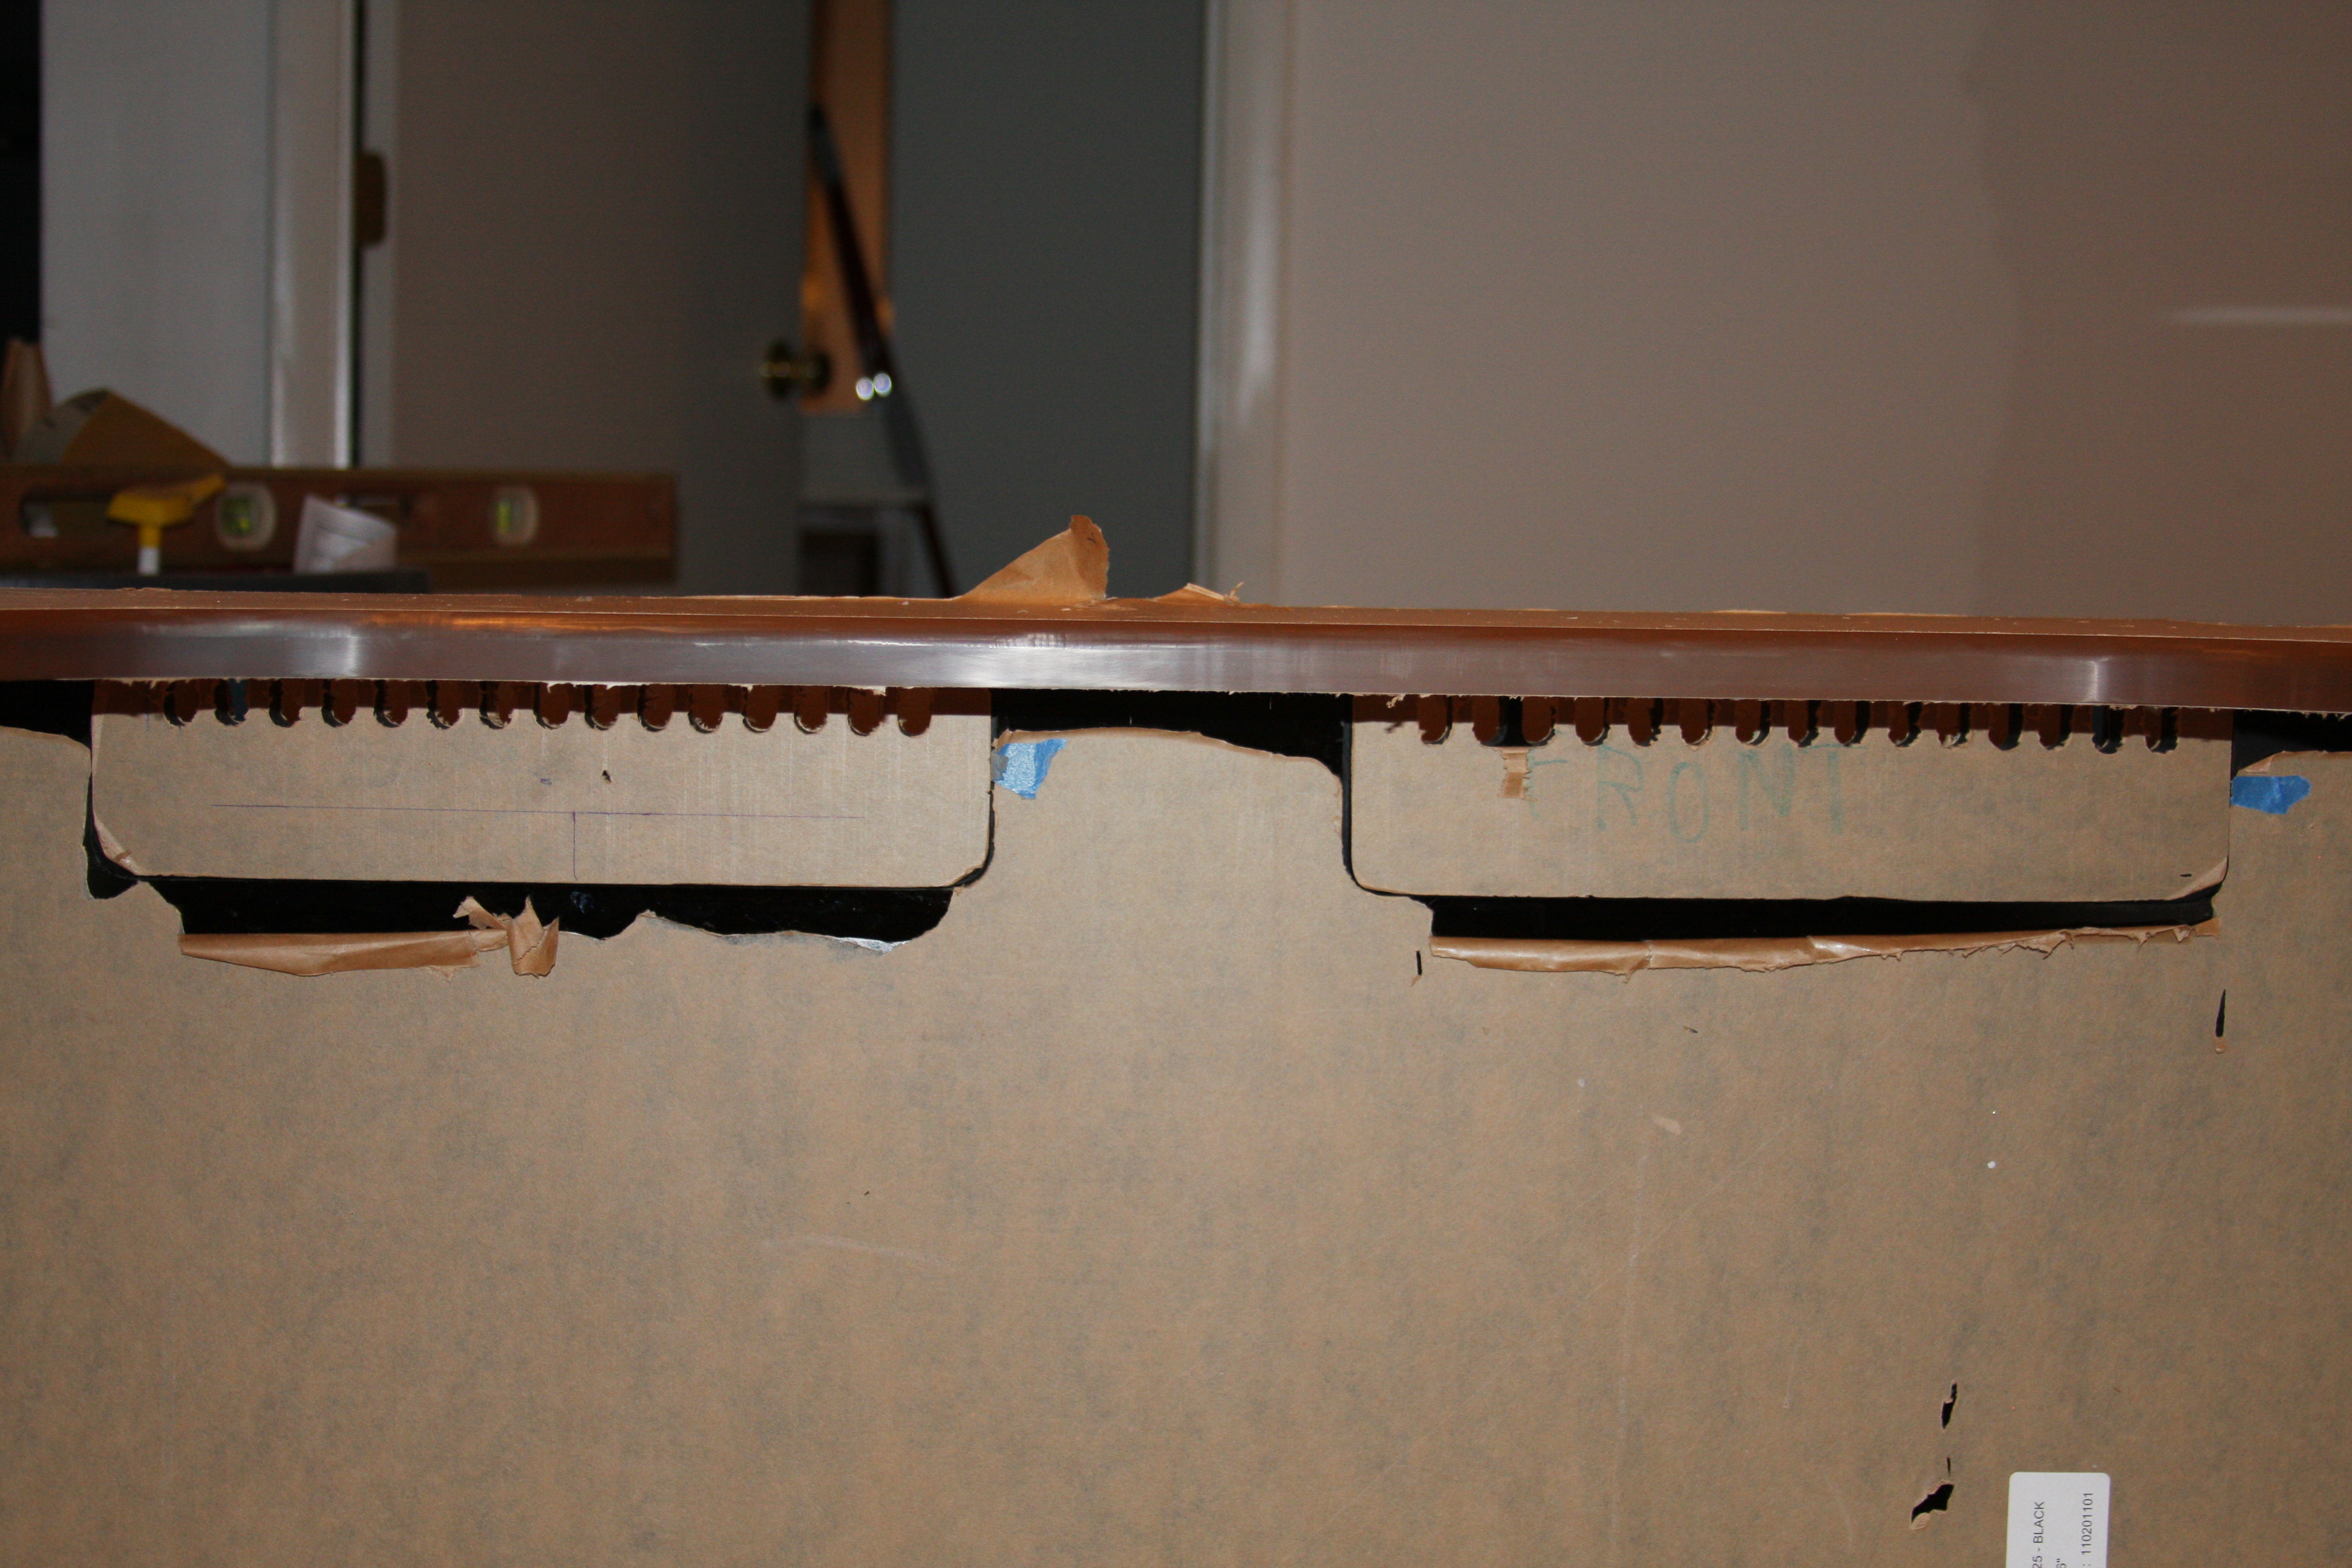
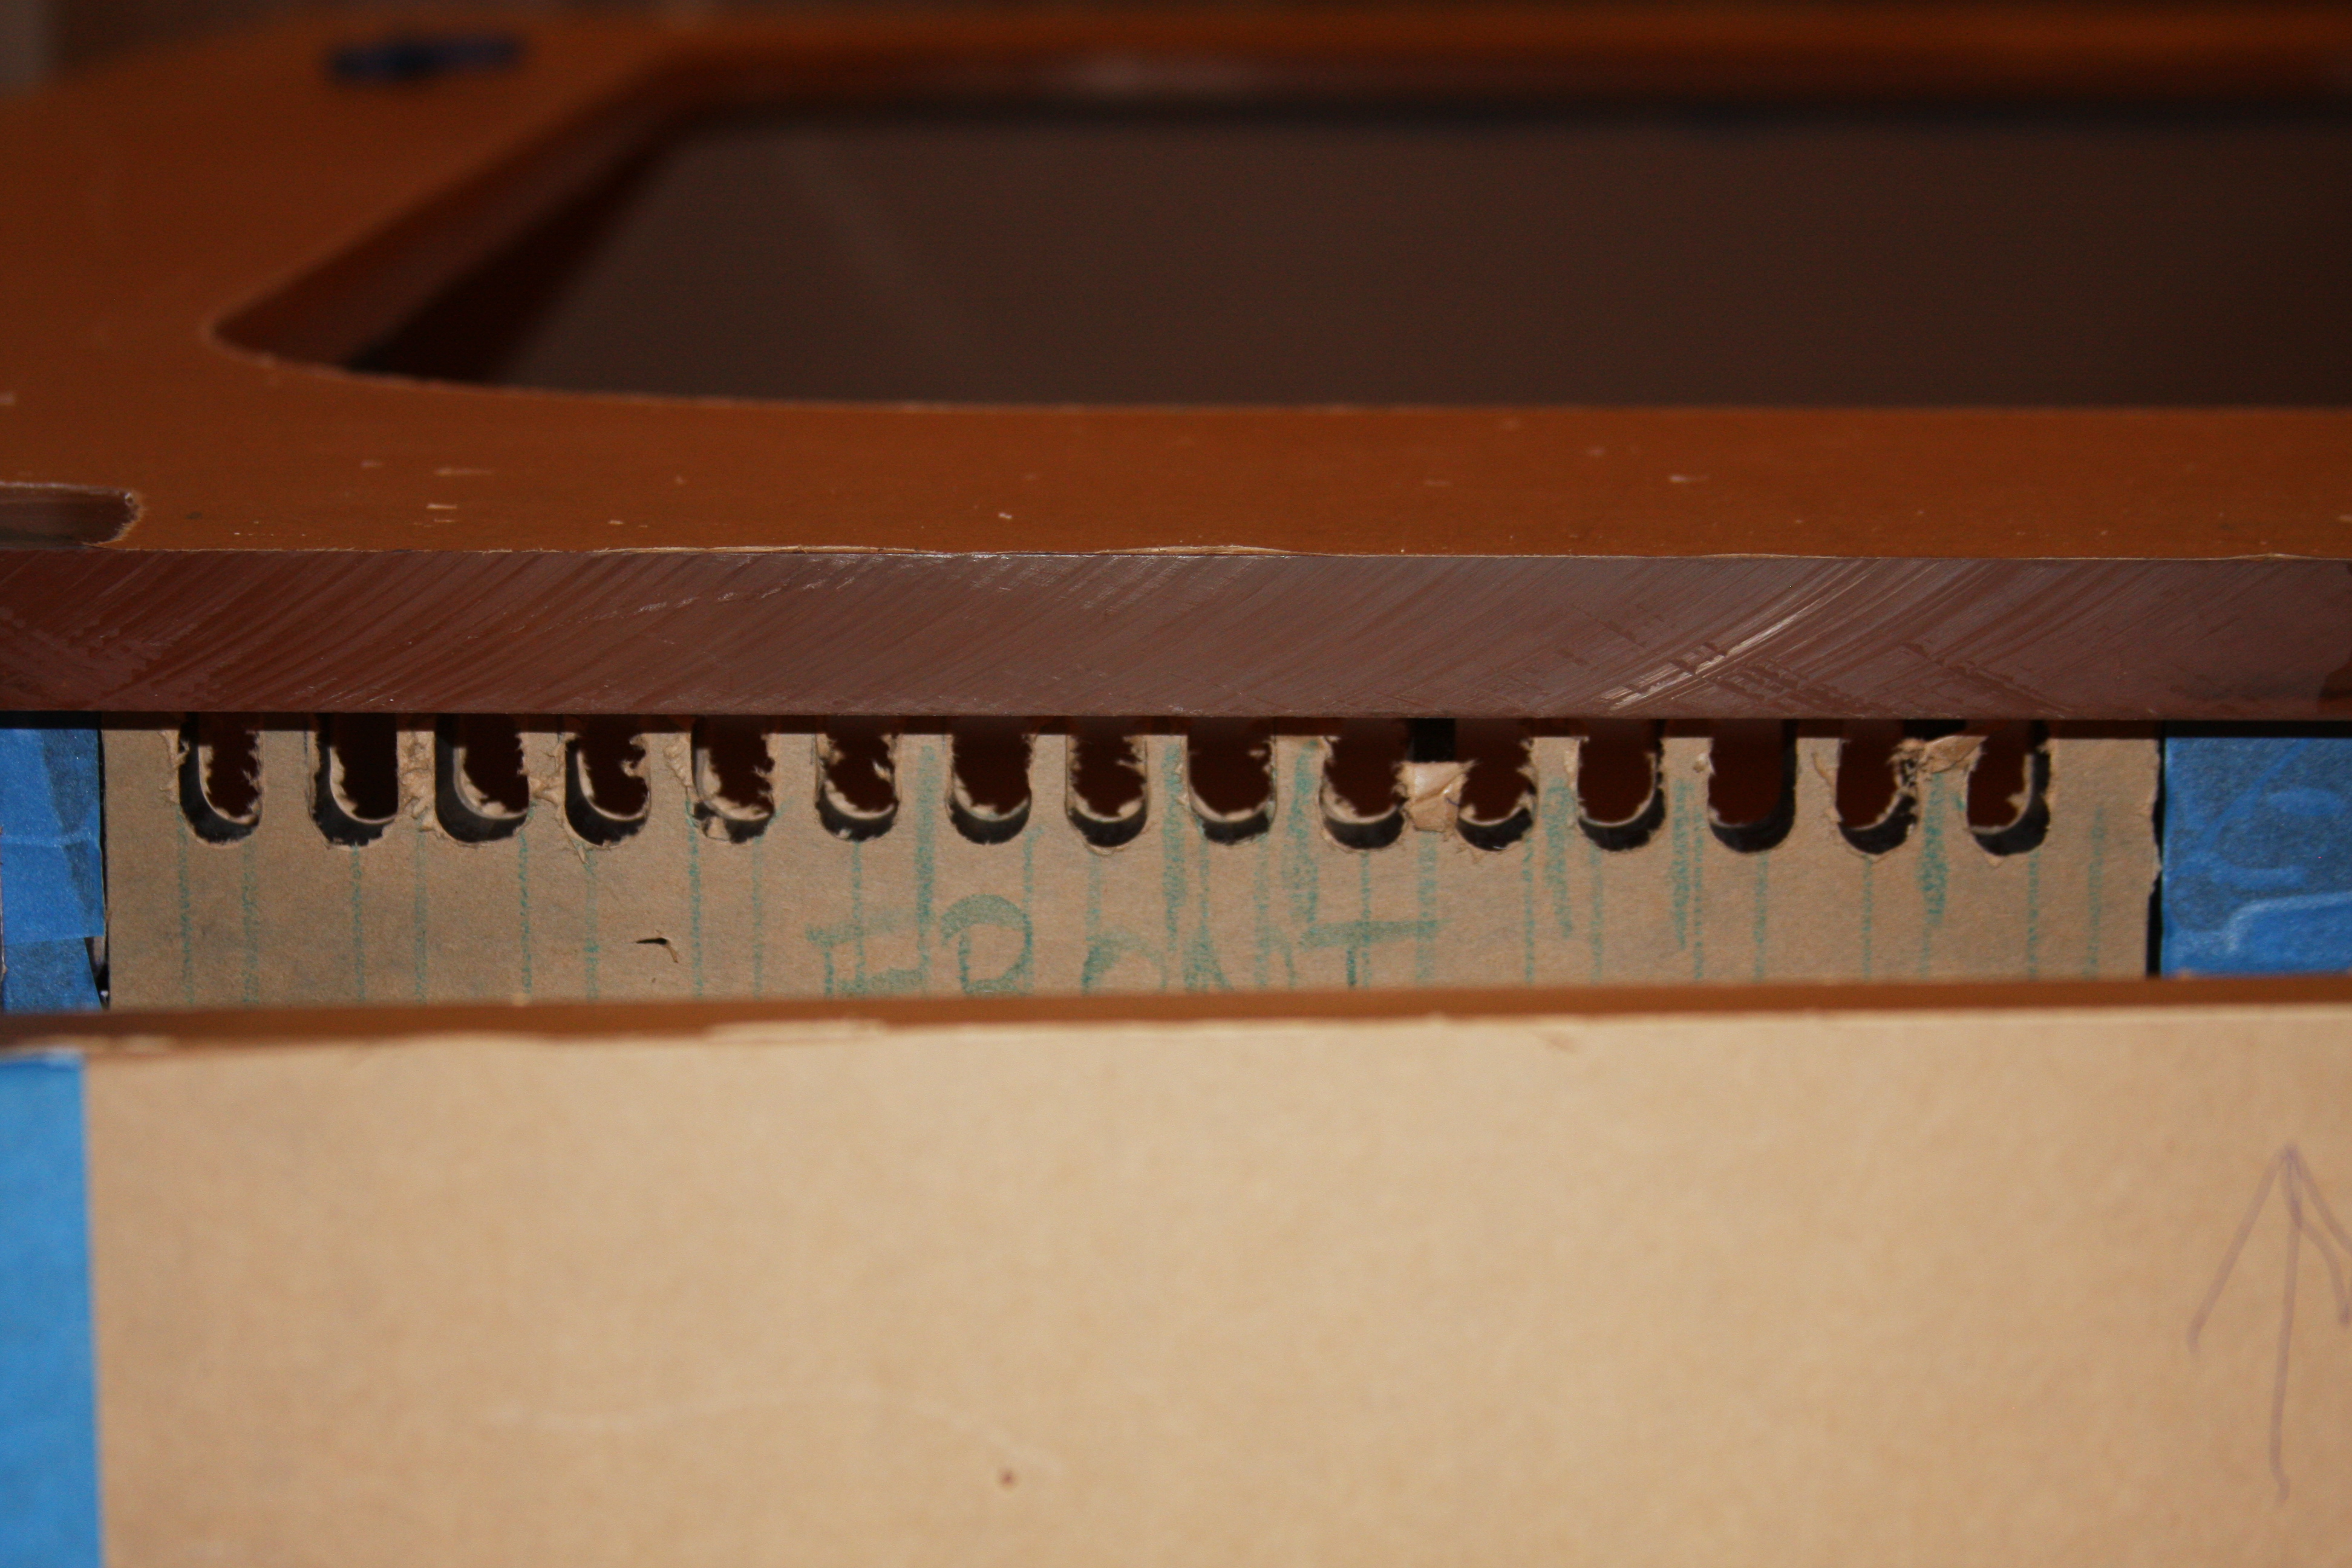
Here's the completed covers......Took quite a bit of time......Worked till 2:00 am this morning and then lost power due to the storms, and finally got power back and finished the router work cutting the teeth......Originally I had talked about using 3/8" material for the covers, but in the back of my mind flexing was a major concern and figured with a little extra work on my part, I could used some of the extra 1" black acrylic I had sitting around......Using the 1" acrylic meant that there would be extra steps, cuts neeed to make them fit flush as I want/expect......
We had also talked and debated on overflow teeth size and spacing......I was already cutting when Corey texted me back!!!!!! Thanks Buddy!!!!! I know it was late, but wanted to get them started. I originally layed everything out using a 1/2" teeth with 1/4" spacing between the teeth.....With this spacing I was able to get 15 teeth per panel......What I ultimately did during the cutting process was narrow the spacing down between the teeth, which allowed me to bump my teeth width to roughly 9/16" wide.......
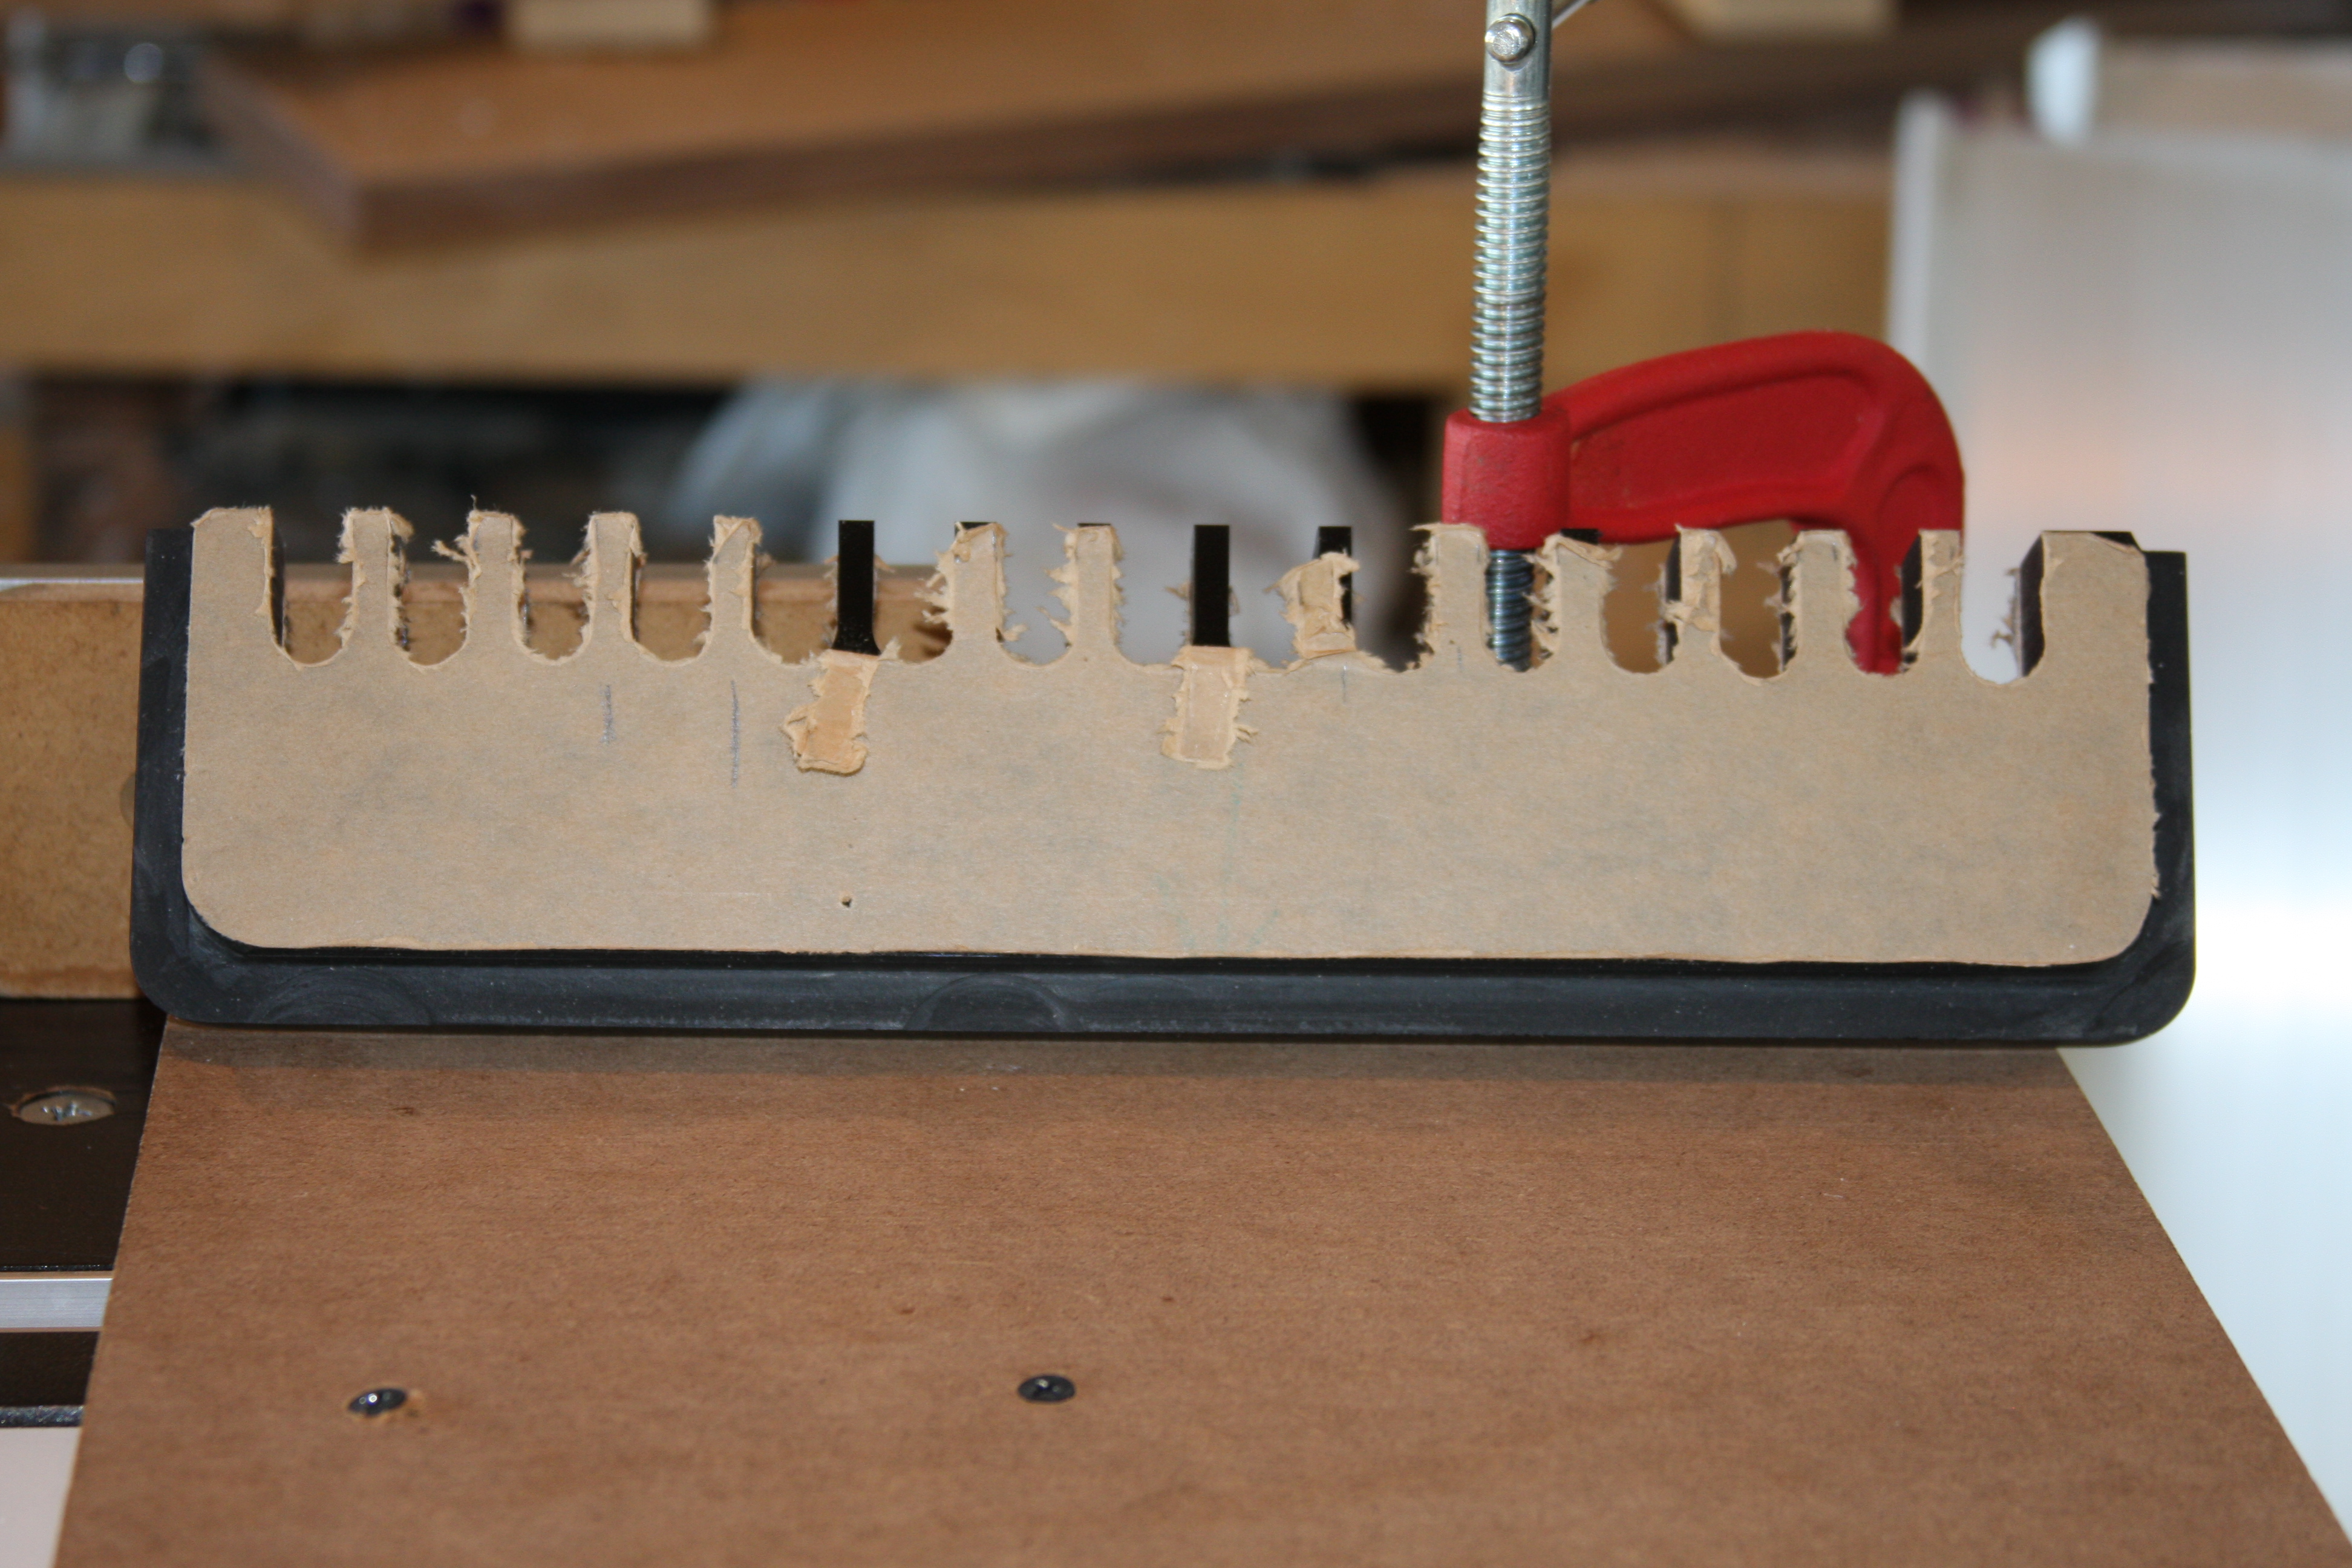
In this pic you can see that even the backside of the overflow covers/grills had to be recessed just as the panel of the tank....The reasoning behind this; is that I wanted the covers to be perfectly flush with the panel of the tank.......
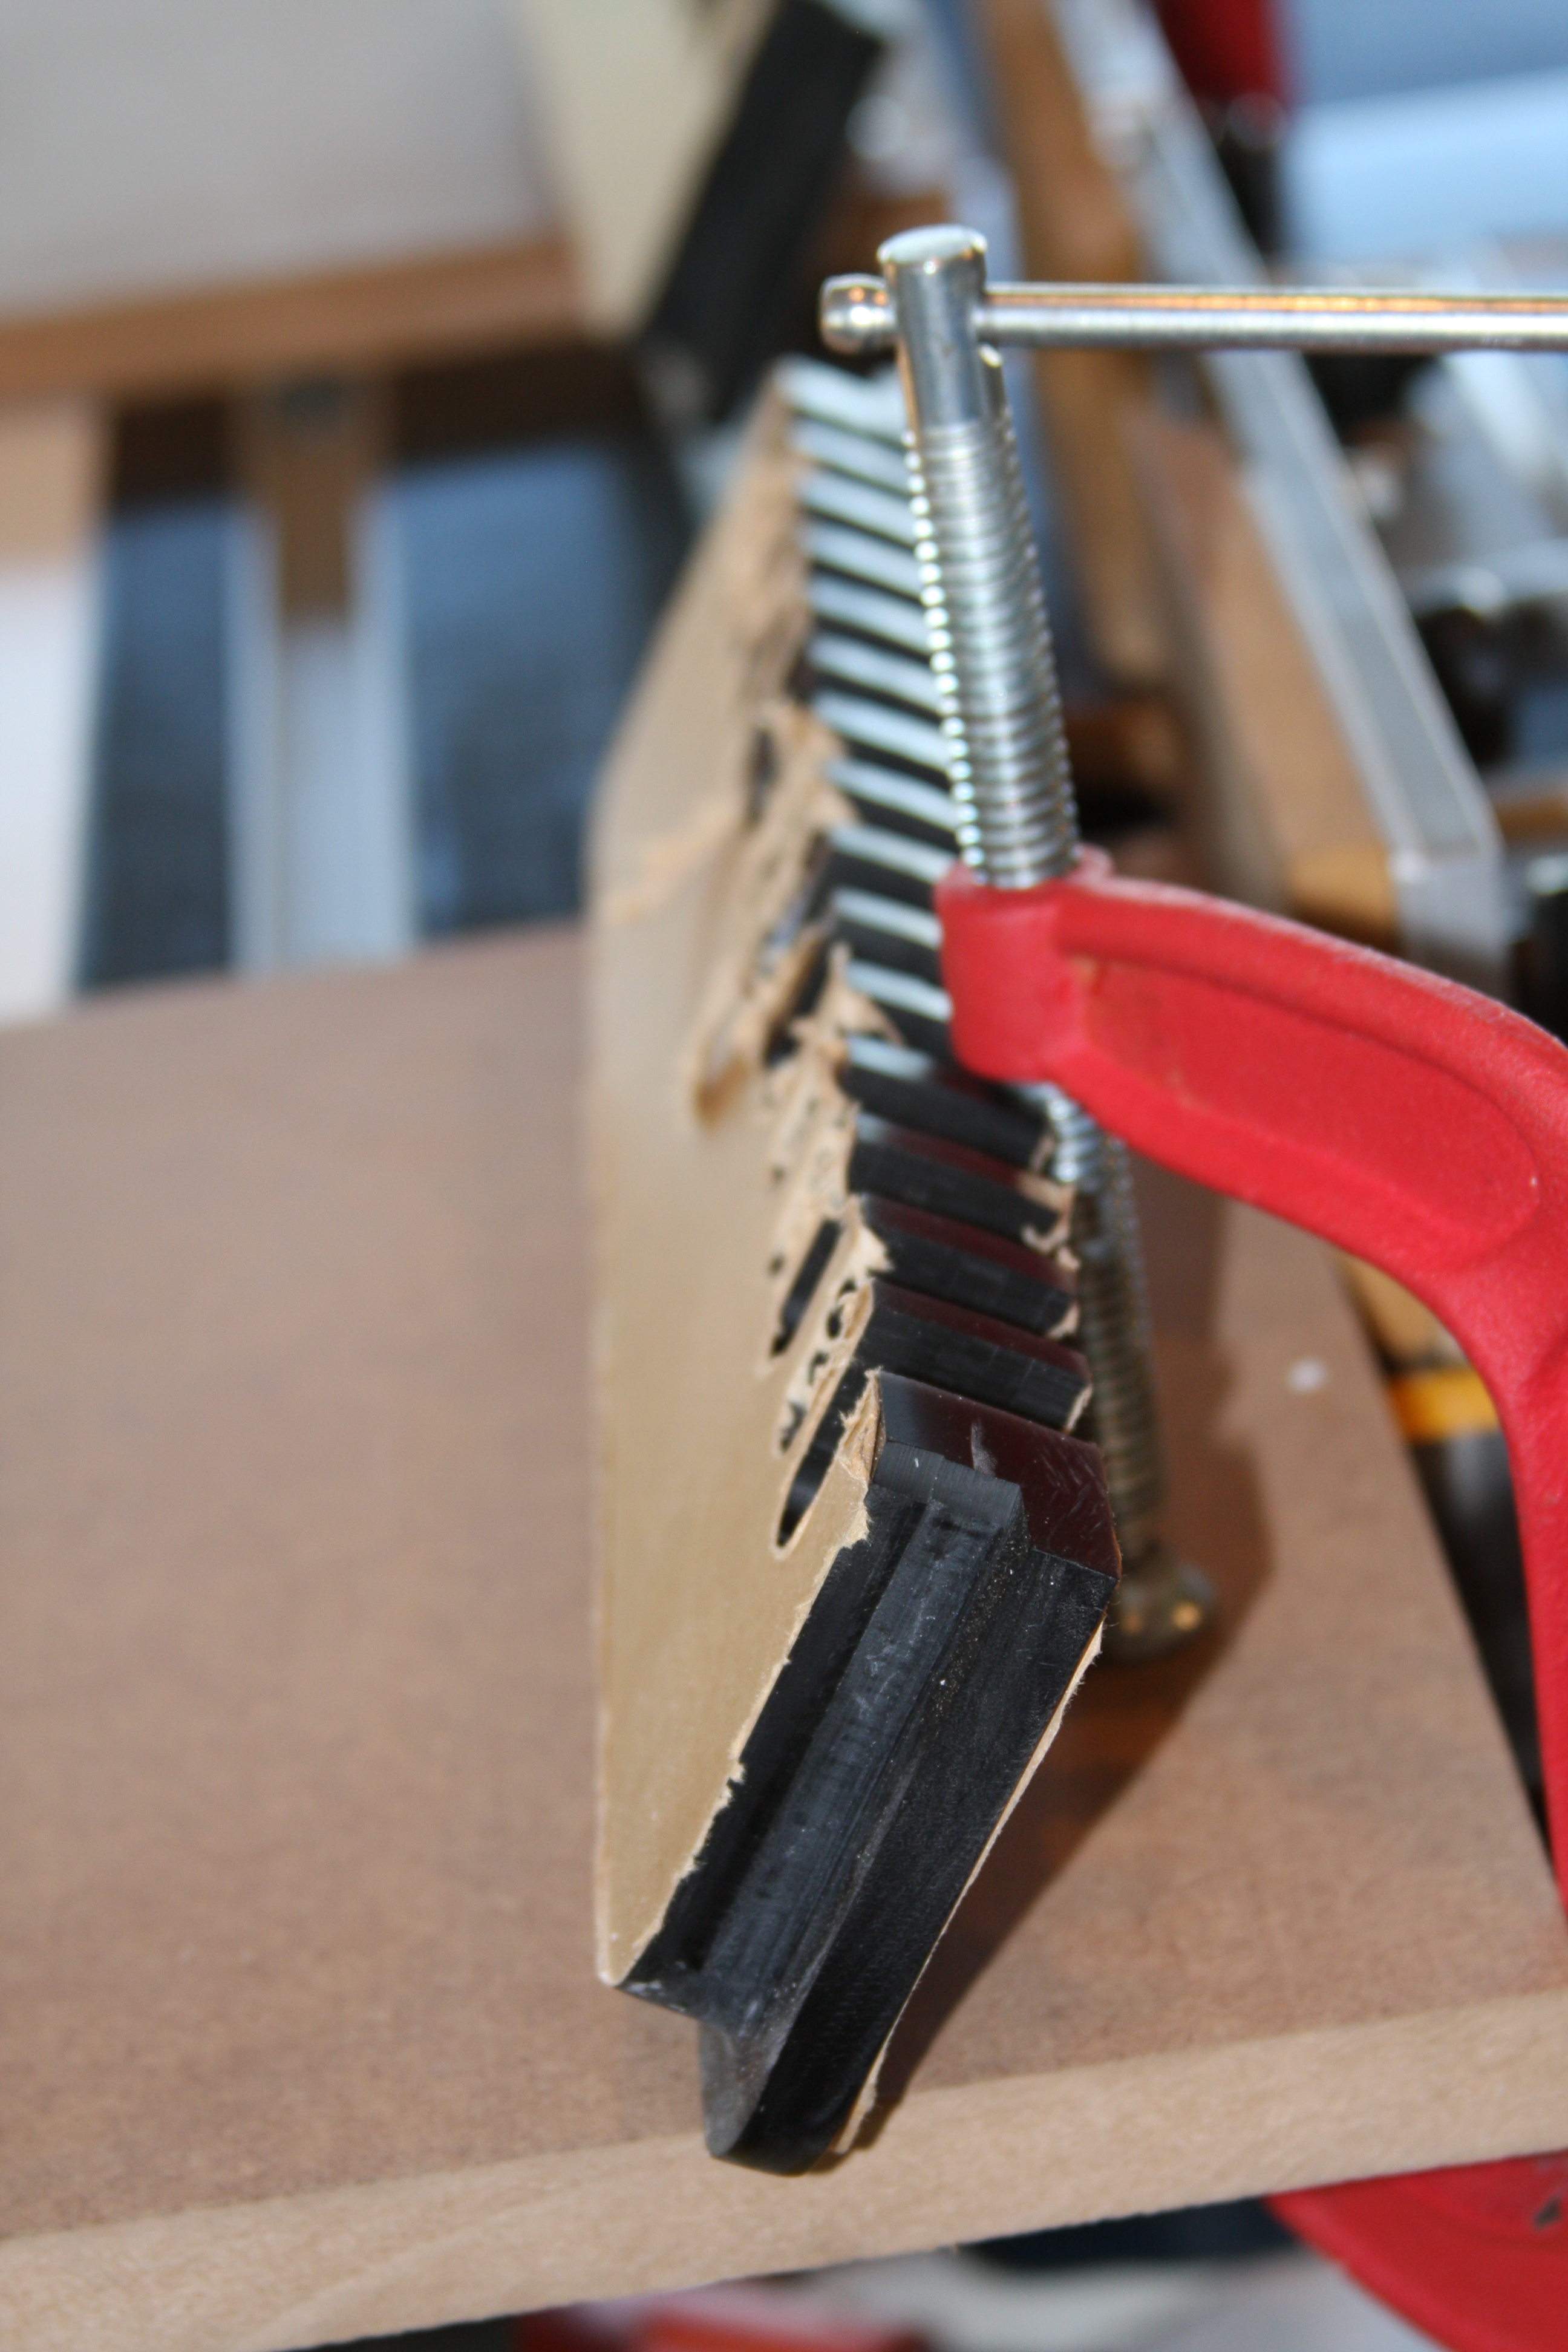
This is a side shot of the overflow cover/grills.....In the pic you can see that the corners had to be rounded since the cuts in the tank panel are rounded, so everything has to be rounded somewhat to get a good fit.....Again the rabbeting router bit was used......
This is the mess after doing all the routing just on the 2 small overflow covers......Imagine the mess from routing the tank flush!!!!!!
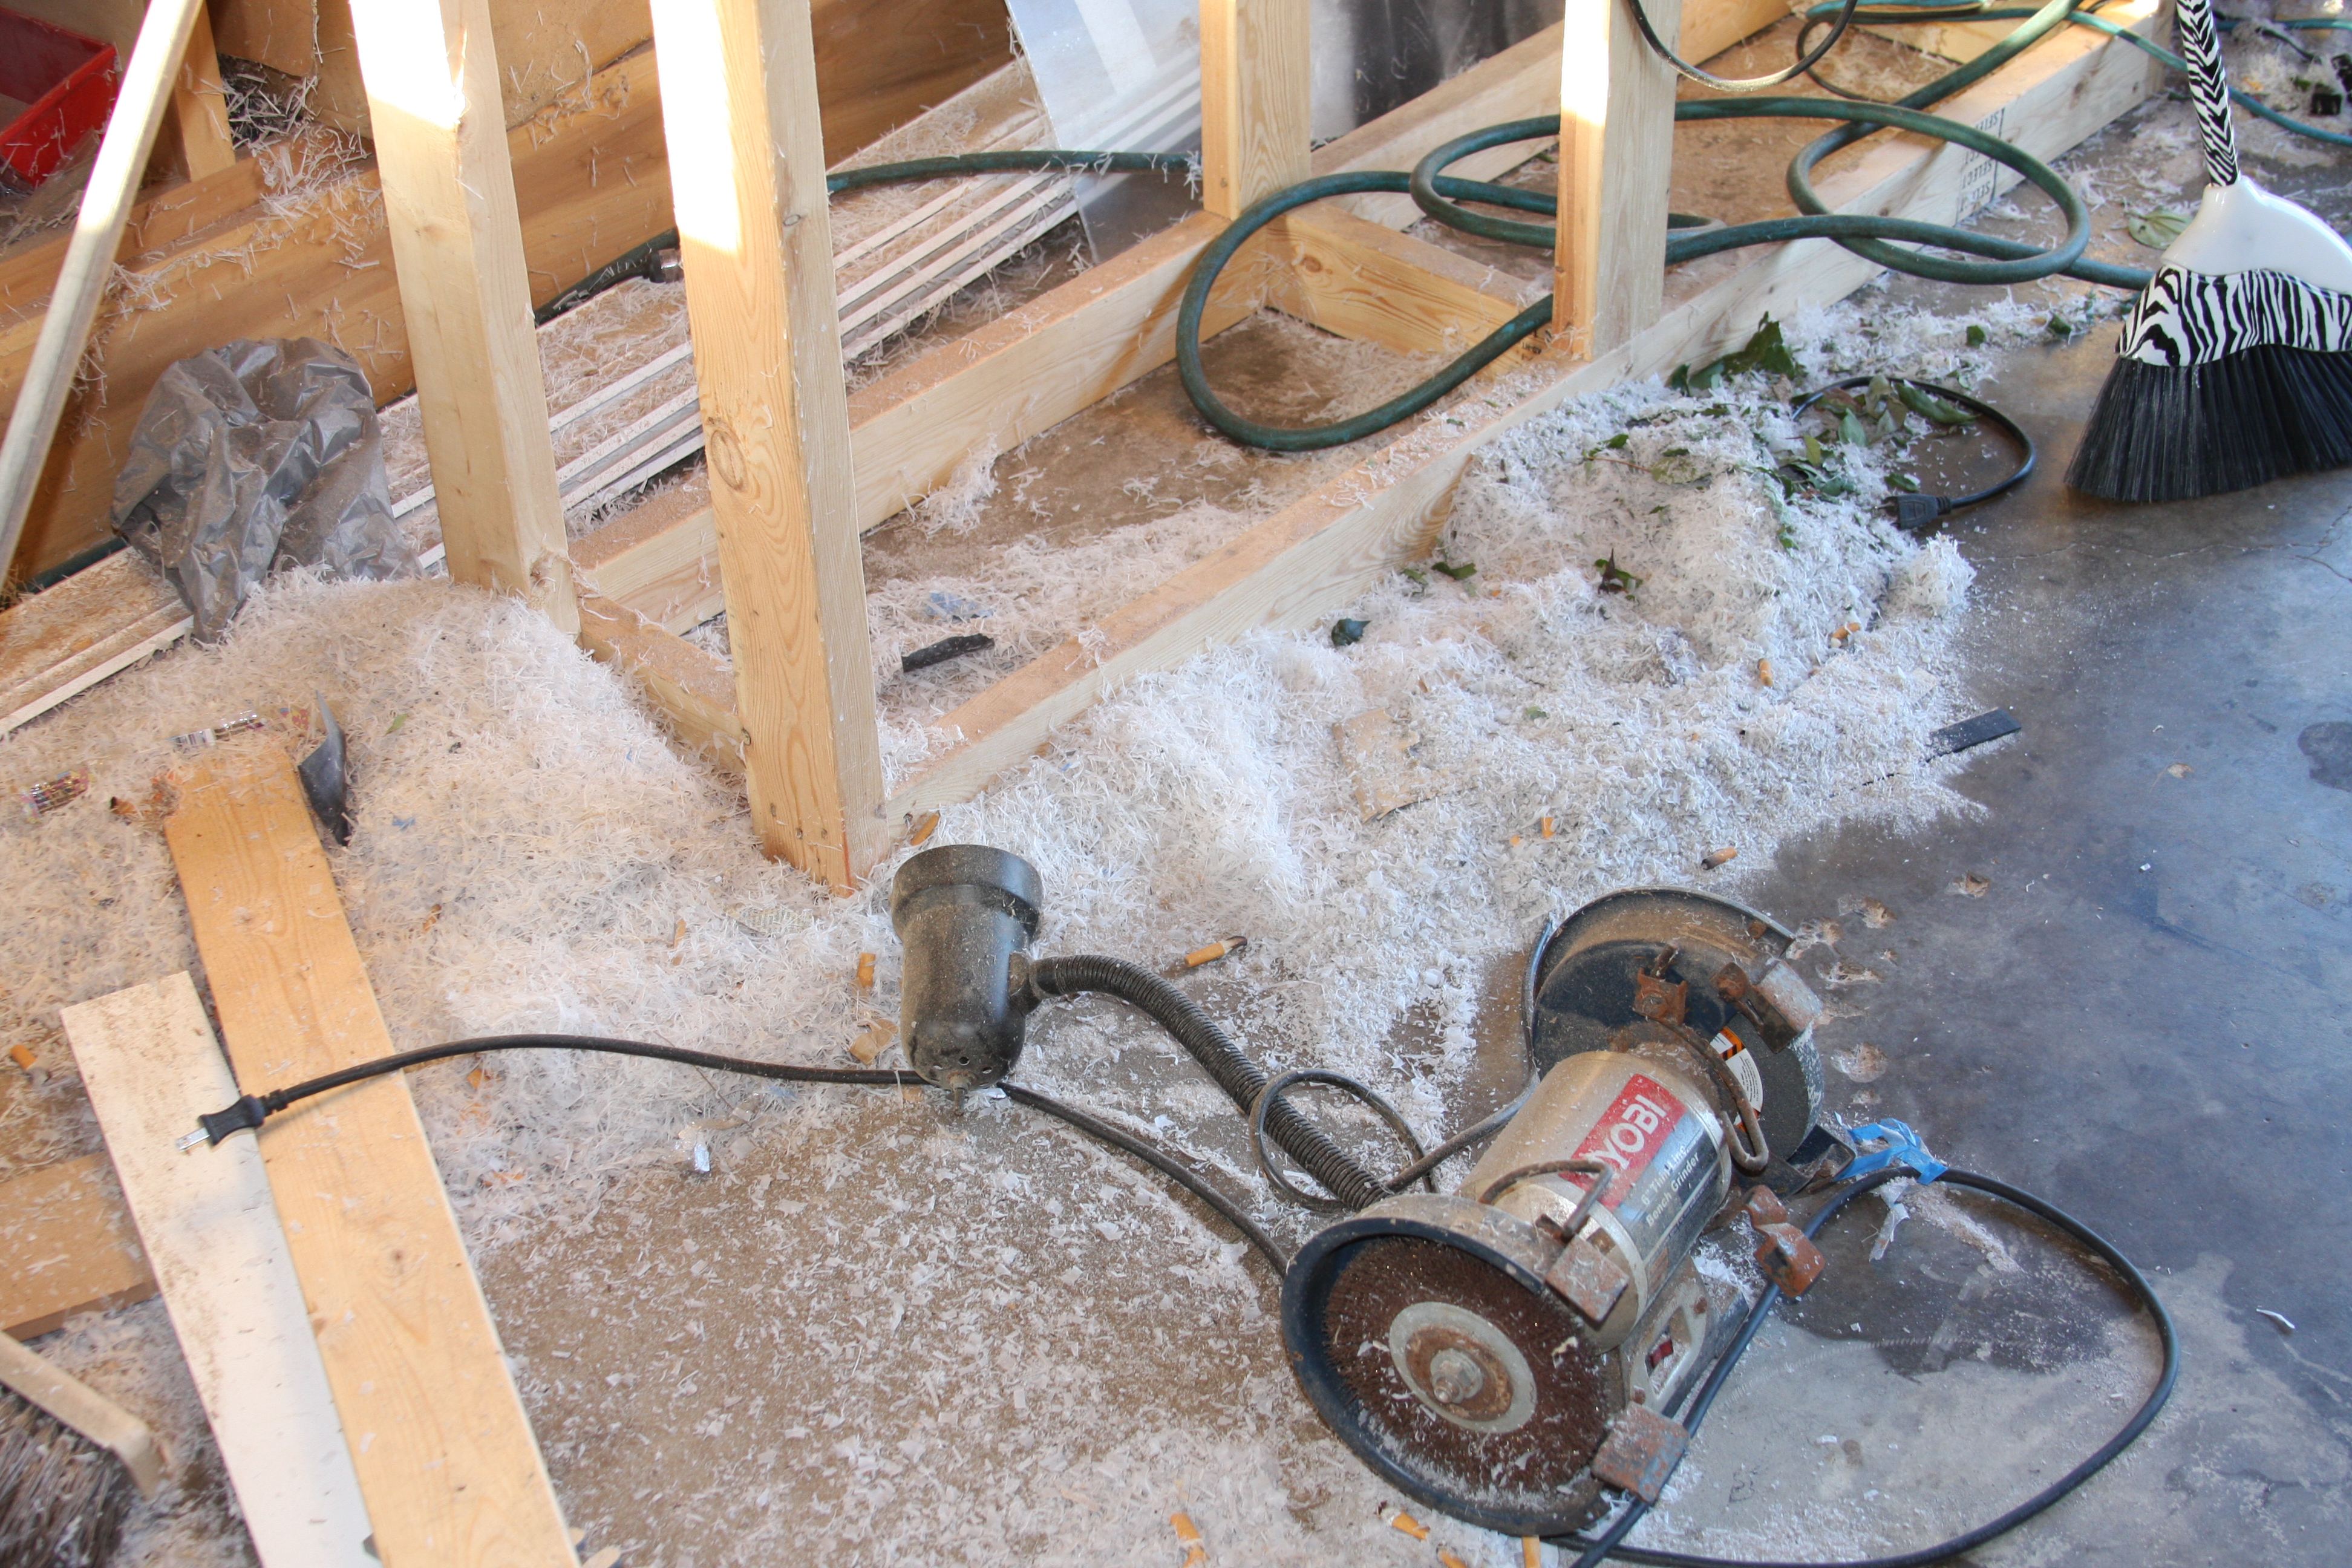
 

acrylic51

Active Member
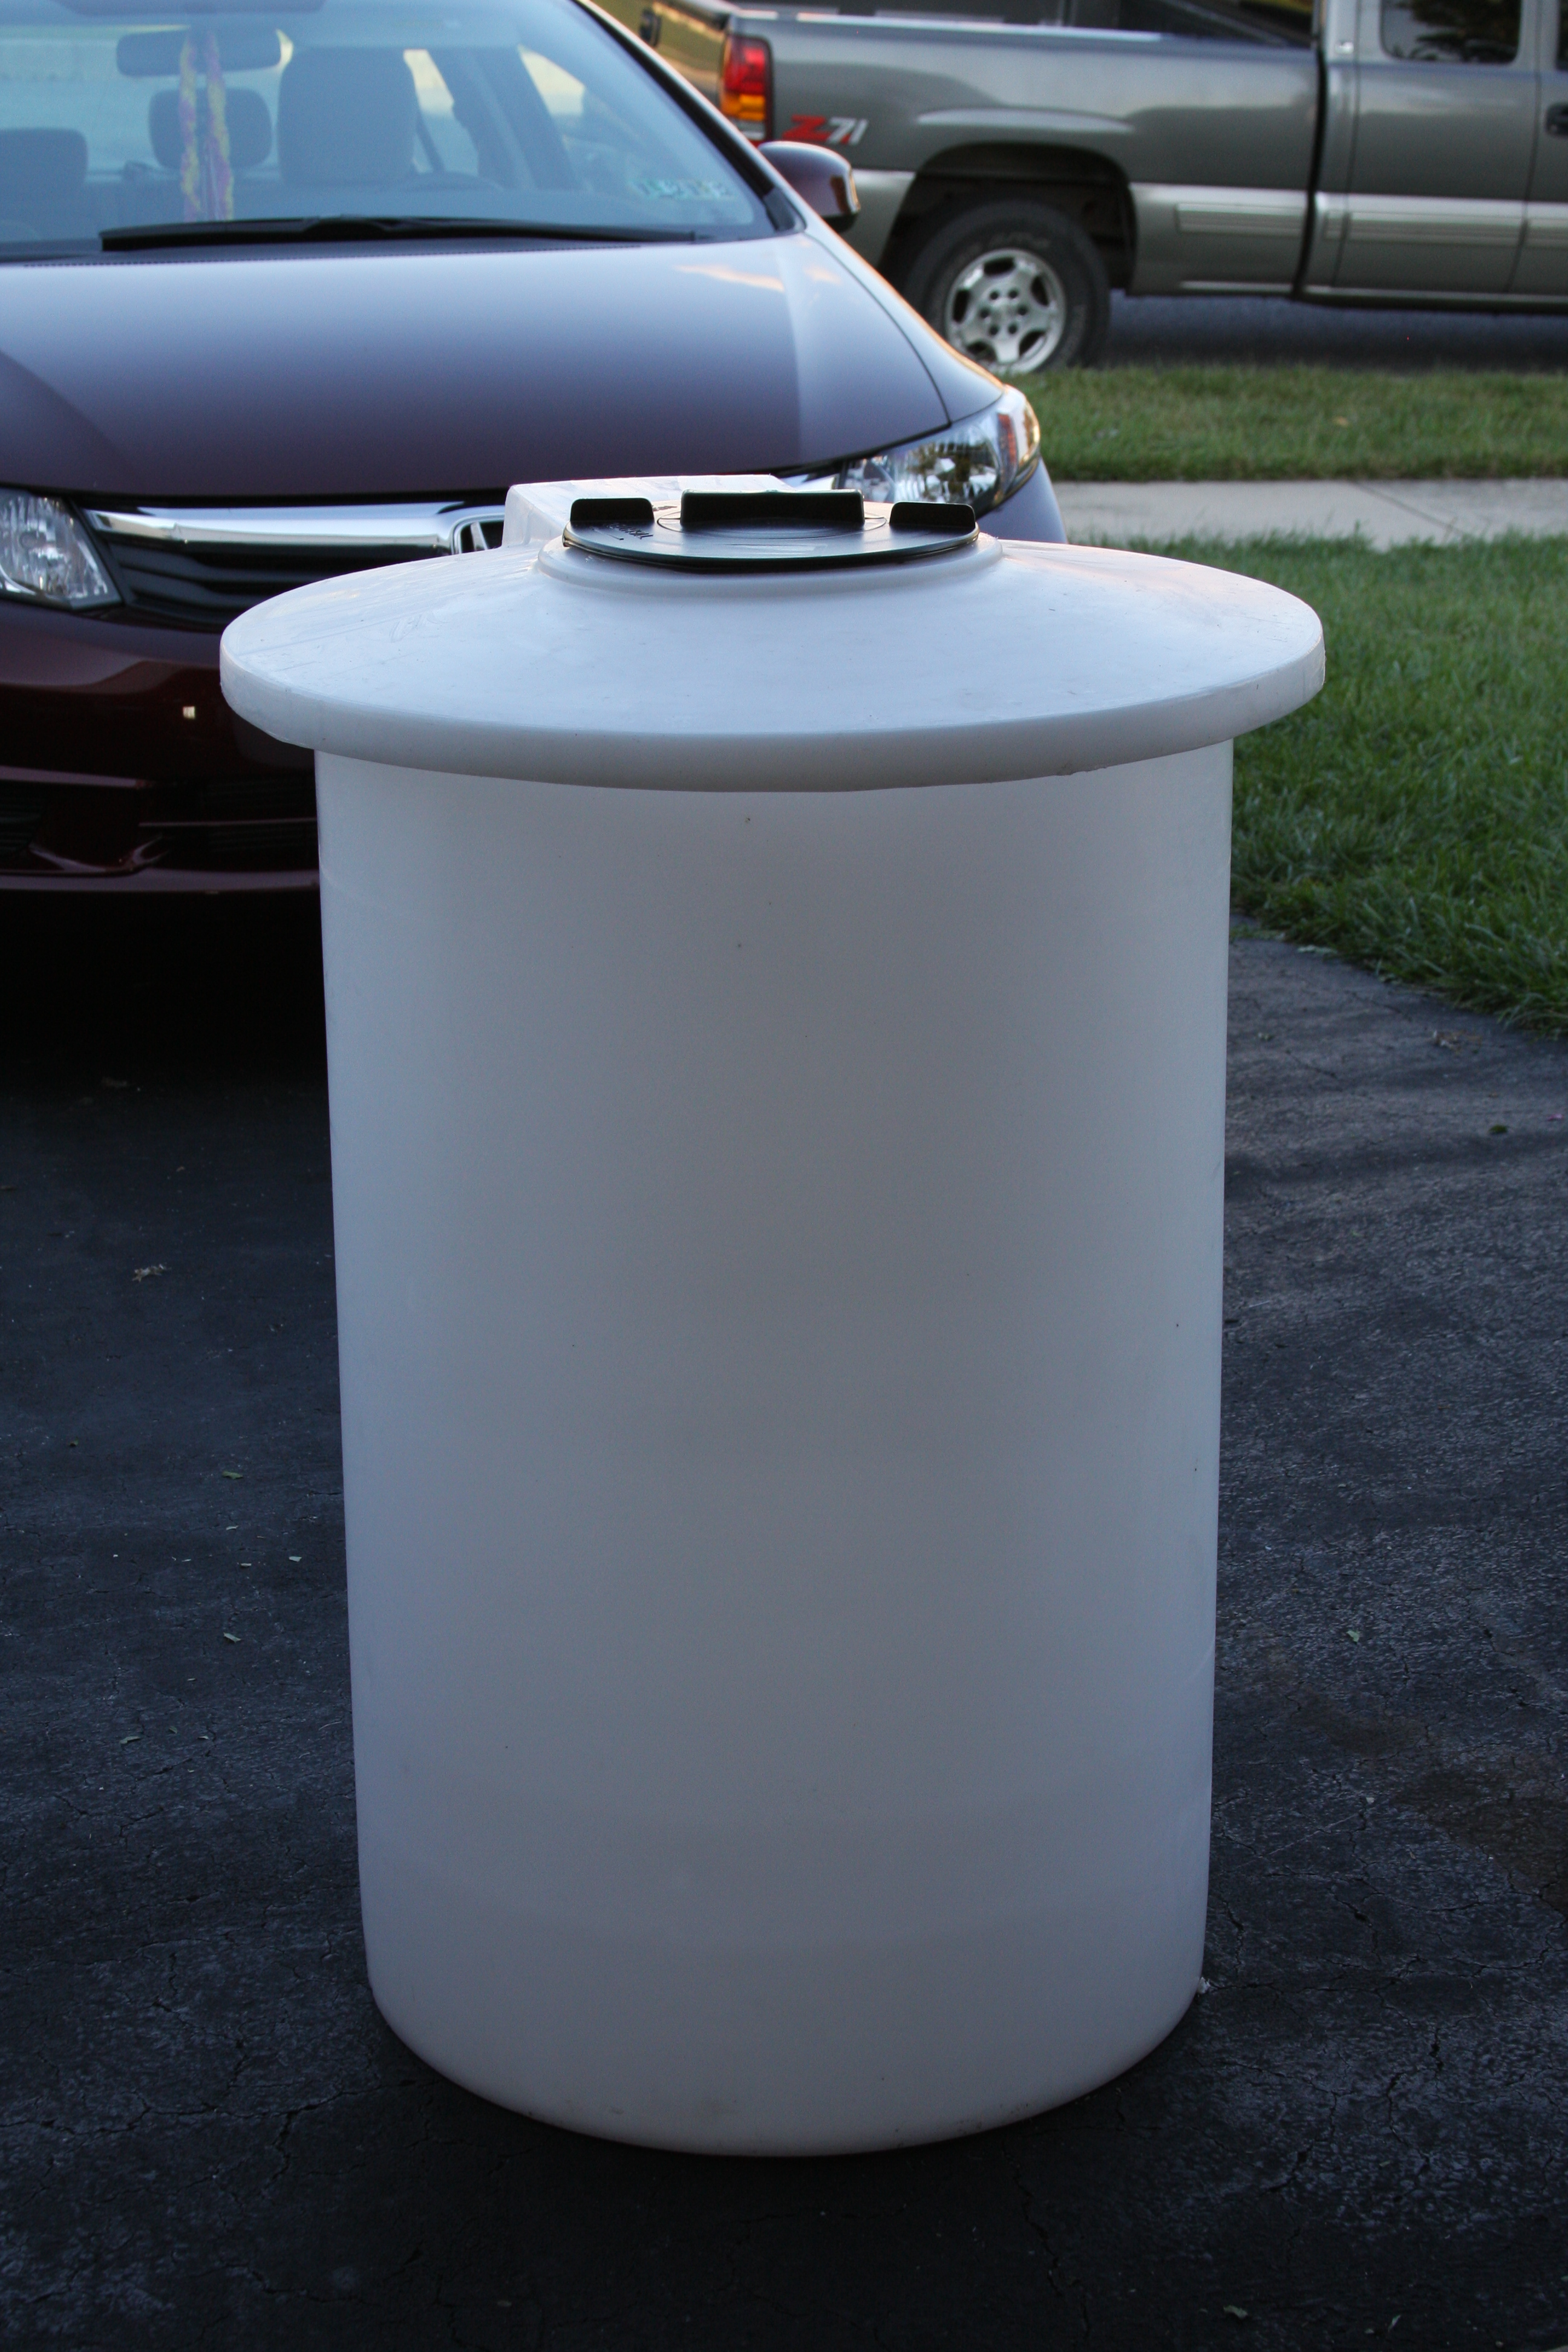
Through my daily travels working for UPS I pickup from a place that makes these water storage containers.......The guy gave me the website and said that they have seconds, that they can't sell top dollar because of defects......I was off Friday, by some miracle of God, which doesn't happen to often in my line of work, but decided to go out there and see what they had in the reject pile....I found this 50 gallon container with a vented top for $23.00......It was rejected because they cracked the flange on the outer ring of the top.....The black plastic outer ring.....
Not a big deal......Some quick epoxy from Lowes outta fix er right up........
I
 

acrylic51

Active Member
Hmmmmm!!!!!:laughing: Water storage comes to mind.... Gonna hold out and see if I can get another one cheap and have 1 for fresh water and 1 for salt. My buddy Jerry has a pretty nifty mixing, water change setup that I might copy with a few twists from a podcast from Melevs site I seen!!!!
Meowzer basically just tired of looking at trash cans. I can stash these on the outside of the fishhook in the storage area in the laundry room. I already have a PVC line plumbed into the fishhook from the laundry area just hadn't decided what I wanted to do with it quite yet.
 

meowzer

Moderator
LOL....smarty......I figured that...just wondering if you HAD A PLAN.....for something extravagant.....LOL.....like a fancy ato.....or something
 

2quills

Well-Known Member
Dang that's a nice score on the tank Shawn. I never come across deals like that. Those poly tanks aren't cheap.
 

acrylic51

Active Member
Quote:
Originally Posted by meowzer http:///t/376802/415-gallon-plywood-tank-build/1060#post_3411595
LOL....smarty......I figured that...just wondering if you HAD A PLAN.....for something extravagant.....LOL.....like a fancy ato.....or something

Just messing with you!!!!! The actual ATO will be housed in the fish room, and will probably be handled by Tunze Osmolator.....with the optical sensors........I'll have to find the podcast and shoot it to you!!!!!!
Quote:
Originally Posted by 2Quills
http:///t/376802/415-gallon-plywood-tank-build/1060#post_3411606
Dang that's a nice score on the tank Shawn. I never come across deals like that. Those poly tanks aren't cheap.
You just never know the places you might go during the course of the day!!!!!! The worst part is shipping, but I will keep my eyes posted for containers if you like.....I'm going to have to check and see what it costs to ship these things......
 

acrylic51

Active Member
.Some updated pics......

Again sorry about the poor quality of the pics....but these are pics of them installed........
Shot of the overflow covers from overflow side view installed in the tank....Sorry for the bad pic!!!!!!
 

desertdawg

Member
I think you should go with 1/2" teeth with roughly 9/16" between them
And if you have some extra 1" black acrylic I had sitting around I bet it would help prevent flexing....
You do damn nice work, but your slow. I hope it doen't take this long for you to build one for me...
 

acrylic51

Active Member
I think my problem is I think to much about it. We had been hashing material thickness and the black 3/8" was for another project, and figured why let the 1" sit around!!!!! Actually the teeth were suppose to be 1/2" as originally laid out, but after seeing how rigid the 1/4" teeth were I figured to thin them out a bit.
If you had all the proper; good tools the job goes quicker and seems less tedious. My new router fence just came in today from WoodCraft. Ain't that a shocker. Dawg I'm always rather anal; meticulous about my work. I made 2 overflows, because I didn't like the quality!!!!!! Sweatervest's idea ofdoing the overflow in black and making the back panel clear was used in the final overflow!!!! See that suggestions are used, so throw them out there people!!!
 
Top