415 Gallon Plywood Tank Build

1snapple

Active Member
Yea, Well a local guy to me (Brad Syphus) has a 210 with a TON of wrasses which made me look into wrasses, and melanurus wrasses are super mellow and eat, all bad bugs.
If I had a larger tank, I would do a Sohal and a Chevron tang. And maybe a Black tang. Another local guy bought a crosshatch and it was rediculously agressive. He bit his owners finger and took a chunk out of it and got some blood in the water, cool fish though.
 

acrylic51

Active Member
After you mentioned wrasses, I did slightly start browsing them a bit. After all these years I've never been a fan or found of the Chevron's for some reason. A buddy of mine does have a Sohal and a very pretty fish. I do love my triggers though. My one friend is trying to convince me on a school of yellow's as well. I am looking for a well rounded mix/blend of fish. Must keep in mind though there won't be an actual sand bed, so that does rule certain guys out. I like the Lyretail anthias (sp?) as well. Hopefully others will have suggestions as well.
On another note not a very productive night. Worked 15hrs and by the time I got home was actually bed time to make start time for today. I did though manage to fill the tank a bit more. As it stands now the tank is 4" from the bottom of the curious for the overflow. I haven't finished ordering bulkheads or any plumbing as of yet, so I have to be mindfull of the overflow. I still need to put the finishing touches on the overflow covers as well. This is 1 area where I will cheat and flame polish between the teeth.
 

snakeblitz33

Well-Known Member
Looking good man!!! I can't wait to see some more vids. Good luck with the stock list. I'm anxious to see what you come up with. I think some anthias would look cool...
 

acrylic51

Active Member
Not much of an update.....Took the tank to the cut outs for the overflows to make sure they were level with the tank in place and perfect........
Probably couldn't cut them level again if I tried. Took measurements again today, and still no noticeable deflection......I will take more measurements again tomorrow as well.
 

acrylic51

Active Member
Still leak testing the tank and so far so good, no issues, and no, noticeable deflection in the panels......I got a bit tired of looking at water just sitting in the tank, and realized I had stashed my Tunzes in the bedroom closet.......I've never tinkered or played with them and huge instruction booklet, but I'm not 1 to read instructions till something goes majorly wrong.......Needless to say when the wife saw me pulling them out of the box, she got curious as to when I made the purchase....After a quick reminder that I had bought these awhile ago, and had put them away. She actually forgot about them in the bedroom closet.......

Here's a couple videos of water flowing in the tank.....I had picked up 2 Tunze 6100's and they are mounted on the back panel and both are angled at the side walls, which in turn bounce the water towards the front panel of the tank.....The PH's are mounted roughly 6"-7" from the bottom of the tank, so they are pretty deep in the tank, but still giving good flow characteristics for the tank.......
Again I didn't read any directions, but pretty simple to hook the pumps up, but there's different settings and timings you can play with to produce different patterns. I had originally bought them to put in my waveboxes. Again not knowing what I was actually playing with it just starting dialing things around and walked away from the tank as I usually do, and to my surprise it was pushing 2" waves easily through the tank and it was pushing water over the cutouts of the overflow into the overflow box, which at this time isn't plumbed.....so needless to say a little mess to clean up, but had to dial the pumps down a bit.....Hope you enjoy the videos!!!!!!!
 

acrylic51

Active Member
In the 2nd video you can see the surface of the tank has decent movement....Again with more tweaking and actually figuring out the pumps I'm quite sure I can do a lot better with the water movement.....I can only imagine what I could do if I had actually built and put them in waveboxes.......
 

acrylic51

Active Member
Yeah only testing with freshwater......Didn't even clean the tank out before filling....Couldn't wait a bit just filled it and let it rip.....
 

acrylic51

Active Member
Thanks Corey!!!!! The only bad thing about them is the cords and the Vortech's aren't an option.....I don't see anyway in using them and putting them on an angle as how I have the Tunzes positioned.....I think I'll have to try to find a way to hide the cords from the Tunzes....The nice thing is the cords are black and might be able to use some 1/2 round acrylic rod, and hollow out the center of it, and then build something like a cable management system along the back wall. I wish they were either the 6205's or 6305's.....They would really be evil.......
I'm almost thinking I could do the same thing using the OM's plumbed into the back wall, but with more outputs and use adjustable nozzles to angle them into the correct position something in line with how the Tunzes are positioned......I think with multiple outputs angle similar I could create the same type of pattern....Not sure I'd ever achieve a wave effect, but not totally important IMO.......The nice thing about how the Tunzes are positioned even with a tentative rock layout plan, the outlets wouldn't be hindered with it hitting the back of the rock structure due to the nozzles being fired against the side panels of the tank, and with multiple 1 high, 1 lower, I think it could really exaggerate the movement?????
I have to get some pics with the digital and put some light over the tank, so you guys can really see the Tunzes, and see what I'm referring to about the rock structure not really interfering with the flow from the outputs.......
 

acrylic51

Active Member
Quote:
Originally Posted by Al&Burke http:///t/376802/415-gallon-plywood-tank-build/1180#post_3421808
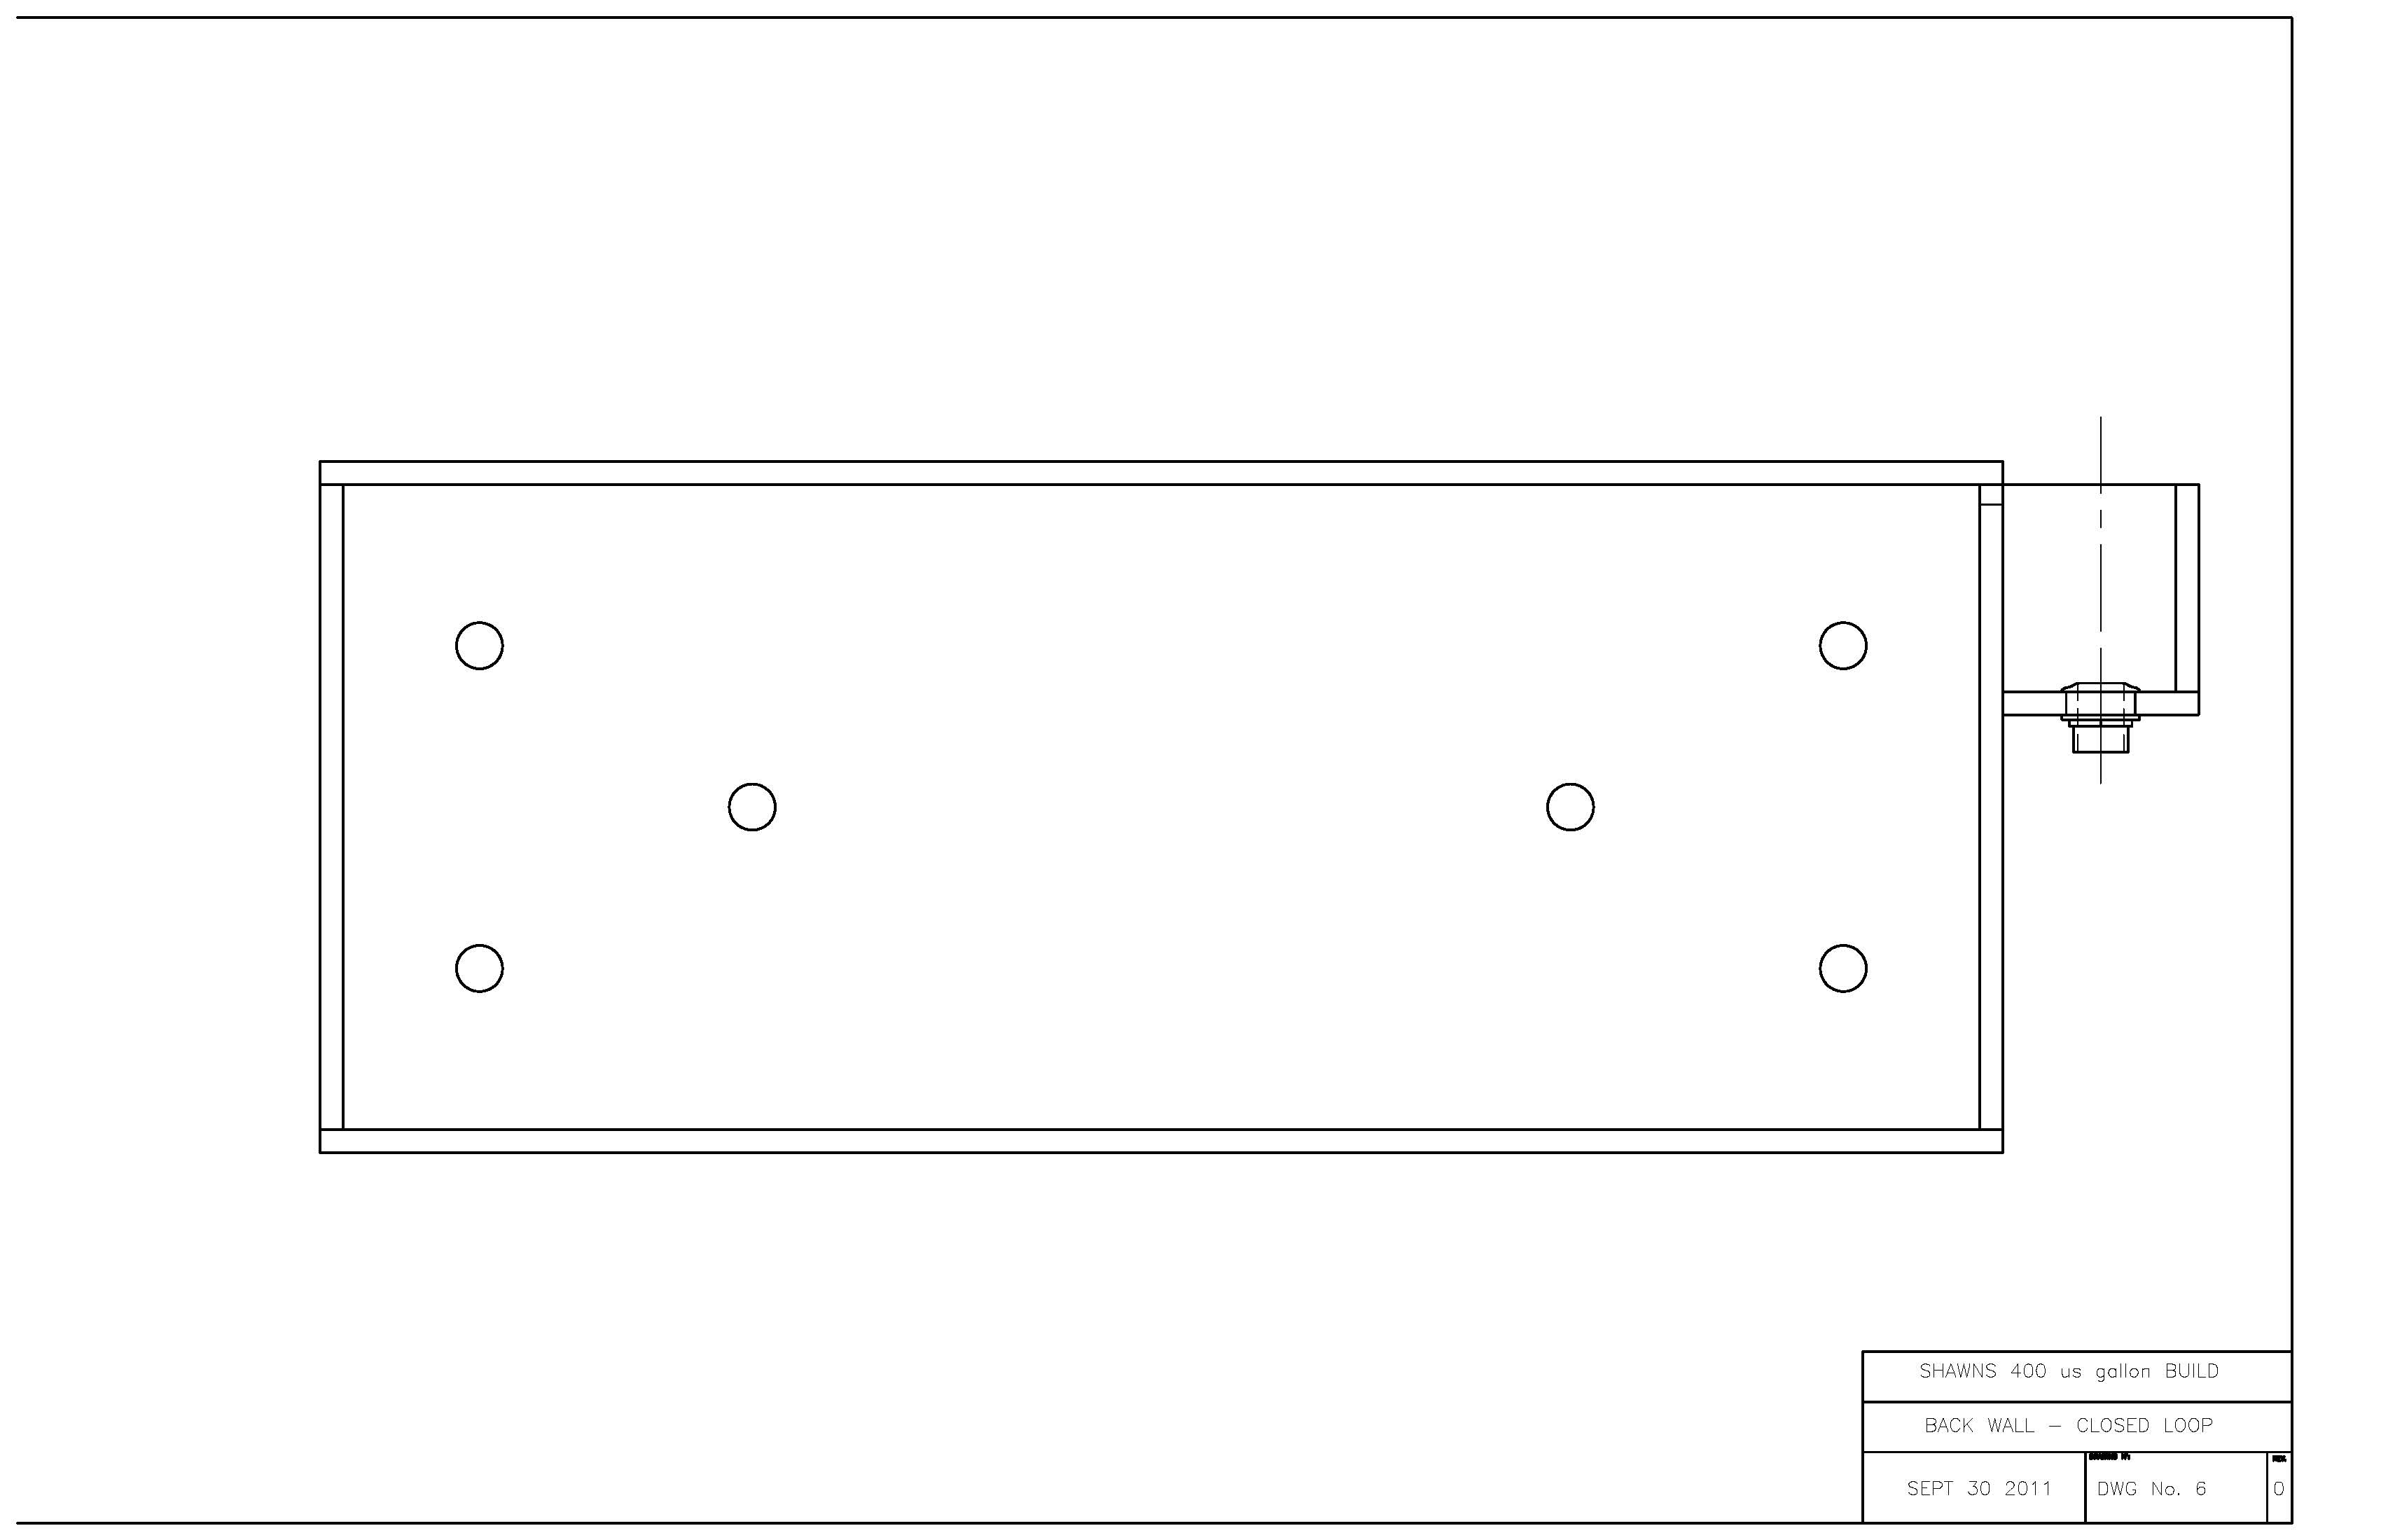
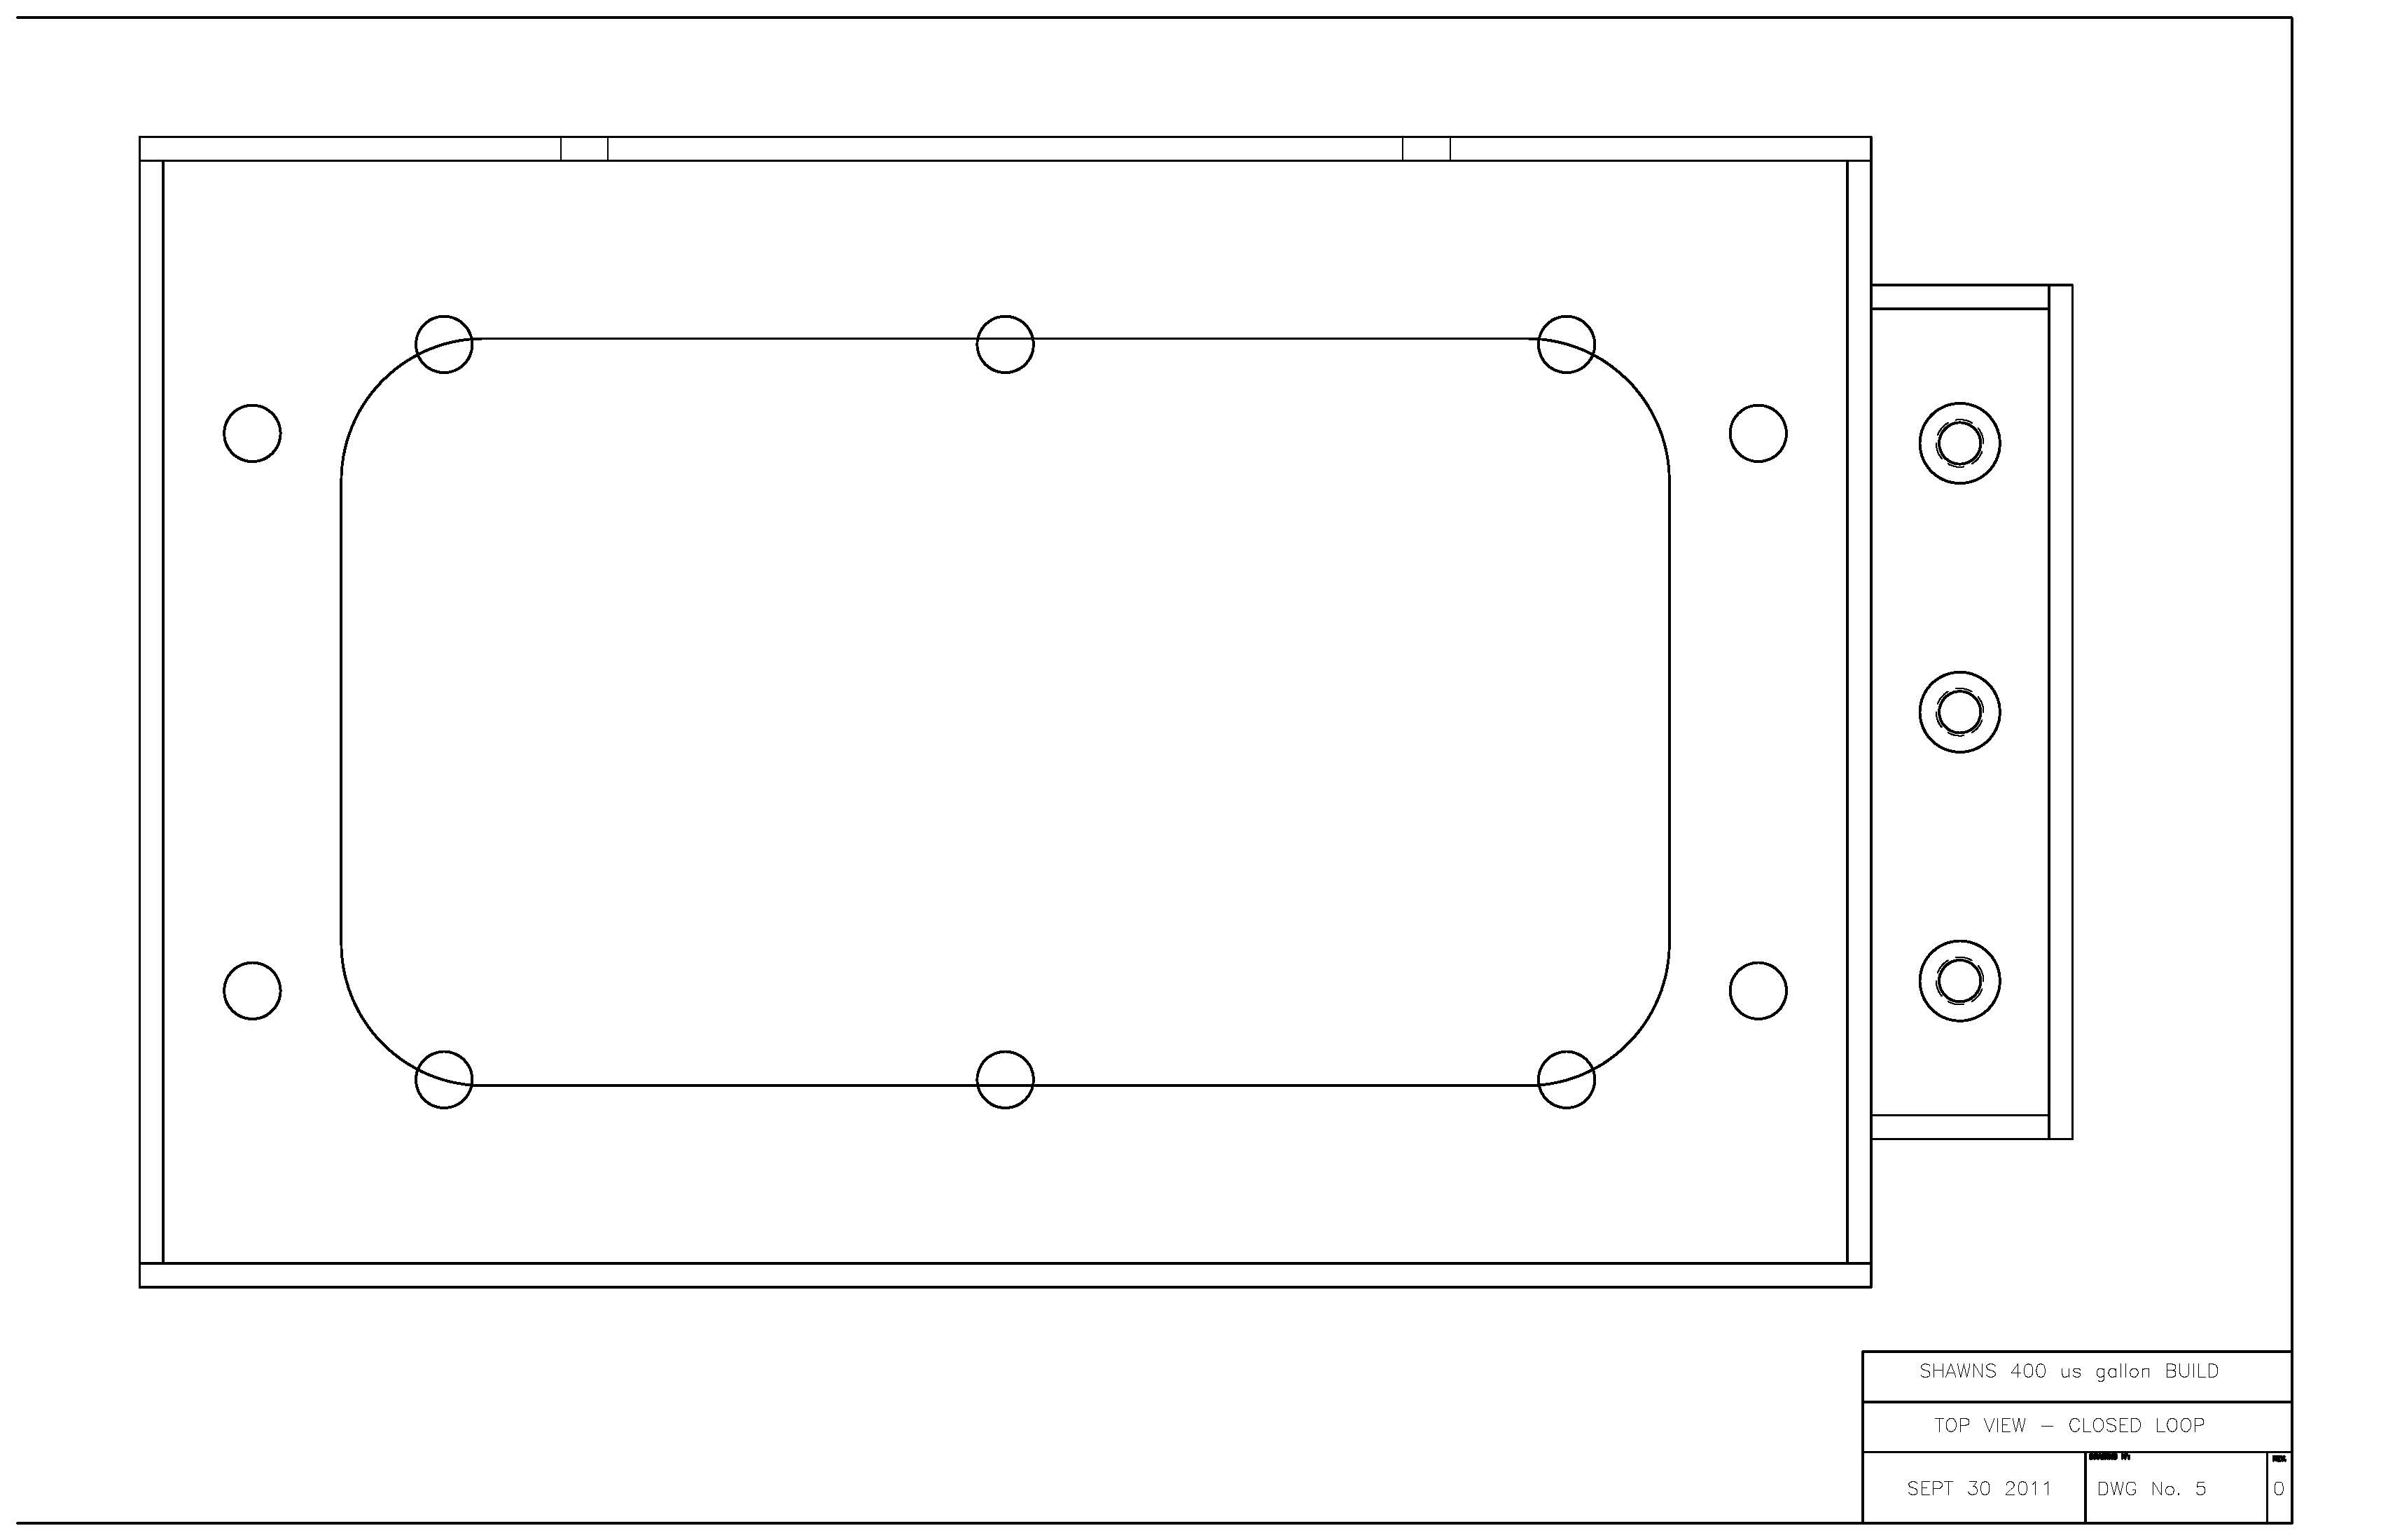
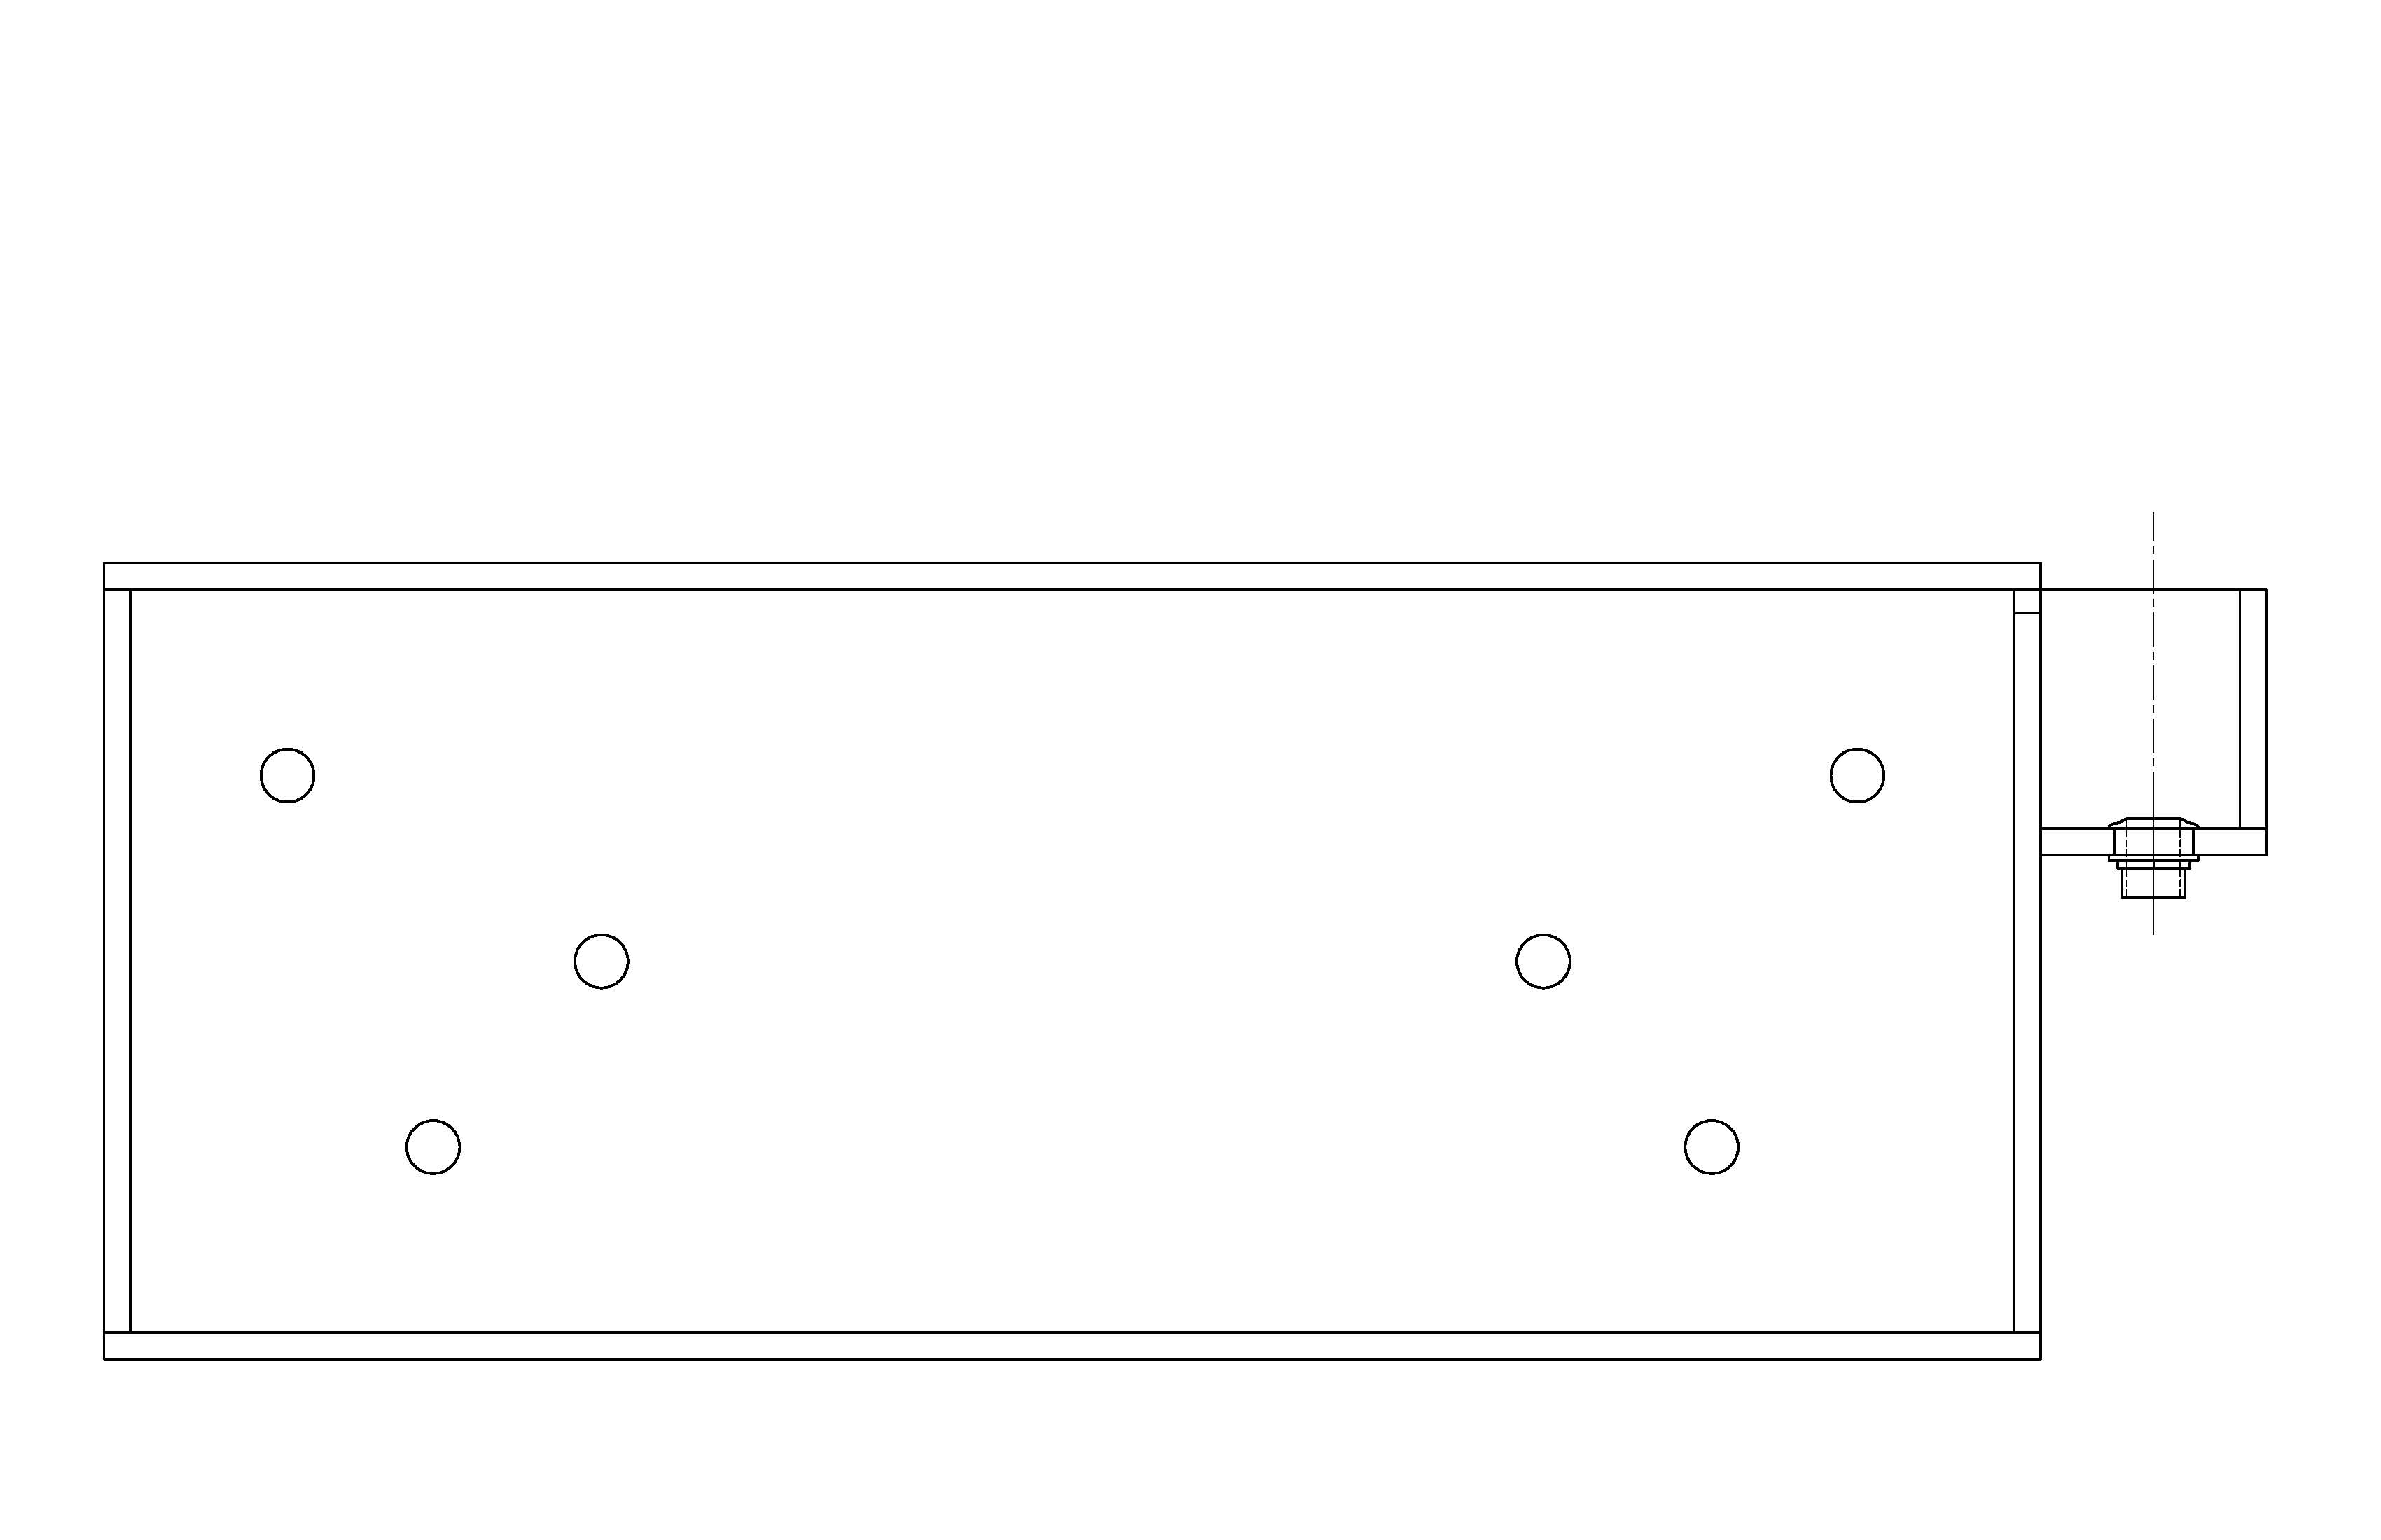
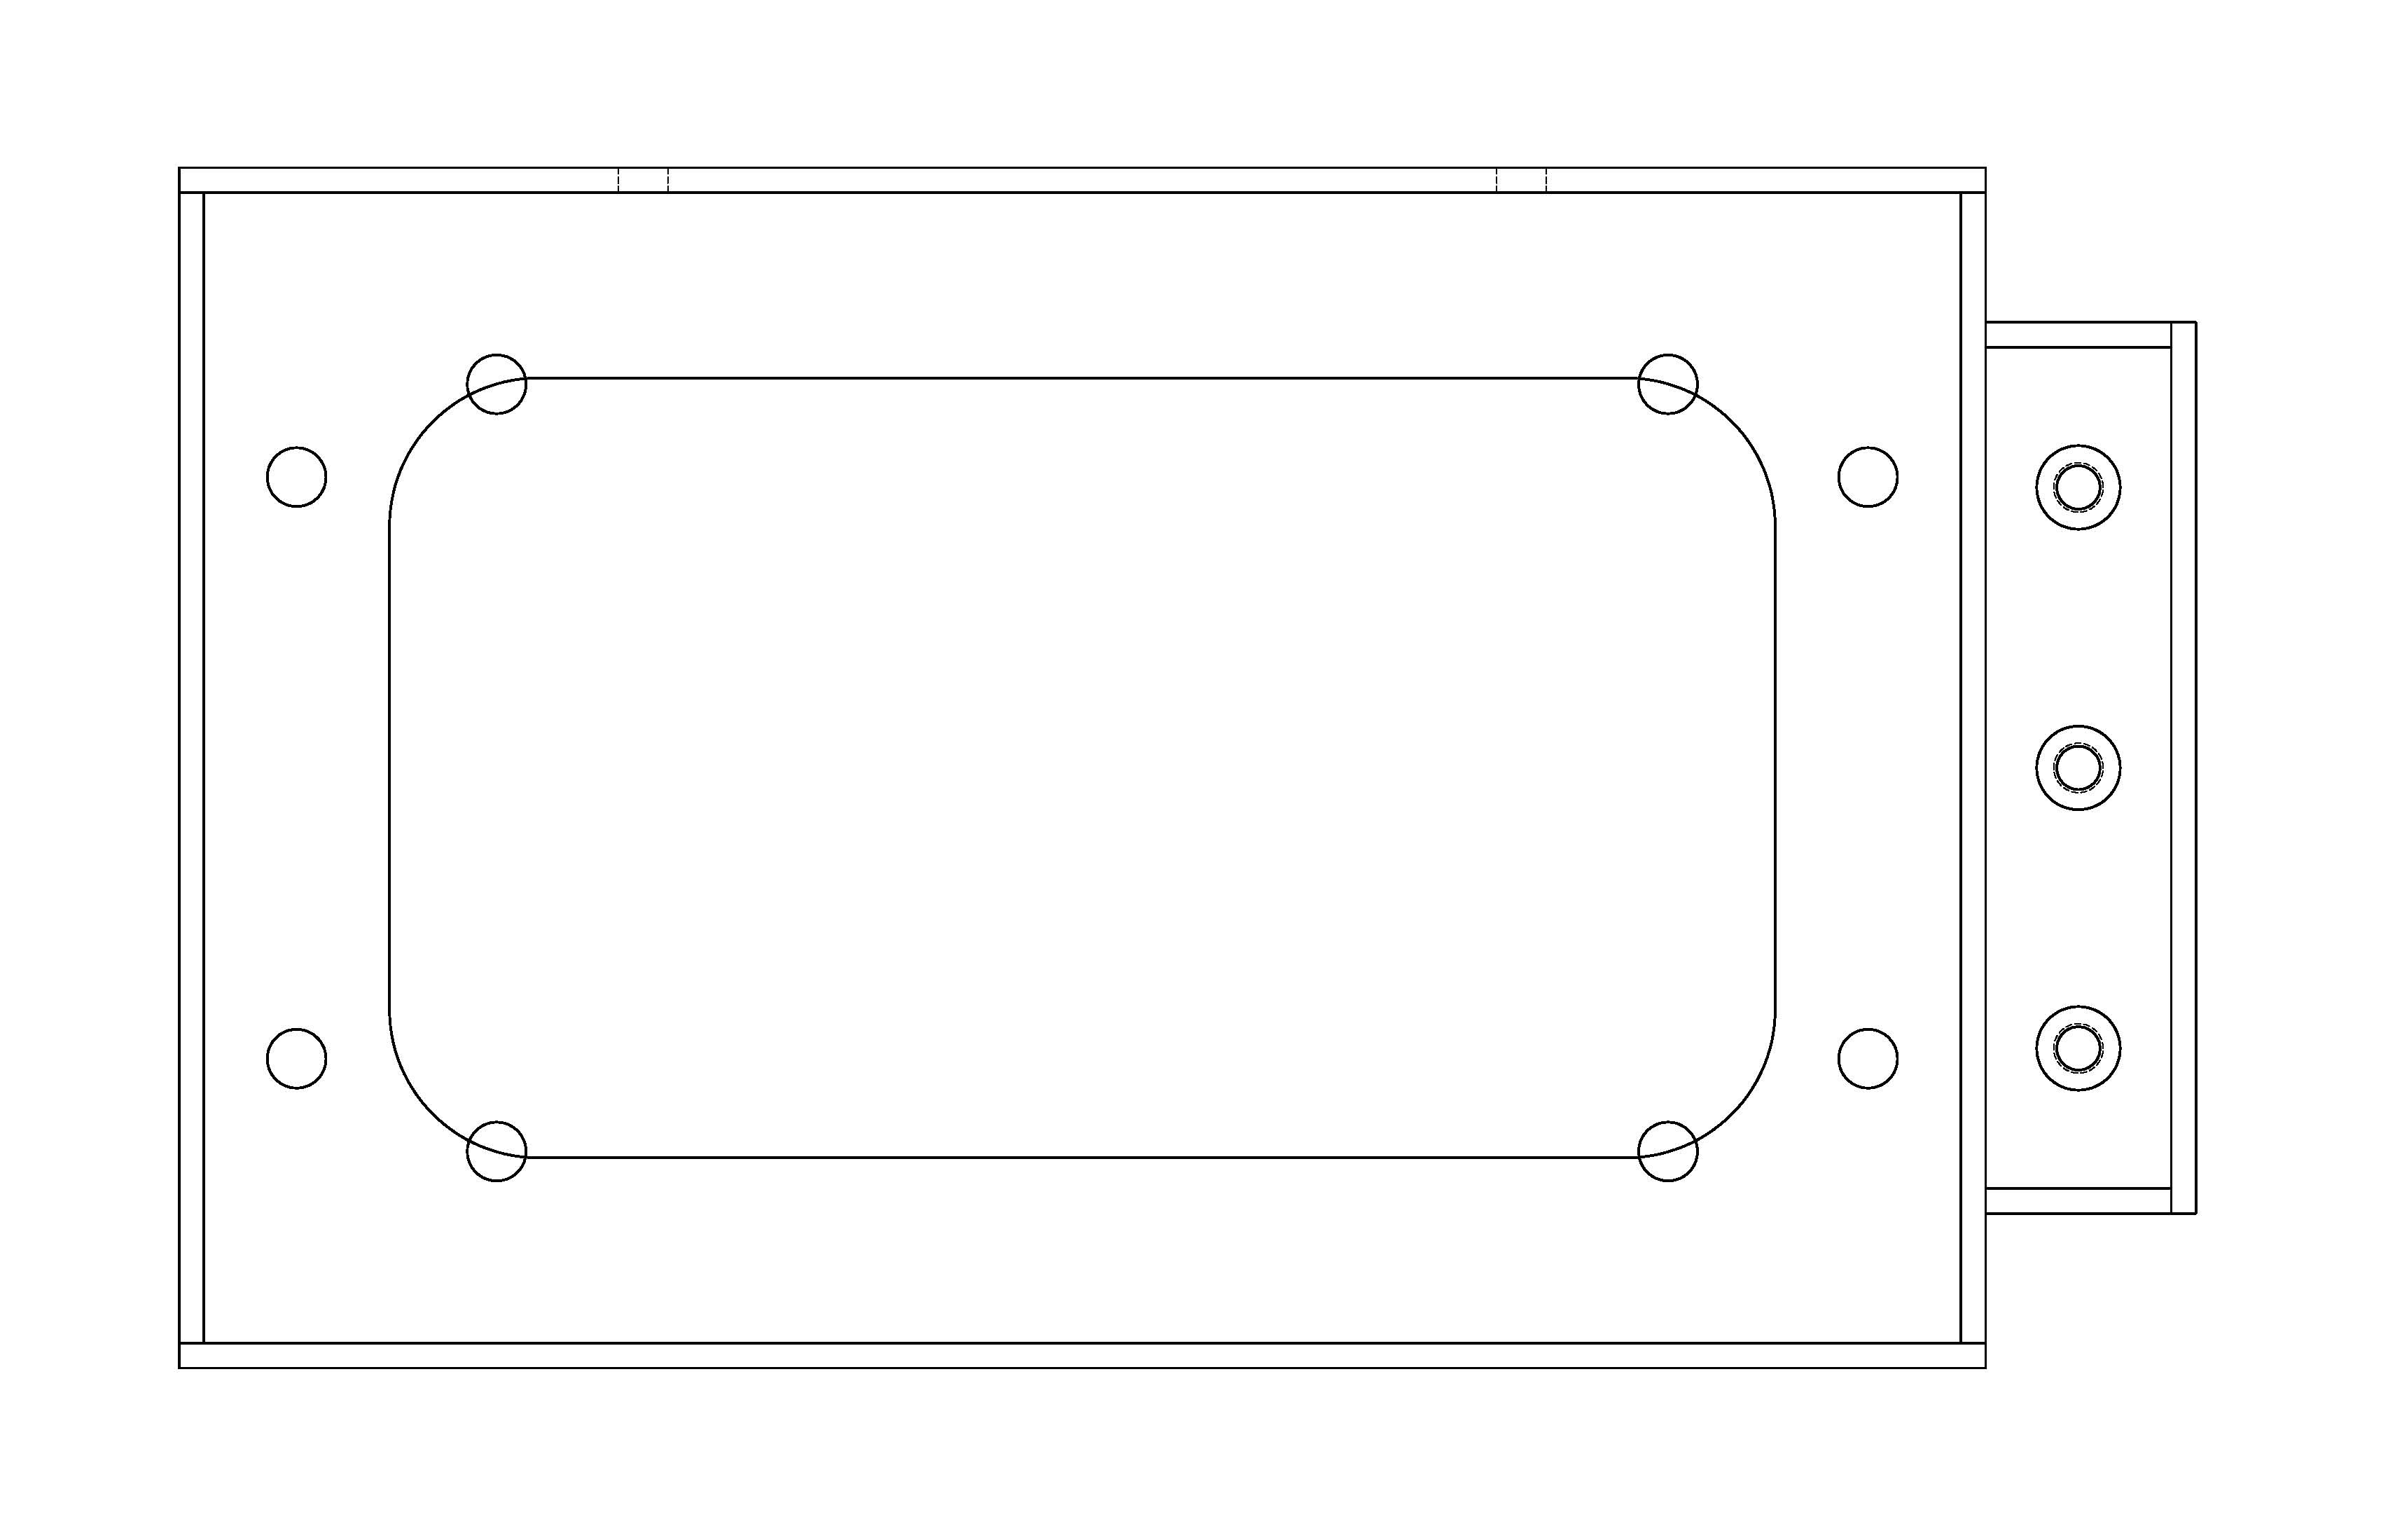
Here are the drawings you were looking for Shawn, sorry they took a while.

Thanks Al....... On the first drawing could you move the bottom bulkheads inward staggering them a bit from the bulkheads at the top? Also on the 2nd drawing could we remove the bulkheads in the middle of the tank front and back?
They look good....Sorry for being picky.....I'm quite sure I wasn't super clear and rambled on.......
 

acrylic51

Active Member
Not a whole bunch to update at this point.....Slowly starting to get the plumbing components in house......The tank has been water tested now for almost 2 weeks and no deflection noted during the leak test, so I'd say we are a success to this point......I'm starting to see a lot of little odds and ends that need to be addressed rather quickly......
I still need to get the exhaust fan ordered and installed for the fish room. Still need to get the baseboard molding installed; which I haven't purchased yet. Still have to order replacement parts for the RO/DI unit.....Thinking about upgrading it to a 150gpd water saving unit.
The biggest part still left is working out the details of the bulkheads that need to be drilled in the tank. Right now Al has been working on some pics, so I can get with Paul at OM and design and put together a super flow pattern. As I had mentioned earlier that the flow from the 2 Tunzes are really good. The only thing I'm not totally satisfied with is I have flow on the very bottom of the tank, but it's just not right.....I get movement of sediment, but it's not kicking it up and keeping it moving and suspended like it should, so we are trying to address that issue. Not really an issue....The issue could easily be solved more or less with drilling the bottom of the tank with a CL, but for whatever reason I've been trying to shy away from that, but more than likely that is what will happen. I think I'm shying from that option more or less is because of the issue of trying to hide the fittings;bulkheads in the bottom of the tank.
Currently the planning aspect for the bottom of the tank is either BB or a faux sandbed. Faux sandbed meaning I would get starboard material and pour epoxy overtop of it and sprinkle sand on top of the wet epoxy. I would keep pouring and adding sand till I get it to my liking. BB the nozzles would be visible, but not sure exactly how noticeable they would really be. I might just be chasing my tail at this point worrying about something so small. Basically the bottom line is to have perfect flow inside the DT......
Hopefully this weekend I'll get a little done, and be able to take some pics and post good pics of the tank, and show a little plumbing work. I have already started the standpipes for inside the overflow box. As mentioned previously in the thread I will be following and using BeanAnimals overflow design......
 

spanko

Active Member
The vids here are nice. Thanx for showing them. Is the wave action both side to side and front to back or is that just an illusion?
 

acrylic51

Active Member
Thanks Henry!!!!! No no illusion..... Wave action front to back and side to side. Using 2 Tunze 6101 dialed down to roughly 30%, ramping them alternately PH to PH from 30% - 20%.
 

acrylic51

Active Member
A quick question or all you DIY/Plumbers.......

Currently doing some thinking planning before drilling the tank for the return lines.....There will be a total of 4 return lines coming off my Dart/Snapper Hybrid pump and I'm curious how would you guys plumb it??? What I'm debating stuck on is where the return lines will enter the tank will be through the euro bracing....With that said would you drill the euro bracing for bulkheads and then the lines to the bulkheads or would you opt for smaller holes in the euro bracing and just drill the holes in the euro bracing and then drop the lines down through? The nozzles that will be used on the end of the plumbing will be the OM Omni nozzles.....
What would you guys do?????
 

al&burke

Active Member
Shawn that is a good question, from experience (not a lot of it) with my FW planted tank I did bulkheads in the eurbracing in the sump and I like it because I covered the sump because eventually I am going with a CO2 system, not to get off track or anything like that - what you could also do to save on those expensive bulkheades is use a female adaptor with a male adapter connected together with a gasket inbetween. This is called a poormans bulkhead, but I have a feeling that you are going to go with the real bulkheads, and I mean that as a complement my friend. I just think that with all that water going into the DT you should have those lines well connected, JMHO.
Oh hay and those last drawings is that what you were looking for.
 
Top