415 Gallon Plywood Tank Build

jchase1970

Member
"I've never known a certified electrician to install more than one GFCI per circuit. If you want them all protected then just install one GFCI as the first outlet in the circuit. Better yet install a GFCI Breaker, they are LESS likely to cause false trips."
I'm a license master electrician and I have often installed more then one GFI receptacle on 1 circuit. It prevents a whole circuit outage if just 1 receptacle has a Ground fault. Breakers are no less likely to trip from nusiense trips. It also aids in troubleshooting because you can pinpoint the problem device much easier. It can often be cheaper as well, IE a Squared D QO brand GFCI breaker will cost as much as 5 GFCI receptacles.
"If water splashes on an outlet or a heater cracks in a tank with a standard breaker would it not trip also? Is that not what breakers are used for, to help prevent fires?"
Not if a heater breaks in your tank/sump it will not trip the breaker, have had first hand experience in this matter. There has to be a short circuit for a standard circuit to trip. If a heater case breaks and the internals are not damaged it will just induce stray voltage into the tank. Standard breakers are not meant to prevent fires they are ment to shut a circuit off that is overloaded, which might cause a fire but not always. A GFIC breaker is for personal protection as it looks for a 2nd path to ground which is normally a person. A Arc fault breaker is designed for fire prevention and detects sparking arcs in the circuit and shut the circuit off.
"Grounding probe, ofcorse, why not? But they do not need to be on GFCI as long as the curcuit is properly grounded like all circuits SHOULD be to begin with."
a ground probe on a GFIC will provide the 2nd path to ground and trip the GFIC before you stick your hand in the tank. It's alerts you to a hazard before you are placed in jeopardy.
 

jchase1970

Member
Asumming you are mounting them to the light frame or heatsinks, If something happens and the frame becomes engerigized and you lean against the frame and stick your hands in the tank to do something then you could possible create a 2nd path to ground where current could flow though you. A GFCI will shut the circuit off when this is snesed by the GFCI.
 

2quills

Well-Known Member
Hey I totally agree with the use of GFCI in aquaria. I just don't think it's necissary for every outlet to have to be one. Agreed it is safer for humans though if you protect everything. More people get killed by 120 volts every year than any other voltage. It's also true that sometimes grounding probes can make things even more dangerous than they make safer but I'm sure some people might disagree with me on that.
Btw does it really matter if you install a ground probe on a GFCI or not, I thought what matters most is if the piece of equipment that has gone bad is on a GFCI. Because if the faulty equipment isn't shut off then how is a GFCI going to know what's going through the ground wire, doesn't a GFCI measure the current between the hot and the neutral (which is a ground) but not the actual ground wire itself? Just curious but perhaps this is a topic for another discussion elswhere.
 

acrylic51

Active Member
I understand what your getting at, but I question their uses.... Under my tank where it's more probable for water splash I understand, but other areas not quite so willing to buy into the theory I guess. Lights are usually a big culprit for shorts and I like to try to evenly break my loads over my circuits, and would and have heard horrir stories of them tripping because of the ballast and taking the pump down as well. I guess that is my apprehension, but with my main pump and CL pumps on opposite circuits might not really be an issue.
 

jchase1970

Member
"More people get killed by 120 volts every year than any other voltage." this is one of those quotes that people love to throw around, Like "More people are killed in autos then in airplanes" There are reasons that these are true, everybody in the US is around 120 voltage power everyday, alot of people have 240 in their house but don't plug and unplug 240V items except in a rare instance of replacing an item or moving to a new house. And very few people are exposed to Voltages >240, so it's just a numbers thing, more people are exposed to 120V then any other voltage and more people use cars then airplanes. Neither are more inherintly dangerous then the other, one just has greater exposure.
"It's also true that sometimes grounding probes can make things even more dangerous than they make safer but I'm sure some people might disagree with me on that."
"Btw does it really matter if you install a ground probe on a GFCI or not, I thought what matters most is if the piece of equipment that has gone bad is on a GFCI."
Ground probes can cause alot of debate in aguariums, but here is what is going on with a ground probe in the tank. Almost no tanks have a path to ground. A rare few have a piece of equipment that is grounded and exposed to the water. This is because steel items can't be used in salt tanks because of how fast they rust, you have to use something rust proof, stainless steel, aluminum, titainium. These metals are much more expensive then plastic and glass. So the water has nothing grounding it and it can become engerized if voltage is induced to it. Salt water is very conductive, if you have a ground probe in a tank and a short energizes the water, there is a "chance" that it will let enough current flow to ground to trip a standard breaker. It will not always work, don't assume it will, most of the time in a large tank it wont. A gound fault sensors are required to pick up milliamps of current leaking to ground and if a item ground fault protected energizes the water there is a "Very Good Chance" it will trip the GFCI and shut off the voltage.
Other things a ground fault can do for your tank, are drain a stray vlotage from the water, especially a induced voltage that is not directly protected by a GFCI. There is alot of discussion about some fish illnesses like HLLE being related to water having stray voltage in it. They has been NO studies that I have been able to find testing this. We know some people are over percautious and jump to safe grard any possible or suggested danger with no more then someone saying "I Heard That..."
There's not much more to a ground probe then that, It a device that grounds the water column in a tank, there is nothing dangous about it, it can't cause any extra harm.
"Because if the faulty equipment isn't shut off then how is a GFCI going to know what's going through the ground wire, doesn't a GFCI measure the current between the hot and the neutral (which is a ground) but not the actual ground wire itself?"
A GFCI does monitor the current going out on the hot and back on the neutral, that is how it works. If you have some current going out on the ground you dont have that current going out on the neutral wire and therefore the GFCI sees this as a "Current Leak to Ground" and shuts off the power. Now there are other current leaks not just to ground, another discussion here but it treats them all the same. What goes out on the hot a GFCI expects to see coming back on the neutral wire.
 

jchase1970

Member
So a simple example is a broken glass water heater,
example 1 regular circuit breaker no ground fault,
The electric current enters the water and some of it finds a path though the water back into the netral through a shorter path then the heating element, some current will continure though the heating element if it is not broken, but it most likely not be enough to heat the element at full strength, but it could get hot enough to melt a plastic holding tank and cause enough water to leak from your tank to kill your fish. Now introduce your hand to the tank. Far enough away from the electric source (the heater) you might feel a tingle, if you have a scratch or a freshly healed wound you feel this tingle like a constant zap of static electricity. But if you are diging around and come in contact with the heaters electrical terminals you will recieve the full force of the current into your body. If the path of the current is across your heart it only tanks 50ma to disrupt your heart. 20 amp circuit is 20,000ma. You might be able to get your hand off of it if you just brush up against it, but current makes muscles contract and if your palm brushes it your hand muscles contract and you grab it and you can't let go and this can be fatal even if it doesn't find a path across your heart.
example 2 a GFCI with out a ground probe.
Same as above until you stick in your hand. Now when you stick your hand in the water some of the current flows through your body and to ground the GFCI if working properly see the different in current out on hot wire and current in on neutral wire and shuts the circuit off. Again as above it will vary by effectiveness depending on how well you are grounded and how close you are to the broken heater. A question often asked is why didn't the GFCI trip before I put my hand in the water. Until you provide another path to ground for the current to flow ,because the tank has no path to ground by design, all the current going into the heater then into the water is coming back out the water and back into the neutral wire of the heater, so no current leak to ground.
example with GFCI and ground probe,
same as GFCI example above but if the heater is close to the ground probe it can have current flow to ground and shut the circuit off with out you having to stick your hand in the water. always better to realy on a non human path to ground. in a big tank with enough distance between the broken heater and the ground probe, nothing different happens. This is where a common GFCI breaker protected circuit also causes problems, if the current flows to ground through the ground probe then the GFCI trips and all items on that circuit shut down, which might be everything on some tanks. If you are gone for a day and come back, very nasty smell waiting for you. seperate GFCI on each outlet only the one the heater was plugged into is shut off. No tank failure, no stray voltage in the tank, which may or may not cause fish problems.
 

jchase1970

Member
Originally Posted by acrylic51
http:///forum/post/3276101
I understand what your getting at, but I question their uses.... Under my tank where it's more probable for water splash I understand, but other areas not quite so willing to buy into the theory I guess. Lights are usually a big culprit for shorts and I like to try to evenly break my loads over my circuits, and would and have heard horrir stories of them tripping because of the ballast and taking the pump down as well. I guess that is my apprehension, but with my main pump and CL pumps on opposite circuits might not really be an issue.
Well, you are using meanwell drivers on LED custom build, and GFCI receptacles are about $7 or $8 each. If you have 2 light circuits is it really any extra expense in the build to add $16 for a couple of GFCI outlets? You most likely will never need them, but that little chance of something coming loose and falling into the tank and maybe not shuting off and you grabbing ahold of it the wrong way and getting shocked bad from it may be worth the extra $16. Do you leave the house with others there? What if something fell in while you was gone and someone else tried to get it out?
In the end it's up to each person installing a tank to decide what he/she is ok with. My lights are not on a GFCI, they are temperary lights until I finish my LED build myself, I am sure there is no way they will every fall into the tank just becasue of the redicluously oversized support staps I used, use what you got available you know. Will I add GFCI to the new LED lights? I should, but I'm under the misguided illusion that no one in my house is ever going to do anything to the tank and would probably not even notice something wrong with lights laying in the water, heck the way I do things they would just think, hmmmm dads trying something new in the tank today. So the old addage do as I say and not as I do might fall into play and the other one that a automechanics car runs worse then anyone elses, well a electrician own wiring might not be as perfect as the one he got paid to put in too. I'm not perfect, only human.
 

acrylic51

Active Member
Thanks Jchase1970.....It's not really the expense of the outlets, it's I honestly don't think they are needed....I've done numerous setups always bigger and have never used them just, because of the fact most of the setups usually employ some type of controller and as I stated earlier I like to break my equipment up evenly amongst those circuits. With that being said the controllers power outlets have multiple outlets, and the outlets plug into the wall outlets, so with things set that way the outlet isn't going to discriminate, exactly which outlet on the controller actually needs shut off.
I've had a heater break before and got the nice little tingle
I've also been an idiot and forgot to shut the breaker off and cross an outlet with a screwdriver as well....I think those things are far and few in my mind or my time in the hobby personally.
I understand what your saying about the lights falling into the tank and I've always overbuilt for whatever reason, so I'm on the same track as you, that lighting falling in the tank is all but nill......There is always someone home during the course of the day.....Wife works 1st shift and I 3rd. With that being said even if the wife and kids were home they wouldn't even attempt to retrieve anything from the tank or attempt mess with the tank.....I can't even get them to feed....
Besides with the new build there will be no access to the tank from the front unless you have a key to open the locks that I'll be installing on the stand, since my 2yr old granddaughter lives with me, and there will be no way into the fishroom behind the tank since the door will have a lock as well. I only do this, because even though my wife takes no interest in the tanks, she does love to show them off to company, and I hate someone peering into my stuff and on the short note, something gets bump, flipped by accident from curious minds.......
 

acrylic51

Active Member
Made alittle progress this weekend....The drywall work is about 90% complete. Will have to take some pics and get them posted. Still have to work the drywall a bit around the tank opening on both the front and back side of the fishroom and the view area. The drywall on the ceiling is 99% complete. Still trying to decided if I'm going to install my exhaust fan there, or install the AC duct work using that duct work???? Any suggestions???? My other choice was to install the exhaust fan there and run another duct through the wall through the laundry room to the outside of the house? I got the drywall primered and still trying to decided if I'm going to just paint it white, to help lighting in the room, since it's not overly huge. Either way I don't think the walls will be a dark color.
Did alittle bit more to the front skin of the stand....Finally after several trips to WoodCraft I finally remembered what I was actually there looking for. I was to lazy and didn't want to make my own acrylic tabs/mounts for the door inserts. Got the door panel inserts mounted and have to do alittle adjusting here and there, before it goes back out to the garage for alittle more sanding and detail work. Didn't take any pics of the inserts mounted yet, but they are coming.
I finally made it to Lowes today, to get some of the materials for the actual tank itself. The people at Lowes were actually shocked, because they hadn't seen me all week. I guess the figured I was dead or sick....Just OT at work to fund the build...usually I'm in there at least once a day if not more and to go all week, I was starting to have withdraw....
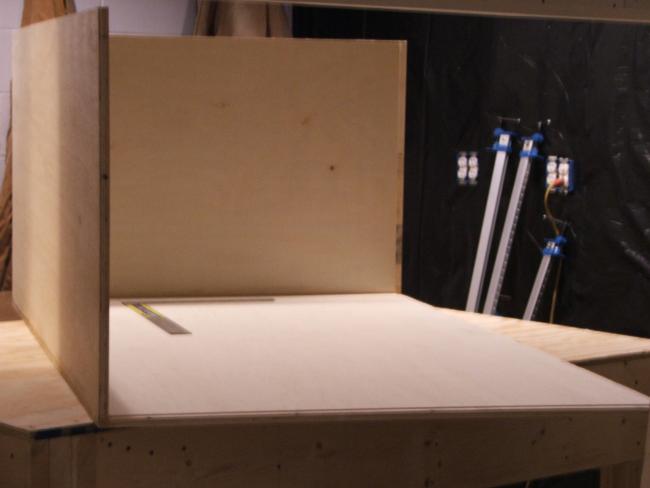
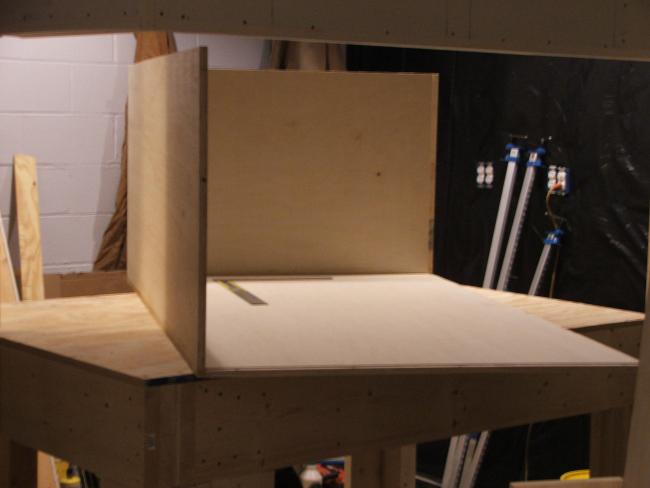
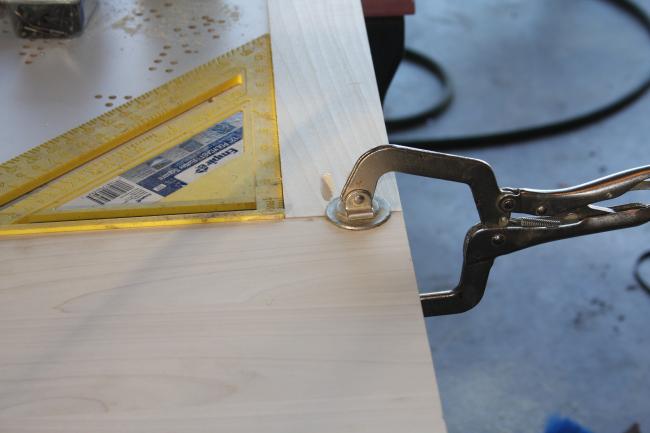
I'm using 7ply Poplar plywood for the bottom, back, and sides. The front will be done with solid Poplar strips. I was rather particular about the pieces of plywood I choose. I was looking for pieces that had very little to no voids between the plys. All the pieces were rabbeted and I used Titebond III wood glue. All pieces were tacked in place with the air nailer and once they were tacked up, I predrilled all my screw holes and countersunk them as well and installed screws. I can't remember quite off the top of my head without measuring, but the screw installs were either every 3" or 6". I think it was 6".
 

acrylic51

Active Member
Here are a couple more shots of the tank building process so far....In the following pics I just have the bottom, back and side panels installed. A big key and extra care being taken to keep the panels square. I started the build on the stand first due to the nature of the size of the tank, plus it will double as a work area for glue up. I should have mentioned the tank will be built in house in my family room, due to the fact, that if I built it outside in the garage I could get it through the door, but can't make the swing to get it down the stairs to the family room. This makes he wife super happy with the tank being built in the house.


2quills

Well-Known Member
Looks pretty square from here.
So let me get this straight. The plywood is going to serve as a form to build the tank and then when the tank is done your are going to cut out the areas for viewing and then the rest will serve as trim for the tank as well as support?
Not sure about branching off of your ductwork for the central air. To me, I guess it would depend on what room the duct work above your fish room is serving. I wouldn't want to lose too much air flow in my living room for instance. Perhaps you could do a nice sized exhaust fan, and a portable a/c like mentioned before, or get a dehumidifier.
Everything looks great, can't wait to see more pics.
 

acrylic51

Active Member
The plywood actually stays in place...... Yes during the build process I will lay out my viewing windows and cut them out using a router which will give the cleanest cut possible. The tank will feature and external wavebox on the 1 end housing 3 Tunze PH's. Back awhile ago I found a thread over on -- and really peeked my interest and there are tons of nah sayers around, that either hasn't tried it or have tried, but cut corners........Redtop actually built one, and during his build thread we conversed quite a bit. There is actually another forum site, that more caters to the plywood tanks. These guys have been doing it for years and alot bigger than mine. If you look at the other big forum you'll see a couple super nice ones.....
Once the form made out of plywood it will stay in place....most guys do some modifications inside the tank with support work, but the key is the epoxy resin, that will seal the tank, but more importantly the epoxy is super strong.....If your not quite sure the strength of 2 part epoxy resins check out West System Epoxy or MAS epoxy. There are a couple others, but I've narrowed my epoxy choices so far down to 3. The epoxy is poured into the tank forming a barrier, that will harden. This is a long and tedious process and you don't want any air bubbles, which could lead to a void which would lead to a leak at some point possibly, so yes these tank builds require attention to detail and alot of patients. Alot of people don't use fiberglass. I can't spill all the beans yet.......
Everyone will just have to stayed tuned for more progress. This week time will be very short, due to daughters graduation, granddaughters birthday, and parties.....
As far as the cooling, AC.....There is no way I will cut into my central air duct work. During the construction stage of the fishroom, I ran a duct straight to the outside of the house with the intention of using an exhaust fan geared more towards greenhouses, but then I thought about just using AC (portable). I then thought I could install both. Install the fan in the original location, but install and additional duct to the outside (running though my fishroom wall through the laundry room to the outside with a drier vent duct).
 

aquaknight

Active Member
Awesome on the updates, seeing the tank taking shape will be sweet. Very interested in the wave box.
If your wife is super happy now, I bet you can't wait till you start pouring the epoxy
 

acrylic51

Active Member
Thanks.....I've gotten a small container of the West Epoxy and still waiting on a small batch of MAS, so I can see and play with both epoxies to see which one I like best. So far, and I've done this in the house; the West Epoxy gives off none or very little odor and I can say this because the wife would have told me so. Trying to figure out how to mix it and pour without introducing air bubbles into the mix. Also gives me a chance to work with the propane torch to work any air bubbles out of the pour before the epoxy sets up.....The stuff is incredibly strong.
 

acrylic51

Active Member
Didn't get much accomplished today.....trying to get ready for daughters graduation and all.....Sunday I had picked up the epoxy for the fishroom floor, and today I did manage to get the room cleaned out and the floor etched.....Need to let it dry, and see what free time I have to paint the floor.......
Had a mishap later in the day....took the front skin of the stand out in the garage to drill and insert the door panels, and my shear stupidity, I was to lazy to move the front skin, and grabbed the air line to the compressor and tugged it and WHAM.....
It wouldn't have been so bad if it had fell flat on the floor, but needless to say there was a small step stool sitting about 1.5' away and guess what?? It caught one of the doors in the router work.....Thank God it didn't crack or split it; just dented it.....but now I'm standing there cussing up a storm and figured oh well I'll have to deal with it.....I stand it back up and guess what???? I knock it over again
Hitting the same spot, same door same d$mn stool.....
After some thinking I remembered reading something somewhere about using steam to raise dented fibers in wood!!!!!! After a few weird stares from my neighbors with me in the garage with a wet rag, and my wife's iron, using steam and the wet cloth it pulled the dents completely out of the wood.
Should have taken pics, but I was to pissed to think about that.
 

acrylic51

Active Member
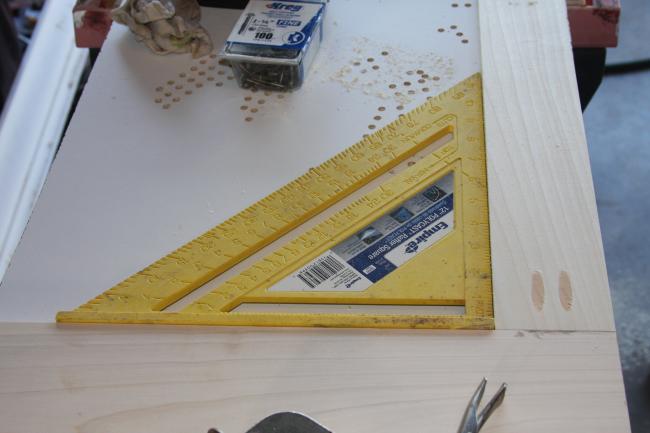
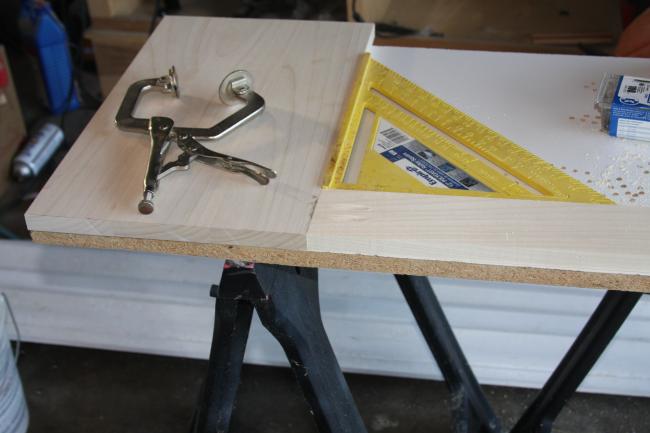
I did manage to get the front skin back in the house without anymore damage. I started working on the side skin of the stand. I used the same build method as I did on the front skin; using the Kreg pocket hole setup.....Here's a couple pics of what I've got done so far.... I will have to get a pic of it screwed together before I take the router to it. I still have to fab up another door for that side. This door won't really be functional for any real purpose other than looks and being able to see into the side of the sump.


2quills

Well-Known Member
Ouch!...that sounds like a typical monday around here.
Nice save though. I seen that ol iron and steam trick on an episode of this old house one time, glad to see that it actually works in real life.
Caught some more pics of the stand on your profile page, it's lookin good. Are you going to use any form of fiberglass with the epoxy for the tank or no?
 

acrylic51

Active Member
Thanks Corey!!!!! Yeah I had remembered seeing the trick somewhere on tv, but wasn't sure so looked it up and also found you can use a drop of alcohol and then put a match to it, and puff.......it raises it quickly......I was rather impressed something actually worked....
Before the fiberglass and epoxy is add to the tank, I'm going to incorporate 45's in all the seams. This will tie all the sides and bottom together and will also form as a barrier as well. When the 45's are installed, I will use gorilla glue instead of regular wood glue because, the gorilla glue expands and will fill any voids between the 45's and the sides, top and bottom. The 45's will be tacked in place using the nail gun, and will stay as part of the tank.....The 45's should be all but invisible once everything is done. Once I get to that point of the tank build I will take a pic of the 45's and I might even go into a little detail on how they are cut......I've been told it's a process you have to sit and figure out with your miter saw to get your angles, but pics will surely follow.
As far a fiberglass for the tank. A really good site to learn about plywood tanks is Fingerakesreef. Those guys have all but perfected the build process IMHO. Most over there don't use fiberglass and if they do only in the corners(seams). I have already bought fiberglass for the build. I happened to be talking to AcroSteve who did an awesome woody build as well, and he turned me on to using biaxial fiberglass cloth. Unlike tradtional fiberglass cloth laid at 45 degrees, biaxial has it laid both ways, which makes it extra strong. I will be covering the entire bottom with 37oz biaxial cloth along with all sides and back and the overflow will be fiberglassed with the same 37oz biaxial cloth as well. I know it sounds like overkill?
Well it's more a piece of mind for strength. It's alittle more tedious laying the fiberglass and with it being so thick, getting it smoothed out and then having to wet it all out should prove to be a feat within itself. I will have to get the camera out and take some pics of the biaxial fiberglass cloth. I have already cut most of it up to rough sizes for the tank, and trying not to touch what I have cut already, so hopefully I have a piece laying around that I can take a quick pic of.....Stayed tuned....
I had mentioned early on in the top of the thread that there were several goals I was trying to achieve.....I was trying to utilize all my skills with this build.....Make the top of the tank as open as possible and try to eliminate any cross bracing if possible, and the tank will feature a 48" external coast to coast overflow box, the tank will also feature an external wavebox on the side wall buried in the fishroom, and this I received help from by a couple people over at -- mainly JarHead.....
The external wavebox will feature (3) 6100 Tunze powerheads to produce the wave......That is why I'm actually overbuilding this tank if that is at all possible???? With the addition of the 37oz biaxial fiberglass cloth, I will also be incasing the entire tank with 3" angle iron; welded to build basically a steel cage around the tank. I know, I know.....alot of you guys are already thinking it will rust.....Relax.....The tank will be rabbeted again where the steel angle iron will sit, so it will sit flush, and the steel will be embedded in thickened epoxy so it will not rust. The angle iron will be hidden, by a skin around the tank, so when it's all said and done you'll never see the steel.
I will try to get some updated pics up in a bit, and show some of what I'm using, to give an idea how thick the fiberglass is.....Pics to follow.....
 

2quills

Well-Known Member
ummm, Shawn...are you building an aquarium or are you building a bomb shelter? lol j/k.
I'm going to have to check out these sites that you're talking about...I need to see these things in action.
I think I know what you're talking about on the 45's...are you refering to a 3-way miter joint? They're pretty easy to do.
 
Top