Just Started My SW Tank!!! HELP ME OUT!

girlina4x4

Member
Originally Posted by premilove
http:///forum/post/2874171
if that link doesnt work, search DIY sump on you tube. the makers name is limpitsreef
limpitsreef is also a member on swf.com! He has a very similar name, maybe with a number on the end I think.
 

sean48183

Member
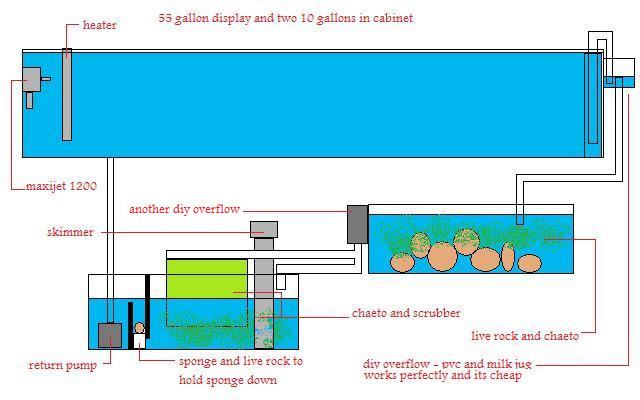
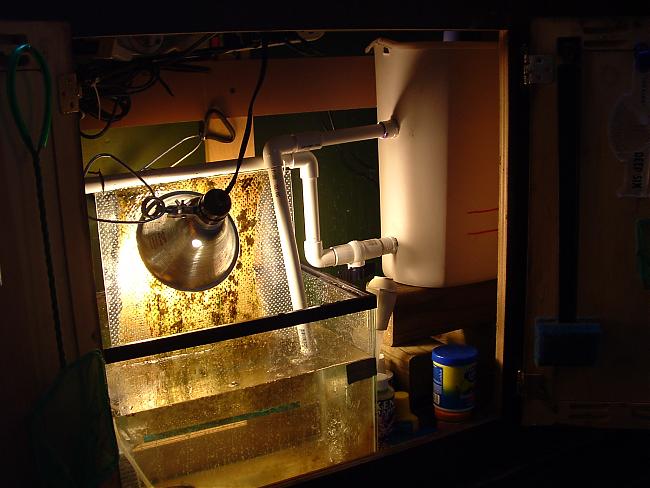
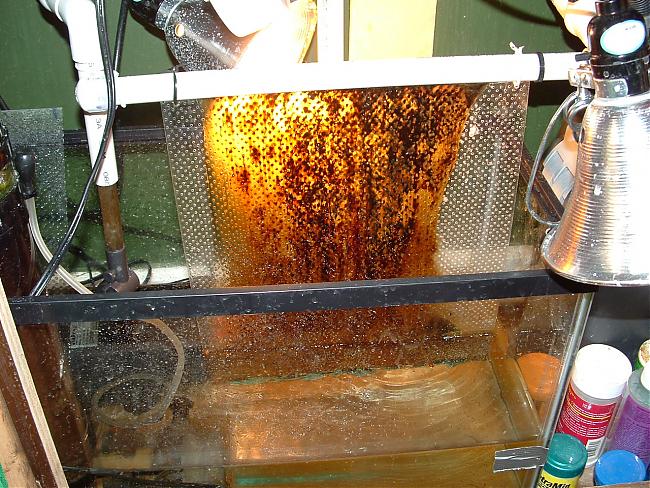
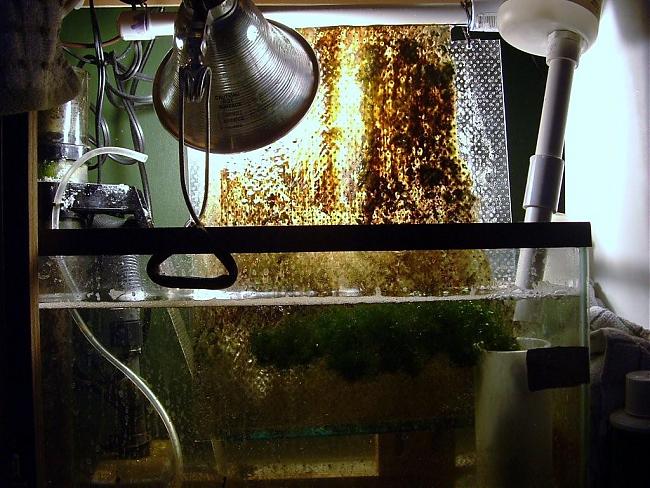
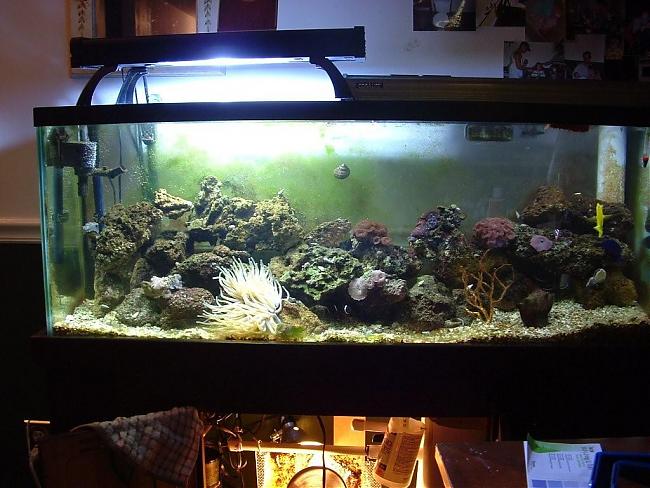
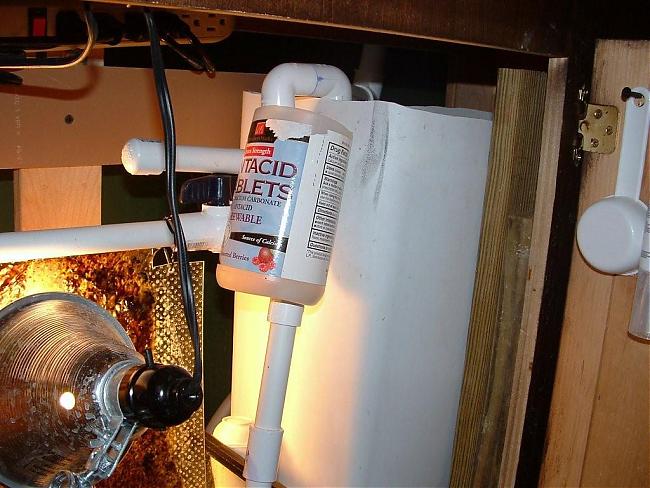
If you don't want to put a sump underneath the tank and easy way to do one is to put one on a desk next to the tank. All you need is a maxijet 1200, some flex tubing from home depot, a tank drilled on its side near the top, and a bulkhead for the hole and drain tubing. Basically pump the water up to the fuge and let it drain back to your main tank. I used a 15g tank on my 55 and it worked real well. Advantages are that critters drain back to your main tank without an impellar tearing them up and you don't have to use a siphon drain line to a sump(Dangerous if siphon breaks and water keeps pumping to tank). Disadvantage-Mine got pretty nasty looking after running for a few years. Looked like a green swamp.
 

shyshko08

Member
Originally Posted by sean48183
http:///forum/post/2874207
I dug up a picture from mine from a few years back. It's not the best but may give you an idea.

Yeah, your probably right. I'll go with the sump in the future. But for right now I guess I'll get my use out of the canister filter. After all its not that big of tank its only 45gal.
 

weaponusmc

Member
When adding new live rock, unless fully cured from someplace local (being able to take fully cured live rock from that place and have no time wasted putting it into your tank, no die off) you can have a new cycle. You are adding a larger load with the die off and new bacteria is needed adjust to your rock. Same reason you should take any un-eaten food out of your tank, or if you should have a die off of any fish.
 

woody189

Member
Originally Posted by Shyshko08
http:///forum/post/2875598
Yeah, your probably right. I'll go with the sump in the future. But for right now I guess I'll get my use out of the canister filter. After all its not that big of tank its only 45gal.


I'm not saying sumps aren't the way to go, but you barely have anything in your tank right now. I say a canister is just fine. I have 1 in my 46 gal with 5 fish. It works just fine. I cleaned it out like once every 6-8 weeks and no problems, but i started cleaning it every 2-3 lately, just in case.
I rinse all my media. The manual says to replace 2/3's, but i'm pretty sure that's completely unecessary. Just clean it regularly and you'll be fine. Everyone who does the scheduled 2 week mainenace seems to have no problems.
 

sean48183

Member
Nice Video. Funny that song with a couple of nemo's. Seems like it would be a good song for a couple queen triggers.
 

todj2002

Member
Originally Posted by Shyshko08
http:///forum/post/2875598
Yeah, your probably right. I'll go with the sump in the future. But for right now I guess I'll get my use out of the canister filter. After all its not that big of tank its only 45gal.

shy - have been at this hobby for past two years and have had ups and downs, but recently have been putting some real effort into it and added a sump to my 55 gallon. its all diy and it was pretty easy just takes some time. i made diy overflows that i believe work flawlessly and i had purchased and eshopps overflow and sold it cause i prefer my diy overflow. here is a diagram of what i have going on. i wish that under my tank were as neat as the diagram. also it is a bit of a lie, the upper ten gallon in the diagram is a 10 gallon rubbermaid for now. i am planning on switching it for the 10 gallon aqaurium soon. rubbermaid is nice to work with though when it comes to cutting holes ect. i also in the process of cutting the dividers for the bottom ten gallon. having the divider for the return pump is essential so in case of overflow failure the return pump will only return the amount of water that is in that area so u dont flood. i finally have got this all working perfectly and about a month ago i was clueless to any of this. pvc is cheap, easy to cut and once u get started it just gets easier as u go. building the overflow is simple!! i know some people will prolly bash me and say drill ur tank but as far as i am concerned, no need.
 

todj2002

Member
Originally Posted by premilove
http:///forum/post/2877817
wow nice diagram would love to see pics of your system!
i will maybe take some pics 2morrow, lights are off now and like i said the diagram looks good, but under tank is kinda messy. here are some pics of when i first started all this undertank business. i like to draw the diagrams before i start a project so i have a good plan. it is pretty redneck, milk jug for the top overflow and another plastic jug on the lower tank but the price is right. these are old pics and is much different now. this was in the begining and have made changes as i learned more. ok well it wont let me upload my pics now... what the heck. ne way i will get some up to date pics and post them 2morrow.
 

scoobydue4

Member
I noticed your water level is low on the video compared to the previous photos of your tank. I just wanted to make sure you are remembering to do fresh water top offs.
 

todj2002

Member
k - here is a couple pics of the begining when i was still trying to figure things out. these are all i can post for now, im at work using my laptop tethered to my cell phone and it cost 3cents per kb. when i get home i will try and get some new pics.


todj2002

Member
alright i got a couple pics tonight. this hobby is about to give me an heartburn. lol, watch u will get it. ok this is pretty redneck but it all works fine and i just finished testing parameters and all on the money except chelated iron was low. i will replace rubbermaid with another ten gallon and put in dividers into it, and then use it as bottom tank with overflow pump (i finally just realized that this is how u stop a flood in case an overflow should fail, learning ...) and move the other ten gallon up. anyway the assembly is cake and cheap if u wanna go that route. the hardest part for me was to figure out the plumbing, but after u start doing it u figure it out.


Top