Originally Posted by
fishkid13
http:///forum/post/3086086
Cool, post pics of it after you get it painted. Plus you need to post a pic of your cat for meowzer.
haven't seen him at all in two days. last i saw him he was diving for cover under some boxes in the tool shed when the dog came around the corner. maybe i should have kept him on a leash for a few days to get him used to the idea this would be his new home. sigh....oh well. getting a cat isnt exactly a tough thing. i could snatch up a few dozen on craigs list...people are dumping them off all the time. maybe this time Ill get a helpless kitten, that would ensure it would bond to the dogs/property...rather than someone else's cat that just wants to find its way back home.
that guy obviously lied to me, insisted the cat would be fine as an "outdoor only" barn cat. poor cat didn't even get a chance to adjust to his new place. ill put up some fliers around the neighborhood, and post on craigs list with his description.
Originally Posted by ReefForBrains
http:///forum/post/3086140
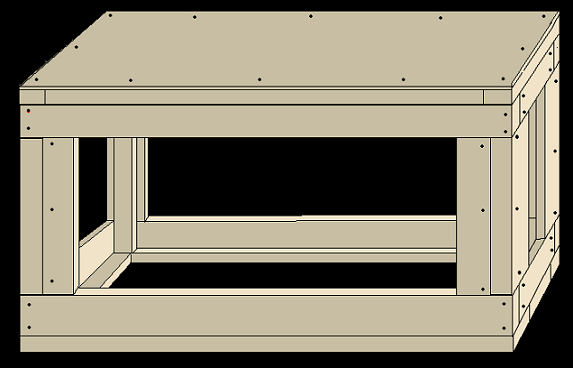
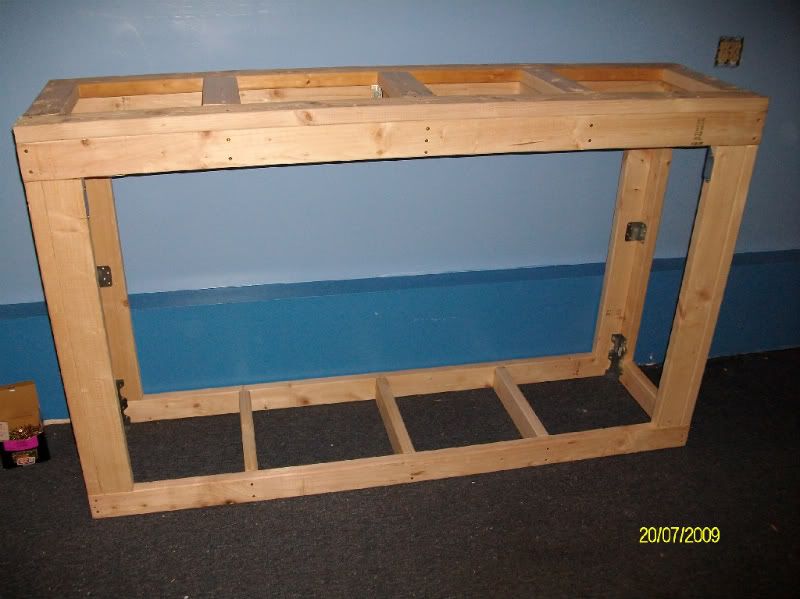
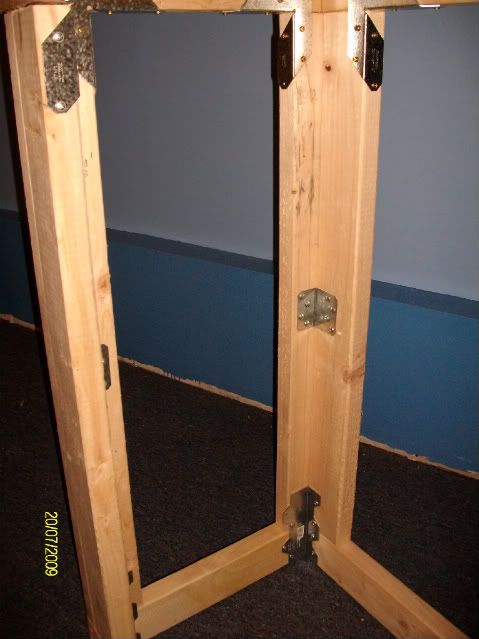
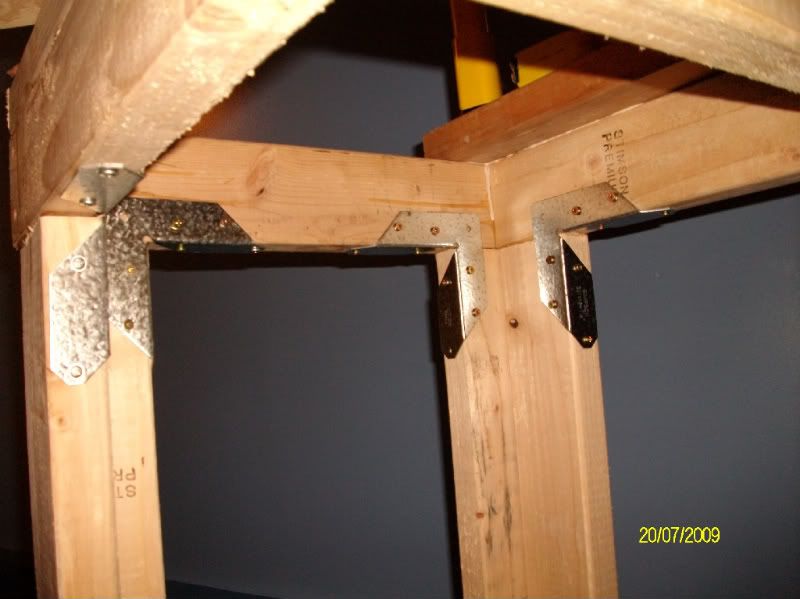
I am sure you have a design your working with but here it a sort of tried and true skeleton design I have used for several stands now on larger tanks.
You can see from the pic. (microsoft Paint btw)
Made just from 2x4, stratigic placeing and stagered joints will let you span very large distances without center bracing to get in your way. Just spend a few moments really looking at the joints and it is quite simple. Self explanitory how it compliments itself for strength......complete overkill.
, Deep in my history there are several different builds usig this same design with step by step photos but I doubt you will need them.
Quick, easy and can literaly hold a herd of elephants.
[hr]
As for head room, consider this.
When crawling under your tank you want to be able to allow enough room to have your head and chest fit under the stand but still over the top of the tank. (worse case scenario for working on larger projects)
As for bonding, forget the weld-on. Resins available right next to it on the shelf at any plastic shop are many times superior...and cheaper to boot.
Weldon is to be considered for acrylic-to-acrylic only.
Sorry to hear about the house but it sounds like everything is working out for the best.
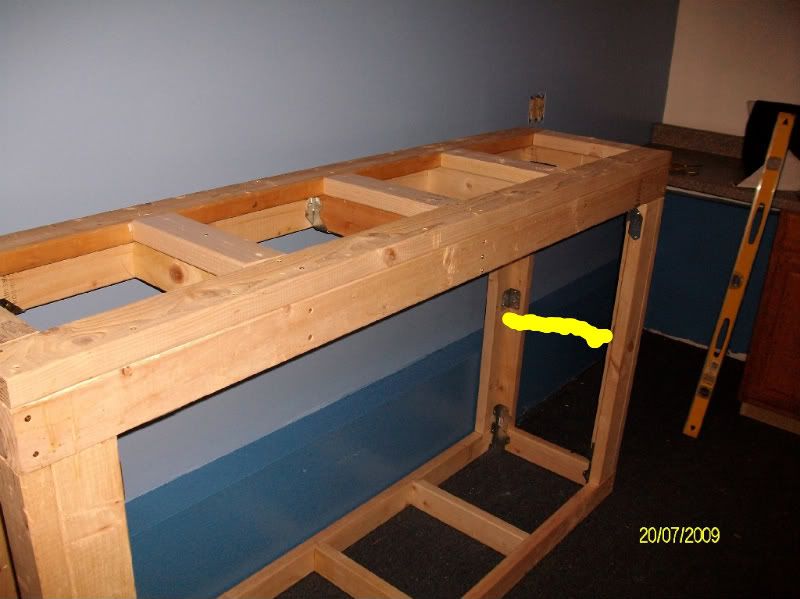
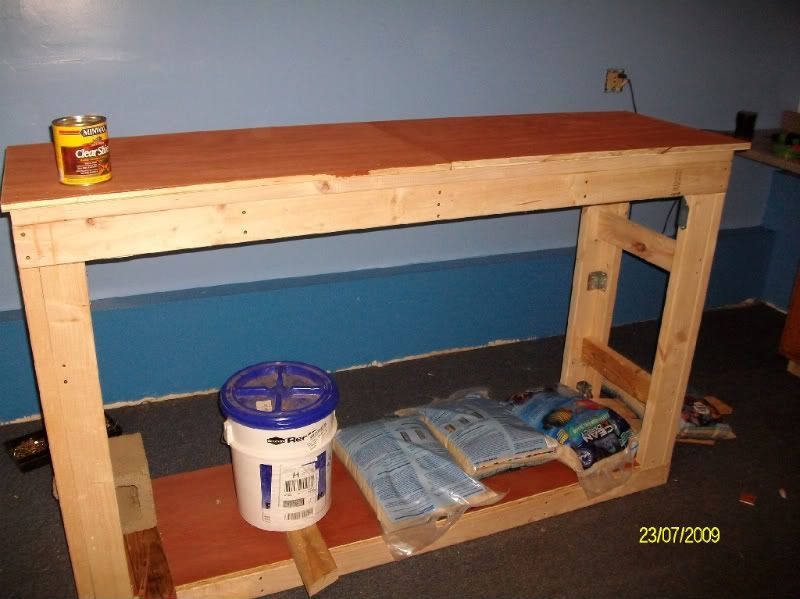
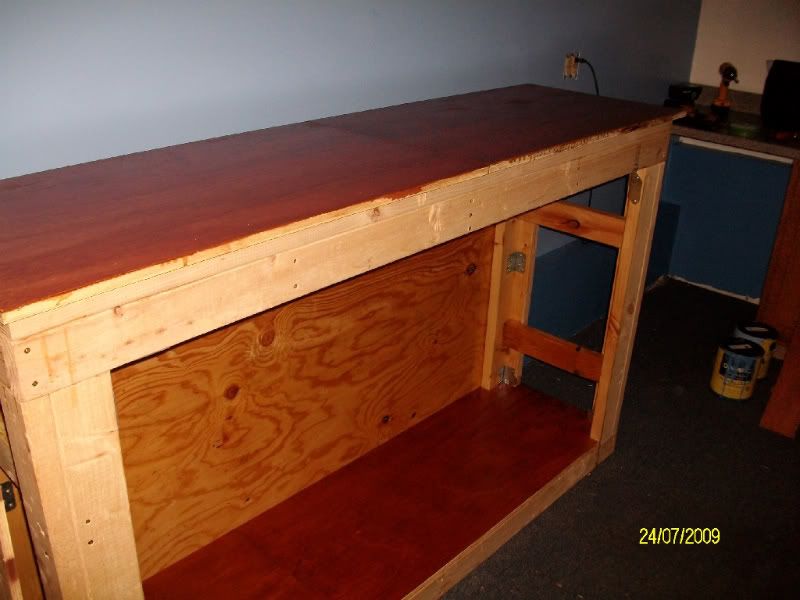
ya, that design is pretty close to what I was going to use. especially the the legs. I'm entertaining the idea of having it an open skeleton...just for show to let people see how it all works. I am putting in a center support leg, but the idea is to have it so I can put on doors in the future. I can always add a skin of nicely stained finish wood later, and a couple nice cabinet doors as well.
as for head room, i want it to be a pretty tall tank, im considering having the bottom of the DT sit about chest level when I stand. that way you can look up and down when standing in front of it all. plus will give me lots of room underneath for plumbing and future upgrades...ie larger scrubber ect.
you were referring to weldon...was that in regards to my wanting to put cross braces on the top of the tank to prevent bowing?
")